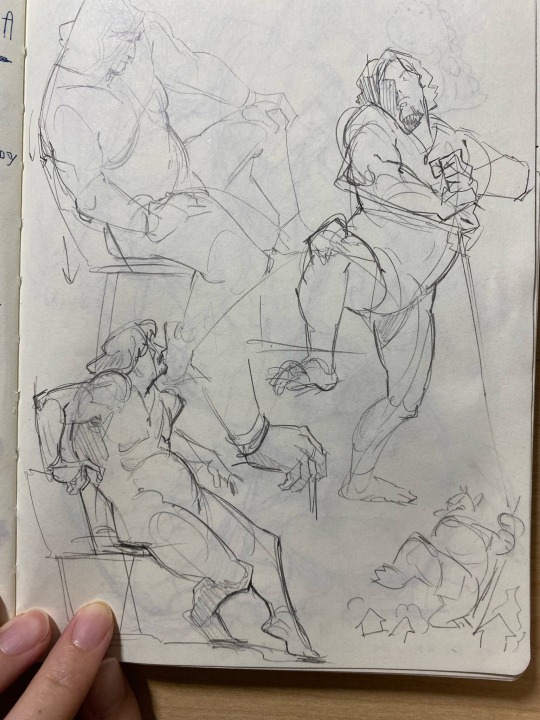
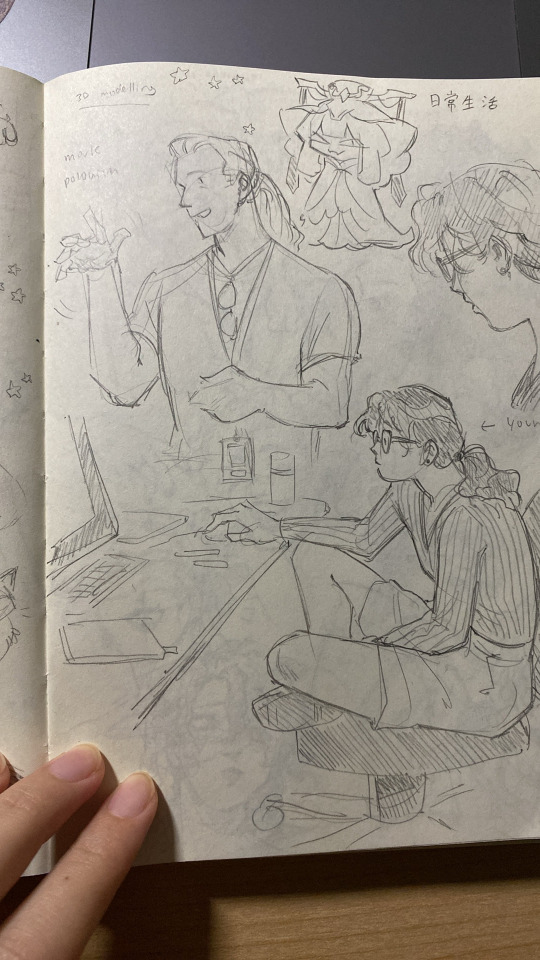
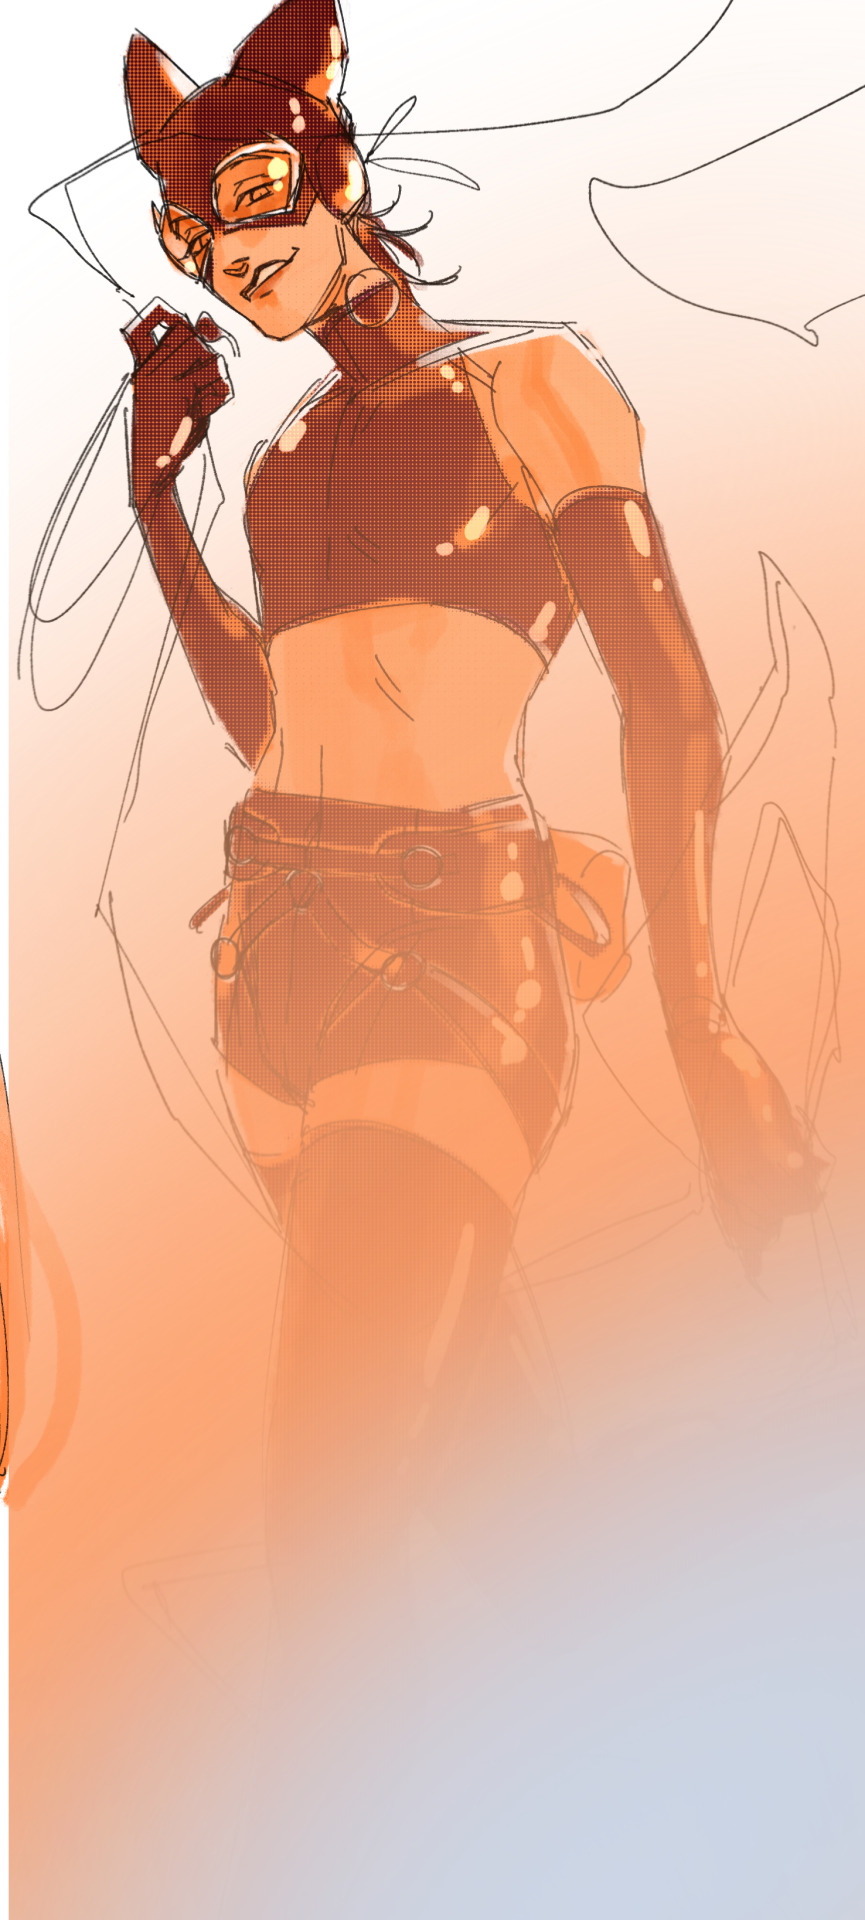
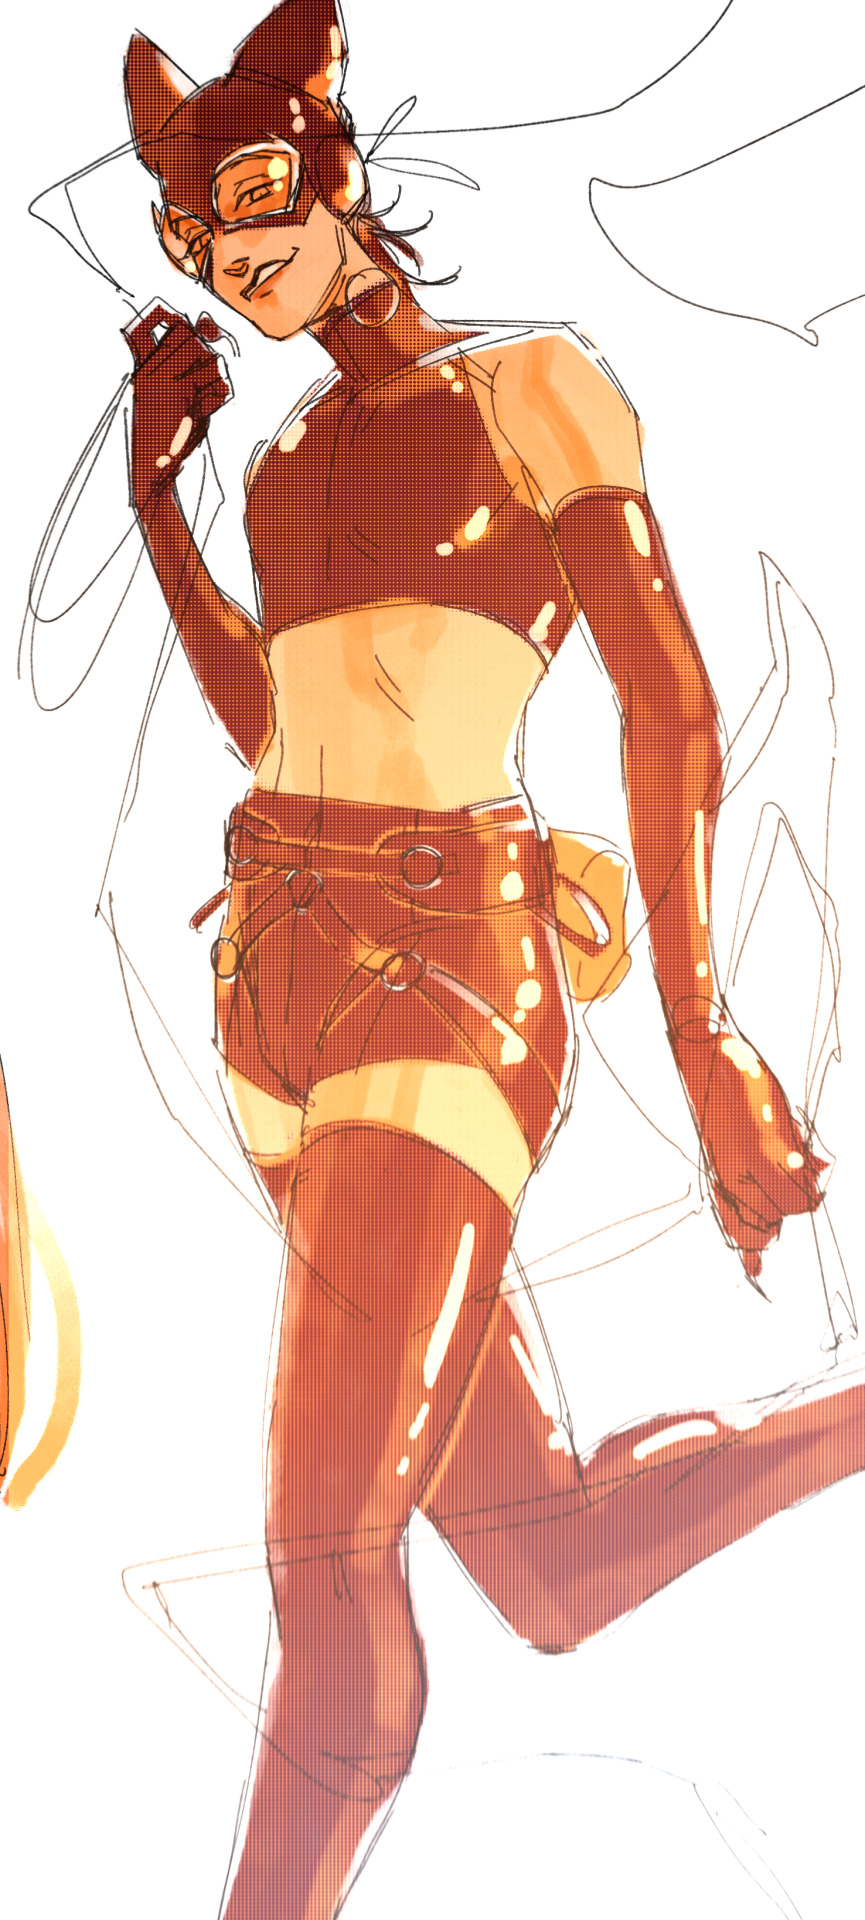
#still finding ways to improve anatomy and the way I draw characters
Explore tagged Tumblr posts
Visit Tumblr Blog
Explore Tumblr blogs with no restrictions, modern design and the best experience.
Last Seen Tumblr Blogs


Fun Fact
130K people were victims of a chain letter scam that affected Tumblr in May 2011.
Text
Artistic puberty is real
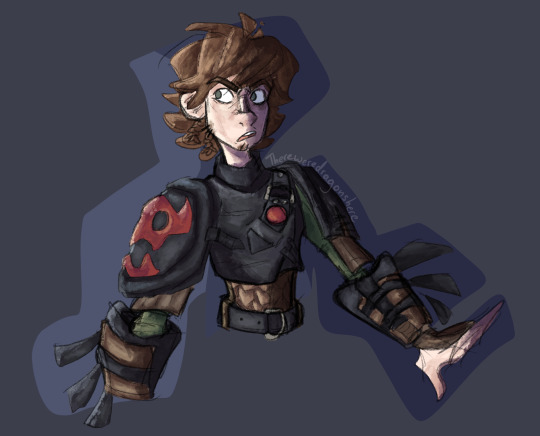
#looking back at posts from last month and going ‘holy shit why did I think any of this looked good’#like I thought I was at my peak then but apparently not#still finding ways to improve anatomy and the way I draw characters#fun#awesome
20 notes
·
View notes
Text
It's strange how I kind of went from consistently disliking my art, to like, disliking individual pieces, but when I look at my overall work I just get filled with so much joy and pride
It's not like I'm doing anything groundbreaking or utterly amazing, but I guess it's the thing of like, seeing myself as an ordinary human capable of creating things? I just see so much beauty in humanity's capacity of creating things, and I guess I had to teach myself to see that beauty in my own capabilities as well, no matter how mediocre they are
It's hard to say I like things I create because I fear people will think I'm full of myself, but I just have so much pride in my work. If I start looking too closely at my art, I start seeing all the mistakes and everything I hate about it, but if I step back and take in the bigger picture of all I've done and how far I've come? I don't know, it's a strange feeling to describe
It's best described as this sentiment of fulfilment that makes me realize that there's nothing else I'd rather be doing with my life other than creating art I love and sharing with people
#Jay Talks#turning off reblogs because I'm paranoid over people interpreting me the worst way possible#I feel like creating my website last year was what helped me come to this realization the most#I love creation#I've been drawing seriously since I was like 11 or smth#And only now at my mid 20s am I getting to a point of being okay with what I create#I still have a lot I dislike and things I want to improve#But it helps not loathing every sketch that leaves my hands#Cherishing every bad drawing as a stepping stone to something greater#All the outdated art that gives me psychic damage to look at#All the out of character OC art that doesn't fit anything I have#All the art with bad wonky proportions and terrible anatomy#I still can't look at those pieces without shriveling up in cringe#But I'm learning to celebrate those pieces not for what they are but for where they took me#idk is this anything#Don't mind me my mental health has been in the gutter these past months#Finding peace in my escapism and pride in my work has been so freeing...#It's hard to celebrate my joy when so many artists struggle with enjoying their work#I can't help but feel like they'll think I'm rubbing it in...
10 notes
·
View notes
Text
(1)Learn the rules before you break them + Gather proper references
(2) Understand what you want to break and how
(3) Can't do it? Find someone who can

(4) It's going to look really bad for a while
(5) Have fun with it!
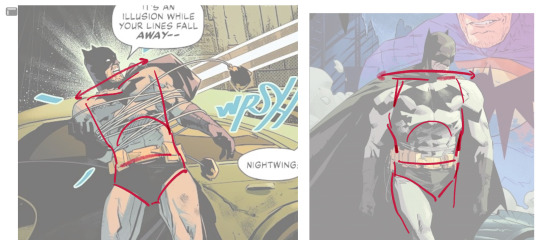
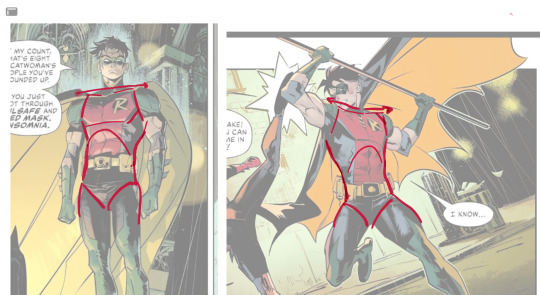
(1) -Yes, I am that kind of artist. Yet, not in the conventional way. I encourage people to go in guns blazing when it comes to drawing something new, then coming out analyzing what they know, and what they need to learn more of right away.
-Here, I broke down the anatomical pieces of Nour and Narinder's face with the same labels so you guys can understand this weird invisible pattern that I follow in my work. Doing this with any animal you're attempting to draw greatly improves your line confidence when drawing different face shapes. Also understanding the biological function for why animals look a certain way helps you keep consistency.
(3) Time to throw any artistic guilt you have for heavily referencing people's art OUT THE WINDOW and start ANALYZING PEOPLE'S WORK YOU WANT TO BE LIKE✨ I've always done this, having a reference of someone else's amazing work right next to my own drawing so I can try and understand how they make their magic work! No shame, no embarrassment, nada. Pure, unadulterated will and spite that I would be just as good as the artist who made me so motivated and happy with their work! I couldn't figure out how to make Nour's face both sheep-like, and humanly expressive, so I looked at a LOT of Zootopia and old Disney art for help!
(2) With how I draw narilamb, I'm still working on it (as you can see) but I wanted to break Narinder's face to be fluffier and slimmer, while Nour's face would be shorter and flatter. If you look at it for too long, it's absolutely going to look weird, in the way that if you look at Anna from Frozen for too long she starts looking really weird. The anatomy isn't meant to be correct or consistent, it's meant to convey the emotion and energy I want out of the characters in that moment. If you're able to properly get that across, then you don't need to think about how broken something looks, as long as your eye is happy enough to trick your brain into thinking what you're seeing is canny.
(4) Yeah, I hate this part too. It's going to look like shit at first. I can't even look at my art from a few months ago when I was figuring out their designs... God, so fucking ugly. If it weren't for the shittiness of those drawings, I would have never gotten here! Wading through the "trust the process" stage always really sucks, but it's absolutely worth the relief of when you finally get something to look right.
(5) Art is work, yes. It's stressful, it's long, it's straining, its draining, it's exclaiming, blah blah blah. But, I try to keep my art FUN. If I find my artwork becoming slow as I depressingly drag my pen over my tablet, I'm failing. You MUST keep spirit and life in your work. The spirit of emptiness or the life of sadness can have a very meaningful place in art, but those can only exist with keeping work light, easy, and fun! If you're stressing how a specific thing looks or how you can't get something to look right no matter what, FUCK IT. Draw something to bring the flavor back in your work! I'm kind of rambling, but just, HAVE FUN!✨️ Be messy, scream, laugh, slash canvases, throw paint, smash sculptures, tear apart books, GO CRAZY
#liseysart#illustration#cotl fanart#cotl lamb#cotl narilamb#cotl narinder#cotl#cotl art#i really REALLY need to work on how i draw narinder haha!#when i feel stumped#i watch videos that make me laugh to bring my spirit back
2K notes
·
View notes
Note
Do you have any tips for drawing noses? Sorry this is out of nowhere but I'm wanting to improve on my art, specifically the faces, and it's always the nose I find myself struggling most with.
I really struggle w making it fit the face if that makes sense? Every time I try to add it it just throws the whole face off, especially the eyes, not to mention how to make different nose types and the angles </33
I love your art style so bad, it's so smooth and satisfying to look at and the way you draw noses like it's nbd (and anatomy in general like damn) baffles me so I was just wondering if you maybe had any tricks or not, Ty either way for sharing your art in the first place <33
@extravagav Well I can try! First off thank you very much, I often feel like I still have a very long way to go in regards to proportions and anatomy so I really appreciate your kind words <3
Hokay, so, noses. I do love noses. To start off when it comes to drawing noses I'm afraid I'm going to have to give you the most annoying advice in the world which is just to practice a lot. Find a lot of pictures of noses in a bunch of different shapes from a bunch of different angles and just draw them until your brain melts out of your ears. Pay particular attention though to the nose as a 3D object!
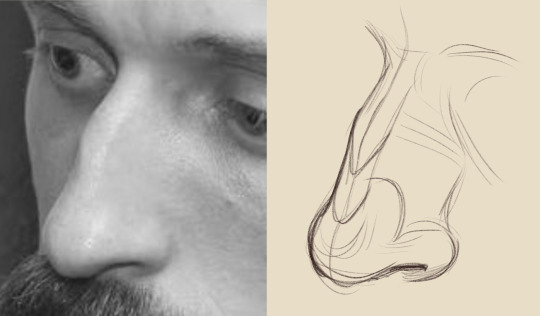
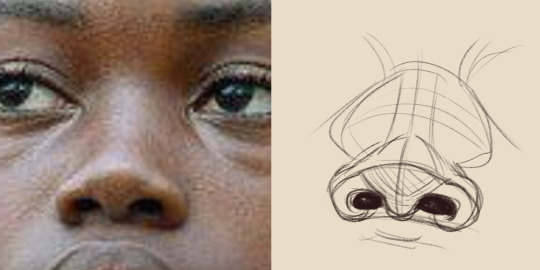
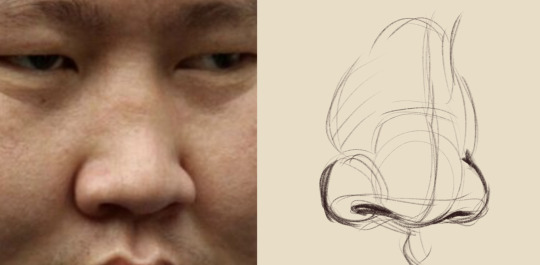
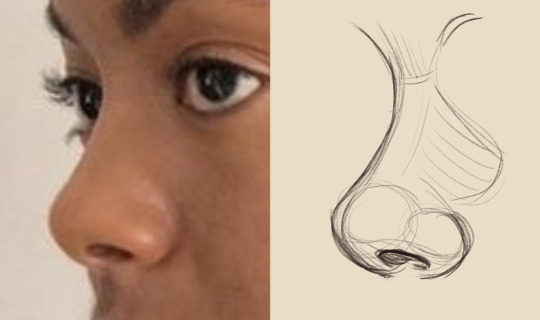
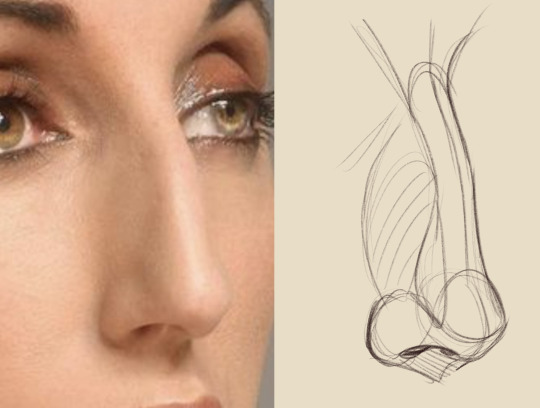

It's of course trickier to do than I'm making it out to be but the more you practice at imagining the nose as a 3d physical form the easier it becomes to make a nose model in your mind that you can rotate like a microwave.
This is my personal very very basic understanding of the nose's construction:
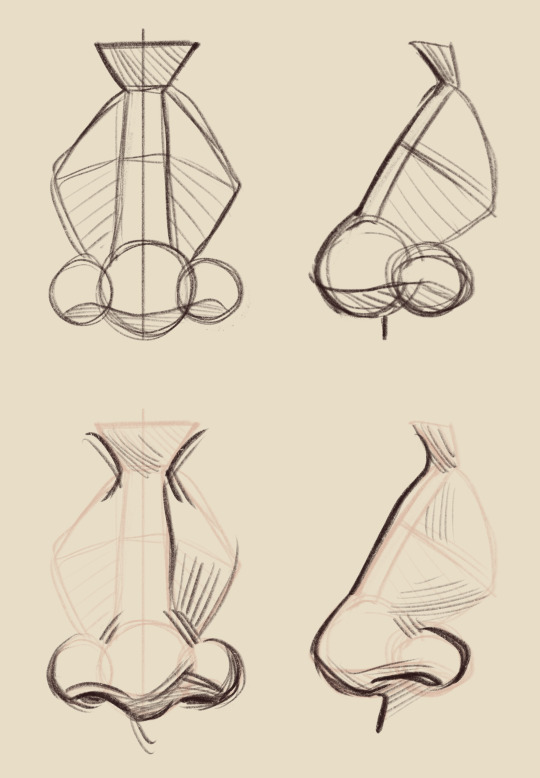
it's like three circles and a taco shell.
Okay so now that you've got a basic understanding of the nose's construction, how to put it in the middle of the god-dang face??
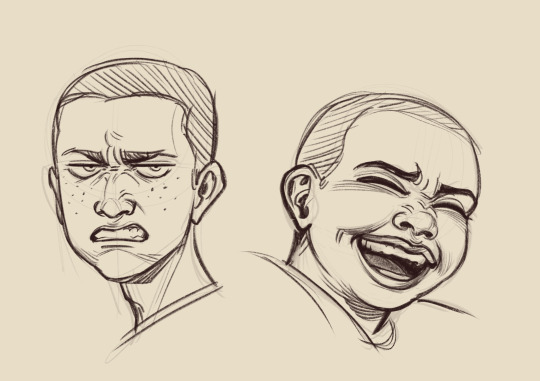
So the funky thing about noses is that they tend to change shape the least out of all our facial features when we're making expressions. Our eyes change shape, our mouths move, our eyebrows, our cheeks, our jaws, they all go all over the place. the nose, however, tends to be pretty stationary and doesn't deform much (save in one important way I'll get to later). So because of all this, and here's my biggest piece of advice when it comes to making the nose fit in the face, I like to draw the nose first! I do a very loose head construction, draw the nose, and then sort of "hang" the rest of the features off of it:
Two very different expressions, same nose!
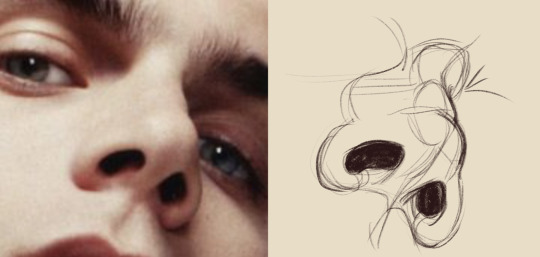
Now when it comes to noses interacting specifically with the eyes the greatest thing to remember is that the part of the nose that sits between the eyes sticks out farther than you might think, and will likely be obscuring one of them, the extent of which depending a lot on the angle and how pronounced the nose bridge is.
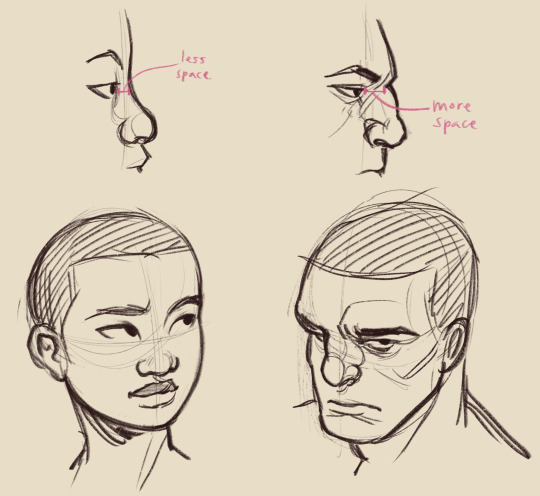
for someone with a pretty flat nose bridge you'll be able to see most of the eye except in a more extreme angle, while someone with a protruding ridge might obscure the eye entirely. but the nose will likely be interacting with at least one eye if we're not facing the character head on. Really making your brain think in 3d is gonna most helpful here.
Finally! The nose being expressive! So the main way the nose plays in to expression is by wrinkling. the muscles that pull up your top lip and the muscles that pull down the middle of your forehead are almost all connected to the nose, so the nose tends to develop a lot of wrinkles whenever brows are furrowed or teeth are bared.
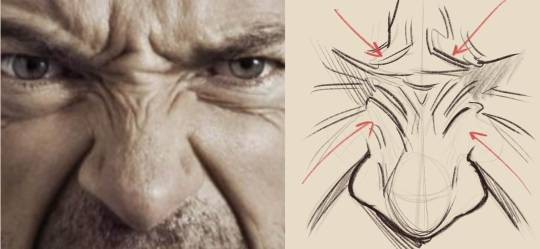
Adding those wrinkles can add a lot of impact in the expression! And not just angry ones neither:
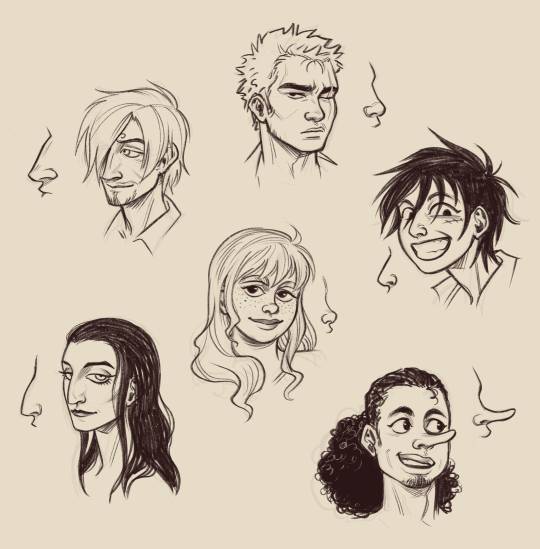
Sooooooooooooooo yeah! noses! They're weird and they come in all sorts of shapes and sizes and they can do a lot to add character to a face and they can also make you want to tear your hair out in big clumps! I'm still learning myself when it comes to noses (and most other things) and I'm faaaar from a master at it, but I hope I've been able to provide at least a little bit of help. If you do use my advice going forward please let me know! Good luck!!!!! (And here's all my nose "headcanons" for the strawhats. The ones who actually have human noses, anyway):
455 notes
·
View notes
Text
Collection of Free Art Tutorials
I don't usually make text post on this blog, but a nice artist I know was asking for tutorials a while back and I forgot to send some to them while in school. So here's a post on it since it's easiest to grab and go this way. :)
This list focuses on the basics. I'm focusing on the foundations of art, so medium is generally irrelevant and you can use physical or digital with these. You'll have to google more specific tutorials on things like character design and such.
One of the biggest pieces of advice I can give to you is strangely, introduce things to yourself one at a time. In art class, we took whole topics week by week. For high school, we did a few exercises then spent a week drawing/painting and doing your piece(s). For basic art 1 & 2 in college, we did 1-2 exercises and then did 1-2 drawings, followed by HW (which we turned in next week) and sketchbook practice (which she'd check at midpoints). For basic art lessons with a tutor, we did practice then our own art. You can see the pattern here - the point is don't be distressed if you don't get everything at once, or the lesson in 2 weeks, or the lesson in 3 years - we practice and do a lot over time, and you'll pick up on things you need to improve naturally and through help with others. Take time to be proud of your art in mini steps too, even if it's not the best! You tried and attempting to climb an obstacle over and over again before finally leapfrogging it is still progress to it.
Overall tutorials:
DrawABox.com is a site that's dedicated to art exercises and practicing when you can. They talk about the basics of art as well as how practice is important. It can get tough at times and it's ok to stop and do a balance of say those practices and doodles if you choose to try and do all of it's stuff - but you don't have to either. It's just a nice basic education done by some art nerds who like going hard.
Ethering Brothers - these guys are famous for their 40billion tutorials. If you need help on a specific idea, search their gallery and you'll likely find something.
Thundercluck's Art Fundamentals - She did a good huge ass tutorials on how things work, and it's the least overwhelming of the 3 I got in this section, so I suggest it as one of the first to look at for digital stuff.
Art Instructions Blog - Another good & simpler website that goes great into fundamentals. They focus more on traditional art but if you're digital, you can replicate most of the techniques - art fundamentals and subjects cover all mediums. Very important
Drawsh - Particularly notes on Construction: construction is the basics of building an illusion of a 3D image on a page. Figuring out how to build shape gives depth to your work, and learning how to see in 3D lets you be able to draw an item then move it around in your head (sometimes, when you're good enough, don't be afraid to pull out a reference or use live subjects). Construction is how to figure out the foundation of your drawing, and good planning = better picture! This link starts at the back, hit newer post to go forward.
There's a lot on anatomy and other nitty gritty details for when you want to practice those as well.
Griz and Norm's Assorted tips - Long time artist talk about various tips and tricks they use in art and how to avoid certain pitfalls. It's eclectic but great to look through.
James Gurney's Blog - He's got a lot of thoughts, a lot of tips, and a lot of adventures he catalogues. It's the least organized out of these but fortunately he has plenty of tags and most post have something neat going on. He's fantastic!🥰
BEFORE ALL OTHER BASICS….
How to Make Your Art Look Nice: Mindset
There's a lot of artist with different perspectives on how to approach art and your mindset while doing it, but the general consensus is that it's a process and sometimes you have to remind yourself to enjoy art!
Line
How to draw straight lines without a ruler. …but for the love of all that's good do NOT feel bad about using one! This talks about how to hold your pencil and how to do some good freehand stuff, some good practice.
5 grips for holding a Pencil for Drawing - This goes for pencil, pen, tablet, etc.. Get comfortable and figure out what's right for you and your pictures. I'd like to note that paintbrush holding will overlap, but some will differ.
A few line drawing exercises that help with line confidence.
Types of line drawings & what they are.
Contour Line & exercises with Mrs. Cook - Contour lines are one of the first art exercises I do in all the drawing classes I've taken. The good news is that they're surprisingly fun & look neat, even the blind contours!
Good deep thoughts on lines and how to use them.
Line Weight Tutorial
Lineart Weight Tips!
How to show variation in your line art: part 1 & part 2.
Some teacher's Drawing 1 & 2 lessons put online.
Light, Shadow, & Value
An introduction to tonal values.
Why values are important. The main reasons are that they give depth to a piece, and values literally shape our world.
Tonal Values: Everything you need to know
How does light work & the basics on Light
Light & Shadow in Art - much more in depth of the above! Highly recommended if you have time to spare.
Understanding grayscale/monochrome art. Great for shading & planning.
A guide to Cross Hatching (and hatching in general) - As a side note, crosshatching is one of the early things taught as it marries Line + Value into a nice neat package and helps add form with just a pen.
Crosshatching for Comics
Learn more about coloring by working in grayscale
How to Make Your Art Look Nice - Contrast!
Using lighting to make your art look nice.
Some light & shadow classifications.
Edges - notes on how they work in shading.
Color
A side note - color theory doesn't differ much, but color MIXING will change between mediums. If you're doing traditional colored pencil, you're overlapping 2 or more pigments on top of each other. If you're doing traditional paint, you're mixing & creating a solution/emulsion (depends on the pigment and binding) of pigments with the particles reflecting light in different ways. In digital, overlapping colors & blending colors depend on how the program you use calculates it if you're not just putting 2 color side by side. This just means you have to adjust your mixing when you switch between them. :)
Slawek Fedorczuk's Light & Color Tips - also shows how to guide through a scene.
The Color Tutorial Part 1 & 2 by Sashas - A personal favorite.
Color Studies 1-6 by Sheri Doty Amazingly nice breakdown on how color works in simple terms.
Sarah Culture's Tips on Color
The value of underpainting
A few notes on reflective light.
Experimental color techniques with Alai Ganuza: first post, second, & third.
Color zones of the face charts
Composition
Good Tips on Composition
Here's an example of how you can search the Etherington Brothers' stuff and get like 10 tutorials and tips on one subject. Composition & Cover Design, Shadow Composition, Two Line Composition - plus more.
How to make your art look nice: Thumbnailing!
And don't be afraid to make silly thumbnails or sketches.
Composition Examples - charts like these are great when you can't think of something yourself. There's no shame in using them.
Flow and Rhythm
Formulas for landscape composition.
Perspective
Perspective Drawing Tutorial by Julie Duell
Linear & Atmospheric Perspective Guide
One Point Perspective City Tut by Swingerzetta
Niso Explains Perspective - these are great for drawing figures in perspective!
Putting characters into scenes and drawing backgrounds
Backgrounds that make your character stand out!
Using background detail to guide the eye.
Odds and Ends
I shit you not, probably 1/3rd of my color, value, & structure knowledge comes from pixel art since I've done so much of it and it is all about challenging yourself to do the most you can with limitations. Check out lospec's tutorial database for fun and see how it compares to art techniques you're doing - even if you never try a medium, it's always interesting to see how it works. :D
How to Make Your Art Look Nice: Reference Images & Style, Pushing Proportions, and developing style.
Foervraengd talks about how he expanded his comfort zone with concept art & landscape drawing.
Luna Art talks about what they're thinking when doing concept art.
Repeating visual motifs in character design looks cool.
Eric's Thoughts on Drawing Backgrounds and Props.
Show vs. Tell: Why Visual is Not Optional in comics.
The Lost Vocabulary of Visual Story Telling Day 1, Day 2, Day 3, & Day 4.
Traditional Animation's 2 Digital Library books, The Know-How of Cartooning by Ken Hultgren & Advanced Animation by Preston Blair are two books from the golden age of animation they have up on their site for free viewing!
Animation resources dot org has a lot of cool stuff. Here's Nat Falk's How to Make Animated Cartoons (part 1). Their pages on Instruction & Theory are a good start.
Books
Good news: the internet archive has a TON of resources. Make sure to check around and toggle filters, it's a bit weird with organization. For example, a book can be under art or drawing - techniques, depending on who catalogues it.
Andrew Loomis is someone artist tend to die-hard reccomend. His work is collected here & here on the internet archive (one is Andrew Loomis, the other is Loomis, Andrew - thanks). I own Figure Drawing for All It's Worth and I recommend checking all of his stuff out, especially if you're having trouble with bodies and hands.
The Animator's Survival Guide by Richard Williams is mandatory in animation classes for good reason - it's fantastic!
Perspective for Comic Book Artist by David Chelsea is great for any type of artist. So is Extreme Perspective & Perspective in Action.
Scott McCloud's Understanding Comics, Reinventing Comics, & Making Comics. The first one is on the internet archive, the second two are likely avaliable at your library or at a bookstore as they're pretty popular.
Speaking of comics, Drawing Comics the Marvel Way has been a favorite of comic artist for years no matter what comic book companies and artist you like, it's a good introduction.
Anything by or endorsed by James Gurney, Color and Light: A Guide for the Realistic Painter is one of my favorites (this is his official page but you can get them elsewhere for cheaper too).
Art resource blogs with good tagging systems: @artist-refs , @help-me-draw , @helpfulharrie , @art-res , @drawingden , & @how-to-art
Lastly, I suggest if you find something you like online for free, SAVE IT! Whether it is through the Wayback Machine, screenshotting a whole webpage, reblogging/retweeting something, or putting it on pinterest, digital media is fickle and tends to go up in smoke when you least expect it. I have a partially organized Pinterest board that helped me find most of the stuff I wanted to keep. Figure out what works for you and save what you can.
1K notes
·
View notes
Text
Class of 09: The Flipside: Rewrite
Hey everyone! I’m a huge fan of Class of ‘09 and I’ve been thinking about how amazing the game could be with a bit of a revamp, especially after the direction the third game took. While I love the dark humor and over-the-top tone of the original, I feel like the third game didn’t really hit the mark for me (and I’m sure a lot of you feel the same way). So I’ve been working on an idea for a rewrite/remake, but with a fresh twist—turning it into an interactive YouTube series while keeping the same spirit and dark humor that made the first game so iconic.
Plot Overview:
The story would pick up after the Graduation ending, with Jecka as the main character. She’s been desperately trying to find a university that will accept her, not because she cares about school, but because (in her words), “I’m too fucking hot to work in a fast food restaurant, Nicole!” She calls Nicole at 3 AM, and together they find a “cool” fashion university.
It turns out Jecka has secretly loved fashion for years and even draws her own outfits every Wednesday when she barely talks to anyone—even Nicole! Most of the game would follow her experiences trying to survive at the fashion university, dealing with new classmates and the ridiculous world of high fashion.
While the cast is mostly new, Nicole, Ari, and Jeffrey all return:
Ari is now a confident head of the city Pride Parade and got into the university because of her work designing outfits for the parade.
Jeffrey is much less weird—he’s still into manga and anime, but his focus is on design and improving his art. He got into the university because his anime character designs have great anatomy.
Nicole got in by tracing Jecka’s work (I don't wanna get murdered by the fandom so I had to sneak her in the University SOMEHOW).
What Makes It Different:
Same Dark Humor: I want to keep the sharp one-liners and edgy humor from the first game. Think along the lines of the famous "I feel" conversation from the Nicole x Ari ending.
Character Growth: Jecka gets more depth, especially with her secret passion for fashion. Nicole will still be chaotic, but she’ll face new challenges trying to survive at a university where she doesn’t belong.
New Characters: Jecka’s new classmates would bring fresh dynamics and humor. Some could be rivals, others potential new friends.
5 Endings: I’ve outlined five endings, with a mix of success, rivalry, and even failure, all with the same darkly comedic twists that Class of '09 is known for.
Why Interactive YouTube?
I think the interactive YouTube format would be a cool way to bring this story to life. Viewers could make choices for Jecka and Nicole, leading to different outcomes—kind of like the original game but with the visual and comedic flair of a YouTube series. I’m aiming to create something that feels like it could be an official continuation, with all the humor, drama, and ridiculousness we love from the first game.
I’d love to hear your thoughts! Does this idea sound like something you’d watch? Any suggestions for what you'd want to see from a Class of ‘09 remake? Let me know!!!
#class of 09#class of 09 the flip side#jecka class of 09#nicole class of 09#ari class of 09#jeffrey class of 09#rewrite#indiedev
96 notes
·
View notes
Note
Any tips for getting better at drawing?
Oooooh that is a very broad topic.
If I’m being honest I find it hard to put my art journey (that I am still pretty young in) into words. It all depends on so many things- experience, medium, your ability to understand anatomy, objects in a 3D space, colour theory, how joints work, lineart, comprehensive understanding of form etc etc. There is a lot of stuff involved with art and it would be hard to just compile it all into one topic. But I’m gonna assume you mean drawing as in pencil, paper (or the digital equivalent) and an idea.
My main tip, which you’ve probably seen over and over and over again is just practice. It’s disheartening to hear the same thing repeated until your ears are bleeding but from personal experience, it’s how I improved my understanding of form/linework. But don’t just practice the same thing. Go on Google or Pinterest, find reference photos of real people, trace over the human skeleton, divide complicated structures into easy to understand shapes. There is no wrong way to study art, do whatever works for you!
Another one is to look at other people’s art, see what about it you like and you dislike, and how you can apply that to your own work. Someone use a particular brush for outlines that you like? Try it out! Do you like the fluidity/connectedness of colours within a particular piece? Have a go at it!
And not everything you draw will be amazing, or even good. I’ve been sat feeling frustrated with myself because I couldn’t get a face right, or the way I was drawing a hand looked weird a squiggly, and that’s completely normal! No one posts the fucked up looking pieces of warmup art that they abandoned because they couldn’t find the right angle to draw a character’s cheek bones at (Cough cough). Trust me, everyone that draws has art they will never post.
Finally, progress takes time. It’s a long, frustrating, gruelling process that has massive highs and lows where you feel like the worst artist in the world or the fucking reincarnation of Picasso. It depends on the weather.
For example, my art at the start of 2023 looked like this:
And now it looks like this:
It took my two years to get that far, and fuck knows what my art will look like at the end of 2025.
Your art journey never stops, it only becomes less confusing and frustrating as time goes by. To everyone that feels like they’re in the art trenches right now, you got this, I believe in you and I promise that one day you will crawl out from the mud and filth with a clear understanding of the colour wheel (because fuck me I do hope I get out of that trench soon)
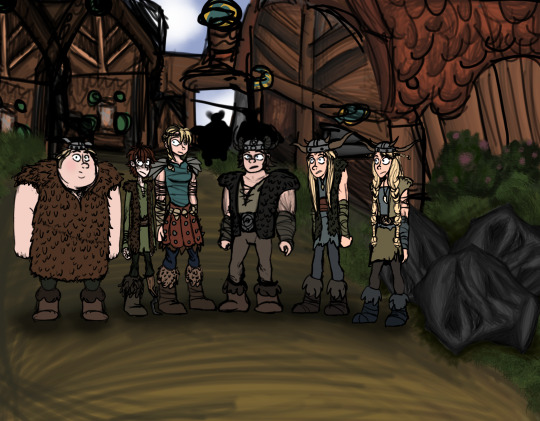
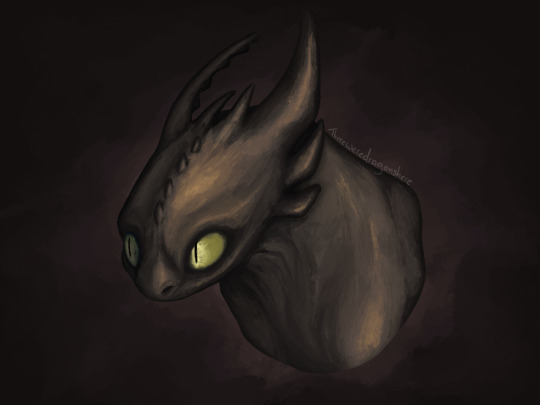
#httyd#how to train your dragon#my artwork#art stuff#artist#original art#my art#digital art#art#artwork#artists on tumblr#art advice#art advisory#hiccup#hiccup haddock#httyd hiccup#hiccup httyd#toothless#red death
61 notes
·
View notes
Note
I am in love with your art style. I love all your jjk art, it’s like stitching back the pieces of my shattered heart. Your art is so soothing and has such a warm feel, I love it. Also if you don’t mind me asking what program do you use for your art, and do you have any tips? I strive to someday create art that gives the same feeling of comfort as yours. Thank you <3
Thank you so much for the kind message! I'm actually in the middle of making another jjk piece but it's been a while so I've been trying to remember and consolidate my process. This ask came at a great time hehe
I use photoshop for most of my art pieces but I think there are a lot of cheaper alternatives (procreate on Ipad, clipstudio paint, medibang etc) that would work just as well. As for tips, I have a technical and an emotional one:
My technical tip would be to use references!! Especially if you're just starting out, it's SO IMPORTANT imo for catching mistakes especially with anatomy, lighting and perspective. And by reference I mean real life photos. I think you can be inspired by other artists' work, but there is the danger of picking up their bad habits if you only use their work for reference. I would recommend sticking mainly to real life and looking to other artists only for resolving specific stylistic details once you have a solid grasp of your fundamentals.


I would start with a rough sketch first of whatever you want to draw and then look for refs that match the mood and tone you want to go for. Get the idea down first and draw from the heart. Then the refs come in to help with the specifics (ex. what a window looks like, how someone would hold a cigarette) The jump from the rough to the clean line version is an amalgamation of all the little things you learn along the way. For example, on one day, I learned that clothing folds usually start at one point and spread out. Then another day, I learned how to do 1 point perspective and so on and so forth. Then all those tidbits slowly add up to help you get better and better.
2. My second tip would be to understand what you want to convey with your artwork. If it's fanart, what about the media that you're interacting with draws you in? It doesn't always need to be a complex answer, sometimes you just want to draw a character because you think they're hot and that's totally valid imo.
I occasionally tutor very young artists and oftentimes, they will tell me that they want to draw like X artist or X painting/piece of media. I always try to encourage them to go deeper. What about that drawing resonates with them and what specifics are occurring in the picture to make them feel that way? For example, I recently realized I love environment heavy drawings not for the background itself but because they ground the characters and seeing them do mundane things makes them feel more real to me.
For the example below, the whole set was to explore friendship and mental health. Sometimes just having someone there who listens and is willing to talk with you can make a huge difference.


Once you know the purpose of your art, then I think it makes the decision making for the rest of the process much easier. What type of lighting scenario conveys support and comfort? I went with dusk. Then I started searching up references for dusk lighting. Couldn't find the ref I actually used for colour but a quick google will show you lots of similar options.
What kind of poses feel in character for Shoko vs Geto? What is the focus of the picture? As much as I love details, I think sometimes they can actually take away from the main message. For example, if I had rendered the lamp on the right a lot more, it would've distracted from the main point of the picture so I tried to keep that and the background in general simple (still something I need to improve on haha).
Then those extra technical things (value structure, cool vs warm light, reflective lighting, connotations behind colours) you pick up along the way are all there to help you better communicate what you want to convey with your art.
Okay I lied one more tip, be patient and learn to appreciate the process. Like with any skill, there are a lot of technical aspects that you have to study and practice. I think because the end result is so visual and easily accessible in comparison to other hobbies/jobs, it really cripples beginners. Even with writing, you won't realize a book is good until you learn how to read. With art, you can resonate with a painting without having drawn a single line yourself.
I think beginners and even professionals see a lot of beautiful finished artwork and get enticed by that only to be discouraged when they find their process/finished work didn't end up the way they wanted it to look. Treat it like you would learning how to write. The fundamentals can be tedious and do take time to drill into your head, but learning them will help you SO MUCH with the creative fun parts. You can't write a poem without first taking the time to learn the alphabet, spelling and grammar. You're also probably going to write a bunch of shitty poems before you write that one good one, but that's okay because each piece lets you experiment and exercise your voice. Art is the same thing, don't rush it! Enjoy the process and celebrate your improvements.
#omg i typed way too much but i have a lot to say!!#thank you for the ask this was actually so therapeutic lmao#ask#my last advice...is to be selective about who you take advice from#so you can just ignore all this or cherry pick what resonates with you and your process
85 notes
·
View notes
Note
Any tips on drawing humans? (Your human jazzprowl is so gorgeous)
draw often!! draw things repeatedly, don't take it too seriously bc it's really not that deep and you can always redo a drawing <33
study just enough to understand the basics of forms and how they work and then just.goof off tbh,,
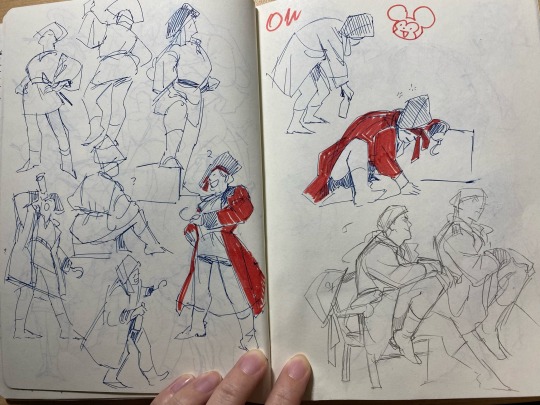
below are a few recent scribbly pages from my little daily sketchbook just as a rough example, i think it's most important to find something you enjoy about the process and lean into it !!
my perspective as an animation student is that. yes of course understanding your fundamentals of weight, structure, anatomy etc is v important, but it actually only gets more fun when u get to apply it to doodles of friends and little characters and such and u suddenly find its way easier to get your intended point across fjdhgj
sorry ik this is still very nonspecific fjdjf but just have fun drawing, observe the people around you going about their lives, look for those little moments that mean something to you ,, i think theres always something to love about people living their daily lives if you're looking for it, and then the urge to note those moments down in little doodles just appears and improvement in technical skill will follow and style will emerge from there :)
#every time i get an ask about art advice i end up rambling about loving people.which i stand by#creepily observing people is my favourite activity#asks#i hope this is coherent at least a little bit??#if not then.maybe ill make a more academically correct post but there are already a lot of resources for that fjdjfj
69 notes
·
View notes
Note
What advice would you give beginner artists?
it's fine to want to do more stylized art, but nothing will help you improve quickly like studying from life. even if you want to draw very stylized figures, life drawing is still going to help you understand how the human body works and then you can build your stylization off of that understanding. I also recommend studying specifically things you're looking to improve--if you feel like your poses aren't dynamic, ask your model to do some quick (1-2 min) dynamic poses and work on getting the gesture down. if you're looking for anatomy, ask for longer, more static poses and really study the contours of the body. this also applies for portraiture and character art--my expressions and facial structure improved like CRAZY when i started doing portrait studies from life! (note: i know live model sessions aren't accessible for everyone. i'm a huge advocate for nude models, if you can find a studio nearby that's affordable to you that offers sessions, that's the best you're gonna get. however, there are sites that will give you photos of nude models to draw from, too, or you can even just ask friends or family to pose for you when they aren't busy, that's what i did before i started getting model sessions from my school!)
materials are not everything but sometimes a good material can make a difference. it's important to know what's worth it and what isn't for your skill level. invest in some decent-quality supplies or a good art program, but understand that you're still going to need to work to understand your materials and use them to their fullest potential. (if you're a digital artist buy csp. trust me on this. get it on sale. it will change your life. also do not fucking use photoshop)
tracing is ok. listen to me. TRACING. IS. OK. tracing is how you learn. don't trace other people's art and pass it off as your own, obviously, but there is literally no problem with tracing real-life reference photos. I routinely trace references for backgrounds and the like. there is no reason for you to kill yourself trying to make complex perspective and shit up from your head when you can very easily just overlay a photo and get what you need.
in that same vein, USE REFERENCE PHOTOS. find pics online or take pics of yourself and USE THEM to see how your poses work. it makes it SO SO SO much easier. the understanding that you need to create a pose out of nowhere will come with time but you're not going to get that skill unless you have a foundation of understanding how the real human body works, and the easiest way to get that understanding is by copying photos of real people.
last but not least, there's generally a sort of 'rulebook' that new artists are expected to go by, especially online, when it comes to digital art. when i was first learning, it was all about lineart and cell shading, two things that I didn't really like. Nowadays it seems to be all about rendering. the single most important thing i can tell you is if it sucks you don't have to do it. if you hate lineart just color your sketches. if you hate shading don't shade, or find a different way to shade that you enjoy more. if rendering is annoying or difficult for you DON'T BOTHER!! art is supposed to be fun. if part of your process is annoying or upsetting to you, cut it the fuck out. don't torture yourself just to do art the "right" way. i guarantee your art will look better when you're having fun making it anyway!
#asks#ALSO don't go in expecting to monetize your social media presence/go viral as an artist. make art for YOU and make what you want to make.#if your art has passion behind it then attention will come naturally!
331 notes
·
View notes
Note
Do you have any tips on getting better at anatomy and dimension? You always draw such beautiful, dynamic and expressive people!! So i was wondering if you have any tips for people who struggle with that? I also love whenever you share your life drawings because your sketches always look so smooth and effortless, and I would really like to learn but I have no idea where to start lol. I know you're probably sick of being asked this but I really look up to your art!
hello! i’m so honoured, thank you! i would normally say “live sketching is the best way to improve!” but you’ve already seen my live sketches so ill see if i can list down all the other things that helped me with my art journey:
using references - online, but also references of yourself (or someone you know who can do it for you). you are going to be able to get exact references to what you want to draw when you pose for it yourself. this is something i started considering only after i was forced to do acting for animation at uni. it’s really helpful!
learn to draw cloth and folds. when you’re drawing people there’s a 90% chance they’re in clothes, so observes and see how different materials look when they’re hanging or scrunched up or blowing in the wind.
the coil technique by sycra helped me out a LOT when i was trying to figure out foreshortening and make the character still seem like a solid structure.
line weight is another great way to show volume without shading. it also makes the line art process a lot of fun!
and i’ve heard many other artists say this and i stand by it too. find something you’re interested in and keep drawing for it. eventually you’re gonna get really good at it! and then you find the next thing and keep drawing that!
if anyone has any more tips feel free to leave it in the replies! i hope you have a good time drawing <3
112 notes
·
View notes
Note
Do you have any tip (or like a book rec) for composition and/or perspective? I'd like to improve that skills but I dont even know where to start 😭
Oh boy, I'm not sure if the way I do it is the best way 🥲. I avoid studying art like the plague in the traditional sense. I don't look up tutorials, read art books, or use grids for perspectives because I straight up don't understand them. That way of working, where you break down the steps in such a methodical way, doesn't work for me. The few times I've tried to use a grid, it ended up looking so wrong to me, and I couldn't make it work, hah! Whenever I've tried to take a 'study' approach to my art, it has stunted my progress and taken the joy out of it.
I wing it a lot. Sometimes I take photos of various items like cups and books and use them as perspective lines because I like a very tactile and hands-on approach to feeling out the composition in real life. The same goes for reference photos for anatomy —I try to understand it in a physical way by moving around myself and sometimes filming or taking photos of myself, but most of the time, I just wing it!
For this piece, I just closed my eyes and prayed. One of the easiest ways for me to build up a composition, is by stacking things and avoiding the floor (it's basically cheating, hah). It makes it look like you know what you're doing when really, you don't. I stacked the front of the boat in front of the mast, which is in front of the tentacle, and so on. Then I just gradually made things smaller as they moved further away until it felt right, rather than being accurate. And if you tilt the composition a bit (this one tilts a bit to the left) and make the characters overlap, then BAM, it looks like it's all intentional.

For this one, I took a picture of the bottom corner of my shelf with a wide-angle, to get the floor right because my brain couldn't comprehend it 🤔

I do study art somewhat by actively observing and breaking down pieces I love that are made by other artists. For example, when I started drawing my comic, I read all of One Piece and Fullmetal Alchemist and took my time to understand their panelling and the tricks they used. I'd stop and look at a page, really taking my time to understand how they were telling the story. I was surprised to find that sometimes they barely drew anything at all for several panels, yet I was never in doubt about who was talking and where they were.
I think, by looking at my art, you can tell that I grew up with Oda's illustrations. I still love how vibrant and well-composed they are, especially how he plays with perspective until it feels right and looks amazing, even if it doesn’t always make anatomical or logical sense. That's the vibe I'm going for as well—just mashing things around until I feel good about it.
One thing that really helped me was letting go of the idea that it has to be perfect or always make sense. For example, this Halloween piece is one of my personal favorites, but if you look at Dakon's foot for too long, you can tell that it's way too small and doesn't match the perspective at all. However, I was satisfied with the overall feeling of the piece, so I just left it.

The only time I've ever "studied" anything art-related was when I went to film school for animation and learned how to animate in 3D, and let me tell you, what a fucking scam. You can learn all of that, and more, just by watching YouTube videos (which I did, lol).
I feel like that wasn't very helpful at all 😭 Is there a particular piece you're curious about, maybe? I'm always ready to break down my pieces and explain how I go about composing them!
40 notes
·
View notes
Note
Okay gen question, how are you so good at anatomy? like I know its a mix of years of practice and experience. Mayhaps you can spare some tips on how ppl can improve theirs? Always looking forward to your works btw! Even the scribbles you think aren't decent are always such a nice treat to see <3
It being drilled into my system years ago in a drawing class specifically for that 😭 Then a character design class the next semester that added on top of it. BUT FOR CARTOONSSSSS (I have not accomplished anything in my life to utilize any of this.)
My main point of knowledge reference is this book though (OMG FREE INTERNET ARCHIVE PDF? Yes. Though I personally have a physical copy.) We didn’t really read the walls of text so much as just practiced the proportion stuff in the early pages ad-nauseam and some skeletons (not hyper detailed ones just making sure bones were where they should be). Tho admittedly I’ve been neglecting any studying. (This book came out in 1943 brrgh) DO YOU KNOW HOW MUCH I HAD TO DRAW THIS DIAGRAM? MORE THAN ANY PERSON SHOULD.
But hey, it works. I still sometimes end up referring back to it if I think I’m sucking (disclaimer: i think this often )
As far as I’ve come to know, how something looks visually doesn’t matter so much long as basic proportions are correct. Cuz even people without trained eyes for this sorta thing can recognize when something is proportionately wrong. Like, I guess on you know where everything is supposed to go, you can kinda do anything from there?? I think. It translated well when we were drawing real people who were not the “ideal” presented, and when moving to more stylized stuff with their own rules in a completely different course. So what if that leg doesnt look exactly like u think a leg looks anatomically— IS THE KNEE IN THE CORRECT SPOT? Yes? Then u did it.
Also that eyes are in the center of the face. Not the nose. JUMPSCARE!!!
Aaaa, this isn’t really an interesting answer. If I ever figured out better streaming outside if private discords I could probably make my points better rather than pulling a “here’s a textbook, figure it out” CUZ ITS LIKE. ITS OVERWHELMING WITHOUT A GUIDE AND 😭😭😭
I don’t know. I don’t think I have “anatomy” correct, just “proportions.” Cuz I wouldn’t be able to tell you what something is, just where something goes. Which… I think is a little more important and also a distinction I don’t really see anyone making in drawing.
Though, as much as I wanna be helpful in a more effective way, it’s really really really hard for me to articulate how anyone could improve theirs if I don’t know what the alleged problem areas are 😭 I find all this stuff to be case by case. I kind of do better if i can directly point things out and offer info from there instead of blank slate tips. If I ever figure out streaming outside of private discords it would probably be easier (literally doesnt own a functional up to date enough computer)
I guess focus less on “anatomy” and focus more on proportions since that does more of the heavy lifting? Unless ur a med student, then you probably should focus on anatomy
someone could die because you couldnt identify their coccyx
OKAY THATS IT THANKS AND SORRY
#cozy ask#i didnt go to any art school.#but you’ll net more appropriate results online if u look for proportions instead of anatomy#it’ll give u more of what u probably are looking for#especially since the latter is more so a scientific field#tho there are artists whi specialize in it#i feel like a nerd saying things like that BUT ITS TRUE.
40 notes
·
View notes
Note
hello!I hope this finds you well ^^ the names magpie,I was wondering if you could tell me some basic tips for your art style or a time's lapse of one of your drawing for me to analize? I love the art style so much and I want to be like you! if you cant/won't I completely understand!sorry if its to much to ask,have a good day/night! ><
hello magpie! thank you so much for sending in a question and I’m delighted you like my art! 🩵✨
to start off with, the only person who can truly do the atompalace art style is me- it’s my own uniquely personal way of drawing, so I cannot tell you how to wholly replicate it nor would I encourage it. BUT! every single artist’s art style, including my own, is a patchwork of effort and practice, techniques you enjoy using, and influences from the things you love- and that’s beautiful!!! 🌈💕 so instead I’ve written four ways to help develop your very own art style:
1. Gather Inspiration 🌟
what inspires you? this can be any type of art, photography, character design and so on, or anything made by a favourite artist, but also delving into nature, places, feelings... now try and identify what specifically you love about these things!
I like to save any artwork or photo that particularly resonates with my tastes into a folder, then I analyse the specific traits about each piece that I admire, especially if I aspire to improving that trait in my own work. artists who have influenced my style recently include Mia Ikumi, the Kamikita Twins, Lisa Frank, Naoko Takeuchi, and Elena Kucharik; I also find lots of inspiration in Sanrio character artworks and Pretty Cure cards and merchandise ✨
it’s a wonderful feeling to reach a stage where you’re naturally drawing the type of art you love to look at, and by delving into why you enjoy the art you enjoy, you can use that knowledge to your advantage to achieve that!
2. Practice, Practice, Practice 🔥
I always tell aspiring artists that the most important way to develop your skills is to draw as much as possible. yes, fundamentals and going out of your comfort zone are important, and many artists tell you to focus on these when you start out… but personally I think drawing the things you enjoy and often is an equally valid method, because it gets you into the habit, and you will still learn lots!
when I was in school, I drew OCs and Pokémon on spare paper using ink. I didn’t really focus on anatomy or composition at that point, but it certainly helped develop my line control/confidence and drawing speed- and my art style, too!
a good specific way to practice is to pick artworks that you love and make studies of them! this way you can learn from the various techniques of the original (such as ones you identified in the previous section!) by trying to redraw them. IMPORTANT: if you make studies/reproductions of illustrations, particularly by contemporary independent artists, please keep them private and don’t post them, because that can give others the impression that you’re imitating them 💧
another fun way to do studies that you can post publicly is by choosing a TV show, film, comic, or video game with a style you like and try to draw your character (or even a character from a different media) in that style! for example, I enjoy drawing my Pokémon trainersona in the official Pokémon style occasionally- I improved with every attempt because of the time I spent practicing and looking closely at art made by professional illustrators, which helped me really understand the trademarks of that style. learning by doing!
3. Making It Yours 🎀
a recognisable or “iconic” art style is made up of multiple trademarks; no single trademark is ever exclusive to one artist, but it’s a unique combination of them that makes a style stand out.
for instance, I love drawing heart shaped shines in my characters’ eyes, which is something lots of artists do. but in tandem with multiple other trademarks common to my works (pastel colours, lineart quirks, typical subject matter and more), that’s what makes them say- “I’m an atompalace piece!”
to make sweet, glittery art, drawing your very own effects brushes or textures is a fantastic way to express your own style effectively. I programmed all of my sparkle brushes! some of my base brush shapes are referenced and some are entirely from my own imagination, but I drew them all myself. you can find free tutorials on making your own brushes for most art programmes online if you need help, or just edit default brushes that came with your art program!
4. No Restrictions 🪽
don’t be afraid to experiment! especially as a digital artist, a good few of the exclusive techniques I use were ones I discovered unintentionally or by trial-and-error, and when you work with digital layers it’s a lot easier to play around with colour palettes. tweak colours and mess around effects, and you might come up with a happy accident that you can use in the future as a building block to your style!
this might seem contradictory to the previous section, but you don’t have to tie yourself to any one art style. we all change and grow all the time, and especially if you’ve only been drawing for a relatively short time, it’s good to keep an open mind and allow your art to evolve. (for me, only the last 2-3 years has been the longest my own art style has been consistent!)
even if there’s a main style you always return to, it’s absolutely fine to deviate from it. I do, and I have fun with it, too! switching things up every so often is fun and can even help your main art style improve! conversely, if you try too hard to stick to a method that you don’t truly enjoy or have become bored of, it can be creatively stifling, so allowing yourself to branch out is key.
if you’re a hobby artist, your own enjoyment and personal satisfaction should be your priority- not the approval and attention of others. one of the best ways to let your art style shine is by letting yourself draw as self indulgently as you like without holding back!
before I sign off, I do have two timelapses of two detailed illustrations to share with you! The Sylveon Sanctuary and The Mermaid and the Fairy 🫧 notice how I use the golden spiral or a grid to help make balanced compositions; I don’t always make a colour draft, but I did for these; and I sometimes do “mini sketches” to help me visualise from my base sketch.
thank you again for your message, I enjoyed answering this and I hope you find it helpful and motivating to draw lots of lovely art!!! 🎨
- Princess Sol ⚜️🎀🩵✨
#atompalace correspondence#atompalace writings#yapped a lot but I’m passionate about art and style 🥹#super hope this is helpful!!!
19 notes
·
View notes
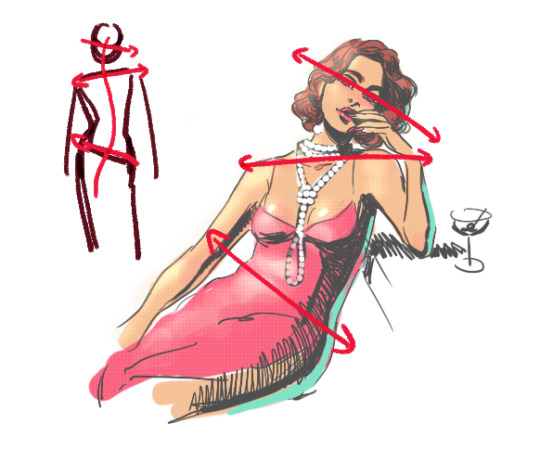
Note
do you have any tips for drawing dynamic poses? i always love the way you draw bodies!!
i know this has been said a million times but the way i draw bodies significantly improved after i started drawing more frequently from reference. if i cant find a reference for a pose on the internet, i'll just use myself or a friend. i spend an unfortunate amount of time just standing in front of my mirror looking at my own joints. pay attention to where your body curves!!
other than that though—honestly my anatomy/pose knowledge is a whack amalgamation of art tips i've accumulated over the years (i miss old school deviantart/tumblr style art tutorials). i also like to look at how artists i admire draw bodies—what details to they include, what anatomical short-hands etc
i think i'm still figuring out how to draw dynamic poses, but here are some cheats i've picked up (under the cut coz this got long again):
gonna use this stray!tim as a base
the easiest way for make up a pose is to start roughly with the head, collarbones, ribcage, and pelvis — you can build everything from there
here's a couple more of what i mean by the ribcage-pelvis deconstruction:
2. push your perspective a little!! imo things look more dynamic if you move your sight-line up or down—the horizontal orange line here. if you look at the panels above, the sight lines tend to be a little low, at around the character's torso or waist. i did the same below with stray!tim
to do this i usually try to get a sense of the space im working in by putting in some sloppy perspective grids
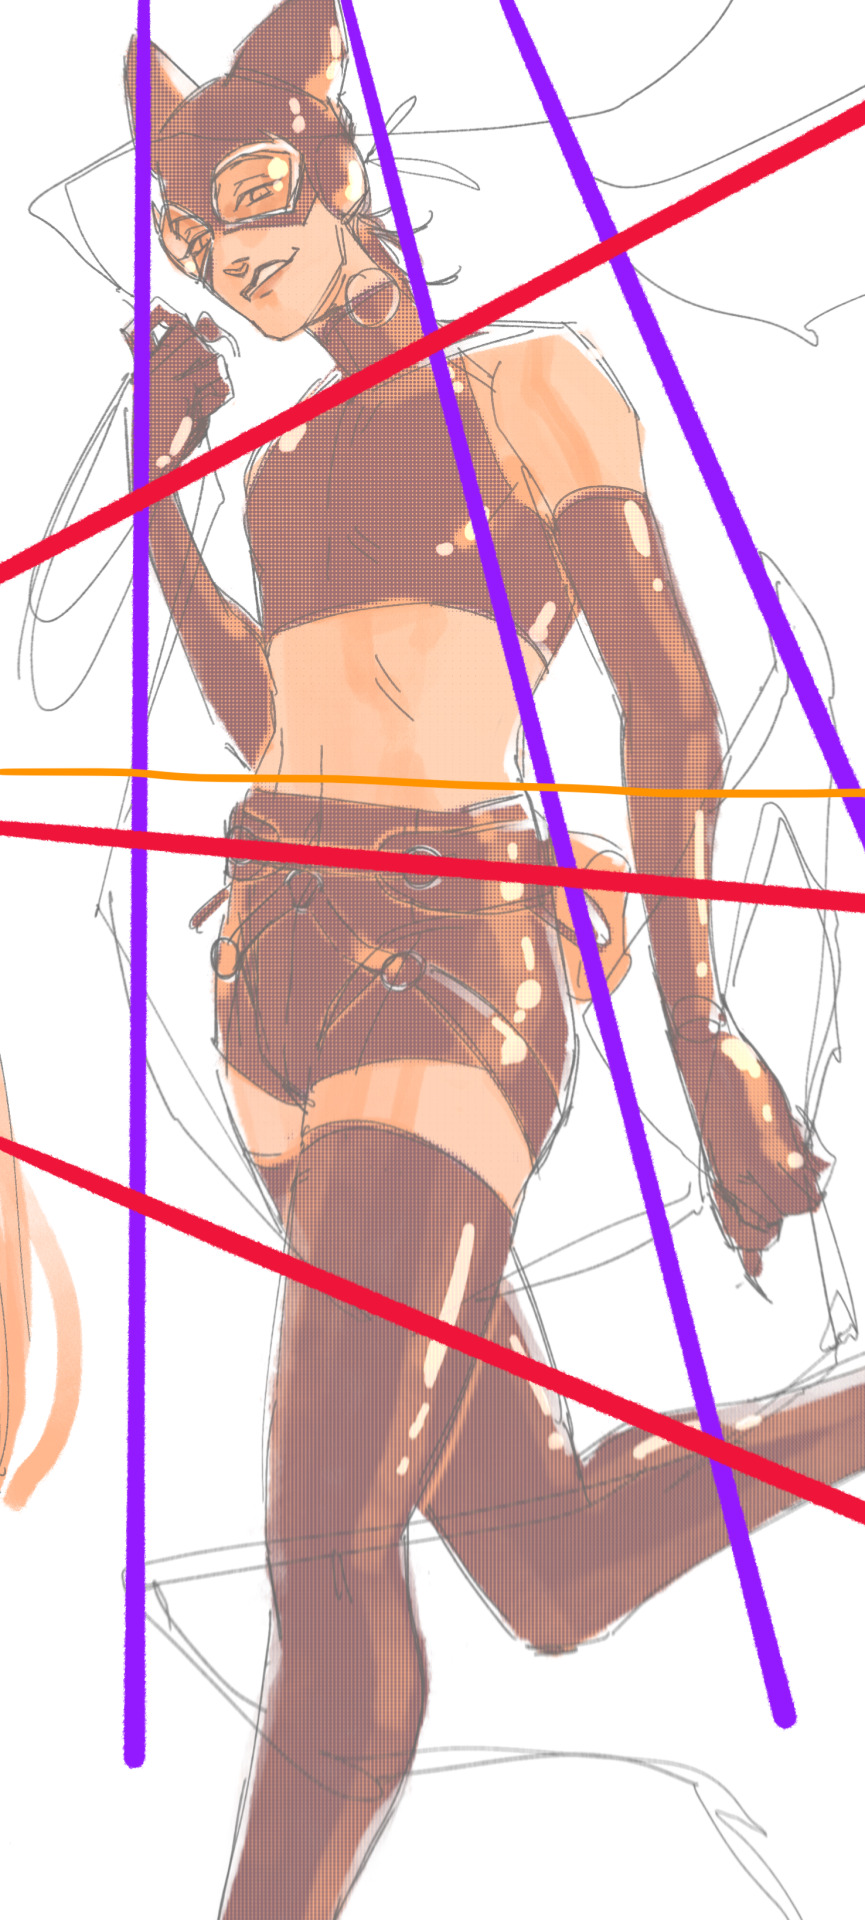
3. S curves!!! exaggerate the lines of the body. the body naturally has parallel horizontal lines—an easy way to get a body to look less rigid is to tilt those horizontal lines which in turn curves the vertical line of the body
this is what a mean by horizontal lines—usually i use the eyes, shoulders, and hips:
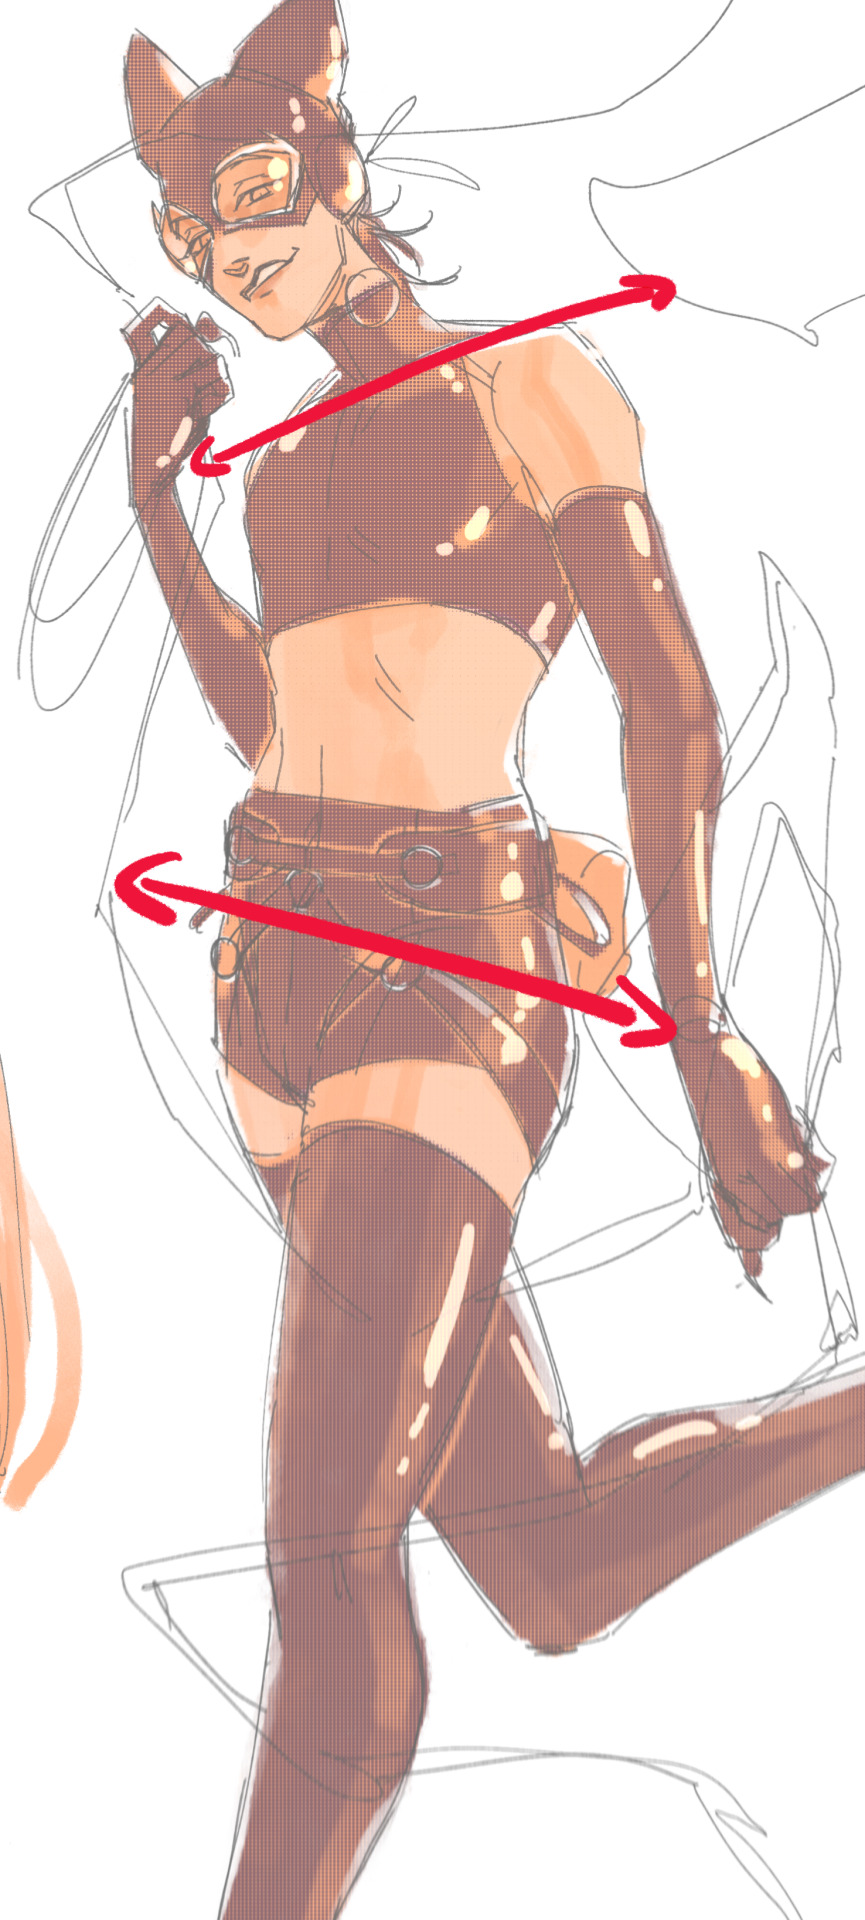
i'm gonna use caterina as a better example—usually you want the horizontal lines to sort of zigzag:
i've also picked up a couple visual tricks that don't exactly add dynamism to a pose? but they do give a static pose a little more oomph. a lot of this is done by visually highlighting one specific point of the body
for our purposes, i'm gonna make the focal point tim's face
motion blur! there are a couple ways to do this. i actually dont like working with traditional motion blur because you have to mess around with selections, so i usually fake motion blur using postional perspective blur:


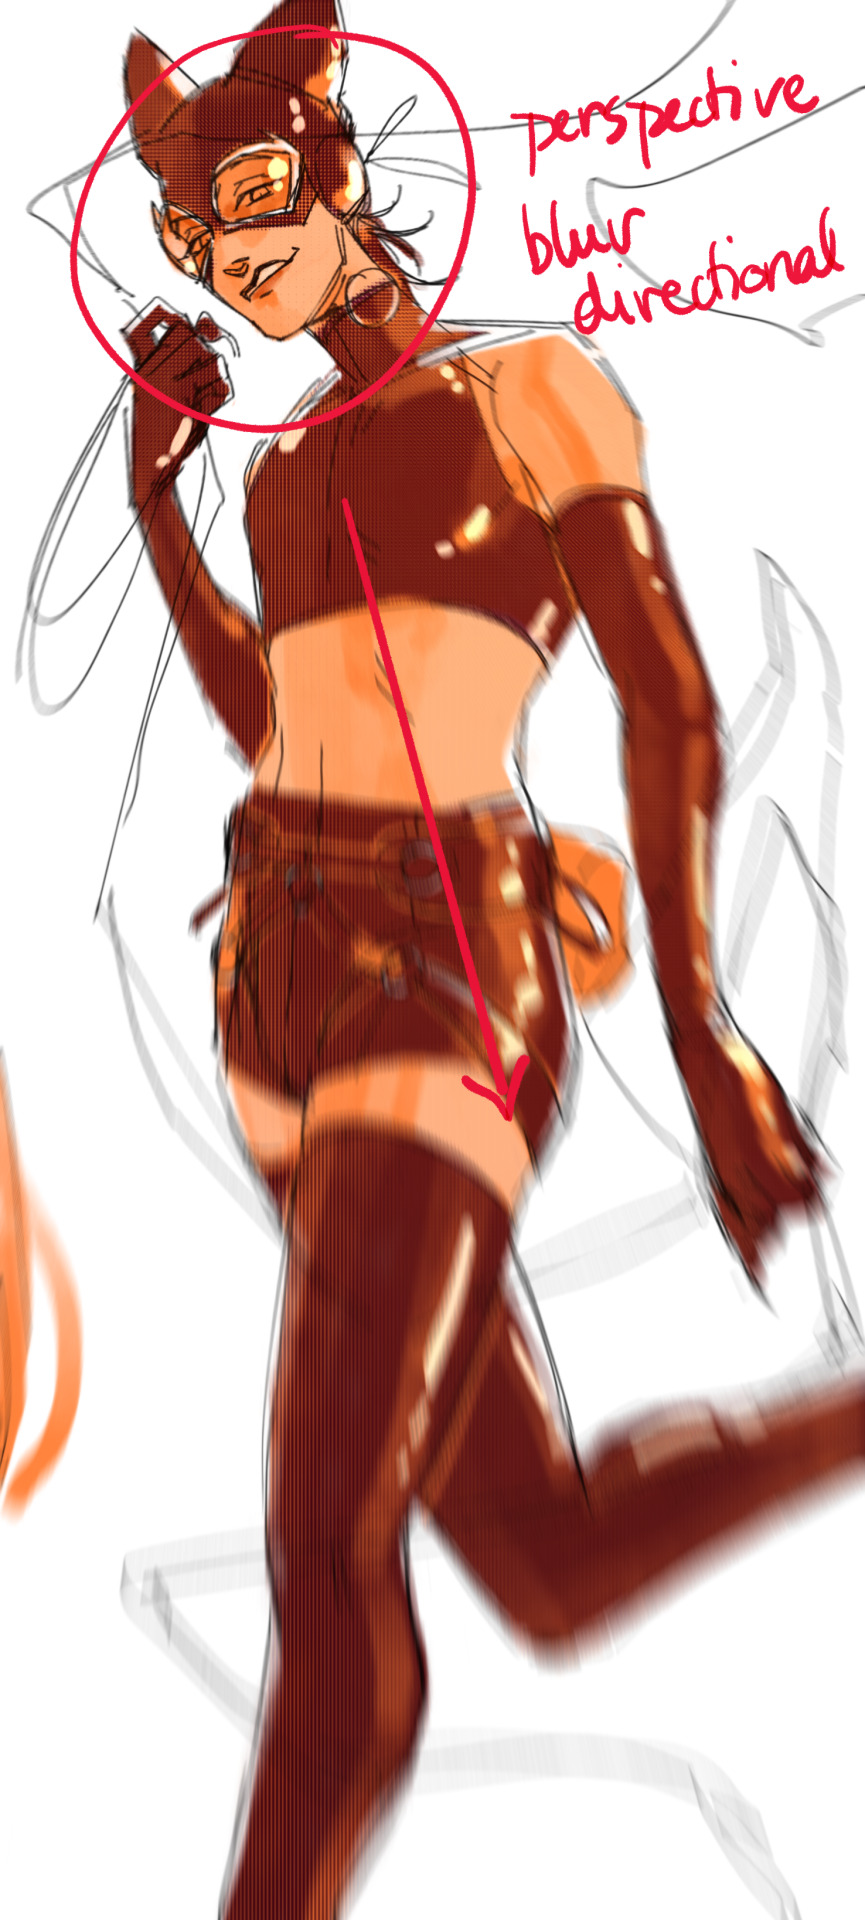
2. gradient lighting—you can add a lot of depth this way. usually i like setting the gradient in the direction of the focal point, e.g. tim's face
below, i added a layer above the base drawing, used an airbrush to get this gradient, and then set the layer to color burn and lowered the opacity. you can also clip the lighting layer to the base drawing and set it to multiply

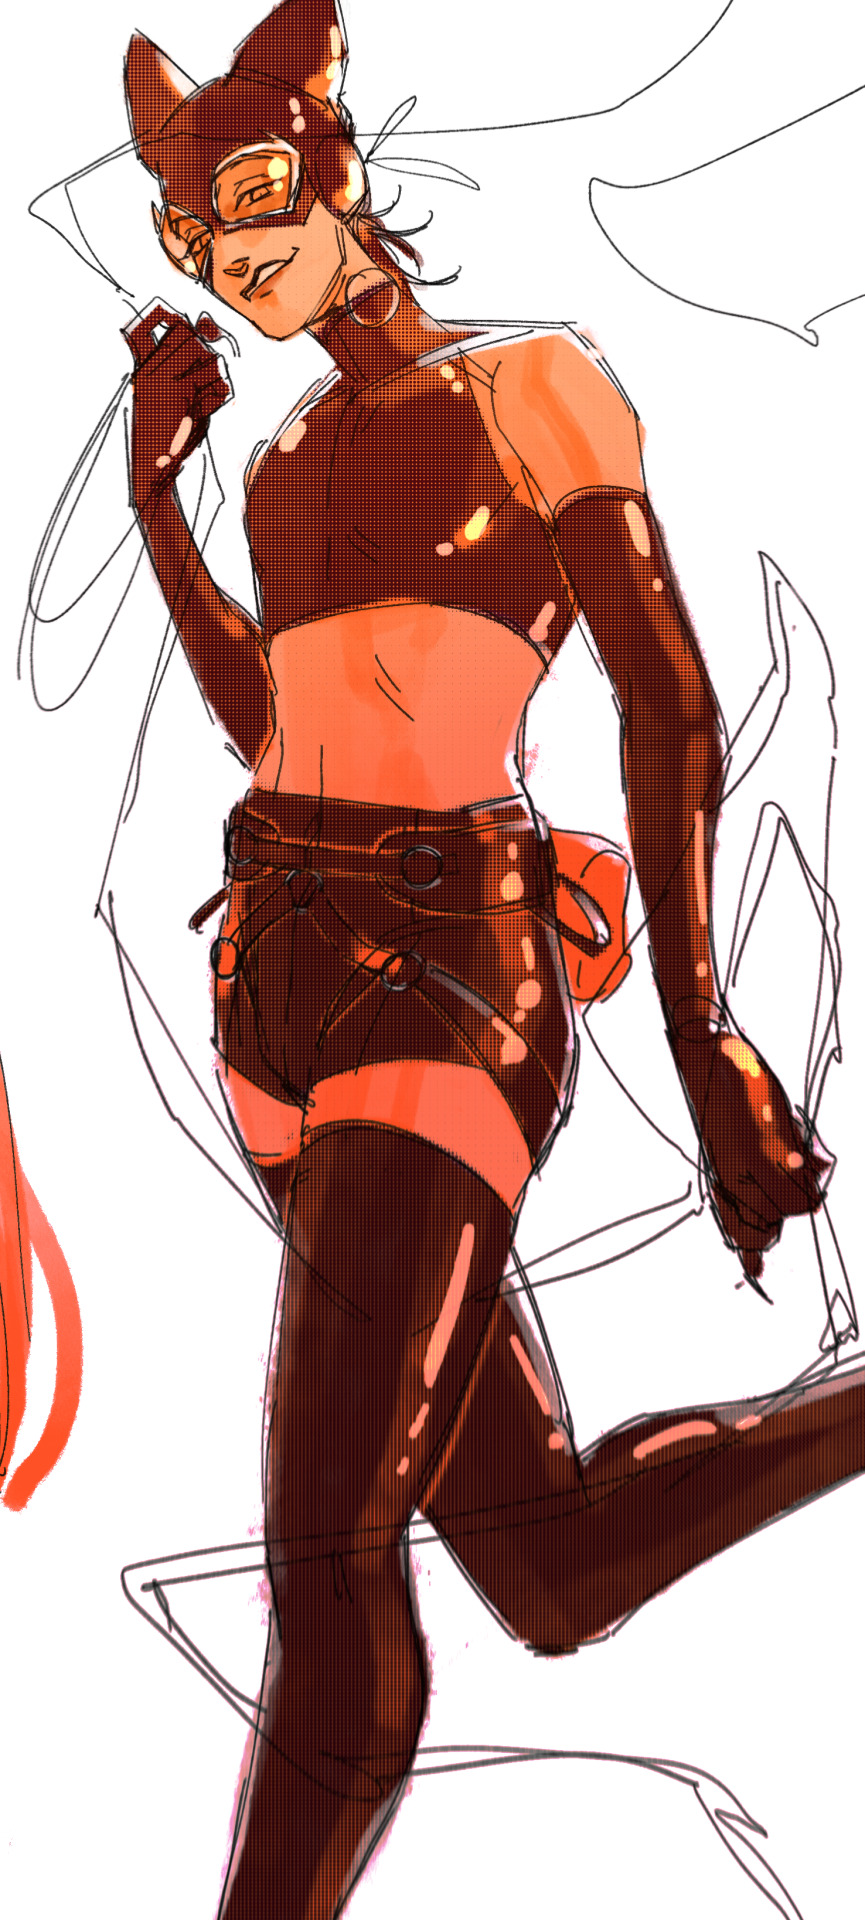
below, i did the opposite—instead of adding a gradient shadow, i added gradient light. i set the layer to add this time (instead of color burn) and then lowered the opacity again.
this kinda serves to desaturate the parts of the piece that are less important (ish i was kinda sloppy here), driving the eye to face—the most saturated. the motion blur does a similar thing, where the only thing "in focus" is tim's face
the gradient also sort of adds a directionality to the piece—it starts at the bottom right corner and goes up towards the upper left, causing your eye to follow that same path, which drags your gaze up tim's body
here's what it looks like when i combine 1 and 2:

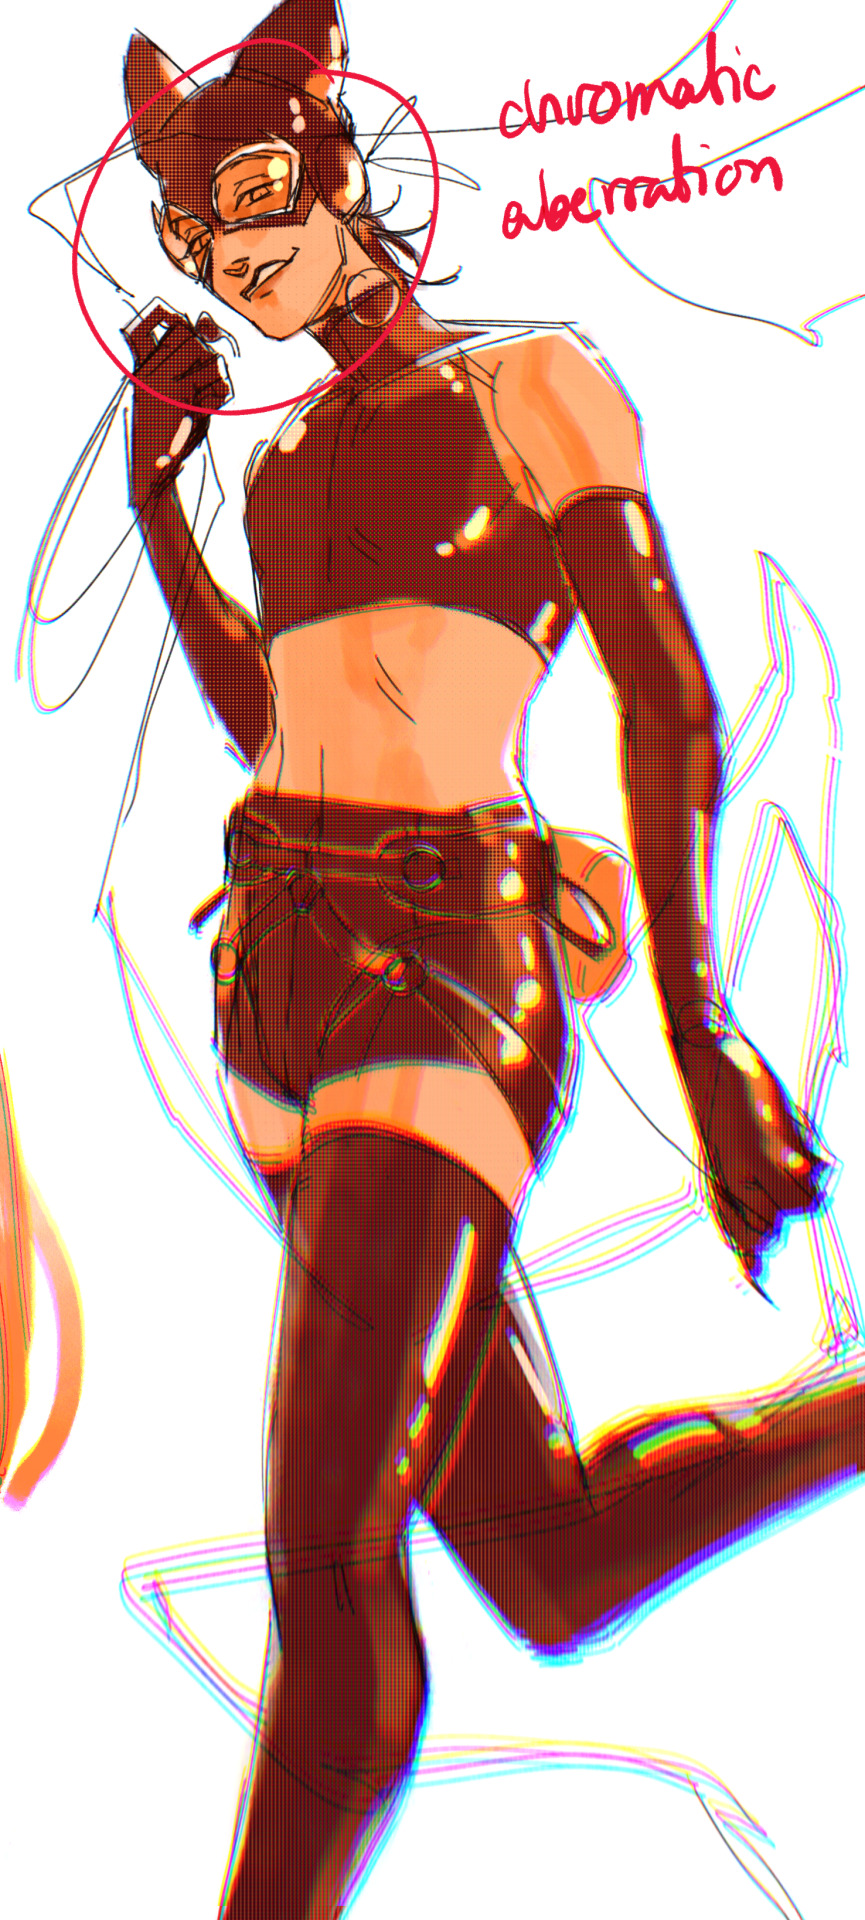
3. chromatic aberration's been pretty popular recently. it does a similar thing as perspective blur but with more eyestrain (although i went with a really exaggerated version below just to show you what it does) but it looks cool!
bonus cryptid tim as a reward for getting to the end :-)
#red talks#sart#art tutorial#YeAH UH this got long lmaooo i was on the bus for a Sec plotting this out so#also i am neck deep in a reincarnation/regression manhwa stress hyperfixation so i havent had the brain space to draw#so you get this instead!#if anyone wants recs lemme know lol#thank you anon :)))
68 notes
·
View notes
Note
how do i get into drawing more? i've enjoyed drawing since i was a child but i never really practiced it that much and as such most of my stuff is pretty rudimentary from a technique standpoint. i only have physical supplies and i cannot afford an ipad or a drawing pad any time soon
there is no need for an ipad or a tablet if you don't already draw something expansive you don't even have to worry about that. I (and i imagine many/most artists who began drawing young) got my start on normal paper sheets the one they call "printer paper" because it's thin and textureless. Actually that might be a lie because I think that even before that I was drawing on walls so truly full circle of a thing.
The only stuff you need to draw are something To Draw With, whether it be a pencil or a pen; if it is a pencil also have an eraser, a no-bullshit rectangular eraser, I've literally never understood what the good was in the pink & blue ones beyond making holes & stamps in them, just get a normal good eraser, slightly squishy so it doesn't pull at the paper like a maniac when you use; And paper to draw in. I'd say get a sketchbook for the convenience + the chill of it all. Doesn't even have to be thicker "drawing paper" it can just be a random, lineless notebook. I like mine to have a spiral spine so I can take full advantage of the page but don't even need that. Genuinely for years this was my drawing material (+ whatever paper I found, including my school supplies)
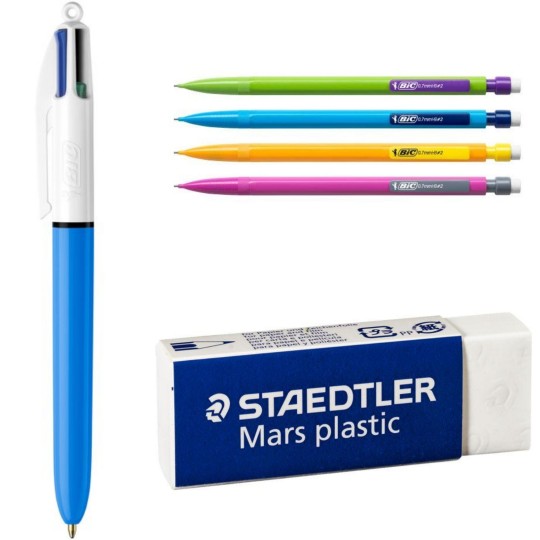
(Staedtler eraser very good actually I've been using it for 10yrs among the better I've used if you find it get yourself one. This shit was like 1.50€ at my local papeteries and then again they mightve inflated the price)
Now I'm gonna tell you about my life because I think it colors the way I approach drawing and as such the advice I'll give you: I started drawing really young (like pre-dates knowing how to read or write) and never stopped. That means I, technically, have some 20+ years of drawing, but I still struggle with what are kinda "fundamentals". I only quite late, technically speaking, gotten into trying my hand as perspective & naturalistic anatomy. That's because I had, at the start, nothing but passion.
And that's gonna be the one piece of advice I have for you:
Get really, really into something, and start trying like the devil to get good at drawing it.
When I was a wee lad I loved horses so much (and I still do.) and all I wanted to do was get good at drawing horses so I could draw stories with horses, so I practiced drawing horses from the horse magazines i had. Around 11, I got really into manga and all I wanted to do was get good at drawing manga so I could draw my own (a lot of my actually like Formative Years of drawing was manga, and I think it's still visible especially when I draw cartoony faces these days), so I practiced drawing manga from the how-to books their were at the library (and we had actually good ones, including Japanese mangaka's translated into french). Around 14, I got really into Video Game, and all I wanted to do was get real good at drawing the characters, so i practiced from youtube tutorials & other internet finds. Nowadays I'm into art history & archeology, and go out of my way to see and grasp and understand #whateverthiswas and try to pepper it (or sometimes dump the whole bag) in my images.
If you're starting "from nothing", I feel like practicing anatomy for the sake of anatomy (for example) will just piss you off. When you get more into the groove of things, and actually want to Get Serious, you'll sit down to Actually Practice, but I personally have always found that Learning for the Passionate Goal makes the whole thing more interesting than Learning To Learn To Then Attempt The Passionate Goal.
It's gonna suck for a while. It truly will. You'll see every improvement so drastic you'll be like ewww what was that 2 months ago. But you will HAVE HAD FUN DOING IT!!!
Tldr
1) get into something. Whatever it is.
2) collect tools and tutorial to serve whatever it is you're into, and not try to get into the tools: that will come later, once you're already in the habit of drawing.
3) you don't need fancy material
4) never underestimate the power of the humble ballpoint pen and clicky pencil
5) train your brain, the muscle of your brain, to conjure up images until there is nothing you can do BUT exteriorize them lest they poison you
6) you don't have to post anything online btw. In fact, I attribute the fact that I have always loved art so much to the fact that for the first 15yrs of my life I could truly just enjoy the process and vibe. I still do, don't take me wrong, and truly I draw for myself and you're all trapped in here with me. Looking at the slop i feed you. But there is an inherent, new dimension added with Being The Blogger. So have fun and vibe.
7) the heart is the horse, the hands are the rider
21 notes
·
View notes