#sketchbook drawing tutorial
Explore tagged Tumblr posts
Visit Tumblr Blog
Explore Tumblr blogs with no restrictions, modern design and the best experience.
Last Seen Tumblr Blogs


Fun Fact
69% of Tumblr users are millennials.
Text
#sketchbook#drawing#alcoholmarkers#sketchbook drawing#sketchbook drawing anime#sketchbook drawing tutorial#sketchbook drawing ideas#sketchbook drawing easy#copic markes#alcohol markers#prismacolor markers#prismacolour markers#markers#fine-liners#fine liners#fineliners#prismacolor markers art#fineliner pen art#copic markers drawing#posca markers#fineliner sketching#copic markers for beginners#copic markers#drawing ideas#drawing easy#drawing tutorial#drawing anime#markers drawing
3 notes
·
View notes
Text
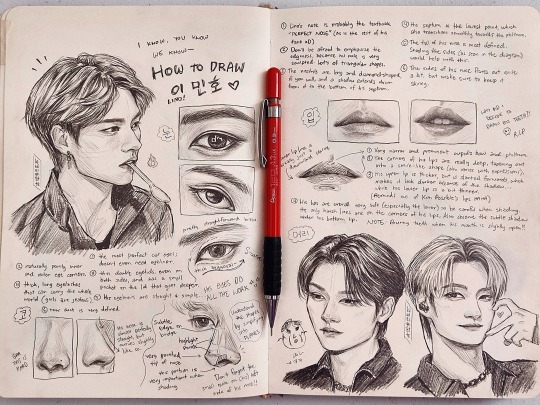
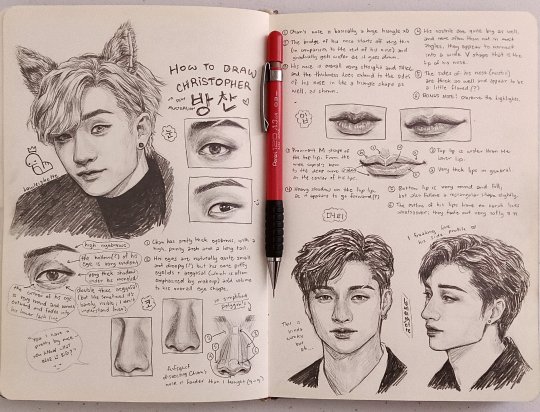
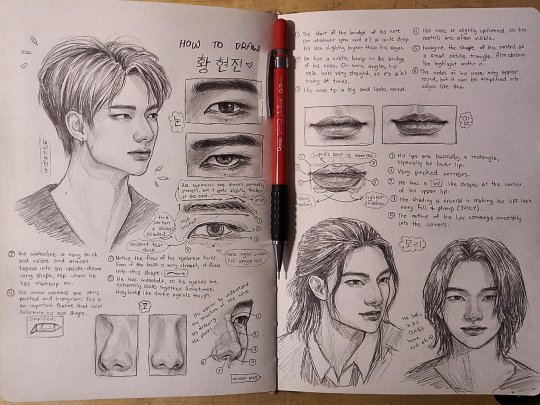
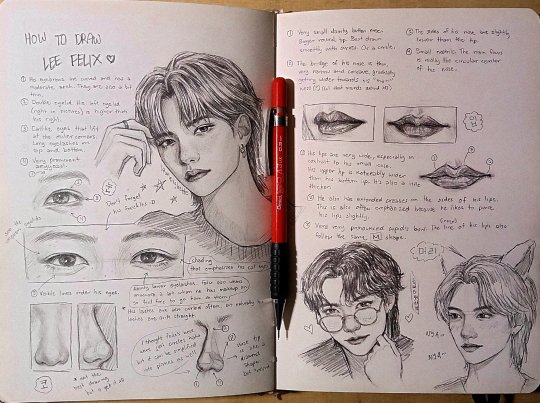
SKZ studies part 1 (4/8) Lino, Chan, Hyunjin, Felix.
I realized I had never posted any of the studies I've done for the past (almost) 2 years x'D I was finally able to finish Lee Know's study recently, which is the fourth out of the eight members, so here they are!! I'll do the rest of them sooner or later :3
©Lawleighette 2021-2023
#SKZ#stray kids#스트레이키즈#lee know#bang chan#hyunjin#felix#stray kids fanart#skz fanart#kpop fanart#traditional art#art study#drawing guide#sketchbook#sketches#pencil drawing#drawing#illustration#tutorial#how to draw#portrait#art#artist#artwork#artists on tumblr
4K notes
·
View notes
Text

It's Snoopy's birthdayyyyy! ✨🎂 Hope he likes pistachio cake.
You can find the timelapse of this on my Tiktok and IG @joydawood!
#snoopy#peanuts comics#peanuts#birthday#charlie brown#art#sketch#sketchbook#drawing#illustration#characterdesign#artist#artists on tumblr#illustrators on tumblr#theartofjoydawood#cute art#childrens illustration#illustrator#celebrate#art tutorial
96 notes
·
View notes
Note
do you have a process for drawing dragon faces? their expressions are so fun and lifelike to look at :]
Sure I do!! I don't think about it too much consciously nowadays but I definitely have a process. Mostly it's informed by previous experience doing human expressions? Specifically a loooot of anime style characters, but I also use the same basic layout for pretty much every character I draw from dragons to ponies; only thing that changes is the proportions and whether or not I need to add a snoot.
I threw together my best shot at a guide, hope it helps~!!
(I am aware that my chicken scratch is very messy and accessibility is a good idea so I'm gonna throw plaintext of what I wrote beneath the cut)
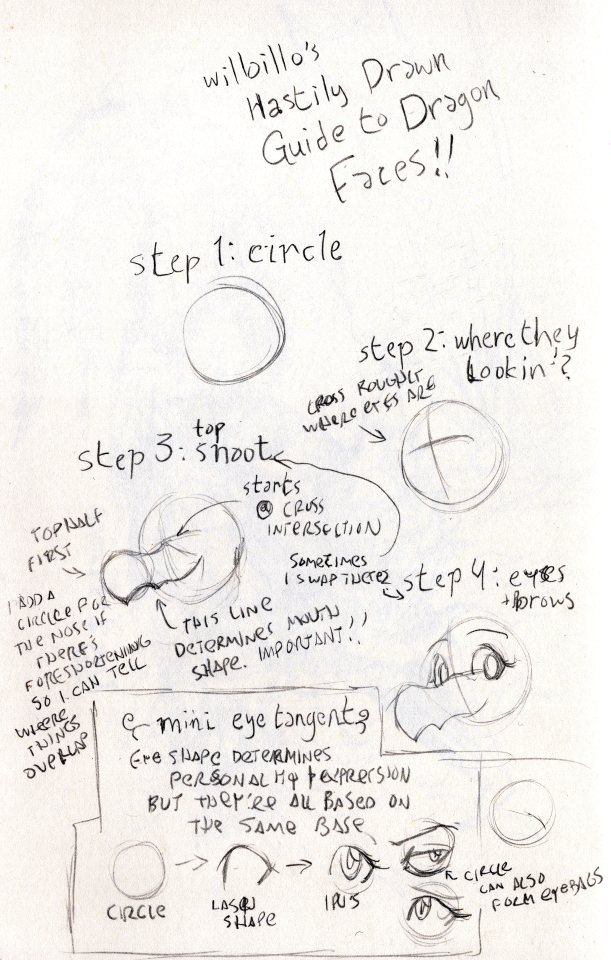
Willoillo's Hastily Drawn Guide to Dragon Faces!!
Step 1: Circle [image ID: a sketchy circle]
Step 2: Where they lookin'? [Image ID: the same circle, but with a cross drawn on it. the lines that make up the cross are curved slightly to show dimension.]
Cross roughly where the eyes are
Step 3: Top Snoot [Image ID: The same circle with the cross, but now with a collection of curved lines making up the top half of a dragon's snout attached. The mouthline is curved upwards to show a smile.]
top half first
I add a circle for the tip of the nose if there's foreshortening so I can tell where things will overlap
this line determines mouth shape. Important!!
Step 4: Eyes + Brows [Image ID: The circle with the snout, now with a pair of eyes and raised brows looking at the viewer.]
Sometimes I swap steps 3 & 4
Mini Eye Tangent [Image ID: a series of three drawings showing how to build an eye shape, starting with a circle, then adding a top and bottom lash to create a specific shape, and finally showing the eye with an iris looking at the viewer. Next to it are other eyes with different shapes and expressions, with the circle behind them shown to show how they were built from the same template. One of the eyes has a heavy eye bag drawn, following the shape of the circle behind it.]
Eye shape determines personality and expression but they're all based on the same base
Start with a circle, then do the lash shape, and finally the iris
The circle can also from wrinkles/eyebags
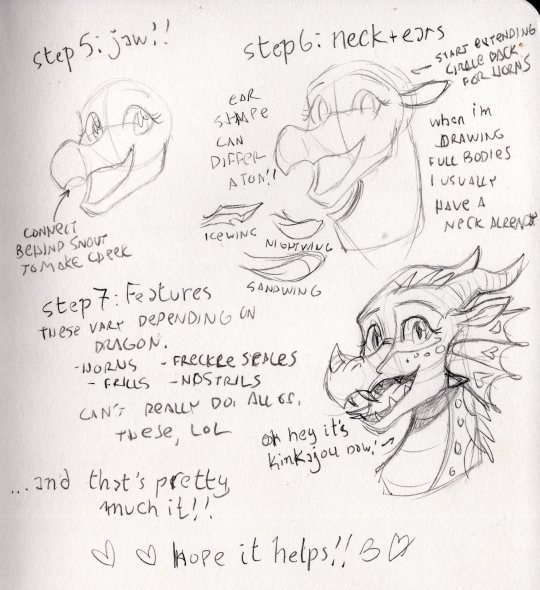
Step 5: Jaw!! [Image ID: The same dragon, but now with a lower jaw. The line for the back jaw is drawn visible through the snout to show how it connects to the face on the other side.]
Connect the back jaw behind the snout to make the cheek
Step 6: Neck + Ears [Image ID: Same as previous, but now with a curved neck added connected to the circle, as well as leaf shaped ears. An additional circular sketch has been extended behind the original circle past where the ear is connected.]
Start extending our circle back to make room for horns
When I'm drawing full bodies I usually have a neck already in place
Ear shape can differ a ton!! [Image ID: examples of how I draw different ear shapes for icewings, nightwings and sandwings; the icewing ear is sharp and jagged, the sandwing ear is long like a rabbits, and the nightwing ear is twisted like a goat's.]
Step 7: Features [Image ID: A finished sketch of Kinkajou from the Wings of Fire series with a happy expression. An arrow is pointing to her with the line 'oh look it's kinkajou now' written next to it.]
These vary depending on dragon.
Horns, frills, freckle scales, nostrils
Can't really show all of these, lol
... And that's pretty much it!! Hope it helps!!
#illustrators on tumblr#willoillo#artists on tumblr#art#illustration#drawing tutorial#lillo answers#wings of fire#wof art#wof#dragon#dragon art#pencil sketch#sketch#sketchbook
64 notes
·
View notes
Text

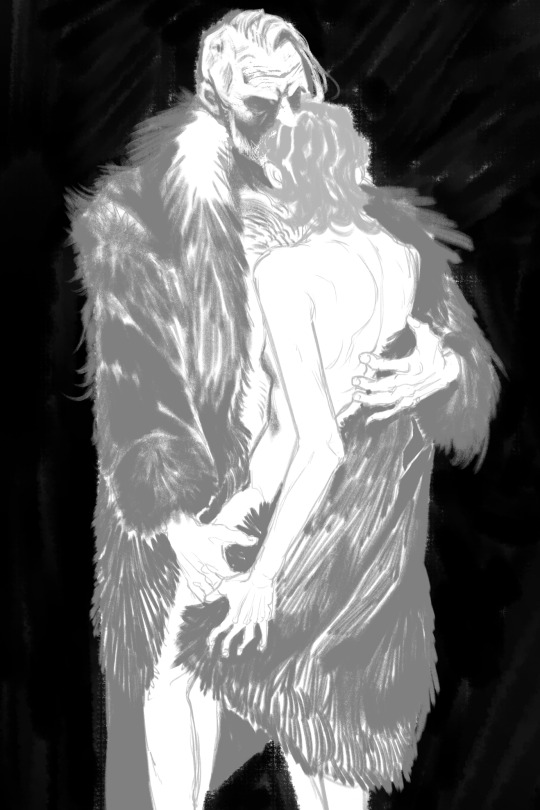
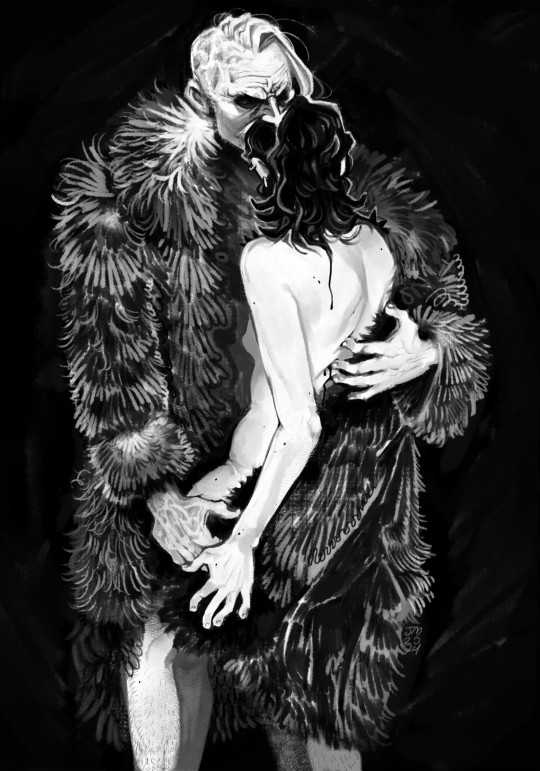
The sketch, blocking, and full rendered black n white version of the most recent painting
#i should post progress pics more#i pretty much always work off a reference image or photo collage to block in shapes#i cant eyeball proportions and remember anatomy that well#so i just dont!#im most happy rendering so i put my effort in there instead :)#art#illustration#black and white#drawing#artists on tumblr#digital art#ocs#sketchbook#dungeons and dragons#dnd#art tutorial#fathom#uriah#malcolm#wip
71 notes
·
View notes
Text


Sketchbook 2015-2020
I’ve put together a 100-page artbook full of pieces from 2015-2020, showcasing all the pencil & ink process steps and details all together, all in one place. It’s free for any viewing, study, practice, and inspiration! Enjoy! https://allisonchinart.gumroad.com/l/freesketchbook
#artists on tumblr#art#ink#sketchbook#nature#concept art#art process#drawing#fan art#black and white art#ink drawing#pencil art#tutorial#art book#art books#illustrations#fanart#art collections
70 notes
·
View notes
Note
So, your Madoka Kaname drawing looks amazing, and as a traditional artist, I was trying to observe to see if I could learn from your drawing.
One thing that stuck out to me was the shading and outlines.
How do you shade so well? How do you know which colors to use, and where to use them? Same question goes for outlines, too.
hihihihiii!! first of all thank u so much, im rlly flattered that u were so impressed 🫶🫶 im honestly really surprised how much attention my drawing got gyuh
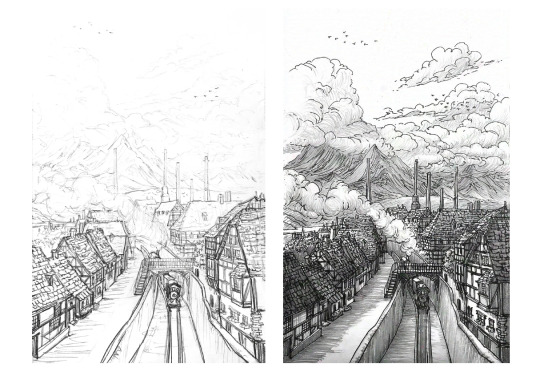
anyways!! the picture i referenced was from the crash fever x pmmm crossover, so it’s by no means completely original. here’s the side by side comparison of the (cropped) og image vs in my sketchbook!!
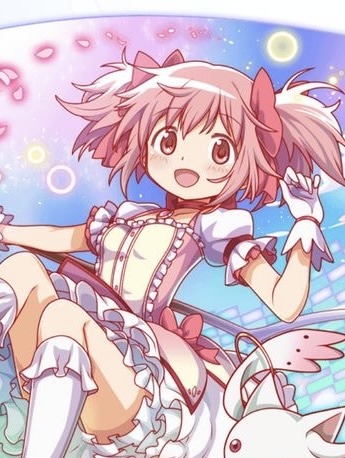
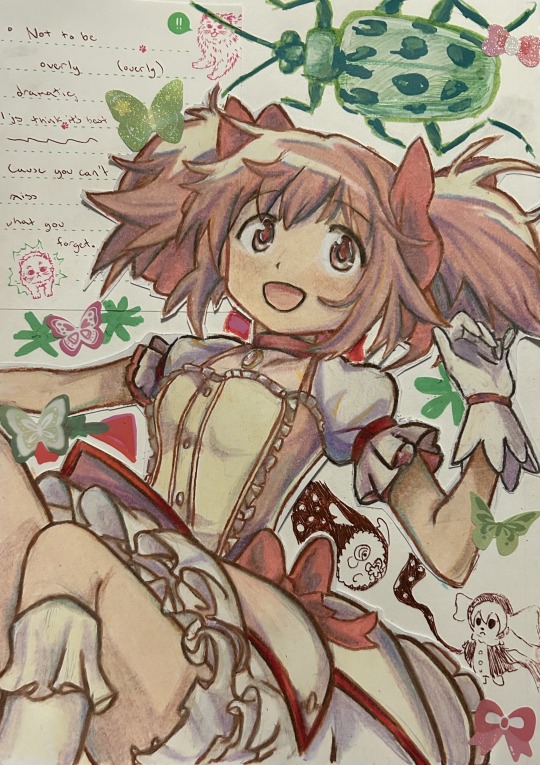
so, most of the actual shading decisions and placements are from the original work. however, i had to change up the colors a bit because of the selection i had. (please note that my version is also darker because of lighting and iphone picture quality 😭😭)
also, for most of my drawings i follow the call of the wind (make guesses) and fufill the prophecies (keep adding more colors until it looks okay)
that being said, below the cut is a full coloring walkthrough if you’re still interested!!
please note that this is much smaller scale and done in less time (took an hour instead of two days 😨) so the quality will be a bit less!!
alright. so let’s say we wanna draw this image, but we tweaked it a bit because drawing BOTH eyes was too much of a hassle.
after you clean your sketch, the best thing to do is open with an outline that’s not QUITE black but close to it.

now, i have a rule. PLEASE PLEASE PLEASE remember this rule: you can use ANY color. for your outline, shading, whatever. it doesn’t have to match the reference.
if you are using this as a genuine tutorial, please know that i change colors every fucking time i draw. i change mediums too. this is only the process i used for my madoka drawing (as best as i can remember)
cuz, like my art teacher said, you have this thing called artistic license, which means you have the right to change whatever the FUCK you want if you think it makes your drawing better. make her purple, give her one ponytail, whatever. as long as you can make it work, have fun!!
anyways. next, go over that outline with other dark colors of different hues. there’s no rhyme or reason, it’s just fun.
after, place your highlights on the hair. i used cream instead of the pastel pink in the original because i like cream better and it adds more hues.

usually, i start with the darkest value instead for shading as it’s more vibrant, but madoka doesn’t have any really standout dark tones. it’s okay though i love her
then, you gotta go in with base colors. simple pink and peach yada yada
listen, quick reminder: YOUR BASE COLORS DON’T MATTER AS LONG AS YOU CAN STILL ADD ONTO THEM!!!
just pick a light base close to the original. don’t agonize over it. apply lightly and gently in circular motions, and you’ll be okay!!
next, we adjust the tone of the hair. i wanted a cooler toned pink, so i added amethyst. i also added a bit to the stray eye.
after, adjust your tone more as needed. again, any color goes. the means justify the ends, and if you end up adding some blue or yellow or whatever then good!! go bonkers with it. i used vermillion.

next, add shading blocks (referenced from the original image!) in a color that’s light enough to blend in more but dark enough to see (amethyst is my favorite for this, and i use it a lot!!) you can also add extra shading in some areas to give it some personality.
after THAT, blend in your shading a bit more with your base colors. by this point you should be pressing down a lot to get the pigment you want. i think for her skin i added beige instead of peach in this step, but that’s also what i did for the above drawing.
the purpose of this is to mute your colors a bit so they fit together more. however, if you want it to pop, you don’t have to add another base color!!
i also went over the outlines with the base color to lighten them and even out the drawing. i do that with almost every step, as needed. follow your heart on that one
also, i gave her a little bit of blush in that step. just because.
ok, so now is the fun part. for the hair and any accessories/clothes/things of the same texture, add random streaks of random colors.
yeah, go ahead, add orange, blue, yellow, whatever. it’s best if it’s of the same value (aka darkness) so it fits in with the base color, but it can be anything!!
you don’t have to do this, but it’s fun.
also, i shaded the eye too offscreen. same process, because pmmm’s style has a very flat texture on characters. thus, it’s okay to use the same shading technique.
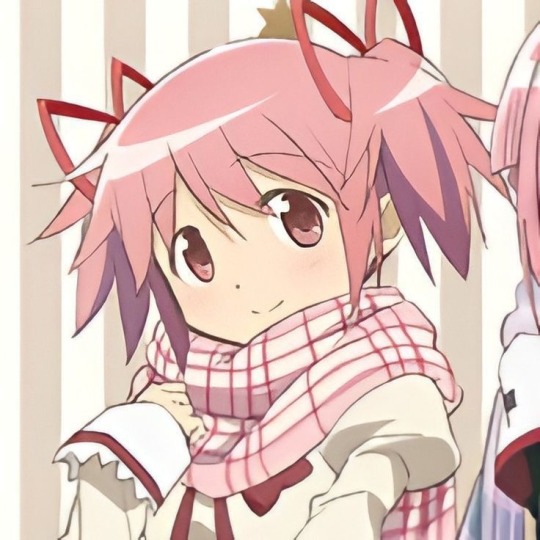
now, we can do the same with accessories!! these are simpler and i honestly got too lazy to even reference for the scarf because the hair was the main focus.
finally, add little details, clean up anything you don’t like, and do whatever you want with it!!
that’s all i do for shading, and i hope it helped a bit. i mainly work with pen and paint markers, but the process is the same aside from tweaking parts.
just remember:
its your art do whatever the fuck you want
LAYER LAYER LAYER fix anything by adding new things
it doesnt have to be perfect yada yada
fun color = fun drawing
it doesnt have to look like the picture because thats boring and you wont learn if you try and carbon copy everything you see
like and subscribe
#also PLEAAASE check out my more original art if you like this drawing#i post my full sketchbook pages where i use a lot nmore mediums and draw original stuff like. bugs!!#pleaseee sorry for self promo but i love attention#drawing tutorial#drawing#my art#sketch#puella magi madoka magica#madoka magica#madoka kaname#madoka magica fanart#prismacolor#idk what do i tag. bro
34 notes
·
View notes
Text
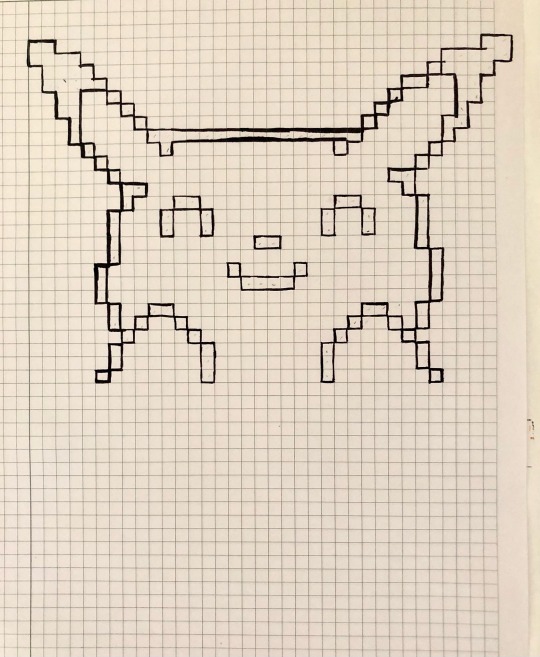
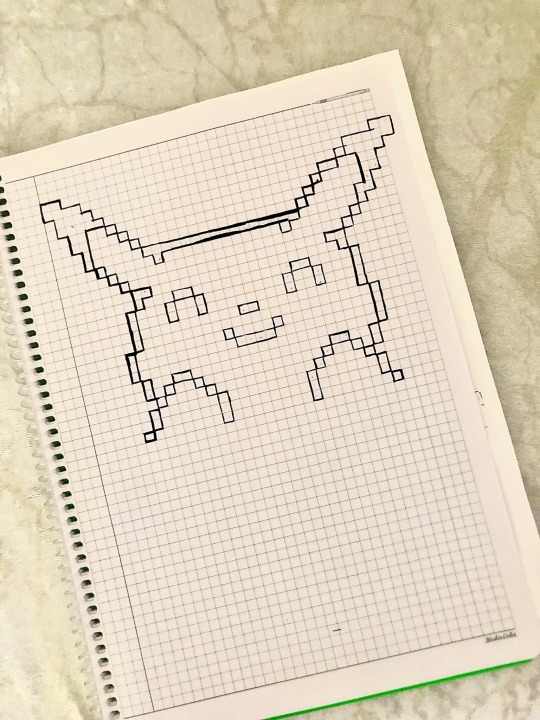
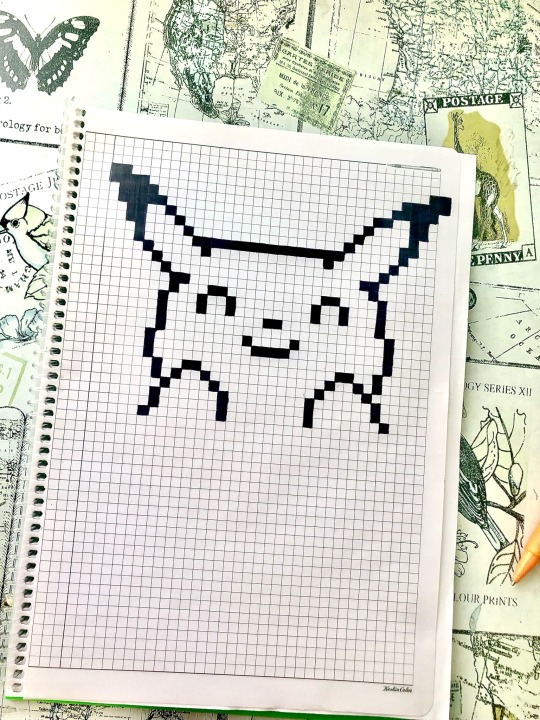

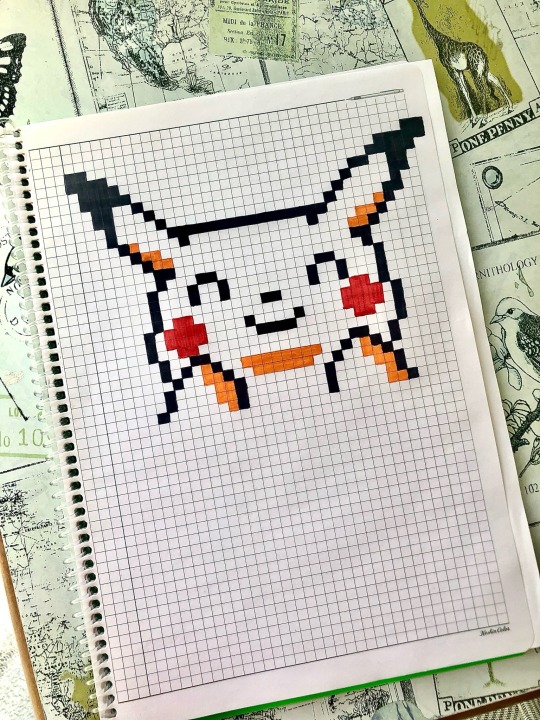
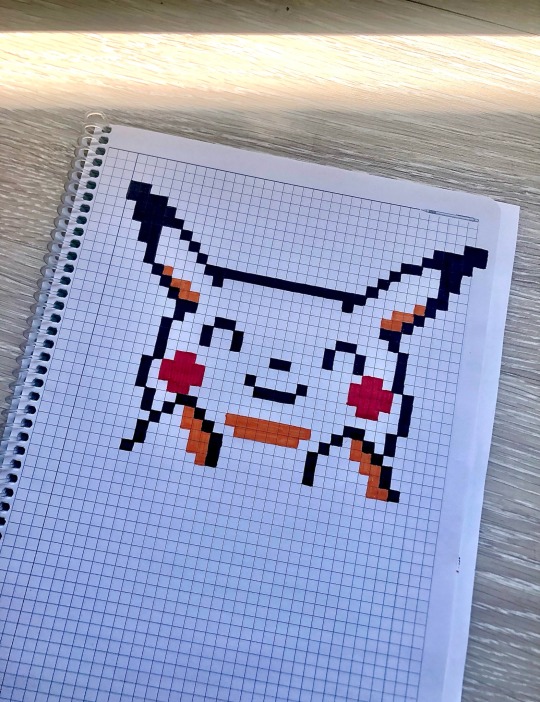
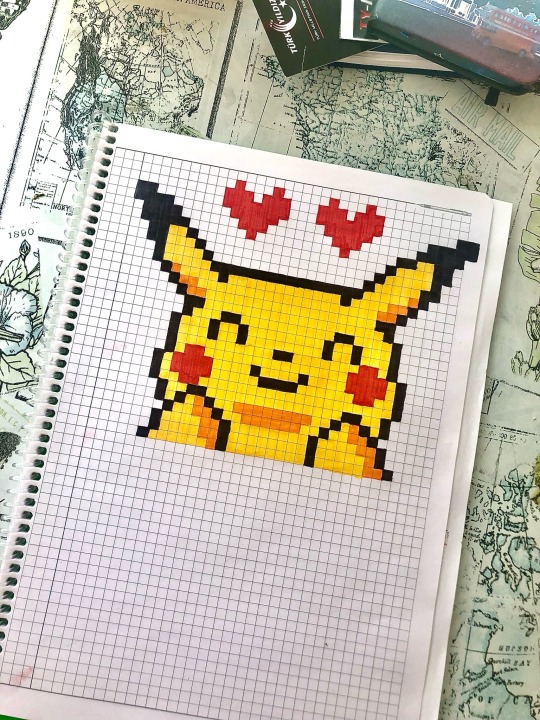

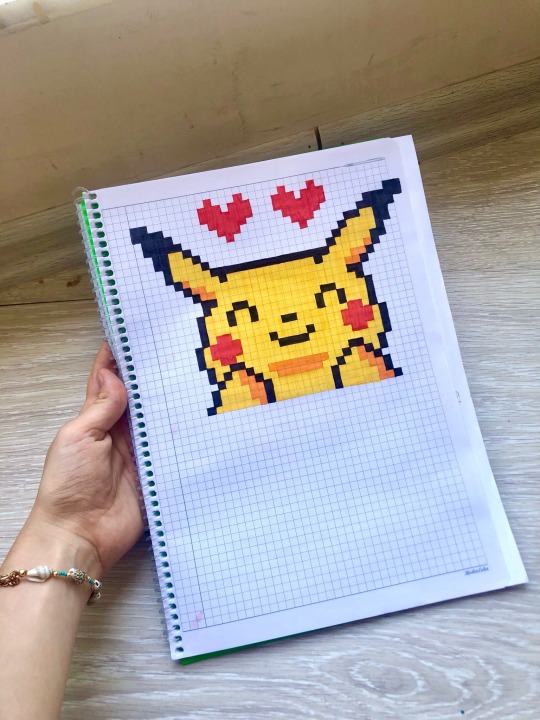
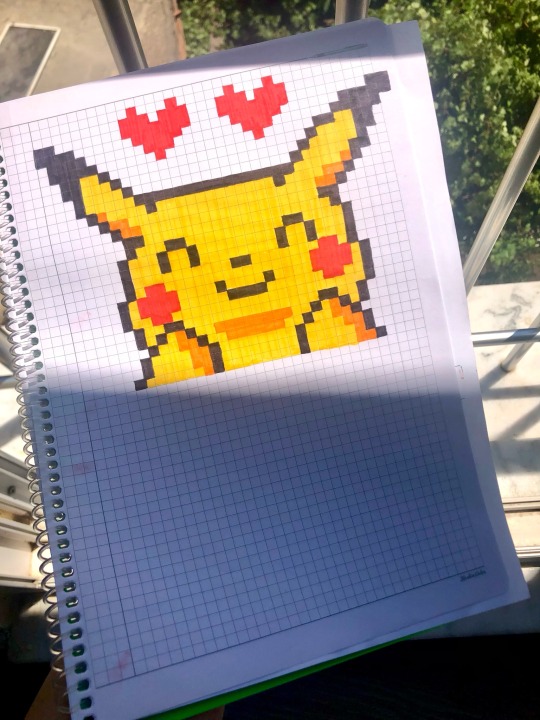
Pikachu Pixel Art 💛
#pixel art#pixel illustration#pixel aesthetic#pixel animation#pixelated#pixel graphics#pikachu#anime art#drawing ideas#drawinyourstyle#draw this in your style#draweveryday#tumblr draw#my draws#drawdrawdraw#hand drawn#drawn#drawing#sketch time#sketching#sketchbook#sketch#cute art#artists on tumblr#my art#artwork#art#anime fanart#tutorial#diy tutorial
26 notes
·
View notes
Note
If I may, how do you typically approach choosing colors in your art? It always has just a lovely feel to it, so I was a bit curious; don't feel pressured to answer ofc :]
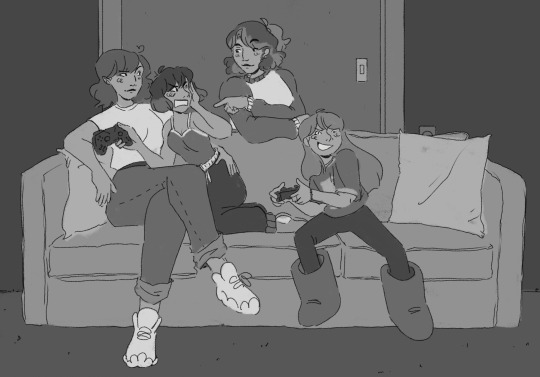
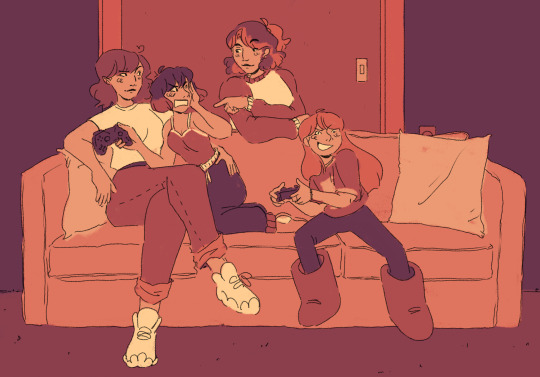
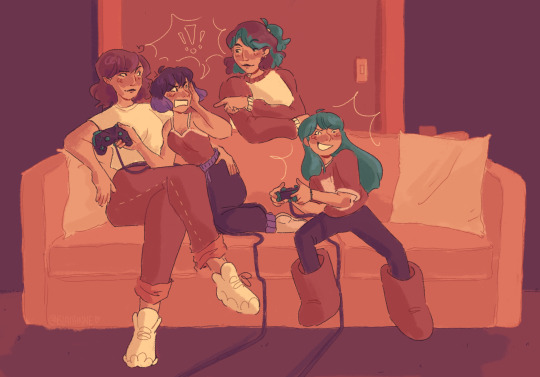
I’ve been using a lot of gradient maps lately, they work by switching the greys in your piece with a corresponding colour according to its value. Basically, I colour in black and white, grab a gradient map, and then I adjust the colours by hand until I’m happy with it. This isn’t the only kind of colouring I do, but it works great if you’re in a rush or you’re struggling to find a good starting point for your colours. I’ve been operating under a time crunch for these Sketchbook Week drawings and the Plenism promo stuff I made, so for all except one I used gradient maps. I’m actually in a bit of a funk with my colours right now soooo I’ll come back and do a proper colouring tutorial for my style once I’m happier with how my non gradient mapped colours are looking !
#after sketchbook weeks over I wanna sit and do some colour studies to find palettes I’m more happy with#even these gradient map ones I’m not thrilled with#they’re fine! but I could do better#in terms of other tricks I use I’ll often adjust the hues and saturations if the whole piece to give things more unity if I’m struggling#and/or add a new layer on top of everything and fill it with one base colour#and play around with different layer settings and opacities on top#I’ve found a luminosity layer on a low 5-10% setting is quite nice#basicslly I fuck around and find out#and if I’m in a rush I use a gradient map#they’re not neccesarily a quick fix! if you’re like me you’ll still want to do some tweaking after it’s been applied#and you need to pay attention to your values when you’re colouring in black and white#but that’s another good thing about gradient maps - they force you to focus on value over hue which is an important skill to build#so yeah I’ll come back to this and make an actual colouring tutorial once I feel like I have actual good advice to give#cause rn I’m just very meh in my colouring and I don’t think I have anything very helpful to add#need to find some tutorials myself first !#ty for the ask!#ask#art#my art#bpcol-reblogs#textpost#blethering#for this piece the adjustments were minimal in comparison to what I usually do btw#because I was rushinggggg lol#I did more for my Plenism posters n such#but I can’t really show good comparisons because I. didn’t save them like that#I usually smush all my layers together when I’m drawing sooo yeah makes it hard to go back my bad whoops#but I saved as I was going whilst drawing this so I could provide examples yipee!#if I’d been smarter and remembered more I could’ve had more process screenshots butttt oh well lmao
17 notes
·
View notes
Text
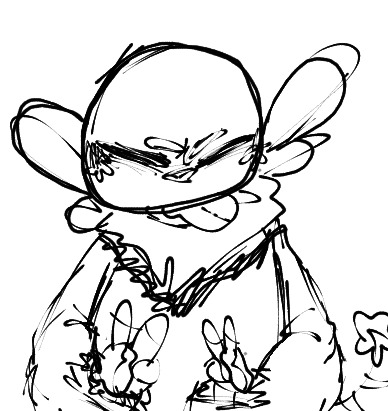
Bleh!!! Ehehe I genuinely liked doodling this I love this pose am!! So fun to draw!!!
Don't repost my art without creds
@anon-coke @scramble-eg @borisboring @thelunarsystemwrites @the-second-reason
#utmv sans#sans au#sans oc#sans undertale#my art#utau#sans persona#art#undertale au#undertale art#lineless drawing#sketchbook#traditional art#drawing#doodle#sketches#sketch#digital art commissions#digital art on tumblr#digital art tutorials#digital art is hard#digital art prints#digital artist#small artist#artists on tumblr
20 notes
·
View notes
Text

Starting an art study with fox 🦊
I wanted to start learning the difference between foxes vs wolves. I started with the Sketch being cartoony as to what I imagine a fox looks like. Before going off of a real reference.
#art#artillustration#commission#commissionsopen#original character#wip#furry#artists on tumblr#traditional media#traditional art#traditional drawing#traditional sketch#fox#art study#pencil#sketchbook#sketching#pencil drawing#hand drawn#fox anatomy#anatomy#art reference#art advice#tutorial#art help
14 notes
·
View notes
Text
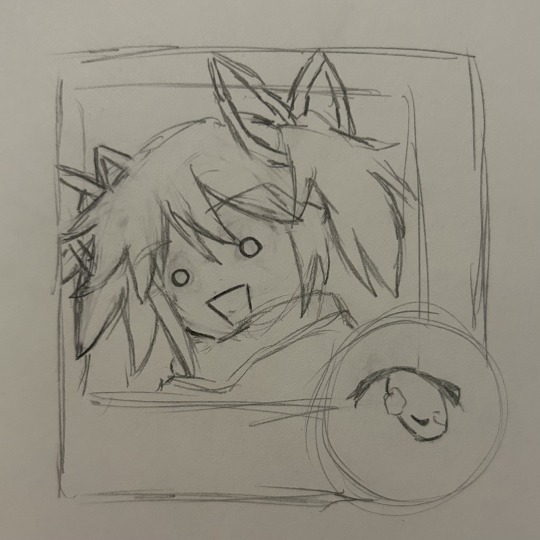
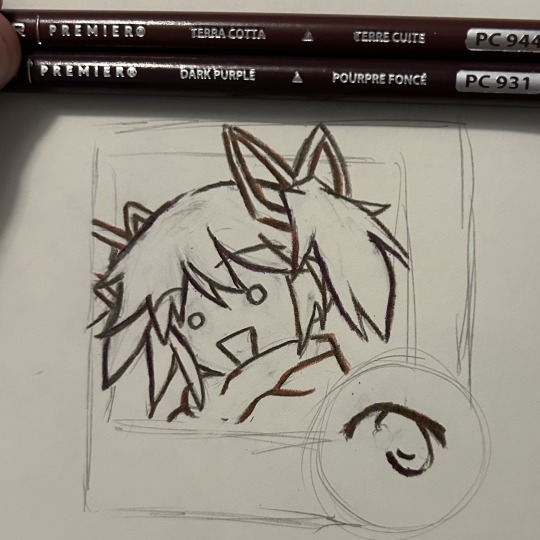
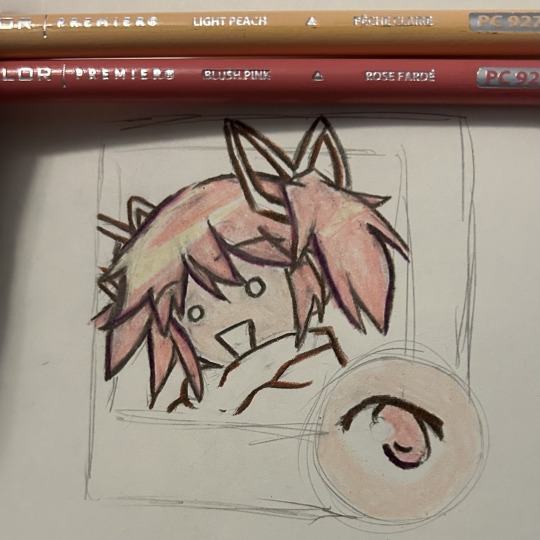
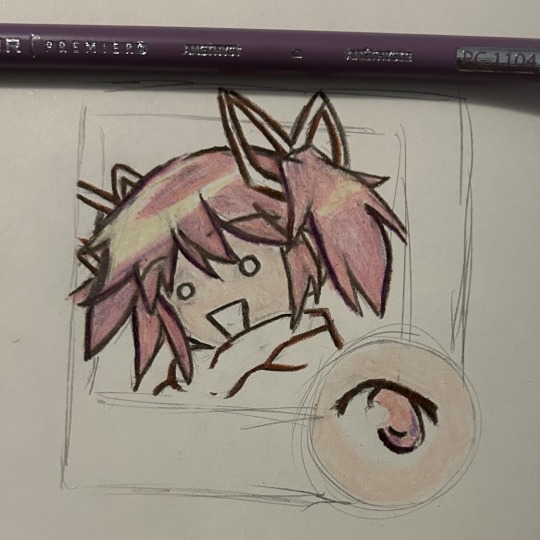
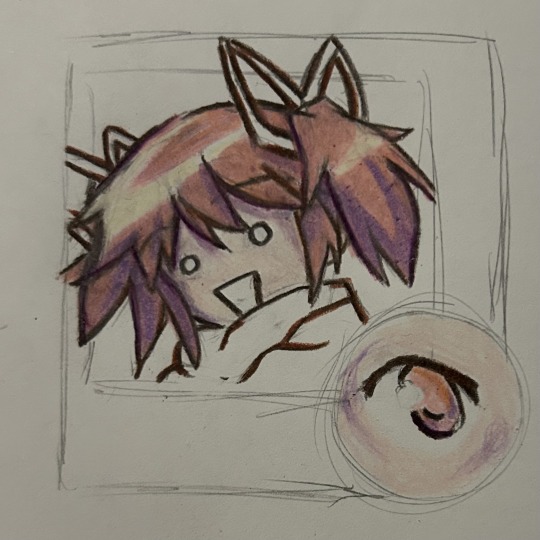
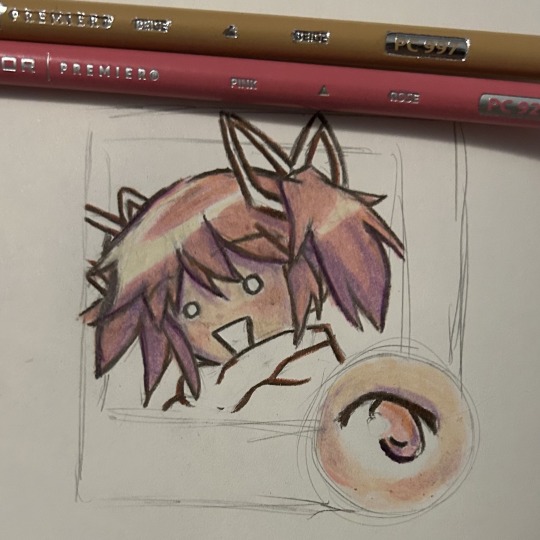
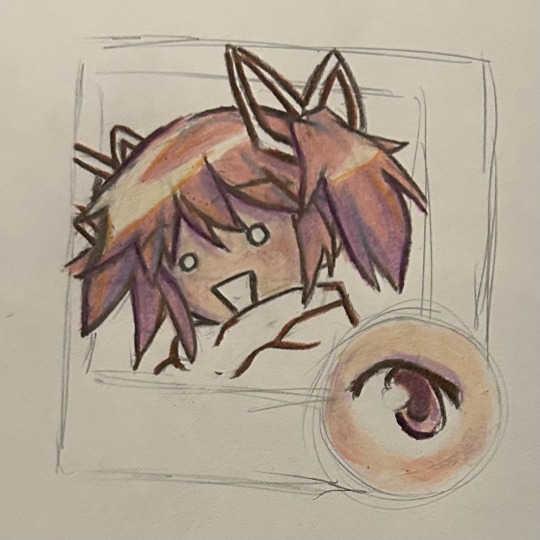
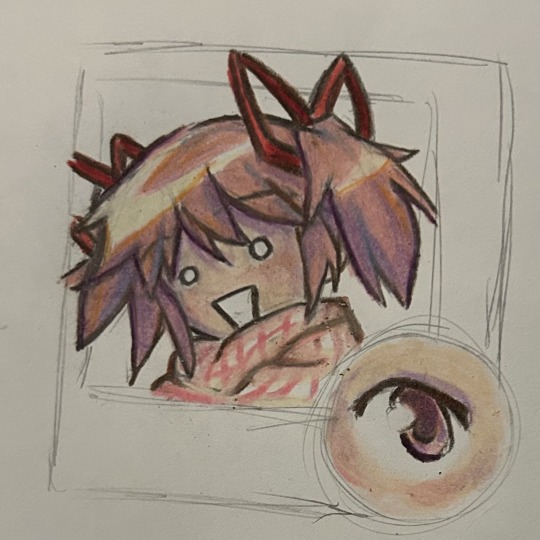
Alright y'all, I was contemplating giving up a while back, but I didn't. I realized I was wanting to do advanced shit too fast, so!
I started sketching basic stuff, so here's some of my byproducts already!

Criticism is welcome (but not too mean please, I'm trying my hardest-)
#also tell me why the hello kitty tutorial wanted me to draw her white#like excuse me wHAT#also what's this?? an eye of my future kinniku self insert??#it is indeedy#lexi's sketchbook corner
7 notes
·
View notes
Text

˚ ༘ ೀ⋆。˚ How To Draw Eye’s On Datzebraartist YouTube Channel ˚ ༘ ೀ⋆。˚
youtube
˚ ༘ ೀ⋆。˚˚ ༘ ೀ⋆。˚˚ ༘ ೀ⋆。˚˚ ༘ ೀ⋆。˚˚ ༘ ೀ⋆。˚˚ ༘ ೀ⋆。˚˚ ༘ ೀ⋆。˚
#art#artist#artlover#artofinstagram#instaart#instaartist#instaartwork#tutorial#tutorials#arttutorial#arttutorials✏️🎨#arttutor#digitalart#digitalpainting#digitalartist#digitaldrawing#digitalillustrator#digitalsketch#digitaldesign#sketch#sketchbook#sketchtutorial#sketchoftheday#sketchdrawing#drawingsketch#sketchbookdrawing#drawing🎨#drawingtutorial#drawingtutorials#youtube
7 notes
·
View notes
Text
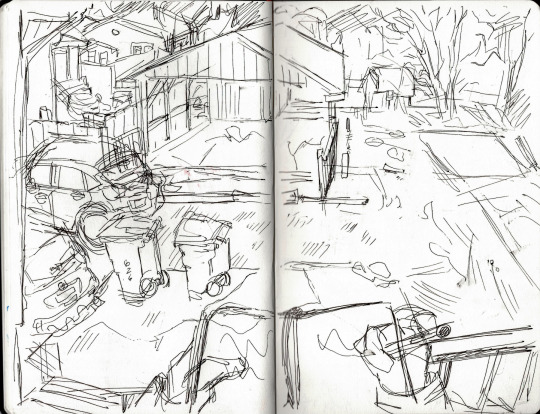
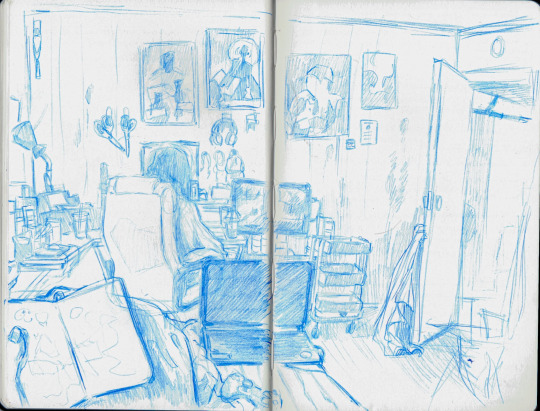
One of my favorite art exercises is just drawing your surroundings
#artist#art#artists on tumblr#patreon artist#artist on tumblr#cute#queer artist#pencil#sketchbook#pencil art#pencil sketch#colored pencil#pen drawing#aesthetic#traditional art#markers#sketch#sketches#drawing tutorial
24 notes
·
View notes
Note
This is weird, but I like... Really enjoy the way you draw dragon legs? Like they always look so good. Just. The structure of them is nice??? It's very cool, is what I'm trying to say.
Would you happen to have any sort of guide to drawing legs? /Nf
This totally isn't cricket haha. Not her. Nope. I'm just a very anonymous anon looking to the professional for advise. *Coughs awkwardly*
Okay!! So this took me a bit to figure out how to break down; unlike faces I don't really think that much about this.
Something I will note is that like... Joy Ang's dragons have more lizard-y hindlegs? The way I draw these legs is very much more informed by like... wolves. Because I drew a lot of wolves in high school. So mine are digitigrade and have toes/pawpads (I don't usually literally give them paw pads but it's relevant for the way i structure them)
As with the last one of these, I'll give a plain text of what I wrote down under the cut!! Hope you enjoy, totally not @ilikebookssomuch~ :P
Willoillo's Hastily Drawn Guide to Dragon Legs!!


Step 1: Lines!!!
[Image ID: Two sets of zig-zagging lines. One is mostly vertical, while the other has the leftmost segment laying along the ground]
My legs are 3 segments (well 4 but we'll get to that) so I usually start by plotting each segment.
The first segment and the last segment are about the same length!!
Step 2: Flesh out Shapes
[Image ID: The same zagged lines as previously, but at each point where the line changes directions, there is a circle. On the "top" segment is the largest circle, with the other two being smaller. On the end of each segment is a small semi-circle. There are three arrows pointing to each circle; the biggest one is labelled "hip," the next one is "knee" and the third one is "ankle."]
I start with circles for each joint, then connect them. Also, our 4th segment appears!! The toes!!
Step 3: Define Layers
[Image ID: same image as previously, but the outlines have been made more bold to show what portions are on top of each other.]
I figure out what's in front of what & solidify outlines.
Step 4: Toes & Claws
[Image ID: Same as previous image, but now a small curved line has been added at each joint, and the semicircle to represent the toes has been separated into four round shapes with claws. A claw has been added to the back of the ankles, as well. Arrows point to the shapes to show the knee and ankle lines.]
Break toe shape down; add claws and ankle/knee shapes to show definition. Some dragons don't get the back claw.
Step 5: Details!!
[Image ID: Same as previous image, but now with large overlapping scales over the hips and smaller plates added to the ankle and toes.]
Scales, more definition, stuff specific to dragon race
Note!! It is best to do both legs & build from the hips!!
[Image ID: Three quick skeletons of dragons, one with them standing, one with them rearing up and one with them sitting.]
#lillo answers#Anonymous#wings of fire art#dragon art#wings of fire#wof#wof fanart#traditional art#pencil sketch#drawing guide#art tutorial#sketchbook
44 notes
·
View notes
Text

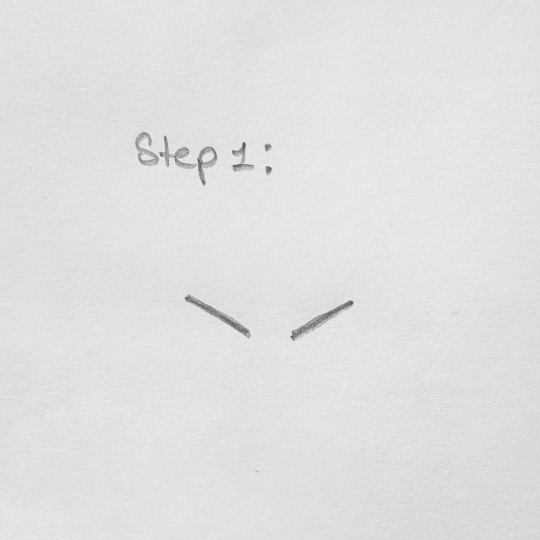
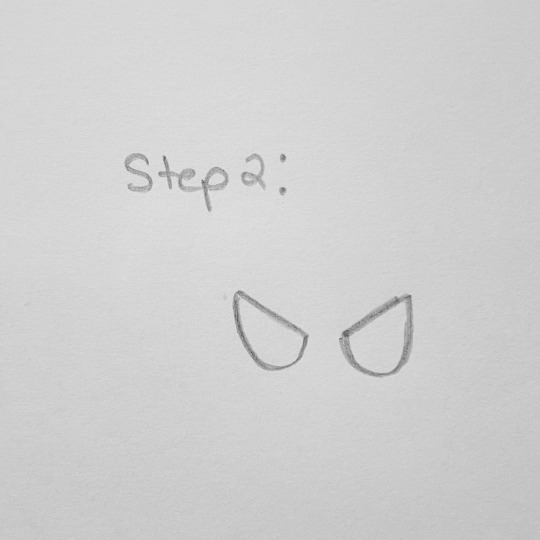
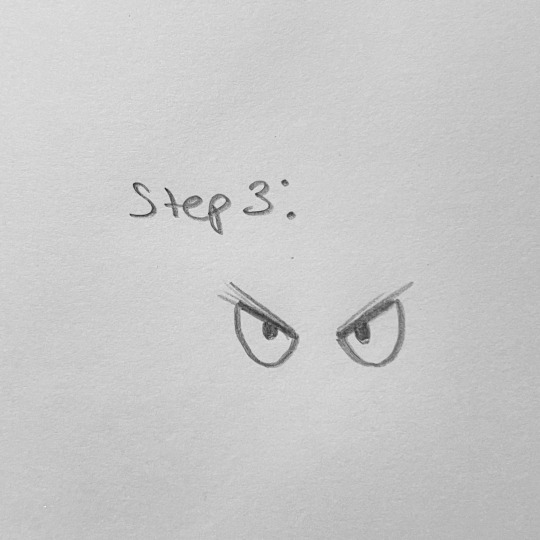

Here is a short little tutorial on how to draw angry cartoon eyes! Swipe to see! You can also altar the eye shapes, sizes, and details! Add eyelashes and thinner eyebrows for a more female look! ✏️
#tutorial#drawing tutorial#art tutorial#art#artist#artwork#sketches#sketchbook art#sketchbook#cartoon art#cartoonist#cartoon artist#tips and tricks#art tips and tricks#art tips#drawing#my art
12 notes
·
View notes