#sharpen action for icons
Explore tagged Tumblr posts
Visit Tumblr Blog
Explore Tumblr blogs with no restrictions, modern design and the best experience.
Last Seen Tumblr Blogs


Fun Fact
Tumblr has been banned in Indonesia for providing people with access to pornographic content.
Text
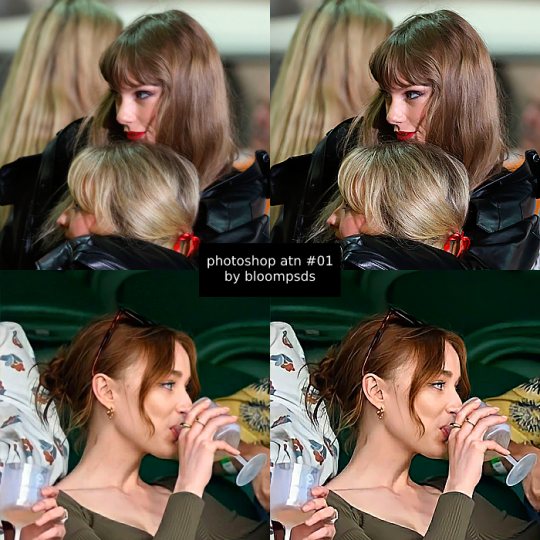
photoshop atn, number #01.
This is a action sharpen with noice reducer that can works with almost any kind of photo. I also use this one in screencaps edits that I make, but I always modify to let the sharpen in the way I like it.
The action comes with the modifications that I am used to turn on and off, when I need, so you can adjust!
Like or reblog is it was useful.
Follow me for more contents.
#yeahps#itsphotoshop#completeresources#dailyresources#sharpen#sharpen action for icons#sharpen atn#sharpen actions#photoshop action#photoshop actions#coral#allresources
199 notes
·
View notes
Text

SAINTE PSD COLORING + ACTION by @loviestudio
This set was made on Photoshop CC. The sharpen needs Camera Raw and Filter Gallery to work properly. This set might NOT work on Photopea.
TERMS
Like and/or reblog to help a creator.
Don’t repost, re-upload or put it on packs and/or google drive. Don’t claim my resources as your own, and don‘t share them without my consent! Don’t use my resources as a base or copy them.
Credits are not mandatory, although I’d love to see your edits!
My resources are free for personal or non-commercial use only. For commercial use, you must pay for the download. If you paid for the download, you are authorized to use it commercially. Reach out to me for more information or if you have questions about my resources licenses.
Follow me for more resources! ♡
This is a free resource, you can download it on Ko-Fi. Thank you!
DISCLAIMER: I don’t own any of the pictures used to make the preview and I have no intention to violate the copyright rules. If any picture in the preview belongs to you and you want me to remove it, please, contact me!
#dailypsd#supportcontentcreators#dearindies#dailyresources#chaoticresources#allresources#completeresources#photoshop resources#rp resources#rph resources#indie rph#rphelp#resources#photoshop psd#psds#psd coloring#psd download#psd#for icons#actions#free#coloring psd#icon psd#ps resources#free resources#sharpen action
70 notes
·
View notes
Text

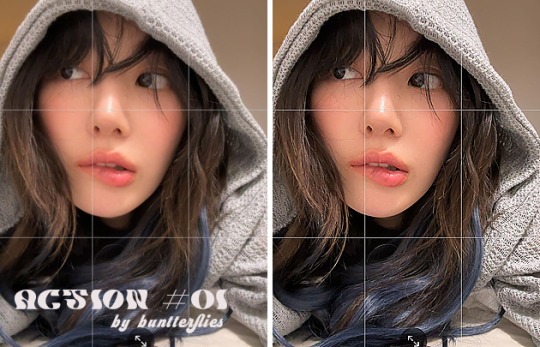
01. sabrina action
⌗ action feita no photopea e funcionará melhor apenas nele
✦ uso ela em todos os icons do @twisabrina, então você pode olhar e se basear antes de baixar!!
♡ dê like ou reblog se você fizer o download!
› Download aqui. ‹
#icons#photopea action#action#sharpen action#photoshop action#atn#photopea#photopea icons#photopea resources#actions for icons#noise action
72 notes
·
View notes
Text


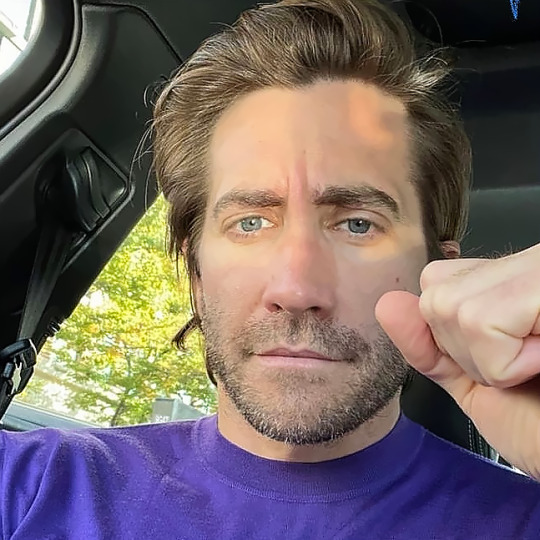

!! ¥홼◟ꕤ🐣𓈀 𝗇𝖤𝗐 ᘞ𖣠𝘀𝗍 ! ‹3 ✹ⵑ🐢 ᳵៈ ᎗ ★/❀⼃ ㍌*𝗸𝗶𝘀𝘀* 📃𝖼𝗋𝖾𝖽!𝗍𝗌 ॽ! 🌻 . . ᦾ࣭🥨★̶̲.🏡𖦆 ぬ🛠 ⵓⵓ 𝗅𝕚𝗄𝕖 🍪𝗿 𝗋𝕖.!𝖻𝕝𝗈𝕘ᐝ ㄖ𖥵 🥤ඖ
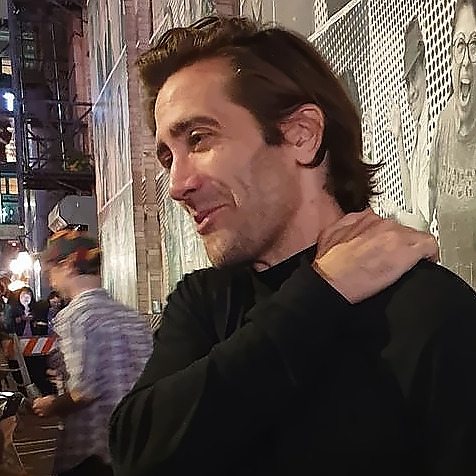
#twitter#fashion#icons#packs#psd#blue aesthetic#mood#quality#aestehtic#film#jake gyllenhaal#jake gyllenhaal icons#ator#atores icons#quality icons#low quality#sharpen action
66 notes
·
View notes
Text

undercover.atn
Action that contains sharpness, two types of effect that work together made by Mischiefiles. I would appreciate your feedback or suggestion if you like the effect, it helps to maintain the quality. If you had any problems please contact me here.
Like or reblog this post if you save this file;
Don’t repost anywhere or claim as your own;
You can adjust the layers if you need to;
Don’t copy my file, I can recognize it if I look;
↳Download: ©️ Free on DeviantArt | For commercial use, please buy on Payhip.
#hisources#dailypsd#allresources#dailyresources#completeresources#makersleague#atn#action#actions#action for icons#sharpen action#effect#effect atn#colorful#ten#nct
7 notes
·
View notes
Text
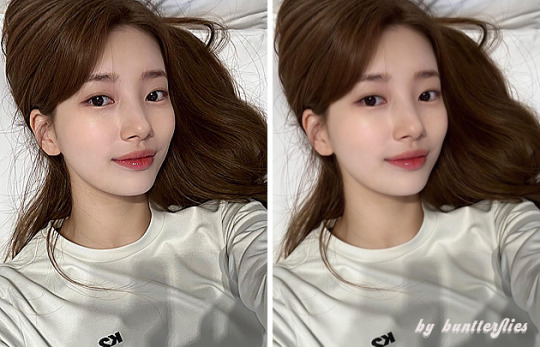
#01 ACTION BY BUNTTERFLIES ♡
don’t repost, reupload or put on pack/google drive.
don’t claim as your own.
for personal/non-commercial use only.
download: follow me + like or reblog + ask (logged) for the link.
#action#actions#sharpen action#sharpen#for icons#resources#hisources#allresources#dailyresources#completeresources
104 notes
·
View notes
Text
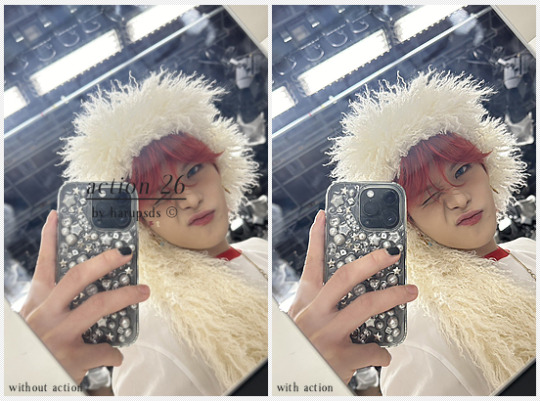
(26).action made by harupsds ©
This effect was made by me in photoshop, it works better on it and contains 3D effect (see here). Before downloading read all the rules and follow them, be honest. Don't forget to leave your feedback or suggestion.
Like or reblog if you download and follow me for more content.
Don’t repost, reupload or put on pack/google drive.
Don’t claim as your own.
Don’t recreate or use as base.
Give me credit if you use it.
For commercial use pay the download.
▸ Download: deviantart.
This is our work done with effort and time spent. Please do not copy do not violate, and do not sell it as if it were yours. The Preview was made by me, being my own. Please, if your photo is here, talk to me. It is not my intention to violate the copyright rules.
#dailyresources#allresources#hisources#makersleague#action*#actions*#action#actions#sharpen action#sharpen actions#sharpen#action for icon#action for icons#photoshop resouces#action download#harupsds
33 notes
·
View notes
Text

03. Action © xHannie
Don't copy, redistribute or modify and claim as your own. Don't repost or post to public folders. Don't use as a base for new actions. Any problem, contact me. If you download, don't forget to like or reblog to encourage my work.
DEVIANTART | PAYHIP
#xHannie#action#actions#sharpen action#action sharpen#atn#photoshop#photoshop actions#actions photoshop#photoshop action#action photoshop#resources#photoshop resources#resources photoshop#photopea action#action photopea#action for icons#action for edits#sharpen#photopea
30 notes
·
View notes
Text
୨୧ CONHEÇA AS OUTRAS TAGS DO BLOG !
Utilizamos de muitas tags no blog, fora as que já destacamos no post principal, então para ajudar, use esse post para verificar as demais. Veio um pouco tarde, então temos muitos assuntos abaixo, não deixe de conferir!
#( sakuradump )#signal boost.#( by others )#divulgando o trabalho dos coleguinhas.#( free )#( premium )#( sobre gif )#( tumblr )#( discord )#( templates )#( themes )#( rp indie )#( sobre codes & themes )#( sobre sharpen )#( sobre cores )#( html )#( twitter )#( psd )#( sobre icons )#( sobre filtros )#( mobile )#( sobre action )#( pinterest )#( help : girls )#( help : boys )#( help : nb )#( help : trans )#( help : pcd )
0 notes
Text

WORKING WITH YOUTUBE QUALITY - HOW TO GET THE BEST RESULTS
helloooo, i recently feel as though i have found the key when it comes to dealing with youtube quality and i thought it was worthwhile sharing! i'm finding that when you're stuck with 1080p videos only, (although there is a lot more 4k downloads these days, thankfully) the quality is pretty poor. BUT, this is speaking exclusively about the quality of youtube 1080p - if you use a site such as sharemania, that's usually acceptable and good quality and doesn't deliver poor results.
but alas, this is about youtube, so let's get into it! this process will simply go over all the ins and outs of working with youtube quality, and will not look into the entire giffing process. i'll be using photoshop 2025, but it should work on any version!
Download your video.
firstly, start by downloading your video with 4k video downloader. (<- this will lead directly to a dl of 4k video downloader if you don't have it already! link is all safe and official <3) i can't really think of any other downloader because i haven't used any apart from this one. it's safe and secure and does a really good job.
you'll want to choose the 1080p option that is the BIGGER file amount. not every video will have that, but i believe that the bigger file size is the youtube premium 1080p. take what you can get with them 😭
2. Load frames, crop, convert to smart object...
just get your normal prep work done! make sure to leave out sharpening. you should essentially just be here:

(if my process looks a bit odd or if, on the other hand, you'd like to know my process, you can check that here.)
3. sharpening.
THIS is the point that changes how your youtube file comes out. often times, you'll find the gif comes out with chunks, squares and overall poor quality. kind of like if i used my regular sharpening:

chunky! gross! trashy! i'm seeing too many pixels and things aren't looking the right way that i'd like. (tbh, it's not the worst i've seen - but you can definitely notice when there's light.) if i went on as it is now and continued to colour it, it would continue to look bad.
so, here's what you'll do.
i use multiple sharpening actions, for different purposes: one for hq downloads, so any movies, tv or downloaded/4k music videos, one making icons and the other for lower quality media and photos. the one that i typically use for youtube quality is @/anyataylorjoy's sharpening action (which many gifmakers use, so i wouldn't be surprised if you do already have it!) which is what you'll use. apply the action, using the 'sharper' lot.

^ that's the settings.
4. sharpening pt 2. (noise)
now, you'll need to add noise to offset how harsh the rest of the gif still comes up.
apply these exact settings onto the gif and ensure that monochromatic is enabled.

sometimes, 2% noise might make it look worse, or not be enough. i personally wouldn't go to anything more than 3%, (i don't think you'll ever want to use 3%) and wouldn't go lower than 1%.

it's grainy looking at the moment, just as is. from here, i'll colour it, and then if i think it's no good, i'll go back and clear the noise filter and toggle it. that's just how the process works, don't stress if it doesn't always go your way 😭 that's just gifmaking!
here's the final product!

and here's another example too, i know this one has a lot going on colour wise, so it can be good to look at it working on something with less bright colours:

as compared to before! before shows the gif was really smooth, as compared to in chappell's, were the lighting was just kind of messing with everything. you're more likely to come across videos that are that weird smooth quality, so i'd say that 7 times out of 10 you'll be applying these settings to something more along the lines of doechii's!

the before :)
#*tutorial#**l.myeditss#gif tutorial#gifmaking tutorial#photoshop tutorials#just a little something :D#flashing tw
392 notes
·
View notes
Text

Hi ^^
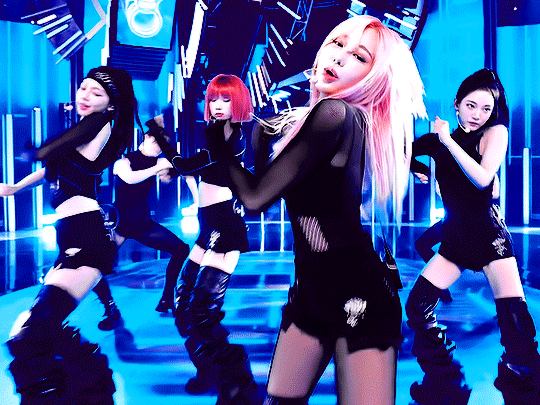
It’s me, the creator of some gifs you like and the creator of many gifs you could’ve probably lived without. A few people have asked me for a giffing tutorial recently so I have made one documenting my normal process! I’m going to gif this Aespa stage in this tutorial because I am still pretty bad at coloring stages. So come struggle along with me 🫶!
Step 1. Getting Sources & Vapoursynth
The worst enemy of the tumblr gifmaker is tumblr itself. You will spend your time making the clearest gif imagineable only for the blue site to reduce it to pixels. But alas, we must gif on. The best way to get good results is have a good source and to precompress your gif with vapoursynth.
As far as downloading from Youtube the best app to use is 4k Video Downloader. 4kVD let's you get download your file as a .mkv which is how youtube stores their 4k quality vids. Only limitation is on the free tier you get only 10 downloads. There are other more technically dubious methods to get 4kvids but I've literally never hit this limit.
10 out of 10 gifmakers agree if you want those good good crystal clear gifs you gotta stick with 4k or 1080p sources. Although if you are a complete sicko like me you can gif 720p and still get pretty good (not great) results.
So now you got your source video but you won't actually be able to open that bad boy up in PS yet. This is where the Vapoursynth step comes in. Vapoursynth will blast that footage into a nice denoised, sharpened and resized little baddie of a video clip for us.

To download VS and get a more in depth explanation of the exact steps on how to use it please reference this post. The basic steps of Vapooursynth are:
Drop your source video on the "vapourscript (drop a video file on me).bat" icon and type in the timestamps
Crop your gif to your liking (I do a lot of 540 x405 or 540x335 for horizontal gifs. 268x480 for vertical.)
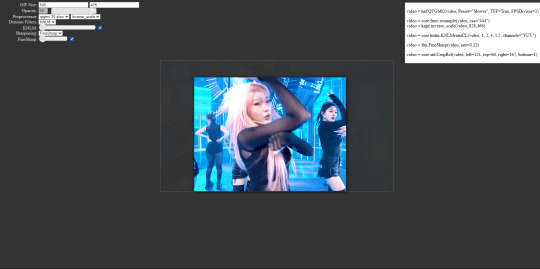
Apply the sharpness and denoise (these are the options I use):

copy the code from the white box and paste it into the script like below
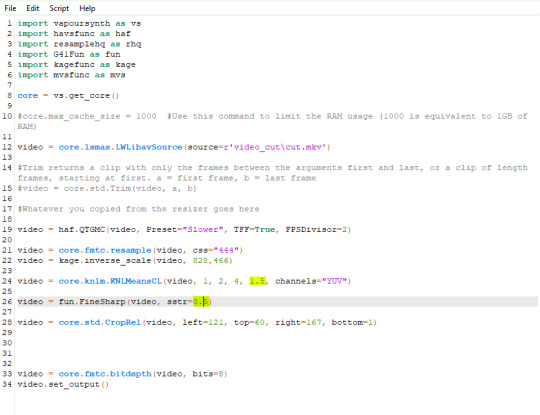
I set my denoiser to 1.5 and my sharpening to .5. (I stole this from @hyeongseo lol)
Go to Script > Encode Video. Make sure on this screen to name your file and set the header option to 'Y4M'. (Sometimes this is the step where it crashes and all your dreams are ruined because it can't convert it unfortunately. But 99% of videos are good lol)
You will find your Photoshop ready clip in gifs/output
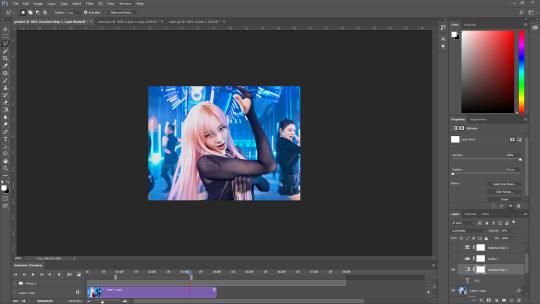
Step 2. Photoshop
You are now good to open up your clip in Photoshop.

if we export our gif at this moment it will look like this:

Which isn't too bad. They just are pretty washed out and a lot of times at this step you'll see a lot of grain.
Sharpening (again lol) and Noise:
This might sound weird cause we just denoised lmao but stick with me.
We are going to convert our clip to a smart object. If you want to slow down or speed up your clip make sure to do so before converting.
(Often times if i have 60fps clip I put it at half speed, but if the action of the gif is really jerky or flashy at 30fps a lot of times I'll set it to 85% speed)
Convert your video to a smart object by right clicking it in the layers panel and selecting the "Convert to Smart Object" option
Create a copy of layer 1 and arrange it so it is aligned perfectly on top of the first video in the timeline. You have to drag it outside of the video group to do this. It should look like this once you are done:

On the bottom clip (layer 1), select filters -> sharpen -> smart sharpen. Apply the filter with these settings:

Then on the same clip (layer 1) apply the same smart sharpen filter with these settings

Setting up the Sharpness like this makes sure the finer details with stand out with crisp lines in the final product. (Look at how the mesh on her arms is in finer detail now)

Your video might look a little crispy at this point and that is ok cause we are going to soften that.
Now on our top video layer (layer 1 copy) select filters -> Blur -> Gaussian Blur. Use this setting:

Finally apply filters-> Noise -> Add Noise to layer 1 copy with these settings

"Vacancy what the hell? It looks like shit now."
Yeah... But now we'll put layer 1 copy at 25% opacity and it will look less like the shit that it does look like right now I prommy. Here is the current output:

The idea behind all this blurring and adding noise is that it will help create smoother transitions between the colors of the gif and reduce large blotchy bands of pixels that can sometimes show up
PLEASE!!! Save your current step as a PSD file. You can skip having to apply all those filters and just drag the filter groups on to the layers after the smart object conversion step.
Step 3. Coloring
Now to the fun part! There is a lot of trial and error in this step since we only have 256 colors to play with.
Typically my goals for this step are:
Raise the black point (Make Giselle's outfit in this gif black so more color can be used on her hair, skin and the background.)
Reduce the overall contrast of the gif. (Darken the lightest lights if possible)
Saturate the colors enough so they stand out but not so much that everything looks gross.
Depending on how we do these steps we may need to subtract frames from the gif. (Which I hope not cause there is exactly 69 frames in the current version lol)
Here is an example of what my coloring difference can look like:


In this case the colored gif is actually smaller because I elminated a lot of the dark greys in the background.
Vacancy's Dumbass Original Recipe thing
This is probably the only thing different that I do from most creators
My first adjustment layer is usually a gradient map. The green and red one to be more specific.

I then change the blend mode to luminosity and set the opacity somewhere between 12 and 20% (Usually 15%).
This step brings all our shades closer together so we have more freedom with coloring later. Also when idols are very white wash this seems to bring out the shadows and skin tone better in later steps as well. If you overdo it though the person in the gif can wind up looking very orange or yellow so less is sometimes more here.
There's also probably a better way to achieve this but you know... oh well
My Other adjusment layers usually consist of:
Levels: With the gradient map applied you can darken the blackpoint of your gif pretty significantly.
Selective Color: This is the most useful adjustment layer. Make sure to expirement with adding to the black slider on the blacks and neutrals color options. Often times kpop vids are over exposed and darkening this can bring out a lot of unseen color.
Hue/Saturation: I use this layer to darken the blues of the background with the lightness slider as well. You can adjust individual colors with this layer and with selective color and that is a very powerful tool for coloring.
Start:
Finish:
Because I darkened the gif so much I was able to add around 6 frames!
Though I’m not 100% satisfied with this gif, this would be my process from the start. You can put those adjustment layers all in a group and save it to the psd as well to skip all the steps to apply them. I used all the same adjustment layers for the header gif of this post as well which saved me a lot of time ^^!
Since every video is different you usually have to play around with the sliders a lot between clips.
Step 4. It Flops…
Jk jk but it does happen a lot tho on this site so don’t get discouraged ☺️
Parting Notes
If you want a really nicely colored fancam to practice on I would see if MIRAI on YouTube has a fancam of your fave idol. Their videos are really nicely color balanced from the start where stages like this tend to be very bright.
I’ll probably make a follow up post with more coloring tips and my thought processes while making gifs but this is the very basics to making hq gifs hope you learned a lot.
You can always hit my dms or inbox with questions if you have them ^^!
#hope this helps#tagging a few people#tuserflora#userdoyeons#forparker#useranusia#rhitag#usercherry#<- these are all creators I try to learn from#flashing tw#flashing cw#tutorials
95 notes
·
View notes
Text

photoshop atn, number #02.
This is a sharpen action with gaussian blur and sharpen mask that can works with almost any kind of photo. Unfortunately tumblr changes the quality of the image and in this preview the action isnt right, click here to see the real effect!
Like or reblog is it was useful.
Follow me for more contents.
#yeahps#itsphotoshop#completeresources#dailyresources#allresources#sharpen#sharpen action for icons#sharpen actions#sharpen atn#photoshop action#photoshop atn#coral
36 notes
·
View notes
Text
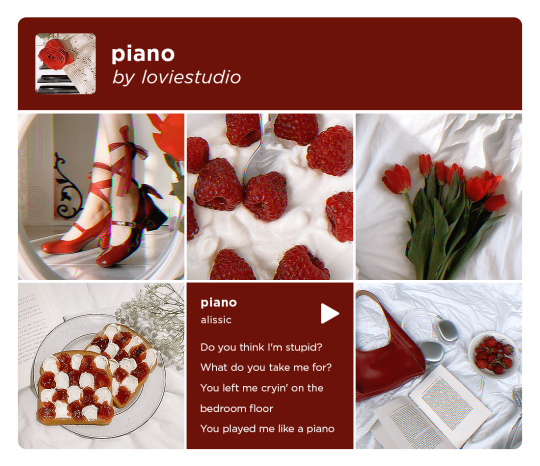
PIANO PSD COLORING + ACTION by @loviestudio
This set was made on Photoshop CC. The sharpen action needs Camera Raw to work properly, and the PSD contains “Color Lookup”. The PSD Coloring will NOT work on Photopea.
TERMS
Like and/or reblog to help a creator.
Don’t repost, re-upload or put it on packs and/or google drive. Don’t claim my resources as your own, and don‘t share them without my consent! Don’t use my resources as a base or copy them.
Credits are not mandatory, although I’d love to see your edits!
My resources are free for personal or non-commercial use only. For commercial use, you must pay for the download. If you paid for the download, you are authorized to use it commercially. Reach out to me for more information or if you have questions about my resources licenses.
Follow me for more resources! ♡
This is a free resource, you can download it on Ko-Fi. Thank you!
DISCLAIMER: I don’t own any of the pictures used to make the preview and I have no intention to violate the copyright rules. If any picture in the preview belongs to you and you want me to remove it, please, contact me!
#dailypsd#supportcontentcreators#dearindies#dailyresources#chaoticresources#allresources#completeresources#photoshop resources#rp resources#rph resources#indie rph#rphelp#resources#photoshop psd#psds#psd coloring#psd download#psd#for icons#actions#free#coloring psd#icon psd#ps resources#free resources#sharpen action
45 notes
·
View notes
Text
Paddock Confidential - Chapter 13.5: Antonelli's View - Pieces of a Puzzle


Pairing:
Oliver "Ollie" Bearman x Lira Räikkönen (Original Female Character )
Minor background pairings reflecting the real-life F1 grid (e.g., Charles Leclerc/Alexandra Saint Mleux)
Summary:
Rising F1 star Ollie Bearman navigates the intense pressure of his rookie season with Haas, juggling demanding team expectations and his close ties to Ferrari under the watchful eye of Fred Vasseur. His biggest challenge lies off-track: guarding his relationship with the enigmatic and fiercely private Lira, whose surprising motorsport knowledge and aversion to the spotlight hint at a complex past connected to one of the sport's icons. As Ollie fights for his future, their secret world threatens to unravel amidst paddock gossip, rivalries, and the ever-present Drive to Survive cameras. When exposure becomes inevitable, they must confront the consequences and find a way to navigate the relentless glare of the F1 world together.
Warnings and Notes:
Warnings: Depictions of anxiety, stress related to high-pressure environments (F1), mentions of past trauma (related to privacy/media intrusion), media scrutiny/harassment, potential minor F1-typical language.
Notes:
This is a work of fiction using real people (F1 drivers, personnel) as characters; their portrayals, actions, and relationships are fictionalized for the story.
I tried to follow IRL timeline in the previous chapters but the timeline will be diverted from now on
The relentless Austrian sunshine beat down on the tarmac of the Red Bull Ring paddock, reflecting harshly off the gleaming surfaces of the motorhomes and transporter trucks. Inside the cool, technologically advanced sanctuary of the Mercedes-AMG Petronas hospitality unit, Andrea Kimi Antonelli sat hunched over his laptop, ostensibly reviewing data from the morning's free practice session. Lines of telemetry squiggled across the screen – braking points, throttle traces, steering angles – the familiar language of his craft. But his mind wasn’t entirely on the delta between his laps and George Russell's benchmark. Instead, it kept drifting, circling back to a persistent, intriguing anomaly, a puzzle that didn’t quite fit: Lira Virtanen.
Ollie Bearman’s friend. The quiet, dark-haired Finnish girl who seemed to exist only on the very periphery of the F1 circus, yet occasionally revealed flashes of insight that belied her supposed detachment.
Antonelli frowned, tapping a pen absently against the screen displaying his Turn 3 performance. His memory replayed fragmented moments like disjointed data points: Jeddah, Ollie's chaotic Ferrari debut, and the sight of Lira slipping through a service door with the practiced ease of someone who belonged backstage, not a typical guest. Then Monaco, after FP3, where she'd casually dissected the tyre temperature drop-off over the reprofiled Swimming Pool kerb with a precision matching Mercedes' own internal analysis, referencing internal carcass temperatures and TPMS data interpretation. Her quick, almost too smooth, deflection about reading it in an article hadn't sat right. Where did a 'private researcher' gain that level of granular, comparative insight?
Adding to the puzzle was Ollie himself, usually open but becoming instantly guarded whenever Lira was mentioned. Antonelli recalled Ollie relaying an anecdote after Japan, trying to laugh off Lira knowing obscure details about drainage at Fiorano from a test day years ago, attributing it to 'random facts' from technical articles. Fiorano – Ferrari’s intensely private testing ground. Antonelli knew access was tightly controlled, and public articles didn't detail specific drainage from old test days. It implied presence, observation, something more than casual reading, and Ollie's forced casualness had only sharpened Antonelli's focus.
Then there were Lando Norris's comments after Australia – Lira speak fluent Finnish to Ollie, followed by her cagey reaction when Lando playfully probed about Finnish connections, specifically mentioning that Finnish world champion. Virtanen was a common enough Finnish name, plausible as an alias, but coupled with everything else... Finnish, intensely private, technically astute, comfortable yet invisible in the paddock. The pieces were forming a picture.
He minimized the telemetry window, pulling up the live paddock feed. Ollie was doing an interview near Haas. Antonelli scanned the periphery. There she was. Lira. Standing well back, partially hidden, phone in hand but eyes constantly scanning the surroundings, tracking movement, cameras, potential approaches. A familiar tension lay beneath the relaxed posture. As a TV camera panned nearby, she shifted subtly, turning away, shielded by her hair – an instinctive avoidance he’d seen before.
It reminded him, faintly but persistently, of someone else. Someone legendary for his media disdain, his need for privacy, his ability to vanish despite global fame.
Someone whose name Antonelli himself carried.
He leaned back, recalling the conversation with Toto Wolff months ago. Toto's description of Kimi Räikkönen – blunt, efficient, technically brilliant, fiercely protective of his family, building walls against the circus – resonated disturbingly with the fragments Antonelli had observed of Lira. He even remembered mentioning Lira's invisibility to Toto, a casual comment at the time. Had Toto, with his vast network and sharp mind, made a connection? A quiet, knowledgeable Finnish girl close to a Ferrari junior... It added another layer of unease.
Could Lira Virtanen actually be Lira Räikkönen? Hiding in plain sight?
The audacity seemed immense, yet the pieces fit with unnerving logic. Her comfort, her technical knowledge likely absorbed over a lifetime, the fierce privacy mirroring her father's, the Finnish connection, the deliberate alias. Even the fleeting sense of familiarity he sometimes felt around her – a subconscious echo?
If it were true… the implications were staggering. The media storm upon discovery would be immense, the pressure on Ollie and Lira unimaginable. Antonelli felt a complex mix – the intellectual satisfaction of potentially solving the puzzle, but also deep respect for Ollie's talent and hard work, and for the obvious lengths they went to protect Lira's identity. Betraying that confidence, even accidentally, felt wrong.
He wouldn't pry; it wasn't his place. Whatever Ollie and Lira were navigating, it was their path to walk. But the suspicion settled within him, changing his perspective. Lira wasn't just Ollie's quiet companion; she carried a hidden weight, a significant legacy. Recognizing the invisible burden Ollie carried alongside his own rookie pressures sparked a deeper appreciation for his friend's resilience. A strange, protective instinct flickered. He knew this paddock, how secrets unravelled. He found himself scanning differently now, noting not just Lira, but noticing who else might be noticing her. Had his own comment sparked Toto's curiosity?
He pushed the thoughts aside, forcing his attention back to the data. Speculating wouldn't find him time against George.
Later that afternoon, needing a break from the data and a change of scenery, Antonelli wandered out into the paddock, grabbing a bottle of water. He saw Lira sitting alone again at the same quiet coffee bar she'd visited before. Sketching intently, espresso beside her, lost in her world. On impulse, driven by a genuine curiosity that went beyond just solving the puzzle, Antonelli approached her table.
"Lira? Mind if I join you for a minute?" he asked, keeping his tone light and friendly.
Lira looked up, her initial surprise quickly masked by her usual polite reserve. She hesitated for a fraction of a second, perhaps assessing the risk, before nodding towards the empty chair. "Andrea. Please."
He sat down, careful not to crowd her space. "Just escaping the engineers for five minutes," he explained with a small smile. "Sometimes you need to clear your head." He glanced at her sketchbook. "That looks serious. Research?" He remembered Ollie mentioning she worked in research.
Lira closed the sketchbook smoothly, placing it beside her. "Something like that," she replied vaguely. "Just observations."
"You seem to observe quite a lot," Antonelli commented gently, trying to keep it conversational. "You pick up details others miss. Like the tyre comment in Monaco."
He saw a flicker of guardedness in her eyes, but her expression remained calm. "I listen," she said simply. "And I read. It's interesting to understand the 'why' behind what happens on track, not just the 'what'."
"Me too," Antonelli agreed readily. "The technical side is fascinating." He paused, then added, "It’s… a lot though, isn't it? This whole world. The pressure." It was a slight opening, testing if she'd engage on a more personal level.
Lira looked at him, her gaze steady, analytical, but perhaps holding a fraction less reserve than usual. "It demands focus," she conceded quietly. "On what you can control. Blocking out the noise." She took a small sip of her espresso. "How are you finding it? The pressure at Mercedes… it must be intense."
Antonelli was momentarily taken aback by the direct question, the shift towards him. "Intense, yes," he admitted honestly, appreciating the rare inquiry. "Expectations are high. Toto… he expects results, constant improvement. But it’s good. Pushes you."
Lira nodded slowly, her eyes holding his for a moment longer than usual, a flicker of something akin to empathy in their cool depths. "Focusing on the process, not just the outcome, helps," she offered softly, almost as if sharing a well-worn personal mantra. "One corner at a time."
The brief moment of shared vulnerability, her quiet acknowledgment of the pressure and the subtle advice felt significant. I. He shifted the topic back to safer ground. "Ollie mentioned you're interested in art history?"
A tiny spark of genuine interest lit her eyes, the brief personal connection seemingly closed off again. "Yes. It's my field."
"Anything specific?" Antonelli asked, genuinely curious now. "My mother loves the Italian Renaissance."
"A different period, mostly," Lira replied, still reserved but slightly more forthcoming. "Early 20th Century abstract expressionism, the pioneers. Kandinsky, Malevich. The theory behind breaking form."
"Ah, challenging," Antonelli nodded, impressed despite himself. "Requires a different way of seeing things, I imagine? Like finding the pattern in the chaos?" He drew an unconscious parallel to analysing complex race data.
Lira met his gaze, a flicker of understanding passing between them again. "Exactly," she said softly. "Finding the underlying structure beneath the surface noise."
That brief exchange, her quiet empathy and the shared understanding about finding structure in chaos, resonated with Antonelli. He'd glimpsed more of the thoughtful, intelligent person behind the walls, someone who understood pressure not just intellectually, but perhaps personally. She cared, in her own quiet, guarded way.
"Well," he said, finishing his water and standing up. "Back to the data mine for me. Nice chatting, Lira."
"You too, Andrea," she replied, offering a small, polite nod as she reopened her sketchbook, retreating back into her private world.
As Antonelli walked away, he felt the puzzle pieces shift slightly again. Complex, layered, intelligent, guarded, and surprisingly… perceptive about the human element amidst the technical chaos. The Räikkönen theory felt stronger, yet confirming it mattered less than respecting the privacy she so clearly valued, and the quiet strength she seemed to offer Ollie.
Later, heading back to the Mercedes motorhome, he saw Ollie finish a media scrum. Lira waited on the edge, obscured by a flight case. As the crowd thinned, she slipped out, falling into step beside Ollie. They walked away, heads close, talking quietly, Lira melting back into the background. Antonelli watched them go – the quiet girl, the hidden connection, the constant vigilance. He sighed softly. It was a complicated puzzle with high stakes. He decided definitively: Observation, yes. Interference, no. Whatever storm might be brewing around Ollie and Lira, he wouldn't be the one to unleash it.
A few weeks later, during a break between races, Antonelli texted Ollie: ‘You guys free later? Toto gave me the keys to something ridiculous. Need witnesses.’ Ollie replied almost instantly: ‘Intrigued. Where and when?’
Antonelli arranged to meet them at the discreet underground parking garage of the apartment building where Ollie and Lira were staying temporarily. He arrived first, parking the gleaming, brand-new Mercedes-AMG GT – a surprise 'performance incentive' gift from Toto Wolff – in an empty bay. He felt slightly self-conscious but undeniably thrilled.
Ollie and Lira emerged from the elevator a few minutes later, Lira carrying a bag of groceries. Ollie spotted the AMG immediately, his jaw dropping slightly. "Whoa! Kimi, what is that?" he exclaimed, walking straight towards it, Lira following with a curious smile.
"Present from the boss," Antonelli explained casually. "Toto said something about 'rewarding potential'... or maybe he just wanted me to stop borrowing George’s."
"He gave you this?" Ollie whistled, circling the car, running a hand over its sleek lines. "Mate, that's insane! Fair play!"
Lira peered inside, equally impressed. "It's beautiful, Andrea. Congratulations. Toto has good taste."
"Come on, check out the inside," Antonelli urged, unlocking the doors.
For the next ten minutes, they were just three young people excited about a fast car. Antonelli revved the engine, while Ollie fiddled with the infotainment system, trying to find a suitably ridiculous driving mode.
"Right, Kimi," Ollie grinned, tapping the screen, "found the 'Espresso Run' setting, but where's the 'Panic Overtake' button? And seriously, mate, no racing stripes? How are people supposed to know it's fast?"
Antonelli rolled his eyes. "It's an AMG, Ollie. It doesn't need stripes."
"Everything needs stripes!" Ollie declared dramatically. "Or maybe," he glanced sideways at Lira, who was tracing the stitching on the leather seat, "some subtle pinstriping? Like those fancy suits?"
Lira looked up, a genuine, unexpected laugh bubbling up – a clear, musical sound quite different from her usual quiet murmurs. "Don't encourage him, Andrea," she said, shaking her head, the smile reaching her eyes, crinkling the corners. She leaned comfortably against Ollie's side as he put an arm around her shoulder, pulling her slightly closer. Playfully nudging his hand away from the screen, she added, "Stop trying to break Andrea's new toy before he's even driven it properly. Besides," her voice dropped slightly, a mischievous glint in her eye directed only at Ollie, "stripes are overrated."
Ollie chuckled, tightening his arm around her. "Alright, alright, point taken. But you have to admit, a little flair wouldn't hurt." He dropped a quick kiss onto the top of her head, a casual gesture of affection that spoke volumes in the quiet garage.
For that moment, watching them banter, seeing Lira laugh openly and lean into Ollie without a trace of the hyper-vigilance or guardedness he usually sensed around her, Antonelli felt the carefully maintained walls dissolve completely. She looked relaxed, unguarded, simply enjoying the moment with Ollie and the ridiculousness of the car conversation. The easy intimacy, the shared joke, the comfortable physical closeness – it painted a picture far removed from the tense, watchful figure navigating the paddock shadows.
Antonelli found himself smiling along with them, enjoying the easy, genuine affection between the couple. They just seemed… right together. Normal, even, despite the extraordinary circumstances he suspected surrounded them. The contrast between Lira here, laughing and relaxed in Ollie's arms, and the Lira Virtanen he observed at the track, was stark.
Later, scrolling Instagram, he saw a slightly blurry fan photo: the three of them around the AMG in the garage. Caption:
‘Spotted! Kimi Antonelli showing off a new Merc gifted by Toto (?) to Ollie Bearman & his mystery GF Lira! Perks of being a Merc junior! 🔥 #F1 #Antonelli #Bearman #MercedesAMG #F1Gossip’.
Antonelli sighed.
Even private moments weren't truly private. But seeing the photo, seeing the three of them looking relaxed and happy, reinforced his decision. Whatever Lira’s real story was, whoever she truly was, they deserved this bubble of normalcy, this friendship.
He wouldn’t be the one to burst it.
He liked the post and kept scrolling.
Masterlist | Previous chapter | Next chapter
#oliver bearman#f1 x reader#formula 1 x reader#ollie bearman x reader#f1 fanfic#ollie bearman x oc#f1 x oc#oliver bearman x oc#formula 1#ob87#Paddock Confidential
36 notes
·
View notes
Text


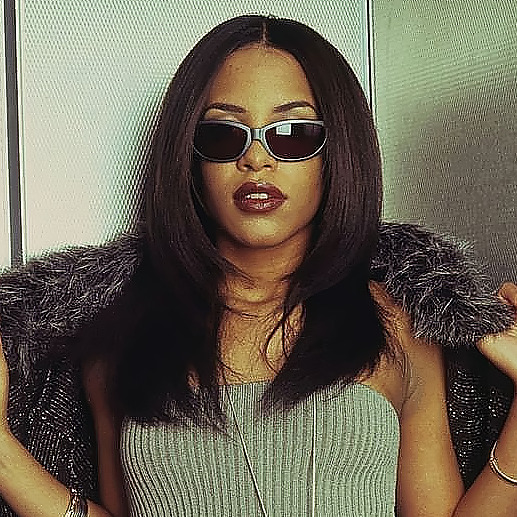
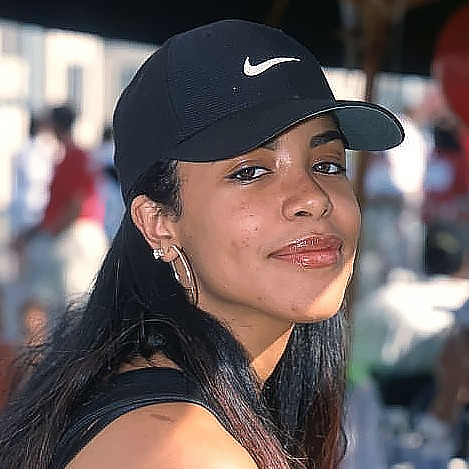


!! ¥홼◟ꕤ🐣𓈀 𝗇𝖤𝗐 ᘞ𖣠𝘀𝗍 ! ‹3 ✹ⵑ🐢 ᳵៈ ᎗ ★/❀⼃ ㍌*𝗸𝗶𝘀𝘀* 📃𝖼𝗋𝖾𝖽!𝗍𝗌 ॽ! 🌻 . . ᦾ࣭🥨★̶̲.🏡𖦆 ぬ🛠 ⵓⵓ 𝗅𝕚𝗄𝕖 🍪𝗿 𝗋𝕖.!𝖻𝕝𝗈𝕘ᐝ ㄖ𖥵 🥤ඖ
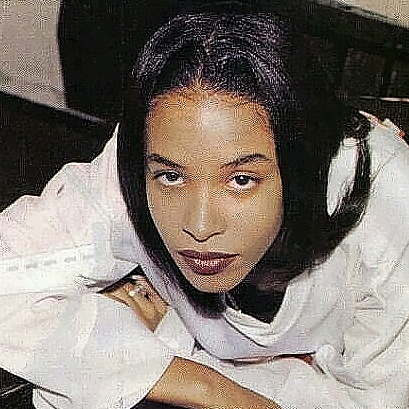
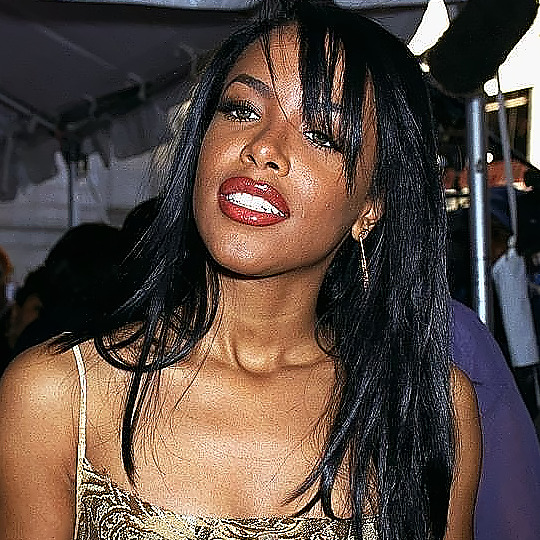
#twitter#fashion#icons#packs#psd#aestehtic#film#blue aesthetic#mood#austin butler#sharpen action#aaliyah#Aaliyah icons#Aaliyah icon
32 notes
·
View notes
Text
gif tutorial
i was asked to make a tutorial for this set i made, so let's get right into it!

first things first, i downloaded the music videos from youtube in 1080p using 4k video downloader. unfortunately, the quality of youtube videos always seems... not great, to put it simply. plus these music videos are from the 90s, so they've been upscaled to 1080p after the fact. all of this works against us, but i've definitely worked with videos of lesser quality than these, so at least there's that!
when i gif, i import video frames to layers rather than screencapping. this comes down to personal preference. after everything has loaded, i group all my layers together and set the frame delay to 0.05. i then cropped my gif to 540x500.
the next step in my process is sharpening. i did play around with my settings a bit given the quality of the footage and the dimensions of the gif. i compared both @hellboys low-quality video gif tutorial to my regular sharpening action and my vivid sharpening action and in this case, i preferred my normal vivid sharpening action. i used this tutorial to create the action for myself, and you can find other sharpening tutorials here. this action converts my frames to video timeline and applies sharpening.
once my gif is sharpened and i'm in timeline, i begin coloring. i wanted to simplify the amount of colors used in these gifs, again because of the video quality -- i knew it wasn't going to have the crispness i would normally like for my gifs. here are my coloring adjustment layers and their settings (not pictured: my first layer is a brightness/contrast layer set to screen) (explanation in alt text):


all of these layers and their settings will vary depending on your footage and its coloring (and obviously, feel free to make the gradient map whatever colors you like if you aren't going for this exact look).
pretty basic coloring, especially with just slapping a gradient map on top (my beloved), but at this point, i still didn't like the quality of the gif, so i added a couple textures/overlays.


i put the left one down first and set the blending mode to soft light and the opacity to 8%. depending on what look you're going for, you could increase or decrease the opacity or play around with different blending modes. i like using this texture with lower quality footage because even when it's sized up a bit, it adds some crispness and makes things feel more defined. for the second texture, i set it to overlay and 75% opacity. we love and respect film grain in this house.
now for the typography! sometimes i really enjoy typography and other times it's the bane of my existence for the sole reason of just how many fonts i have installed. anyway, here are the settings i used for this set:

make sure the color of your font is white and then set the blending mode to either difference or exclusion. i can almost never see a difference between the two, but for this set, i used exclusion. below are the blending options (double click on your text layer to bring up this menu or right click and select blending options).


now we have to add the warp effect. with your text tool still selected, click this icon at the top of your screen:

from the dropdown menu, select twist. these were my settings, but feel free to play around with different warp options and their settings. the ones i use most often are flag, fish, and twist.

this last step is completely optional, but it's an effect i use in most of my sets with typography. duplicate your text layer (select the layer and ctrl+j), turn off the layer effects (click the eye icon next to effects), and set the blending mode to normal. right click on the layer and select rasterize type. right click on the layer icon itself and choose select pixels.

at this point, you should see the moving black and white dotted line showing that only your text is selected. then go to edit > stroke. here are the settings i almost exclusively use.

this is what your text should look like now:

using ctrl+T, move the layer off the canvas so you can't see any of the text anymore. you should be left with only your outline. click anywhere on your canvas to de-select the text we just moved. use ctrl+T again as well as your arrow keys to nudge the outline over to the left 2px and up 2px. this is personal preference as far as the positioning, but i almost never move it any other way. you can leave it like this, which i sometimes do, or you can set the blending mode to soft light like i did for a more subtle effect.
and that's it! rinse and repeat for each gif in your set or use a different warp effect on each gif to switch it up! if you have any questions about this tutorial or would like me to make one for anything else, please feel free to ask any time!

#gif tutorial#my tutorials#gifmakerresource#completeresources#dailyresources#chaoticresources#userdavid#coloring tutorial#typography tutorial#tutorial#photoshop tutorial
272 notes
·
View notes