#seed tutorial
Explore tagged Tumblr posts
Text
What it takes to grow little transplants in my apartment!
I'm starting my first plants of 2023, and I'm going to go thru every single step I have to take in order to have them grow! This is extremely diy, no budget, we use resources we find on the street, I picked out these seeds from a vegetable I got from a friend, type of thing.
The first step is creating the place to put the plants. They need to be inside where it's warm, but get as much light as possible. I have these big french windows in the kitchen, and it’s the place that gets the most light in the morning. I will often carry the plants to the other side of the apartment for the afternoon, especially if there's sunlight! I don't have enough space on the windowsills to put all the plants there, so I have to create a makeshift table for them.
Now the way I usually make a table is I go to the basement, pick out a board (I collect abandoned boards next to the trash), and put it on the top of a big cardboard box. The cardboard boxes can actually take a lot of weight, so they work fine as a table stand, especially if the board is heavy. I found the board I used the last year, and then realized, that my roommate took all of my cardboard boxes when she was moving out, and I do not have an appropriate box to use! I went outside to see if anyone had abandoned a cardboard box, and in about 10 minutes, I found one:

And this is how the construction works:
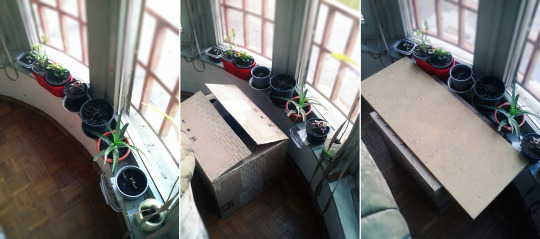
Now that is taken care of, I need to decide what seeds I'm planting. Have I ever shown you my seed box? This is my seed box:
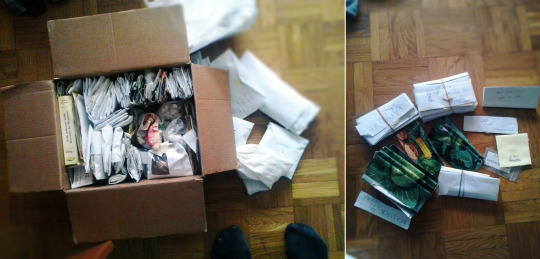
It looks messy, but all of the seeds I collected are in little packets I made from envelopes, and then they're sorted into categories, and each category is kept together by a piece of elastics. I just had to take out the brassicas (kale, cabbage, broccoli) and some early tomatoes, peppers and basil. I decided to sow a lot of kale and cabbage, and 5-6 little dwarf tomatoes, they’re an early variety and they'll give produce as early as May! I've had both basil and peppers successfully grow, sown as early as January, so I'm taking a chance at them again. These plants may not make it, since there's not a lot of light yet, but if they do, they'll give me the earliest produce in the year, and it's worth the effort. If it doesn't work out, I'll sow them all again in February.
Now the next step is finding the containers for them; I have lots of both found and gifted stuff, but my favourites by far are the yogurt cups, they're the ideal size for a pepper or a kale plant, and I can just fit a lot of them next to each other! I'm also trying these tiny black containers, to see how I like them. I'm using the food container with a lid to grow basil, because I've noticed basil germinates more willingly in damp conditions, and once I close that lid, the water won't be able to evaporate. Also all these containers need to have a decent sized hole on the bottom!

Now before I go on to get the soil and start planting, I figured I should make the labels! Once my hands are dirty I will be unwilling to wash them just to cut some labels out. My labels are just a random piece of thin cardboard (like from a chocolate box) cut into a strip, and then I write the name of the plant there. Otherwise I will immediately forget what I planted where. These are short-lived, for a lasting one, I've seen people cut out plastic containers into strips, and write on them with a permanent marker, that would last! But I only need these temporarily, I don't mind if they decompose later.

Now, the soil! If I hadn't been prepared for this, I would have to go to the forest, or some area where a lot of leaves were decomposing, to get my soil, but I always remember to take some home in the fall, so I already have a bucket filled with soil here.
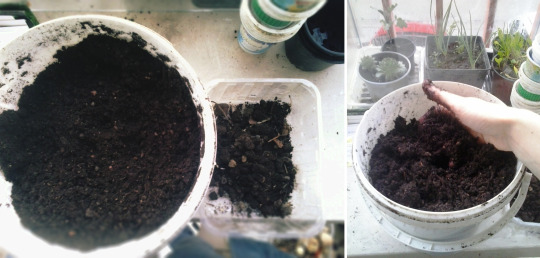
This bucket is great for it because it has a lid I can close, and soil can't dry out in there. Soil benefits a lot from being kept damp, so all of the useful bacteria can keep living inside it. If it goes dry, it loses a lot of its biodiversity! This specific soil is from the forest, dug from under a rotten tree trunk. There's a lot of clumps and pieces of bark and roots, so I'm taking a minute to clean it out a little, I'm taking bigger pieces out so they can't obstruct my little plants. When it's all good, I'm mixing it with some more water! Ideally, your soil would be nice and warmed up before you're about to plant, because seeds like warm soil to grow in. But, if it's not, you can cheat and mix it with warm water to warm it up!
Now to fill the containers:
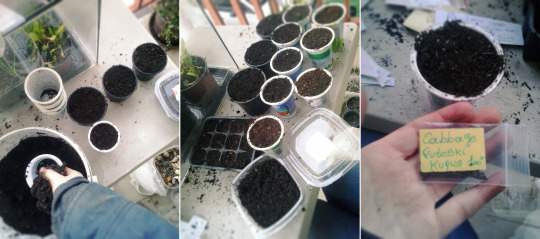
And now I have all of them filled up, I can finally plant. These cabbage seeds on the picture are new and untried, I ordered them online because I want to try and make sauerkraut this year! I'm excited to see if they grow well.
The only thing you really need to know about sowing seeds, they're supposed to go twice as deep as they're wide. Since all these seeds are tiny, all I need to do is to gently push them under the soil, and then pepper some soil on top. Like this:
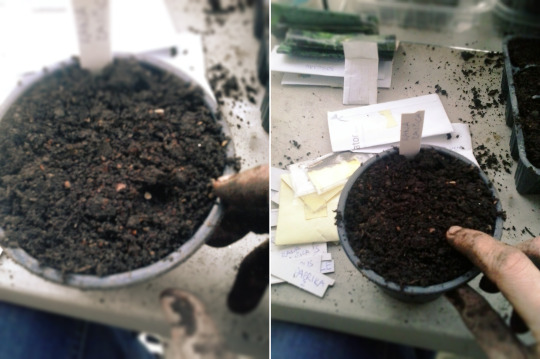
I put two seeds in each container, just in case. Now they're all sowed, I'm spraying them with water gently, so that the soil would properly settle on top of them. If you were to water them with pouring water, it could easily displace the seed, so it's recommended to just gently spray on top!
There's one more important step to this; all of these containers have holes at the bottom, and they need to be put in watertight containers, so that they wouldn't leak when you water them! I always have bunch of old food containers on hand for this purpose:

Now with this setup, it's very convenient to bottom-water them. This means you never water the top of the soil; instead, you pour water in the watertight container, and all of the soil in the containers with holes will soak up exactly as much water as they need. This takes care of the risk of overwatering, your plants will not drown in this way, and also their roots will be encouraged to grow deep down to the source of the water.
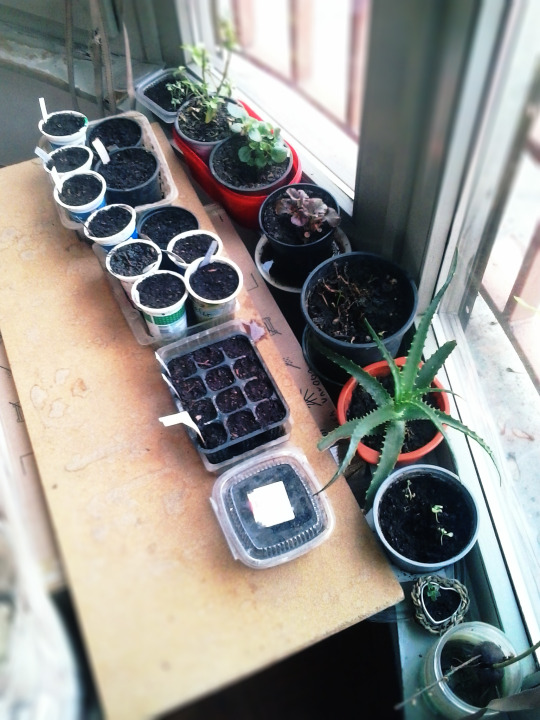
And now they’re on their makeshift table! All the attention these need now is to get some water every few days, and to be in the brightest place possible.
#gardening#diy#sowing seeds#growing food#growing transplants#seed tutorial#growing seeds#growing from seed#diy plants
105 notes
·
View notes
Text

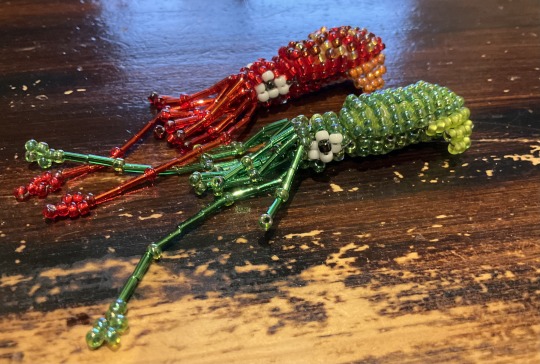
Made a pair of lil squid fellas to sit on my desk :)
I didn’t like any of the squid patterns I found on the internet so i ended up making my own, and after some trial and error I ended up with these little guys. They’ve both even got little beaks! I’ve attached the pattern I made below if anyone wants it haha.
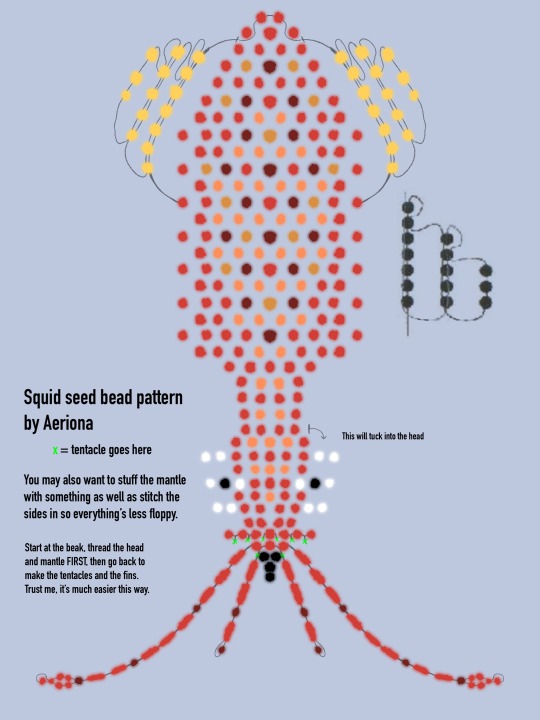
I used size 8 miyuki rocaille/round beads, some bugles and 0.28mm thread, but pretty much any size or shape should work. Hell, you could even use pony beads if you’re crazy enough.
If your thread’s long enough you can even do the whole thing in one go, I’d personally recommend that as it means you have less knots to tie up :).
#Surprise craft tutorial jumpscare#I love these little guys so much i had to share them with the world#My art#squid#beadwork#glass beads#seed beads#pattern#bead pattern#tutorial#crafts#craftblr
271 notes
·
View notes
Text

A Free Fabric Flower Pattern for Stunning Poppy Seed heads - Pillar Box Blue
3 notes
·
View notes
Text
I started beading (mainly with seed beads) about a month ago and I'm absolutely loving it. Here are a bunch of bracelets and necklaces I've made!
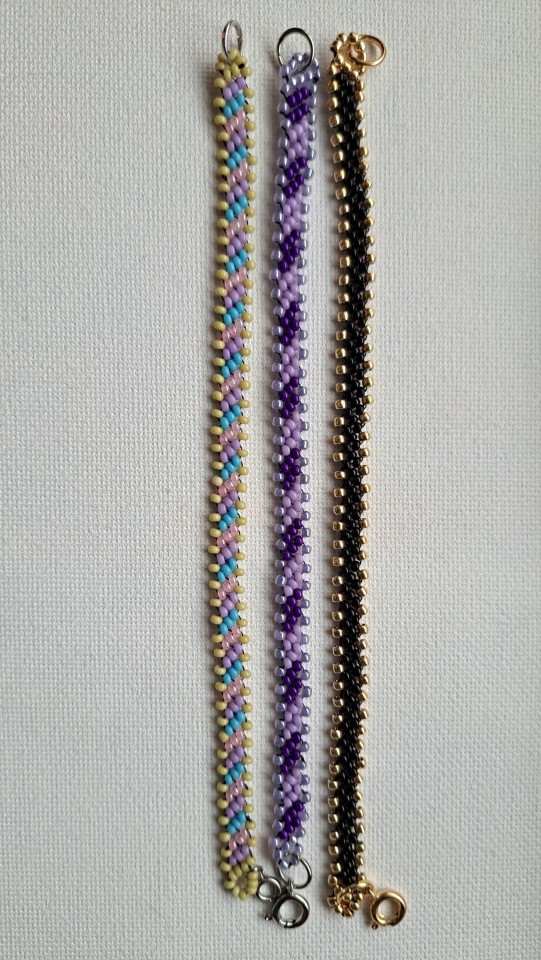
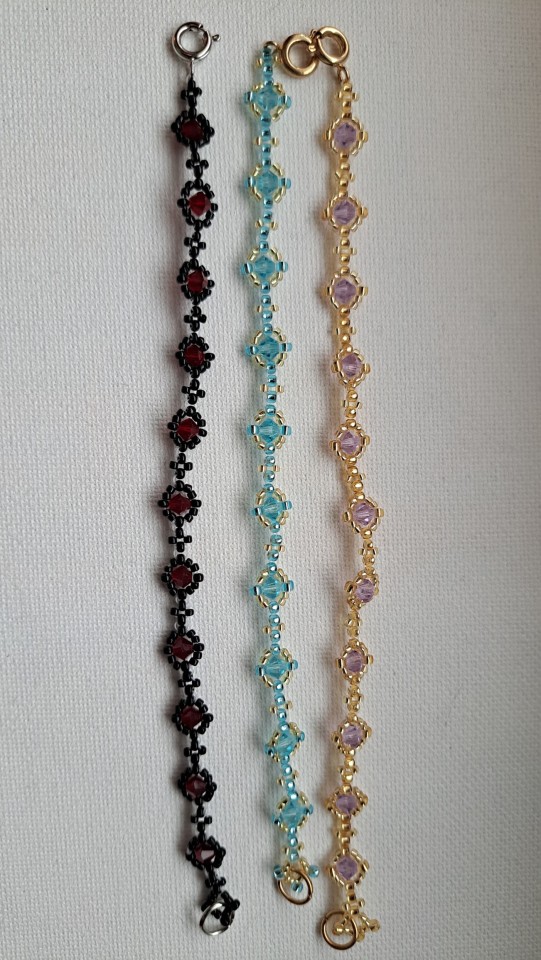
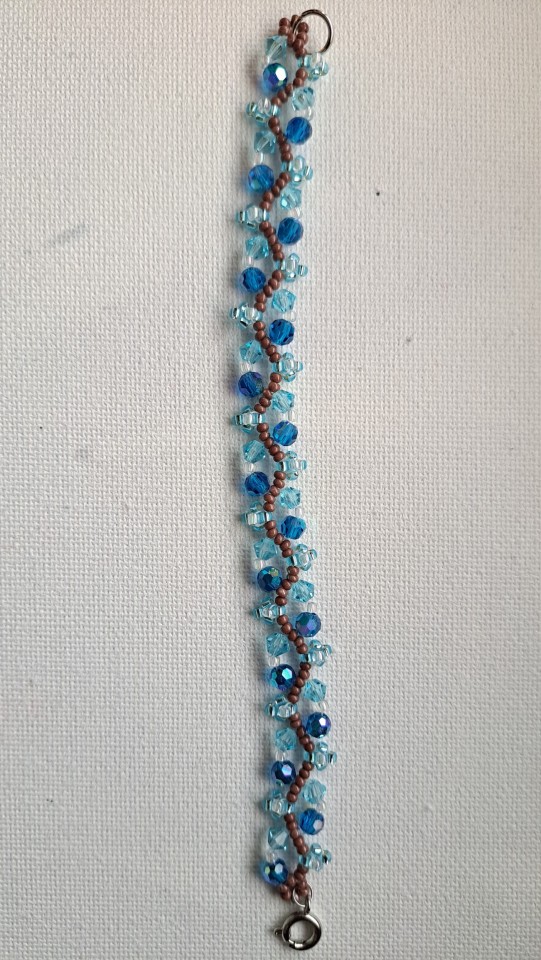
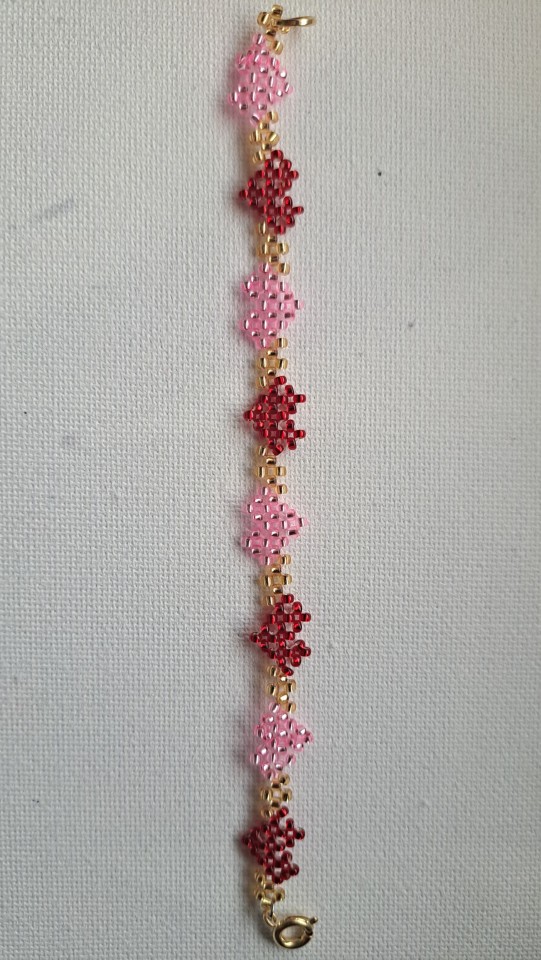

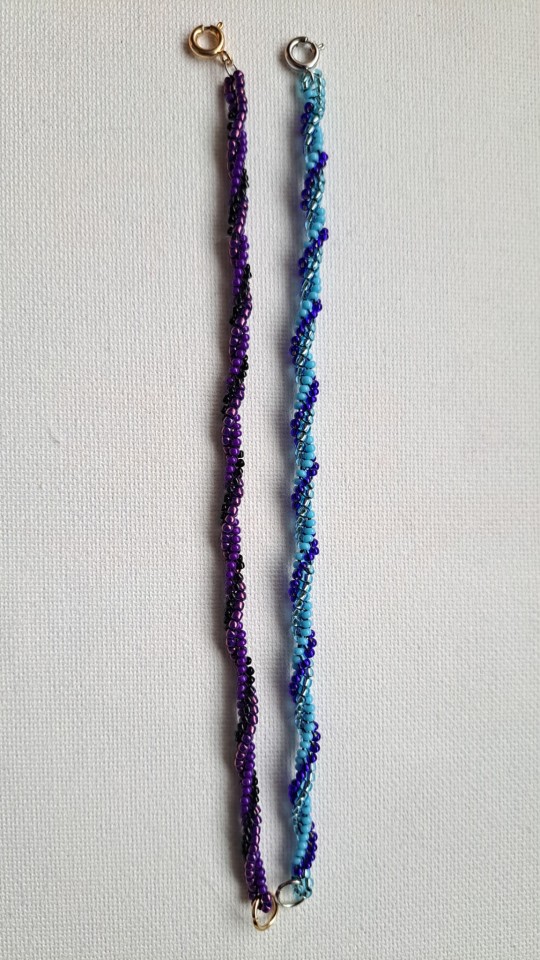
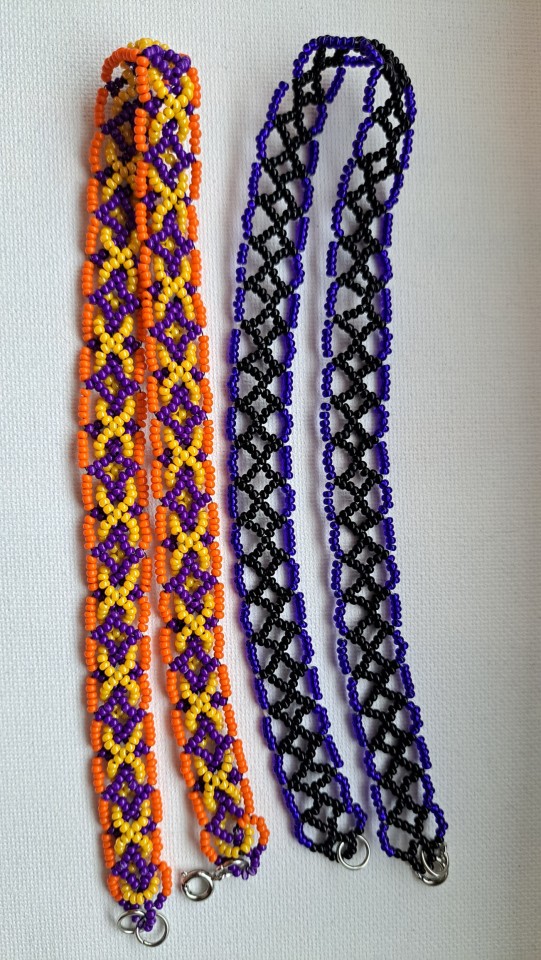
Spyro-themed choker (above right) is prob my favourite so far.

These last 2 are matching frog rings I made for me and my bff (@lilgnomefella). Surprise! 🐸 Here's what they look like on a fingie:

I followed tutorials for all of these. Made adjustments to a few. I'll link them underneath here 'cause this post is long enough lol.
youtube
youtube
youtube
youtube
youtube
youtube
youtube
youtube
#this is the most relaxing creative hobby i've picked up tbh#i turn on a show and bead for hours lol just zone the fuck out it's great#i still have so many tutorials to get through#and i've bought so many beads already......luckily they're pretty cheap lol#well seed beads are#those crystal beads are dang expensive (i got a bunch on super sale though heheh)#ok bye i'm off to make another bracelet for me mother 🙂↕️
6 notes
·
View notes
Text

Peyote bracelet pattern that uses 24kt gold beads! Perfect for most occasions, you can find this pattern here https://www.etsy.com/shop/LizzieMig
#bead weaving#beading#seed bead jewelry#peyote stitch#beaded bracelet#beading tutorial#bracelet making#bracelet tutorial#diy bracelet#loom bead
6 notes
·
View notes
Text
hot take
apart from the UI being based on pocket edition, i think bedrock is a neat successor to legacy console.
#rambles#minecraft#i will always love java the most but bedrock's good for when i'm not on pc#i do wish they could make template seeds of the old tutorial worlds to like preserve them
2 notes
·
View notes
Text
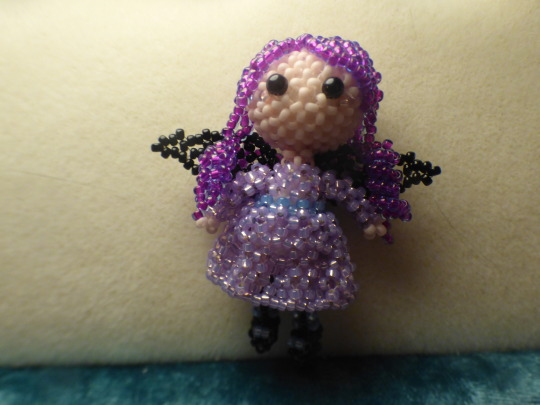

I made this custom Mal doll for my niece using the Guardian Angel, Witch, and Bat doll designs created by the amazing bead designer BeadingWithSmile from etsy! Check her out if you love beading tutorials!
https://www.etsy.com/shop/BeadingWithSmile
#beading#beadwork#seed beads#jewelry#tutorial#crafts#handmade#amigurumi#amigurumi doll#disney descendants#mal bertha
5 notes
·
View notes
Text
How to draw Grass


Credit: Etherington Brothers
#41#42#grass#plant#flora#flower#seed#nature#environment#outdoors#art tutorial#art tip#drawing tip#art tips#art tutorials#drawing#drawing tips#drawing tutorial#drawing tutorials#art#plants
6 notes
·
View notes
Text
ive planted about ~10 times 30 inventory spaces of flowers on my island and every acre has at least 3+ critters displayed plus 3 bridges and an incline and im still stuck at 2 stars rating.
i got a lot of the trees and 95% of all flowers from digging them up from island tours.
according to a reddit post the flowers and trees have to be from seed packets.
if thats it im going to kill myself in front of isabelle

look at this shit. what else do you fucking want from me
#literally spent the last two days and what should amount to 40k miles in tickets for this. im going to be so mad if its a seed thing#ill be doubly mad bc thats what i get from trying to play the game semi-blind (aka not looking up tutorials but still reading the wiki)#acnh posting#<might as well start tagging these i guess
3 notes
·
View notes
Text
I thought I was safe but no, my lamp won't go on now :c
#for context the plugs aren't working#now I can't go eep :(((#with#>:[#I will. play minecraft :c#and build from pretty tutorials#ahshdb I need a cherry blossom seed rn !!!!!!!#posts.nae
0 notes
Text
Nifty Beaded Anklet
Or bracelet, or whatever. But I learned this pattern for anklets, and that's how I wear them.


They're relatively quick to make, pretty much infinitely customizable, the materials can make a lot for the quantities you buy them in (at least they were at my local craft store, ymmv), and they're just plain fun.
You Will Need:
Size 20 cord. My mom uses hemp cord, I prefer bamboo. The bamboo is a bit slipperier and a little thinner, so it might not be the best choice for a beginner, but I like the ease of movement.
Seed beads, size 6. These come in a wide variety of colors, so go nuts. The label will have the size on it- the ones I used had 6/0, though they also come in 8/0 and smaller sizes. 6 will fit on the size 20 cord.
Clipboard or another way to secure the top of your braid
Craft glue (only a small amount) and a scrap piece of paper
Scissors
Instructions:
Begin by picking your length of cord. I usually measure with one end held in my fingertips and cutting at the shoulder joint, though you may have a different length to suit your ankles or wherever you're wearing this. If in doubt, go a little long- you can trim ends, but it's very hard to make things longer. You want three cords of the same length.
Tie the cords together to make a knot. If you want to be fancy and use a button to secure it, then make a loop on the other side of your knot, otherwise just tie it securely.
Pour a tiny puddle of craft glue onto a scrap piece of paper. Dip the end of each cord in the glue and twist, going along with the way the cord is already twisted. You want 1/2 to a full inch covered, to aid in sliding the beads on. Let the ends dry (and get the glue off of your fingers).
Slide beads onto each cord. I use about 25 beads per strand- I've used 20 and 28 for other anklets, though my younger sister uses closer to 20 or even fewer for the size of her ankle. When each cord has the right number of beads, tie a knot in the end so your beads do not fall off. Keep the same number of beads per strand.
Braid the cord TIGHTLY for about two inches- or longer if you prefer- to give yourself a good foundation. The tightness is important- you want a snug, unmoving braid.
When you are ready to add the beads, slide up the bead and then cross the strand over. You will need to pinch the braid to keep it in place as you slide the next bead up so that things do not come unravelled, however, it is hardly the end of the world if they do. Once again, you will want to braid tightly, though this will be easier with the beads.
Once you run out of beads, continue braiding tightly till you either run out of cord or decide that your braid is long enough. Tie a knot in the end- including a button if you are being fancy- and cut your excess.
Tie the braid LOOSELY around your ankle- firstly, it will be less comfortable than you think it will be, secondly, it shrinks when it gets wet, so provide space for that.
When the anklet falls off, it is said that your wish will come true. Until then, enjoy!
#anklet#tutorial#craft#seed beads#anklet making#instructions#fun craft project#the orange-and-metallic is technically replacing a blue-and-green that fell off already#they also make good bracelets but i don't do bracelets#the one downside is they don't always layer well and they're so quick to make that you think you can make more#especially if you have good beads and fun cord
0 notes
Photo

Dragonflies - Make these maple seed dragonflies - Easy craft tutorial - Butterfly party - Dragonfly party ideas - Garden party - Garden Wedding - dragonfly Wedding Favors
#Dragonflies#-#Make#these#maple#seed#dragonflies#Easy#craft#tutorial#Butterfly#party#Dragonfly#ideas#Garden#Wedding#dragonfly#Favors
0 notes
Text
#laravel database seeder#laravel seeder#laravel seeders#laravel run database seeder#seed Laravel#Step By Step Tutorials
1 note
·
View note
Text
youtube
Broadcasting pre-germinated CAKRABUANA 04 rice seeds in seedbeds before transplanted in paddy fields
0 notes
Text


Peyote stitch bracelet pattern. Blue outlined silver crystal hearts, perfect for Valentine's Day! 11 columns x 83 rows and designed using Miyuki Delica seed beads. Follow the link to find this and more LizzieMig patterns! https://www.etsy.com/shop/LizzieMig
#bead weaving#beading#seed bead jewelry#peyote stitch#loom bead#beaded bracelet#beading tutorial#bracelet making#bracelet tutorial#diy bracelet
5 notes
·
View notes
Video
youtube
Pollo con Brocoli tipo chifa SABROSO #diy #how #food #delicious #comida
#youtube#diy#how#tutorial#cook#food#comida#delicious#saludable#como#chicken#pollo#seed#sesame oil#sesame seeds
0 notes