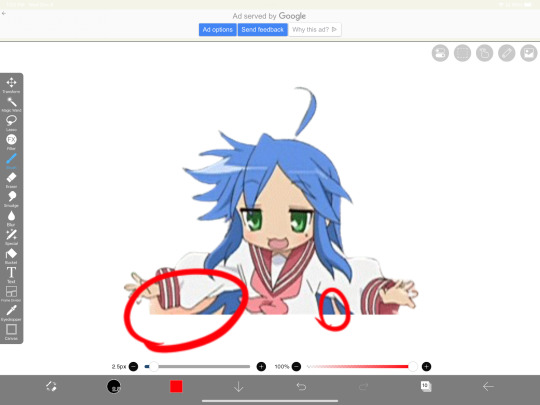
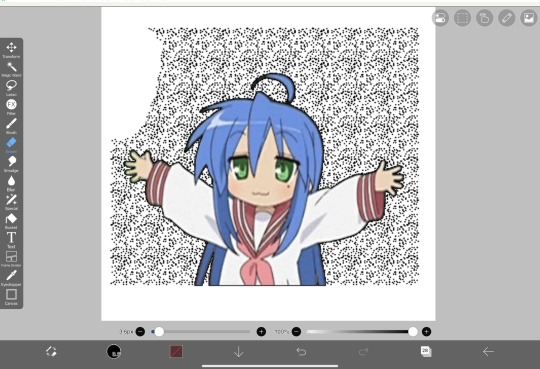
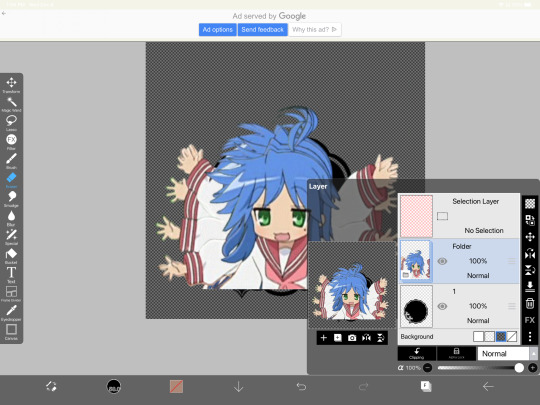
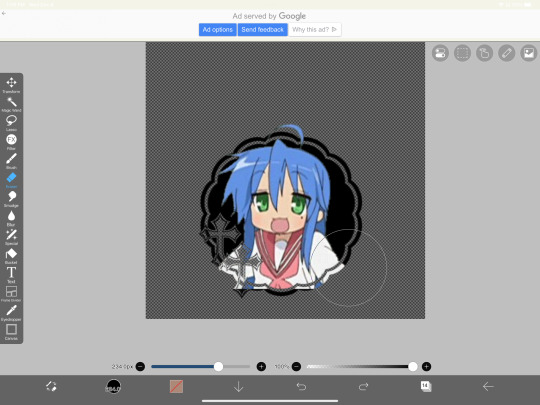
#i used photopea for the first time
Explore tagged Tumblr posts
Visit Tumblr Blog
Explore Tumblr blogs with no restrictions, modern design and the best experience.
Last Seen Tumblr Blogs


Fun Fact
69% of Tumblr users are millennials.
Text


what ARE they doing anyways? 🤨
PREVIOUS
NEXT
#did you guys miss me? i missed you#i heart filler episodes#i needed to post SOMETHING#mr morlind secret relationship???#place your bets on who#penny is not penny pizzazz btw#that’s all i’m saying :)#thecassidystory#the sims 4#part two: high school#simstory#anjelo morlind#part two chapter forty nine#i used photopea for the first time#i was fighting for my life#text template by nucrests
2 notes
·
View notes
Text


Love is like a poison (2024) 毒恋~毒もすぎれば恋となる~
Episode One.
#love is like a poison#doku koi: doku mo sugireba koi to naru#毒恋~毒もすぎれば恋となる~#doku koi#jdrama#hama shogo#hyodo katsumi#soomedits#this is the first gifset i posted this year... huh#photopea had ample time to fuck things up this past year#hardly anything works the way it used to anymore or just straight up doesn't work at all????#my old way of sharpening doesn't work anymore#when i tried to add a selective colour layer it just turned everything black??#as do some other things i always did for the colouring...#i have to fucking reload the page to get any of the filters in the gallery to work + i can't even see the picture while adding one??#and the timing is just one big question mark...#fun times. some of it might just be my old laptop. or the browsers fault. but i've tried other methods... they were worse.#i really enjoyed the first ep though so i pushed through and made a little something
329 notes
·
View notes
Text
hiiii, i have never done one of these before but i am feeling so incredibly loved this year and wanted to share the love !! i just want to say thank you so much to all of my mutuals who have made this year special to me, whether you are a new mutual or one who has been with me since my old blog, i am incredibly thankful to have you in my life !! it really means so much to me to be able to come on here and see all of you on my dash so in saying that, i am sending you all so much love and i will see you in 2024 !! 🤍🤍🤍
part 1 of 2 !!
@tbosas @benoitblanc @userastarion @leviiackrman @chronicowboy @danielsousa @inourtownofhawkins @lyngunn @shinsabine @eohwyyn @heroeddiemunson @naomismcpherson @ncutii-gatwa @waddinghamhannah @anakinskyiwalker @hyacinth--girl @emmaswcns @pansexual-space-princess @hurmione @harleyquinnz @rhaenyratargayen @rachelsennot @nancywheeeler @theroseapothecary @redfive--standingby @usersunshines @jamies @artemistics @eddie-kaspjack @maygrantgf @siobhans-roy @impractical-matters @digenova @nandermoenthusiast @melordamas @maeve-wileyy @eddiesdiaz @merlinaddams @wandavsions @hazardsoflove @rii-chann @sunsetcurveauto @klaushargrove @billhaders @amessofaheart @swkywalker @cheddarholt @beepulon @poscidon
#love you all sooooo much !!!!#have an amazing end of the year 🤍#also pls excuse the gif hahaha#it was my first time using photopea#and i haven't made a gif in yearsssss#mutuals tag#mutual appreciation#text#having to break the mutuals list up into two parts as tumblr hates me !#also sorry if i have left anyone out i checked several times 😭#myedit
87 notes
·
View notes
Text
alright it's bedtime soon but what's everyone's non-adobe video editor program recs
#val comes out of hiding#ideally free or cheap one-time purchase#i have Ideas but I do have image editing to do first#i can use photopea for images tho
2 notes
·
View notes
Text
Just a bunch of Useful websites - Updated for 2023
Removed/checked all links to make sure everything is working (03/03/23). Hope they help!
Sejda - Free online PDF editor.
Supercook - Have ingredients but no idea what to make? Put them in here and it'll give you recipe ideas.
Still Tasty - Trying the above but unsure about whether that sauce in the fridge is still edible? Check here first.
Archive.ph - Paywall bypass. Like 12ft below but appears to work far better and across more sites in my testing. I'd recommend trying this one first as I had more success with it.
12ft – Hate paywalls? Try this site out.
Where Is This - Want to know where a picture was taken, this site can help.
TOS/DR - Terms of service, didn't read. Gives you a summary of terms of service plus gives each site a privacy rating.
OneLook - Reverse dictionary for when you know the description of the word but can't for the life of you remember the actual word.
My Abandonware - Brilliant site for free, legal games. Has games from 1978 up to present day across pc and console. You'll be surprised by some of the games on there, some absolute gems.
Project Gutenberg – Always ends up on these type of lists and for very good reason. All works that are copyright free in one place.
Ninite – New PC? Install all of your programs in one go with no bloat or unnecessary crap.
PatchMyPC - Alternative to ninite with over 300 app options to keep upto date. Free for home users.
Unchecky – Tired of software trying to install additional unwanted programs? This will stop it completely by unchecking the necessary boxes when you install.
Sci-Hub – Research papers galore! Check here before shelling out money. And if it’s not here, try the next link in our list.
LibGen – Lots of free PDFs relate primarily to the sciences.
Zotero – A free and easy to use program to collect, organize, cite and share research.
Car Complaints – Buying a used car? Check out what other owners of the same model have to say about it first.
CamelCamelCamel – Check the historical prices of items on Amazon and set alerts for when prices drop.
Have I Been Pawned – Still the king when it comes to checking if your online accounts have been released in a data breach. Also able to sign up for email alerts if you’ve ever a victim of a breach.
I Have No TV - A collection of documentaries for you to while away the time. Completely free.
Radio Garden – Think Google Earth but wherever you zoom, you get the radio station of that place.
Just The Recipe – Paste in the url and get just the recipe as a result. No life story or adverts.
Tineye – An Amazing reverse image search tool.
My 90s TV – Simulates 90’s TV using YouTube videos. Also has My80sTV, My70sTV, My60sTV and for the younger ones out there, My00sTV. Lose yourself in nostalgia.
Foto Forensics – Free image analysis tools.
Old Games Download – A repository of games from the 90’s and early 2000’s. Get your fix of nostalgia here.
Online OCR – Convert pictures of text into actual text and output it in the format you need.
Remove Background – An amazingly quick and accurate way to remove backgrounds from your pictures.
Twoseven – Allows you to sync videos from providers such as Netflix, Youtube, Disney+ etc and watch them with your friends. Ad free and also has the ability to do real time video and text chat.
Terms of Service, Didn’t Read – Get a quick summary of Terms of service plus a privacy rating.
Coolors – Struggling to get a good combination of colors? This site will generate color palettes for you.
This To That – Need to glue two things together? This’ll help.
Photopea – A free online alternative to Adobe Photoshop. Does everything in your browser.
BitWarden – Free open source password manager.
Just Beam It - Peer to peer file transfer. Drop the file in on one end, click create link and send to whoever. Leave your pc on that page while they download. Because of how it works there are no file limits. It's genuinely amazing. Best file transfer system I have ever used.
Atlas Obscura – Travelling to a new place? Find out the hidden treasures you should go to with Atlas Obscura.
ID Ransomware – Ever get ransomware on your computer? Use this to see if the virus infecting your pc has been cracked yet or not. Potentially saving you money. You can also sign up for email notifications if your particular problem hasn’t been cracked yet.
Way Back Machine – The Internet Archive is a non-profit library of millions of free books, movies, software, music, websites and loads more.
Rome2Rio – Directions from anywhere to anywhere by bus, train, plane, car and ferry.
Splitter – Seperate different audio tracks audio. Allowing you to split out music from the words for example.
myNoise – Gives you beautiful noises to match your mood. Increase your productivity, calm down and need help sleeping? All here for you.
DeepL – Best language translation tool on the web.
Forvo – Alternatively, if you need to hear a local speaking a word, this is the site for you.
For even more useful sites, there is an expanded list that can be found here.
80K notes
·
View notes
Text
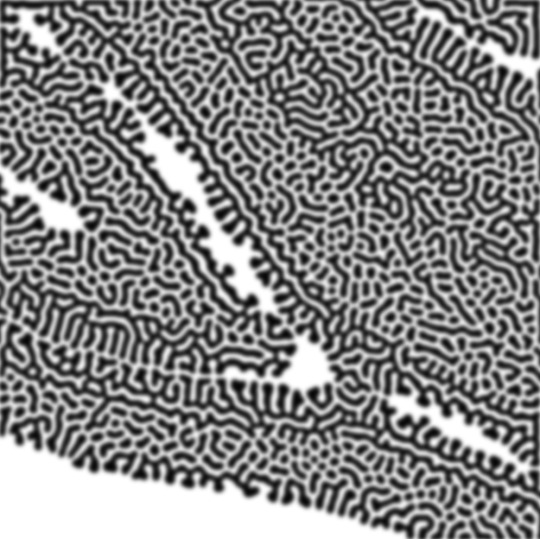
how to make cool blobby turing patterns in photoshop
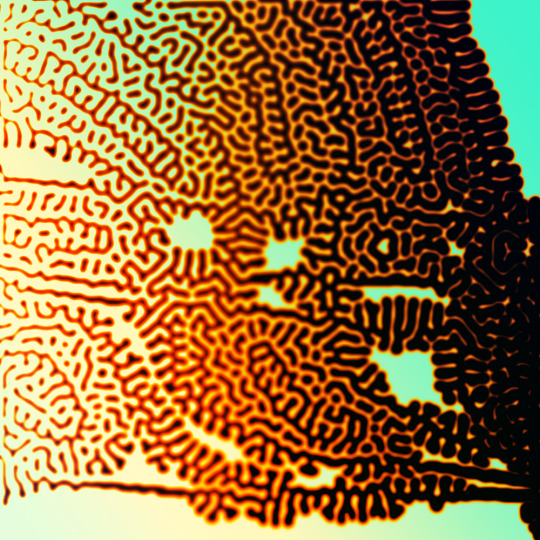
i'll preface with i learned the basic loop from skimming a tutorial on youtube, but as someone who prefers written tutorials i'm sure many would appreciate one! also, the second part of this is some of the visual effects i figured out on my own using blending modes and stuff.
i'm using photoshop CS4 on a mac so some buttons and stuff might be in different places on windows and newer photoshop versions but all the actions are the same. my canvas is 1000x1000 pixels.
UPDATES (i'm hoping these'll show up whenever you open the readmore?)
it's possible to do something similar in krita using this plugin, made by the love @arcaedex
it's also possible to do this in photopea, a free browser alternative to photoshop! the results are pretty much identical.
FIRST off you wanna get or make a black and white image of some kind. it has to be one layer. can be noise, a photo, a bunch of lines, whatever. here's mine, just some quick airbrush lines:

now find the actions tab. idk what it looks like in newer versions of photoshop but you probably won't need to dig!
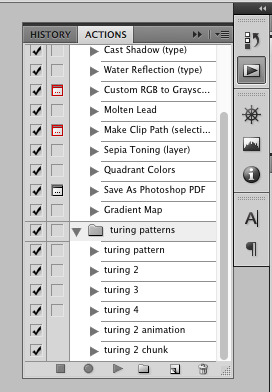
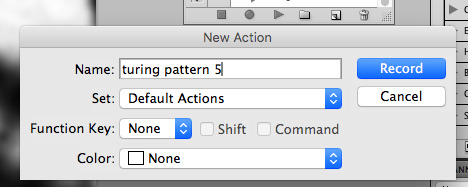
hit the little page thingy to make a new pattern. once you hit 'record', it'll record everything you do. the little square 'stop' icon will end it.
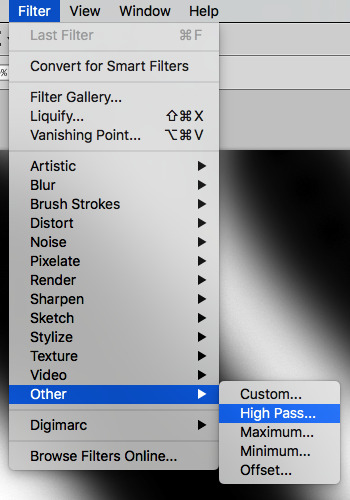
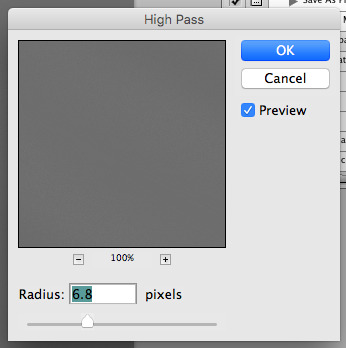
now you want to do a high pass filter. you can mess around with the radius to change the size of your squiggles, but the tutorial had it set to 6. experiment!
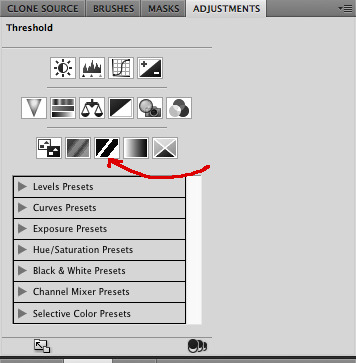
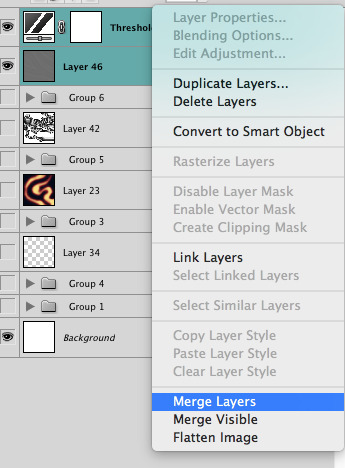
now add the 'threshold' adjustment layer. i use the adjustments tab but i think there's also a dropdown menu somewhere. keep it at the default, 128. merge it down. (control or command + E or you can right click it like some kind of weirdo)
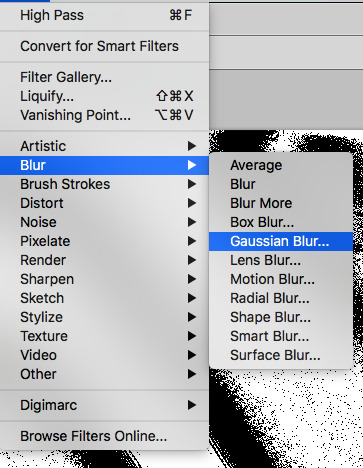
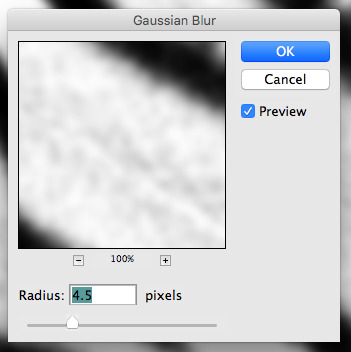
and finally, the gaussian blur! the radius of this affects the shape and size of your squiggles as well. i like to keep it around 4.5 but you can mess around with that too.
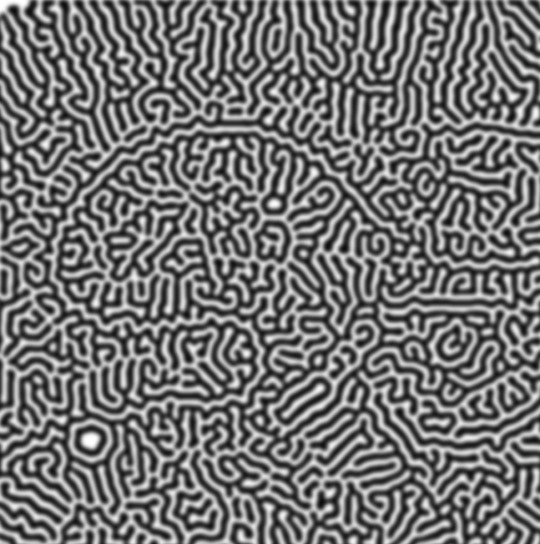
after that, hit 'stop' on the action you're recording, and then repeat it a bunch of times using the 'play' button, until you have something you like, like this:
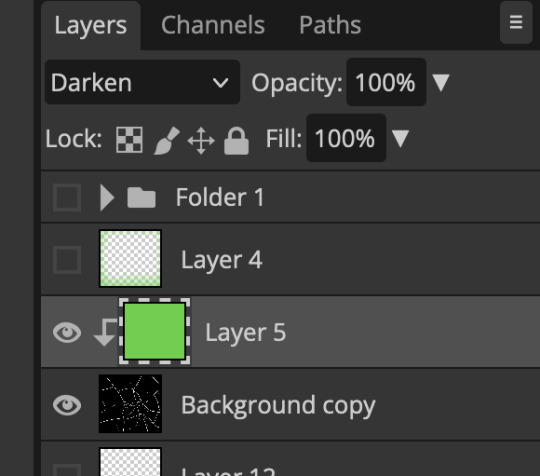
WOW!! that was fun!! and only a little tedious thanks to the power of macros. anyway, here's some fun layer blending stuff i like to do. it's with a different pattern cause i made this bit first.
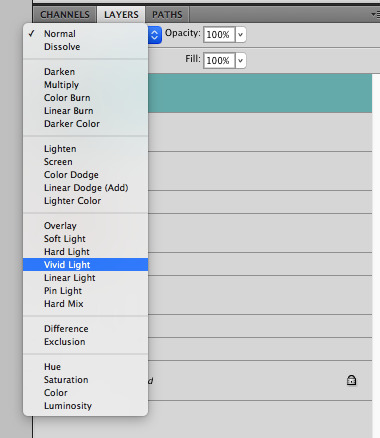
anyway, using a black and white gradient (or a grey base that you do black and white airbrush on), make a layer with the vivid light. this will make the blobs look thicker or thinner.


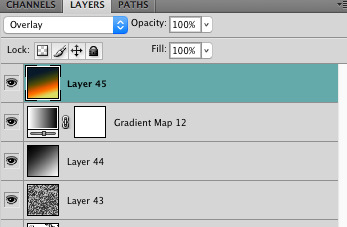
then, for cool colors, do a gradient map adjustment layer over that:

and finally, my best friend, the overlay layer. just using a gradient here bc i'm lazy, but feel free to experiment with brushes, colors, and blending modes!

NOW GO. MAKE COOL SHIT WITH THE POWER OF MATH. AND SEND IT TO ME
also these are not hard and fast rules PLEASE mess around with them to see what kind of weird shit you can make. here's a gif. as you can see i added some random airblush blobs in the middle of it, for fun.
932 notes
·
View notes
Text


(photopea ruined my gif, don't mind it, this was my first attempt at a gif graphic)
Hie I'm Rudy or Junie, I use he / it / any neos, and I'm semi-new to the editblr community, though I still consider myself an amateur. I do graphics (selectively), imvu shiny buttons, and pride flag shiny buttons, like these:


my request info for graphics can be found here, and my button request info can be found here.
A side note that I'm a full time college student, so it might take a while for me to get around to requests / find inspiration to do them, but unless your request has been added to my denied request masterlist, it's still in my inbox + I will get around to it at some point
tagging, send an ask or dm to be removed : @selysie @dwollies @abyslita @lavendergalactic @cutelvr @nomkiwi @hrlyqueen @hiddencircus

#🐾。the cursed fox barks#🐾。the cursed fox posts#editblr#edit tumblr#rentry resources#rentry stuff#rentry decor#rentry#bundlrs resources#bundlrs stuff#bundlrs decor#sntry resources#sntry stuff#rentry graphics#bundlrs graphics#bundlrs#sntry#stellular#carrd#carrd stuff#carrd graphics#imvu shiny buttons#shiny buttons#pride shiny buttons
77 notes
·
View notes
Note
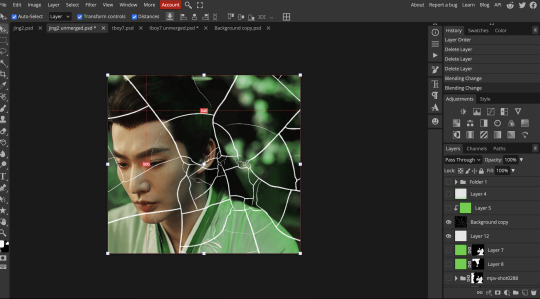
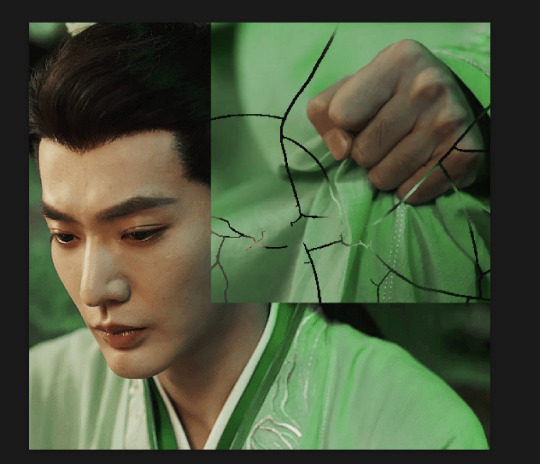
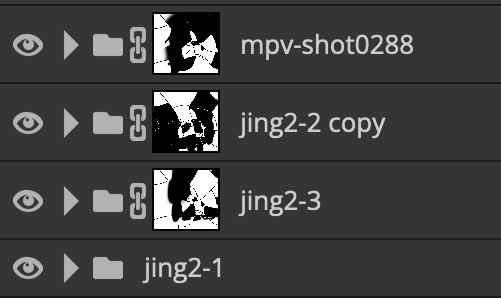
your gifsets are perfect, I'm always in awe of what you can do and you're creativity!!! Could you please explain how you made the broken glass gif with different gif in it on photopea? https://www.tumblr.com/dengswei/754916132337729536/userdramas-creator-bingo-green-asiandramanet?source=share and would it be possible to do something similar with other shapes? Thank you for your lovely creations <33
heyy thanks so much!! and of course! i have to admit the way i do it might be a little bit tedious compared to like everyone else (though i don't know how photoshop users or other photopea users might do it 🤣) okay this is gonna end up being so long because of the way i do it so i'm sorry about that and i hope it makes sense 😭
okay i have to admit i couldn't find the texture i've seen people use for the shattered glass effect so i actually used a photopea default brush from this pack
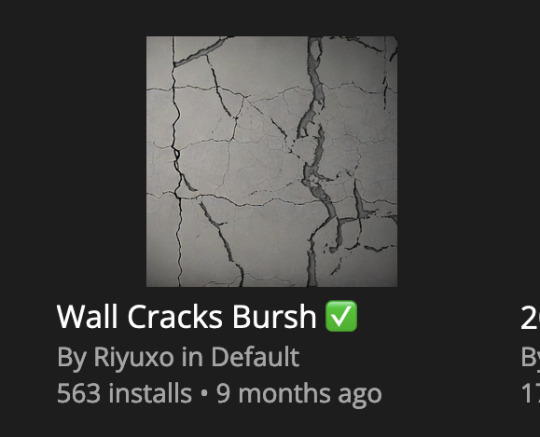
to download the brush set go to window -> plugins -> brush and then search for wall cracks brush (it's literally the only wall related brush set in photopea so it'll show up the moment you download it)
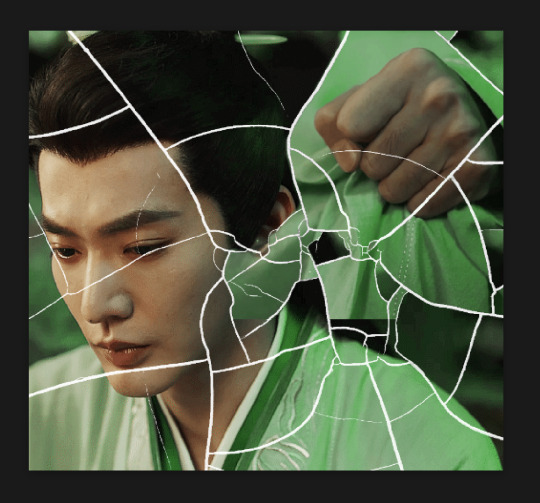
so for the gif i did above i did my giffing the usual way of creating & colouring for different gifs seperatly and then adding them all to one project (it doesn't have to be 4 gifs i just chose 4 because that's what i wanted to show in this gif)
i've done this twice once for this set and another time for this the blood of youth set and i have to say the most important part of this is keep multiple versions of the brush in the position you want as you can so once you've used it to test it out and you like that version keep it because unless you can manage to position the brush in the exact same place every time you're gonna need to reference those (or even use the magic wand tool for it later) and also you need to keep at least a white on black background version for the outline
in the brush pack the one i used was this one: (3564, crack b 9)
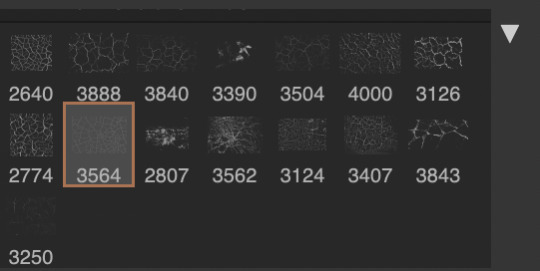
for this part i just say play around with both positioning and sizing of the brush, it automatically opens with the size 3000+ which is fine i think with the tushan jing one (the green gif above) i stuck with that size and just kept clicking around until i got the positioning i wanted (this is another reason why i said what i said in the paragraph above because if the brush size is bigger than 1000 it's doesn't come out in the exact positioning as you expect it too
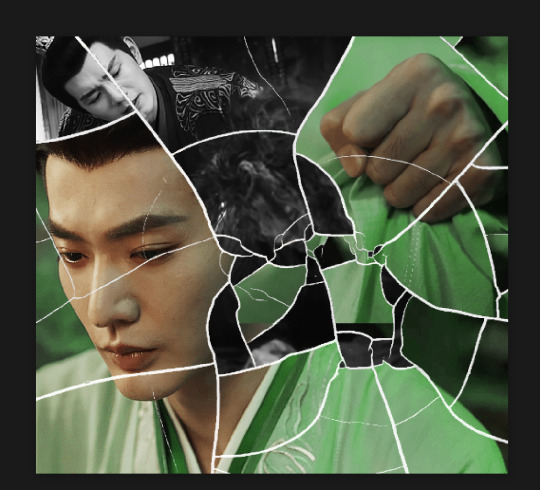
i decide the positioning of the gifs on the way i like the brick brush looking rather than the other way around, this is the positioning i went with if you're curious & would like to use it if that's easier 🤣

you'll need to keep this as a seperate layer at the top, i had it set to screen and then added a colour fill layer clipped on later so that i had the outline for when i was masking
so to start off i have the base gif which i do nothing to, that stays as it is, with the brush layer above set to screen
next is where you want to position your other gifs it may benefit to figure this out all at first before doing any of the masking so you know which parts you want to erase and which parts you want to keep
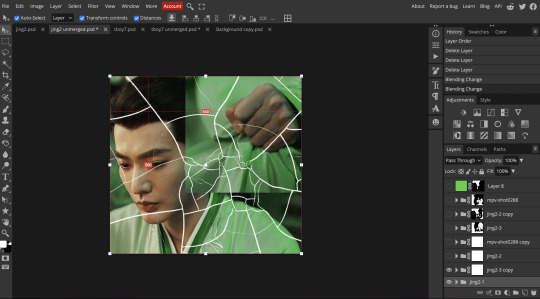
so this is what i decided with my positioning looking at where each of the cracks are
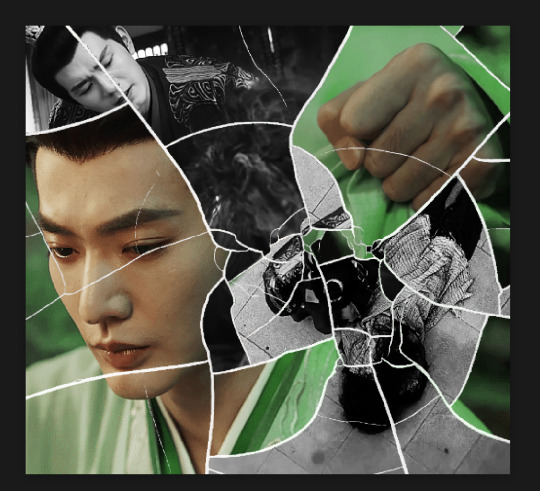
now comes the tedious part, in some ways the way i do this is a lot similar to how i do grid but it's not as easy (for grid photopea automatically locks onto the squares making it easier to mask, here you have to do it all manually)
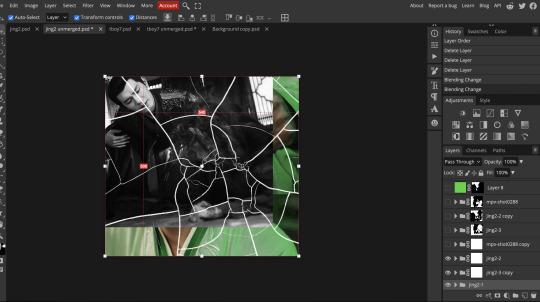
first put a raster mask on all of the other gifs except for the base gif & use the magic wand tool on the brush layer so you get the outline of the brush and you mask that away from your gif (so if you turned off the brush layer it should look a little something like this: (it's not perfect but it won't matter that much because you should have the original turned on at the end anyway) (you don't have to do this step tbh i just did it because i thought it looked better)
so with the brush layer turned on you can use that as a template to which parts of the cracks you want to erase, you can either use the magic wand or the paint brush tool it really depends on how much of a perfectionist you are and whether or not the sharp edges bother you (plus some of the cracks have small openings so it might erase another part you don't want if you use the magic wand tool so it really is another instance of playing around and seeing what you like, and it might also change once you add the other gifs too)
so this is how it looks after i've done that (notice in the middle you can still see the edge of the gif? that won't matter because one of the other 2 gifs i still have yet to mask will cover that) & just repeat the same thing for the other gifs you want to add
this is how my masking folders look if you're curious
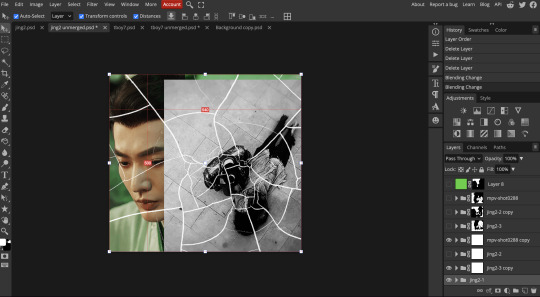
& last but not least i added a green colour fill layer clipped to the brush layer and set that to darken to get the green effect (make sure that the brush layer is still set to screen)
& once you've merged all of the gifs together you should get your desired outcome like the gif above (make sure that all the gifs have the same amount of frames too)
when it comes to other shapes i'm sure you can! like i did a tutorial with the grid version here, i guess it'll just be a lot of trial and error & finding a texture or brush with different shapes to try it out with kinda like how i did with both versions of this (i definitely did it a lot better this time around compared to the first version i did of this)
hopefully this wasn't too long or too confusing, if anything is please feel free to ask me again and i'll try and explain it a little better 🤣
#replies#Anonymous#photopeablr#usergif#tutorials#photopea tutorials#completeresources#mine | tutorials#gif tutorial#photopea#resources#gif resources#gifmakerresource#photopea tutorial#tutorial#gif tutorials
93 notes
·
View notes
Note
hi ^-^! Can you do a tutorial on how to make this icon? I would like to learn :3
https://64.media.tumblr.com/64eb5472b1d49fc941ccefbae558846e/cb2b70c34ebba0a7-b4/s1280x1920/d9e44a125324b309a533a1e56be842355046d740.gifv
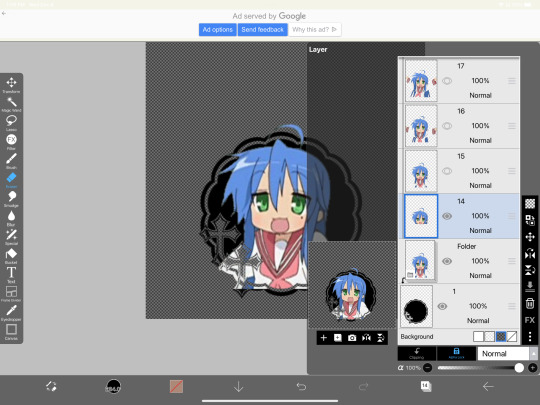
Hello! I apologize in advance for my poor explanation skills, and also for how convoluted this process can get 😭 But I saw this as a worthy challenge, so here’s how you too can make a gif icon where the character comes out of the frame like this and this:
This is going to be very long so the full tutorial is under this cut!
Programs I use: IbisPaintX and Procreate*
*full disclosure, procreate is exclusively for iPad and costs 10 USD. however every thing I do in procreate you should also be able to do in Photopea
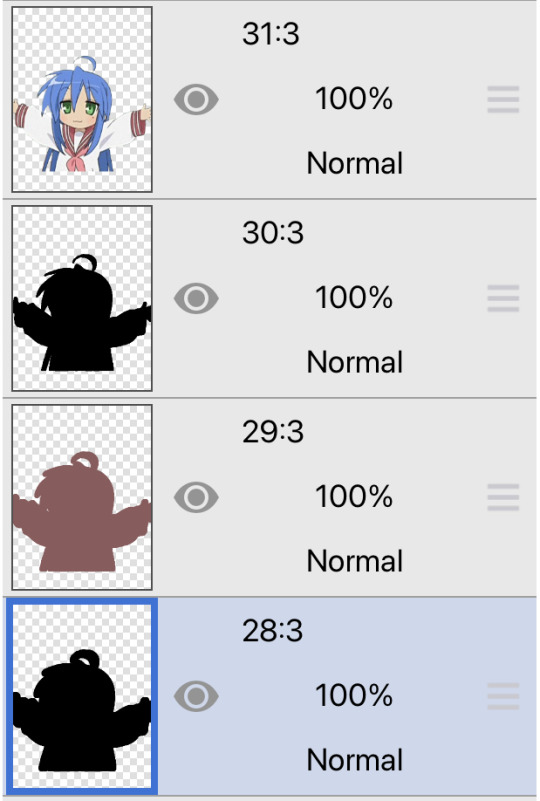
1. First things first, after finding the gif you’ll want to use, you’ll need to download each individual frame. By importing it into either procreate, photopea, or any program that’ll allow you to view individual frames, you’ll be able to save each frame
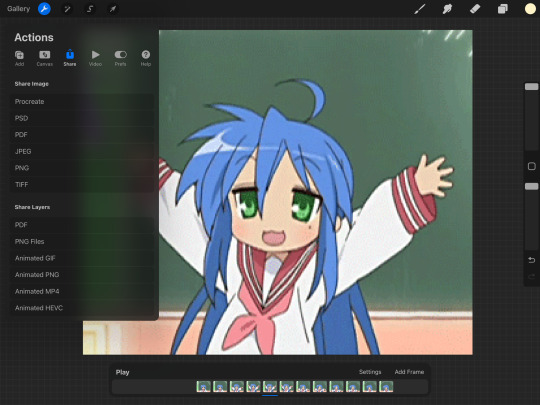
A note about gifs: The best gifs to use are ones with less frames due to the fact you’ll be editing the individual frames. Not to say you can’t use gifs with higher frame counts, however it is much more time consuming the more frames there are
2. Next you’ll have to remove the background from each frame. You can remove the background by hand, but I like to use this website to help make things a bit easier. Just pop your frames into it and download each one

It is unfortunately not always accurate and often misses things on images where the background isn’t clearly defined or is lower quality, and you most definitely will have to do touch ups on your frames For example here, for some reason, the first two frames (on the left) were left with a semi transparent gray background and in the image in the middle, you can see sizable areas where the website missed. And also as of recently there as been practically invisible dots it leaves where the background once was that stroke filter picks up some how. You’ll need to hit each frame with the magic wand tool or similar to remove these dots if you plan on adding strokes

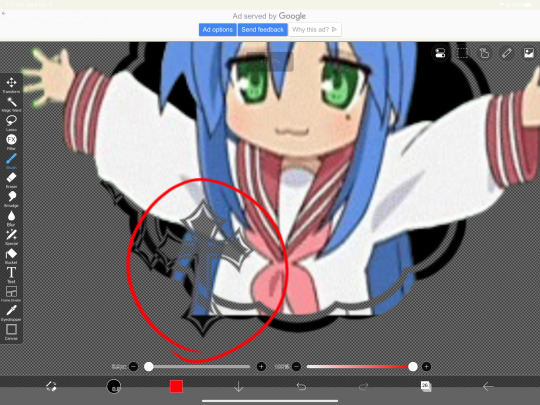
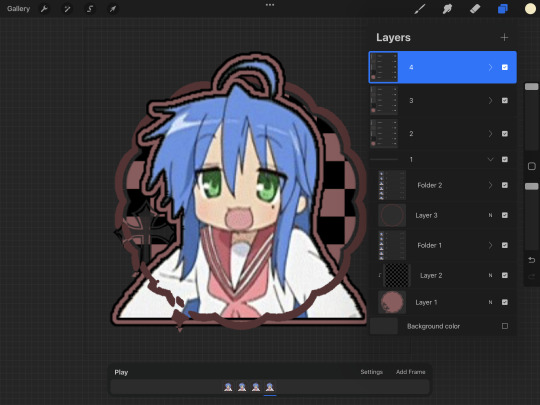
3. Now add all your frames into your program and stick them in a folder. Then, reposition the frames on top of the image mask you are using (in ibis, make sure all frames are visible and select the folder before repositioning the frames, in other programs, you should just be able to select multiple layers and move them that way). Once you’ve repositioned them, duplicate the folder then select clipping on the bottom folder like shown in the right image (I know I forgot to duplicate the folder then 💀)

4. Now here’s where the tedious stuff comes in. Make sure you number your frames, because it’ll help you out a lot. In the top folder, erase the bottom part of your gif that you want to be in the frame (I’ll call this the clipping layer) but keep the top where you want to be coming out of the frame intact (this’ll be the overlapping layer). Repeat this process for all of the frames
Note: Try to use a simple shaped frame for these kinds of icons. However, if you choose to use something with a more complex shape, be weary of where you erase! You will need to be more precise with shapes like these depending on where you want things to go
And if you haven’t edited the frame itself, you should do so now
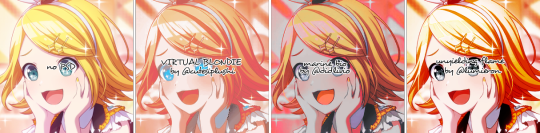
5.5. After that, you can leave things off there and skip this step if that’s what you’re going for! However, if you want to add things like strokes, it’ll get a lil more complicated
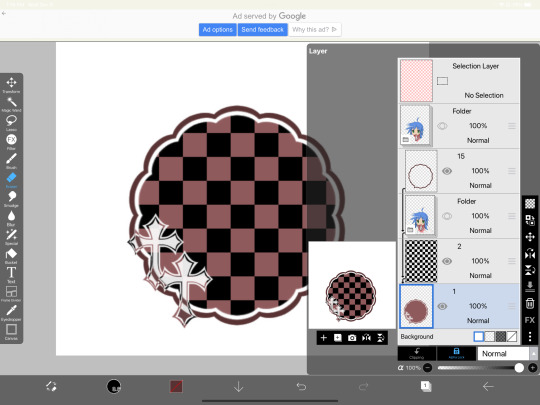
Firstly, I duplicate my clipping layer and then select stroke (both). You can also use stoke (outer) or whatever your program has, but this is my personal preference. I then duplicate that layer and keep applying stroke till I get what I want (if you use stroke (outer) duplicating your layer isn’t necessary). I think merge my stroke layers together, but I keep it separate from my main frame
That way I can duplicate my stroke layer and add it to my overlapping layer. Then I erase the unnecessary parts shown on the left. You may need to clean up the stroke on certain frames or reapply it depending on the position of things and what you’ve erased and what not. It takes a lot of trial and error. You can also apply the stroke before you make your overlapping layers, however when I was making this graphic I fucked it up in the process of making this tut and had to remake it so that’s what I did the second time around 💀 if you were wondering why I didn’t just do that in the first place, now you know


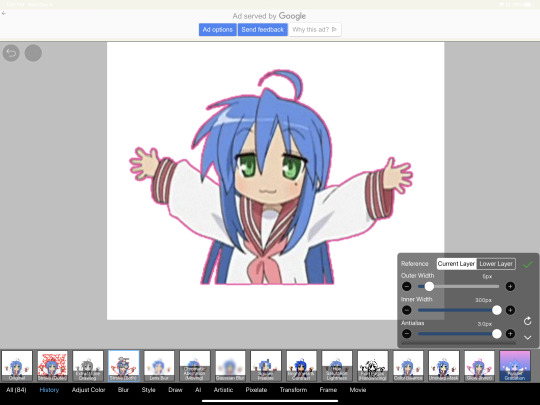
6. Now it’s time to export your layers as a psd and import it into procreate/photopea! You’ll now have to merge your clipping layer into your image mask then merge your overlapping layer on top of it to create one layer. Repeat this for all the frames and you’ll be finished!

Tada! Now you can add filters and whatever else if so desired. And that’s my process for making these kinds of graphics! There’s definitely an easier way of doing this but that’s just what I’ve got figured out for now. Don’t hesitate to ask any questions for the things that make zero sense lol
320 notes
·
View notes
Text

PSDs For Dummies <3
— as written by a dummy
hello dear readers and welcome back to canarysage, the world’s least comprehensive tutorial blog. today, we’re back at it again with photopea for dummies, and we’re tackling something i probably should have done first: psds.
example psds are: 1 (@cutesiplushi) 2 (@didlivio) & 3 (@lumieron)
what is a psd?
excellent question, dear reader! psd stands for photoshop document, and it’s a type of file format (like .png or .gif) that allows you to store a project’s individual layers! it’s a file format that, for obvious reasons, is exclusive to photoshop and photopea.
in editing circles, psd has become shorthand for filter. people use psds to save configurations of adjustment layers that are then used to filter images consistently, without having to remake them every time. when someone posts a psd, they’re posting a folder (hopefully it’s in a folder) with their specific set of adjustment layers for anyone to use!
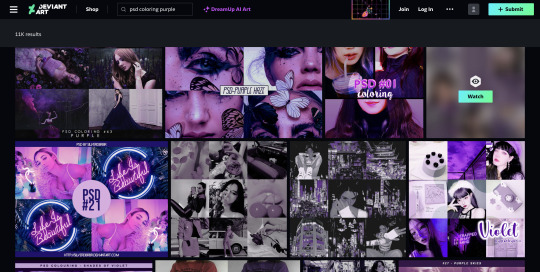
where can i get psds?
right here on tumblr! check your favorite edit blogs, as they may have posted some, or search ‘free psd’ or ‘psd coloring’ in the search function. tumblr doesn’t allow you to upload psds directly, so you’ll be redirected to a site outside tumblr. probably either deviantart, google drive, or ko-fi, all of which are easy to use. deviantart requires you to have an account to download anything (luckily, an account is free!) and ko-fi may require you to pay money. google drive doesn’t have a search function in and of itself, but it’s extremely easy to download off of.
also, shameless self plug, but i post psds right here on canarysage! i personally use deviantart, but again, an account is free. if send me an ask, i may be able to provide you with a google drive link, if you ask really nicely (。•̀ᴗ-)✧
and of course if you don’t want to use someone else’s psd, you can always make your own.
how do i use a psd?
once you have a psd of your choice downloaded, open up photopea! or photoshop, if you’re rich like that.
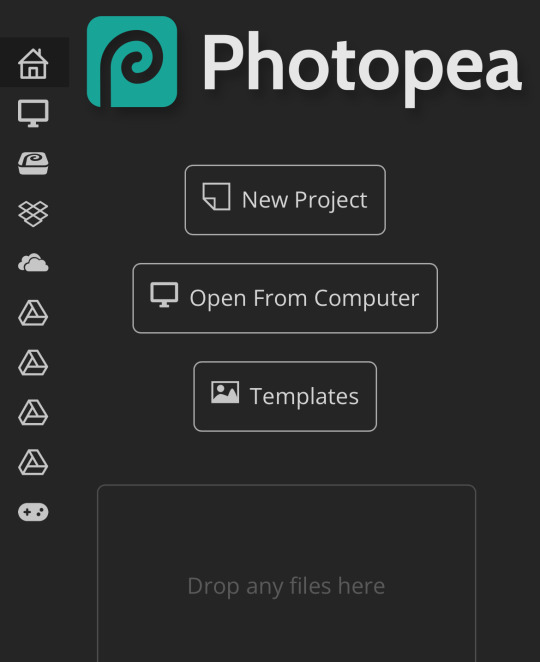
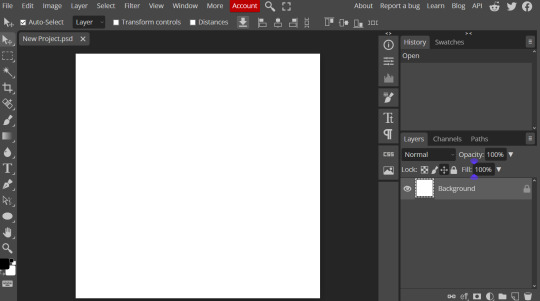
once you open photopea, click this here button right in the middle of the screen, the one that says “open from computer”
from there, go to choose files and open up your psd! depending on from whom you got it, psds will look different once you open them. i’m using one of my own as an example.

you can see there’s two layers in my psd, a folder, and an image. the image is just for me so i know which psd this is once i save it—i like to save all my psds with images of real people so i know how it looks on moodboards or stimboards.
the folder is the important part here, that’s where the adjustment layers are contained. to transfer a psd, you can either go to file > new
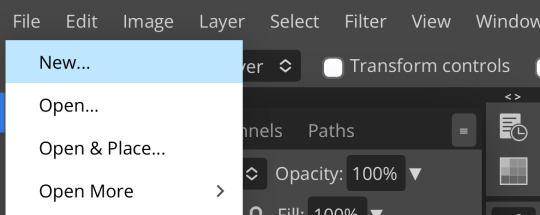
which lets you start an entirely new project, or you can open an image using file > open
which will give you the image you selected.
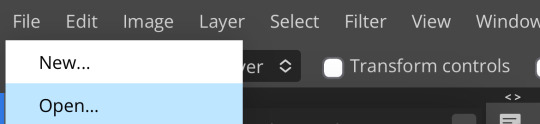
as an aside, if you’re opening a psd and you already have a project in progress, make sure to click file > open and not file > open & place, as open & place won’t give you the adjustment layers.
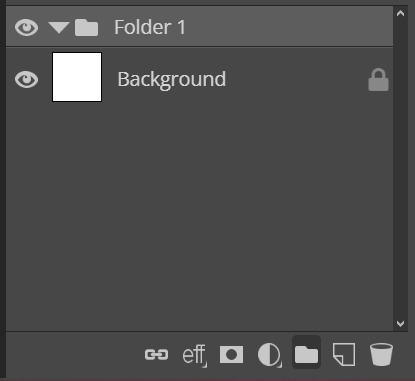
then to move the folder, go to layer > duplicate layer into while having selected the folder (just tap on it, that will make it a lighter gray to show it’s selected) and duplicate the folder into whatever your image is
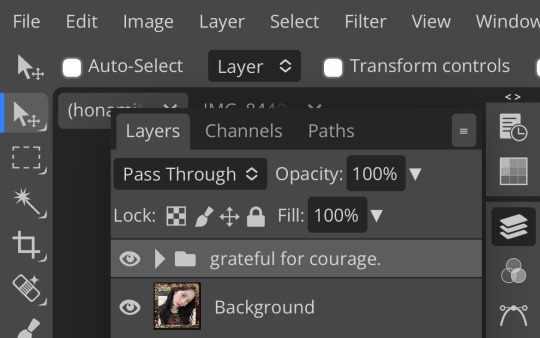

i’m moving mine to a random image of honami i found which is why it’s named like that. once the folder’s duplicated into your project, go over and take a look!
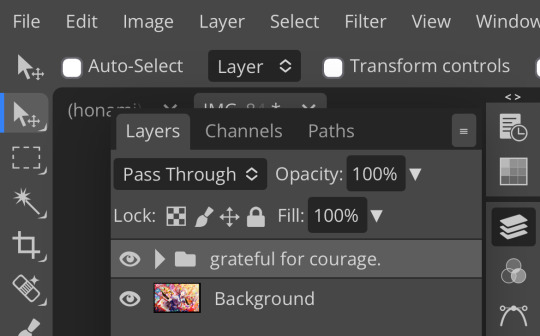
you should now see something like this! ensure that the folder is on top, as otherwise the adjustment layers won’t work.
here’s the difference between the unfiltered image and the image with my psd!
to save images in photopea (like i did just now) go to file > export as > (your preferred file format)
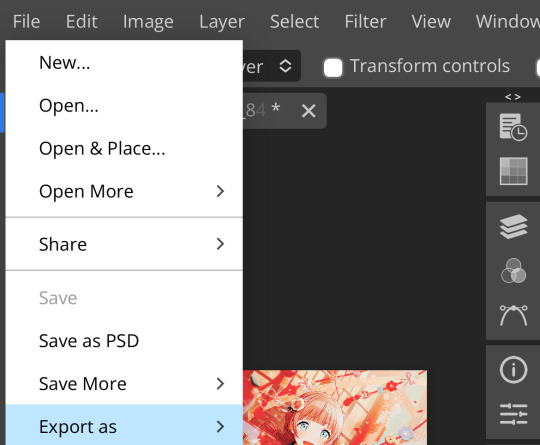
which will pull up something like this
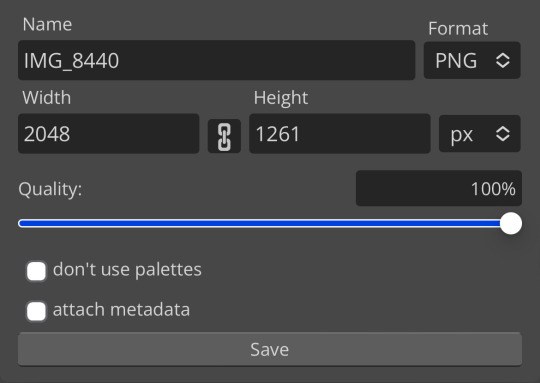
i recommend either saving as a png (for still images) or as a gif (for… gifs) but that’s up to you! in order to save a psd, go to file > save as psd! that will save your project to your device
bear in mind that tumblr doesn’t accept psds as a file format, so if you’re going to post an edit, you have to save it as something else. also, don’t just save other people’s psds and claim them as your own—psds take a lot of time, effort, and skill, like any other art form.
can i make my own psds?
100% yes! i can’t give you a step-by-step process unfortunately, as there really is no one way to make psds. i recommend familiarizing yourself with adjustment layer and seeing what works.
shameless self plug again, but you can check out my other posts in this series to find out about some of the adjustment layers!
basically, i like to think of adjustment layers as a few different categories. light/darkness adjustments (ie: brightness/contrast, levels, curves, exposure, black & white, and threshold to a certain extent.) saturation adjustments (vibrance, hue/saturation.) color adjustments (hue/saturation, color balance, photo filter, channel mixer, selective color, gradient map depending on how you use it, and replace color.) and also, miscellaneous (posterize, which gives your images a pop-art crunchy kind of effect, invert, which… inverts your colors, and color lookup, which is a set of filters unto itself)
how you utilize adjustment layers is up to you! i personally like to use a variety and see what happens, my personal favorites being channel mixer, photo filter, and hue/saturation. you can also utilize blending modes (shameless self plug again,) or opacity.
if you have no idea where to start, you can look at other people’s psds to see their process. don’t copy or steal, for obvious reasons, but you can toggle layers on and off and see what happens and what each layer does.
making psds isn’t as intimidating as it sounds, you just have to start a project and start creating! it gets really fun once you get the hang of it (*'▽'*)
i don’t edit with photoshop or photopea, can i still use psds?
short answer: nope!
long answer: if you want use psds but you’re super used to ibis paint or whatever you currently use, have no fear! you don’t have to switch all your editing to photopea. you can make your main project in ibis or whatever as normal, then upload it to photopea and add a psd.
you can also make perfectly fine filters in ibis paint in your own right, with enough tweaking. there’s also apps such as polarr and picsart which come with filters, but i’ve never used them so i’m unable to vouch for how they work.
do i need to use psds when editing?
nope! psds are 100% optional. they’re a style like anything else—some people prefer them and some people don’t. it’s up to you.
did you genuinely write 1178 words answering questions no one asked?
yep.
what if i have a question you didn’t answer?
feel free to shoot me an ask! i don’t mind explaining further, and i promise i don’t bite. as with anything, this is just meant to explain to anyone who needs assistance—photopea for dummies by a dummy, after all. we can be confused together!
are you done now?
i am! congratulations for reading this far!
yours truly, canarysage
230 notes
·
View notes
Note
hi!! do you mind sharing how u make ur graphics into gifs?? /nf
(I use photopea and whenever I use 2 gifs at once it plays it one at a time)
I love ur graphics sm!!! ^_^


Gratitude from the stars and beyond for your words of kindness .. The tutorial is under cut, do please click "Keep Reading"


In these two screenshots - the first one is the main GIF which we will be using, the second GIF is the one we want to merge with. Let us begin by dragging our second gif into the main canvas, or alternatively you can duplicate it into your tab.

Now that you have placed your GIF into your main canvas, it's optional to move it but always encouraged - of course, do know that you should only move them in a separate canvas as it may lag if there are multiple of other layers.

Select both/all of your GIF folders and click Layer > Animation > Merge. There will be a tab popping up on the top, warning you about the amount of layers that will be duplicated

Now why does this matter at all? Your canvas size not only affects how much MB/KB it'll take but also the amount of FPS and timeline. The more frames = more MB/KB.

And now your GIFs are now merged! And something to note, do not place all of your GIFs into a single folder, if you do - something like this will pop up.

You have to first merge all your GIFs and later on placed them in a folder if you wish to overlay them with your effects ( Like I did ) Also, when exporting them - if your canvas size is huge, for instance; 1920x1080, something like this would pop up:

If you desire to maintain the canvas, click OK and resize it later on. ( Mind you that it may take long for it to export to that size depending on how huge it would be ) Alternatively, you can also lower the quality in the settings here:
( Ensure that the percentage is not too low! Otherwise it could get quite noisy like my previous works as you can see.. )

And here is my result ;

I hope this would prove to be helpful to you, do please feel free to inquire for anything else - I'd be delighted to assist.

#𝐕。꒱ ⠀Reservoir⠀ ֢𓏼♡#editblr#rentryblr#rentry frame#rentry resources#rentry decor#rentry stuff#rentry help#rentry gif#photopeablr
35 notes
·
View notes
Note
how did u get into graphic design? its always been an interest of mine but my lack of access to photoshop has made it sort of fizzle like i have no clue how to actually learn abt it in an applicable way u_u
when I was in high school and I was deciding what to major in college I wanted to do art but it had been drilled into my head that artists dont make money and its a useless degree so I chose graphic design because its still kind of art but more practical and involves more hireable skills lol
I've been fortunate enough to have access to the adobe suite first through my school and now through my employer, but if you want to use photoshop try Photopea! it's a free dupe of photoshop you can use in your browser. I haven't actually used it much myself, but there's a million photoshop crash course/beginners guide videos on youtube that should apply to photopea as well. there's also a competing suite of products called Affinity that includes analogs to photoshop, illustrator, and indesign. it costs money but unlike adobe it's one time purchase so you might consider it a worthwhile investment. I haven't really used that one much either though so your mileage may vary
the textbook we used for my history of gd class was Graphic Design: A New History by Stephen J. Eskilson and I found it sooo fascinating. if you can get your hands on a copy or a pdf I def recommend it because it's really informative about the various styles and movements that have influenced graphic design with a lot of cool examples.
my fave gd youtube channels are Linus Boman and Elliotisacoolguy. linus does more analytical videos breaking down designs in popular culture and elliot does increasingly ridiculous design challenges. there are also a lot of websites that generate random design prompts if you need ideas for something to work on
lastly a few years ago I compiled a bunch of websites that have free gd assets like fonts, photos, icons, photoshop mockups etc so everyone have fun with these !!!
34 notes
·
View notes
Note
RENTRY GIF TUTTT😭😭

YOU GOT IT !!! Since I don't which one you're referring to either the crossfade one or the ones with the GIF in the frames, I'll give you a two in one special ! [ Crossfade tut will be another post ]
First off, you will need an advanced photo editor, I highly recommend Photopea with how much similar it is to Photoshop, but free !
Now, heads up, I prefer to use Photopea on PC as it's easier to navigate. But, if you can use it on your chosen device, then that's great!

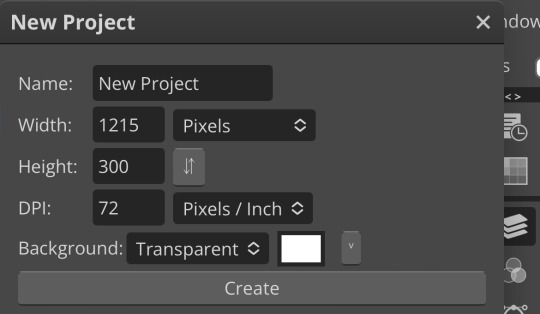
This is easy, start off with a blank canvas of any size !
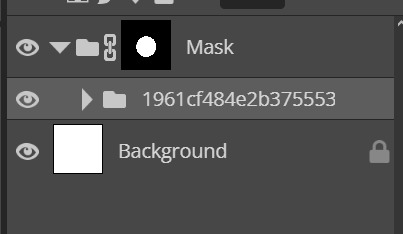
Then create a folder for the mask [ aka. the shape ]
While the folder layer is highlighted, create a clipping mask

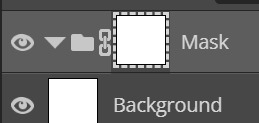
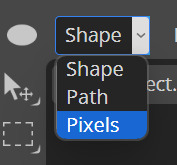
If you're making a simple mask like the example, please remember to make sure the shape is a pixel so it doesn't become another layer
This is near the top ! Now go make that mask ! ^^

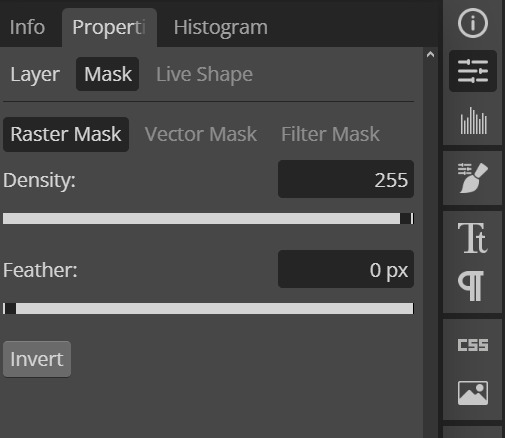
On the side click on the sliders icon and then properties, here we have to invert it, so the shape will show the gif. To quote my tutors " Black conceals, white reveals "
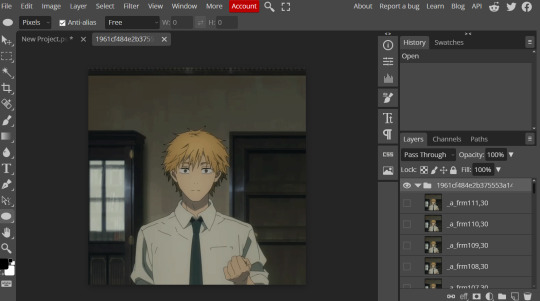
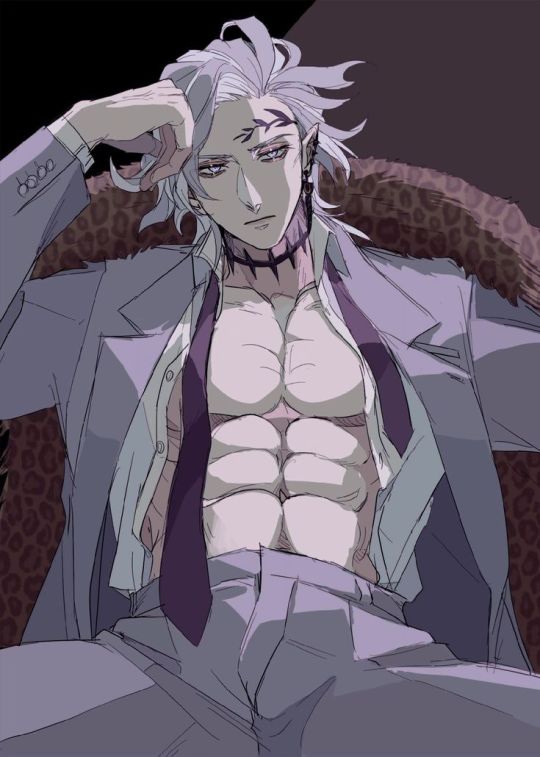
Now it's time for the GIF part ! Open your gif as a new project, say hi to Denji :D
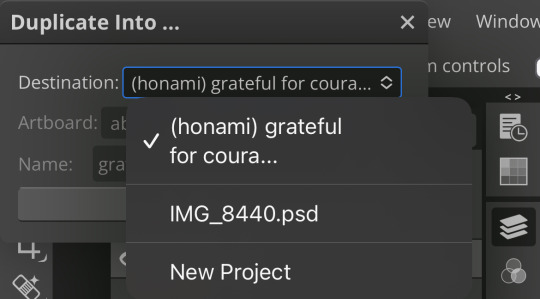
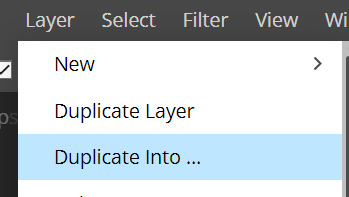
At the top, click on Layer and ' Duplicate into '
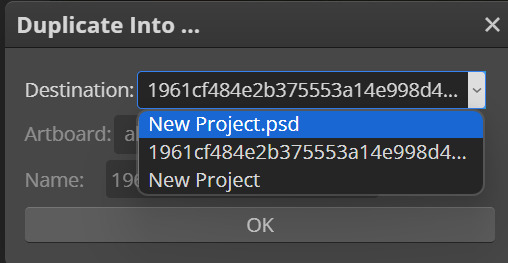
This window will pop up and make sure the destination is on the canvas where your shape is [ for me it's the file that ends in .psd ]
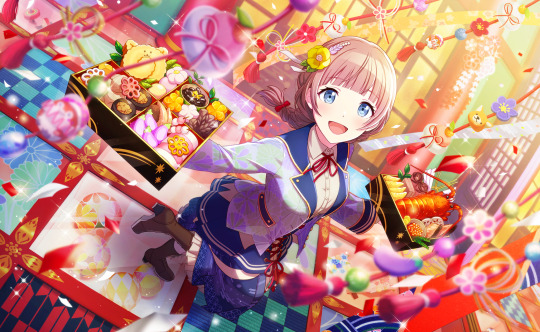
Boom ! There's Denji on the canvas with the mask ! :3

Drag the folder that has all the frames of the GIF into the mask folder
[ I collapsed the GIF folder so the layers are neater ]
Wowww, look at that ! Pat yourself on the back [ Adjust if needed, e.g. size and position ]

To save it, go to the top and click 'File', 'Export as' and then 'GIF'
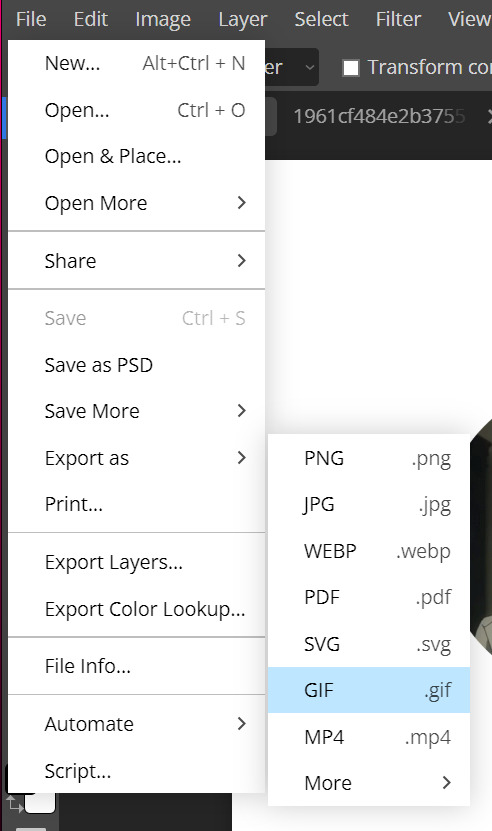
Another window will pop up and it will give you a preview of what your work is gonna be and the GIF should be moving !
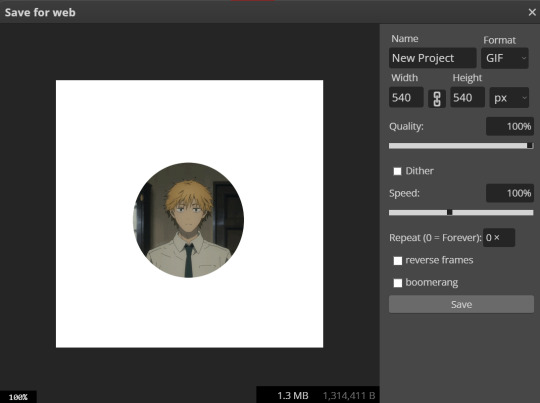
If you have any questions, feel free to ask me ! I am happy to help <3
#( 🍓 ) request . . .#I hope this helps !!!#Go crazy anon#tutorial#rentry#rentry gif#sentry#sentry graphics#rentry resources
57 notes
·
View notes
Note
How did you find/make your aesthetic profiles of the gods in your book?
i was gonna link you to my guide that i posted a long time ago, but i realized how old it was and that it was lacking some details...... 💀
so i'm gonna do a new one that hopefully helps a bit more!!!!
websites used: pinterest, tumblr, canva, deviantart, & photopea!
first off, i find the pictures from sites like pinterest and tumblr. the color schemes of each pic need to be somewhat close to each other (but it doesn't always have to be like that depending on the psd you'll be using later on)
i'm gonna use hades for example. this is the first pic i find of him lol:
the most dominant color here is purple, with some tinted ivory from his skin, and brown in the background, so the next few pics i find should have somewhat similar colors too, or they should at least be purple cuz it's the most frequent color here
here are the next few photos i found:
they don't look perfect, but we can always individually tweak the colors and shades later
i download the photos and then i go to canva. the site provides you with templates that you can use but since i only got three pics, i chose the "email header" option.
(for those wondering which template i used for the bigger ones you see in the first chapter with percy and the yans, i don't use a template. i just use "custom size" and type in "800 x 800 px")
go to the sidebar, click "elements" then scroll down for "grids" and then find the one with 3 parts. i reduced the spacing between the photos to zero.
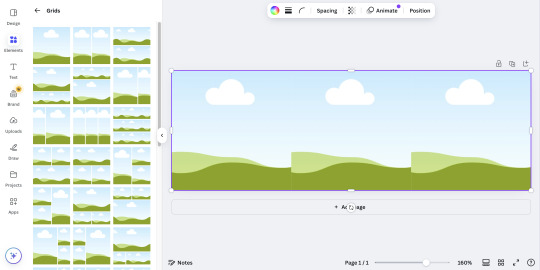
then i upload all 3 photos and put them in the squares. because they're not exactly the closest in color schemes, i individually edit them until i'm satisfied.
canva provides filters that you can use, but i always find it best to toggle with the adjustments like brightness, contrast, saturation, etc.
here's what i ended up with so far:

again, not exactly perfect, but whatever
now that i'm done, i go up to "share", select "download", and increase the size by 1.5 (that's 900 x 300 px). idk why, but for some reason, the quality looks better when you enlarge the size before download.
once that's done, i download the whole thing.
(keep the file type as "png" btw)
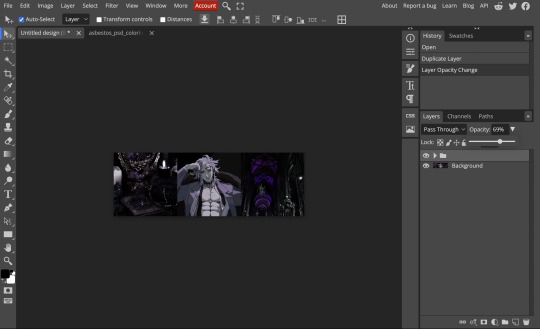
then i go over to photopea and upload my graphic. it'll look like this:
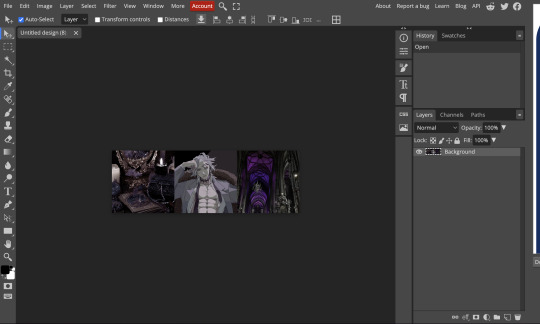
in another tab (not the photopea tab, but like... the actual tab of whatever browser ur using), i can find a bunch of psd colorings in deviantart. since i want one that's specifically purple, i just search up "psd coloring purple"
and i get all this:
i pick whichever one i think might look best and download it.
then i head back to photopea.
at the top, click on "file" and the new psd you just downloaded, and it'll show up in a new tab.
stay on that tab, go up to "layer" -> "layer into" and select the first tab where the graphic's at. this applies the psd coloring onto ur graphic.
over at the side, there's something called "opacity: ___%" you can toggle with that if the psd is too overwhelming, so you can lessen it by dragging it down if you need to.
once you're satisfied, click "file" -> "export as" -> "png" and it'll be downloaded.
and that's pretty much it!
THIS CAN BE A LONG PROCESS THOUGH! literally in every step, you might end up going back and changing stuff.
for example, i do not like the right photo that i selected. the purple is too bold compared to the purple shades in the left and center photo. i'd probably go aaaalll the way back to the earlier steps by returning to pinterest to find a better photo
or maybe you don't like the psd you picked. if that's the case, delete the photopea tabs and redo the above steps with a different psd.
it can be a bit annoying if ur the perfectionist type and have to go back again and again 😅
but anyway, psd coloring's are great. i'm looking back at the og versions of all the graphics i made (og as in, before i applied the psd colorings) and they're soooo different from the finished pieces
21 notes
·
View notes
Note
your graphics r freaking adorable!! how do you do the gif thing with the chibi figurines it is so cuteee


❥ thank you so much dear ! here is a quick tutorial on how i did that , i hope it isn't terribly confusing as instructions aren't one of my strengths ⋆。˚

[PT: "thank you so much dear! here is a quick tutorial on how i did that, i hope it isn't terribly confusing as instructions aren'y one of my strengths" End PT]
resources: photopea, ezgif

first, you'll want two (or more) images of whatever you want to switch back and forth, as shown above. i do this in photopea, but whatever editing software you use works too.

next, go to ezgif and select the link to switch to manually ordered upload. there, upload the files.
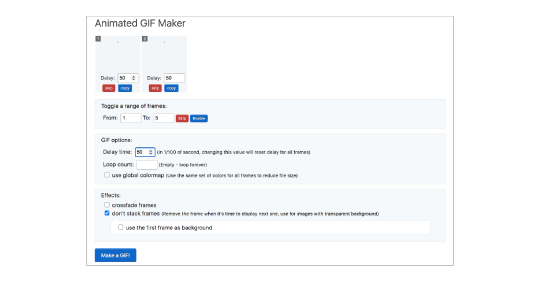
set your delay time to whatever you please, i chose a delay time of 50. make sure to also select "don't stack frames." from there, click the button to make your gif and you should be able to save it directly there. (i would show that but my computer doesn't load images properly sadly)
i hope all i said came out clear and that it ended up working for you, if you need any more help i'd gladly assist. again, thank you so much for the message!
90 notes
·
View notes
Text
Cas and Ripley during the musical chairs game, drawing by me (for art trade with @rjschoicesstuff)

So this is my first time doing an art trade! And I definitely quite enjoyed it :D
I drew a scene of Ripley and Cas during the musical chairs game of book 1 chapter 1, as per the details of his headcanons for the scene. I really liked the mental image of Cas circling Rippy like she's prey during the game, so I drew that haha. I also used this piece (also linked in the headcanons post) as a reference.
Background is obviously from the Choices assets.
My art tag: @lover-also-fighter-also / @lilyoffandoms / @choicesficwriterscreations
WIP/Process Pieces below!
Left: Initial pencil drawing on paper. Right: Cropped drawing with colors, lighting adjustments, and position adjustments for a few details done in Photoshop/Photopea.
Bottom: Flat color version because I liked how it looked


#id fanart#cadybear draws#choices fanart#cadybear's fanart#choices game#choices#choices stories we play fandom#choices stories you play#choices stories we play#id#immortal desires#choices id#choices immortal desires#id mc#immortal desires mc#pb choices#choices app#id cas#immortal desires cas#cas harlow#cassius harlow#cassie harlow#art trade
20 notes
·
View notes