#cross-browser
Explore tagged Tumblr posts
Visit Tumblr Blog
Explore Tumblr blogs with no restrictions, modern design and the best experience.
Last Seen Tumblr Blogs


Fun Fact
In February 2021, Tumblr had 518.6 million blog accounts.
Text
Mailler – The Ultimate Free Bootstrap 5 Business Website Template You Can’t Miss
Why Every Modern Business Needs a Powerful Website Template If you’ve ever struggled with creating a professional online presence for your business without breaking the bank, you’re not alone. From confusing layouts to poor mobile responsiveness, many templates promise results but fall short. That’s where Mailler – Free Bootstrap 5 Business & Corporate Website Template comes in. In a world where…
#Bootstrap 5 templates#Burger Menu#business website#Call to action button#Carousel#Clean#Contact form#corporate design#cross-browser#css3 landing page#developer-friendly HTML5#Dropdown#Email Subscription#free template#Google Maps#Hero Header#HTML5 responsive template#Multipage#Multipurpose#On hover effect#SCSS#Sticky Navigation Bar
0 notes
Text
Compiling CSS With Vite and Lightning CSS
New Post has been published on https://thedigitalinsider.com/compiling-css-with-vite-and-lightning-css/
Compiling CSS With Vite and Lightning CSS
Suppose you follow CSS feature development as closely as we do here at CSS-Tricks. In that case, you may be like me and eager to use many of these amazing tools but find browser support sometimes lagging behind what might be considered “modern” CSS (whatever that means).
Even if browser vendors all have a certain feature released, users might not have the latest versions!
We can certainly plan for this a number of ways:
feature detection with @supports
progressively enhanced designs
polyfills
For even extra help, we turn to build tools. Chances are, you’re already using some sort of build tool in your projects today. CSS developers are most likely familiar with CSS pre-processors (such as Sass or Less), but if you don’t know, these are tools capable of compiling many CSS files into one stylesheet. CSS pre-processors help make organizing CSS a lot easier, as you can move parts of CSS into related folders and import things as needed.
Pre-processors do not just provide organizational superpowers, though. Sass gave us a crazy list of features to work with, including:
extends
functions
loops
mixins
nesting
variables
…more, probably!
For a while, this big feature set provided a means of filling gaps missing from CSS, making Sass (or whatever preprocessor you fancy) feel like a necessity when starting a new project. CSS has evolved a lot since the release of Sass — we have so many of those features in CSS today — so it doesn’t quite feel that way anymore, especially now that we have native CSS nesting and custom properties.
Along with CSS pre-processors, there’s also the concept of post-processing. This type of tool usually helps transform compiled CSS in different ways, like auto-prefixing properties for different browser vendors, code minification, and more. PostCSS is the big one here, giving you tons of ways to manipulate and optimize your code, another step in the build pipeline.
In many implementations I’ve seen, the build pipeline typically runs roughly like this:
Generate static assets
Build application files
Bundle for deployment
CSS is usually handled in that first part, which includes running CSS pre- and post-processors (though post-processing might also happen after Step 2). As mentioned, the continued evolution of CSS makes it less necessary for a tool such as Sass, so we might have an opportunity to save some time.
Vite for CSS
Awarded “Most Adopted Technology” and “Most Loved Library” from the State of JavaScript 2024 survey, Vite certainly seems to be one of the more popular build tools available. Vite is mainly used to build reactive JavaScript front-end frameworks, such as Angular, React, Svelte, and Vue (made by the same developer, of course). As the name implies, Vite is crazy fast and can be as simple or complex as you need it, and has become one of my favorite tools to work with.
Vite is mostly thought of as a JavaScript tool for JavaScript projects, but you can use it without writing any JavaScript at all. Vite works with Sass, though you still need to install Sass as a dependency to include it in the build pipeline. On the other hand, Vite also automatically supports compiling CSS with no extra steps. We can organize our CSS code how we see fit, with no or very minimal configuration necessary. Let’s check that out.
We will be using Node and npm to install Node packages, like Vite, as well as commands to run and build the project. If you do not have node or npm installed, please check out the download page on their website.
Navigate a terminal to a safe place to create a new project, then run:
npm create vite@latest
The command line interface will ask a few questions, you can keep it as simple as possible by choosing Vanilla and JavaScript which will provide you with a starter template including some no-frameworks-attached HTML, CSS, and JavaScript files to help get you started.
Before running other commands, open the folder in your IDE (integrated development environment, such as VSCode) of choice so that we can inspect the project files and folders.
If you would like to follow along with me, delete the following files that are unnecessary for demonstration:
assets/
public/
src/
.gitignore
We should only have the following files left in out project folder:
index.html
package.json
Let’s also replace the contents of index.html with an empty HTML template:
<!doctype html> <html lang="en"> <head> <meta charset="UTF-8" /> <meta name="viewport" content="width=device-width, initial-scale=1.0" /> <title>CSS Only Vite Project</title> </head> <body> <!-- empty for now --> </body> </html>
One last piece to set up is Vite’s dependencies, so let’s run the npm installation command:
npm install
A short sequence will occur in the terminal. Then we’ll see a new folder called node_modules/ and a package-lock.json file added in our file viewer.
node_modules is used to house all package files installed through node package manager, and allows us to import and use installed packages throughout our applications.
package-lock.json is a file usually used to make sure a development team is all using the same versions of packages and dependencies.
We most likely won’t need to touch these things, but they are necessary for Node and Vite to process our code during the build. Inside the project’s root folder, we can create a styles/ folder to contain the CSS we will write. Let’s create one file to begin with, main.css, which we can use to test out Vite.
├── public/ ├── styles/ | └── main.css └──index.html
In our index.html file, inside the <head> section, we can include a <link> tag pointing to the CSS file:
<head> <meta charset="UTF-8" /> <link rel="icon" type="image/svg+xml" href="/vite.svg" /> <meta name="viewport" content="width=device-width, initial-scale=1.0" /> <title>CSS Only Vite Project</title> <!-- Main CSS --> <link rel="stylesheet" href="styles/main.css"> </head>
Let’s add a bit of CSS to main.css:
body background: green;
It’s not much, but it’s all we’ll need at the moment! In our terminal, we can now run the Vite build command using npm:
npm run build
With everything linked up properly, Vite will build things based on what is available within the index.html file, including our linked CSS files. The build will be very fast, and you’ll be returned to your terminal prompt.
Vite will provide a brief report, showcasing the file sizes of the compiled project.
The newly generated dist/ folder is Vite’s default output directory, which we can open and see our processed files. Checking out assets/index.css (the filename will include a unique hash for cache busting), and you’ll see the code we wrote, minified here.
Now that we know how to make Vite aware of our CSS, we will probably want to start writing more CSS for it to compile.
As quick as Vite is with our code, constantly re-running the build command would still get very tedious. Luckily, Vite provides its own development server, which includes a live environment with hot module reloading, making changes appear instantly in the browser. We can start the Vite development server by running the following terminal command:
npm run dev
Vite uses the default network port 5173 for the development server. Opening the http://localhost:5137/ address in your browser will display a blank screen with a green background.
Adding any HTML to the index.html or CSS to main.css, Vite will reload the page to display changes. To stop the development server, use the keyboard shortcut CTRL+C or close the terminal to kill the process.
At this point, you pretty much know all you need to know about how to compile CSS files with Vite. Any CSS file you link up will be included in the built file.
Organizing CSS into Cascade Layers
One of the items on my 2025 CSS Wishlist is the ability to apply a cascade layer to a��link tag. To me, this might be helpful to organize CSS in a meaningful ways, as well as fine control over the cascade, with the benefits cascade layers provide. Unfortunately, this is a rather difficult ask when considering the way browsers paint styles in the viewport. This type of functionality is being discussed between the CSS Working Group and TAG, but it’s unclear if it’ll move forward.
With Vite as our build tool, we can replicate the concept as a way to organize our built CSS. Inside the main.css file, let’s add the @layer at-rule to set the cascade order of our layers. I’ll use a couple of layers here for this demo, but feel free to customize this setup to your needs.
/* styles/main.css */ @layer reset, layouts;
This is all we’ll need inside our main.css, let’s create another file for our reset. I’m a fan of my friend Mayank‘s modern CSS reset, which is available as a Node package. We can install the reset by running the following terminal command:
npm install @acab/reset.css
Now, we can import Mayank’s reset into our newly created reset.css file, as a cascade layer:
/* styles/reset.css */ @import '@acab/reset.css' layer(reset);
If there are any other reset layer stylings we want to include, we can open up another @layer reset block inside this file as well.
/* styles/reset.css */ @import '@acab/reset.css' layer(reset); @layer reset /* custom reset styles */
This @import statement is used to pull packages from the node_modules folder. This folder is not generally available in the built, public version of a website or application, so referencing this might cause problems if not handled properly.
Now that we have two files (main.css and reset.css), let’s link them up in our index.html file. Inside the <head> tag, let’s add them after <title>:
<head> <meta charset="UTF-8" /> <link rel="icon" type="image/svg+xml" href="/vite.svg" /> <meta name="viewport" content="width=device-width, initial-scale=1.0" /> <title>CSS Only Vite Project</title> <link rel="stylesheet" href="styles/main.css"> <link rel="stylesheet" href="styles/reset.css"> </head>
The idea here is we can add each CSS file, in the order we need them parsed. In this case, I’m planning to pull in each file named after the cascade layers setup in the main.css file. This may not work for every setup, but it is a helpful way to keep in mind the precedence of how cascade layers affect computed styles when rendered in a browser, as well as grouping similarly relevant files.
Since we’re in the index.html file, we’ll add a third CSS <link> for styles/layouts.css.
<head> <meta charset="UTF-8" /> <link rel="icon" type="image/svg+xml" href="/vite.svg" /> <meta name="viewport" content="width=device-width, initial-scale=1.0" /> <title>CSS Only Vite Project</title> <link rel="stylesheet" href="styles/main.css"> <link rel="stylesheet" href="styles/reset.css"> <link rel="stylesheet" href="styles/layouts.css"> </head>
Create the styles/layouts.css file with the new @layer layouts declaration block, where we can add layout-specific stylings.
/* styles/layouts.css */ @layer layouts /* layouts styles */
For some quick, easy, and awesome CSS snippets, I tend to refer to Stephanie Eckles‘ SmolCSS project. Let’s grab the “Smol intrinsic container” code and include it within the layouts cascade layer:
/* styles/layouts.css */ @layer layouts .smol-container width: min(100% - 3rem, var(--container-max, 60ch)); margin-inline: auto;
This powerful little, two-line container uses the CSS min() function to provide a responsive width, with margin-inline: auto; set to horizontally center itself and contain its child elements. We can also dynamically adjust the width using the --container-max custom property.
Now if we re-run the build command npm run build and check the dist/ folder, our compiled CSS file should contain:
Our cascade layer declarations from main.css
Mayank’s CSS reset fully imported from reset.css
The .smol-container class added from layouts.csss
As you can see, we can get quite far with Vite as our build tool without writing any JavaScript. However, if we choose to, we can extend our build’s capabilities even further by writing just a little bit of JavaScript.
Post-processing with LightningCSS
Lightning CSS is a CSS parser and post-processing tool that has a lot of nice features baked into it to help with cross-compatibility among browsers and browser versions. Lightning CSS can transform a lot of modern CSS into backward-compatible styles for you.
We can install Lightning CSS in our project with npm:
npm install --save-dev lightningcss
The --save-dev flag means the package will be installed as a development dependency, as it won’t be included with our built project. We can include it within our Vite build process, but first, we will need to write a tiny bit of JavaScript, a configuration file for Vite. Create a new file called: vite.config.mjs and inside add the following code:
// vite.config.mjs export default css: transformer: 'lightningcss' , build: cssMinify: 'lightningcss' ;
Vite will now use LightningCSS to transform and minify CSS files. Now, let’s give it a test run using an oklch color. Inside main.css let’s add the following code:
/* main.css */ body background-color: oklch(51.98% 0.1768 142.5);
Then re-running the Vite build command, we can see the background-color property added in the compiled CSS:
/* dist/index.css */ body background-color: green; background-color: color(display-p3 0.216141 0.494224 0.131781); background-color: lab(46.2829% -47.5413 48.5542);
Lightning CSS converts the color white providing fallbacks available for browsers which might not support newer color types. Following the Lightning CSS documentation for using it with Vite, we can also specify browser versions to target by installing the browserslist package.
Browserslist will give us a way to specify browsers by matching certain conditions (try it out online!)
npm install -D browserslist
Inside our vite.config.mjs file, we can configure Lightning CSS further. Let’s import the browserslist package into the Vite configuration, as well as a module from the Lightning CSS package to help us use browserlist in our config:
// vite.config.mjs import browserslist from 'browserslist'; import browserslistToTargets from 'lightningcss';
We can add configuration settings for lightningcss, containing the browser targets based on specified browser versions to Vite’s css configuration:
// vite.config.mjs import browserslist from 'browserslist'; import browserslistToTargets from 'lightningcss'; export default css: transformer: 'lightningcss', lightningcss: targets: browserslistToTargets(browserslist('>= 0.25%')), , build: cssMinify: 'lightningcss' ;
There are lots of ways to extend Lightning CSS with Vite, such as enabling specific features, excluding features we won’t need, or writing our own custom transforms.
// vite.config.mjs import browserslist from 'browserslist'; import browserslistToTargets, Features from 'lightningcss'; export default css: transformer: 'lightningcss', lightningcss: targets: browserslistToTargets(browserslist('>= 0.25%')), // Including `light-dark()` and `colors()` functions include: Features.LightDark , build: cssMinify: 'lightningcss' ;
For a full list of the Lightning CSS features, check out their documentation on feature flags.
Is any of this necessary?
Reading through all this, you may be asking yourself if all of this is really necessary. The answer: absolutely not! But I think you can see the benefits of having access to partialized files that we can compile into unified stylesheets.
I doubt I’d go to these lengths for smaller projects, however, if building something with more complexity, such as a design system, I might reach for these tools for organizing code, cross-browser compatibility, and thoroughly optimizing compiled CSS.
#2024#2025#ADD#amazing#Angular#applications#Articles#assets#background#browser#Building#bundle#cache#cascade#cascade layers#code#Color#colors#command#command line#complexity#container#content#course#cross-browser#CSS#CSS Snippets#css-tricks#custom properties#Dark
0 notes
Text

its been a very productive day!
#art#cross stitch#offline dinosaur web browser game#i got done THREE cross stitch patterns between yesterday and today#unfortunately i feel that tomorrow i cant cross stitch and must work on my PRDS piece instead 😔#but then its dragon d20 pattern times
736 notes
·
View notes
Text


club penguin easter eggs (2006-2009)
#i only celebrate easter bc of the candy lol#but easter egg hunt stuff in things like club penguin and animal crossing genuinely make me feel happy idk why#club penguin#rocketsnail games#pc#browser games#world wide web#2006#2007#2008#2009#nostalgia#nostalgiacore#shantien uploads
150 notes
·
View notes
Text
83 notes
·
View notes
Text
You know, I've seen picrew chains, how about animal crossing chains? Take a cool picture of your animal crossing character and post it on here (bonus points if you make a cool scene w/ the photo)

#firefox nightly says#gimmick blog#corpo blog#corporation blog#firefox nightly#firefox#gimmick account#web browser#animal crossing#acnh community#acnh
30 notes
·
View notes
Text
has anybody made an actual competitor to google docs? i mean a cross-platform word processor with real-time remote collaboration
#look i made something#i would make one myself but#it kinda requires like. money to operate#google docs itself is just. kinda janky as word processors go#but the cross platform and real time remote collaboration#are the only reason i use it#and afaik NOBODY else has that#i would accept browser based as long as it's functional and not janky on mobile
2 notes
·
View notes
Text

Our hoes make every garden dream possible, they’re the first step to a field full of crops and cozy days ahead!
#upon the meadow#petsite#indie game#art#gamedev#harvest moon#stardew#stardew valley#virtualpetsite#virtual petsite#virtual pet#browser game#game#rpg#indiedev#cozy game#pet sim#pet site#animal crossing#human avatars#neopets#subeta#santae
6 notes
·
View notes
Text
i've been contemplating how you could even create an anonymous kinkmeme in the post LJ world. I used to co-mod one back in 2012 but that was late stage LJ era, and saw in the birth of moralising trolldom, a definite besieging sensibility going on then.
For writers, an AO3 collection where writers select the collection, and it forces the anon.
For prompters, a mod-written placeholder "work" within the collection under which people can anon-comment with a prompt? Except that contravenes AO3 policy (all works must be works, not containers). And everyone has to leave an email when anon'd, IIRC, which is a minor barrier to use.
Collection owner becomes moderator and standardises everyone's tags within the collection for navigability? Collection owner leaves works as they are, but bookmarks every work (similar to the delicious days on LJ) using standardised tags?
It's like everything could work easily enough on AO3 except for the prompt-leaving.
Could link it to a tumblr container which is just asks; send an anon-prompt via ask and the mod sorts/tags for searching; AO3 collection becomes the posting space, and the tumblr then also becomes the distribution method because the mod can then reblog the original ask with the link to the AO3 anon story? I mean that's extra effort, but...eh difficult.
#all modding takes effort but they'll fail if too many barriers to access by users/browsers#anon kinkmemes are some of the safest spaces in fandom IMO#crossing platforms doesn't help but fandom did effectively use delicious-lj crossplatforming#so possibly ao3-tumblr isn't unfeasible#personal
4 notes
·
View notes
Text
fighting for my life on microsoft 365
#because apparently it's no longer free for students in my school. i mean it is. on the browser. but not on the apps.#but i was able to use the apps just now somehow? but at the same time it wasn't syncing cross platforms and it was pissing me off#<- pissing me off for no good reason because the document i was doing rn was not all too serious and due next week but#i am an insane person and finished it already so i wanted to upload it and it was lowkey a nightmare finding the updated version of the doc#and thus... the new semester begins! i didn't go today bc i don't have in person classes on tuesdays but i will go tomorrow#eek! wish me luck guys
6 notes
·
View notes
Text
Best C# Testing Frameworks In 2024 - Technology Org
New Post has been published on https://thedigitalinsider.com/best-c-testing-frameworks-in-2024-technology-org/
Best C# Testing Frameworks In 2024 - Technology Org
Automation testing frameworks are essential in ensuring application performance and quality. C# testing frameworks offer multiple features to meet various testing requirements. In this blog, we will explore the top C# testing frameworks of 2024.
Writing software code. Image credit: pxhere.com, CC0 Public Domain
C# testing Frameworks – Overview
The C# testing framework is a set of tools and an API that help construct, run, and manage the automation testing process in C# applications. Theses framework presents the developers with the systematic method to design and architect test suites so that the software works correctly and satisfies the given requirements.
C# testing frameworks typically offer features such as
Test case organization: Allow developers to group tests into logical units such as test classes or test suites for better organization and management.
Assertions: Build functions to state that the code has followed the desired sequence for the code under automation testing to make a program behave logically.
Setup and teardown: Support setup and teardown actions to correctly initialize the test environment before running tests and consequently clean up.
Test discovery and execution: Automatically execute and test the code and provide responses about test results and errors associated with the code.
Mocking and stubbing: Developers should be able to create mock objects to simulate dependencies and isolate units of code for automation testing.
Top C# Testing Frameworks In 2024
Let us see some of the top C# testing frameworks in 2024.
C# Selenium WebDriver
C# Selenium WebDriver is a framework for automation testing. It can process the navigation from the web page and detect its functions, performance, and user experience.
It also allows developers to write code and simulate user actions to verify elements on the web page. This allows for the creation of reliable automated tests that can be executed repeatedly to ensure the application’s behavior
Its cross-browser compatibility allows developers to write tests once and run them across multiple web browsers to ensure test coverage and compatibility with various user environments.
NUnit
The NUnit is a unit testing framework for languages like C# and VB.NET. It addresses the need for developers to write, manage, and run the unit test either within Visual Studio or through the command-line interface.
NUnit offers assertions, test runners, and attribute-based automation testing capabilities to validate the behavior of individual components. Its extensible architecture allows integration with various development tools and continuous integration pipelines that enable automation testing practices. NUnit supports parameterized tests, setup, teardown methods, and parallel test execution in automation testing. It remains the best framework for .NET developers to maintain code quality through unit testing.
MSTest
MSTest provides developers an efficient tool for writing and executing unit tests for .NET applications. MSTest can integrate with the IDE to create and manage unit tests effortlessly.
MSTest supports various testing features, such as test discovery, assertion methods, test execution, and result reporting, to effectively validate code’s behavior and functionality. It also offers attributes for defining test methods and classes to enhance the organization’s efficiency and maintainability.
It reduces the writing process and testing execution action and provides a wide user guide for most project types like .NET Core, .NET Framework, and Xamarin.
MSTest is integrated into the Microsoft Azure DevOps cloud platform to customize the unit cloud testing phase into automation testing and continuous feedback.
xUnit.NET
xUnit.NET follows the xUnit testing pattern, emphasizing simplicity, clarity, and extensibility. xUnit.NET provides developers a flexible platform for writing and executing unit tests to validate code functionality.
Its extensible architecture allows for easy integration with various development tools and frameworks. It also offers multiple assertion methods and test runners for a diverse set of testing scenarios.
xUnit.NET promotes test isolation, parallel test execution, and deterministic test outcomes. It supports test fixtures and setup/teardown methods. It can also encourage test-driven development (TDD) by integrating with popular IDEs. It also offers integration with continuous integration tools to incorporate unit testing into their CI/CD pipelines.
SpecFlow
SpecFlow is a BDD framework that uses natural language syntax for creating and writing scenarios, as well as the execution and management of acceptance tests for .NET software. It can be integrated with Visual Studio and other .NET development tools to enhance collaboration among developers and testers.
SpecFlow allows it to formulate executable specifications expressed in a human-comprehensible manner using the Gherkin syntax. These specifications can be added to the software documentation to maintain their functionality.
SpecFlow encourages collaboration and communication among cross-functional teams by defining a common language of application behavior expressed in a readable format. This approach also promotes code reusability and manageability by reusing the step definitions within many scenarios and features.
FluentAssertions
Fluent Assertions is the assertion library for .NET. It enables developers to write assertions in their unit test cases. It uses natural language that allows developers to identify assertions through the fluent interface.
It lets developers write assertion statements like natural language sentences to make the unit test easily understood. Such if-else statements held in the form of assertions can be written as “should” followed by a mentionable situation like “should be equal to” or “should contain,” showing what kind of behavior is expected for that tested code.
It supports various assertions like basic equality checks, collection assertions, and complex object comparisons. It also provides built-in support for asserting exceptions to verify that their code throws the expected exceptions under specific conditions. It also provides customizable assertion messages and failure descriptions.
Ranorex
Ranorex is an automation testing tool specially developed to make application testing of all platforms, including desktop, web, and mobile apps, easier and faster. Its graphical user interface (GUI) is so intuitive to create automated tests.
Unlike other testing tools, Ranorex has an object recognition capability that facilitates testers’ easy identification and interaction with UI elements, including buttons, text fields, and dropdown lists distributed across different platforms. This enables the development of automation testing, which precisely reproduces user interactions.
In addition, it provides built-in support for data-driven testing so they can easily write their test cases and execute them using different sets of data to ensure complete test coverage. It integrates with popular continuous integration and delivery tools that will automate the execution of the created tests as part of their build-up pipelines for continuous integration/delivery.
Its reporting capabilities offer a detailed assessment of the test results and common metrics needed. Testers can analyze the test results, identify problems, and track the progress of their testing activities by using customizable metrics.
BDDfy
BDDfy enables developers to implement Behavior-driven Driven Development practices in their .NET projects. BDDfy allows teams to focus on defining the behavior of their software through executable specifications written in natural language to establish collaboration between developers, testers, and stakeholders.
BDDfy also allows developers to write tests using natural language constructs to make the intent of the tests clear and understandable to all team members. This facilitates better communication and alignment of expectations throughout the development process.
The integration provides flexibility and versatility in test organization and execution, enabling teams to adopt BDD practices.
BDDfy provides detailed and insightful test reports that highlight the software’s behavior under test. These reports provide valuable documentation and can be shared with stakeholders to demonstrate progress and ensure alignment with requirements.
ApprovalTests
ApprovalTests is a versatile testing library designed to simplify verifying code output. ApprovalTests allows developers to approve the current behavior of their code by capturing and comparing its output against previously approved results.
Developers can quickly integrate ApprovalTests into their existing testing workflow regardless of the programming language or testing framework used. This makes it a valuable tool for various development environments like .NET, Java, Python, and more.
ApprovalTests improves handling complex output formats such as large data structures, images, and multi-line text. Developers can easily identify unexpected changes by capturing the code output and comparing it to approved results.
It effectively supports generating and managing approval files to review and update approved results as needed. This ensures that tests remain relevant and accurate over time.
NSubstitute
NSubstitute is a .NET mocking library constructed to simplify the process of creating and maintaining mock classes in unit testing. Mocking is a technique used in unit testing to simulate the behavior of dependencies in a component under test interactions with developers to isolate and test individual components.
NSubstitute expressive syntax enables developers to define mock objects and their behavior using natural language constructs. This makes it easy to understand and maintain mock setups.
NSubstitute supports various mocking scenarios and provides powerful features such as argument matches, callbacks, and received call verification to create flexible mock setups for unit tests.
The integration allows developers to use NSubstitute alongside their existing testing tools and practices without additional configuration.
NSpec
NSpec is a behavior-driven development testing framework for .NET developers designed to promote clarity, readability, and expressiveness in test specifications. It allows developers to write tests in a natural language format that closely resembles the software’s behavior specifications.
NSpec focuses on human-readable test specifications written using a syntax similar to plain English. This makes developers, testers, and stakeholders actively involved in the business and simplifies behavior definition and verification.
NSpec offers us features to do test management, such as grouping test cases under nested contexts, showing descriptive naming conventions, and a behavior-driven development paradigm. This allows developers to create clear and concise test specifications that accurately describe the expected behavior of the software under test. It also ensures compatibility and consistency across different testing environments, making adopting NSpec in existing projects easier.
Utilizing an automation testing framework tailored for C#, conducting automated testing for your website or mobile application becomes a straightforward task.
LambdaTest, an AI-powered test orchestration and execution platform, empowers you to execute manual and automated testing for your web projects on an extensive online browser farm featuring over 3000 real browsers, devices, and operating system configurations. Its cloud-based automation testing platform facilitates the execution of automation tests utilizing various C# testing frameworks such as Selenium, Appium, SpecFlow, NUnit, and others that help you test websites in different browsers.
Conclusion
In conclusion, C# testing frameworks in 2024 present developers with the right choices to meet various testing requirements. From NUnit’s strong focus on unit testing to SpecFlow’s emphasis on behavior-driven development, developers can access efficient tools for maintaining software quality. Whether the need is for unit testing or behavior-driven testing, these frameworks improve automation testing workflows and enhance the overall quality of C# applications.
#2024#ai#AI-powered#API#applications#approach#apps#architecture#assessment#automation#azure#Behavior#Blog#browser#Business#buttons#CI/CD#classes#Cloud#cloud platform#code#Collaboration#command#command-line interface#communication#continuous#continuous integration#cross-browser#data#Data Structures
0 notes
Text
// Long overdue post-event bookkeeping. I currently have Lantern Rite replies from Itto, Furina, Navia, and Klee. I intend to continue these threads, and will reply to them in a day or two.
If you have a LR thread from me in your drafts right now, I’ll leave it up to you whether to reply or not. I’m not tracking the interactions, so if you choose to just quietly drop, that’s fine by me.
#out of character#// I blinked and two weeks disappeared#// posting this on mobile from the safari browser so fingers crossed that nothing funky happens
5 notes
·
View notes
Note
🔺️
If you had to give up one of your Pokémon for whatever reason. Which one would you choose? "None" is not an option.
11/10
I already... I already left them behind once- And I still- I regret it... I- I regret it every fucking day- I don't... Don't want to- To do that... Ever again... Do I- I really have to... To answer this one...?
Fuck... I hate this... IguessitdhavetobeCramorant... He didn't really- He never... Not nearly as attached to me as the others are... But I'd still- I don't want to-
...going to make sure I spend more time with him...
#pkmn irl#ask game#(OH THIS ONE. THIS ONE IS. I KNOW THIS HAS BEEN SENT TO A LOT OF PEOPLE BUT.)#(I THINK THAT. KIERAN IS PROBABLY ONE OF THE ONES WHO ARE GONNA BE AFFECTED MOST BADLY BY IT .)#(anyways i never see anybody acknowledging that fucking cramorant. which makes sense he only used it in one battle but still.)#(everyone seems to forget about it. but i do not.)#(i do not forget because i am not normal about kieran.)#(like if i just type b in my browser it literally autofills to his bulbapedia page. that's the point of derangement we're at here.)#(anyways sorry for the tag rambles it WILL happen again i have adhd.)#(also crossed out bit is written this time too just he really wants to hide it cause he feels bad)
6 notes
·
View notes
Text
Cross Browser Testing: A Complete Guide

Different browsers can display the same website in completely different ways. What seems great in Chrome can be broken in Safari, and what works in Firefox just might fail in Edge.
Cross browser testing ensures that your website works consistently across all the browsers before your potential users see problems. That way, the team can catch browser-specific issues ahead of time, preventing them from affecting the user experience or tarnishing the outlook of your brand.
This blog directs to giving you all possible answers about cross browser testing-from the very basics to the actual implementation of cross browser testing into your development workflow.
What is Cross Browser Testing?
Cross Browser Testing is simply a process of analyzing whether the website or web application works consistently across a range of different web browsers, browser versions, and devices. Each browser interprets the website code
Since a browser interprets a website's code (HTML, CSS, Javascript) differently from other browsers, a site may look or behave differently if viewed on Chrome as opposed to Safari or Firefox. Cross browser testing weeds out and corrects these discrepancies before product release.
They ensure the user will be presented with a smooth and uniform user experience irrespective of whichever browser or device is being used, from the layout to interaction and responsiveness, including the functioning of all interactive elements.
Cross browser testing can be done manually by opening the website with different browsers and on different devices or automated using tools like Selenium, BrowserStack, or Playwright. It is a crucial quality assurance step that helps the teams find out compatibility issues earlier to improve accessibility and give a glossier finish to the product for more eyes.
Why is Cross Browser Testing Important?
Cross Browser Testing ensures that your application is functional as well as appears to be intended across all characterized platforms, especially important for user-facing interfaces where usability, accessibility, and design consistency matter.
Here’s why it really matters:
Varied Browser EnginesBrowsers often run their own rendering engines (Blink, WebKit, Gecko) that interpret HTML/CSS/JS differently. More than 30% of users are non-Chrome customers, so the neglect of this category may result in users suffering from a bad experience.
Multiple Versions of Browsers in UseNot all users update their browsers to the latest version, especially users in the enterprise environment. Your app should support an older version so there is broader compatibility.
Cross-Platform RenderingA site may behave differently with the same browser across Windows, macOS, or Linux. The differences in rendering, font, and GPU usage make operating system testing a priority.
The User Experience Drives the Business OutcomeA broken feature or improper layout lashes out on users. 88 percent of users never return after a bad experience. Poor browser support means lost conversion and revenue.
SEO and Accessibility at RiskCompatibility issues may hurt SEO and accessibility. Some engines render pages differently, and accessibility tools may differ from one browser to another, affecting compliance and usability.
What Features are Analyzed in a Browser Test?
In cross-browser testing, the attributes of a website or an application are tried against cross-browser functionality, design, and performance over the set of browsers and operating systems. Some features to consider: Layout consistency, design consistency, functionality verification, performance testing, and accessibility check.
Here is a detailed breakdown:
GUI Consistence Alignment, layout, font rendering, spacing, and visual elements must be checked. But browsers vary widely in implementing CSS, which mostly leads to inconsistencies.
JavaScript Functionality Validating dynamic behaviors such as form validation, interactive elements, or some third-party scripts may be required, as browsers may interpret a JS feature differently.
Performance Differences Find Issues related to loading times, caching, or JS execution that could differently affect the user experience on each browser.
Third-Party Integration Make sure that all payment services, analytics services, or social login services are compatible with all the major browsers.
Responsiveness and Mobile Behavior Testing has to be done on various screen sizes and on mobile browsers to validate the expected working of responsive breakpoints, touch gestures, or mobile-specific functionalities.
Form Handling Check for the interaction of form fields in terms of file upload, and submission on any browser.
How Do I Select Browsers for Testing?
Selecting the right browsers for Cross-Browser Testing is crucial to ensure your website works seamlessly for your target users. Here's how you can smartly select browsers for testing:
1. Understand Your Users
Start by analyzing your real users through tools like Google Analytics or Hotjar. This will tell you which browsers, devices, and operating systems your audience uses most. Prioritizing testing based on this data ensures you're focusing on actual user behavior, not assumptions.
2. Look at Global and Regional Trends
Use sources like StatCounter or W3Counter to understand the broader browser market share. Chrome usually dominates globally, but Safari, Firefox, and Edge have strong user bases depending on region and device type. This helps you decide which additional browsers to include beyond your user analytics.
3. Don’t Forget Older Versions
While testing on the latest browser versions is a must, many users—especially in enterprise or institutional settings—may still use older versions. Tools like BrowserStack allow you to test across versions without needing to install each one locally.
4. Cover All Major Browser Engines
Different browsers use different rendering engines—Blink (Chrome, Edge), WebKit (Safari), and Gecko (Firefox). Testing across these ensures your code behaves consistently, no matter how the browser interprets it.
5. Consider Special Use Cases
Some industries still rely on legacy browsers like Internet Explorer 11 or use Edge in IE mode. If your web app is used in banks, government portals, or older corporate systems, you’ll need to factor these into your testing matrix.
6. Test Across Devices
Your users won’t all be on desktop. Make sure to test on mobile browsers like Chrome for Android and Safari for iOS, as well as tablets. Responsive design checks are essential for a seamless cross-device experience.
How is Cross Browser Testing Done?
Cross-browser testing is important to provide every user a smooth and consistent experience regardless of location or access medium to the site.
Step 1: Determine Target Browsers and Devices
The very first step is finding where to test : meaning, the most commonly used browsers, devices, and platforms by your audience. Use Google Analytics or StatCounter to find out what are the most common user combinations.
This includes:
Browsers: Chrome, Firefox, Safari, Edge, and Opera, and Internet Explorer.
Devices: iPhones, Android phones, tablets, and desktops.
Operating System: Windows, macOS, Android, and iOS.
Step 2: Write Test Cases
Once you know where to test, you’ll need to determine what to test by careful testing with clear and consistent test cases. One can draft exactly what should be tested in each browser. A test case mostly includes: Layout & Design (e.g., whether elements are correctly aligned, font is readable, and images render correctly), Functionality (e.g., forms, buttons, and sliders work, and proper navigation), Performance (e.g., load speed and responsiveness), and Accessibility (e.g., screen readers work well , smooth keyboard navigation, proper ARIA labels). Proper test cases ensure that testing of all browser and device combinations are done in exactly the same way.
Step 3: Selection of Testing Method
You can perform testing in two general ways: manual and automated.
Manual Testing: Involves opening your website on each target browser and device, interacting with it just like a user would. This method is great for spotting visual issues, layout problems or other strange browser-specific behaviors.
Automated Testing: Automation saves time with repetitive tasks and large projects. Tools like Selenium, Cypress, and Playwright allow you to prepare scripts that automatically pass test cases across browsers.
Most teams use a mix of both: manual testing for design and usability, automation for functionality and regression.
Step 4. Set Up the Test Environment Then comes setting up your test environment, and you have several options.
Real Devices: Testing on real devices gives the most accurate results, but it’s often expensive and time-consuming.
Emulators and Simulators: They imitate mobile or tablet behavior. They are useful during development but might not capture all the nuances of real-world scenarios.
Cloud-Based Platforms: BrowserStack, LambdaTest, and SauceLabs offer online access to an extensive array of browsers and devices so one need not invest in physical hardware. These tools also let you run both manual and automated tests, take screenshots, record bugs, and even simulate network conditions. Most teams now use cloud-based testing as it is cost-effective and scalable.
Step 5: Run Tests and Report Issues
With your test cases prepared and the test environment configured, go ahead to run your tests and report any bugs.
Cover every possible browser-device combination.
If you find a layout shift, a broken link, a missing image, or a JavaScript error, document it properly — include the browser, device, OS version, clear steps to reproduce, and ideally, a screenshot or screen recording.
You may select from various bug tracking applications that will organize the whole process. Such tools include Jira, Trello, and Bugzilla.
Step 6: Debug and Retest
Once the bugs are reported, developers start fixing them.
When the fixes have been pushed, the testers:
Retest the same scenarios to check if the bugs are really fixed.
This might repeat a few times, especially when they add new features or after major updates.
How to Record JSON API Calls from Web App Interactions?
In this blog, we’ll be exploring cross-browser testing, but let’s take a look at something interesting — the way to record API test cases.
Is it possible to record an API call while interacting with your favorite website? Yes, now it is possible with the Keploy API Test Recorder using the Chrome extension.
How to Try the API Test Recorder:
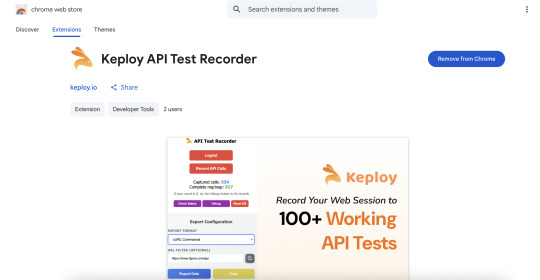
To know more Chrome Extension check the docs: https://keploy.io/docs/running-keploy/api-testing-chrome-extension/
You can also export and filter the URL based on your requirements. Feeling confused? Don’t worry, just give it a try!
When is Cross Browser Testing Done?
Cross Browser Testing is a process undertaken throughout the development cycle to make sure that the website works perfectly well on all major browsers. The main stages where cross browser testing is performed usually include:
During Development
Developers make quick runs of tests for early incompatibility cases all along feature-building.
Testing Before Release
Before a major release, all test suites are run against all supported browsers.
These will include automated checks and manual validations of the UI.
Post-Deployment Monitoring
Compatibility issues are tracked through real-user feedback and monitoring tools.
The purpose of this testing method is to detect any issues caused by new upgrades to browsers or unforeseen environments.
Regression Testing
Regression testing is done after code changes to check whether old functionalities still work on all browsers.
It becomes critical for applications that have a dynamic JavaScript or rather complex UI behavior in them.
Scheduled Maintenance Testing
Conducted periodically at weekly or monthly intervals to detect issues due to browser updates or third-party changes.
Such tests prevent gradual degradation of performance or layout over time.
Who Does Cross Browser Testing?
In cross-browser experiments, many roles contribute to assurance during the functioning of various platforms.
Quality Assurance Engineers Designs test cases, executes manual tests, and maintains the automated test suites. Some might have more focus diverted toward automation, while some might use more of their time for manual testing and user experience.
Developers Frontend developers check their code with browsers and perform basic checks with dev tools. Backend developers test the APIs to make sure that the APIs behave or respond consistently amongst browsers on the server side.
DevOps Engineers They set up infrastructure , manage CI/CD pipelines as well as integrate cloud testing platforms to ease browser testing.
Product Managers & Business Analysts They define browser support on the basis of end-user needs and market data, prioritizing compatibility instructions to the technical team.
Specialized Testing Teams Large companies have specialized teams working solely on browser compatibility, tools, and best practices.
Some of the Other Useful Blogs for Your Reference:
Getting Started With Selenium Ide-https://keploy.io/blog/community/getting-started-with-selenium-ide
Continuous UI Testing Pipeline: Browserstack With Github Actions-https://keploy.io/blog/community/continuous-ui-testing-pipeline-browserstack-with-github-actions
How To Do Frontend Test Automation Using Selenium-https://keploy.io/blog/community/how-to-do-frontend-test-automation-using-selenium
Conclusion
Essentially, cross browser testing is a pivotal practice that ensures smooth functioning of a web application across a broad array of browsers, devices, and operating systems. Given the multiple intricacies involved in present day web development, it simply cannot afford to be optional anymore.
An effective cross-browser testing approach leans on the selection of browsers based on user analytics, a blend of manual and automated testing, and the integration testing into the development workflow. The contribution made to such an investment might translate to a better user experience, fewer support issues, and more confidence in the application's stability.
Cross browser testing is an ongoing process that evolves with your application, your users, and, of course, the browser world out there. Start with those browsers that matter to your users; set up automated tests for repetitive scenarios; and slowly scale up testing coverage along with your application and team.
FAQs
1. How many browsers should I test on?
Test on browsers the analytics show about 95–98% of your users use. The usual list consists of Chrome, Safari, Firefox, and Edge for both desktop and mobile. Somewhere around 6 to 8 browser configurations will do.
2. What's the difference between cross browser testing and responsive testing?
Cross-browser testing is about making sure that the application behaves the same way across various browsers and versions. Responsive testing is about checking layout responsiveness over screen size.
3. Should older browser versions be tested?
Depends on your audience. If analytics show a substantial number of users indeed use the older versions, then put them under test. Usually, the current version, including the past 2-3 major versions for each browser, is supported.
4. How often should one perform cross browser testing?
Cross browser testing must be integrated throughout your development lifecycle. Lightweight compatibility checks should be performed during development, heavy testing before major releases, and regression testing on a regular basis for maintenance. Automated tests can be run at every code commit, while manual tests usually come in dedicated test phases and shortly before production deployments.
5. Can cross browser testing be completely automated?
Complete automation Complete automating is neither practical nor recommended . Manual testing remains essential for user experience evaluation, visual design assessment, and exploratory testing scenarios. The most effective approach combines automated testing for repetitive scenarios with manual testing for areas requiring human judgment and creativity.
0 notes
Text
Times New Roman, my beloved. I’d forgotten how beautiful your italics were.
#my general apathy and tendency not to change the default font has lead to YEARs of Arial#Finally changed the font bc the way 11pt arial looks on google docs on my browser crossed the line into distractingly annoying#And!#Times New Roman is still so good???#After all these years?#Anyway#This is your reminder#If you like me are terminally lazy#Pls change your documents to your preferred font#It makes life so much happier
0 notes
Text
GQAT Tech’s QA Arsenal: Powerful Tools That Make Quality Assurance Smarter
In this technology-driven age, delivering high-quality software is not an optional function but a necessity. Clients now expect us to produce digital products— apps, websites, etc.-- that are made quickly and error-free. The best way to achieve this is with a quality assurance (QA) process and effective tools to adapt to their needs.
The GQAT Tech QA team calls their QA efficient and effective tools combined, and their QA arsenal productive platforms, automation, tools, and proven processes. These testing tools and approaches can help a QA team find bugs more quickly, decrease hands-on effort, and allow more test coverage depending on the software project.
Now, let's look at what a QA Arsenal is, why it is important, and how QA will help your business produce better software.
What is the QA Arsenal?
The "QA Arsenal" refers to the collection of tools, frameworks, and strategies at GQAT Tech that the QA team employs to provide quality testing to clients. The QA Arsenal is like a toolbox, where everything a tester needs to complete the project is in the toolbox.
It includes:
Automation testing tools
Manual testing techniques
Defect tracking systems
Performance testing platforms
Mobile and web testing tools
CI/CD integrations
Reporting and analytics dashboards
What Makes GQAT’s QA Arsenal Unique?
We do not use tools haphazardly. We use the most appropriate tools based on the client's type of project, technology stack, service timeline, and quality. The QA Arsenal is designed to offer flexibility and therefore considers:
Web apps
Mobile apps
Embedded systems
IoT devices
Enterprise software
Whether functional test, compatibility test, API test, performance test, GQAT Tech utilizes a custom mixture of tools to ensure that it is reliable, secure, and ready for launch.
Tools Included in the QA Arsenal
Here are some common tools and platforms GQAT Tech uses:
🔹 Automation Tools
Selenium – For web application automation
Appium – For mobile app automation
TestNG / JUnit – For running and managing test cases
Robot Framework – For keyword-driven testing
Postman – For API testing
JMeter – For performance and load testing
🔹 Defect & Test Management
JIRA – To log, track, and manage bugs
TestRail / Zephyr – For test case management
Git & Jenkins – For CI/CD and version control
BrowserStack / Sauce Labs – For cross-browser and device testing
How It Helps Clients
Using the QA Arsenal allows GQAT Tech to:
Detect Bugs Early – Catch issues before they reach end-users
Save Time – Automation reduces time spent on repetitive tasks
Test on Real Devices – Ensures compatibility across systems
Generate Reports – Easy-to-read results and test status
Integrate with DevOps – Faster release cycles and fewer rollbacks
Improve Product Quality – Fewer bugs mean a better user experience
Real Results for Real Projects
GQAT Tech’s QA Arsenal has been successfully used across different domains like:
FinTech
Healthcare
E-commerce
Travel & Transport
EdTech
AI and IoT Platforms
With their domain expertise and knowledge of tools, they help businesses go faster, mitigate risks, and build customer diligence.
Conclusion
Building a great QA team is essential, but having them equipped with the right tools makes all the difference. GQAT Tech’s QA Arsenal provides their testers with everything they need to test faster, smarter, and more comprehensively.
If you are building a digital product and want to ensure it is released in the real world, you need a testing partner who does not leave things to chance. You need a testing partner with a battle-tested QA arsenal.
💬 Ready to experience smarter quality assurance?
👉 Explore GQAT Tech’s QA Arsenal and get in touch with their expert team today!
#QA Arsenal#Software Testing Tools#Quality Assurance Strategies#Automation Testing#Manual Testing#Selenium#Appium#Test Management Tools#CI/CD Integration#Performance Testing#Defect Tracking#Cross-Browser Testing#GQAT Tech QA Services#Agile Testing Tools#End-to-End Testing
0 notes