#colorify
Explore tagged Tumblr posts
Text
thinking a lot about the game boy final fantasy legends games (which I guess are SaGa games actually) lately
it is a good idea to imitate that sort’ve visual style for The Game I think
fairly simple and I don’t have to worry about color
#bats speaks#maybe colorify it later somehow#do a tint thing like gameboy color did perhaps#we'll see#that is a later me problem
6 notes
·
View notes
Text
Today is being an absolutely lovely pre-leaf-fall day, suitable for long walks in the woods with an ace lesbian.
#lesbian#asexual#ace lesbian#sapphic#it's me I'm the ace lesbian#today I also learned that tumblr only colorifies the lowercase ones
0 notes
Note
would you make gacha designs of devon and reed (from the colors au) with thier skintone being colorified
I would but my gacha designs got deleted 😭
8 notes
·
View notes
Note
reaally random question but have the lads u colorified notice they gained color or liek
Realistically it wouldnt matter in their perspective

They really don't know they have colors now xD
They see everything in black and white still :3
6 notes
·
View notes
Text
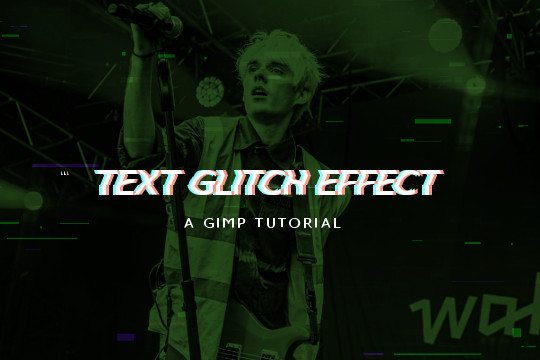
Read more to learn how to make this text + image glitch effect on GIMP!
Things you need:
GIMP
Import your image and resize it to your liking. I'll be using this.

2. Then I'll pick a gradient color. The FG will be black (or the darker color) and the BG color will be the lighter color. Go to Colors > Map > Gradient Map and it will apply the gradient map on the image.

3. Create a text layer. RIght click on the layer in the layers tab and pick "Layer to Image Size". Use the rectangle select tool to select the top half of the text.

4. Go to Filters > Distorts > Ripple and use these values. Feel free to play around with the sliders to your liking. Hit OK and the Ctrl + Shift + A to deselect.

5. Copy and paste the text layer 2 times.

6. On the second layer from the top, go to Colors > Colorify and pick a cyan color.

On the first layer, do the same but pick a pastel red/peach color.

7. Use the move tool to move one of them a few pixels to the left and the other a few pixels to the right.

8. Move the initial text layer to the top.


9. You can also add some TV glitch overlays if you want to.

And you're done!
5 notes
·
View notes
Text
the artist's eye never says goodbye it sees what lie underneath what dies salvages it before it flies embraces it and colorifies what once gleamed like the skies.
— blumine, the artist's eye
#poem#poems on tumblr#poetry#my work#original poem#poems and poetry#poets on tumblr#words#artists#art and poetry#art#artist#my poems
0 notes
Text
The 10 Best LUT Packs for Premiere Pro in 2024
New Post has been published on https://thedigitalinsider.com/the-10-best-lut-packs-for-premiere-pro-in-2024/
The 10 Best LUT Packs for Premiere Pro in 2024
Look-Up Tables, or LUTs, play a pivotal role in video editing. These small but powerful resources are essential for color grading, acting as shortcuts to apply complex color transformations to video footage.
Whether you’re working on a film, YouTube video, or any digital video content, they’re crucial in achieving a consistent look and atmosphere. LUTs help set the mood and tone, significantly enhancing the storytelling aspect of your footage.
The right LUT not only saves time but also elevates the quality of your work, bringing a professional touch to your color grading process.
In this collection, we explore the best currently available LUTs for Premiere Pro (both free and premium). Explore the various options and styles we have curated for you below.
How to install LUTs in Premiere Pro
Installing LUTs in Premiere Pro is a straightforward process. By following these steps, you can quickly integrate LUTs into your editing workflow. Here’s how to do it::
Open Your Project: Launch Premiere Pro and open the project you’re working on.
Navigate to Lumetri Color: In the workspace, find and open the ‘Lumetri Color’ panel.
Go to the Creative Tab: Inside the Lumetri Color panel, select the ‘Creative’ tab.
Browse for LUTs: Look for the ‘Look’ dropdown menu, then click on ‘Browse…’ to navigate to your LUT files.
Select and Apply LUT: Choose the LUT you want to use and select it. The LUT will now be applied to your footage.
Adjust Intensity: If needed, adjust the intensity of the LUT using the slider in the Lumetri Color panel for the desired effect.
Remember, you can apply LUTs to individual clips or adjustment layers for more control over your project.
The Top Premiere Pro LUTs for Video Editors
When choosing the best LUTs for your Premiere Pro projects, it’s important to consider several factors. Look for LUTs that align with the style and atmosphere of your project. Compatibility with your footage is key to ensure smooth application.
1. Colorify LUTs for Premiere Pro
Colorify offers an extensive collection of 222 LUTs, suitable for a wide range of video editing needs. It has been designed to provide editors with various color grading options, catering to different moods and styles.
Whether you’re working on cinematic projects, personal vlogs, or commercial videos, this pack provides a broad spectrum of tones and shades, ensuring versatility and creativity in your color grading process.
2. Asteroid City Inspired LUTs (Free)
This LUT pack has been inspired by the aesthetics of Wes Anderson’s Asteroid City. This free collection is perfect for editors looking to add a distinct sci-fi feel to their projects. The LUTs in this pack will give your footage a creative and otherworldly color grade, making them ideal for projects that require a touch of the extraordinary.
3. Colorify Cinematic LUTs for Premiere Pro
This LUT collection has been created for filmmakers and video editors looking to add a cinematic quality to their footage. This pack offers a range of color grading options that enhance the visual storytelling of any video project. These LUTs will give you a professional, movie-like feel, making them suitable for various cinematic contexts.
4. Color Shift LUT Collection for Premiere Pro
These LUTs have been designed to bring vibrant and dramatic color shifts to your video projects. They are ideal for editors looking to experiment with stark color changes in your footage. This LUT collection allows for imaginative and striking visual effects.
5. Lumetri Looks Luts For Premiere Pro (Free)
Enhance your video projects quickly with this free collection of Premiere Pro LUTs. They allow for quick import and adjustment using the Lumetri Color panel. They’re a great resource for filmmakers looking to add a professional touch to their work without additional cost.
6. Tinted LUT Collection for Premiere Pro
These Premiere Pro LUTs will add depth and character to your videos. Each LUT offers a unique color tint, enhancing colors and tones to achieve professional-looking results. Whether working on a film, a commercial, or a personal project, this LUT collection provides the means to bring your vision to life.
7. 70 LUTs from Color Grading Central (Free)
These free LUTs mimic the subtle hues seen in major Hollywood films. Created by professional colorists, this pack includes 40 colorist-inspired LUTs, 13 that mimic different film stocks, and 17 designed for converting LOG footage to REC709, providing a wide range of creative possibilities.
8. Colorify Duotone LUT for Premiere Pro
The Colorify Duotone LUT pack for Premiere Pro brings the popular two-tone color effect to your videos. It features 65 color presets, each offering a unique and modern style. These effects are versatile and perfect for content like YouTube videos, music videos, TV shows, and social media. They’re great for adding a contemporary touch to your projects.
9. Vintage LUT Collection for Premiere Pro
This Premiere Pro LUT pack offers a range of subtle vintage effects, perfect for giving your videos a classic, time-honored appearance. The LUTs have been designed to replicate the color and style seen in older films, adding a touch of nostalgia to your footage. They’re perfect for filmmakers and video editors who want to add a retro feel to their work.
10. Urban Life LUTs for Premiere Pro
This LUT pack is perfect for adding a bold and modern touch to your videos. The LUTs will enhance your footage with gritty textures, deep contrasts, and vivid colors, capturing the essence of city life. These LUTs are great for making your movies look contemporary and stylish, infusing them with an urban vibe.
Tips for Using LUTs in Premiere Pro
When using LUTs in Premiere Pro, there are several effective practices to follow:
Know Your Footage: Before applying LUTs, understand the lighting conditions, color temperature, and exposure of your footage. This knowledge helps in selecting LUTs that complement the footage rather than work against it.
Color Correction First: Always start with basic color correction. Adjust contrast, white balance, and exposure to create a neutral base before applying any LUT.
Use Adjustment Layers for Flexibility: You gain more control by applying LUTs to adjustment layers rather than directly to the footage. This approach also allows you to affect multiple clips at once and easily toggle the effect on and off.
Adjust LUT Intensity for Subtlety: LUTs can sometimes be overpowering. The opacity slider will help to reduce intensity for a more subtle and natural look.
Layering LUTs for Unique Looks: Combining different LUTs can produce unique effects. However, do this sparingly to avoid overcomplicating the color grading.
Keep Your LUT Collection Updated: Stay current with new styles and trends in LUTs. Regularly updating your collection can provide fresh perspectives and ideas for your projects.
Regular Practice: The more you work with LUTs, the better you’ll understand their impact. Experiment with different LUTs on various types of footage to build your skills and develop your own style.
Frequently Asked Questions (FAQ)
What are LUTs in Premiere Pro?
LUTs, or Look-Up Tables, are presets used in color grading to enhance video footage’s visual tone and mood.
Why use LUTs in video editing?
LUTs provide a quick and efficient way to achieve professional color grading, helping to maintain consistency and enhance the overall look of a video.
Can LUTs be adjusted in Premiere Pro?
Yes, LUTs can be fine-tuned in Premiere Pro to suit the specific needs of your footage.
Are LUTs suitable for all types of videos?
While LUTs are versatile, choosing the ones that match your footage’s style and lighting for the best results is important.
Do I need professional skills to use LUTs in Premiere Pro?
Basic knowledge of Premiere Pro is helpful, but many LUTs are user-friendly and come with instructions for beginners.
Can LUTs fix poorly shot footage?
While LUTs enhance color grading, they work best on well-shot footage. They cannot fix all issues related to poor lighting or exposure.
Are free LUTs as good as paid ones?
Free LUTs can be effective, but paid LUTs often offer more variety and are created by professional colorists.
Do LUTs affect video resolution?
No, LUTs only alter color and do not impact the resolution of your video.
Conclusion
By understanding what LUTs are, how to install them, and the best practices for using them, you can now take your color grading to the next level.
Remember, experimentation is key. Each project is different, and finding the perfect LUT can transform your footage, enhancing its storytelling and visual impact. So, dive in, explore these LUTs, and watch as your videos take on a new life.
We have previously published color grading collections of LUTs for DaVinci Resolve and Lightroom, should you need them.
More Premiere Pro Templates & Tutorials
Related Topics
Top
#2024#amp#approach#Asteroid#atmosphere#Collections#Color#colors#content#creativity#DaVinci Resolve#Design#dropdown#Editing#effects#Features#Giving#hollywood#how#how to#Ideas#impact#issues#it#life#lighting#media#menu#Motion Design#Movie Effects
1 note
·
View note
Video
vimeo
Colorify 222 LUTs Motion Design from Antony Parker on Vimeo.
✔️ Download here: templatesbravo.com/vh/item/colorify-222-luts/32902046
LUT files are available all around the internet for free or just a few bucks, But if you are using these LUT presets you know that not all of them are really worth the time and money you spend on them. With this essential pack, you gonna have 222 professional well-tailored color presets that can be used on any project. These LUT color presets are a perfect fit for your short films, YouTube videos, social media posts, wedding photos and films, and more.
0 notes
Video
instagram
Inspiration #vimage #colorify (at Paris, France) https://www.instagram.com/p/Bu4-aMTHtjr/?utm_source=ig_tumblr_share&igshid=13wojpaqhq4q4
1 note
·
View note
Photo
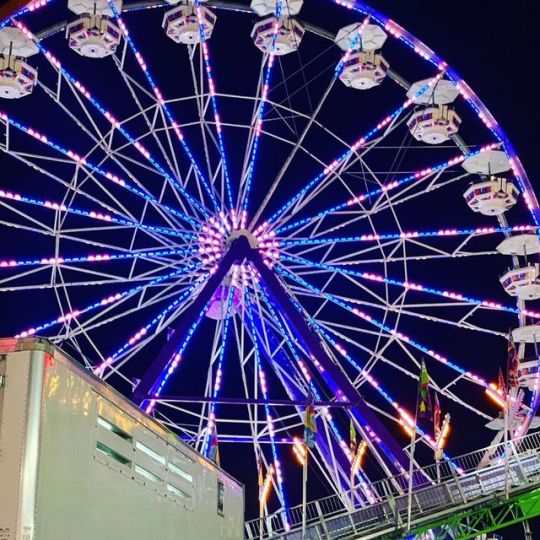
I see nothing in space as promising as the view from the Ferris Wheel🎡... - E.B. White • • • • • • • • • • • • • • • • • • • • • #ferriswheel #ferriswheels #fair #summerfair #summerfair2019 #lakecountyfairgrounds #lakecountyfair2019 #colormyworld #colorify #colorsofthewind #happyplace #amusementrides #amusements #pimpmyride #fairrides🎟🎢 #childhoodnostalgia #childhoodride #lakecountyfair #iphoneshots #iphonography #iphonographer #creyrasnaps #instashots #instagram (at Lake County Fair) https://www.instagram.com/p/B0wlIDMHbks/?igshid=a5ov3aj0y4e1
#ferriswheel#ferriswheels#fair#summerfair#summerfair2019#lakecountyfairgrounds#lakecountyfair2019#colormyworld#colorify#colorsofthewind#happyplace#amusementrides#amusements#pimpmyride#fairrides🎟🎢#childhoodnostalgia#childhoodride#lakecountyfair#iphoneshots#iphonography#iphonographer#creyrasnaps#instashots#instagram
0 notes
Photo

PXLFLX and the Sandbox invite you to Colorify This on the Sandbox Evolution! More cool entries here! https://www.youtube.com/watch?v=GxWpK-HJo24
#Pacman#pacman ghost#pixel art#screenshotsaturday#Indiegame#the sandbox#sandboxevolution#colorify#bandai namco#fan art#line art#pixelart#color#modify#game#app#colorify this#pxlflx
15 notes
·
View notes
Text
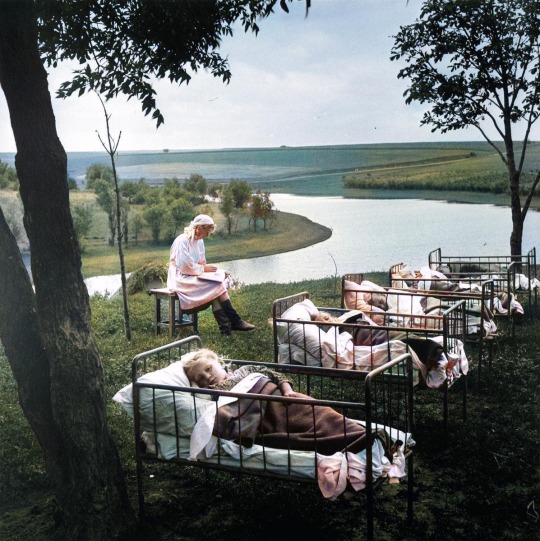
Quiet hour in a kindergarten outdoors, USSR, 1950s (colorifier) - by Yevgeny Khaldei (1917 - 1997), Ukrainian
86 notes
·
View notes
Text
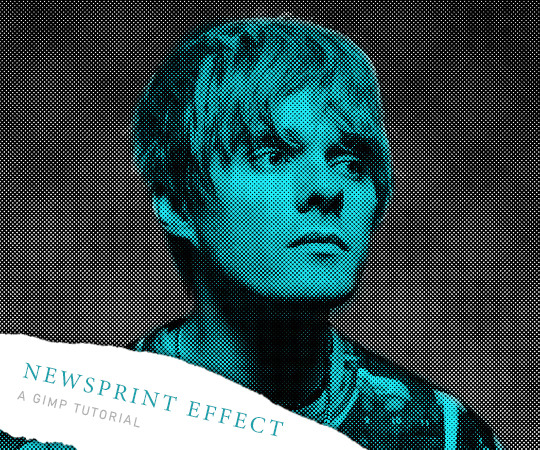
Here's a request on how to make this type of vintage newspaper print effect on GIMP. LET'S GO!
Things you need:
GIMP
Make a canvas of whatever size you want. I'll be making mine 540 by 450px.
Drag in the image you want to use. Resize it by right clicking on the layer in the layer tab and pick "Scale Layer".

3. Go to Colors > Colorify. Pick white to make the pic greyscaled.

3. Next, go to Filters > Distorts > Newsprint.

Play around with the Cell Size. I will keep it very small so it looks more detailed. I would also recommend to put Oversample to 6.

4. If you'd like, you can make another layer and color in the subject to make them pop up even more. Change the mode to "Multiply". And you're done!

2 notes
·
View notes
Note
hiii! love the color traits; you’re a genius. this isn’t a request, but a question! how simple is it to “colorify”? i’d love to make my own (if it’s alright with you!) little additions like the presents or toothbrush someday :]
Hiya! Ahhh I'm glad you like the color traits! I'm really not a genius though haha, I'm surprised no one had made these before me.
I'd be very happy to see color trait mods made by others! How simple it's to make these varies with different objects, but basically:
Make 12 recolors of an object in question (if using images as textures, otherwise it's TXMT editing)
Create the needed TXMTs and TXTRs and link them together
Add lists of mesh groups and materials if the object doesn't have these already, add new TXMTs to the material list
Locate where in the related code the object gets created
Right after it add inventory checks looking for color traits, followed by material changes that swap the texture to the correct color if a trait is found
I think it's easiest to get the proper idea of what all this means in practice by looking inside the toothbrush mod. To give a more specific answer I'd need to know what object is worked with. My inbox is always open if anyone needs advice :)
13 notes
·
View notes
Text
I should probably join the cool LGBTQ+ club and colorify my icons but
@lysxandre he/him & gay & it's complicated
@platanc he/him & they/them* & pansexual & panromantic
*Syc doesn't mind if you use they/them when referring to him, but it doesn't have anything to do with his gender identity.
(I have other muses just not ones that make sense to list here.)
6 notes
·
View notes

