#but this looks like sunblind is installed
Explore tagged Tumblr posts
Text
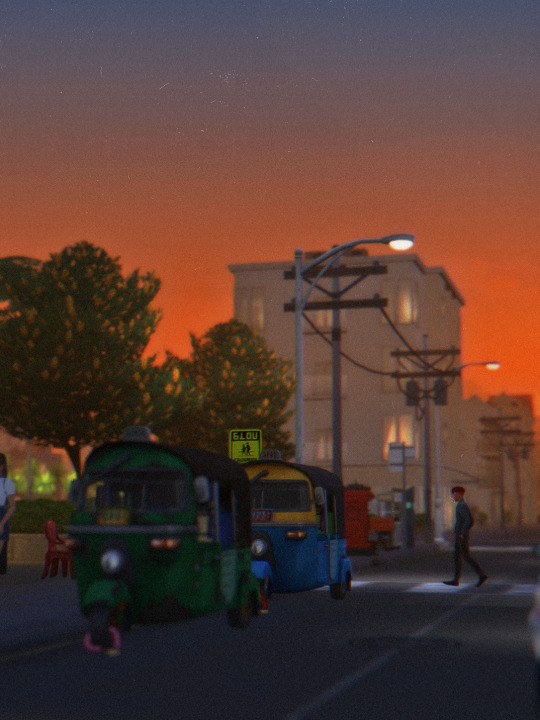
#playing with presets#and tool obvi#i don't have sunblind installed#but this looks like sunblind is installed#i spent the entire day yesterday decorating and world building#i am never satisfied with an interior#ever#good morning!
137 notes
·
View notes
Text

LOVESTRUCK WORN PLASTER WALL RECOLOR
Today I decided to share this mediocre recolor but it still looks pretty nice so I hope you guys like it!!

LoveStruck and BGC Version **
23 swatches ***
If you have any issue, please let me know!
** I tried to do a base game version for everyone who doesn't own LS, however the textures look a little weird. If you own LoveStruck I highly recommend you downloading that version.
DOWNLOAD - Patreon (Free, you need to join for free to get it).
*** I'm using the sunblind mod in my game; the colors may look different in your game if not installed.
Reshade: Warm Reshade by awingedllama
#softle0#download#ts4 cc download#ts4 recolor#lovestruck ep#ts4 cc#ts4 base game#the sims 4#the sims custom content#ts4 screenshots#ts4 screenies#the sims 4 custom content#the sims community#the sims 4 cc#the sims 4 build
1K notes
·
View notes
Text


i made a new gshade preset that was easier on my eyes and coffee jelly was born! i really like how this turned out a lot, and i hope you like it too! :)
check out the CAS version of coffee jelly here
♡ IMPORTANT INFO ♡
highly recommend downloading sunblind by softerhaze so your game looks similar to these screenshots!
check out my tutorial on how to install gshade & lighting mods here
make sure to turn off edge smoothing so mxao & dof work properly
if you want smoother gameplay, turn off mxao & dof
i set toggles for mxao & dof so you can turn them on/off easily
MXAO toggle: ctrl + 4 // ADOF toggle: shift + 4
♡ DOWNLOAD: PATREON / SFS (FREE) ♡
TOU: please don’t reupload and claim as your own
if you use my preset, feel free to tag me. i’d love to see your posts! ♡
633 notes
·
View notes
Text

Kanel - A Reshade Preset
I originally created this to use in my Ultimate Decades Save, but I feel it will go well for most gameplay. It's named kanel (/kan'eːl/) because of the brown tint to it. Like someone sprinkled cinnamon across your screen. Kanel being the Swedish word for cinnamon. I know, very creative. If you'd like a more neutral color, you can turn it off with Shift + F2. It comes with a slew of different hotkey'd shaders meant for screenshots (Shift + 1-6), but is other than that a pretty hans off preset. It runs well on my computer, but if the MXAO is too taxing that is also hotkey'd to be turned on/off with Shift + F1.

Good to know:
Created using Reshade 6.3.1.
You will need Gshade shaders like Mxao 4.0.2 for this to work, see link below. You could probably replace it with another MXAO shader if you'd like though, but result won't be the same.
This is a pretty good tutorial for installing Reshade + getting Gshade shaders
Please note that I use lightning mods, so your end result may look different. I currently use: Sunblind & Even Better In-Game Lightning (I use Bright).


Download over on my Patreon (Free)
#sims 4#the sims 4#sims#the sims#simblr#ts4#sims 4 screenshots#maxis match#cc finds#sims 4 legacy#reshade preset#sims 4 reshade presets#sims 4 reshade#sims 4 reshade preset#reshade presets#my cc
228 notes
·
View notes
Text

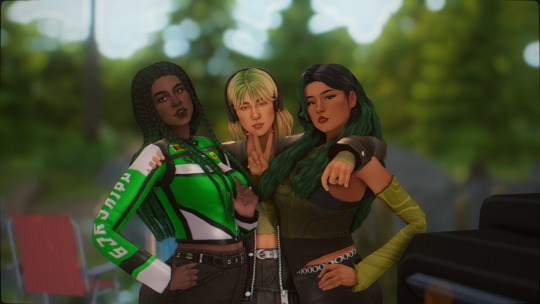

raíces - a reshade preset
vibrant and crisp just like memories should be
Important things:
Lighting mods: I'm using sunblind and better in-game lighting mod (dark saturated dark rooms) so it might look different in your game.
Toggle Keys: I'd recommend changing toggle keys to the ones that work for you (Shaders I found useful to turn off sometimes: BloomAndLensFlares, HexLensFlares & CinematicDOF).
I wouldn't use it for gameplay, but I won't stop you. I only use it for screenies.
Reshade/Gshade: it should work for both
I beg you, do not claim as yours and don't reupload it! Edit it as you will for personal use (in other words, don't use as a base).
download (sfs)
see how it looks in other people's games (ty to those who tested it). Feel free to tag me if you use it so i can see!
*let me know if you have any questions/problems
[more pics + list of shaders under the cut]

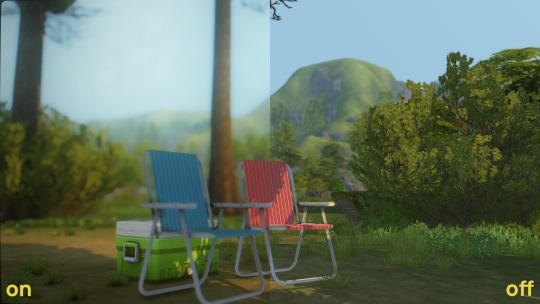

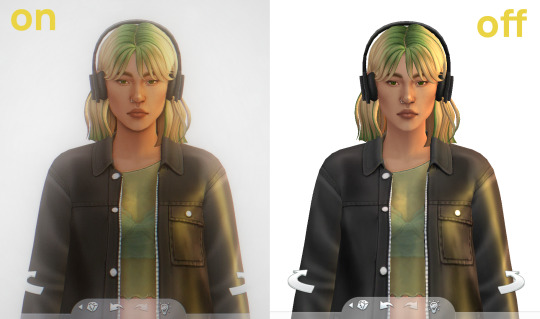

it wasn't made for cas but it works (more or less), maybe it looks better with other backgrouds. At least with white backgrounds you have to turn off BloomAndLensFlares, HexLensFlares and maybe the DOF shaders (mainly CinematicDOF).
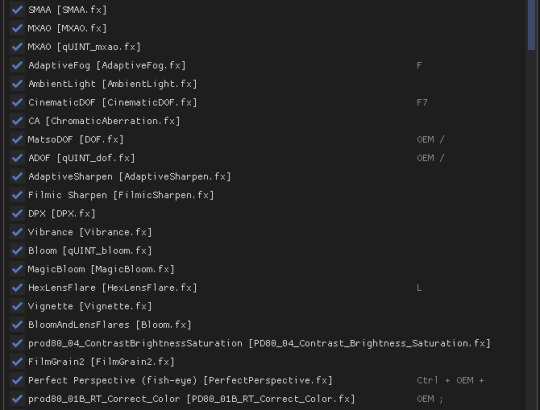
i added the list of shaders in case you guys are missing some (all of them can be downloaded by default when you install reshade I think). Keep in mind that the order of the shaders MATTER.
2K notes
·
View notes
Text


BRIGHTSIDE GShade //
These are all only cropped, resized, and sharpened a bit, and as the title suggests, it's hella bright, so you may want to adjust your sim's skintone so they don't look washed out in certain lighting situations. The whole point of this Reshade is to minimize the need to do a lotta post editing, which if you're like me, gets tired after a while. This also uses the Deband shader, so some skin details may be "buffed" out as a result, so if this is an issue, I suggest unticking it, and unassigning the keybind. I'm using sunblind and this lighting mod in these pics.
SHADERS and KEYBINDS

INSTALLATION
Download, and then put Brightside.ini into your gshade-presets folder, in your The Sims 4 > Game > Bin folder found in whichever drive you installed it on.
DOWNLOAD | MF
213 notes
·
View notes
Text

If you've been feeling burnt out or are just overall not enjoying the look and feel of your game, this guide is meant for you! Coming from someone who started out with The Sims 3, I've had to do a lot of adjusting to find what I like to do in The Sims 4 and I think I've finally figured it out. In this guide, I'll go over Graphics, Essential Mods, and Gameplay Ideas to help you make your experience more enjoyable!
Graphics✨
The Sims 4's biggest asset over previous iterations is its graphics/aesthetic and more importantly, its versatility in this regard. You can make this game look more realistic or more cartoony depending on what you prefer thanks to ReShade and GShade. While there is controversy with the latter, I think having these kinds of tools added to your game will really help with making the game better to look at. I personally recommend these presets:
@bojanastarcevic's Boho (left) and Light (right) presets

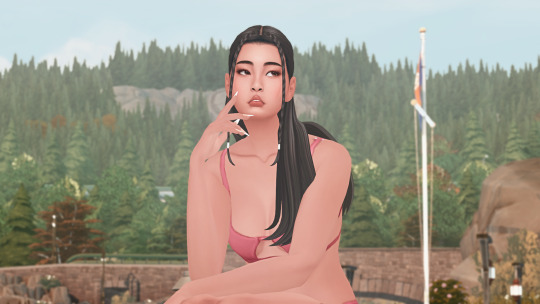
@neecxle's Boho Dreams
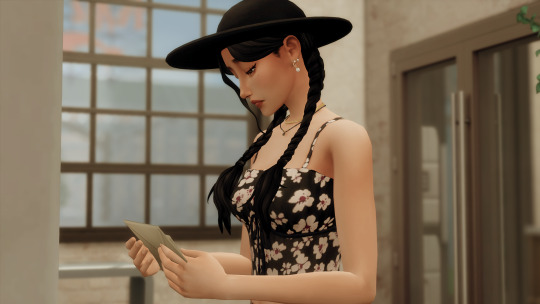
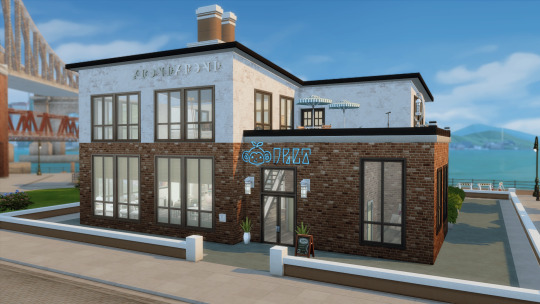
@pixelglam's Pearl
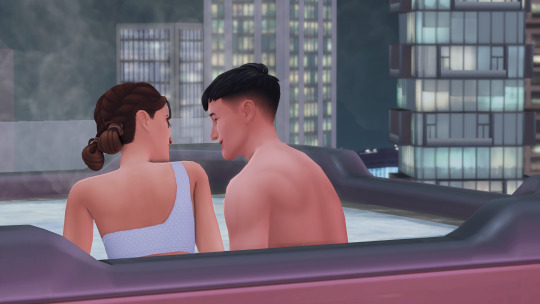

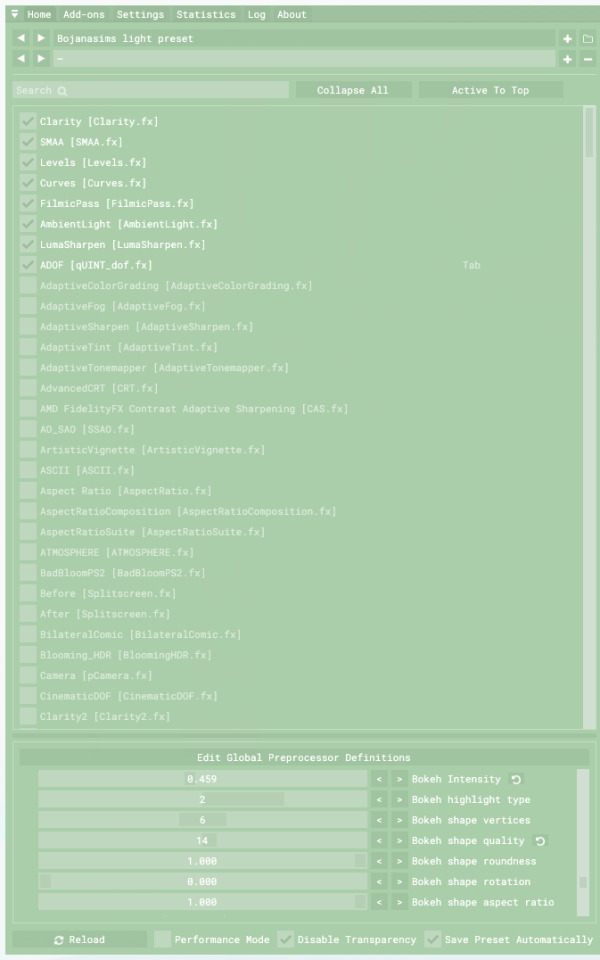
As you can see, using these enhancements can add a lot of great atmosphere to your game but knowing how to tweak these to your liking will make all the difference. When installing and using presets, ensure that 1) you have edge smoothing in game turned off 2) you have SMAA or FXAA turned on through ReShade or GShade and 3) you've adjusted ADOF [qUINT_dof.fx] to suit your gameplay.
These are my settings (apologies if it's hard to see) but what gives my screenshots more of a cinematic quality is having the "bokeh" settings adjusted like so. I also have the ADOF hotkey set to "tab" so that it automatically turns on and adjusts the depth-of-field when I want to take a screenshot.
BUT WAIT, THERE'S MORE! While all of these shader presets are extremely important to the look and feel of your game, there's an extra couple of steps you can take.
@plantyl-m's GraphicsRules.sgr makes those in-game shadows nice and crisp! It's a relatively small tweak, but I feel like it makes such a huge difference to the quality.
@softerhaze's Sunblind Lighting Overhaul. The pictures speak for themselves!
@northernsiberiawinds's Better In-Game Lighting is another great option for lighting tweaks (there's also lighting adjustments for CAS that I love to use)
And that pretty much wraps up my segment on graphics! Now, don't feel compelled to use all of these if your computer can't handle it. While these tweaks are nice, they don't make or break the game. Use what works and don't mind what doesn't!
Essential Mods🔧
I'll be the first to admit that without mods this game can be a bit- or a lot- dry. Depending on what kind of gameplay style you prefer, you may not need or want certain mods but I think there are some core mods that EVERY simmer can make use of.
@deaderpoolmc's MCCommand Center is a must-have. I personally use it most often to add relationships between sims for storybuilding, changing how long certain actions like doing homework takes, and changing my Game Time Speed to make my days last longer (more on this later)
Weerbesu's UI Cheats for quick adjustments to household funds, motives, and more.
@twistedmexi's EVERYTHING, but if I had to narrow it down T.O.O.L Mod, Better Build Buy, and All Cheats are the ones I get the most mileage out of.
TurboDriver's Wonderful Whims. In addition to all the features you might be familiar with, you can also use it for posing and animations. It has a positioner as well that makes placing sims so easy!
@bienchien's Whim Overhaul to make what your sims want to do more sensible based on their personality, aspiration, and environment.
For mods that add more gameplay, try out these: Basemental Drugs to add effects from consuming substances @utopya-cc's Passionate Gifts for more romantic interactions @zerbu's Turbo Careers to make more active careers Lot-51's Collection of Mods for various tweaks and features including functional hotels, internet service, and rentable movies.
There's plenty more mods, too many to list in this post but at the end of the day, enjoying your gameplay involves you!
Gameplay Ideas 💭
I love longer gameplay, that was my favorite thing about The Sims 3. But I often felt like managing a longer gameplay in The Sims 4 didn't feel as rewarding. It can be easy to feel like your save has become stagnant, especially if you're only playing with one sim in a household. And I realized why this happens. The Sims 4 has a lot of features, more than I thought, and they're overly available. Right off the bat, I can take my sim anywhere, to any world and do almost anything. And somehow, that makes it feel less impactful. I don't like following structured challenges or scenarios, so this is what I do to make get myself more invested in my sims and their lives.
Create Your Sims Intentionally What does this mean? Create your sims with room to grow the longer you play! Maybe you want a sim to become a famous actor, but they're socially awkward. Now not only do they need to gain fame, but now they're also working to overcome their awkwardness and develop more charisma. Give your sims room to grow, to adjust. Let them have negative traits or dislike things that they might be naturally better at so they have to work harder at what they do like. Another tip: when making your sim in CAS, choose their aspiration based on what bonus trait you'd like them to have then change their aspiration in game. This way, you get an extra trait that may add more to your sim's character.
Give Your Sims a Context to Exist In Because they didn't just fall out of a coconut tree, give your sims other sims to bounce off of. Maybe they have a strained relationship with their parents so they avoid them all the time. Or they had a falling out with an old friend so when they run into each other, it gets super awkward and makes them tense or uncomfortable. Using MCCC or other cheats to give your sims a little more of a backstory when you start playing makes them feel more real as you go forward.
Lengthen Your Game Time Speed When I realized I could do this, it changed everything! Sims take a long time to do pretty much everything. So days and days pass and it feels like you aren't really getting much done. Using MCCC, I changed my Game Time Speed to "30" and that lets me actually stop and think about what I want to get done throughout the day instead of solely focusing on filling their needs. For example, my sims can actually have a full morning routine like going for a walk, making breakfast, and showering before going to work. Having more time in the day lets you focus on all the smaller details and lets you notice that there's actually a lot you can do.
Make or Place Multi-Use Lots and Use T.O.O.L. Mod If you own a decent amount of packs, having multi-use lots is a must to get a lot of bang for your buck. For example, country clubs, movie theaters, restaurants, etc. are going to add to what your sim is able to do. Look at CC made by Cepzid for more functional objects to add variety to what you can do. Also, if you use T.O.O.L. you can place any object in the world to add more activities and make your surroundings feel less like set dressing.
Limit the Worlds You Play In If your sim can go anywhere, at any time, then what is the point of going anywhere at all? I like to limit the worlds that I can visit by using "travel" to around 3 or 4 depending on region. That way, when my sims go to worlds outside of the region, it's more exciting because I'm not constantly seeing it. For example, my current family The Fords live in Brindleton Bay. I'm American so I think of Brindleton Bay as being The Hamptons, which is North East Coast. So I think, what other worlds would be reasonably close and easy to visit? I assign regions like this: - North East: Brindleton Bay, San Myshuno, Newcrest, Britechester - The South: Willow Creek, Magnolia Promenade, Forgotten Hollow - Northwest: Evergreen Harbor, Copperdale, San Sequoia - Southwest: Del Sol Valley, Oasis Springs, Strangerville -Europe: Tartosa, Windenburg, Henford-on-Bagley - Central America: Selvadorada, Ciudad Enamorada - Pacific Islands & Asia: Sulani, Mount Komorebi, Tomarang Playing with these regions in mind, it adds a challenge to my gameplay. If there's a world I want to visit, I need to set aside time in my sims schedule to actually visit it (such as requesting vacation time). Also this allows me to have long-distance relationships which can add to slow burn dynamics! Case in point, Darcy and Lopez or Caleb and Natty.

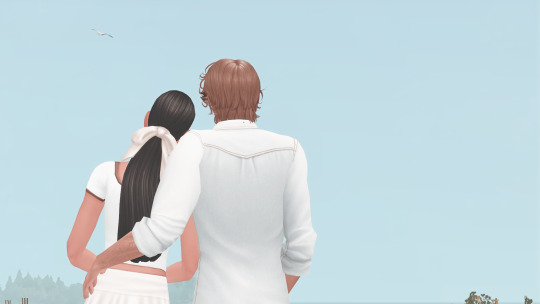
6. Let Your Sims Have Their Autonomy Back Okay, I'm guilty of micromanaging. But sometimes, it's okay to sit back and let your sims try different things. Obviously, the autonomy isn't always super logical so definitely nudge your sims in the right direction but a lot of the enjoyment of the game for me, especially when playing with families, is to leave them to their own devices. With The Fords, I primarily focus on Natty which leads to a lot of hilarious moments that wouldn't have happened if I was stressing over everyone acting perfect. For example, when Caleb came to the Ford house I had Natty make them iced tea to drink on the porch and while she was inside, Alan (her dad) came out on his own and started talking to Caleb which didn't go that well. Let your sims do what they want sometimes!


7. Most importantly, find what YOU like to do! Comparison is the thief of joy, that's totally true. What one simmer likes to do, you might hate. For me, decorating is like pulling teeth. I'll do it every once in a while, but I mostly find builds from other amazing builders. I also don't really care much for challenges and like to create stories with my sims. The point is, we all have our thing. But it's important to experiment and find what your thing is. I happen to really like the actor career, which a lot of people don't find enjoyable. So don't let others opinions impact what you have fun with. Of course, if my advice works for you then I'm happy but if not, there's no love lost. Do what makes you happy!
Well, that's all I've got. I can definitely make some follow-up posts if my tips change or I discover something new. But for now, I hope this post helps or gives you some ideas!
#sims 4 simblr#sims 4#the sims 4#simblr#sims#sims4#the sims#the sims community#the sims tips#gameplay tips#sims 4 maxis match#reshade#gshade#sims 4 graphics
34 notes
·
View notes
Note
do you have any beginner friendly resources for reshade/lighting mods? I love how they look but i'm not very tech savvy and unfamiliar with computer terminology so it's a bit overwhelming and i don't know where to start :x
Hi anon!
I wrote a guide called Understanding ReShade about a month ago, it tries to go through step by step exactly what ReShade is, what shaders are, what presets are, and ends with installation help, info about backups and uninstallation, and some troubleshooting tips too. Take your time to read through it, and bookmark it so you can refer back whenever you need.
As for other lighting mods, I'm guessing you mean for TS4? There are 2 main types: package mods that go in your Mods folder; and world lighting mods.
The first type are like No Blu/No Glo by luumia, or Into the Light/Out of the Dark by lotharihoe. These are package files that go in your normal Mods folder. They tweak some of the global lighting parameters. They're easy to add in or take out, just like regular mods and cc.
The second type are like Sunblind by softerhaze. These are world lighting mods. They edit each world map in the game to have a different lighting profile. To use these you have to replace the game's world files. If you make a backup of the originals, it's quick and easy to swap them in and out, but it is a bit more involved than just using a regular mod.
I hope that's helpful, anon. If you have any other questions about ReShade I'm always happy to try and help.
16 notes
·
View notes
Text


LYKAIA ☽ S1 P1 Presets | 4.8 reshade + gshade
With the first half of season one of Lykaia released, here are all the presets I used to make the first half of the show. These are absolutely NOT gameplay presets. In fact, a few of them may be very heavy and lag your pc if you do not have a higher end computer. Specifically, the rain preset which adds reflections to everything. If you want to see any of these presets in action, check out episodes 1-5 of Lykaia. The second half of season one premieres wednesday april 5th!

OPTIONAL MODS: if you want your game to look just like mine, i use a variety of different visual mods: sunblind by softerhaze, ootd by lotharihoe, shadows for days by picture amoebae, cas lighting mod by northern siberia winds, & better in-game lighting by nothernsiberiawinds.
☆ wanna learn how to install reshade? i recommend this tutorial!
☆ need the download link for reshade? check it out here! i use 4.8!
TOU:
don’t steal/claim this as your own, and do not put this or any of my content behind a paywall. if you use my presets in any series, please give credit! do not alter my presets and reupload them. other than that, feel free to use this however you like! tag me in your posts on tumblr!
@sssvitlanz


☆ download
62 notes
·
View notes
Note
Hi,
How are you doing?
Please I am kinda confused how to make your script mod for sunblind work. Please how do I install it for a pirated game as well.
you need to find the folder where you usually manually install the mod, the one that has your data and delta folders

copy that path and change the sims variable to that

you may need to change these as well, these are just the data and delta folders where you change the files. i don't know what your folders look like, you can send me screenshots if you need to

2 notes
·
View notes
Text
DIY Makeover: Tips & Tricks From Blind Manufacturer In Calgary
Before we jump into the DIY tips, let's talk about why Sun Blinds YYC is the perfect choice for your home upgrade. We're all about providing you with fantastic custom blinds that not only enhance the look of your home. Not only that, but we care about being innovative and making our customers happy. Choose us if you want to upgrade your living space with trusty and stylish options. In this blog, we're exploring the DIY makeover scene with tips from a blinds manufacturer in Calgary.
Get set to give your space a stylish and comfy upgrade without spending too much.
DIY Tip 1: Setting the Stage with the Right Blind Style
When giving your space a makeover, start by picking the right foundation. Think about the vibe you want – classic, modern, cozy, or minimalistic. Blinds are key for your windows and can set the tone for the whole room.
At SunBlinds, we've got styles for everyone – from classic to contemporary. Like the fancy Roman shades or the sleek look of roller blinds? We've got you covered, No matter what you go for.
DIY Tip 2: Play with Patterns
Blinds don't have to be bland! SunBlinds YYC encourages you to get creative with patterns. If you want to give your space a personal touch, think about adding patterns to your blinds. No matter its stripes, polka dots, or floral designs, patterns can complement your decor or become the standout feature of the room.
DIY Tip 3: Layering for Depth
Ever thought about making your room cozier? Think about adding layers! It's not just about looks; it also helps with light and privacy. One of the secrets to achieving a professionally curated look is layering. How can you use this trick to make your room feel just right?
Blinds manufacturers in Calgary recommend combining different types of blinds or pairing blinds with curtains. This not only adds depth to your windows but also allows you to control light and privacy more effectively. Experiment with textures and materials to find the perfect combination that suits your style.
DIY Tip 4: Personalized Accessories
Go beyond just blinds in your DIY makeover—add personal touches with accessories. These little details can transform your windows into a standout feature that brings the whole room together. And when it comes to "Your Home, Your Rules" customization is key. Blinds manufacturer in Calgary understands that every home is unique, and your blinds should reflect your taste.
Whether you want motorized blinds for convenience or need a specific size to fit an unconventional window, at SunBlinds YYC, we tailor our products to meet your requirements. Embrace the power of customization to make your space truly yours.
DIY Tip 5: Colour Palette
Now that you've selected your blinds, let's dive into colours. We understand how crucial colours are for a room, and we've got a variety for you. Whether you prefer calming neutrals or bold, attention-grabbing shades, we've got them all. Just keep in mind, that the colour you pick can transform a regular room into something special.
Think of shades like beige, grey, or soft whites. They work great if you want a calm and soothing atmosphere.
Go for lively shades like deep blues, bright reds, or rich greens. These colours add vibrancy and personality to your room, ensuring it catches your guest's eye.
DIY Tip 6: Get Creative with Installation
After selecting your desired blinds, you can easily install them yourself with Calgary's blind manufacturers. With clear instructions and quality hardware, you can enjoy the satisfaction of a successful home makeover without the hassle.
Experiment with mounting heights, try installing blinds at an angle or even combine different types of blinds in the same room. Unleash your creativity and turn the installation process into a design opportunity.
DIY Tip 7:Sustainability with A Green Makeover
Curious about how your home makeover can contribute to a greener planet? Time to discover eco-friendly options for a sustainable and stylish space.
In today's eco-friendly times, a blinds manufacturer in Calgary highlights the significance of going green. By using materials that are good for the environment and creating designs that save energy, choosing eco-friendly options doesn't just help the Earth but also gives your home a stylish, responsible vibe.
DIY Tip 8: Budget-Friendly Transformation
People often think that DIY projects are costly, but that's a common misunderstanding. However, a blinds manufacturer in Calgary shares their cost-effective tips for a budget-friendly makeover. From repurposing existing blinds to exploring affordable material options, transforming your space doesn't have to burn a hole in your pocket.
Takeaway Your DIY Journey Now...
Armed with insights from a blinds manufacturer in Calgary, you are now ready to embark on your DIY makeover journey. Remember, we at Sun Blinds YYC not just transforming your space; we're creating a home that reflects your personality and style.
Feel free to let your imagination run wild! Transform your living space into a canvas that beautifully narrates your distinct story. Happy DIYing!
The article was originally posted on: https://sunblinds.ca/calgary/diy-makeover-tips-tricks-from-blinds-manufacturer-in-calgary/
0 notes
Text
Add Smartness To Your Space With Automated Blinds
Why settle for the regulars when you can have an updated regular? Your window deserves the smartness you possess too. Add some smartness to your window treatment, not for others but for your soul. Feel the brilliance of aesthetics with SunBlinds's automated window blinds in Edmonton!
SunBlinds offers a wide range of shades and types of automated window blinds.
Here are some famous picks of automated blinds in Edmonton-
1. Automated Zebra Blinds
The altering sheer and solid panels of zebra blinds, when controlled remotely, the smooth slides will leave your visitors in awe. It allows light and privacy equally at the same time. Enjoy the cool spring breeze or prevent scorching heat from entering your space; zebra blinds are the most effective.
2. Automated Honeycomb Blinds
Honeycomb blinds, also known as cellular blinds, are versatile and practical window treatments. The unique design of honeycomb-shaped pockets traps air and provides excellent insulation and energy efficiency to your space. With a wide range of colors and styles, honeycomb blinds effortlessly combine functionality with aesthetic appeal. It offers privacy, light-control and helps reduce noise pollution, making it a popular choice for any home or office space when opting for an automated mechanism.
3. Automated Innowin Blinds
The most modern window blinds in Canada and an updated version of combi blinds is innowin blinds. If you wish to work in enough natural light without compromising privacy, the sheer & solid formation of this blind is apt. When tilted to the desired angle, the translucent layer paired with solid horizontal vanes allows sunlight in but keeps strange eyes out of the frame. When operated automatically, this can create a fanned look that is soft, elegant, and beautiful. You might try out such blinds for ceiling-to-floor slides.
4. Automated Roller Blinds
Last but not the least! This is the most preferred window blind in Edmonton of all time. An automated roller blind suits expansive windows, office windows, or cabins. Whether you need complete privacy or ample light, it allows all. All you need is to choose the preferred shade. You may add some drama to your space by opting for customized printed roller blinds.
Speaking of blinds, there are tons of rumours about automated window treatment. It's costly-overpriced-not for all-disturbance in the mechanism-problematic installation and whatnot. We say, Take A Pause! Let SunBlinds Inc break the myths for you.
The Common Myths Busted
Myth#1 Troublesome Mechanism
It's not like operating on a body. Right? It is as simple as you control your TV unit or sound system remotely. All it needs is timely maintenance. Consider your body, for instance; if you don't maintain yourself, you will get lethargic and eventually have trouble working. It is not at all complex as it appears. At SunBlinds, we offer sun sensor-activated automated, suitable for high-low voltage, cordless window blinds.
Myth#2 Problematic Installation
Relax! When you purchase SunBlinds, we offer a completely hassle-free installation service. Mainly any window blinds company would install the automated blinds for you. But we differ in enlightening our customers about maintaining its smooth functioning, a lifetime mechanism warranty, and a client-first approach.
Myth#3 Costly
Yes, it is slightly higher in price than the regular blinds. But it's not sky-high! You won't have to spend a fortune on automated blinds. We don't decorate our interior now and then. It's mostly a one-time purchase. To elevate your home's aesthetics with a touch of style and trend, the price is worth it. Automated blinds are also recommended by the government as it the safest window treatment of all time. Unlike corded blinds, motorized blinds eliminate the chance of your pets or kids getting strangled.
To Wrap Up
Sun Blinds Inc offers a customized window treatment for all. Our expert engineers visit your place, measure according to your requirements, share experienced suggestions if requested, and process the installation with sheer care. You may visit our website or store or call us for guidance and quotation. If you're a trend lover or simply like elegance, neither wait any longer nor look any further! Have a look at the best-automated window blinds in Edmonton from our stock.
Visit Our website to read more blogs like this.
0 notes
Text
Install Durable Outdoor Canvas Blinds to Get Complete UV Protection
High-quality outdoor canvas blinds are provided and installed for your properties by reputable shade suppliers. A popular and affordable method of protecting your windows from the stifling Australian sun are canvas blinds. Their outdoor canvas blinds contain a lot of advantages, like a slim form that blends well with contemporary architecture and gives your home a classy aspect. These blinds' head box and bottom rail can be powder coated in any colour of your choosing. These blinds have a gearbox for manual operation, or they can be fully motorised, giving people or groups of people control over windows.
Also, at affordable costs, these blinds companies provide a large selection of PVC cafe blinds in Melbourne. With the help of these fashionable outdoor cafe blinds, you can extend the comforts of indoor eating to your customers or guests. Café blinds are perfect for expanding a variety of spaces, such as verandas, cafes, bistros, restaurants, hotels, and more. With the help of these clear blinds, you can expand your inside area without giving up the outdoor sensation. This will provide you with long-lasting coverage and weather protection so that your guests or clients can enjoy eating outside in every season without worrying about getting rained on or distrubed by wind.
Installing outdoor canvas blinds is important:
According to verified portals, this "Classic" sunblind is an effective and affordable way to prevent the sun from entering your room through your windows and heating it up. It also helps prevent your carpets and furnishings from fading. Outdoor canvas blinds are guaranteed to last a long time and offer complete UV protection. They also contribute to the energy efficiency of your home. Homeowners enjoy displaying their brand-new canvas awnings to neighbours and visitors. They are significantly more durable than less expensive imitations and have amazing looks.
Finally, awning companies provide a wide range of awning products, such as awning fabrics, canopy awnings, clear PVC cafe blinds, drop arm awnings, sunblinds, and more. Anybody looking for these items should contact a local blinds company.
Source
0 notes
Note
hi! do you have any tips for making good quality screenshots in ts4?
Hi! Let's see what I can come up with..
LIGHTING/GRAPHICS MODS Easy to use/install, lighting mods can change the look of your game drastically with little effort! I use a few:
no-glo
no-blu
graphicsrules override
I use this camera mod too, much less drifty...
Softerhaze makes some bomb ass lighting mods too.. I just switched from twinkle toes to sunblind and I am in LOVE - gamechanger lemme tell you.. so pretty! LOOKIT!!

RESHADE I'm still using g-shade at the moment but after recent events, I'll probably end up switching back again when I can be arsed. The effects you can achieve with reshade presets are amazing tbh.. and it's real fun to mess around with and create your own! Tho lots of people have made awesome ones if that's a bit much for you. If your PC can't handle it all too well you can always just switch it off until it's time to take screenies as well.
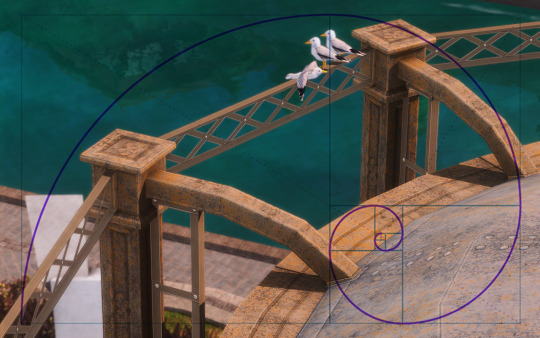
COMPOSITION Kinda hard to explain but basically, composition is what's in your frame and how you line it all up. I'd recommend reading some photography guides to get the gist of the concept.. but honestly, the more you mess around the more you'll get the hang of it. I've always loved photography and sims screenies really aren't so different. If you use reshade there's even some templates for thirds/the golden ratio etc you can slap on top for practice. Personally I don't use 'em cos I prefer my own judgement (that sounds rlly obnoxious but we're rolling with it). I found a template to show you what I mean! (ngl I was stoked that the first screenie I thought of for being a good eg. almost perfectly fit into this golden ratio shit LOL) but let's keep in mind how long I scooted around to get a good shot of this.. pretty sure I deleted about 10 other failed shots of this but shhhh, it's trial and error!
ANGLES/FOCUS The way you take a shot and how you angle it can change the whole feel of the image. For example.. in this image I tilted down and bit and filled over two thirds of the shot with the man, he's a big character and quite an intimidating guy so I think it helps get the idea across without pointing it out (at least I think so but idk I could also be talking outta my ass)

Similarly in these two shots below.. the first with the guy on the left gives the feel that he's in control here. The "camera" is tilted above him slightly and he's all up in your face, making the woman look much smaller in comparison. BUT! If you flip around to the second image, tilt down a bit and switch the focus to her, it makes him look more insignificant and less in control. I hope this makes sense??
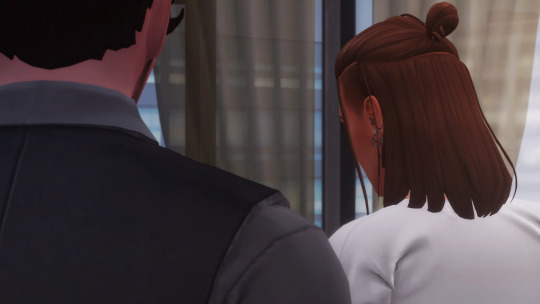
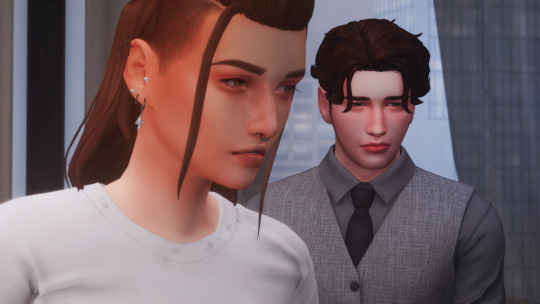
EDITING/PHOTOSHOP ACTIONS ETC Personally I don't use photoshop actions but there's plenty out there to do the work for you! I think Intramoon? maybe.. has made a few but idk, you guys feel free to jump in with any suggestions! You can also smooth, fix stuff, change the mood/lighting, all sorts.. my advice on this is patchy at best tbh cos I just faff around until I see what I like lmao.. which leads me on tooooooo...
FUCK AROUND AND FIND OUT Lol.. but seriously! I don't know what I'm doing. I've never taken any classes or read up on much, I always just jump in and see what happens. Fuck around with reshade, fuck around with camera mods, fuck around with composition/focus, fuck around with photoshop or gimp or w/e.. just mess about for a while and have fun! I promise you'll get better.
#ts4#?#uhh what do i tag this as#tips#!?#screenie tips!?#extra#lmaooo#being asked advice is always wild cos i'm like uhhh ?? idk how i do stuff i just do it without thinking#which is annoying cos if you ever wanna replicate smth you can't remember how 😂🙈#pls take my advice lightly cos i ain't an expert nonny but ty for asking#<3
202 notes
·
View notes
Note
Nirvana in Fire, space AU!
Thank you, darling! So predictably I came up with so much worldbuilding and then got sidetracked into feelings about cyborg Xuanjing Bureau agents and DNA-rewriting magical plot devices and people having feelings about being human and loving other people, so now it’s just A Lot of Feelings about Xia Dong and Nie Feng, who deserve the HAPPIEST ENDING. It is also very full of spoilers.
----
Xia Dong is very young when they install the augmentingimplants in her, but old enough to remember it.
She is very proud, of course, to be doing her duty, but shetries not to recall those first few hazy-not-hazy weeks. To see and hear somuch more, to be aware of so much more, for her brain to be able to process somany things that it hadn’t before. Her bones and flesh are made more durable,her tongue now heavy with a hundred dialects, her fingertips conceal imperialseals that spill the secrets of any electronic device in the vast empire of DaLiang.
Xia Dong, faster, smarter, sharper, inhuman, is an instrument of the Xuanjing Bureau, and herheart is very still behind the blankness of her face. She is loyal down tonerves and neurons, and her teacher is everything. Da Liang is everything.
When she reaches her majority,she is given weightier assignments, trusted with the secret things needed torun a kingdom of a hundred planets. She is given, one turn of Jinling’s manymoons, responsibilities with the young members of the Imperial Family, adjacentto the Chiyan Fleet.
Nie Feng is handsome – long dark hair tied up with anexacting proper neatness, dark brown eyes brimming with conviction, veryelegant hands lined with combat scars – and very kind. He is sharp, too, awhirlwind of strategy and sword, but very easy with his commander’s son andassorted young relatives.
He smiles like a thousand stars whenever he sees Xia Dong,and speaks to her about weather and security features with the same confidentease.
Xia Dong loves him. She loves him as the river cutting pastthe Imperial City, as Mount Gu in its illustrious heights, as the cut of herhidden blades and precise lines of code.
There is room in her heart for him, beside the encyclopediaof poisons, the endless lines of regulations, the whip-quick dire decisions shemust make every day.
Xia Dong wants a home lined with tapestries, with a shrine.She wants a kitchen, where they can fumble their way through food that isn’tmilitary rationing. She wants breezy curtains by open windows, and to liebeside Nie Feng at night, his hands unflinching on her strange skin.
She tells him, breathless, that she loves him. That she wouldbe loyal to him.
He would never ask her to be less unnerving for him, thoughshe would, and she loves him for that even more.
She loves him, and he loves her.
They marry on an auspicious dayin the summer, and Xia Dong is full of joy.
----
Nie Feng is dead.
His grave on the tall sides of Mount Gu holds half hisremains.
The other half are lost half a system away, on the lonelyghost moon of Meiling, a cold burned out husk of betrayal.
It is winter, winter, winter,and Xia Dong is cold through.
----
Grief doesn’t fade, has burned itself permanently into hercircuits and synapses.
It’s a storm that rages for over a decade, though she hasnever let it twist her face.
Xia Dong falls back on her work like subroutines. She triesto make herself harsher, sharper, more unnaturally ruthless, something evenmore inexplicable to the members of the court.
She loves Nihuang who is sad at her own losses rather thandisloyalty, and she burns at Jingyan who is contemptuous of Xia Dong’s loss,and wishes that she didn’t care for either of them. She loves Xiao Jingrui andYan Yujin, and resents them for caring for one another so freely.
Xia Qiu watches her with steady eyes, and never says thatperhaps this is better, that perhaps she is lucky that her husband is deadrather than a traitor, that perhaps she needs have no feelings for anything atall. But he thinks it, she is uncharitably sure.
Xia Dong is a weapon, must be a weapon, a blade sharp enoughto dismember any who would misuse her. All that is left to her is loyalty andgrief.
Perhaps if she could bring up that wall between herself andher work enough times, she could cut herself off from grief. But losing griefwould be losing Nie Feng a final time, and Xia Dong cannot bear to lose himagain.
There are whispers, on Jinling and across all of Da Liang,that the Xuanjing Bureau agents are fully artificial, computers given form,without remorse or mercy or kindness.
Some days, Xia Dong wishes she were not a person, had neverbeen a person, were only electricity and anger.
But the augmented implants in her mean that each memory ofNie Feng’s smile is as bright as the day he gave them. The weight of his eyes.The touch of his hand, holding hers as something sturdy and precious both. Thefall of his hair let down to be brushed, dark as ink, as the void between thestars.
Xia Dong drinks them, bitter andsweet as they are, and pours out wine at his grave when Jinling turns to facethe sun again.
----
Nie Feng is not dead.
----
He is covered in fur white as star-centers, shouldershunched in with years of loneliness, and his tongue chokes helplessly on hername. His DNA is as rewritten and altered into something unfamiliar. It shouldbe no wonder that others thought him alien.
And yet, his eyes are the same – Xia Dong remembers themvery clearly. Her blank wall mask cracks, and tears well in her eyes likeblood.
Xia Dong has spent this much time making herself strange andapart, that it startles her to see his eyes as full of grief and longing andwater as her own.
And his mask breaks too, and her beloved husband curls intohimself, away from her. His hands cover his face, overcome.
It takes her steady, careful strength to pull them away, ascareful and insistently as she has ever done anything. He is alive, and yethides from her the way she had once thought to hide from him, shy andunfamiliar with being wanted.
A hundred dialects in her mind, and the hardest and easiestthing in the world to speak to him.
“You finally came home,” Xia Dong says, cracked-voiced, andif the feel and color of his hair is not the same, the way he leans into hertouch is familiar as the day he left her. She loves him, still, as she hasnever loved anything.
“I am not a person,” Nie Feng says with faltering hands,looking at her and away, sunblind. “Not now.”
He loves her, still, she knows, has not forgotten the lookof it in his face and his hands and the line of his body.
“You came back to me,” Xia Dong says, fierce and sure, herheart blooming with the empty home she had given up years ago, with all thethousand pains of the last two years, with desires that have been buried solong she half-convinced herself they were disabled. She loves him. “My husband.”
Nie Feng wavers, but if his memory is not hers, it is goodenough to recall the early days of their marriage, those days when she cameback from bureau work. He must recall murmuring into the ear of the empire’sblunt instrument, “my wife,” as though eight times repetition made her boththings.
“My husband,” Xia Dong repeats, and wipes the tears from hisface. Her own spill heedless over her cheeks, and she will not check them, doesnot know how to give voice to her happiness otherwise.
“You,” his hands say, like the gesture is precious, and NieFeng raises trembling hands to her face, and his eyes hold a thousand stars.
#nirvana in fire#xia dong/nie feng#space au#i may have to write another heightened space opera au snippet sometime#but lbr sometimes you just need#complex feelings about what it means to be a person#and emotions being hard#nif#sovin writes things#samyazaz
52 notes
·
View notes
Text
Outside Window Blinds
New Post has been published on http://www.taylorandstirling.com.au/outside-window-blinds/
Outside Window Blinds
What are the best outdoor blinds?
There are many types of outdoor blinds and the best outdoor blind really depends on what you are trying to do with the area that’s driving the requirement. The following are all variants of outdoor window blinds.
Auto Sunblind or Spring blinds – have been around for many years and were traditionally covered in canvas product now being replaced with the mesh style products, which provide better light control and allow the window to breath. The mesh is also more durable in “wetter” winter locations. They can sit at different distances from the window depending on the location, 150mm, 250mm or 300mm at the lower section of the window.
Straight Drop Blinds – very similar to the auto sunblind, however they normally have a manual winder to lower and raise the blind. Unlike auto-sun they drop straight down in front of the window, good for areas where there is a path that doesn’t allow a traditional auto sun blind to operate.
Wire Guide Blinds – a more modern approach to the straight drop blind, but replacing the large metal sides with stainless steel wire. It has a more minimalistic look than the auto sunblind and straight drop blind. Also suited to areas which are close to the sea as the stainless wire is less prone to rusting than the traditional outdoor blind side rails.Pivot arm awnings – a more modern version of the traditional auto-sunblind, unlike auto sunblind there are just two large arms that pivot around a central location. Arms come in standard sizes and allow the window to be covered at different points. Ideally suited to modern homes or where an additional air gap is required providing better insulating factors as the air gap between the window and the blind is considerably more that any of the previous outdoor blind solutions. Also works well for covering wind out windows(awning windows)
Patio blinds/ Cafe blinds, Verandah blinds – generic term for the traditional blind installed on decks and patios to provide wind and sun protection. Traditional patio blinds or café blinds allow the users to lower the blind to a nominated point and then lock the blind into place with “dog clips”, then the user puts tension on the blind by winding the blind back onto the tube. Patio blinds are the hardiest type of outdoor blind and can withstand heavy winds and can be left down for extended periods or time.
Folding Arm awning – great for outdoor decks or outdoor entertainment areas, but can be used to cover large bi-fold doors/sliding doors that allow too much heat build up in summer. The folding arm awning allows for different pitch controls, or slopes. They project out at fixed widths in standard increments of 1.5m, 2.0m, 2.5m, 3.0m, 3.5m and 4.0m. They can span up to 14m in width in a single blind. The projection out will be constrained by the width of the blind.
Hoods – Often fit over doorways or windows, traditional mounted above the window or door with a fixed projection, unlike other solutions they are not retractable, they do come in a variety of styles – Dutch hoods, French Hoods, Wedge Hoods, Bow Hoods.
External zip blinds, or ziptrack blind or alfresco blinds – these blinds enable you to cover in large entertainment spaces, unlike patio blinds they provide a total wind/rain weather block, and added advantage of keeping out the insects in summer months. They are also remarkably good at keeping the entertainment space usable in the winter months with the addition of an outdoor heater.
External Roller Shutters – provide one of the best outdoor blind coverage options, reducing heat in the summer months and keeping heat in in the winter months. Roller shutters also assist in keeping noise out. BAL 29 and BAL 40 roller shutters are available.
Retractable Roof – for pergolas, skylights, sunrooms, glass roofs, courtyards or custom-built structures. These awnings are available in a variety of mesh and acrylic fabrics, providing the ultimate protection from the sun. It’s a tensioned system that extends and retracts within fixed tracks. This system successfully brings year round comfort.
Outside View
External Venetians – Unlike textile blinds, external venetians allow reflected light to pass through, resulting in light-filled working or living spaces and reducing the need for artificial lighting. They can stay down in pretty much all weather conditions and provide similar heat benefits to external roller shutters – keeping heat out in summer and helping to retain heat in winter.
What is a retractable blind?
All of the above examples are Retractable, except for the fixed French/Dutch hoods . They are either controlled by an internal spring, manual winding clutch or motorised system. Very cheap systems allow you to roll up with a rope, but we don’t sell these as the quality of the hardware is less than satisfactory.
How much are outdoor awnings?
The price for outdoor blinds depends on the size and style, your traditional auto-sunblind is the most economical solution in the market. These can last 20 years+ if looked after, with quality components and good fabric making the difference. The quality of some of the outdoor blinds found at large mass market hardware chains and online auction sites are not worth the money, they have low quality components from the internal tube and spring through to the fabric used to provide sun protection. We repeatedly get asked to repair some of the patio or alfresco blinds, but the quality of the materials doesn’t allow this to take place.
How much does a motorized awning cost?
All retractable outdoor blinds can be motorised. While the outdoor market was traditionally dominated by the European motor manufacturers, the Chinese made motors have caught up and in most cases surpassed the old European manufacturers, offering superior functionality with longer motor warranties and often better equipped to integrate with home automation systems. The Chinese motors are typically less expensive than the motors from the old European manufacturers, but don’t just focus on price as some cheap motors may not give the longevity and service that you are seeking. What you choose really depends on the size of the blind you want to control and how well the area will be exposed to weather. A good quality motor for outdoor use will be just under $300 dollars per blind depending on size and requirements.
Are awnings waterproof?
It all depends on the fabric and pitch of your awning. Even the mesh awnings depending on the style of mesh can be waterproof. Awnings can be covered in Mesh, Canvas or Acrylic and solid PVC. The solid PVC either clear or solid colour are totally waterproof. Canvas and Acrylic fabrics are just like a tent they can be water proof to a point, but water may eventually penetrate depending on weather conditions and type of fabric, Finally the mesh comes in two categories of openness with 95% being 5% open and the 99% being 1% open. The 99% is the most waterproof. In the vertical position all mesh is quite water proof however in a sloping use (such as a retractable roof) the water tension will provide the ability for water to run off but any interference with water tension, such as wind, will result in the mesh leaking.
0 notes