#anyway i made these in photopea
Explore tagged Tumblr posts
Text


Psych season 4 bloopers that @fyrmayj and I quote all the time
Other sets: Season 1, Season 2, Season 3
Image descriptions:
Gif 1: We are looking over the shoulder of a woman who opened the front door of her house. Lassiter spins to face us as the door opens and says quickly, "There's a male about 5'8" I didn't get a g'look at him--" he cuts off due to the line mess-up. He makes a funny face and says something like "glololk" as he turns away to reset.
Gif 2: Tight shot of Jules reaching down to grab some files from a cabinet. She starts by saying, "So I need you…" and proceeds to struggle comedically while documents try to spill out of the folders she has grabbed. She finally gets the files out of the cabinet, intact, with a vocalization something like "nnnn!" and then laughs at herself.
Gif 3: Closeup of Jules, with Lassiter just out of frame to the left. She has a look of realization and says to him, "We solved it!" They go for a high five but whiff it. She says "We missed!" and Lassiter says "We suck!" while she laughs.
Gif 4: Jules and Lassiter are giving a case update at the station. Jules says, "They discovered the location of the warehouses and they stole the scon--" she cuts of due to the line mess-up. Smiling now, she finishes the line, "Stole the sconfiscated drugs!"
Gif 5: Closeup of Lassiter, outside at a crime scene, trying to put on gloves. It is not going well. His fingers have not aligned with the glove fingers and it looks ridiculous. He is trying to fix them while saying, "Aaa my fingers are so stubby and short!"
Gif 6: Tight shot of Lassiter in the station. He's speaking to Shawn and Gus, saying, "Let me guess, he chewed his way out with his teeth, all the better to see you with." Before they can respond, he waves his hand in front of his face as if to erase the words, and says, "That doesn't make any sense."
Gif 7: Chief Vick is in her office, standing between Lassiter (behind) and Shawn (foreground). She's looking at a crewperson to the left of the camera, making a silly grin and shrugging. She says with a vaguely Australian accent, "Kinda weird, but it could work."
Gif 8: Looking over the shoulders of Lassiter and Jules, we see Gus and Shawn standing outside a building. Shawn says, "I have to go number one," looks at Gus, looks back at Jules and continues, "and Gus likes to pee on other people's poop."
End description.
#psych#bloopers#my gifs#this was definitely the season of lassie bloopers#there are a few other funny ones that i didn't think would translate as well to gifs#anyway i made these in photopea#some things were easier than in photoshop and some things were more time consuming. probably just gotta learn more#also wow it's been a minute since the last set
21 notes
·
View notes
Text
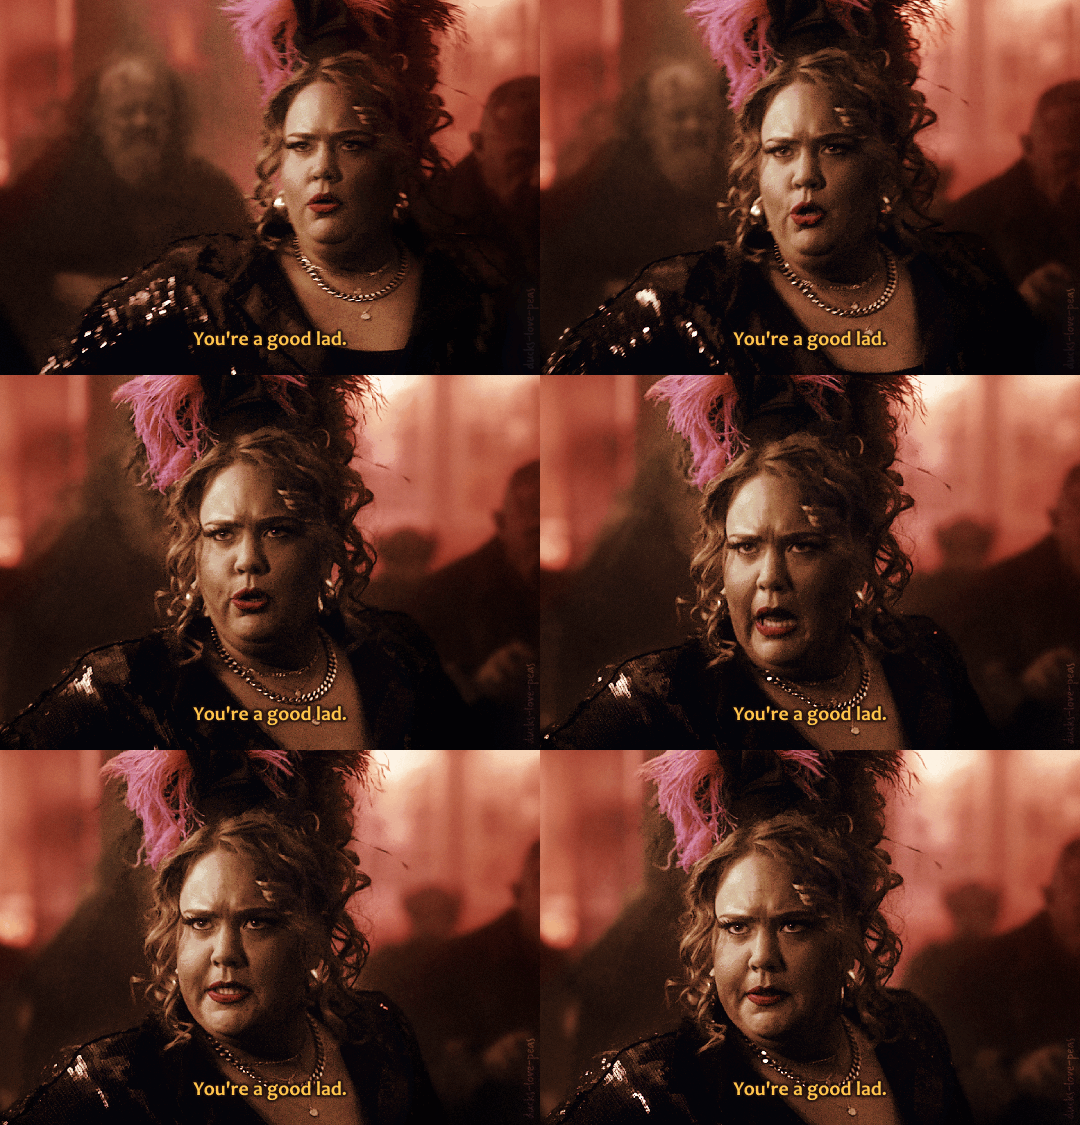


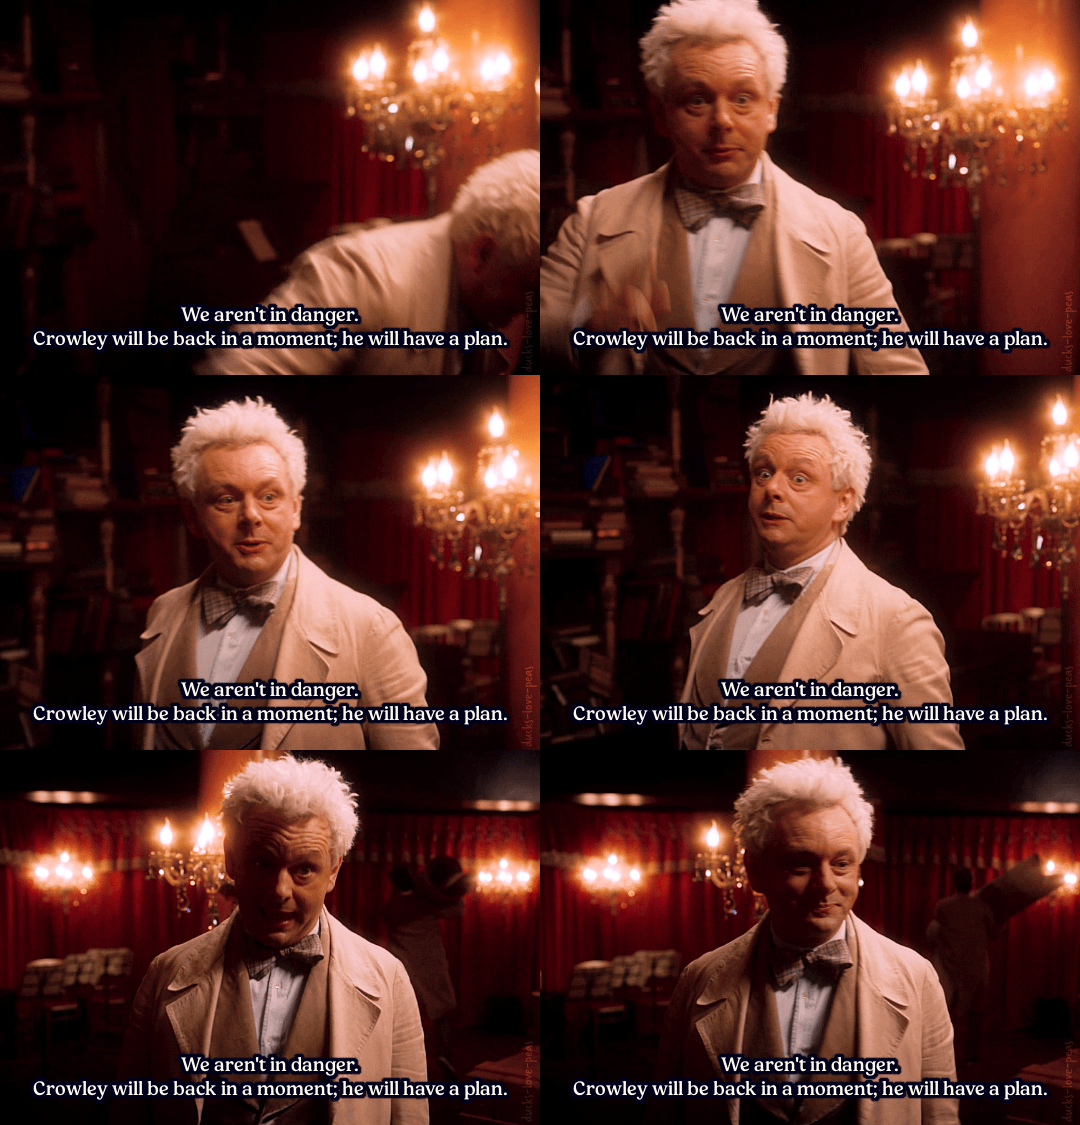
Good Omens 2 | ⭑favorite moments⭑ 1/?
#good omens#good omens 2#crowley#mrs. sandwich#goodomensgifs#goodomensedit#s2e5 'the ball'#*emerges from photopea three days later covered in blood* i think these took ten years off my life#how on god's green earth are people coloring this scene?!?!#my apologies to mrs. sandwich who looks vaguely undead but that was the best i could do#anyway#one of my favorite s2!crowley lines and i wanted to make it in gif form :D#i made this#gos2 faves
3K notes
·
View notes
Text


mahmoud darwish from this post
For @volvaaslaug, @kingslionheart, @thedarknone
#the last kingdom#sevenkingsmustdie#tlk aelswith#alright I'm getting back into still edits#anyway this is just a vibe#this is the first edit I'm made is photoshop and there's a lot of differences from photopea and pixlr#anyway this is an aelswith vibe#its very her#your honor I love her#she means everything to me#my queeeeen 😌🥰
20 notes
·
View notes
Text

you are getting very sleepy . . . . . . . .

come one come all to sydney's first ever performance for kinktober 2023 ! introducing: the sideshow spectacular !
ignore the delay to my announcement and marvel at the wonders waiting for you this month as we traverse the perverse and erotic. all contributions to kinktober will be reader self insert fics. if you are interested in being added to a taglist for this event, please do not hesitate to reach out via ask or private messages ! any updates to schedule or changes to teasers will be edited here and reblogged. continue below to see the teasers for the updates taking place each week !
thank you @cafekitsune for the dainty chain divider !

☞ week one: yandere!ryomen sukuna + medical play ( located here ! )
☞ week two: ryomen sukuna / yuuji itadori + voyeur + threesome
☞ week three: boyfriend!nanami kento + exhibitionism
☞ week four: ryomen sukuna / yuuji itadori + domme!reader
☞ week five: a super special secret surprise !

#kinktober 2023#the sideshow spectacular#the surprise is for everyone including me! lmao#i have soooo many ideas we're gonna see wins by the end of the month heheheheehehehehe#anyway! first update tonight! doing my edits now#really coming in under the wire arent i for week 1#header + footer made by meeeee in photopea xo#jjk kinktober
53 notes
·
View notes
Note
for research purposes, what size are your reply icons. slash forcing

can you get out of my inbox for real. anyway it depends on the icon. the rectangle template is 1100x250 since it’s rectangle, my canarysage reply icons are 600x150, my ashenscion reply icons are 1080x275, and i think most of my old roseysekai/azure grit icons were 1080x175. so, tldr: it varies
#okay i do not remember why i made the new canarysage reply icons so small. what the fuck. but anyway#they’re never above like 1500 bc it starts to crash my photopea lol#kanacide#ʚɞ — chatting.
6 notes
·
View notes
Text
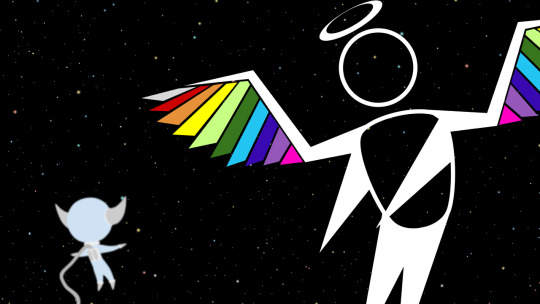
listen i just like putting wings and halos on things. and making them humanoid apparently
#broke out photopea for this one! the stars took so long#feel like i should've made the geolyte more out-of-focus but whatever#i still have the psd file so i could do it if i really felt like it#anyway the sages aren't canonically minor deities but they aren't canonically NOT minor deities#there's not a lot of canon in meteos anyway#i will do what i please#postin this one kinda earlier than usual! might actually fill a queue at some point. would like to do that#meteos#art#i can stare into a strobe light without getting a headache so i can't judge when to put eyestrain tags#but if i post things that need to be tagged with anything please tell me#digital art#geolyte#hevendor
5 notes
·
View notes
Text
got a new photoshop after approximately a billion years and i feel like i'm navigating a spaceship
though tbh i think i might be based on how my laptop fans sound like they're trying to achieve vertical lift any time i make a selection
#the previous version i used until it finallt gave up the ghost was ~15 years old#this feels like when i tried to drive my mother's car (made 2016) after years of driving my car (2006)#like. why are there screens. where does the key go. i need some practical effects amidst all this cgi please#+ i tried fucking around in photopea and i do like it but me and my inability to maintain a normal learning curve sort of wrecked that#the sort of stuff i want to make on it requires like seventeen workarounds and weird editing sequences compared to ps#and i somehow introduced some kind of de novo mutation to my photopea tab while trying to work on it#anyway! i have approximately 170000 other things i should be working on but this is of course what's eaten my brain up#tire fire talks
0 notes
Text
How to have animated rentry graphics with semi-transparency!!
Have you ever had this problem? You find this super pretty clipping mask that you wanna use...

...But when you try to save it as a gif, it suddenly breaks the pretty blurring?

So, let's talk about APNG:
APNG (Animated PNG) is exactly what it sounds like: a png that can be animated, with all the benefits of our beloved png format!! Such as unlimited colours!! Bet you didn't know this could be done!
Actually, you probably didn't know that for a good reason: APNG does not work everywhere. For example, I&'m not using it in this post because the animation won't work on Tumblr. It also doesn't work on old browsers, which you can check here if yours supports it or not:

However, even if the animation doesn't work, it will show the first frame as a still image!! So even those on older devices will still get to enjoy the graphic!!! (unless like... you want to do a fade-into-existence animation where the first frame will have nothing... but those are uncommon anyway)
But for this post, what's important is where it DOES work, and that is image hosting websites like imgur or catbox. And so, by extension, it will also work on Rentry + its forks!!
So how does one actually make an APNG?
Ezgif:
Note: DO NOT CONVERT GIFS TO APNG! It's useless because the gif file does not store any information about transparency, has less colours/lower quality, and you'll be needlessly removing backwards compatibility.
Go to APNG Maker and upload your frames individually. Check "don't stack frames" and make your APNG.

Photopea:
Works normally same as if you would save a gif. File -> Export as -> PNG. (You do need to have the frames layers in a folder same as you would for a gif)

Photoshop and Ibis Paint:
Unfortunately, Photoshop and Ibis do not let you just export as an APNG like that. You'll have to save each frame individually and then import them into Ezgif or Photopea.

As you can see, it's that simple! If you'd like, you can see a rentry template I& made using this the example APNG I& was showing throughout the tutorial here. I& was not able to find who made the overlay mask in the first place but a frame version of the cherry blossoms there did show up on adobe stock when I& tried to reverse search it so all they did was fill in a circle in the middle anyway.
Lastly, I& wanted to address one more question:
Why not use WEBP and/or AVIF instead? They offer the same benefits!
Well for one, fuck Google and fuck WEBP all my& homies hate WEBP. But for two, APNG has the benefit of backward compatibility: it's older (supported by more browser versions) and if the animation doesn't work, it still shows the first frame of it. WEBP and AVIF, on the other hand, don't show up at all/show alt text.
That's all, happy APNGing!
#rentry#rentry graphics#editblr#rentry tutorial#tutorial#edit tutorial#graphics#pfp masks#clipping mask#apng
218 notes
·
View notes
Text
how to make cool blobby turing patterns in photoshop
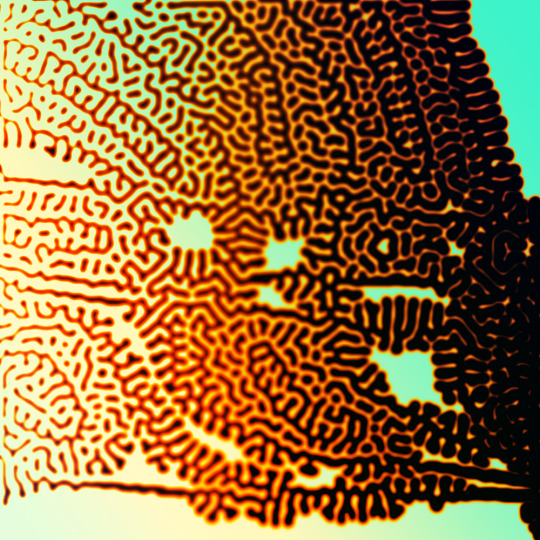
i'll preface with i learned the basic loop from skimming a tutorial on youtube, but as someone who prefers written tutorials i'm sure many would appreciate one! also, the second part of this is some of the visual effects i figured out on my own using blending modes and stuff.
i'm using photoshop CS4 on a mac so some buttons and stuff might be in different places on windows and newer photoshop versions but all the actions are the same. my canvas is 1000x1000 pixels.
UPDATES (i'm hoping these'll show up whenever you open the readmore?)
it's possible to do something similar in krita using this plugin, made by the love @arcaedex
it's also possible to do this in photopea, a free browser alternative to photoshop! the results are pretty much identical.
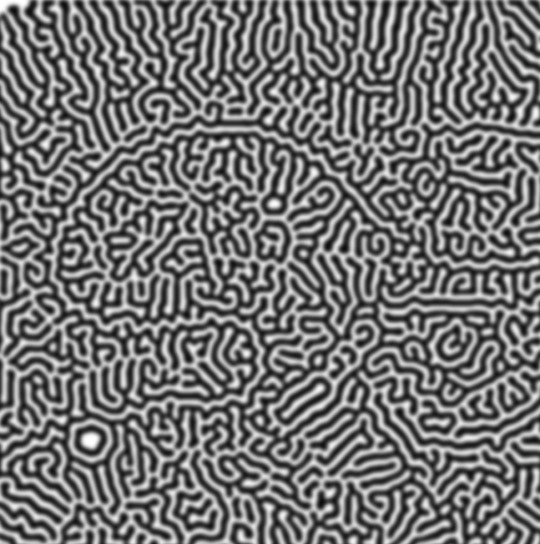
FIRST off you wanna get or make a black and white image of some kind. it has to be one layer. can be noise, a photo, a bunch of lines, whatever. here's mine, just some quick airbrush lines:

now find the actions tab. idk what it looks like in newer versions of photoshop but you probably won't need to dig!
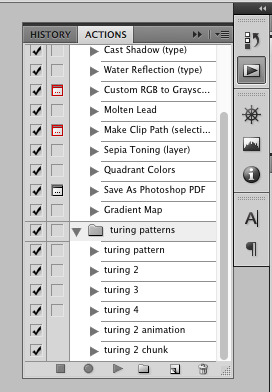
hit the little page thingy to make a new pattern. once you hit 'record', it'll record everything you do. the little square 'stop' icon will end it.
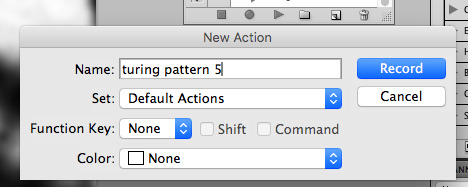
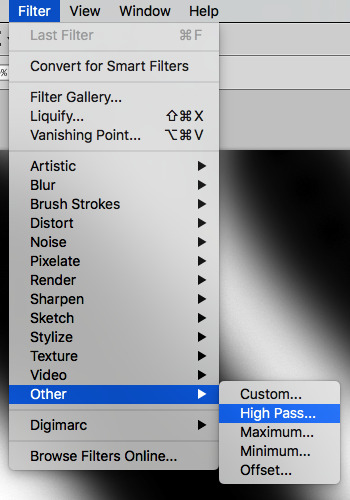
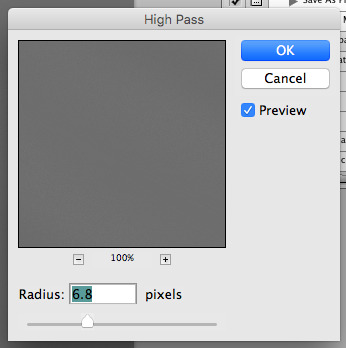
now you want to do a high pass filter. you can mess around with the radius to change the size of your squiggles, but the tutorial had it set to 6. experiment!
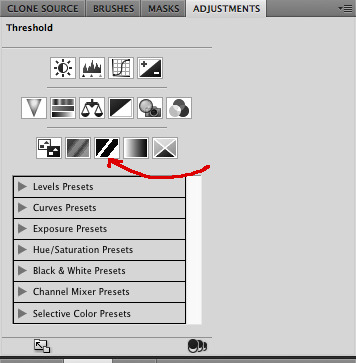
now add the 'threshold' adjustment layer. i use the adjustments tab but i think there's also a dropdown menu somewhere. keep it at the default, 128. merge it down. (control or command + E or you can right click it like some kind of weirdo)
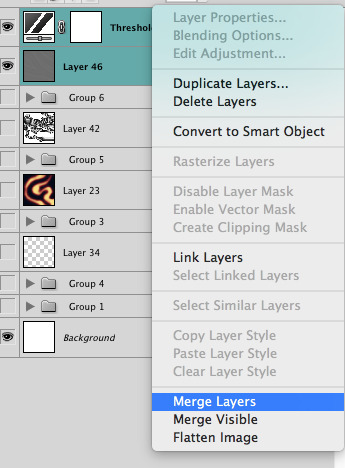
and finally, the gaussian blur! the radius of this affects the shape and size of your squiggles as well. i like to keep it around 4.5 but you can mess around with that too.
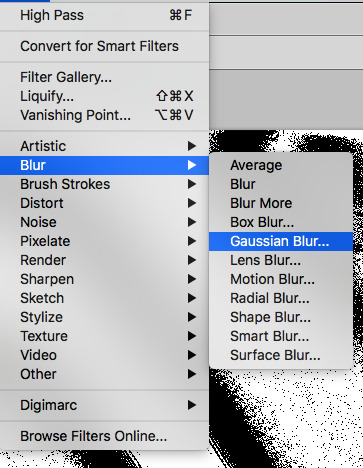
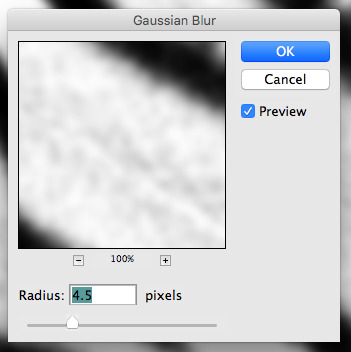
after that, hit 'stop' on the action you're recording, and then repeat it a bunch of times using the 'play' button, until you have something you like, like this:
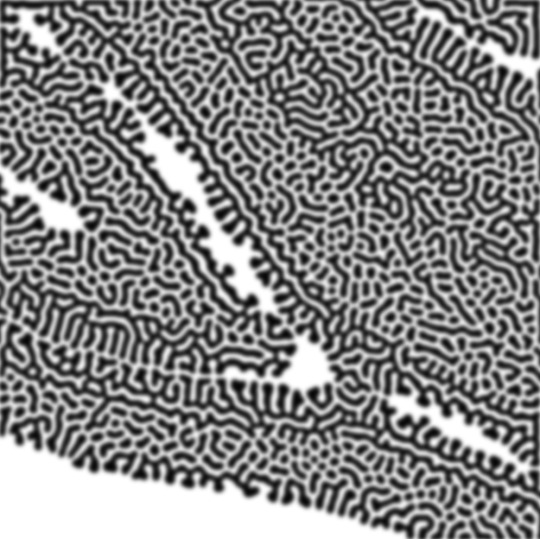
WOW!! that was fun!! and only a little tedious thanks to the power of macros. anyway, here's some fun layer blending stuff i like to do. it's with a different pattern cause i made this bit first.
anyway, using a black and white gradient (or a grey base that you do black and white airbrush on), make a layer with the vivid light. this will make the blobs look thicker or thinner.

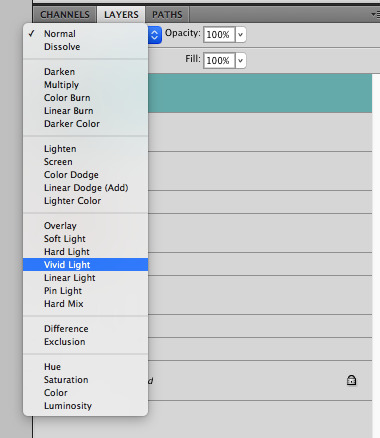

then, for cool colors, do a gradient map adjustment layer over that:

and finally, my best friend, the overlay layer. just using a gradient here bc i'm lazy, but feel free to experiment with brushes, colors, and blending modes!
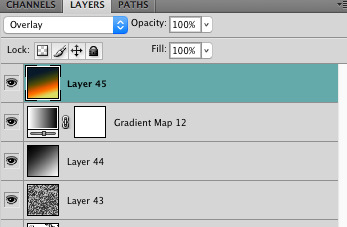

NOW GO. MAKE COOL SHIT WITH THE POWER OF MATH. AND SEND IT TO ME
also these are not hard and fast rules PLEASE mess around with them to see what kind of weird shit you can make. here's a gif. as you can see i added some random airblush blobs in the middle of it, for fun.
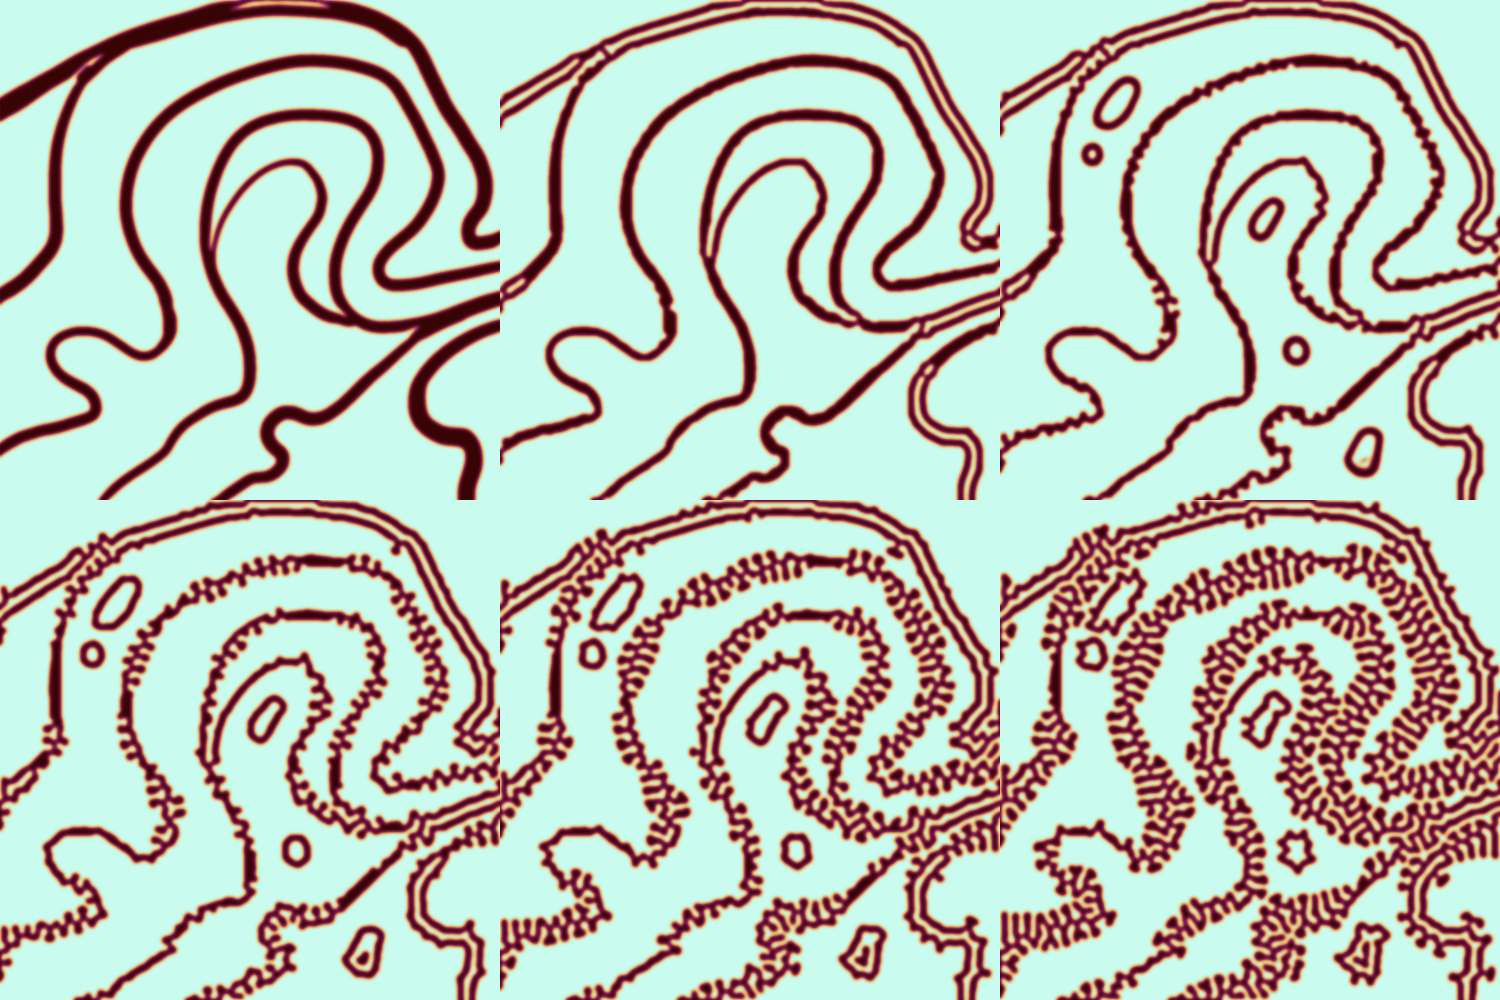
932 notes
·
View notes
Text
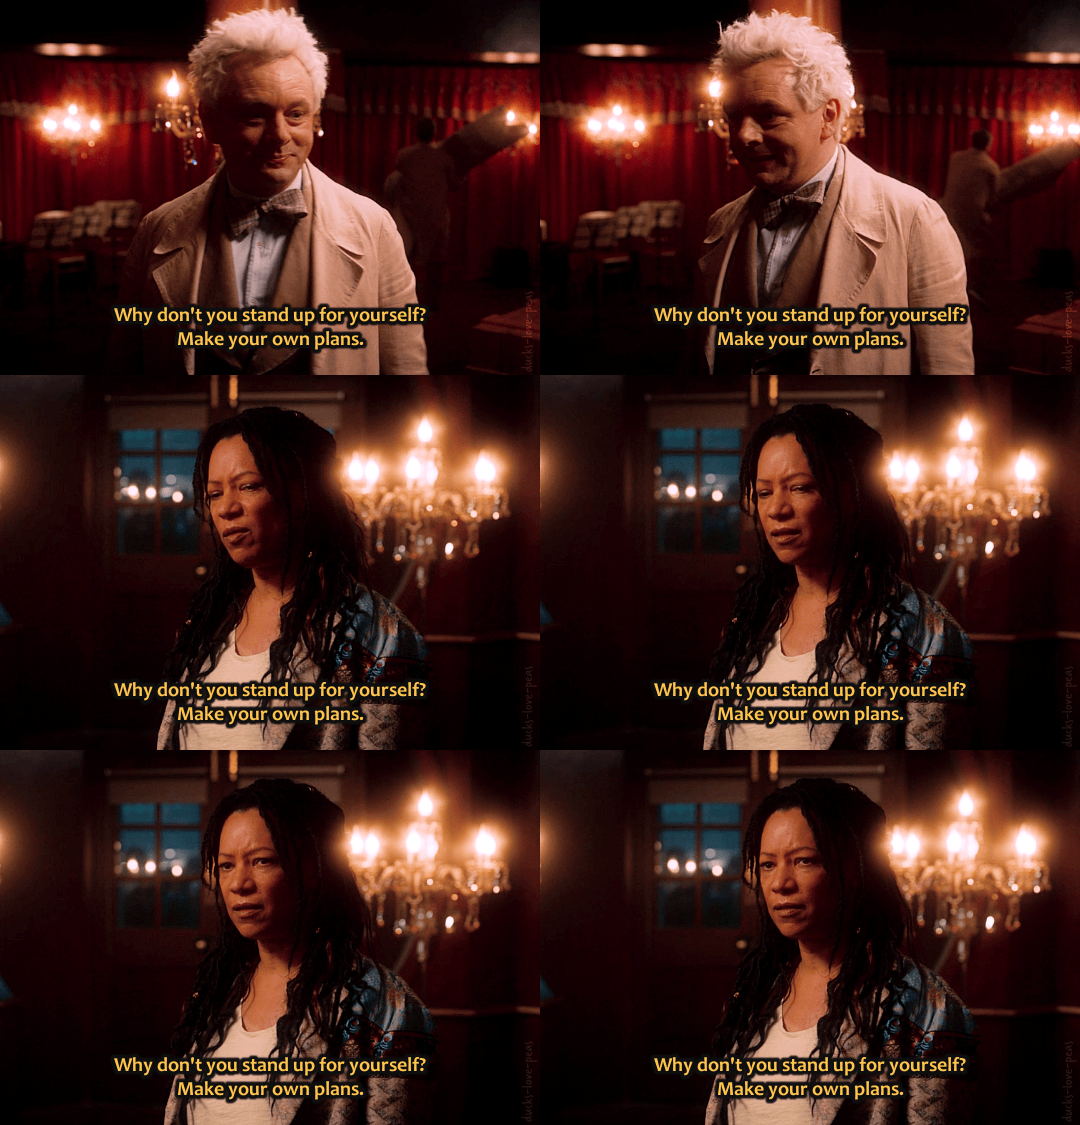
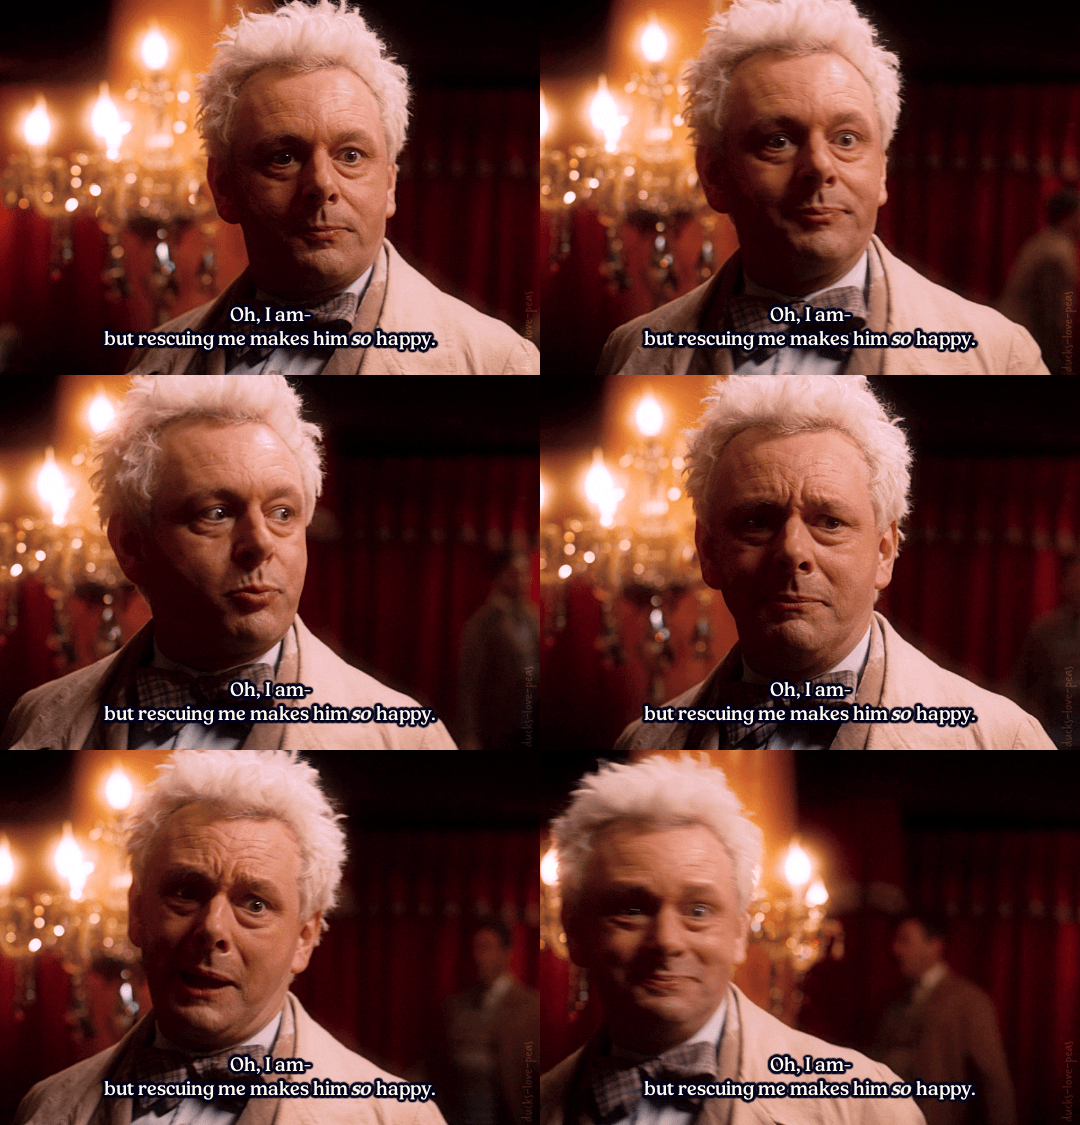
meanwhile, Crowley:
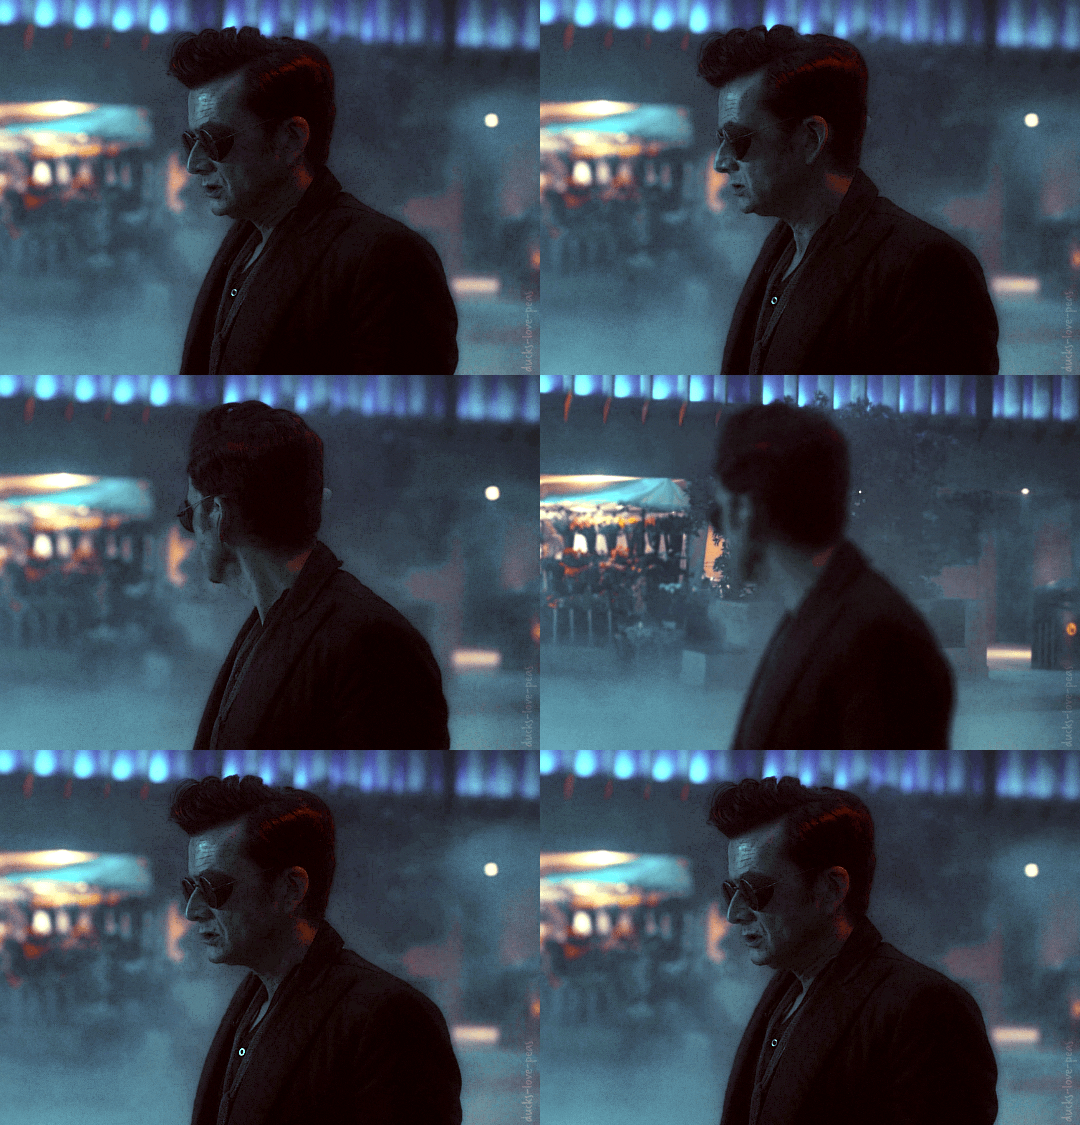
Good Omens 2 | ⭑favorite moments⭑ 2/?
#good omens#good omens 2#goodomensedit#goodomensgifs#aziraphale#crowley#nina#s2e5 'the ball'#the NOISE i made when i heard the 'rescuing me' line was embarrassing#(i was very glad the family member i'd started watching with had already gone to bed)#just. i love that we got aziraphale saying this#anyway i didn't mean to start a gif series and disappear for months oops#life was a bit much for a while#also i was annoyed at how captions were antialiased in photopea and i had to like... just step away haha (i'm still annoyed oh well)#also remind me to never do a night-outside-the-bookshop scene ever again. i've done it three times now. and i hate it. so much lol.#i made this#gos2 faves#photopeablr#gifs
263 notes
·
View notes
Text
how to load psds on ibispaint!
this was made with coiners in mind but will work with p much every psd so no worries if you wanna use a base or a sticker pack in a psd file (note, since its important, psd files meant to change the color of an image only load as intended through photoshop and photopea, so youll need either of that for them, not any other drawing programs.)
first of all: where to find files?
honestly, there isnt a clear answer. you can find some for most of them through just seeing if the coiner has linked any. most of them will be linked through file hosting sites, most common is drive or deviant art, but I used catbox for a while then switched to filegarden personally. the user @daybreakthing has took upon solself to turn a lot of more complex flags into psd files, so you can find a lot of them on sols old and current deviantart page (linked in their pinned)
the only downside for deviantart is you HAVE to log in to download the files. it is free however and you dont have to do much else.
for this tut Ill be using the nonhuman x for x flag psd by daybreakthing, (coined by sol as well, on melabea)
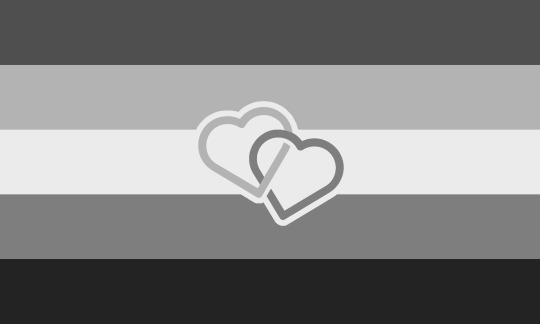
^^^ this guy
now onto the actual tutorial:
youre here likely because you already tried it, but its good to go over what not to do, and the results, anyway.
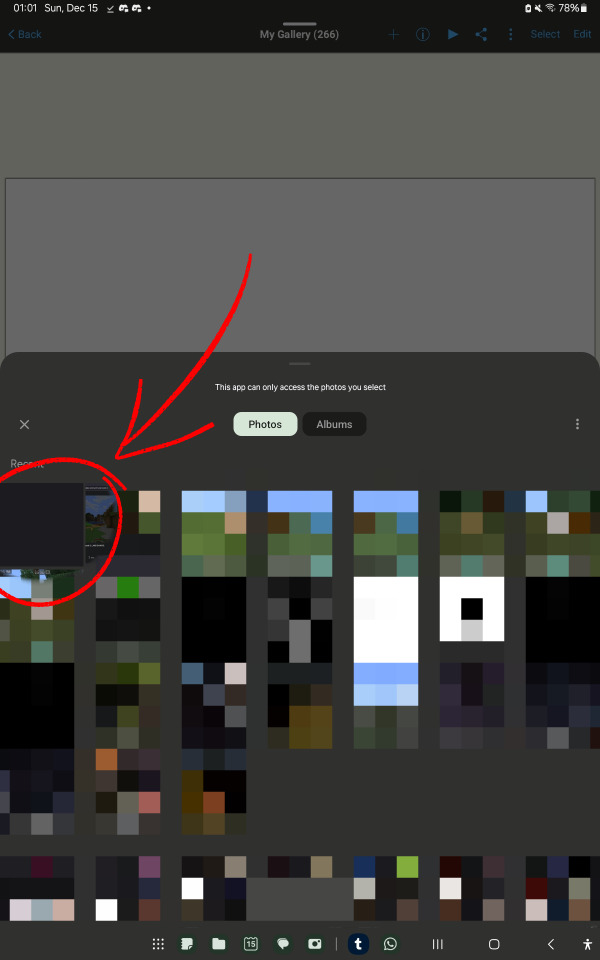
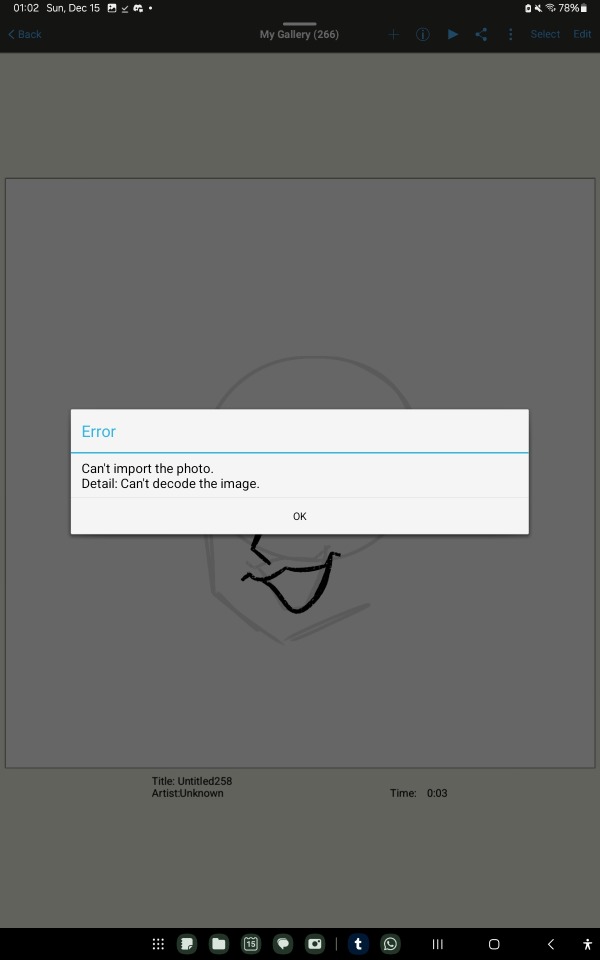
if you try to open it like a regular file, you will get errors, often more than one.
its important to note that psd files, while still considered image files, have no previews (except on drive) so they will look blank or empty. no worries about that, they will load properly.
here is what to do (or what I do, anyway)
go to your gallery, google photos, or another file manager (like just files or an external file manager)
Im using google photos bc my device's gallery wont let me share psd files
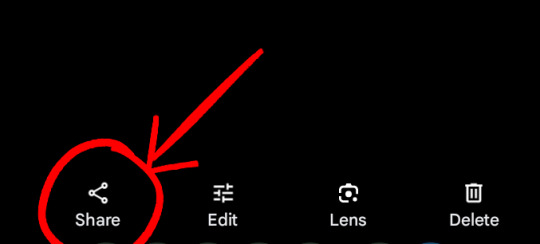

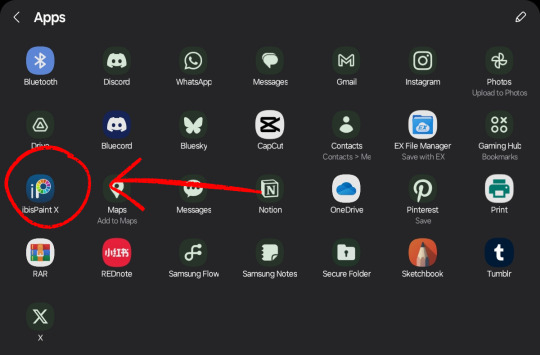
select the image, go to 'share', and pick ibispaint. theres a chance it wont pop up in the first screen, so just press the more option.
if ibispaint is not an option, try another image or file manager!
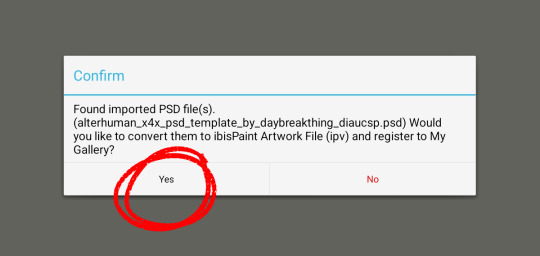
it will ask if you want to convert the file to ipv, select yes!
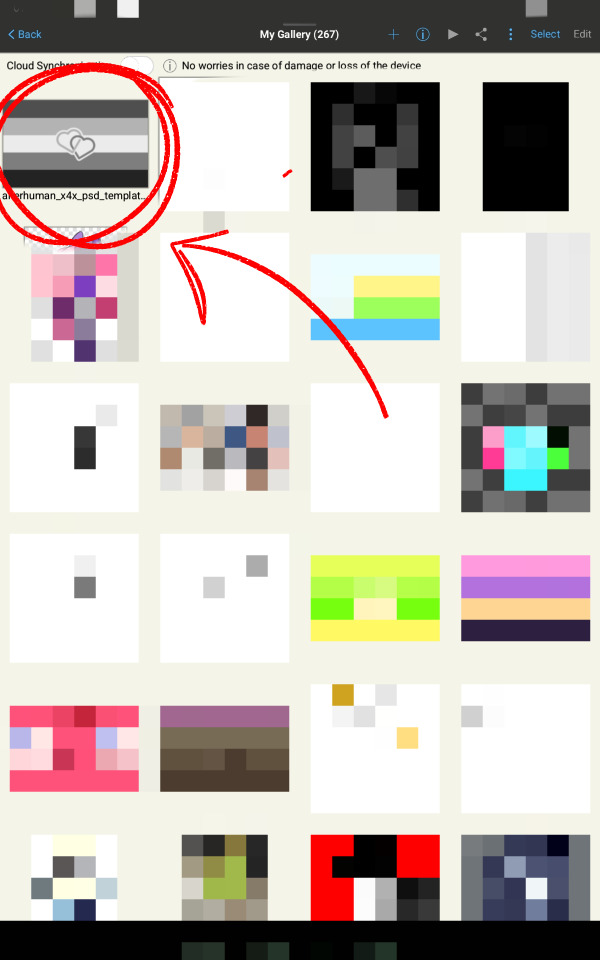
and thats all!! if all goes well it should be in your gallery when you open ibispaint. keep in mind it may crash once or twice when you first try to open it, just clear your app history cache thing and try again! (ibis paint is held together by duct tape and prayers)
I hope that helps!! if you have questions or problems, never be afraid to ask, I love to help!
tagging @idwl since their anon had a question related to this and I was directed to, to help :3
sorry about the amount of clutter with the red arrow and circles and pixelated stuff, I wanna obscure irrelevant or personal stuff while making sure people dont miss anything important.
60 notes
·
View notes
Note
your gifsets are perfect, I'm always in awe of what you can do and you're creativity!!! Could you please explain how you made the broken glass gif with different gif in it on photopea? https://www.tumblr.com/dengswei/754916132337729536/userdramas-creator-bingo-green-asiandramanet?source=share and would it be possible to do something similar with other shapes? Thank you for your lovely creations <33
heyy thanks so much!! and of course! i have to admit the way i do it might be a little bit tedious compared to like everyone else (though i don't know how photoshop users or other photopea users might do it 🤣) okay this is gonna end up being so long because of the way i do it so i'm sorry about that and i hope it makes sense 😭
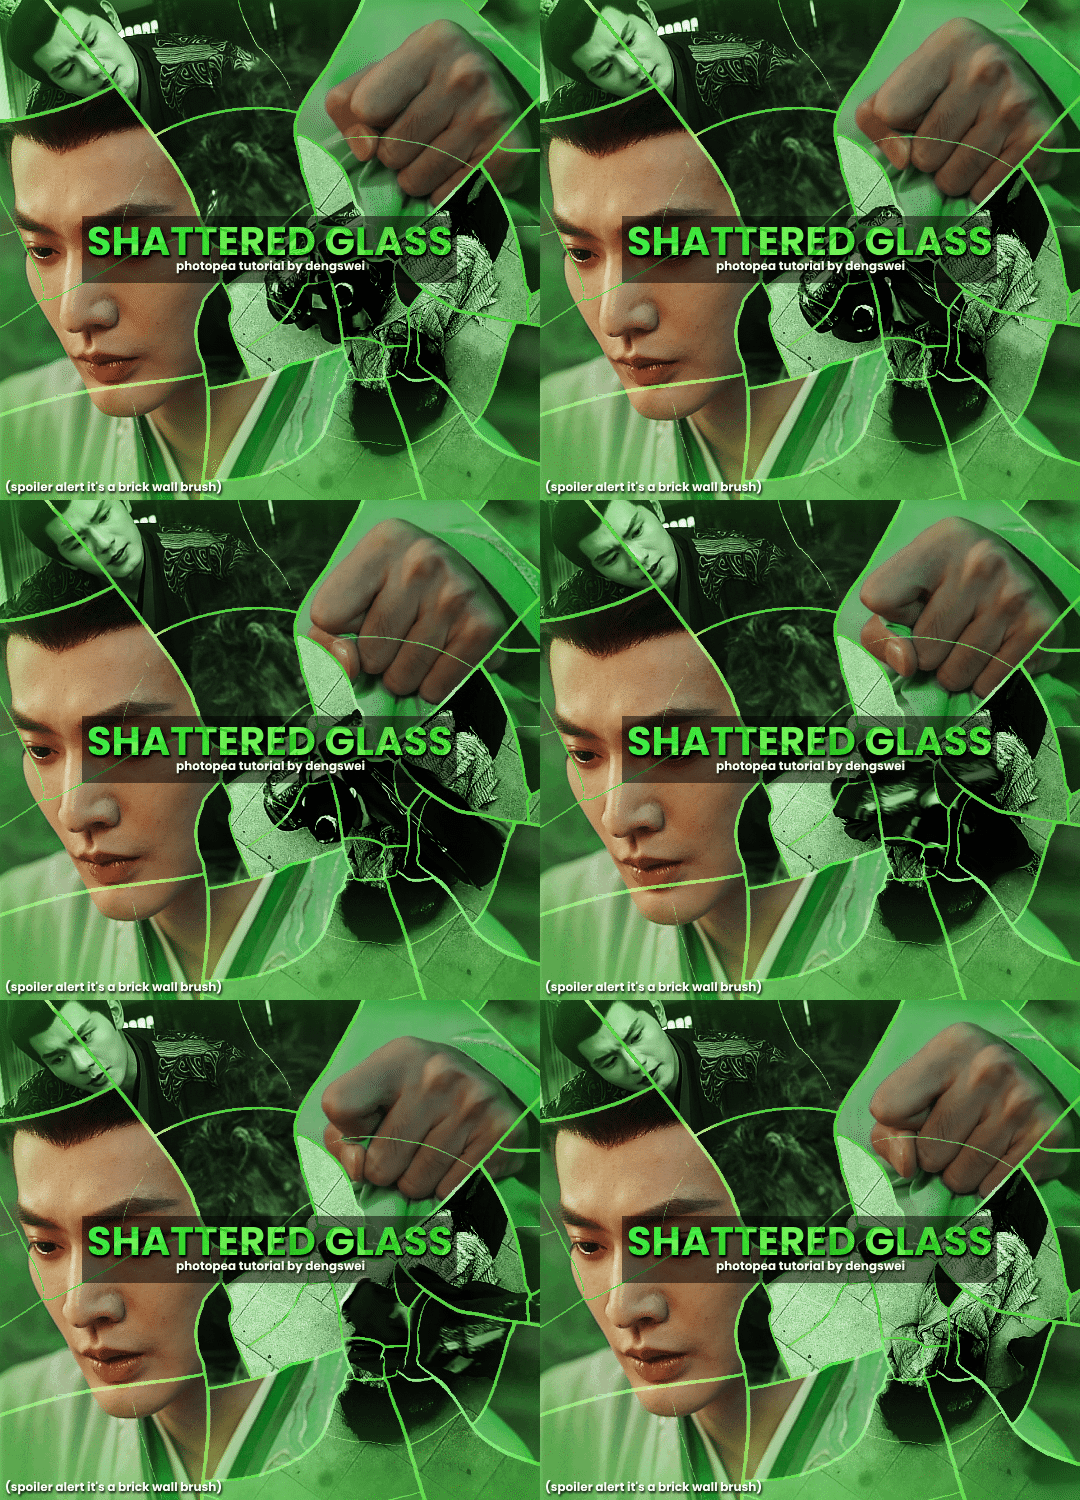
okay i have to admit i couldn't find the texture i've seen people use for the shattered glass effect so i actually used a photopea default brush from this pack
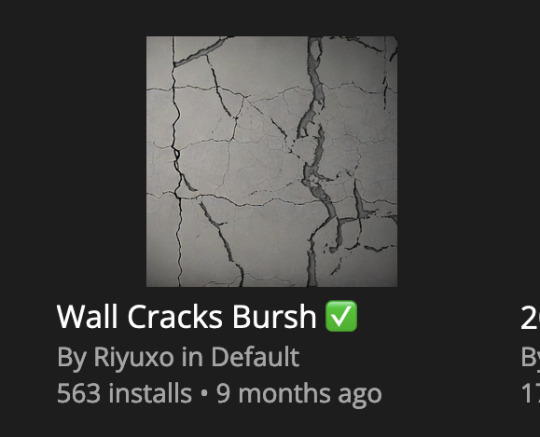
to download the brush set go to window -> plugins -> brush and then search for wall cracks brush (it's literally the only wall related brush set in photopea so it'll show up the moment you download it)
so for the gif i did above i did my giffing the usual way of creating & colouring for different gifs seperatly and then adding them all to one project (it doesn't have to be 4 gifs i just chose 4 because that's what i wanted to show in this gif)
i've done this twice once for this set and another time for this the blood of youth set and i have to say the most important part of this is keep multiple versions of the brush in the position you want as you can so once you've used it to test it out and you like that version keep it because unless you can manage to position the brush in the exact same place every time you're gonna need to reference those (or even use the magic wand tool for it later) and also you need to keep at least a white on black background version for the outline
in the brush pack the one i used was this one: (3564, crack b 9)
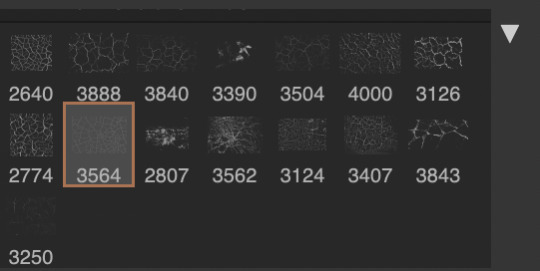
for this part i just say play around with both positioning and sizing of the brush, it automatically opens with the size 3000+ which is fine i think with the tushan jing one (the green gif above) i stuck with that size and just kept clicking around until i got the positioning i wanted (this is another reason why i said what i said in the paragraph above because if the brush size is bigger than 1000 it's doesn't come out in the exact positioning as you expect it too
i decide the positioning of the gifs on the way i like the brick brush looking rather than the other way around, this is the positioning i went with if you're curious & would like to use it if that's easier 🤣
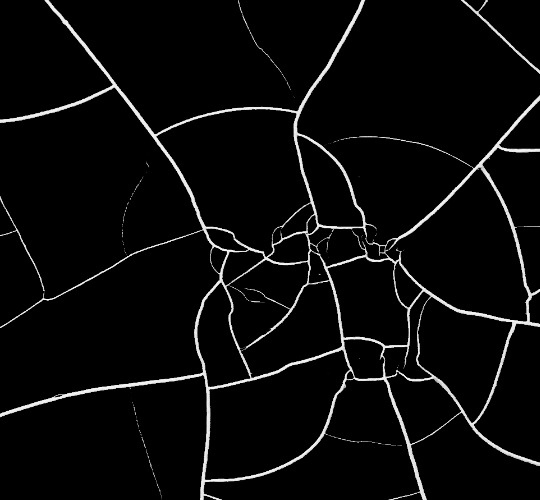
you'll need to keep this as a seperate layer at the top, i had it set to screen and then added a colour fill layer clipped on later so that i had the outline for when i was masking
so to start off i have the base gif which i do nothing to, that stays as it is, with the brush layer above set to screen
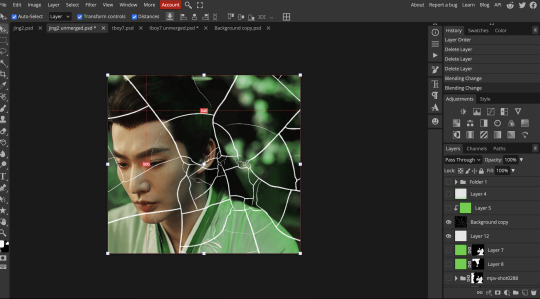
next is where you want to position your other gifs it may benefit to figure this out all at first before doing any of the masking so you know which parts you want to erase and which parts you want to keep
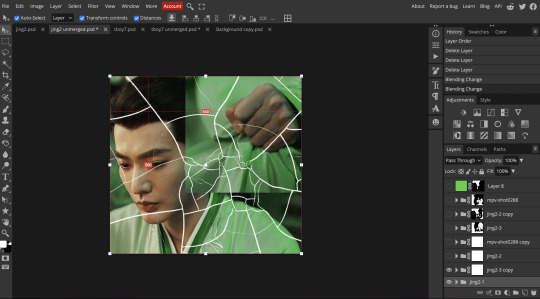
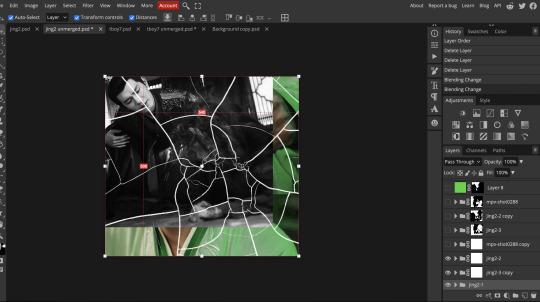
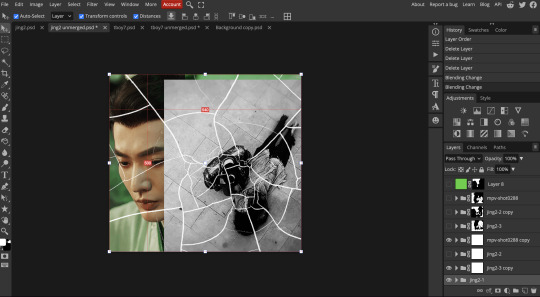
so this is what i decided with my positioning looking at where each of the cracks are
now comes the tedious part, in some ways the way i do this is a lot similar to how i do grid but it's not as easy (for grid photopea automatically locks onto the squares making it easier to mask, here you have to do it all manually)
first put a raster mask on all of the other gifs except for the base gif & use the magic wand tool on the brush layer so you get the outline of the brush and you mask that away from your gif (so if you turned off the brush layer it should look a little something like this: (it's not perfect but it won't matter that much because you should have the original turned on at the end anyway) (you don't have to do this step tbh i just did it because i thought it looked better)
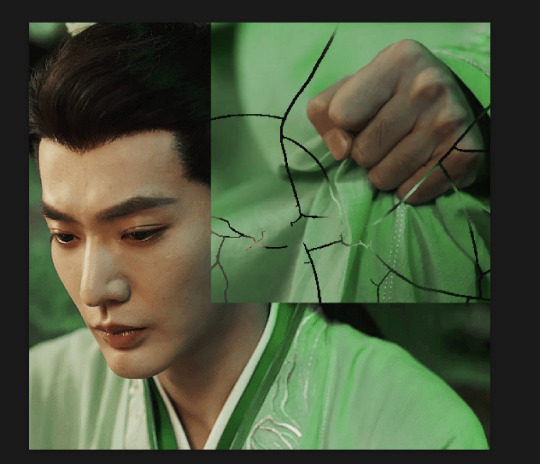
so with the brush layer turned on you can use that as a template to which parts of the cracks you want to erase, you can either use the magic wand or the paint brush tool it really depends on how much of a perfectionist you are and whether or not the sharp edges bother you (plus some of the cracks have small openings so it might erase another part you don't want if you use the magic wand tool so it really is another instance of playing around and seeing what you like, and it might also change once you add the other gifs too)
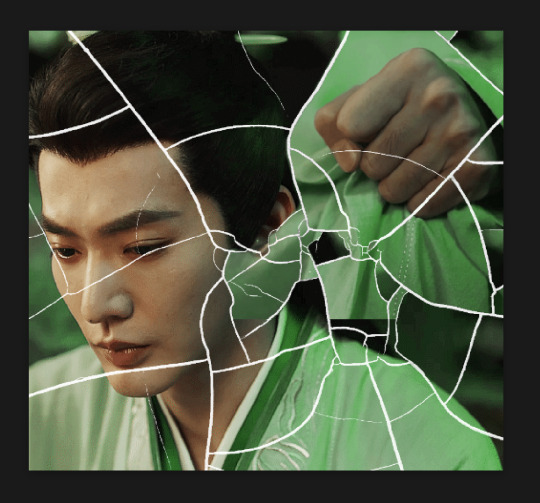
so this is how it looks after i've done that (notice in the middle you can still see the edge of the gif? that won't matter because one of the other 2 gifs i still have yet to mask will cover that) & just repeat the same thing for the other gifs you want to add
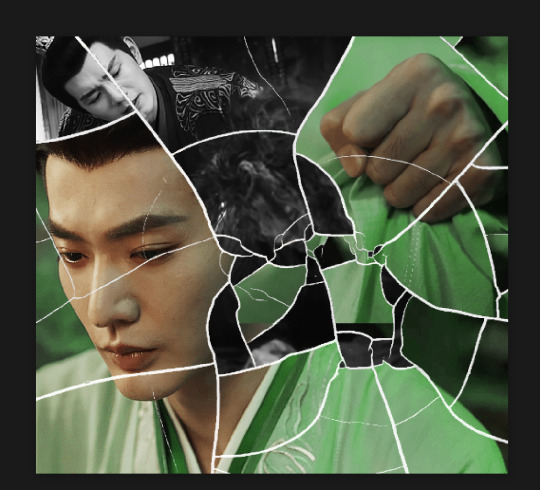
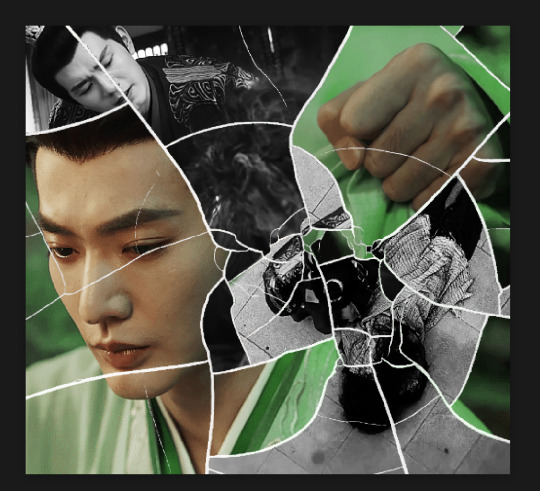
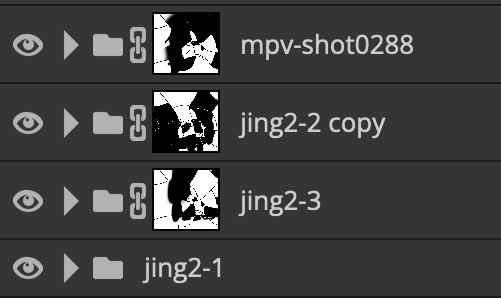
this is how my masking folders look if you're curious
& last but not least i added a green colour fill layer clipped to the brush layer and set that to darken to get the green effect (make sure that the brush layer is still set to screen)
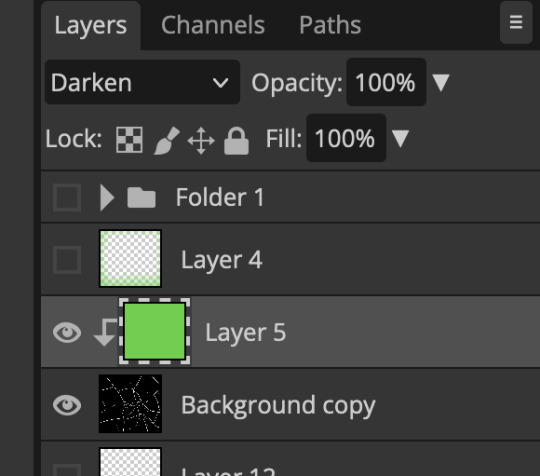
& once you've merged all of the gifs together you should get your desired outcome like the gif above (make sure that all the gifs have the same amount of frames too)
when it comes to other shapes i'm sure you can! like i did a tutorial with the grid version here, i guess it'll just be a lot of trial and error & finding a texture or brush with different shapes to try it out with kinda like how i did with both versions of this (i definitely did it a lot better this time around compared to the first version i did of this)
hopefully this wasn't too long or too confusing, if anything is please feel free to ask me again and i'll try and explain it a little better 🤣
#replies#Anonymous#photopeablr#usergif#tutorials#photopea tutorials#completeresources#mine | tutorials#gif tutorial#photopea#resources#gif resources#gifmakerresource#photopea tutorial#tutorial#gif tutorials
85 notes
·
View notes
Text
Before / After colouring 🎨
I got tagged such an embarassingly long time ago that I don't remember who it was. Anyways, thank you so much to whomever lovely it was, I really appreciate the tag and finally found time to do a post about my colouring.
I started gifing less than a year ago and learned a lot since then. I gif online in Photopea as Photoshop is just to expensive for me atm (and my old laptop probably wouldn't survive running Photoshop). So, if anyone wants a detailed process of gifing in Photopea, jhmu.
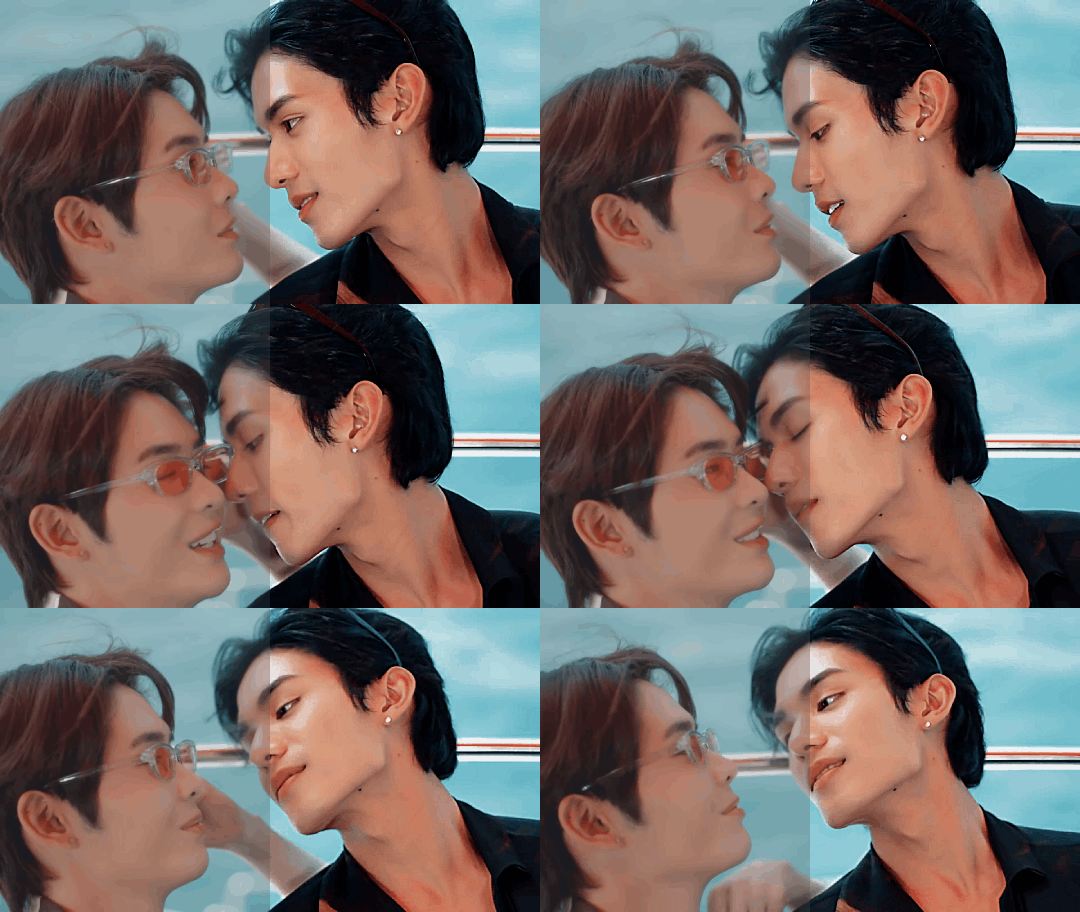
Bed Friend | King and Uea I love how King's desire for Uea is shown in this gif. He is just gone on Uea and barely can hold himself back.
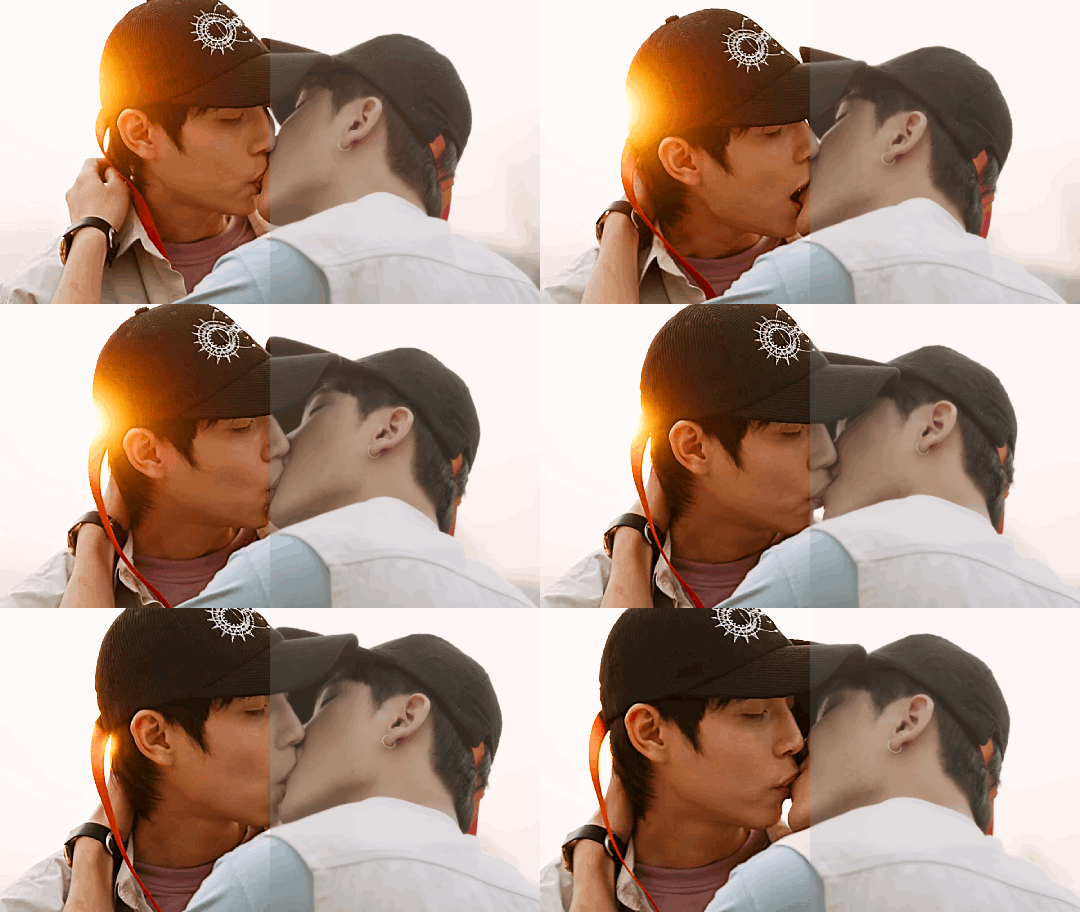
The Eclipse | Akk and Ayan Loved the sun shining from behind Akk's head and had to colour the gif in a way that the sun would stand out a bit.

A Boss And A Babe | Gun and Cher Them and their adoration for each other made me love this show.
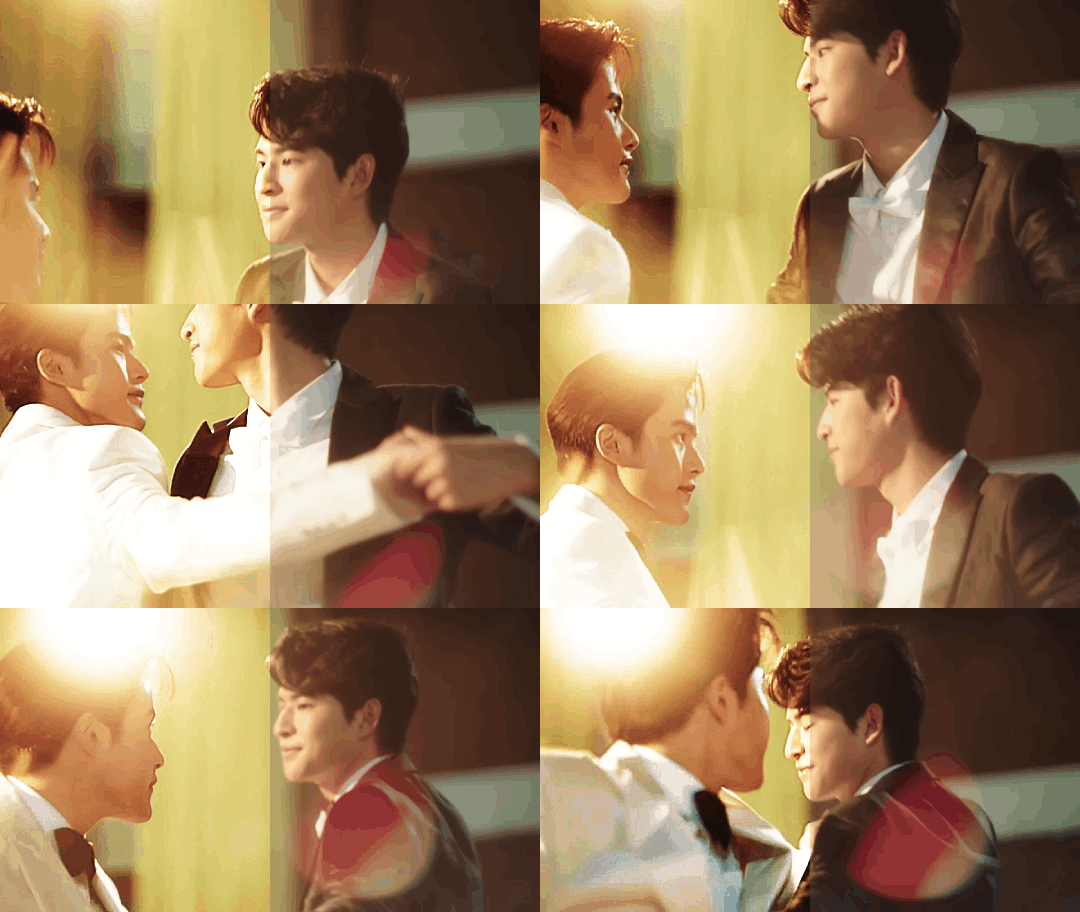
My School President | Tiw and Por TiwPor my beloved side couple 💖
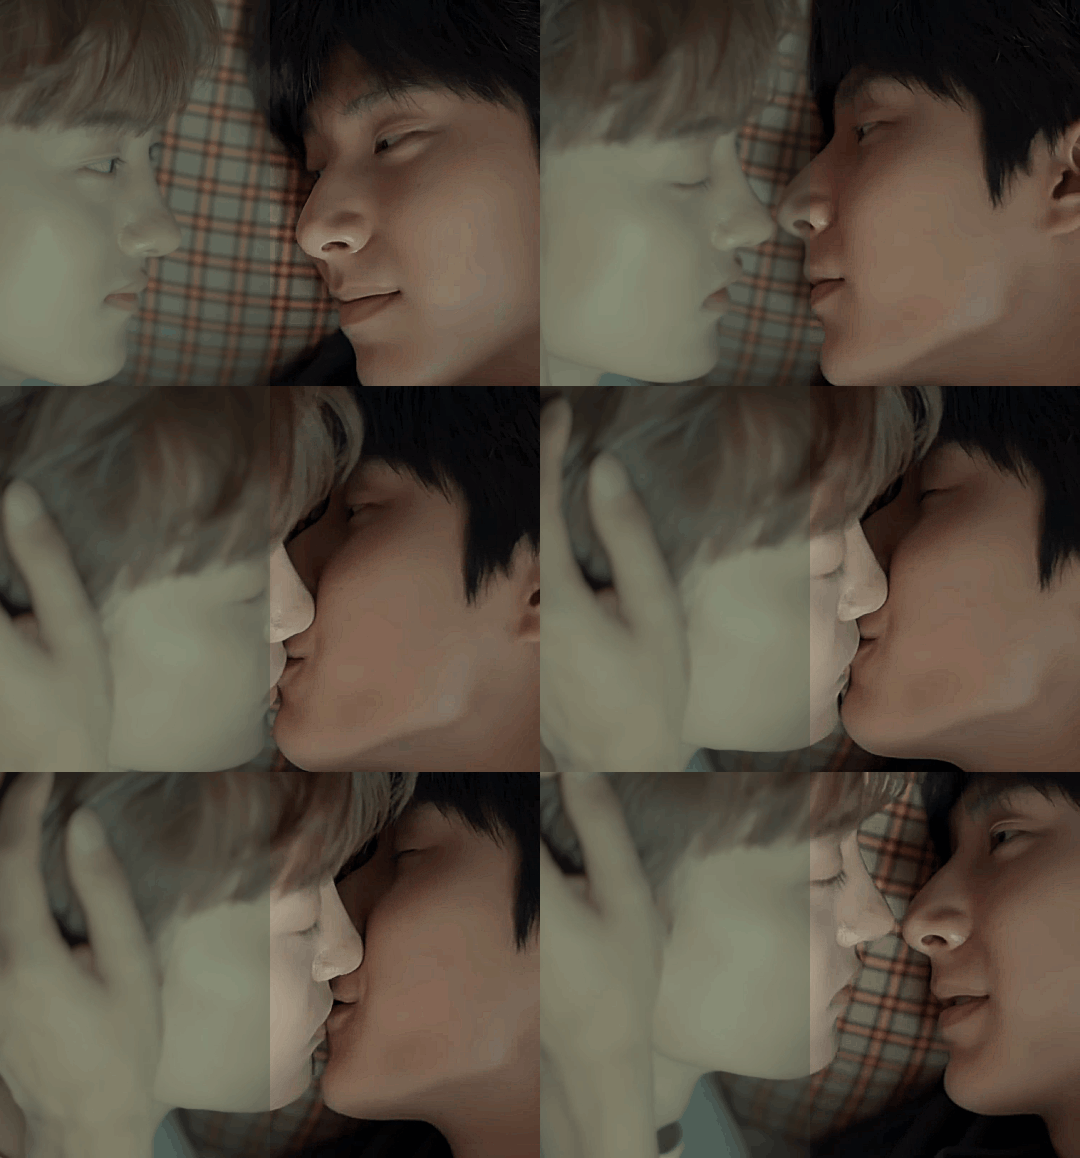
The Eighth Sense | Jae Won and Ji Hyun The story of Jae Won and Ji Hyun was the first of a few series that I call "The Right One", i.e. series that just capture me and leave an impact ✨
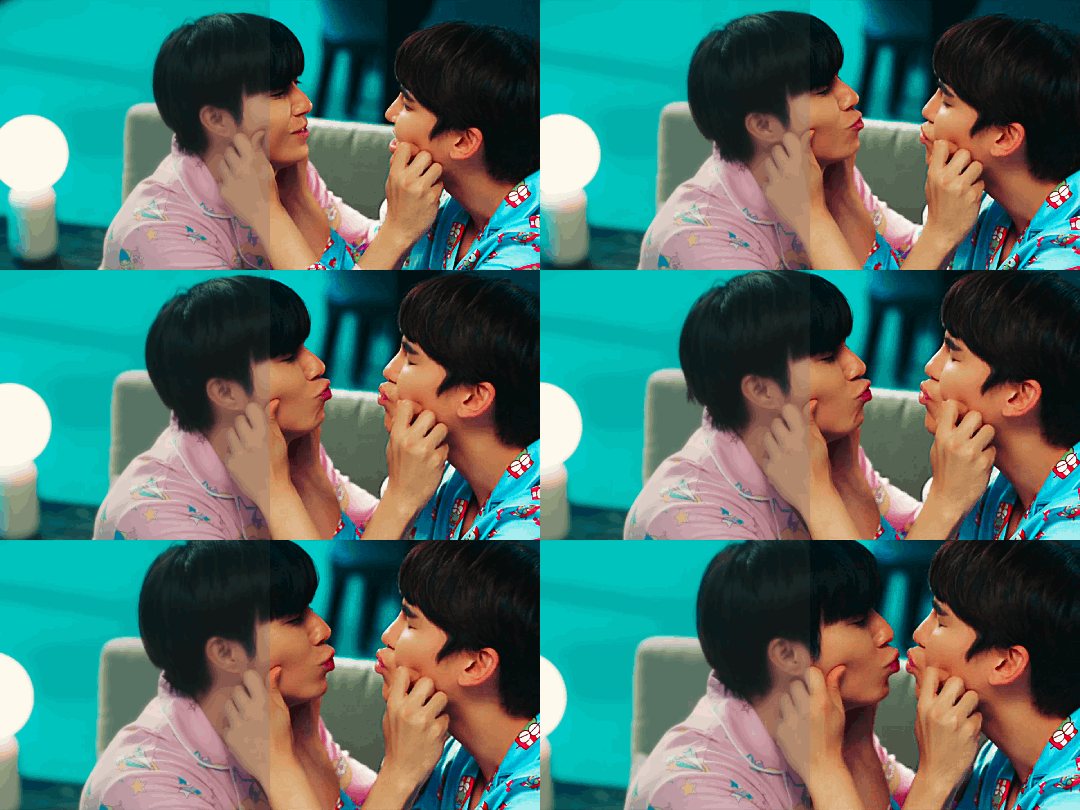
Naughty Babe | Yi and Lian My favourite ghostship. Also the colours in this scene were just too good to not gif.

Never Let Me Go | Palm and Nueng Just Palm having his big entrance 🤩

Bake Me Please | Shin and Peach This kiss was sooo cute and lovely.

Moonlight Chicken | Alan, Wen and Jim MLC was everything, especially this scene.
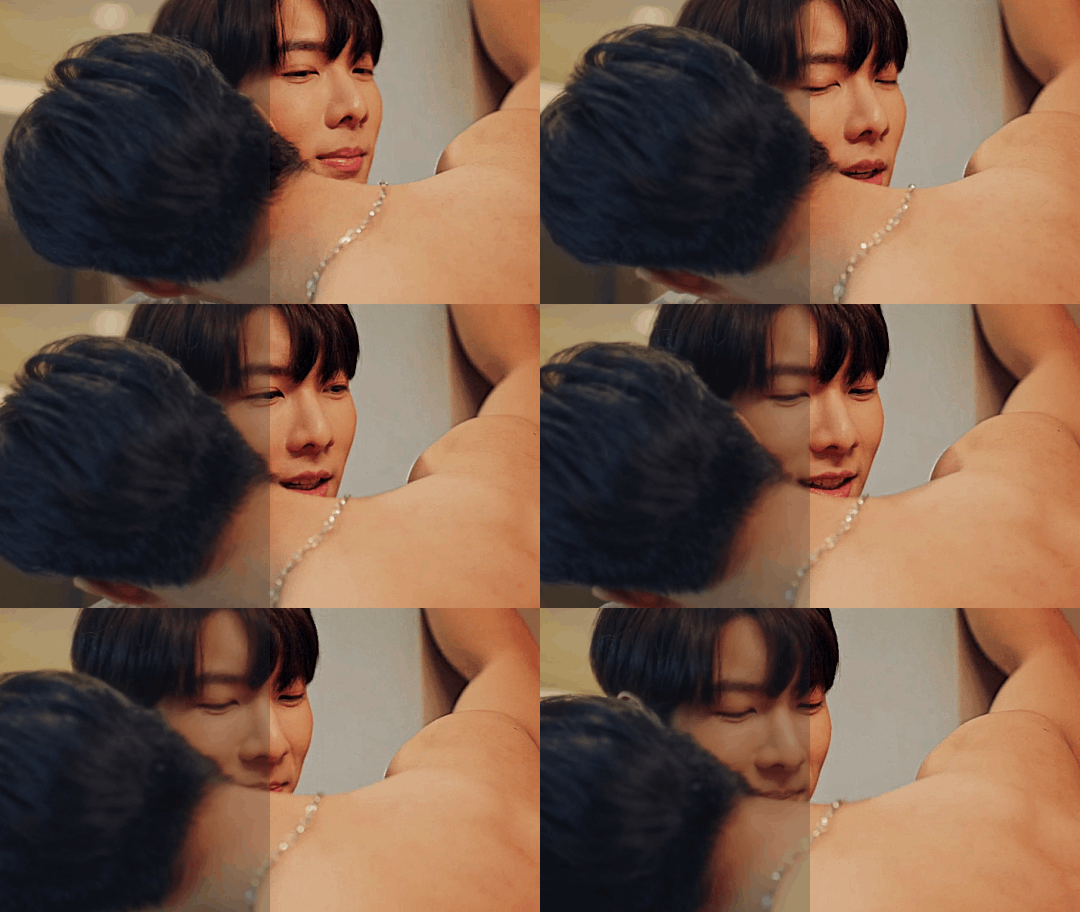
Be Mine Superstar | Mingmueang and Namning Aka how to seduce a doctor. I'm excited that we get a new series with Bosston and Jo.
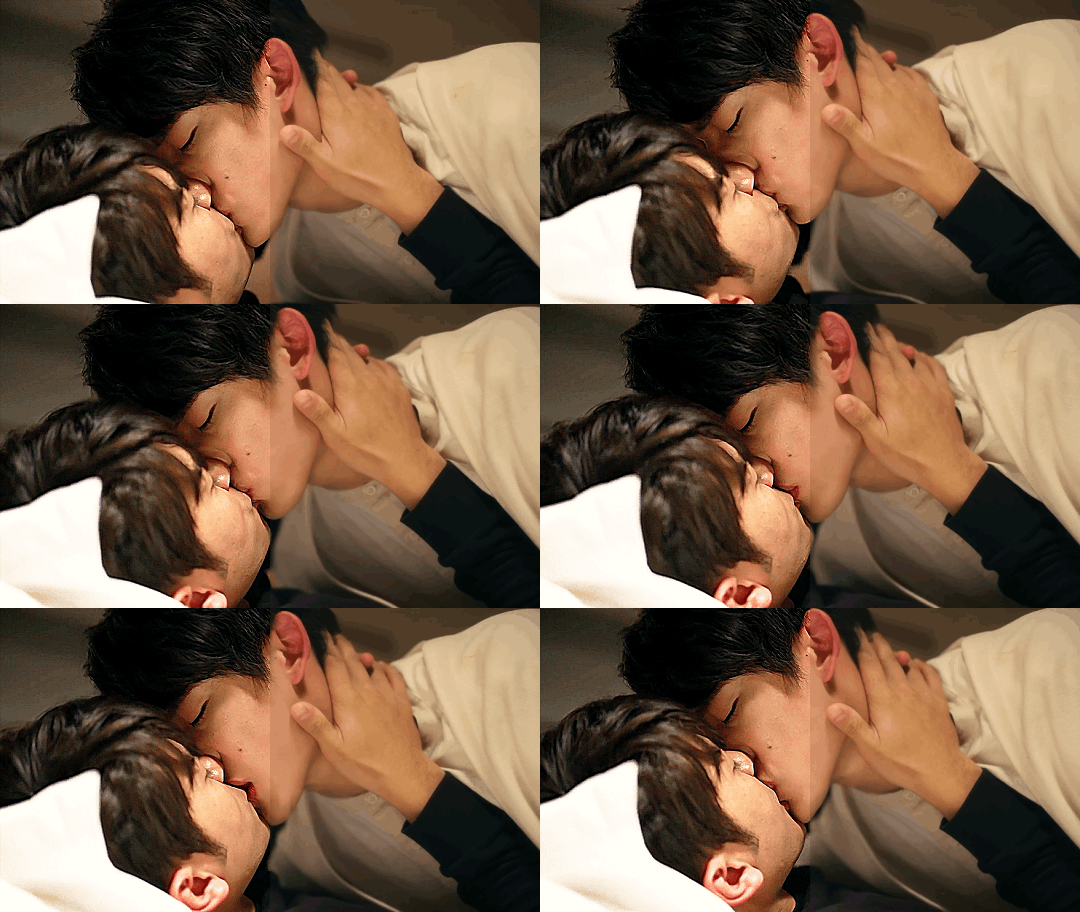
Kiseki: Dear To Me | Bai Zong Yi and Fan Ze Rui A couple and a show that left me speachless. Their story was so just so good.

Wedding Plan | Sailom and Namnuea Loved their story and how insatable they were.
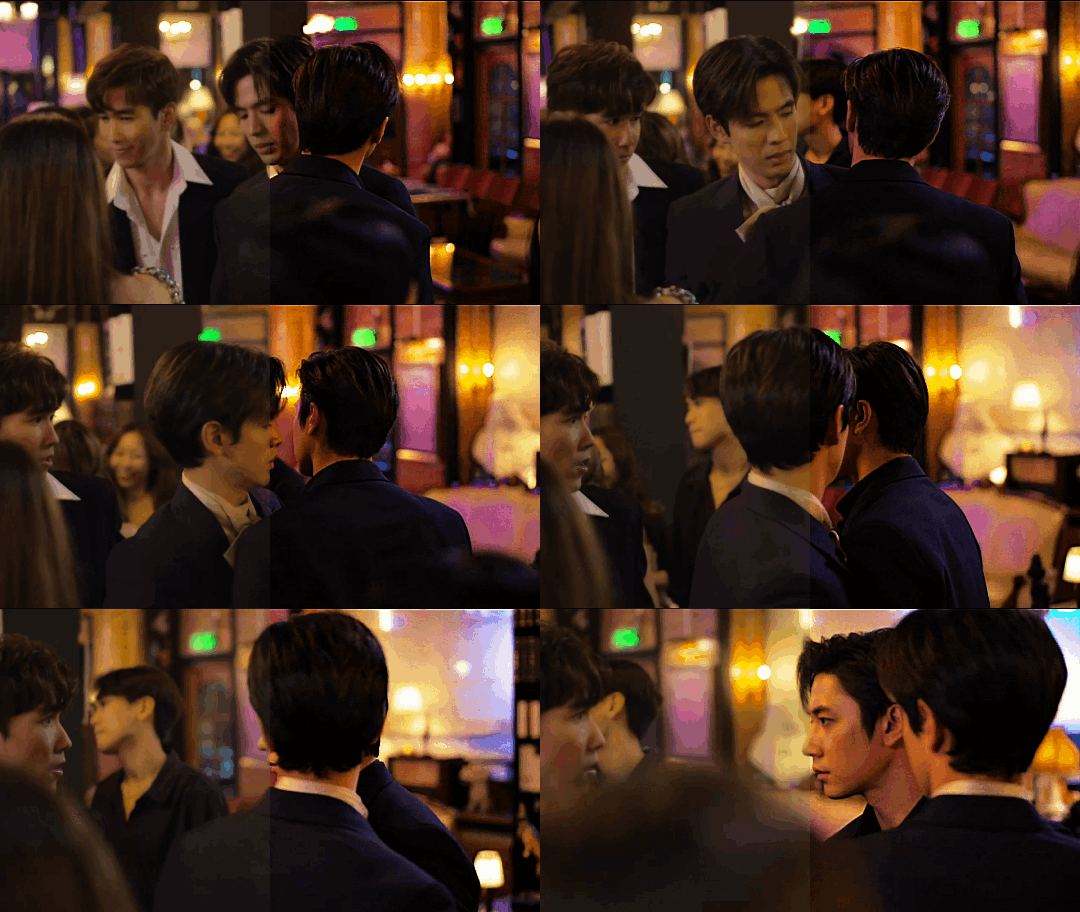
Laws Of Attraction | Tinn and Charn Forever one of my favourite couples and series ✨

My Ride | Mork and Tawan Had the most fun doing a rewatch of this series.

Playboyy | Teena and Zouey The way this show combines gorgeous cinematic shots with that storyline makes me feel like I'm watching a stage show. I love it.

The Sign | Phaya and Tharn Every week this show leaves me spechless it's that good. One of the shows that I call "The Right One"!
Bonus:

The Sign | The colours As I sad in another post, I'm rolling in the colours of this show like a cat in catnip 😎

Edited to add a few people who I'd love to see doing a post about their before / after colouring: @wanderlust-in-my-soul @pharawee @liyazaki @bunnakit @khaotungsfirst @gabrielokun @spicyvampire @zhaozi @guzhu-furen @25shadesoffebruary @chinzhilla @crispywizardtale as always please ingnore if you don't want to do it.
#the eighth sense#our skyy 2#the eclipse#my school president#a boss and a babe#bed friend#naughty babe the series#never let me go#bake me please#moonlight chicken#be mine superstar#kiseki: dear to me#wedding plan the series#laws of attraction#my ride the series#playboyy the series#the sign the series#bl series#bl drama#maxine gifs#thai bl#korean bl#taiwan bl#multi bl#photopea
150 notes
·
View notes
Note
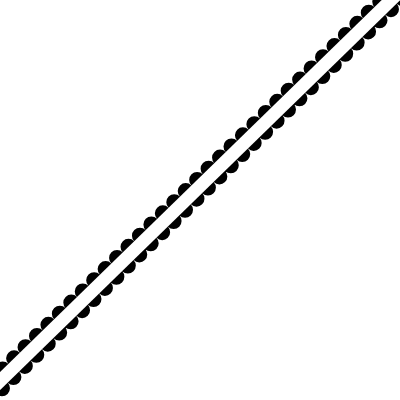
sorry ro ask again but what did u use 4 this little lace line??! its so kyute i want … pls and thank chu!!
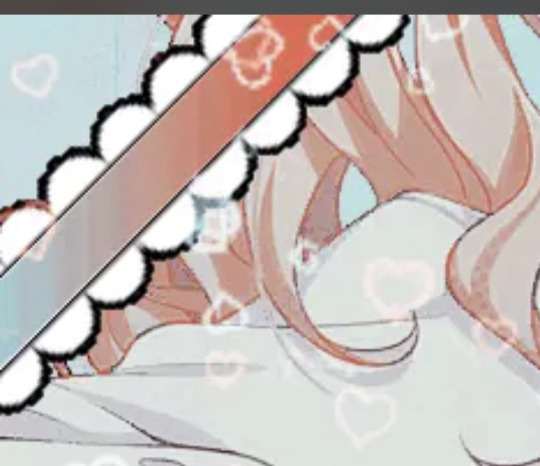


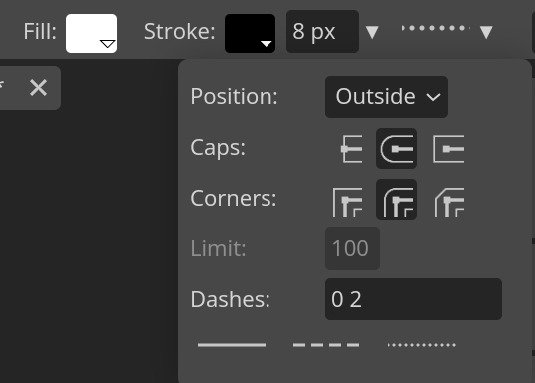
HAII :3c i made it using photopea's shape tool !


i used this specifically ^^
here are my settings :


but you could mess w/ it anyways even tho it doesn't have to be specific . although if you're lazy to do that here's the lace but i recommend you to do it ^_^


68 notes
·
View notes
Text

Gradient Maps For Dummies <3
— as written by a dummy
it’s been a while! hello gracious reader and welcome back to the series where yours truly fails at explaining things: photopea for dummies. if you’re unfamiliar, this is a series where the admin of this blog tries to explain how photopea works. whether or not the series is successful is yet to be determined.
today, we’re attempting to tackle yet another one of photopea’s adjustment layers: gradient maps. gradient maps have become more popular in the editing community lately, so i’ve been meaning to make this one for a while. apologies for the delay!

what is a gradient map? a gradient map is a form of layer that adheres a gradient to a photo’s dark and light values. a gradient fill is something different altogether, wherein a gradient is made atop the image without regard for the image’s original form.
think of it as a bedsheet. when held upright, a shield is just a rectangle, but if you lay it on something three dimensional, you can see the object beneath, because gravity causes the sheet to adhere to whatever is beneath. in our case, your image is two dimensional, but a gradient map applies different colors to the dark, light, and middle values.
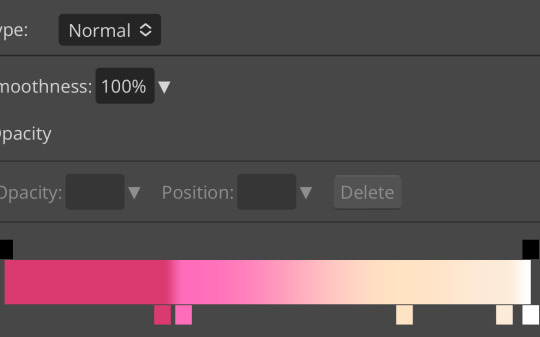
this is the gradient map used on all of the icons above. i made this one by experimenting with different colors. to add colors to a gradient map, double tap below the line, and you’ll see a small square appear. click the square to choose the colors you desire, and feel free to adjust it as you wish.
in photopea’s gradient maps, the colors closest to the left will adhere to the darkest parts of your image, while the colors closest to the right will adhere to the lighter parts of your image. the saturation and lightness values of your color itself don’t affect this at all—for example, here’s the same gradient map applied in reverse.

(to reverse a gradient map, toggle the reverse button as seen above. to undo it, just click the button again.)

pretty different, right? especially with no blending modes or adjustments in opacity, this gives your images a spooky negative look. if that’s what you’re going for, go crazy. if you want something a little more plain, set your darker colors on the left, and your lighter colors on the right.
exactly how the editor utilizes a gradient map is up to personal preference. some editors use gradient maps in lieu of complicated psds, while others like myself use gradient maps as one of the pieces of our complicated psds. gradient maps often go hand in hand with blending modes—for more on that, see here.
personally, i use a gradient map as a base for most of my psds.

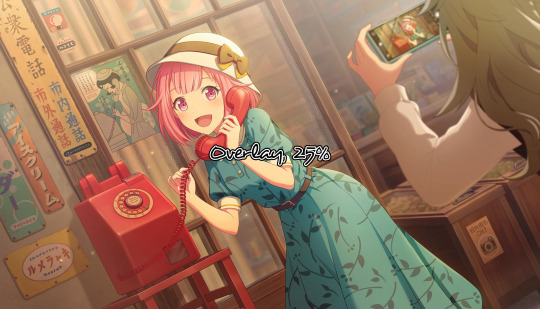
the exact settings are up to you, but i typically use either blending mode soft light with 50-75% opacity, or blending mode overlay with 10-25% opacity. the gradient map i use is one of the default ones available in photopea, a simple black and white set to reverse.

i like to use this gradient map to soften the colors and as a simple, easy to do base for all of my psds. if you look in some of the psds i have posted, you usually see this at the bottom or close to it.
how else can i use a gradient map? anyway you want, really! as you can see in my example image, gradient maps can be used to completely change the colors of your project, or to add a little bit of spice. something else you can use is a noise gradient map for texture.
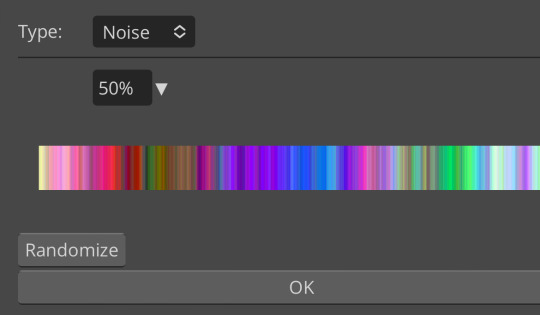
go to the gradient map itself as if you’re going to adjust your colors, and switch the type from normal to noise. then click randomize until you land on something you like!

it looks something like this. set to normal is pretty chaotic and janky looking, but set to soft light or to a lower opacity hue setting, this can be a great way to add some flare to your psds!
like with a lot of things in photopea, it’s best to experiment on your own and figure out what works best for you. i recommend playing around with opacity and blending modes, as well as what color combinations you personally like. every editor’s style is different, and the sky’s the limit with what you can do!
yours truly, canarysage
#i have a migraine so i sincerely apologize if this is incomprehensible#photopea for dummies#ʚɞ — tips.
72 notes
·
View notes
Note
I have to ask how you do gifs for bg3!! Do you record your whole gameplay then splice the moments, or do you just have a hotkey to screen record and how do you edit and augh i have so many questions, i'd love a quick lil tutorial (if you want!!). I wanna do my tav justice :')
Hi hi! Sorry this has taken me a while to get back to! I'm very very new to gif making, like, literally started making them on Dec 31st to count in the New Year hahaha, however, I've am blessed with many, many GIF maker friends that have been helping me and some of them have made really good tutorials and others have shared some really good tutorials, which I shall link here because I am in no place to make one myself, not yet anyways! [I have not used all of these, however these have been shared among friends and if anyone is getting into giffing you may find them helpful!] Tutorials: @snug-gyu - Colouring Tutorial @quokki - Full giffing process - tutorial @seonghwasblr - Tutorial @hanjesungs - Colour Table Tutorial @scoupsy-remade - Tutorial @renjunniez - Gif tutorial & extra tips @ashleysolsen - Giffing Masterpost @woozis - Tutorial @kangyeosaang - How to pan gifs & how to fix grainy gifs @theedorksinlove - Tutorial @saw-x - Guide for beginners @brainwasheds - Sharpening Gifs @jjnxs - Gifs on Gifs
Also this video helped a lot, which I helped me understand it better more easily. Though I make all my gifs in photoshop. For capturing I record my footage through OBS and import it into DaVince Resolve where I cut up the sections I want to use, because I record a lot at once so it's easier for me that way since I know my way around editing videos and then bring my photo editing skills in after in Photoshop to enhance them. But you can also do this in Photopea which is basically a free photoshop and the video I linked also covers how to use this website! I also film all of my stuff using Otis' freecam mod! I hope this helps! ❤ [I will keep adding to this list as my friends recommend me more, I find the more resources and different ways things are explained sometimes the better!]
77 notes
·
View notes