#angelblr
Explore tagged Tumblr posts
Visit Tumblr Blog
Explore Tumblr blogs with no restrictions, modern design and the best experience.
Last Seen Tumblr Blogs


Fun Fact
US Tumblr user growth rate is estimated to slow down to 4.1%.
Text


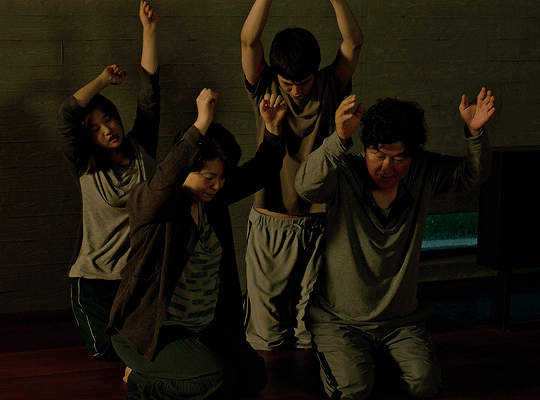


기생충 [PARASITE] 2019 | dir. Bong Joon-ho
#*#*mine#films#faves#parasite#parasiteedit#filmedit#filmgifs#cinemapix#doyouevenfilm#userstream#underbetelgeuse#userchristineb#angelblr#userbunneis#userriel#usermoonchild#userbuckleys#userbess#1k#2k
3K notes
·
View notes
Text


Music in Film: Twisters (2024) dir. Lee Isaac Chung
#twisters#filmedit#twistersedit#daisy edgar jones#glen powell#filmgifs#dailyflicks#angelblr#usermimsi#userbuckleys#usertina#usertreena#usercera#userarrow#userholloway#userbarrow#musicinfilm#my edit#my gifs#1k
2K notes
·
View notes
Text


I read about it in a book when I was a precocious child
#taylor swift#i hate it here#tswiftedit#taylorswiftedit#candy swift#tswiftgraphic#tswift#tsedit#ttpd#usertreena#usershreyu#userhallie#tuserheidi#tusernaij#usersray#tusermels#userabs#angelblr#useralys#edit#my edit
2K notes
·
View notes
Text


DAISY EDGAR-JONES AS KATE CARTER Twisters (2024) dir. Lee Isaac Chung
#twisters#daisy edgar jones#treena#~#filmgifs#fyeahmovies#filmtvdaily#filmtvcentral#userhella#userrainbow#underbetelgeuse#userannalise#userrobin#uservalentina#alielook#mialook#tuserjen#userelio#usertina#angelblr#userchibi#tuserambs#tuserella#userbuckleys#tusermira#userchristineb#usermimsi#usermorgan#userzaynab
768 notes
·
View notes
Text


@pscentral event 36: trios → the disaster trio
#*#swedit#tcwedit#pscentral#tvedit#starwarsblr#swsource#anakin skywalker#ahsoka tano#obi wan kenobi#angelblr#userpegs#usertina#quicklings#tusermira#userarrow#userholloway#userelio#i miss them
275 notes
·
View notes
Text


@lgbtqcreators creator bingo: blending + angst EMMA APPLETON as RENFRI OF CREYDEN
#the witcher#renfri#renfri of creyden#gfx*#death tw#tw blood#witcherladies#thewitcheredit#witcherdaily#usergreens#femalecharacters#tvgifs#tvedit#userbrina#angelblr#usermagic#userarrow#userbess#userhann
429 notes
·
View notes
Text


TWISTERS (2024) dir. Lee Isaac Chung
#twisters#treena#ours#movieedit#filmgifs#fyeahmovies#filmtvdaily#filmtvcentral#userhella#userrainbow#underbetelgeuse#userannalise#userrobin#uservalentina#alielook#mialook#tuserjen#userelio#usertina#angelblr#userchibi#tuserambs#tuserella#userbuckleys#tusermira#userchristineb#usermimsi#usermorgan#userzaynab
591 notes
·
View notes
Text


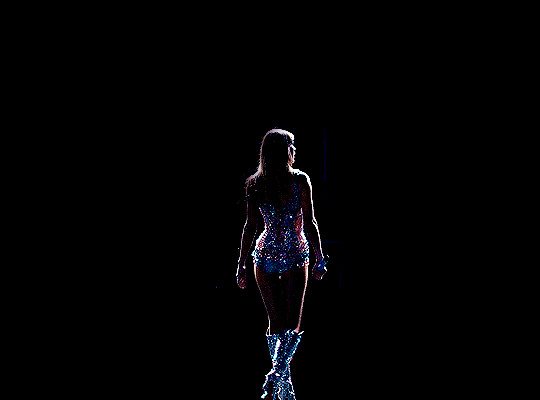
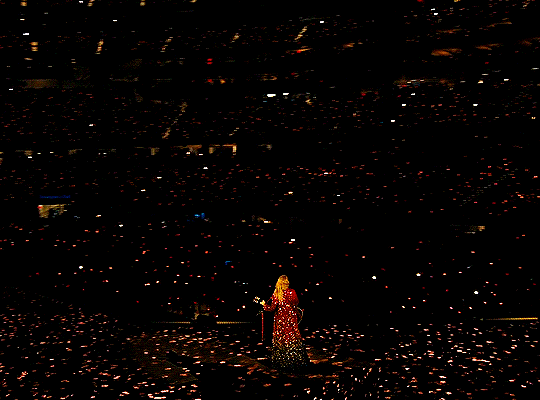
and though i can't recall your face, i still got love for you.
@pscentral event 31: faceless ↳ taylor swift: the eras tour (taylor's version), dir. sam wrench
#taylor swift#tswiftedit#taylorswiftedit#tswiftgif#tscreators#nessa007#usercharisse#angelblr#userabs#userlockescoles#userrobin#userlorna#usermadita#tuserheidi#tuservaleria#userkarolina#usertreena#usernaureen#userzaynab#usernolan#tusermels#useradds#useralys#tusernaij#my gifs#mine#networkthirteen
647 notes
·
View notes
Text
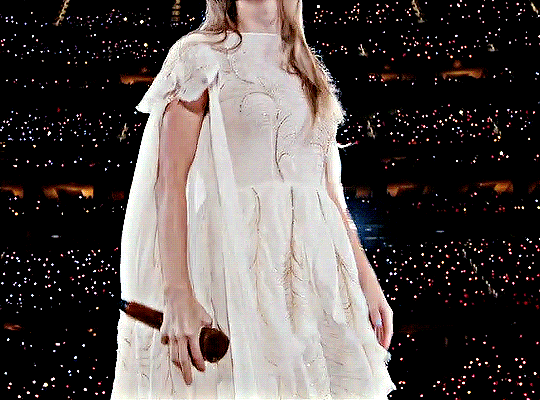
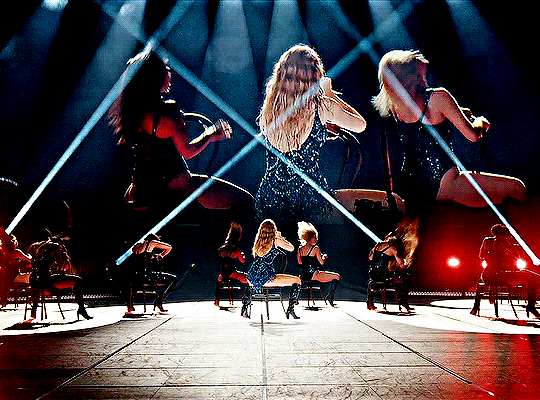

@pscentral event 31: faceless | the eras tour movie
#taylorswiftedit#tsedit#tswiftgif#swiftedit#tswiftedit#taylor swift#networkthirteen#tscreators#dailymusicqueens#dailywomen#nessa007#tsuserluna#usertreena#usernolan#angelblr#userabs#tuserheidi#useralys#mine#mygifs
612 notes
·
View notes
Text


@pscentral event 28: throwback | favourite childhood films
Fantasia (1940) & Fantasia 2000
#fantasia#disneyedit#filmedit#animationedit#retrodisneydaily#filmgifs#cinematv#cinemapix#animationsdaily#moviegifs#userthing#useroptional#*#my edits#userrobin#underbetelgeuse#userchristie#larlies#tuserheidi#userhallie#userisaiah#usertina#angelblr#userlaro#disneynetwork#fyeahdisney#disneydaily#cinematicsource#classicfilmsource
385 notes
·
View notes
Text
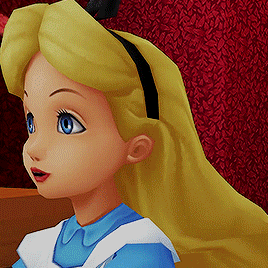


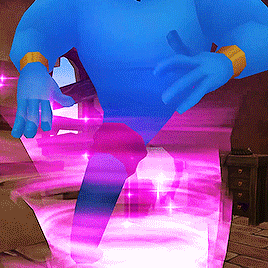
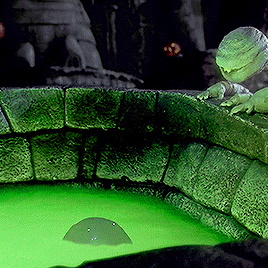

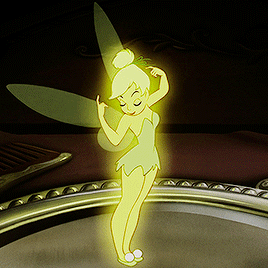
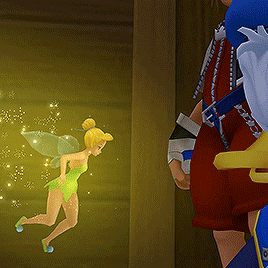
@pscentral event 18: adaptations
SILVER SCREEN to KINGDOM HEARTS WORLDS
#kingdom hearts#khedit#khgraphics#khsource#nyctoheart#singinprincess#userhannah#underbetelgeuse#tusercat#userxoames#userpanda#userdean#usercas#dailygaming#gamingedit#gamingnetwork#angelblr#tagged:kingdomhearts#filmedit#ngifs
1K notes
·
View notes
Text


Park So-dam as Ki-jung 기생충 [PARASITE] 2019 | dir. Bong Joon-ho
#*#*mine#films#parasite#park so dam#parasiteedit#filmgifs#filmedit#doyouevenfilm#cinemapix#userstream#userchristineb#userlaro#underbetelgeuse#angelblr#userbunneis#userbuckleys#usermoonchild#userbess#tuservaleria#userzaynab#userhollywood
837 notes
·
View notes
Text


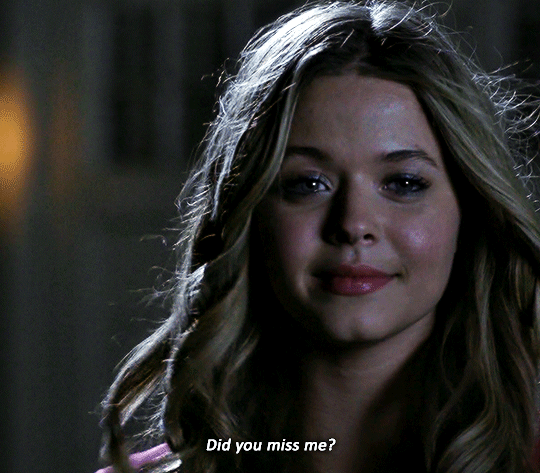
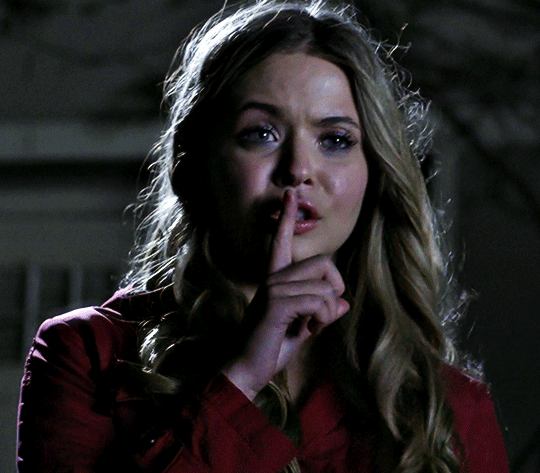
lives were changed.
PRETTY LITTLE LIARS Grave New World | October 22nd, 2013
BONUS:

#alison dilaurentis#pretty little liars#plledit#teendramaedit#addys-beth#userlix#userhizziee#userlolo#tuserheidi#usermorgan#usermoonchild#useryusi#usermegara#tuservaleria#angelblr#tv#*#*lana
433 notes
·
View notes
Text


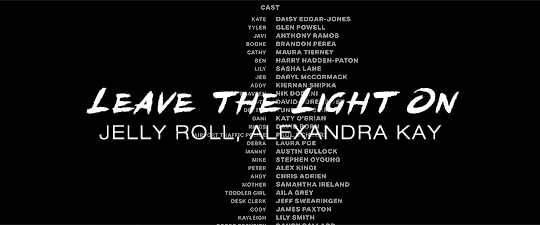
Forgive me, Peter, please know that I tried To hold on to the days when you were mine But the woman who sits by the window has turned out the light
#taylor swift#peter#tswiftedit#taylorswiftedit#dailytaylorswiftedit#candy swift#tscreatorsnet#tswiftgraphic#ttpd#editingpotm#tsusermeggie#angelblr#uservivaldi#userobiwans#userkarolina#tuservaleria#userabs#tuserheidi#userarrow#edit#my edit
487 notes
·
View notes
Note
if you ever have time/feel so inclined, i would love to see a tutorial or some tips from you about how to do color isolation sets!! they are absolutely incredible and I love them so much! <3
absolutely! thank you so much 💙
here are a few examples of my color isolation sets:
the substance (yellow) || beetlejuice (red) || us (red) || conclave (blue) || sleeping beauty (cyan/blue) || crimson peak (yellow) || smosh (purple) || conclave (red)
beneath the cut, i'll walk you through my coloring process!
notes: tutorial assumes basic gifmaking knowledge & i'm using adobe photoshop 2023 (though afaik, your version shouldn't matter much)
i don't color my gifs until they're sharpened and i'll give you a quick overview of my process: file -> import -> video frames to layers -> trim any extra frames -> crop to desired dimensions -> run sharpening action (i used this tutorial and just made it into an action) which also converts to timeline
once i'm in timeline, i go through my normal coloring process. unless i'm giffing similarly colored scenes that i've already colored and saved a psd for, i usually color from scratch every time. obviously, some adjustment layers vary depending on the source material, but these are almost always my main adjustments, just with differing values
a brightness/contrast layer set to screen - this is a gamechanger for especially dark scenes. note: i do not adjust the values, i leave them both at 0 and just change the blending mode
a curves layer utilizing the black & white eyedropper tools. first, i select the black eyedropper and then click on the blackest area of the gif. i do the same with the white one, using it to select the brightest/whitest spot. this can help a lot if you're dealing with heavily tinted scenes!
a selective color layer (set to absolute, not relative) where i adjust the blacks usually anywhere from 1-5 notches higher and the neutrals either up or down the same amount depending on the scene. be careful with the neutrals when giffing poc as lightening them can result in whitewashing. if need be, i will also adjust the whites, making them slightly whiter with the black slider. selective color is by far my fave adjustment layer and i use it in every single coloring.
after this, i sometimes add a black & white gradient map adjustment layer set to soft light. i'll play around with the opacity, leaving it anywhere between 5-100% depending on the scene. i think this adds depth to your colors and adds some contrast, but i don't use it in every psd.
occasionally, i'll mess around with vibrance/saturation, and that'll be my final layer, but oftentimes i won't actually add this layer until i've finished the rest of the coloring. this is just where the layer will go.
these are the main 5 layers i almost always start every single coloring with and they act mostly as a base and to color-correct any weirdly tinted or exceptionally dark scenes.
now, let's talk about scene selection. i try to set myself up for success by choosing scenes that either already have a very noticeable pop of color or have a color i know can easily be manipulated. you'll want to pick scenes that aren't drenched with the color you want to isolate though, or you won't have the contrast of the black & white.
here are a few examples of good scenes:

the only red here is the covered bridge and it will be easy to adjust only that and not the blue, green, or yellow.

same as above, apart from ralph fiennes's face, which obviously contains red undertones. i'll go more in-depth on this in a bit, but because this scene doesn't have a lot of movement, this will be able to be fixed with layer masks.

again, here we have one bright occurrence of yellow surrounded by blue that we'll easily be able to neutralize.
and a few of bad/less than ideal scenes:

while this scene is an absolute dream for making super vibrant sets or color palettes, it's no good for color isolation. this yellow covers basically everything, leaving no other colors to cancel out.

while i definitely did try this one out, the scene is ultimately too dark and too cyan-tinted to properly isolate the red of the blood or the cyan in her eyes and on the walls.

just like the first one, this scene is fully just. color drenched. would make a great base for a vibrant or color palette set but not useful for color isolation.

bad and wrong!! coloring this movie, however beloved, was a test of my sanity. you have this yellow/green filter over everything and so much of it that isolating or changing one or the other is pretty much impossible.
with all that being said, play around! the best way to learn what does what is to try it out yourself. selective color, though there are other ways of getting the same or similar effects, will be your best friend. it's how i'm able to make sets like this & this!
let's look at this adjustment layer using a scene from conclave:

truthfully, you could either isolate the orange of the wall or the blue of her outfit. i'm going for the latter at the moment.
add a selective color layer by clicking this button:

i like to really emphasize the color i'm going to isolate, make sure it's as consistent with the other scenes i'm using and that it pops. from the dropdown in the layer properties, i select blue.

each color from the dropdown will look like this. you have adjustable sliders for cyan, magenta, yellow, and black. the more to the right, the more you're emphasizing that color in any blues in your image. the further to the left, the more of that color's opposite you'll adjust. each opposite pairing is as follows:
cyan + red magenta + green yellow + blue black + white
if you're struggling with this (i did at first), visualize it. pull up one of those "bad" examples. say we take the yellow scene from the gorge. add a selective color layer to it and select yellow from the dropdown. play with the sliders to see how AND how much each adjustment changes the coloring. decreasing the yellow slider all the way to -100% is adding blue to anything ps identifies as yellow. because yellow and blue are opposites, it pretty much neutralizes the scene. instead, if you use the magenta slider and push it all the way to the left, you make any yellows become green. if you move the magenta slider all the way to the right, you'll add magenta to any yellows, making the scene orange. it's all about knowing the color wheel and experimenting!
back to the conclave gif! i want to bring out the blue as much as possible, under the blue dropdown, i crank the cyan slider all the way up and bring the yellow all the way down.

is it a massive difference? no, but you can definitely see the difference between the left (with the adjustment) and the right (without).
depending on the scene and color i'm working with, i'll play around with other layers from the dropdown. but i prefer to do each color in a different layer and i right-click on the box with the eye in the layers panel and change it to the applicable color. that way, it's easier to adjust something later on. you can also rename your layers, but this is quicker and easier imo.

with this particular scene, this is the only adjustment i want to make to the blue for the time being. now, it's all about getting rid of any other colors. to do this, add a hue/saturation layer and select every color, one at a time, EXCEPT the color(s) you're isolating and bring the saturation all the way down to -100. in this case, it's everything but the cyans & blues.

and this is what i'm left with:

from here, you can leave it, but a lot of the time, i'll add a vibrance layer or even another blue/cyan selective color layer and crank that shit up.

this is after adding a vibrance layer (increasing both vibrance & saturation to 100) AND a selective color layer (decreasing the yellows to -100 in the blues).
i would consider this finished, but this can also be super fun to mess around with, again, using selective color:


and if the way her hair changed colors is bugging you, toggle your layers on and off until you find which one(s) changed it and add a layer mask, coloring over her hair with a soft black brush:

once you're happy with everything, save your gif in your preferred way. these are my save settings just for shiggles:


et voilà!
overall, the best advice i can give is to try. experiment! if you're not sure a scene will work, give it a shot. even if it doesn't, you've still learned something. i know it can seem confusing at first, especially if you're not super familiar with these layers or the color wheel, but please feel free to ask any questions. also, let me know if anyone wants another tutorial(s) where i go more in-depth on other colors. i'm happy to do it!
#answered#daynascullys#my tutorials#gif tutorial#gifmakerresource#completeresources#dailyresources#emilyblr#usercats#userholloway#tuseruta#usertina#userrobin#uservivaldi#userchibi#userbunneis#userbambie#useraljoscha#tusermira#userelio#userscourt#userishh#angelblr#heymaur#elwintersoldado#tuserhol#usermaguire#useraashna
94 notes
·
View notes
Text


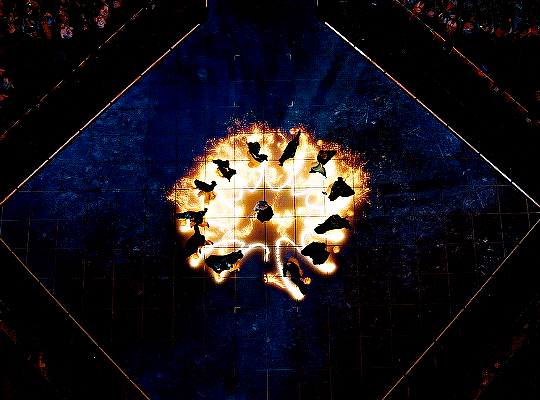
star wars rebels appreciation week: day 2 — favorite episode -> 02x15 - the call
#*#swedit#rebelsweek2024#rebelsedit#userbariss#userbokatan#rebelsmik#tusernicky#tusernaij#tusermira#usertina#userholloway#userarrow#userbrina#underbetelgeuse#usershale#angelblr#usermagic#quicklings#userchristie#userrainbow#star wars rebels
462 notes
·
View notes