#WebDevelopmentTutorials
Explore tagged Tumblr posts
Visit Tumblr Blog
Explore Tumblr blogs with no restrictions, modern design and the best experience.
Last Seen Tumblr Blogs


Fun Fact
The most popular pages on Tumblr are about Minecraft, GIFs, and David J. Peterson.
Text
HTML (HyperText Markup Language) is the foundation of web development and is used to create and structure web pages. It consists of elements enclosed in tags that define how content is displayed in a web browser.
#HTML#WebDevelopment#FrontendDevelopment#TechEducation#HTML5#TechBooks#HTMLForBeginners#MarkupLanguage#WebDesign#TechLearning#HTMLTags#WebAppDevelopment#WebDesignSkills#HTMLStructure#ResponsiveDesign#HTMLForms#HTMLCSS#WebDevelopmentTutorial#HTMLBestPractices#TechTutorial#WebDesignTips#HTMLElements#MobileFirstDesign#FrontendWebDesign#HTMLSyntax#SEOOptimization
0 notes
Text
Step-by-Step Guide to Creating a Modern Website in 2024

In today's digital-first world, having a strong online presence is not just an option; it's a necessity. Whether you're an entrepreneur looking to expand your business, a freelancer showcasing your portfolio, or a blogger sharing your passions, a well-designed website is your gateway to reaching a broader audience. However, creating a modern website in 2024 is not merely about attractive visuals; it involves integrating advanced technologies, optimizing user experience, and ensuring robust performance. Constructing a website needs a strategic strategy in this day of rapid technical breakthroughs and shifting customer expectations. Every stage is critical, from picking the finest platform and guaranteeing mobile responsiveness to putting SEO best practices into effect and producing interesting content. This all-inclusive book will walk you through every step of the website development process and provide you the resources and know-how to create a website that not only satisfies but beyond your goals.
Whether you're new to web development or looking to update an existing site, this guide will help you create a modern, functional, and visually appealing website that captures and retains your audience's attention. Join us as we explore the essential steps to building a successful website in 2024.
Step-by-Step Guide to Creating a Modern Website in 2024 Creating a modern website in 2024 involves combining cutting-edge technology, user-centric design principles, and efficient development practices. Whether you’re building a personal blog, an e-commerce store, or a corporate website, this step-by-step guide will help you navigate the process from concept to launch.
Define Your Purpose and Goals Before you start designing or coding, it’s crucial to understand the purpose of your website and what you aim to achieve. Identify Your Audience: Determine who your target audience is and what they need from your site. Set Clear Goals: Define what success looks like for your website, whether it’s increased traffic, higher sales, or improved engagement. Choose the Right Platform Select a platform that suits your technical expertise and the needs of your website. Content Management Systems (CMS): WordPress, Joomla, and Drupal are popular for their flexibility and ease of use. Website Builders: Wix, Squarespace, and Weebly are great for beginners who need a drag-and-drop interface.
Custom Development: For more complex needs, consider developing a custom website using frameworks like React, Angular, or Vue.js. Register a Domain and Choose a Hosting Provider Your domain name and hosting service are critical components of your website. Domain Name: Choose a domain name that is easy to remember, relevant to your business, and optimized for SEO. Hosting Provider: Select a reliable hosting provider that offers good uptime, fast loading speeds, and excellent customer support. Options include Bluehost, SiteGround, and AWS. Design Your Website Modern website design focuses on aesthetics, user experience, and responsiveness. Wireframing: Create wireframes to outline the structure and layout of your web pages. UI/UX Design: Use tools like Adobe XD, Sketch, or Figma to design a visually appealing and user-friendly interface. Responsive Design: Ensure your website is responsive and looks great on all devices, from desktops to smartphones. Develop Your Website Translate your design into a functional website using the appropriate technologies.
HTML, CSS, and JavaScript: Use these core technologies to build the front-end of your website.
Back-End Development: Depending on your needs, use back-end technologies like Node.js, PHP, or Python to handle server-side operations.
Content Management: Set up your CMS or integrate your custom back-end with a database.
Optimize for SEO
Search engine optimization (SEO) is crucial for driving organic traffic to your site.
Keyword Research: Identify relevant keywords and incorporate them into your content.
On-Page SEO: Optimize title tags, meta descriptions, headers, and image alt texts.
Technical SEO: Ensure your website is fast, mobile-friendly, and has a clean URL structure.
Add Content Content is king when it comes to engaging and retaining visitors.
Create High-Quality Content: Develop valuable, informative, and engaging content tailored to your audience. Use Multimedia: Incorporate images, videos, infographics, and other multimedia elements to enhance your content. Content Management: Organize your content effectively using categories and tags.
Integrate Essential Features Ensure your website includes essential features that enhance functionality and user experience.
Navigation: Create a clear and intuitive navigation menu. Contact Forms: Include forms for users to get in touch with you easily.
Social Media Integration: Add social media buttons to encourage sharing and engagement.
Analytics: Integrate tools like Google Analytics to track visitor behavior and website performance.
Test Your Website
Thorough testing is essential to ensure your website functions correctly and provides a good user experience.
Functionality Testing: Check all forms, links, and interactive elements.
Usability Testing: Ensure the site is easy to navigate and use.
Performance Testing: Test the loading speed and responsiveness across different devices and browsers.
Launch and Promote Your Website
Once everything is in place and tested, it’s time to go live.
Deploy Your Website: Upload your website files to your hosting server and configure your domain settings.
Promote Your Site: Use SEO, social media marketing, email marketing, and other strategies to drive traffic to your new website.
Monitor and Update: Regularly update your content and features, and monitor your website’s performance to make necessary improvements. Conclusion
Creating a modern website in 2024 involves a blend of strategic planning, creative design, and technical development. By following this step-by-step guide, you can build a website that not only meets your business objectives but also provides a seamless and engaging experience for your users. Stay updated with the latest trends and technologies to keep your website relevant and competitive in the ever-evolving digital landscape
#WebDevelopment#ModernWebDesign#2024WebDesign#WebsiteCreation#StepByStepGuide#WebDesignTrends#WebsiteBuilding#WebDevelopmentTutorial#UXDesign#ResponsiveDesign#HTML5#CSS3#JavaScript#FrontEndDevelopment#BackEndDevelopment#WebDesignTips#WebsiteLaunch#SEO#DigitalMarketing#WebDesignTools
0 notes
Text
Mastering Full-Screen Background Images with CSS
Learn how to create captivating full-screen background images with CSS in our latest blog post. Perfect for web developers looking to enhance their design skills. Read now!
#CSS#WebDevelopment#FullScreenBackground#CSSTutorial#WebDesign#HTML#CSS3#ResponsiveDesign#BackgroundImage#WebDevelopmentTutorial#InnovateCodeInstitute#FrontEndDevelopment#Coding#Programming#LearnCSS#Blog#WebDesignTips#FullPageBackground#WebDevTips
1 note
·
View note
Text
Building an Effective Portfolio Websites:
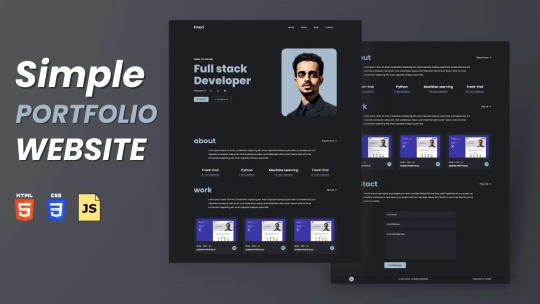
Step 1: Define Your Objectives and Audience
Clearly define the purpose of your portfolio websites. Are you aiming to attract clients, land a job, or simply showcase your work?
Identify your target audience. Tailor your portfolio content and design to appeal to potential clients, employers, or industry peers.
Step 2: Choose the Right Platform For Portfolio Websites

Consider using website builders like WordPress, Squarespace, Wix, or portfolio-specific platforms like Behance or Dribbble.
Evaluate each platform based on factors like customization options, ease of use, pricing, and the specific needs of your portfolio.
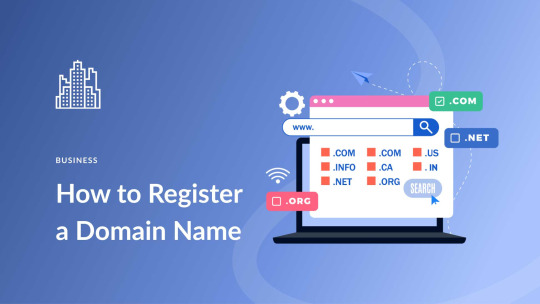
Step 3: Select a Domain Name and Hosting
Choose a domain name that is professional, easy to remember, and ideally reflects your name or brand.
Select a reliable hosting provider that offers good uptime, speed, and customer support.
Step 4: Plan Your Website Structure
Design a clear and intuitive navigation menu that guides visitors through your portfolio websites.
Organize your work into categories or sections such as projects, About Me, Services, Testimonials, and Contact.

Step 5: Design a Visually Appealing Layout
Select a clean and professional design that highlights your work without distracting from it.
Pay attention to typography, color scheme, and overall aesthetics to create a visually cohesive experience.
Ensure your website design is responsive and looks good on various devices and screen sizes.
Step 6: Showcase Your Best Work
Select a curated selection of your top projects or achievements to feature prominently on your portfolio website.
Provide detailed descriptions, images, videos, and any relevant links for each project to give visitors a comprehensive view of your work.
Consider including case studies or project breakdowns to showcase your process and problem-solving skills.
Step 7: Craft Compelling Content
Write an engaging About Me page that tells your story, highlights your skills, and showcases your personality.
Use clear and concise language throughout your portfolio, focusing on the benefits and outcomes of your work.
Incorporate client testimonials or endorsements to build credibility and trust with potential clients or employers.
Step 8: Optimize for Search Engines (SEO)
Conduct keyword research related to your industry and include relevant keywords in your content, headings, and metadata.
Optimize your images with descriptive alt text and ensure your website structure is crawlable by search engines.
Submit your sitemap to search engines like Google to improve your site's visibility.

Step 9: Make it Easy to Contact You
Include a dedicated contact page with multiple ways for visitors to reach out to you, such as a contact form, email address, and social media links.
Make sure your contact information is easy to find and accessible from every page of your portfolio websites.
Step 10: Test, Launch, and Promote
Test your website thoroughly on different devices and browsers to ensure it functions properly.
Once you're satisfied, launch your portfolio website and promote it through your professional network, social media channels, and relevant online communities.
Monitor your website's performance using analytics tools and make necessary adjustments to improve its effectiveness over time.
Step 11: Maintain and Update Regularly
Regularly update your portfolio with new projects, skills, and achievements to keep it current and relevant.
Stay engaged with your audience by responding to inquiries promptly and actively promoting your portfolio websites through various channels.
By following these steps and putting effort into each aspect of your portfolio websites, you can create a standout online presence that effectively showcases your skills, accomplishments, and unique value proposition to potential clients or employers.
FAQ?
What are the key elements of an effective portfolio website?
Clear Navigation
High-Quality Content
About Me Section
Portfolio Section
Contact Information
Testimonials or Reviews
Responsive Design
Visual Appeal
Call to Action (CTA)
Blog or Insights Section (Optional)
SEO Optimization
Update Regularly
Visit: https://chennaiwebsitedesigner.in/
#EffectivePortfolio#PortfolioBuilding#PortfolioBuildingTips#PortfolioDesign#PortfolioInspiration#PortfolioTips#PortfolioWebsiteDesign#PortfolioWebsites#PortfolioWebsiteTips#WebDesignGuide#webdesignportfolio#WebDesignTips#WebDesignTutorial#WebDevelopmentGuide#WebDevelopmentTutorial#WebsiteDesignGuide#WebsiteDesignTutorial#WebsiteDevelopment#WebsitePortfolio
0 notes
Text
Creating Popups with HTML and CSS: Engage Your Users
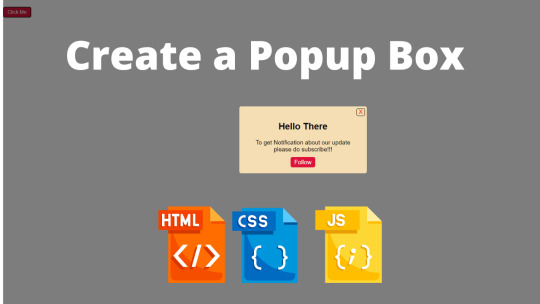
Introduction
Welcome to the world of engaging user experiences! In this blog post, we'll explore the art of creating popups with HTML and CSS to captivate and interact with your website visitors. Popups serve as powerful tools to convey messages, gather feedback, or showcase important information in an attention-grabbing manner. As online interactions continue to evolve, it's crucial to employ effective design techniques to keep users involved and interested. We'll delve into the fundamentals of HTML structure, CSS styling, and even add a touch of interactivity with JavaScript to ensure your popups not only look good but also function seamlessly across various devices. Whether you're a beginner looking to enhance your web design skills or a seasoned developer seeking new tricks, this guide will equip you with the knowledge to create visually appealing and user-friendly popups. Let's dive in and discover the magic of crafting engaging popups with HTML and CSS.
Understanding HTML Structure
HTML lays the foundation for structuring your webpage, and when it comes to creating popups, a solid HTML structure is essential. Let's break down the key components and concepts involved. Basic HTML Setup Start by setting up the basic HTML structure for your webpage. Use the declaration to specify the document type, and create the HTML document with the element. Within the tags, include the section for meta-information and the section for the content of your webpage. Divs and Containers Divs (division elements) act as containers to organize and structure content. Create a for your popup container. Give it a unique ID or class to easily target it with CSS. This container will hold all the elements of your popup, providing a structured layout for styling and positioning. Creating Content Sections Divide the content of your popup into logical sections using HTML elements such as for paragraphs,
to for headings, and and - for unordered lists. This helps in organizing and styling different parts of your popup, making it visually appealing and easy to understand. List Example - Header: Define a clear and concise header for your popup. - Content: Include the main content of your popup, breaking it down into sections if necessary. - Buttons: If your popup includes buttons, create a section for them. Table Example Element Purpose Declaration of the document type. Root element of the HTML document. Understanding the basics of HTML structure provides a solid groundwork for building visually appealing and well-organized popups. In the next sections, we'll explore the CSS styling to enhance the look and feel of our popups.
CSS Styling for Popups
Once you've established the HTML structure for your popups, it's time to breathe life into them with the magic of CSS styling. This section will guide you through the process of making your popups visually appealing and in harmony with your website's design. Introduction to CSS Styles CSS (Cascading Style Sheets) is the language that brings aesthetics to your HTML structure. Start by linking your CSS file to your HTML document using the tag in the section. This file will contain all the styling rules for your popups. Styling Popup Containers Target the popup container you created in the HTML with its ID or class. Set properties like width, height, and padding to control its dimensions and spacing. Experiment with background colors, borders, and box shadows to achieve the desired visual impact. Customizing Popup Appearance Dive deeper into customization by styling individual elements within the popup. Use selectors to target headings, paragraphs, buttons, and other components. Apply properties like font-size, color, and margin to create a cohesive and visually pleasing design. List of Common Styling Properties - color: Set the text color. - font-size: Adjust the size of the text. - background-color: Define the background color of elements. - border: Add borders around elements. - box-shadow: Apply shadows for a 3D effect. Adding Hover Effects Enhance user interaction by incorporating hover effects. Change properties like color or background-color when users hover over buttons or links. This subtle interaction adds a layer of responsiveness to your popups, making them more engaging. Responsive Design Considerations Ensure your popups look good on various devices by implementing responsive design. Use media queries to adjust styles based on screen size. Test your popups on different devices to guarantee a seamless user experience. With these CSS styling techniques, you can transform your basic HTML structure into visually appealing popups that not only convey information effectively but also elevate the overall user experience on your website.
Adding Interactivity with JavaScript
Elevate your popups to the next level by incorporating dynamic interactivity using JavaScript. This section will guide you through the process of adding behavior to your popups, making them responsive and engaging for users. Introduction to JavaScript for Popups JavaScript is a powerful scripting language that enables you to add functionality to your web pages. Start by linking your JavaScript file to your HTML document using the tag. This file will contain the logic and event handlers for your popup interactions. Event Triggers Identify the events that will trigger your popups, such as button clicks or page load. Use event listeners to detect these events and execute the corresponding JavaScript functions. For example, you can create a function to display or hide the popup when a button is clicked. Managing Popup Behavior Control the behavior of your popups through JavaScript functions. You can dynamically update the content, change styles, or even create animations. For instance, use JavaScript to validate user input within a popup form or to display different messages based on user interactions. List of Common JavaScript Functions - document.getElementById(): Access HTML elements by their ID. - addEventListener(): Attach event handlers to elements. - classList: Manipulate the classes of elements for styling changes. - innerHTML: Update the content of HTML elements dynamically. Handling Asynchronous Operations If your popups involve fetching data from a server or performing other asynchronous operations, use JavaScript promises or asynchronous functions to ensure a smooth user experience. This prevents the page from freezing while waiting for operations to complete. Testing and Debugging Thoroughly test your interactive popups on different browsers to ensure cross-browser compatibility. Use browser developer tools to debug and fix any issues that may arise. Regular testing guarantees that your popups function as intended and provide a seamless experience for users. By incorporating JavaScript interactivity into your popups, you can create a dynamic and engaging user experience. The combination of HTML, CSS, and JavaScript allows you to craft popups that not only look great but also respond intuitively to user actions.
Responsive Design Considerations
In the ever-evolving landscape of web development, ensuring your popups look and function seamlessly across various devices is paramount. This section explores responsive design considerations to guarantee that your popups provide an optimal user experience on both desktops and mobile devices. Making Popups Responsive Responsiveness starts with the basic structure. Utilize fluid layouts that adapt to different screen sizes. Avoid fixed widths and heights, allowing your popups to expand or contract based on the available space. This flexibility ensures a consistent and visually pleasing experience on all devices. Media Queries Implement media queries in your CSS to apply different styles based on screen characteristics such as width, height, or device orientation. Tailor your popup's appearance to the specific needs of smaller screens, adjusting font sizes, spacing, and overall layout for improved readability and usability. Testing on Various Devices To validate the effectiveness of your responsive design, test your popups on a range of devices, including smartphones, tablets, and desktop computers. Embrace the diverse world of browsers and operating systems to identify and address any potential issues that may arise. List of Common Media Query Breakpoints - Mobile: Less than 576px width - Tablet: 576px to 767px width - Desktop: 768px to 991px width - Large Desktop: 992px and above width Optimizing Images and Media Optimize images and media files to reduce page load times on mobile devices. Use responsive images that scale based on the screen size, and consider lazy loading to defer the loading of non-essential resources until they are needed, improving the overall performance of your popups. Fluid Typography Implement fluid typography by using relative units like percentages or ems for font sizes. This ensures that text scales appropriately across different screen sizes, preventing issues of readability or awkward text wrapping. By embracing responsive design principles, you can guarantee that your popups not only adapt to the diverse array of devices but also provide a consistent and enjoyable experience for users, regardless of how they access your website.
Common Challenges and Solutions
While creating popups with HTML and CSS can be a rewarding experience, it comes with its set of challenges. This section addresses some common issues that developers may encounter when implementing popups and provides effective solutions to overcome them. Handling Z-Index and Overlapping Issues One common challenge is managing the z-index property to control the stacking order of elements. If popups are not appearing above other elements as expected, check and adjust the z-index values. Use higher values for elements that should be in front and lower values for those behind. Dealing with Browser Compatibility Browser compatibility is a perennial challenge in web development. Different browsers may interpret CSS styles and JavaScript behaviors differently. Regularly test your popups on major browsers like Chrome, Firefox, Safari, and Edge. Consider using browser-specific CSS prefixes or utilizing a CSS framework to streamline cross-browser consistency. Optimizing for Performance Popups that involve complex animations or large media files can impact page load times. Optimize performance by minimizing the use of heavy graphics, compressing images, and lazy loading non-essential resources. Prioritize a smooth user experience by ensuring that your popups load quickly and efficiently. List of Common Performance Optimization Techniques - Image Compression: Reduce image file sizes without compromising quality. - Lazy Loading: Defer the loading of images and media until they are needed. - Minification: Minimize CSS and JavaScript files to reduce their file sizes. - Caching: Utilize browser caching to store static assets locally for faster subsequent visits. Ensuring Popup Accessibility Accessibility is a crucial consideration for all web components, including popups. Ensure that your popups are navigable and usable for users with disabilities. Use semantic HTML, provide descriptive alternative text for images, and ensure that keyboard navigation is smooth and intuitive. List of Common Accessibility Practices - Semantic HTML: Use appropriate HTML elements to convey meaning. - Alt Text: Include descriptive alternative text for images. - Keyboard Navigation: Ensure all interactive elements are accessible via keyboard controls. - ARIA Roles: Use ARIA roles to enhance the accessibility of dynamic content. By addressing these common challenges and implementing the suggested solutions, you can enhance the reliability, performance, and accessibility of your popups, providing users with a seamless and enjoyable interaction on your website.
FAQ
Explore frequently asked questions about creating engaging popups with HTML and CSS. Whether you're a beginner or an experienced developer, these answers provide insights into common queries and challenges related to popup design. Q: How Can I Customize Popup Size? A: To customize the size of your popup, modify the width and height properties in your CSS styles. Adjust these values according to your design preferences, keeping in mind the responsiveness for different devices. Q: What Are Best Practices for Popup Accessibility? A: Ensuring accessibility is crucial. Use semantic HTML elements, provide descriptive alternative text for images, and implement keyboard navigation. Consider ARIA roles to enhance the accessibility of dynamic content within your popups. Q: Can I Use CSS Frameworks for Popups? A: Yes, incorporating CSS frameworks like Bootstrap or Tailwind CSS can expedite the styling process for your popups. These frameworks offer pre-designed components and responsive layouts, allowing you to focus on the specific customization of your popups. Q: How Do I Handle Z-Index and Overlapping Issues? A: Z-Index issues can be resolved by adjusting the stacking order of elements. Ensure that the popup container has a higher z-index than other elements on the page. Test and fine-tune these values to achieve the desired visual hierarchy. Q: What Are Common Performance Optimization Techniques? A: To optimize performance, consider techniques such as image compression, lazy loading, and minification of CSS and JavaScript files. These practices help reduce page load times, ensuring a smoother experience for users interacting with your popups. Have more questions or need further clarification? Feel free to reach out, and we'll provide the guidance you need for successful popup implementation.
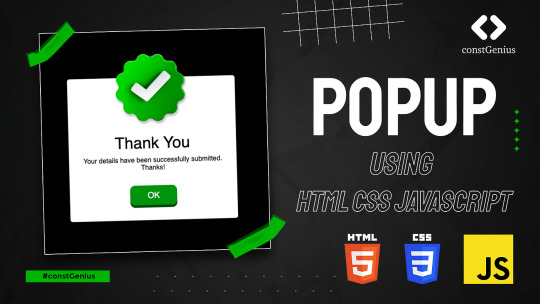
Conclusion
Congratulations on reaching the end of this comprehensive guide on creating popups with HTML and CSS. We've covered essential aspects, from understanding HTML structure to adding interactivity with JavaScript, addressing common challenges, and ensuring responsiveness and accessibility. Let's summarize the key takeaways. Summary of Key Takeaways - HTML Structure: Establish a well-organized HTML structure for your popups, utilizing divs and containers to structure content. - CSS Styling: Apply CSS styles to enhance the visual appeal of your popups, customizing both container and content elements. - Adding Interactivity: Use JavaScript to add dynamic behavior to your popups, handling events and managing popup behavior. - Responsive Design: Implement responsive design practices to ensure your popups adapt gracefully to various devices and screen sizes. - Common Challenges: Address challenges such as z-index issues, browser compatibility, and performance optimization to create robust popups. - FAQ: Explore common questions about popup design, covering customization, accessibility, the use of CSS frameworks, and more. Encouraging User Engagement Through Popups Popups are powerful tools for engaging users, conveying messages, and showcasing important information. By combining HTML, CSS, and JavaScript effectively, you can create popups that not only capture attention but also provide a seamless and enjoyable user experience. Final Thoughts As you embark on implementing popups in your web projects, remember to test rigorously, embrace responsive design principles, and prioritize accessibility. The key to success lies in finding the right balance between visual appeal and user-friendly functionality. Now, go ahead and craft captivating popups that leave a lasting impression on your website visitors. Read the full article
0 notes
Text
youtube
In this comprehensive tutorial, we provide a step-by-step guide on how to create a drop-down menu in WordPress. If you want to enhance the navigation experience on your WordPress website, adding a dropdown menu can greatly improve usability and organization.
We begin by explaining the importance of having dropdown menus and how they can benefit your site's user interface. Next, we delve into the practical aspects, covering each essential step involved in creating a dropdown menu within the WordPress platform.
Our tutorial is designed for both beginners and experienced WordPress users. We walk you through the process from start to finish, ensuring that you have a clear understanding of every action required. Whether you're a blogger, business owner, or website developer, this tutorial will help you customize your site effortlessly.
Throughout the tutorial, we explore various methods to create dropdown menus in WordPress. We demonstrate the use of built-in features and plugins, allowing you to choose the most suitable approach for your specific needs. By following our instructions, you'll be able to create an efficient dropdown menu that complements your site's aesthetics and enhances user navigation.
Key topics covered in this tutorial include:
Understanding the importance of dropdown menus on your WordPress site
Accessing the WordPress dashboard and menu settings
Creating a new menu or modifying an existing one
Adding pages, posts, or categories to your menu structure
Arranging items and creating parent-child relationships
Styling your dropdown menu to match your site's design
Testing and previewing your menu before making it live
By the end of this tutorial, you'll have the knowledge and confidence to create elegant and functional dropdown menus in WordPress. Elevate your website's user experience and improve navigation with our easy-to-follow instructions. Watch the video now and take your WordPress skills to the next level!
Don't forget to like, share, and subscribe to our channel for more valuable tutorials and WordPress tips.
#wordpressmenu#wordpressdevelopment#wordpressdesign#wordpressplugins#webdevelopment#webdesign#dropdownmenu#wordpressdropdown#wordpress101#wordpresshelp#tutorial#stepbystep#websitedesign#webdevelopmenttutorial#wordpressvideo#wordpresswebsite#wordpressblog#wordpresscreator#wordpresscommunity#wordpresssupport#Youtube
0 notes
Text
20 Essential JavaScript Concepts Every Developer Should Know for Success #phptutorialpoints #webdevelopment #webtechnologies #webdevelopmenttutorial #javascriptconcepts #javascripttutorial #javascriptdevelopment
0 notes
Video
youtube
WooCommerce Buy 2 Get 1 Free Offer – No Plugins! Custom Code Tutorial
🚀 #Boost #Sales with a Buy 2 Get 1 Free #Offer in #WooCommerce - No Plugins! Custom Code #Tutorial 🛒🎉
Want to increase conversions and drive more sales in your WooCommerce store? In this tutorial, I'll show you how to set up a Buy 2 Get 1 Free (BOGO) discount using custom PHP code – no plugins required! 🔥
What You’ll Learn: ✅ How to implement a BOGO discount in WooCommerce ✅ Custom PHP code for automatic discounts ✅ Applying the offer to specific products or categories ✅ Tips to customize the promotion for your store
🔗 Full Guide & Code Here:
https://www.tutorialswebsite.com/how-to-add-a-buy-2-get-1-free-bogo-offer-in-woocommerce/
#woocommerce #BOGO #buy2get1free #ecommerce #php #webdevelopmenttutorial #wordpress #Ecommerce #onlinestore #techtutorial
#youtube#woocommerce#bogo offer#buy2get1free#ecommerce#php#web development#wordpress#ecoomerce#onlinestore
1 note
·
View note
Text
youtube
Hosting Multiple Websites in GoDaddy: Addon Domain Setup and Upload Tutorial - #godaddyaddondomains by TutorialsFor #GoDaddyTutorial #AddonDomainSetup #MultipleWebsiteHosting #WebsiteUpload #GoDaddyHosting #DomainManagement #WebHostingTutorial #AddonDomainGuide #GoDaddyForBeginners #WebsiteSetup #HostingMultipleSites #GoDaddyTipsAndTricks #DomainNameSetup #WebDevelopmentTutorial #GoDaddyAddonDomain #GoDaddyAddonDomainSetupForBeginners #HostingMultipleWebsitesOnGoDaddy #GoDaddyDomainManagementTutorial #AddonDomainUploadAndSetupGuide Hosting Multiple Websites in GoDaddy: A Step-by-Step Guide Are you tired of managing multiple web hosting accounts for your various websites? Look no further! GoDaddy's addon domain feature in cPanel allows you to host multiple websites under a single account, making management a breeze. In this tutorial, we'll walk you through the process of setting up an addon domain and uploading your website in GoDaddy. The tutorial is designed for beginners and intermediate users, providing a comprehensive guide to managing multiple websites in a single GoDaddy account Step 1: Log in to Your GoDaddy Account First, log in to your GoDaddy account using your credentials. If you don't have an account, create one and purchase a hosting plan that suits your needs. Step 2: Access Your Control Panel Once logged in, access your control panel (cPanel) by clicking on the "Web Hosting" tab and then selecting "Control Panel" from the dropdown menu. Step 3: Create an Addon Domain In your cPanel, scroll down to the "Domains" section and click on "Addon Domains." Enter the domain name you want to add, select the subdomain (if desired), and set the document root (public_html/yourdomain.com). Click "Add Domain" to create the addon domain. Step 4: Upload Your Website Next, upload your website files to the document root you specified in Step 3. You can use File Manager, FTP, or SFTP to upload your files. Step 5: Set Up Domain Name Servers (DNS) Update your domain's DNS settings to point to GoDaddy's nameservers. This step varies depending on your domain registrar. Contact their support if needed. Step 6: Verify Your Addon Domain Return to your cPanel and click on "Addon Domains" again. You'll see your newly created addon domain listed. Click on the "Verify Domain" button to ensure everything is set up correctly. Conclusion Hosting multiple websites in GoDaddy using addon domains is a straightforward process. By following these steps, you can easily manage multiple websites under a single account. Take advantage of GoDaddy's addon domain feature today and streamline your web hosting management! Additional Tips - Make sure your hosting plan supports addon domains. - Use a unique document root for each addon domain. - Update your website's configuration files to reflect the new domain name. By following this tutorial, you'll be able to host multiple websites in GoDaddy with ease. If you have any questions or need further assistance, feel free to ask in the comment section! https://www.youtube.com/watch?v=aoOCO5KsBd8
#Hosting Multiple Websites in GoDaddy: Addon Domain Setup and Upload Tutorial - godaddyaddondomains#Youtube
0 notes
Video
youtube
AI-Powered Websites: Built for the Futurepen_spark Click. Code. Create: Unleash AI for Website by Fifthgen S. Jgadeesan, Fonder FGI Academy Cell: 9443126900, 7904510800 #GenerativeAI #WebDevelopment #AIDesign #WebsiteCreation #WebDesign #ArtificialIntelligence #WebDesignTools #AIWebDevelopment #AutomatedWebDesign #AIWebsiteBuilder #TechTutorial #WebDevelopmentTutorial #MachineLearning #DigitalDesign #AIApplications
0 notes
Text
Why choose BigCommerce for your online Store?

Introduction
BigCommerce was founded in 2009, growing to be a business of more than 25 billion dollars, with more than 600 employees. It justifies the use of the word “Big” in its title. It is a premium e-commerce site that is used by all kinds of enterprises to set up their online stores and customize them according to their requirements. All kinds of products and services can be sold on this platform.
A major reason for its popularity among businessmen is that it enables them to access the store from anywhere and is a SaaS (Software as a Service) which means that all the tools they need to set up the store are available to them, from themes to layouts, which is beneficial to them. If you are looking to set up your store on Big Commerce, it is required for you to know more about this platform before using it for your future use.
Features of BigCommerce
Customization
Store Customization is the practice of editing, and customizing your storefront using the tools and design templates provided in the program. The drop-and-drag visual editing tool is used in BigCommerce to add design and customized elements and the biggest merit is that you do not need to write any codes. This is helpful for beginners and people from non-technical backgrounds which makes it likable and profitable for businesses.
CMS
Content is one of the ways through which you can associate with your customers and even invite visiting users into becoming one. That is why it is integral for you to focus on managing the content of the website.
Publishing quality content, and constant updates about newly launched products, events, news, etc helps in connecting with your audience better which in turn enhances brand awareness. BigCommerce has an effective and stable CMS which will help you in promoting your content and raising your rank in the SERPs which is a big boost to your business.
Design Themes
It provides a large number of built-in themes that are open to editing and changes, which means, you have the freedom to let your imagination flow and customize them according to your wish. The themes are developed using HTML, JavaScript, and CSS which is easily learned and even a beginner who knows these can create new themes and design templates on this platform.
Speed
Site speed is important for your business to be noticed. Smooth and fast loading speed ensures more traffic and higher ranking. Since BigCommerce is supported by Google AMP, Google Cloud Platform structure, and Akami Manager Built In, you can rest assured that the site speed of your store will be excellent.
Payment
BigCommerce supports a lot of cashless payment options like Amazon Pay, Apple Pay, and PayPal, along with other digital wallets that make the checkout process transparent and easier on both the client and seller’s side.
You can operate stores on multiple platforms such as Instagram, Facebook, Amazon, etc because it provides a cross-platform structure. This means that you get to connect with a larger audience and increase sales of your services and products.
Industries using BigCommerce
BigCommerce is very popular in the business world. Many established and large companies use this e-commerce platform to boost their sales and generate revenue and create brand awareness. With many tools and techniques unique to it, BigCommerce offers many packages that businessmen can choose from according to their business plans. Some of the big names that can be found on this platform are-
Sony
Almanac
Casio
RAZER
Game Nerds
Dremel
Why is setting up a Store in BigCommerce Beneficial?
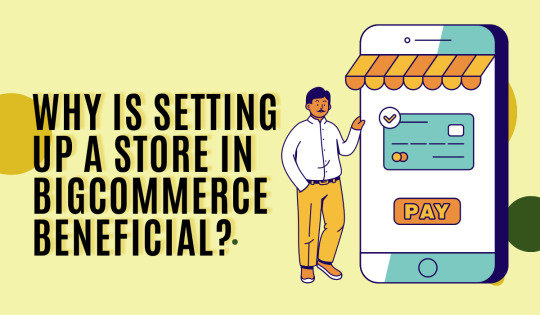
BigCommerce has a strong foothold in the business sector because of the many features and benefits that come with this platform. Some of the best advantages you are guaranteed while setting up your store in BigCommerce are as follows.
Easy Usage
It is easy to set up and use. This is especially beneficial for people who are beginners or don't have a technical background. They can quickly and efficiently set up a fully functional online store with tools and techniques that are provided by the platform without the need for writing any code or downloading additional apps or plugins. As a result, BigCommerce can compete successfully with other e-commerce websites.
Website Optimization
SEO (Search Engine Optimization) is a very critical part of online business. Optimization of your store or website can drastically improve your standing in the industry and you get to have many opportunities for increasing your rank in the SERPs. BigCommerce follows the latest SEO practices that help you in optimization, enriching your website with appropriate keywords, and checking for any malicious content that might be a threat to your ranking.
Customer Satisfaction
It provides quality customer service to all the users who visit online stores. It includes a feedback and query forums, 24/7 customer support, a short waiting period, quick checkout and payment services, etc. These factors must be taken into consideration to ensure that your business offers quality customer service.
Conclusion
Since the past few years, BigCommerce has taken up a stable position in e-commerce. It is convenient, efficient, user-friendly, and quick, which is why it is an ideal program for all kinds of businesses. So, if you want to start your online business, BigCommerce is the one for you.
#BigCommerceDevelopment#eCommerce#OnlineStore#WebDevelopment#WebDesign#WebDevelopmentTips#WebDevelopmentTricks#WebDevelopmentTutorials#WebDevelopmentResources#WebDevelopmentCommunity#CodeSnippet#CodeTips#CodeTricks#CodeTutorials#CodeResources#PHPDevelopment#JavaScriptDevelopment#CSSDevelopment#HTMLDevelopment
0 notes
Text
Learning PHP, MySQL & JavaScript" by Robin Nixon is a comprehensive guide for anyone looking to build dynamic, database-driven websites. This book covers three essential technologies—PHP, MySQL, and JavaScript—and how they work together to create modern web applications. Below is a step-by-step breakdown of the outcomes you can expect after reading this book, presented in a user-friendly manner:
#PHP#MySQL#JavaScript#WebDevelopment#FullStackDevelopment#PHPMySQL#JavaScriptTutorial#PHPDevelopment#MySQLDatabase#WebAppDevelopment#Coding#BackendDevelopment#FrontendDevelopment#TechTutorial#WebDevelopmentTutorial#Programming#DatabaseManagement#PHPProjects#JavaScriptProgramming#TechLearning#FrontendBackendIntegration#ProgrammingLanguages#WebDesign
0 notes
Link
There are so many great Free Software Tutorials on YouTube to learn Web Development. The free Tutorials on these channels are better than ones you would for pay. who wants to learn Web Development is that where to look for top tutorial start with. It can be very useful or helpful tutorials on the same topic from different creators. There is no particular order.
1 note
·
View note
Text
youtube
WordPress is a popular content management system (CMS) that is used to create and manage websites. If you are looking for WordPress Development Services, there are many options available to you. Here are some of the common services offered by WordPress developers:
#WordPressDevelopment#WordPressTips#WordPressTutorials#WordPressPlugins#WordPressThemes#WebDevelopment#WebDesign#WebDevelopmentTips#WebDesignTips#WebDevelopmentTutorial#WebDesignTutorial#Code#Coding#Programming#PHP#HTML#CSS#JavaScript#jQuery#WordPressCustomization#WordPressDesign#WordPressSecurity#WordPressSEO#WordPressHosting#WordPressMaintenance#WordPressBeginners#WordPressExperts#WordPressCommunity#WordPressUpdates#WordPressNews
0 notes
Video
youtube
Introduction to UI Development | Web Development Tutorials | Mr.Naveen
#ui#uidevelopment#uiclasses#uiprogramming#uiclassesonline#uicoursesonline#uiintroduction#webdevelopmenttutorials
0 notes
Text
youtube
In this tutorial, we will walk you through the process of changing sizes and dimensions in Revolution Slider 6. Revolution Slider 6 is a powerful tool for designing stunning sliders for your website. However, it can be overwhelming to navigate the many options and features. But don't worry, in this video, we will guide you step-by-step on how to change sizes and dimensions in Revolution Slider 6.
First, we will show you how to change the size of your slider to fit your website's layout, and then we will dive deeper into the dimensions of your slider, including width, height, and aspect ratio. With these adjustments, you will be able to create custom sliders that look great on any device.
In addition, we will cover how to set your slider to full width, and how to adjust your slide's layers to fit your new dimensions. By the end of this tutorial, you will feel confident in your ability to create amazing sliders in Revolution Slider 6.
So, let's get started and learn how to change sizes and dimensions in Revolution Slider 6!
#RevolutionSlider#SliderTutorial#WebsiteDesign#WebDevelopment#WebDesign#ResponsiveDesign#WordPress#SliderPlugin#WebDesignTutorial#WebDesignTips#WebDesignTricks#WordPressPlugins#WordPressTutorial#WordPressTips#WebDevelopmentTutorial#WebDevelopmentTips#WebDevelopmentTricks#SliderDimensions#SliderSize#DesignTools#Youtube
0 notes