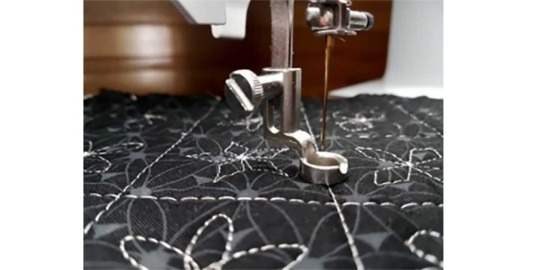
#Tips for sewing intricate designs
Explore tagged Tumblr posts
Visit Tumblr Blog
Explore Tumblr blogs with no restrictions, modern design and the best experience.
Last Seen Tumblr Blogs


Fun Fact
Tumblr has a 66 index score for customer satisfaction in the US.
Text
How to Sew a Patch on a Hat - Easy Sewing Tutorial
In this post, you will learn how to sew a patch on a hat in super easy way. Love what you see ? Support me by snagging some cool items from my shop! Every purchase helps me bring you more awesome content. Thank you! Shop Now Adding custom patches to a hat is a great way to personalize your accessories, whether it’s a baseball cap, trucker hat, or knit cap. This tutorial will guide you through…
#Adhesive backing patches#Baseball cap customization#Care and maintenance for patched hats#Creative patch designs for hats#Custom patches for hats#DIY custom hats#Embroidered patch application#High-quality patches for hats#How to sew a patch on a hat#Iron-on patches guide#Personalized hat patches#Sewing machine for patches#Tips for sewing intricate designs#Trucker hat patch tutorial#Unique ways to use patches
0 notes
Text
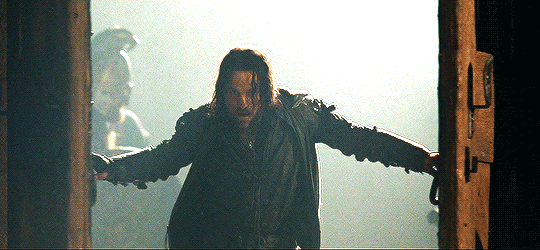
Flower Crown
Aragorn x Female Reader
Content & Warnings (per the warnings MDNI): fluff, light angst, kissing, non-descriptive intimacy
Word Count: 2k
During a spring festival, the man you love returns unexpectedly.
ao3 // taglist // main masterlist // spring 2024 masterlist
The sky is a cloudless, endless ocean above your head.
You breathe deep, savoring the scents in the air. Newly bloomed flowers, freshly baked bread, and roasting chicken all infiltrate your nostrils, reminding of you the celebration that’s about to begin. Anticipation buzzes under your skin like a swarm of startled bees. You’ve been waiting for this all winter. Spring is finally here, knocking, ready to be greeted. The flowers are in full bloom, and the trees have awakened from their solemn slumber.
Every year the small village in which you’ve lived your whole life celebrates the changing of the seasons. A community-wide festival is held. Each person is involved in their own way, and the duties are often assigned at the beginning of winter to allow everyone to prepare. Sometimes, these responsibilities shift, but a few remain the same.
Last year, you attended the baker in their duties to provide baked goods. This year, you were tasked with sewing new dresses for all the unmarried young women. The base fabric, an off-white cotton, remains the same. It’s like a blank page awaiting colorful paint or black ink, each dress ready to be designed with every young woman in mind. You, and several of the married women, take great care in personalizing each dress to the young ladies’ personalities.
It is not by chance that this happens. It is more than tradition. Rebirth and renewal are the themes of the festival, and with that comes an influx of weddings. The dresses are for that very reason, as a form of matchmaking, along with the presented flower crowns and the festival itself. You’ve always thought it silly but never truly commented on the matter. Fortunately, with you on sewing duties, you were able to work on your own dress.
With the dresses come flower crowns. They are given to the young women by unmarried men of the village. It is always the married women and village elders who quietly determine which man will gift what crown to who. They’re intuition is almost always correct. It is rare for a pair to not eventually marry. Sometimes it is quick, and sometimes it is years later before either realizes they belong together.
And the flower crowns are the true beauty. Another group handmakes each one. But because you know how intricate they are, you did nothing for your dress. It is simple. Plain. Just because you’re forced to be part of this tradition doesn’t mean you want to try and find a husband. You’re perfectly fine alone, because the man you do want is far away.
He isn’t avoiding you. Not on purpose. Aragorn is a ranger. He thrives in the wilds, seeking out the darkness to rid it from the world. But you do miss your wanderer. He tries to travel through your area as often as he can just to see you.
Over the years, the friendliness has grown, becoming heat and tension.
None of the other men in the village make you feel the way he does, and they likely never will.
In the shade of a tree, you smooth out the front of your dress. The tips of your fingers itch and you need to move them just to calm yourself. That alone is silly. What do you have to be nervous for? The process is always the same, always consistent, so why do you feel like this?
The young, unmarried women begin to congregate near the arch of flowers. Breathing deep, you march forward, finding your spot where it always is. You can taste the eagerness in the air. The women around you are just as nervous, nearly bouncing on their toes. They whisper to each other, giggling, but none of them glance your way or address you.
All day, and not even one has thanked you for your work.
But you won’t let it eat away at your resolve. Today is a good day. You’ll drink berry wine and gorge yourself on delicious food while listening to the married women gossip about their husbands.
As the village elders arrive, all talking ceases. That is the cue, and just like the women in line, you curtesy. You’re not allowed to look up, to glance into the face of the man who will place a crown upon your head. You keep your head bent and gaze on the ground.
There is shuffling, the rustling of hands lifting crowns. You focus on the green grass beneath your feet. You’re the only one up here not wearing shoes. You breathe in, and out, watching as so many pairs of polished boots pass by.
When someone does stop before you, the boots are not clean. They are muddy and have seen travel. You almost want to laugh but really, you’re curious. Who is this? Who would be so bold to come to the crowning with filthy boots?
In the next moment, the crown is placed upon your head. You don’t move. Don’t breathe. The stranger’s fingers brush the underside of your chin, pressing gently. You respond. You can’t resist. It is natural to do so.
Your gaze takes in this stranger as your head lifts. And when you see his face, you realize that this is no stranger at all.
“Aragorn,” you whisper, and his response is a smile.
There is applause, and good-natured cheering all around, and yet you respond to none of it. It is only him, this man you’ve been missing, standing before you.
“What are you doing here?” you ask just as the music starts up. It’s too early. Aragorn often arrives in the fall when the leaves start to change.
Others are already wandering off together or going their separate ways. You’re left staring, happy to see him but not understanding why.
“To see you,” he replies.
To see you. To see you. Whatever nervousness you felt before is gone, replaced with a giddiness that sends heat right to your cheeks.
When you don’t reply immediately, Aragorn frowns. “Have I upset you?”
“No!” You reach for him, grabbing his upper arm, taking a step forward. “Not at all. I’m just…surprised.”
His gaze softens, and you could fall into his depths. “Didn’t think I’d come?”
“You always visit when the weather begins to cool.”
“I do,” he agrees. “Couldn’t stay away.” Aragorn says this almost absently as his fingers toy with a white ribbon on your dress.
A young woman shrieks with delight, and you and Aragorn both turn as she’s hoisted in the air.
“Would you like to dance?” he asks.
The answer is immediate. “Yes.”
He presents his hand, and you take it. His palm is warm. Strong. Aragorn leads, and then you’re moving, matching the correct steps. It’s not an intense dance but it isn’t slow either.
“Did you just arrive?”
He smiles. “As they were distributing the flowers.”
“Is that why you’re so dirty?” Aragorn laughs as you lean in and sniff, making an exaggerated expression. “And smelly?”
“I thought you liked the way I smelled after a ride.” Aragorn wraps his arm around your waist, turning as he does so.
“A ride,” you correct. “Not a journey.”
The music swells, dips, and then increases in pace. You’re left focusing on your feet, going through the motions. But Aragorn knows what he’s doing, and he leads you through it effortlessly. It’s difficult to speak, but his hands do enough talking. Aragorn’s touch lingers. He might squeeze slightly or allow his hand to wander. It stirs something hot in your belly that travels lower until you’re blazing everywhere.
When the music comes to an end, and the two of you are out of breath, Aragorn places his hand on your lower waist and guides you away.
“Something to drink?”
“Please.”
Berry wine is had before Aragorn takes your hand again, the two of you strolling off into the nearby orchard. Between the trees, there is privacy, the two of you walking in gentle silence. It’s just your hand in his and the warm breeze that stirs up your dress.
“I’m glad you’re here,” you say, stopping next to an apple tree. There are leaves on its branches but no blooms.
Aragorn comes to a stop beside you, his chest nearly brushing your shoulder. “Glad? That is all you feel?” With a soft touch, Aragorn turns your head in his direction. His head is angled downward, and there is no escaping what you see in his eyes.
There are times when the two of you have found a bit of quiet, some peace only with the need to explore the other. As you gaze upon his face, you are entirely aware of what he wants, but Aragorn is an honorable man. He will not push or insist on more unless you’re the one who seeks it out.
The berry wine is warm in your blood. Aragorn’s nearness is just as intoxicating. His fingers play with that same ribbon, and you lean into his touch until your noses brush lightly against each other.
“There is plenty I feel,” you reply, your voice a whisper amongst the birdsong and breeze.
“Is your heart willing to share?” Aragorn tugs lightly on the ribbon, loosening a portion of the bodice.
“Is yours willing to hear the truth?” you counter, knowing that you’d give him anything in this moment.
Aragorn tugs on the ribbon again, loosening the bodice further. Air rushes into your lungs as your chest receives a bit of freedom. “Tell me now. Under the trees. Let the sky listen.”
“You’re far too sweet to be a warrior,” you laugh, and Aragorn grins, closing the distance. The kiss is chaste and lovely, sending heat down to your toes and up to the crown of your head.
Your fingers find the front of his tunic. They curl inward, pulling of their own accord, seeking his closeness. Aragorn indulges, deepening the kiss until your bodies are pressed together. His hand rises, clutching the back of your neck. There is only you and him and your repeated meetings.
When you finally break apart, your lips are raw, and you hunger for more. You ache for deeper things, and long to tell him so.
“Is this all right?” he asks, fingers brushing against your exposed collarbone.
“Yes,” you murmur in reply, shivering under his touch.
Aragorn returns to your mouth, and you open for him. Your own fingers explore as much as his, but it is Aragorn’s fingers that venture beneath fabric.
You inhale sharply, and his hand retreats. “Apologies.”
“Don’t stop,” you say, grasping his wrist to guide his hand back to your skin.
Under the shade of the apple tree, Aragorn follows your lead, the two of you finding a dance. Although time has not been kind, keeping the two of you parted, there is no need to rush. You are happy simply existing with him, taking time to explore and savor what you’ve missed over the last few months.
Every caress is a song, and each kiss not only satiates but fuels the hunger that sits low in your belly. Fingers press and dig into skin. Clothing opens or falls away. There is no one else around, and Aragorn’s warmth is all you seek.
“Will you stay?” you ask between kisses.
Aragorn pauses, drawing back slightly. “For a few days.”
A few days. A few days with him and then separation. With Aragorn arriving now, will he return in the fall? Or will this be your new normal?
Even as these doubts swirl in your mind, you know the truth.
You don’t care.
As long as he comes, as long as he returns to you when he can, that is enough.
taglist:
@foxxy-126 @glassgulls @km-ffluv @firelightinferno @glitterypirateduck
@tiredmetalenthusiast @protosslady @childofyuggoth @coffeecaketornado @cherryofdeath
@berarenado @therealbloom @ninman82 @thewulf @ferns-fics
@beebeechaos @hantheconqueror @miaraei
#aragorn fanfiction#aragorn fanfic#aragorn fic#aragorn fluff#aragorn x f!reader#aragorn x female reader#aragorn x fem!reader#aragorn x you#aragorn x reader#aragorn elessar#aragorn smut#aragorn lotr#lotr aragorn#lotr fanfiction#lotr fanfic#lotr fic#lotr smut#lord of the rings#lord of the rings fanfiction#lord of the rings movies#lord of the rings fanfic#lord of the rings smut
602 notes
·
View notes
Note
In memory of the Apology Mug Story (and because I walked past a super old building recently; guess what it had on the facade)
Reader who knows how to carve rocks into specific forms and is very skilled in it makes Malleus a gargoyle for his birthday. He's so happy he ends up accidentally confessing his love to them.
Bonus points if that was Lilia's idea because he got tired of seeing them dance around each other and wanted things to happen already
This is really cute <3 for those who aren't certain what the apology mug story is; the link to that is Here!
A special birthday present for our favorite draconic prince <3
Being in Ramshackle with a limited amount of entertainment (being unable to afford many electronics) you had to resort to other forms of entertainment. Reading, cooking, sewing, board games, long walks outside, musical instruments, and your most recent of endeavors; rock carving. You had learned a few things here and there from Malleus, he was an avid crafter of gargoyles within his club and was more than happy to teach you a thing or two. Although most of your attempts seemed to fail in his eyes, you were actually secretly incredibly skilled at this. You were leaving your skills to set up a surprise present for the fae for his birthday; January 18th.
It wasn't hard to figure out what you were planning on doing for his birthday, Malleus was incredibly easy to read. Although money was scarce for you, using your skills to handmake something would be much more worth receiving than any amount of money could pay for. At least, that's what Malleus had said when you inquired what he would like at his celebration.
"A present is not necessary," He told you with a graceful smile, "Bring yourself, and your smile. That is enough for me." ...you were not going to take that as the final verdict, thus began your journey to create a gift he was surely going to enjoy.
His birthday came upon you, and your gift was finally completed. You did not hesitate to rush over to Diasomnia for the celebration, bringing over two things; A homemade ice cream cake, and your gift box. The cake was pretty much the start of Malleus's excitement, ice cream cakes exist?! It wasn't common in Twisted Wonderland much to your surprise, so sharing your handmade cake with his enjoyment of icecream implemented already sent him over the moon. The joy that was written all over his face was the easiest text to read, soon pouring out of his mouth in a theatric novel after unwrapping his second gift from you- two gargoyles. They were miniature and made for décor less than actual function, however, his excitement seemed to explode off the tip of his tongue.
His bright green eyes were sparkling, his mouth ajar, and a blush painted across his pale cheeks.
"It's us! See, one has your horns and the other-" Malleus immediately wrapped you into his embrace, much to the protest of Sebek nearby, yet the smiles of amusement of Silver and Lilia quickly hushed the student. It seemingly seemed the words held inside had burst at the seams, and Malleus had begun setting free the things he had been eager to share for some time now.
"I am in pure infatuation with you," Malleus blurted out, "I have not received a gift so heartfelt and beautiful," it almost sounded like he was holding back tears of happiness.
"Two gargoyles representing you and I, shall I take this as a declaration that you wish to be my pair?" He did not await your response, the tall fae was already shooting off at the mouth. "I reciprocate. Your beautiful craftmanship will forever be my treasure, next to you, of course." You could not hide the clear redness from your face, and the dumb smile that planted permanently at his sudden confession.
"it's about time!" Lilia laughed, "Now, let us celebrate not only our prince's birthday but also the union between these two lovebirds!" Malleus pulled away from the hug and smiled again at the gargoyles you intricately designed, turning to face his dormmates.
"Yes, let us resume the festivities. We shall celebrate all night long, this will be a birthday well worth remembering. Come now, my dearest." Setting down the Gargoyles in a safe place, he grabbed hold of your hand dragging you into the joyful celebration <3
Happy birthday, Malleus!!
#twst#twisted wonderland#twst x reader#twisted wonderland x reader#Malleus draconia x reader#Malleus#malleus x reader#malleus twst#Twisted wonderland malleus#twst malleus x reader#malleus headcannons#malleus draconia headcannons#Happy birthday Malleus!#Twisted wonderland headcannons
462 notes
·
View notes
Text
quilting
quilting is a fantastic and rewarding hobby! it's a wonderful way to express your creativity, make beautiful and functional items, and even connect with a community of fellow quilters.
step-by-step guide to start quilting as a hobby
step 1: gather your supplies
basic materials: you'll need fabric, a rotary cutter, a cutting mat, rulers, quilting pins, thread, and a sewing machine (or needle and thread if you prefer hand quilting).
article resource: beginner's guide to quilting supplies
step 2: choose a quilt pattern
simple patterns: start with a simple quilt pattern, like a basic patchwork or nine-patch quilt.
article resource: easy quilt patterns for beginners
step 3: cut your fabric
fabric cutting: use your rotary cutter and rulers to cut your fabric into the required shapes and sizes for your chosen pattern.
video resource: how to cut fabric for quilting
step 4: sew the pieces together
piecing the quilt: sew your fabric pieces together according to the pattern instructions to create the quilt top.
article resource: how to sew quilt pieces together
step 5: assemble the quilt sandwich
layering: layer the quilt top, batting, and backing fabric to create the quilt sandwich. secure the layers with quilting pins or spray adhesive.
video resource: how to make a quilt sandwich
step 6: quilt the layers
quilting: use your sewing machine or hand stitching to quilt the layers together. you can follow a simple straight-line pattern or try more intricate designs.
article resource: beginner quilting tips
step 7: bind the edges
binding: finish your quilt by sewing binding around the edges to give it a clean and polished look.
video resource: how to bind a quilt
quilting is a fulfilling hobby that lets you create beautiful and cozy pieces, whether for yourself, as gifts, or to donate. what kind of quilt are you excited to make first? 🧵✨
#hands on hobbies#hobbies#it girl energy#personaldevelopment#selfimprovement#stop doom scrolling#productivity#the hobby menu#hobby#creative#becoming that girl#quilting#quilt#brainrot#doom scrolling#rotting#rot core#bedrotting#scrolling
9 notes
·
View notes
Note
Howdy! Could we have Kid with a toy maker s/o? You can do with it what you may. I just kind of think it would be an interesting match. Also love you Work, good job!!
Heyya!🍞 This was a really fun one to write! My apologies for the very long wait and hope you enjoy~ 🍀
Headcanons: Kid x Toy Maker! S/O
(Gender Neutral)
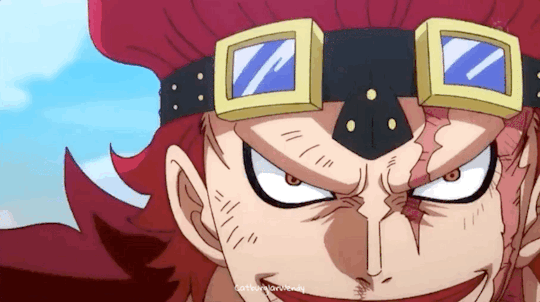
Eustass Kid
🛠 Kid loves seeing their little contraptions, little robots, dinosaurs, teddy bears, ragdolls, and many more creations that they effortlessly create with perfection. He is actually in awe at how finely, quickly and accurately they work. Whether it is with wood carving, working with mechanical pieces or even the sewing skills needed for plush toys or dolls clothes. There was a vast variety of toys which Kid never even knew existed and he thought nothing of toys until he witnessed the craftsmanship first hand.
🛠 When {Name} and Kid got a little more involved with one another, the decision to naturally travel with Kid’s crew became a reality. Kid even sweetened the deal when he agreed to allow {Name} to share his private workshop. Truthfully Kid could sit for hours and just watch {Name} work with how deftly they worked. Everything was interesting, one of the more therapeutic things he watched was when {Name} painted dolls or details.
🛠 {Name} found it cute how Kid would watch them and admire their work. Even though {Name} was a little closer to a merchant than a pirate as they would create all these toys and sell them to the various toy stores along the grandline. They even made a very famous name for themselves, an alias of course but nevertheless. It was how every unique piece was stamped, signed or carved. They had felt motivated to create something unique for Kid. They settled on a very intricate doll, inspired from the punk movement in style with some cyborg-esque qualities, including a mechanical arm that resembled Kid’s. When you pulled the string on the back it gave something of a war cry before aggressively strumming at the guitar in hand. Kid was definitely impressed and touched, knowing just how much effort {Name} put into every aspect of making the doll, from the design to the sewing of clothes, the painting, the mechanical work for it to move or finely carving the wood to make it look as realistic as it did.
🛠 One of the more exciting things was allowing Kid to see their main workshop, back on their home island. {Name} was visibly nervous, more so than Kid had ever seen them. “What’s got ya so damn nervous?” Kid stated. “Well, it’s just so…personal. I’ve never let anyone see my workshop.” {Name} admitted. They cracked open the door and gestured for Kid to walk in. They pulled a large lever down from the adjacent wall and in sequential order, a large amount of lights began to light up the large workshop. Kid was in awe at how messy their design table was. Tons of pencil shavings, eraser crumbs, crumpled up paper balls, dishes and empty snack containers. The reason why it was so shocking, Kid compared its state to the rest of the workshop that was immaculately kept and clean. Every tool and brush had its own place and there was not even a speck of debris. Kid definitely could take a few notes from {Name} on how to organize and keep an immaculate workshop. Thinking back, when he began sharing a workshop with {Name} he never once complained about mess, or clutter. Unlike his side that was so disorganized he could practically lose himself.
🛠 While his partner was almost perfect in every craft they learned with tons of practice, they never hesitated to learn or refine their skills further. Whenever Kid offered up a few of his own tips about working with metal, its components and temperament they were sure to take note of every word and try it out for themselves. Kid enjoyed being able to converse about something he is truly passionate about and have them listen so intently and even challenge some things. If they found something to be a little difficult they would easily ask for his help and Kid enjoyed being able to show off his skills a little. Those genuine and overly analytic comments that {Name} gave really stroked his ego.
🛠 Kid decided to try and reciprocate by making something for {Name} as well. He worked on small pieces, but toys were something out of his expertise. He tried to make something cute, it ended up looking like a janky clump of metal pieces that awkwardly sat together to make some kind of silhouette. Going into this project he truly thought it was going to be like any other project, he thought he would get the hang of it as he went along. He had a newfound appreciation for {Name’s} craft. He kept trying until it eventually resembled, at some angle, in some way, maybe if one squinted a little it could look like a cat. Kid honestly was just going to toss it in the trash, but he didn't know {Name} had been watching him and how hard he worked, even when it ended up with him being even more frustrated. {Name} refused to let Kid throw it away, “It’s for me isn’t it?” {Name} treasured it, “It’s such a cute mantaray!” They said happily, “It’s a cat…” Kid mumbled.
🛠 {Name} had been holed up in the workshop for days on end, without seeing a single ray of sunshine nor coming out to eat or drink water. Kid wasn’t even sure if {Name} slept, when he stepped into the workshop he saw a shrimp-like figure hunched over the desk. Mumbling words so fast it may have sounded like a summoning ritual as strange symbols and illustrations were scribbled over the various pages before a hail storm of paper balls were tossed everywhere. Now, well this may have sounded like some strange start of a horror story, it was actually pretty normal for {Name}. This was merely their design process. Even Kid grew accustomed to seeing his sleep deprived blanket clad shrimp-postured partner in the dark workshop with only a single lamp to light up their table while they scrawled various designs for new toys or improvements for creations they had already made. Well sooner or later, the shrimp will evolve into a slug when {Name} slides out the workshop looking for food.
🛠 {Name} sometimes gets a bit down if they fail at their designs, they get highs and lows of creating things. Sometimes they succeed so perfectly, other times they fail and they struggle to find motivation to give it a second try. Kid often will let them wallow about it by just encouraging them to give it a break and return with a fresh mind when they feel they have the capacity. Sometimes Kid can directly help by giving suggestions on how to change the design, sometimes his insight gives a new perspective that gives [Name} the answer they needed.
#one piece#eustass kid#kid one piece#trashytoastboi#gender neutral#gender neutral s/o#one piece imagines#one piece scenario#one piece scenarios#one piece headcanons#eustass kidd#eustass captain kidd#eustass captain kid#worst generation#fluff#sfw#kid x reader#eustass kid x reader
141 notes
·
View notes
Text
Married to The Enemy - Shingen Ch. 50
Chapter 50
It had been a few weeks since that last dinner with my grandmother. So far, Shingen was doing well with all of his followup appointments. The doctor even remarked on how well and how quickly Shingen was recovering. Shingen was in tip top condition. Though we still had to continue the appointments to ensure the tumor was not returning nor were any others growing. But the doctor was confident that things were going well.
Since we still had time here, we had to decide what all we would do. I showed Shingen around many of the modern sights…we ended up going to the beach a few more times, deciding to enjoy it before summer came to an end. We also went on little trips with Sasuke, him showing us around different places that had been of historical significance. Places that Shingen knew from his time, so he could see how they had changed.
Another thing we had decided to do was to get some work. We learned that the initial money that had been given to us, came from Sasuke. He had insisted he didn’t want it back and that he wanted us to use it to enjoy ourselves. It was something he was happy to do for us. But still neither of us wanted to completely rely on it.
After debating, we had decided our best bet would be to invest the money into our crafts. I bought fabric and some good sewing notions, while Shingen bought some hand tools just like the ones he was used to using back in the Sengoku. We then made a few sample pieces and posted them online and soon we had sales. It didn’t take long for us to get plenty of orders. Though since we were only going to be here for a short time, we didn’t want to take up more than we could handle. But we took on just enough.
It was rather nice, spending our days working together on our projects side by side. We were each doing our own thing. Existing in the same space. But it was just so fulfilling to do so. I found myself always doing my work with a smile on my face simply because Shingen was at my side.
I finished up on a custom dress I had been working on for a customer. She wanted a princess dress for a costume ball she would ball she would be attending. It was a fantasy theme for a charity event and I was more than happy to do the work. It was so much fun.
“There. That’s the last touch.” I declared as I looked at the dress on the form in the middle of the living room.
Shingen looked up from his work and smiled. “That looks so lovely.” He declared. “I am sure your customer will be pleased.”
I smiled. “I hope so. She loved the design when I showed her. Her eyes just lit up. I can’t wait to see her face when I deliver the piece to her.” I replied. I was then picking up my phone, taking a picture and sending it to my customer.
All finished! 🙂
It was a few seconds later I had a reply.
OH MY GAWD! IT’S BEAUTIFUL!!! I CAN’T WAIT TO SEE IT IN PERSON AND TRY IT ON!!! WILL TOMORROW BE OKAY? <3 :D
Haha, I’m glad you like it! I can’t wait to see how beautiful it looks on you! Tomorrow works perfect. Shall we meet in our same place?
YES! My office tomorrow at lunch time!
Great see you then 🙂
“It seems she likes it.” I said with a smile.
“Well, when the piece is made by such a talented seamstress with such care, people are bound to love it.” Shingen replied, a look of pride on his face.
I felt myself flushing. “Oh, Shingen…how is your project coming along?” I asked.
“The jewelry box is almost finished.” He answered. “I’ve finished the carving and such. I just have to put the cushioning and lining in now.”
I smiled as I looked at the intricate carving on top of the box. “It’s beautiful. Your customer wanted to gift it to his wife, right?”
Shingen nodded. “He said it was for their anniversary.” He answered. “And I have to put my best work in for a customer who wants to dote on his wife so. I mean, I can understand exactly where he is coming from.”
“Oh you…”
Shingen chuckled warmly. “We’ll have to be getting ready soon, won’t we?” He asked.
I looked at the time. “Oh yes. If we’re going to meet Shoko and Kenji for the movie.” I replied.
“Alright, I’ll just finish this part up real quick and then I’ll be able to get ready.”
“Okay. I’ll go ahead and hop in the shower real quick.” I replied. I walked over to Shingen and gave him a quick peck on the cheek before heading to the bathroom.
Once in the bathroom, I turned the water on so it could warm up. I hung a fresh towel close by and then stripped and took my hair down from the bun I’d had it in while sewing. I checked the temperature of the water and then hopped in.
I closed my eyes and leaned back to start the process of washing my hair. Once I had my hair wet, I reached for my shampoo…but found a much larger hand had beat me to it. I looked up as Shingen smiled at me having come into the bathroom…or snuck in I should say. I didn’t even hear the door open. He had already stripped down, too.
“When did you sneak in here?” I asked, grinning at him.
“Just a few minutes ago.” He answered. “I thought it would be best to conserve water if we showered together.”
I giggled. “I can see the logic in that.”
“I also thought you might like some help with washing your hair and your back.”
“I’ve been doing those things for myself for years.” I replied. I then pointed to the loofa on a stick that was for washing my back. “That is for my back.”
“I know…but it can’t massage you while washing your back.” Shingen pointed out. “And don’t you enjoy the feeling of my hands in your hair?”
“Okay…you have some good points there.” I replied. “I guess I can allow you to help me…and I can help you, too.”
“My goddess is generous.” Shingen said, that warm smile lighting his gray eyes. He squirted the shampoo in his hands and I turned my back to him. It didn’t take long for me to feel those large hands in my hair, fingers massaging my scalp.
“Mmmm…” I hummed contentedly as I closed my eyes. Shingen was so incredibly good with his hands. They knew how to soothe and relax me just as much as they knew how to work me up into a heated frenzy of desire.
“I love seeing that smile on your face.” Shingen murmured. “You really have the most beautiful smiles.”
“Well, it’s a good thing for you then, that you make me smile so easily.” I replied, my smile widening.
“I am a lucky man, indeed.” Shingen agreed.
After washing my hair, Shingen helped me with my back, being true to his word that he would massage my back as he did. I honestly hadn’t realized how tense my shoulders had been from being hunched over my sewing machine. Shingen must have realized and wanted to take care of me.
After I was finished being washed, it was Shingen’s turn. He sat down on the edge of the tub facing me so that I could wash his hair. He closed his eyes as a contented smile crossed his lips while I worked my fingers against his scalp.
“My goddess had the most relaxing touch.” He said, his eyes still closed.
“I just want to take as good of care of you as you do me.” I replied. “I like doting on you and spoiling you, too.”
Shingen’s strong arms wrapped around me and pulled my wet naked body against his. He opened his eyes and looked at me. “When you say such sweet things, my angel…it only makes me love you more.”
I grinned. “Well, good. Because I can’t help but to fall for you more each day, too.” I replied, leaning in to kiss him on the lips.
“How can you only keep getting cuter?” Shingen asked me when I pulled away.
“I think you might be biased…but I am okay with that.” I replied with reddening cheeks. “You know, I’m starting to think we’re using more water than if we’d have showered separately.”
Shingen chuckled. “Probably…but it is more enjoyable this way, isn’t it?”
“Well…yes.” I replied. “But we should probably hurry or else we’re going to end up being late.”
“Probably.” Shingen agreed. He gave my waist a squeeze before releasing me.
I finished up washing his hair and then helped him with his back. Once we were finished with the shower, we got out and dried off. We wrapped up in towels and Shingen helped me dry my hair before we went to get dressed.
It was going to be a casual evening. Movie and then dinner at a small casual restaurant. But it was also still a date, so I wanted us to dress up a little bit. It was always fun to get dressed up. For Shingen I picked out some nice jeans -and boy did he look good in jeans- and a white v-neck t-shirt and a relaxed black button-down short-sleeve shirt.
For myself, I picked out a cute black dress with a white floral print. It had spaghetti straps and was flowy, coming down to about my mid-thigh. “I really do love these clothes you wear in this era.” Shingen said as he came up behind me, fingertips gliding over my bare arms.
“Are my clothes your favorite thing about this era?” I asked, a teasing smile on my face.
“You are the best part of this era.” Shingen replied, wrapping his arms around me and pulling me against him. “How you look in the clothing of this time is just…icing on the cake as you say.”
I giggled. “I like that I am the cake and the icing in this case.”
“I did say you were my favorite sweet.” Shingen replied, nuzzling his face against the side of my neck.
“We really are gonna end up being late if we don’t hurry.” I said, smiling.
“You’re just so beautiful I forget myself.” Shingen replied, giving me a few neck and shoulder kisses before releasing me. ‘Let me help you with your hair.”
Shingen brushed out my hair and then pulled it up into a cute relaxed bun. He helped me put on my necklace and earrings next. A simple silver chain with a heart pendant and some silver hoops. He ducked down for me so that I could help him put on the silver tiger-tooth necklace.
Once we were dressed, we headed out to meet Shoko and Kenji at the theater. We arrived and met them at the entrance. Shoko grinned as soon as she saw us. “I was starting to think we might have to go see a later showing.” She teased.
“Hey, we aren’t running that far behind.” I teased.
“It’s alright. We only just got here ourselves.” Kenji replied. “The boys didn’t want to get ready so they could go to their grandparents’.”
Shoko playfully elbowed Kenji in the ribs. “You aren’t supposed to tell them that. Come on, we have to give the newlyweds a hard time.”
“Oh, like you don’t remember being that way.” Kenji teased. “We’re still that way sometimes.”
“It’s hard not to be that when you’re lucky enough to have a beautiful wife.” Shingen replied, his arm wrapping around my waist.
Kenji nodded his agreement as he pulled Shoko close. “I agree completely.” He said. “You know, this is why I like you, Shingen. You get that there is nothing better than being totally head over heels for your wife.”
Shoko and I smiled and shook our heads as we looked at each other. Though neither of us were complaining about our husbands being totally in love with us. It was rather nice. “Come on, let’s go in and get our tickets and our snacks.”The four of us headed inside and got our tickets. Then we got in line at the concessions. While we were waiting, we were called to by a familiar voice. “Oh my gosh! Can’t believe I’m running into you guys here! It must be a movie date night for everyone!”
Taglist: @limonzu @zulablaise @oda-princess @kisara-16 @tele86 @lovely-bubb1es @lucyw260
@bjorkshire-pudding @eventinelysplayground
#ikesen shingen#ikemen sengoku shingen#shingen takeda#ikemen shingen#otome shingen#cybird shingen#ikesen au#ikesen#ikemen sengoku#cybird ikemen#cybird otome#fanfic#ikemen series#otome boys#fanfiction#cybird
16 notes
·
View notes
Text
All about sewing tools

Sewing Tools for Professional Results As with any profession or hobby, using the right tools can make all the difference in the world and can make the difference between amateur or professional results. Even if you’ve only sewn a few projects and collected some basic sewing tools, it may be time to learn about some of the advanced sewing tools designed to give your project that professional edge. Most sewing projects can be completed without the following tools, but as you improve and fine-tune your skills and develop an affinity for quilting, home decorating or clothing construction, you’ll find these tools indispensable for saving time, increasing accuracy and simplifying tasks Cutting Tools Needlework Scissors and Snips Small, 3"- to 5"-long needlework scissors or snips are indispensable for clipping close to the stitching line or trimming intricate areas of a project. They can be used wherever your large bent-handled shears can’t reach. Snips have spring-loaded handles. Keep a pair alongside the sewing machine, at-theready to cut stray threads. Rotary Cutter Used with a self-healing mat and a clear plastic ruler, rotary cutters are ideal for straight cuts in one or more fabric layers. Look for blades that can be easily removed and replaced and a handle that is comfortable. Rotary mats and rulers are made specifically for rotary-blade cutting, and the materials don’t dull rotary blades as other products might. Both the mat and the ruler feature gridlines and angles for cutting accuracy. See more about: rotary cutters Measuring & Altering Tools Grid Board Use a large grid board under the fabric and pattern to align the fabric grain while pinning and cutting. A padded grid board allows you to pin into it when stretching or blocking fabric. Some have ironing surfaces that are also helpful for fusing large fabric sections. Consider a rotating grid board if your space is limited. Mats and wide rulers used for rotary cutting are actually modified grid boards used both underneath and on top of the fabric. See “Rotary Cutter” above. French Curve or Fashion Ruler These rulers have a variety of curves to mimic the body’s curves and are used when altering patterns. It’s helpful for the simplest length adjustment and indispensable when actually changing the style of a garment. Depending on how you turn the ruler and what segment you use, one ruler gives you all the curves necessary to complete pattern lines when altering or drafting patterns. Marking Tools FabricMarking Pens The space-age chemicals used to make these clever pens become more high-tech every day. The disappearing ink allows you to mark most projects at the exact location needed—even on the fabric right side— without fear of staining or discoloration. Look for an ink color that is in high contrast to your fabric, and for accuracy select a fine tip. Choose a water-soluble pen for long-term projects, when you want the markings to remain until you remove them with water. Air-soluble pen inks disappear within a few hours and are ideal for fabrics that can’t be washed or dampened. Some air- and water-soluble pen manufacturers caution against exposing marked fabrics to sunlight or the heat of the iron because heat may set the ink permanently. Always test the pen on a scrap of the fabric before using it on your project. Pressing Tools Tailor’s Ham Resembling a ham, this pressing tool is used as a base or a mold when pressing curved or shaped seams. It’s available in several sizes and should be covered on one side in cotton and the other in wool. The ham’s curves are designed to mimic garment curves and are used to set the shape of collars, lapels, sleeve caps and more. Point Presser & Pounding Block The raised points of this wooden tool allow you to press deep into a corner without creasing the surrounding fabric. The base is used as a pounding block, or clapper, to flatten seams. Needle Board A flat, flexible board with a bed of short needles placed very close together, a velvet board or needle board is used for pressing napped fabrics, such as velvet and corduroy, without crushing the fabric’s pile. A lessexpensive, and less-effective, version of a needle board features a canvas backed fabric with a raised pile front that takes the place of the needles. Sewing Tools SewingMachine Needles Sewing needles are designed for the type of fabric, thread and stitches you’re using. Using the right size and type of needle will greatly improve your sewing success. For more information on choosing the best needle for your project . Tip: A stitching problem, such as skipped stitches or looping or shredding threads, at firstmay appear to be a problemwith themachine when actually it’s a call for a new or better-suited needle. Bodkin Used for drawing elastic, cord or ribbon through a fabric casing, bodkins are available in several different styles. The pincer is usually the shortest with teeth at one end designed to clamp down firmly on ribbon or elastic and pull it through a tubular casing. Longer versions have a safety pin style closure at one end, and the slimmest version, designed like a large sewing needle, has a large eye for feeding narrow cord in narrow casings. A bodkin’s ball-point end comes in handy for turning fabric tubes right side out. Point Turner A point turner is a hand-held, pointed plastic tool designed to poke into tight corners. For crisp, sharp corners and points, use this tool to push out the corners of collars and cuffs before pressing. The opposite end is flat or rounded; use it to hold open seam allowances while pressing, so you don’t burn your fingers.Basting Tape Much faster than hand basting with needle and thread, use narrow, paper backed basting tape to hold zippers, bias tapes and trims in place while stitching. Fray Preventer A drop of this liquid on the cut edge of a woven fabric will bond the edges and prevent the fabric from raveling. Before using, test the product on a scrap of the actual fabric, or in an inconspicuous area of the project. Allow the test piece to dry thoroughly. Then wash, dry and press it as you would the finished project, to be sure the product doesn’t discolor the fabric. Read the full article
5 notes
·
View notes
Text
FLORALCRAFT® 6mm Pearl Pins x144 - Ivory
Add a touch of elegance to your crafting with FLORALCRAFT® 6mm Pearl Pins. These pins feature delicate ivory pearl heads and strong 6cm stainless steel shafts, offering both beauty and durability for all your creative needs. Whether you’re securing floral arrangements, fabrics, ribbons, or plants, these sharp, sturdy pins easily pierce through materials to hold everything in place.

Elegant Design for Every Project The FLORALCRAFT® 6mm Pearl Pins are designed to bring sophistication to your work. With their 6mm round ivory pearl heads, they offer a refined aesthetic that complements any creation, from floral designs to fabric projects. These pins add not just practicality but also a decorative element that will make your projects stand out. The soft ivory hue is versatile, matching a wide range of materials and themes, whether you're working with delicate flowers or creating elegant sewing projects.
Durable & Strong Construction Crafted with high-quality stainless steel, these pins are built to last. Measuring 6cm in length, the pins are strong and sharp, making it easy to pierce through various materials without bending or breaking. This strength ensures that your designs stay intact as you work, whether you're securing fresh flowers in a bouquet, layering fabrics in a sewing project, or adding accents to ribbons and plants.
Versatile & Practical Use These versatile pins are ideal for a wide range of applications. Whether you're a florist, crafter, or sewist, the FLORALCRAFT® 6mm Pearl Pins are the perfect tool to help you:
Floral Arrangements: Secure flowers, leaves, and ribbons in place with ease, allowing you to perfect your designs. Sewing Projects: Pin fabrics together to ensure precise and accurate stitching. Crafting: Use them to attach ribbons, lace, or other materials for scrapbooking, home décor, or gift wrapping. Gardening: Secure plants or delicate flowers to supports while adding a decorative flair. The sharp tips make it easy to use on both light and heavy materials, ensuring that no matter the project, you'll have the perfect tool for the job.
Pack of 144 for Long-Term Use The FLORALCRAFT® 6mm Pearl Pins come in a generous pack of 144, ensuring you have plenty to tackle multiple projects. Whether you're preparing for a wedding, a large crafting project, or just need to replenish your pin collection, the ample quantity will keep you prepared. These pins are stored in a clear acetate box, keeping them organized and protected so you can easily access them when needed.
Why Choose FLORALCRAFT® 6mm Pearl Pins? Elegant Design: 6mm round ivory pearl heads add a sophisticated touch to any project. Durable & Strong: 6cm stainless steel pins offer exceptional strength and sharpness for easy piercing. Versatile Use: Perfect for floral arrangements, fabrics, ribbons, plants, and various craft projects. Pack of 144: Generous quantity for multiple projects and long-term use. Secure & Practical: Pins hold your designs firmly while adding a decorative element. Safe Storage: Clear acetate box for safe and organized storage. Ideal for Crafters, Florists, and Sewists No matter what type of creative project you're working on, FLORALCRAFT® 6mm Pearl Pins provide the perfect blend of style and functionality. From florists crafting beautiful bouquets to sewists creating flawless seams, these pins ensure your designs stay secure and stylish. With their elegant appearance, strong construction, and versatility, these pins are a must-have tool for anyone in the crafting world.
Make your next project a masterpiece with FLORALCRAFT® 6mm Pearl Pins. Whether you're adding decorative accents or securing intricate details, these pins will help you achieve the perfect finish with every use!
#PearlPins#IvoryPins#CraftingSupplies#FloralArrangements#SewingPins#DecorativePins#CraftTools#PinningEssentials#SewingAccessories#FloristTools#FabricPins#Ribbons#CraftingEssentials#CreativePins#FloralCraft#PinningTools#Floralcraft
0 notes
Text
Discover the Timeless Beauty of Vintage Sewing Tools in San Diego
Sewing has long been a cherished art form, with its techniques and tools handed down through generations. Each stitch tells a unique story, and the tools used to create these works of art hold a special place in history. For collectors, crafters, or anyone who appreciates the charm of the past, vintage sewing tools are more than just instruments – they’re tangible pieces of history. If you’re in San Diego and searching for an exceptional collection of vintage sewing tools, Remember This Vintage Photos is the place to visit.
Let’s delve into why vintage sewing tools continue to captivate both enthusiasts and collectors, and how these timeless treasures can inspire your creativity.
Why Vintage Sewing Tools Are So Special
The allure of vintage sewing tools lies in their craftsmanship and rich history. Unlike the mass-produced tools of today, these items were often handcrafted with precision and care, using materials like wood, brass, and ivory. Their designs reflect a dedication to quality and longevity, making them as functional as they are beautiful.
Owning vintage wooden sewing tools connects you to a bygone era of artistry. These tools represent a slower, more deliberate time when sewing was not just a necessity but a creative expression. By incorporating these pieces into your craft or collection, you honor the tradition and skill of artisans who came before us.

Explore Our Selection of Vintage Wooden Sewing Tools
Among the many treasures at Remember This Vintage Photos, our vintage wooden sewing tools are a standout. These tools combine elegance with functionality, making them ideal for both use and display.
Intricate Thread Spools: Many of our wooden thread spools feature delicate carvings and designs, adding a touch of old-world charm to your sewing space.
Antique Needle Cases: These beautifully crafted cases showcase the artistry of past eras, while also serving as practical storage for your needles.
Durable Designs: The natural warmth and durability of wood make these tools both timeless and sturdy. Whether used for sewing or as decorative pieces, they are sure to delight.
Each wooden tool in our collection is a testament to the skill and dedication of its maker, ensuring that no two pieces are exactly alike.
Tips for Collecting Vintage Sewing Tools
If you’re new to collecting vintage sewing tools, here are a few things to consider as you build your collection:
Material Matters: Look for tools made from quality materials like wood, bone, or metal. These durable materials have stood the test of time.
Exquisite Craftsmanship: Pay close attention to the design and detailing. Many vintage tools feature intricate patterns that highlight the artistry of their era.
Functional or Decorative?: Decide whether you want tools for display, practical use, or both. Some collectors prefer fully functional tools, while others focus on aesthetic value.
At Remember This Vintage Photos, every piece is carefully inspected to ensure authenticity and quality, so you can shop with confidence.
Why Choose Us for Vintage Sewing Tools in San Diego?
Our curated selection of vintage sewing tools inSan Diego makes us a trusted source for collectors and crafters in San Diego. From buttons and thimbles to wooden spools and beyond, we offer a diverse range of items from various eras. Whether you’re a seasoned collector or just beginning your journey, our collection has something for everyone.
How to Care for Your Vintage Sewing Tools
Preserving the beauty and functionality of your vintage sewing tools is essential. Follow these simple tips to ensure your tools remain in excellent condition:
Store in a Dry Environment: Wooden tools are particularly susceptible to moisture, which can cause warping or cracking. Keep them in a dry, cool place.
Handle Gently: Although sturdy, vintage tools have already lived a long life. Handle them with care to prevent unnecessary wear or damage.
Alternate Use: If you plan to use your vintage tools for sewing, rotate them with modern tools to extend their longevity.
By taking proper care of your tools, you continue the legacy of the craftsmanship that created them while preserving them for future generations.
Step Back in Time with Vintage Sewing Tools
In a world dominated by fast production and disposable goods, vintage sewing tools remind us of the value of craftsmanship and history. At Remember This Vintage Photos in San Diego, our collection of vintage wooden sewing tools and other treasures allows you to celebrate this legacy.
Whether you’re adding to your collection or searching for a unique piece of history, these tools are perfect for reconnecting with the artistry of the past. Visit us today and discover how vintage sewing tools can enrich both your craft and your connection to history.
0 notes
Text
Stitching Success: Proven Tips on How to Promote Your Sewing Business
Turning your sewing talent into a thriving business requires more than just impeccable craftsmanship—it demands effective marketing. If you’ve been wondering how to promote your sewing business, this guide will walk you through essential strategies to help you gain visibility, attract clients, and grow your brand.
1. Create a Distinctive Brand Identity
Your sewing business needs a strong identity to stand out. Choose a memorable name, design a professional logo, and maintain a cohesive visual style across your marketing materials. This consistency helps clients recognize and remember your business.
2. Showcase Your Work Through Social Media
Social media platforms like Instagram, Pinterest, and TikTok are ideal for visual businesses. Post high-quality photos and videos of your sewing projects, from intricate custom designs to simple alterations. Use engaging captions to tell the story behind each piece and connect with your audience.
3. Develop a Professional Website
A user-friendly website is essential for building credibility. Include a portfolio of your work, a detailed list of services, and clear contact information. Optimize your website with search engine keywords like “custom sewing services” and how to promote your sewing business to attract local and online traffic.
4. Leverage Word-of-Mouth Marketing
Satisfied customers are invaluable for spreading the word about your sewing business. Encourage happy clients to leave reviews on platforms like Google My Business or Yelp. You can also offer referral discounts to incentivize existing clients to recommend your services.
5. Partner with Local Businesses
Collaborations with local businesses can expand your reach. Work with fabric stores, bridal shops, or event planners who can recommend your services to their clients. Consider leaving business cards or brochures in their establishments to catch the eye of potential customers.
6. Participate in Community Events
Community fairs, craft shows, and pop-up markets are excellent venues to showcase your work. Set up a visually appealing booth to display your creations, interact with potential clients, and distribute flyers or business cards.
7. Offer Unique Promotions
Launch creative promotions to draw attention to your services. For instance, run a “Back-to-School Alteration Sale” or offer discounts for bulk orders. Seasonal campaigns can help keep your business top-of-mind throughout the year.
8. Teach Sewing Workshops
Sharing your skills through workshops or online classes can position you as an expert in the field. Workshops not only generate additional income but also serve as a great platform to showcase your expertise and promote your services.
9. Utilize Online Advertising
Invest in online advertising to target your ideal audience. Platforms like Facebook and Google allow you to create localized campaigns that highlight your sewing services.
10. Engage with Your Community
Join local Facebook groups or online forums where potential clients might be looking for sewing services. Share tips, answer questions, and subtly promote your business while building trust within the community.
Final Thoughts
Growing a sewing business takes more than skill with a needle and thread—it requires creativity, dedication, and strategic promotion. By implementing these strategies on how to promote your sewing business, you can create a brand that stands out, attracts loyal customers, and thrives in a competitive market.
0 notes
Text
Handmade Return Gifts: A Unique Way to Show Gratitude

Return gifts are an essential part of any celebration, serving as tokens of appreciation for your guests. While store-bought options are convenient, handmade return gifts stand out for their personal touch and charm. These gifts not only show effort and thoughtfulness but also make a lasting impression on your loved ones. In this article, we explore why handmade return gifts are a great choice and provide some creative ideas to inspire you.
Why Choose Handmade Return Gifts?
Handmade gifts have a unique appeal that mass-produced items simply can’t match. Here’s why they are worth considering:
Personal Touch: Crafting gifts by hand allows you to infuse your personality and creativity into every piece. It makes guests feel special and valued.
Eco-Friendly: Many handmade gifts use natural or recycled materials, making them an environmentally conscious choice.
Unique and Memorable: No two handmade items are exactly alike, adding an exclusive element to your gesture of gratitude.
Cost-Effective: With a little effort and creativity, you can create beautiful gifts without breaking the bank.
Creative Handmade Return Gift Ideas
Here are some thoughtful and easy-to-make ideas for handmade return gifts that suit various occasions:
1. Scented Candles
Scented candles are a classic yet personalized option. You can make them at home using wax, essential oils, and dyes. Pour them into jars or decorative molds and adorn with ribbons or tags for a polished look.
2. Mini Succulents
Plant small succulents in colorful pots or handmade containers. These green gifts are low-maintenance and symbolize growth and positivity, making them perfect for any occasion.
3. Homemade Soaps
Craft artisanal soaps using natural ingredients like shea butter, essential oils, and dried flowers. Wrap them in eco-friendly paper and tie with twine for a rustic charm.
4. Fabric Tote Bags
Sew small tote bags or pouches using fabric remnants. Add embroidery, prints, or painted designs to personalize them. These reusable bags are both functional and stylish.
5. Jars of Treats
Prepare jars filled with homemade cookies, chocolates, or granola. Decorate the jars with labels, ribbons, or handwritten thank-you notes for a personal touch.
6. Hand-Painted Frames
Create miniature photo frames using materials like wood or clay. Paint them in vibrant colors or add intricate designs. Guests can use them to display their favorite memories.
7. DIY Jewelry
Handcraft bracelets, earrings, or necklaces using beads, charms, and wires. Package them in small pouches or boxes for an elegant presentation.
8. Herbal Tea Blends
Combine dried herbs and flowers like chamomile, mint, and lavender to create custom tea blends. Pack them in small sachets or jars with brewing instructions.
9. Bookmarks
Make unique bookmarks using pressed flowers, painted wood, or colorful cardstock. These practical gifts are ideal for book lovers.
10. Aromatherapy Pouches
Fill small fabric bags with dried lavender, rose petals, or other fragrant herbs. These pouches can be used as sachets for closets or drawers.
Tips for Crafting Handmade Return Gifts
Start Early: Handmade gifts take time, so plan your crafting schedule well in advance.
Personalize Your Gifts: Add names, initials, or messages to make your gifts special.
Use Quality Materials: Opt for durable and attractive materials to ensure your gifts stand out.
Focus on Presentation: Beautiful packaging enhances the overall appeal of your handmade creations.
Conclusion
Handmade return gifts are a thoughtful and creative way to show gratitude to your guests. They add a personal touch that mass-produced items can’t replicate, making your celebration even more memorable. Whether you’re hosting a wedding, birthday, or festive gathering, these gifts reflect your care and appreciation for the people who matter most.
With a little creativity and effort, you can craft unique return gifts that your guests will cherish for years to come.
For more details, visit us:
best return gifts for wedding indian
indian return gift bags
return gift for ear piercing ceremony
0 notes
Text
Why Choose a Long-Arm Quilting Machine?
For those who love quilting and pursue it as a hobby or as a side job, they know that half of their productivity and precision depends on their quilting machine. And sooner or later, they know they need to get a long-arm machine not only for keeping up with client demands, but also to improve their skills.
But a long-arm quilting machine is a significant investment, especially for serious quilters aiming to complete larger projects more efficiently. With many options and price points, choosing the right one can be overwhelming.
However, there are some factors you could ponder on that can help you make the decision. Here are three essential factors to consider before buying specific models for long-arm quilting machines.
Decide Between a Sit-Down or Stand-Up Machine
A sit-down long-arm machine is an excellent choice if you prefer working seated or have space limitations. For example, choosing a machine that is a compact sit-down option offers around 16 inches of throat space, allowing you to comfortably handle both small and large projects.
These machines are also ideal for detailed work, such as ruler-guided quilting, where you have close, hands-on control over the fabric.
On a stand-up machine, you move the machine head over the fabric instead of the fabric itself, allowing for faster quilting. This setup offers a unique experience and is often preferred by quilters who work on large, intricate designs. Stand-up machines are mounted on a frame with wheels, making the machine easy to maneuver across the quilt surface.
Think about how you prefer to work and the types of projects you plan to tackle. Stand-up models are great for speed and large quilts, while sit-down options offer control and comfort for detailed work.
Evaluate Your Available Space
Space is a critical consideration, as long-arm machines can take up a significant area. Long-arm setups range from more compact models, like the Simply 16 on a 5-foot frame, to large machines with 10- to 12-foot frames.
The larger frames provide more space for the quilt, letting you tackle bigger projects with fewer adjustments, but they require a substantial amount of room.
If you have limited space but want a stand-up machine, consider a model with a smaller footprint, such as the Simply 16. For those with ample space, opting for a larger frame, such as 10 or 12 feet, allows for a larger machine with more advanced features.
This can include automated options or an extended throat, which can make a big difference when working on oversized quilts. Consider not just the footprint but also the clearance needed around the machine for easy access.
Ensure a Strong Support System
A reliable support system can make a massive difference, especially as you familiarize yourself with the machine. Look for brands and sellers that offer setup assistance, in-depth training, and ongoing support.
Some companies offer dedicated customer support and access to private communities where quilters can exchange tips and troubleshoot common issues.
Additionally, consider if the brand provides access to training resources, such as online tutorials, private groups, or live sessions. These resources can be invaluable as you learn to optimize your machine’s settings and maintain it over time.
Knowing that you have a dependable support network can make the experience of using your long-arm much more enjoyable and productive.
Quilting Is Easier If You Know What You Need
Purchasing a long-arm quilting machine is a big decision, but with careful consideration, you can find the right machine to fit your needs and space. You should also consider the types of projects you are in the process of starting or accepting, which can make the decision easier for you.
So no matter what brand or model of long-arm quilting machine you decide to purchase, you know that it suits your project goals, skill level, and the available space you have in your dedicated sewing space.
For more information about Juki Sewing Machine and Sewing Machine Cabinets please visit:- Premier Stitching DBA Sew Vac City
0 notes
Text

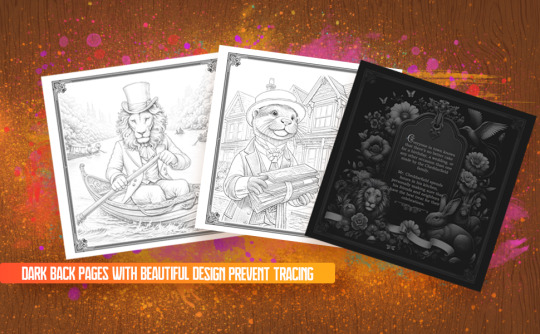
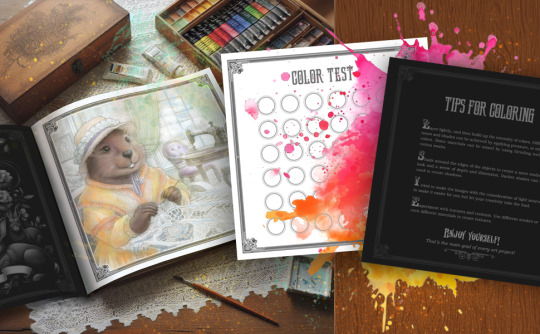
Victorian Animals Coloring Book
Whimsical Whiskerwood Town Awaits Your Creative Touch!
50 Cute Images With Anthropomorphic Animals for Relaxation and Stress Relief.
👉Step into Whiskerwood—Color Your Copy Now!👈
Welcome to the adorable town of Whiskerwood! This is a town filled with fun animals, enjoying their calm days in Victorian style. They sew, dine, play music, you name it. It’s up to you to add some color to their lives. With these cute creatures, you will have hours of joyful coloring! The book is designed for the best coloring experience: high-quality paper can handle your pencils, markers, and other materials. It doesn’t matter whether you are an experienced colorist or a beginner, this book is for everyone.

🦊 50 Unique Grayscale Illustrations: Each intricate design features adorable animals in Victorian attire, creating stunning contrast when colored.
🎨 Perfect for All Skill Levels: Whether you’re a beginner or advanced, these designs are both fun and rewarding to color.
🖊 Premium Paper Quality: Thick, high-quality pages can handle pencils, markers, and more, while dark back pages prevent bleeding and tracing.
📖 A Story Behind Every Page: Immerse yourself in the world of Whiskerwood as each back page reveals a charming story about the animal you’re coloring.
✨ Extra Goodies: Includes coloring tips and test pages to practice your techniques before diving in.
👉Get Whiskerwood's Victorian Charm in Your Hands!👈
#ColoringBook#AdultColoringBook#GrayscaleColoring#VictorianArt#WhimsicalArt#VintageStyle#ColoringForAdults#RelaxingArt#AnimalArt#CreativeTherapy#ColoringCommunity#ColoringIsFun#ColoringTime#ColoringBooksForAdults#VintageAnimals#AnthropomorphicArt#VictorianEra#CreativeHaven#StressReliefColoring#ArtTherapy#InkyArt#ColoringAddict#VintageAesthetic#CreativeEscape#CalmAndColor#CuteAnimals#HistoricalArt#ArtForRelaxation#EscapeWithColoring#ArtisticTherapy
0 notes
Text
Singer Sergers: The Ultimate Tool for Seamless Creations
In the large world of sewing, having the right tools can make all the distinction in producing professional-looking tasks. One such tool that has actually changed the way seamstresses and hobbyists approach their craft is the Singer Serger. With an abundant history and a track record for quality, Singer Sergers have become a staple in lots of sewing spaces around the world.The Development of Singer Sergers Singer, a name synonymous with sewing quality, has actually been at the leading edge of development in the industry for years. The evolution of Singer Sergers is a testament to their dedication to providing sewists with trustworthy and efficient devices. From their early designs to the current highly advanced variations, Singer Sergers have actually continuously enhanced to satisfy the requirements of modern-day creators.Why Choose a Singer Serger for Your Sewing Projects When it pertains to selecting a serger for your sewing jobs , there are many alternatives readily available on the market. Nevertheless, Singer stands apart as a trusted brand understood for its toughness and efficiency. Whether you're dealing with garments, home decor products, or accessories, a Singer Serger can help you achieve professional outcomes with ease.Mastering the Fundamentals: Singer Serger Features and Functions Among the key reasons sewists gravitate towards Singer Sergers is their user-friendly style and intuitive functions. From differential feed systems to multiple thread options, Singer Sergers are equipped with whatever you require to produce perfect seams and surfaces. By mastering the basics of threading and stress settings, you can unlock the complete potential of your Singer Serger and take your productions to brand-new heights.Tips and Tricks for Attaining Expert Finishes with a Singer Serger While owning a Singer Serger can definitely elevate your sewing video game, knowing how to take advantage of its features successfully is necessary for accomplishing expert finishes. Whether you're working with delicate materials or tackling intricate styles, there are numerous tips and tricks you can utilize to make the most out of your device. Try out different stitch types, changing tensions appropriately, and practicing on scrap fabric are just a few ways to refine your skills and develop refined garments every time.Singer Serger Upkeep and Troubleshooting Guide Like any other device, proper upkeep is vital for keeping your Singer Serger running smoothly. Regular cleaning, oiling moving parts, and replacing worn-out needles are simple steps that can prolong the life of your maker. In case you come across issues such as avoided stitches or tension issues, describing your user handbook or looking for help from authorized service centers can assist resolve these issues efficiently.In conclusion ... Singer Sergers have actually certainly made their reputation as the ultimate tool for seamless productions worldwide of sewing. By comprehending their development, selecting them for their dependability, mastering their functions, carrying out ideas for professional finishes, and preserving them appropriately -sewists can unlock unlimited possibilities in their creative endeavors with self-confidence using this renowned brand's sergers.
singer serger reviews
#Singer#Sergers#Sewing#Hobby#Serger#Machine#Brand#Features#Professional#Finishes#Maintenance#Troubleshooting
0 notes
Text
Embroidery Machine Types and How to Choose the Best One
There are different types of embroidery machines available in the market, each unique in its own sense. The more options there are, the more difficult it is to choose the best one. In order to make the right decision when selecting the embroidery machine, you must understand the different types of machines available. Here, in this blog, we will talk about the machine types along with their functionalities:
Mechanical embroidery machines
Mechanical embroidery machines are one of the most basic types of machines. These machines rely on manual stitch length, width, and thread tension. Having said this, the fabric needs to be physically manipulated under the needle to create intricate designs. Unlike the latest machines, these lack the advanced automation but offer a hands-on experience.
Free-motion embroidery machines
As the name suggests, these machines allow users to move the fabric in any direction while stitching, giving complete control over the design. The designer must be skilled, as the movement of the fabric dictates the shape and style of the embroidery.
Cornely hand-guided embroidery machines
A specialized type of machine, Cornely hand-guided embroidery machines are used for creating intricate, textured stitches. The Cornely machine has been around since the 19th century and is prized for its ability to create chain stitches, cording, and other decorative stitch styles. It’s commonly used in haute couture and luxury embroidery.
Computer-controlled embroidery machines
These are the latest machines in the market; these automate the entire embroidery process, thus making it faster and more precise. These machines are programmed via specialized software and can replicate even the most intricate designs with little manual effort. They are divided into several categories depending on their capabilities.
Let’s look at the different types of computer-controlled embroidery machines:
Single-head embroidery machine
Since there is only one-head in the embroidery machine, it is perfect for small businesses or hobbyists. While the machine has only one head, it has several needles to handle several colours and stitch designs on a single piece of fabric.
Multi-head embroidery machine
When it is about mass production, these machines with multiple heads must be opted for. They come equipped with multiple heads (ranging from two to 15 or more), allowing them to produce identical designs on several items simultaneously.
Schiffli embroidery machine
These machines are used to produce specific types of products, such as lace, textiles and intricate fabric embellishments on a massive scale. The Schiffli machine uses a series of needles to simultaneously stitch designs across wide sections of fabric, providing unmatched precision and scale.
So, these are the types of embroidery machines. Here’s how you can choose the one that fits your need the best:
Mechanical Machines: Best for beginners and simple projects.
Free-Motion Machines: Ideal for creative, custom designs.
Cornely Hand-Guided Machines: Perfect for luxury and intricate designs.
Computer-Controlled Machines: Versatile, scalable, and efficient for both small and large businesses.
Remember, whether you are creating custom embroidery for clients or simply exploring embroidery as a hobby, the right machine will make all the difference in the quality and efficiency of your work. Stay tuned for more fascinating insights on embroidery machines by following our page – Industrial Embroidery Machines & Sewing Equipment Suppliers. We will keep you updated with the latest blogs and tips on everything embroidery.
0 notes
Text
learn to digitizing your embroidey designs
From Sketch to Stitch: A Comprehensive Guide to Digitizing Your Embroidery Designs
The world of embroidery has embraced the digital age, allowing you to transform your own unique designs into stunning stitched masterpieces. But how do you bridge the gap between a simple vector graphic and a complex stitching pattern? This comprehensive guide, crafted with 2500 words, will teach you the art of digitizing your embroidery designs, from software choices to stitch considerations and finishing touches. Before We Embark: Understanding SVGs and Embroidery Files Scalable Vector Graphics (SVGs): These text-based descriptions of images offer infinite scalability, making them perfect for digital design. Embroidery files: These contain specific instructions for your machine, including stitch types, colors, and placement (DST, EXP, JEF, PES formats are common). Step 1: Choosing the Right Software Consider these factors when selecting your digitizing software: Skill Level: Are you a beginner or an experienced digitizer? Some programs cater to novice users, while others offer advanced features. Budget: Free and paid options exist, each with varying capabilities and functionalities. Compatibility: Ensure the software outputs files compatible with your embroidery machine. Here are some popular choices: Free: Inkscape: A free vector graphics editor with the Ink/Stitch plugin for basic digitizing. Sewing & Embroidery Software (SERF): Free software with limited but beginner-friendly digitizing features. Paid: Wilcom Embroidery Studio: Offers powerful tools for advanced digitizing and editing. Embrilliance Enthusiast: User-friendly software with various features at a good price point. Brother PE Design: Ideal for beginners with Brother embroidery machines. Step 2: Preparing Your SVG Simplify the design: Remove unnecessary details or intricate lines that might not translate well to embroidery. Optimize colors: Limit your color palette to what your machine can handle (usually 6-12 colors). Convert to paths: Ensure all elements in your SVG are outlines (paths) for proper stitching. Step 3: Importing and Converting Import your cleaned-up SVG into your chosen software. Follow the software's specific instructions for converting to an embroidery file. This typically involves: Choosing stitch types: Select appropriate stitches for different parts of your design (satin stitch for filling, backstitch for outlines, etc.). Setting stitch parameters: Adjust stitch density, length, and direction for desired effects. Color mapping: Assign thread colors to different parts of your design. Step 4: Digitizing Tweaks and Adjustments Preview and test: Most software allows you to preview your design on a virtual embroidery machine. Check for stitching issues and adjust paths or settings if needed. Refine stitch types and parameters: Experiment with different stitch combinations to achieve the desired look and texture. Consider thread types and colors: Choose thread that complements your fabric and design aesthetic. Step 5: Export and Embroider! Once you're happy with your design, export it in a file format compatible with your embroidery machine. Transfer the file to your machine and prepare your fabric and thread. It's finally time to see your creation come to life! Embroider your design, following your machine's instructions. Bonus Tips for Success: Start simple: Begin with basic shapes and designs to get comfortable with the conversion process. Practice digitizing: The more you experiment, the better you'll understand how different stitches and settings affect your final outcome. Join online communities: Connect with other embroidery enthusiasts for tips, advice, and inspiration. Don't be afraid to ask for help: If you get stuck, consult software manuals, online tutorials, or seek assistance from experienced digitizers. Remember, with a little practice and this guide as your compass, you'll be well on your way to transforming your SVG dreams into beautiful embroidered realities! Further Resources: Websites: Needlework Tips and Techniques: https://www.needlework-tips-and-techniques.com/ Books: "The Complete Book of Digitizing" by Jeannette Douglas, "Digitizing Designs" by Laura Ashley YouTube Tutorials: CreativeBug Cutwork Embroidery Masterclass, Bluestone Creations Cutwork Basics Online Forums: Embroidery Forum With these additional resources and the knowledge you've gained, you Read the full article
2 notes
·
View notes