#Scrunchies sewing tutorial
Explore tagged Tumblr posts
Text
DIY Flower Satin Silk Scrunchies ✅ ✅ How to make Scrunchies sewing tutorial. DIY Hair Accessories
DIY Flower Satin Silk Scrunchies ✅ ✅ How to make Scrunchies sewing tutorial. DIY Hair Accessories
DIY Flower Satin Silk Scrunchies. How to make Scrunchies sewing tutorial. DIY Hair Accessories #sewing #scrunchies #sewingideas #sewingforbigenner #hairaccessories #craftideas #diyhairaccessories #diyideas #hairaccessories #tutorial
youtube
View On WordPress
#craft ideas#diy hair accessories#diy ideas#diy scrunchies#Easy Scrunchies DIY#Easy Scrunchies tutorial#flower bow Scrunchies#flower Scrunchies#hair accessories diy#hair accessories for women#Hair Scrunchies#how to make hair accessories#how to make Scrunchies#how to sew Scrunchies#satin Scrunchies#Satin silk Scrunchies#scrap fabric project#Scrunchies#Scrunchies diy#Scrunchies sewing tutorial#sewing and sell#sewing idea#silk Scrunchies#Youtube
1 note
·
View note
Text
youtube
🌟How to Make a Scrunchie at Home – No Sewing Machine Needed! 🌟 Want to make your own scrunchie at home without a sewing machine? Here’s a simple, step-by-step guide to create a cute and stylish scrunchie by hand! Perfect for beginners and a fun project to personalize your style. 🌸
DIYScrunchie #HandmadeAccessories #NoSewMachineNeeded #EasyCraft #HandmadeWithLove
2 notes
·
View notes
Text
Ruched Straps Tutorial: Elevate Your Dress and Top Game!
In this post, you will learn how to sew ruched straps to your dresses and tops. Are you tired of the same old dresses and tops in your wardrobe? Want to add a touch of elegance and uniqueness without spending a fortune? Look no further! In this comprehensive tutorial, I’ll delve into the art of sewing ruched straps—a simple yet transformative technique that can instantly elevate your fashion…

View On WordPress
#beginner friednly#diy straps#ruched straps#scrunchie straps#sewing#sewing fabric#sewing straps#sewing tutorial#straps for dresses#straps for tops
1 note
·
View note
Video
youtube
Sewing Silk Scrunchies in 3 minutes
1 note
·
View note
Text
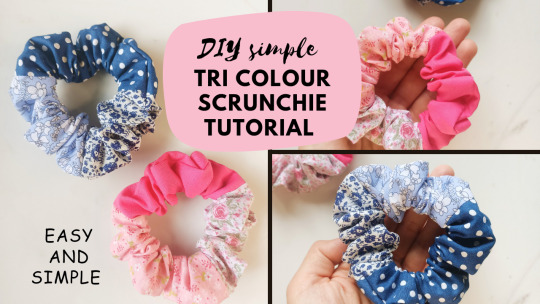
TRI colour Scrunchie tutorial
youtube
#Scrunchies#diy Scrunchie#handmade Scrunchie#Scrunchie tutorial#tri colour Scrunchie tutorial#how to make#how to sew#how to make a scrunchie#sydney#australia#brisbane#handmade#perth#aussiemums#craft#goldcoast#diy#melbourne#Youtube
1 note
·
View note
Text
My next new sewing term starts on June 5th, so it's time once more for me to ask if you can spare a few dollars to drop in my little tin cup, to help my students afford fabric to create garments they'll be proud to show off.
Because of the funds you've helped me raise for previous classes, each of my students who wouldn't have been able to afford to otherwise were able to sew themselves a top, two types of bottoms, a bag, and scrunchies. At minimum! I am so grateful, and I know that they are as well.
If I'm able to raise at least $100, I'll share a pattern/tutorial for one of the projects we'll be working on through this next term.
#community support#sewing community#sewing class#sewing clothes#sewblr#sewing#if you could signal boost that would be awesome#ko fi support#ko fi link
69 notes
·
View notes
Text
Amateur sewing - The Goddamn Pirate Poet Shirt
So. I made a thing.
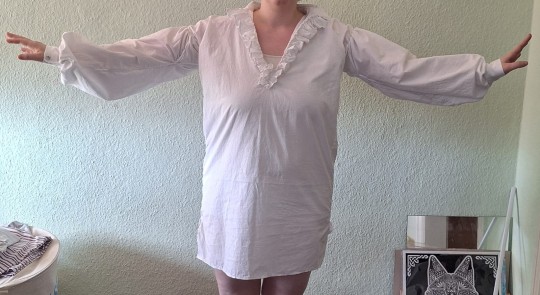
A vaguely late-18th / early-19th century-style shirt. And I'm saying vaguely because, while this has about the right look, I took a few liberties in construction.
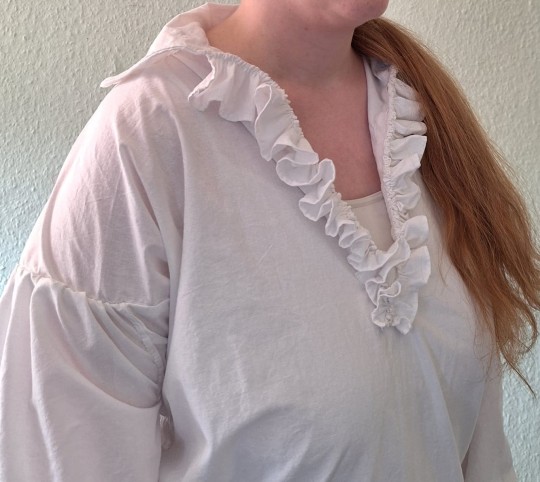
First of all: I wanted ruffles. None of the tutorials I used added ruffles because, frankly, that's a whole lot of hemming work for not that much length of fabric, but I wanted the frill. Behold. Also visible in this picture: The dropped shoulders, which are in fact according to the historical references.
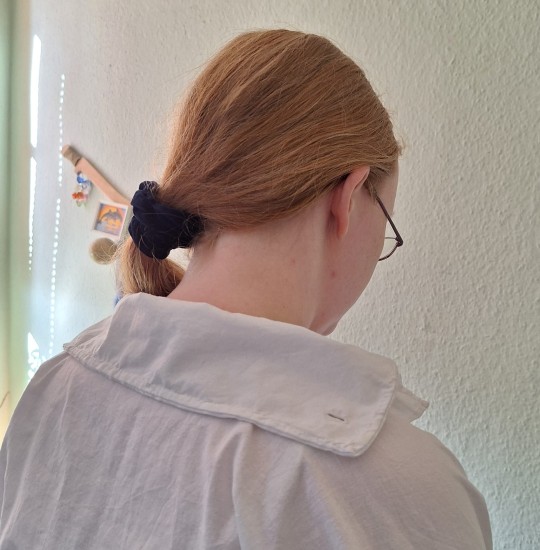
The collar from its better side. The other side, I had to extend with a little placket as this shirt has two modes: slutty pirate (open cleavage) and 18th c decency (closed with a cravat), and for the latter option I wanted to be able to shut it with buttons. For which I apparently took the wrong measure from my neck. Problem-solving!
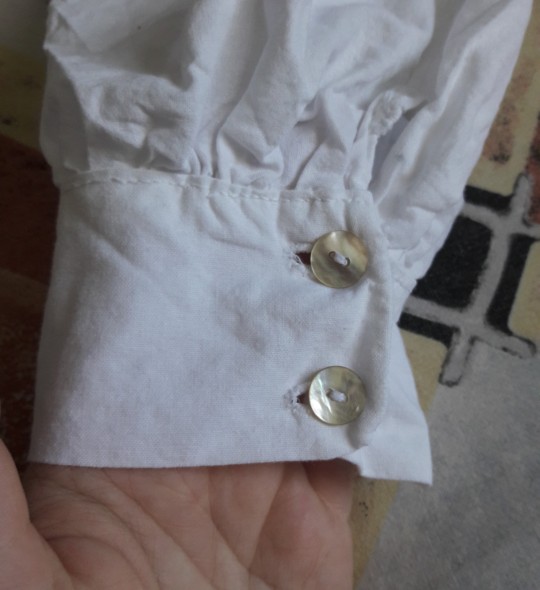
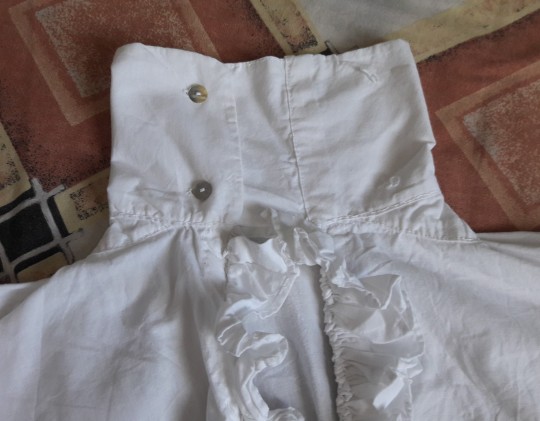
The front placket isn't the prettiest thing in the world, but the closed collar is meant to be covered by the cravat anyway. And check out my darling nacre buttons! I love them so much that I used two on every cuff despite that not being strictly necessary. Probably would have gotten away with one on each side. But. Look. Shiny.
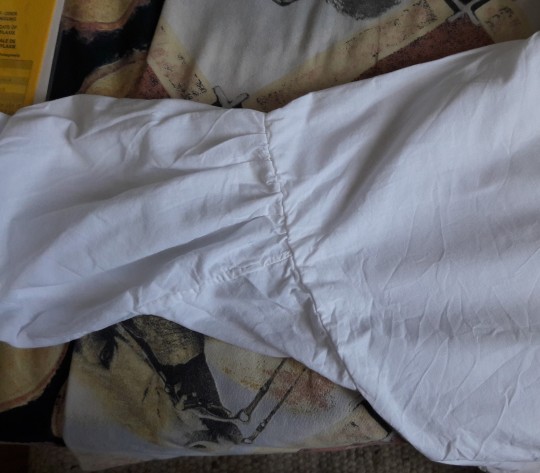
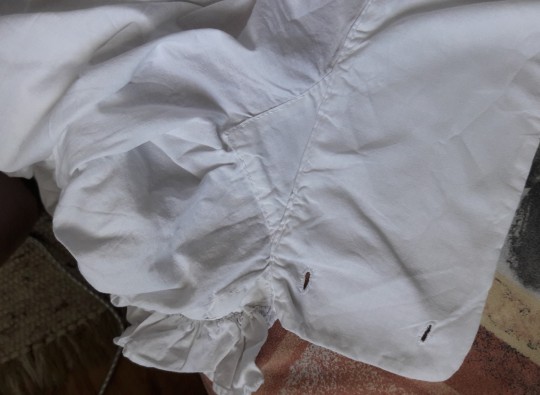
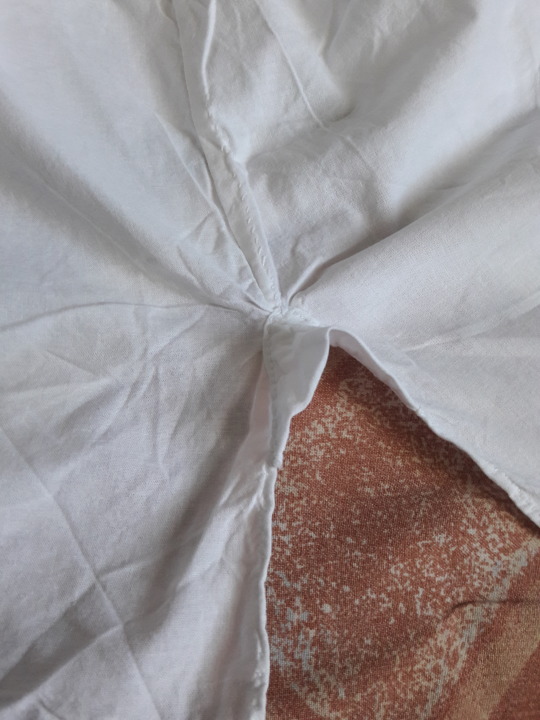
Altogether, I think I used up, like, 70 meters of linen thread? Which is not super economical, but 1st, I backstitched really everything, except when I was felling over the (already backstitched) hems. 2nd, there were the underarm gussets, and wherever a reinforcement patch / strip could go on, I put one in, such as both sides of the collar, the slits to both leg sides, the shoulders and cuffs. And 3rd, there were my neat lil' additional bits such as the long, long ruffles, the tie I added into the cleavage, and the cravat.
I learned that linen thread is a bit tricky; it's very strong, but it's not super even, and it knots easily. It also cannot be used in a machine, but I did this entire thing by hand anyway, so that didn't bother me all that much. Not because I'm a stickler for historical practice, but because sewing machines are scary. I may have to tackle this fear for the sake of my fingertips.
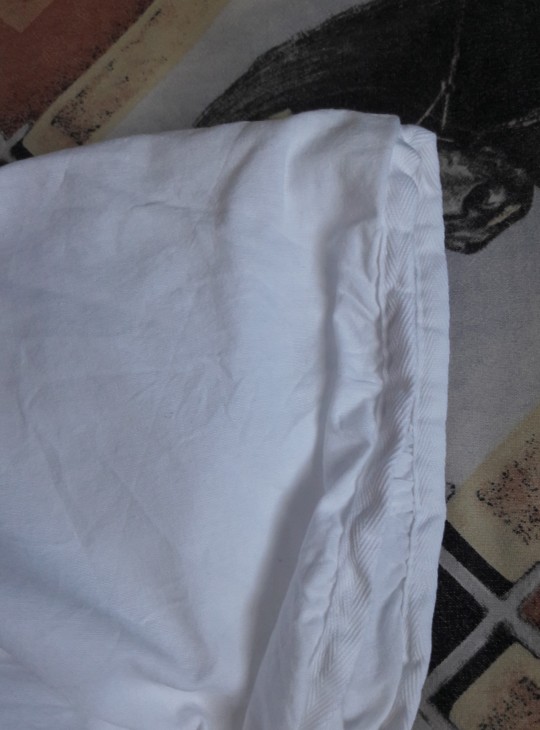
I need to work on my estimation of seam allowance, because I had to clean up the edges on the inside of my shoulder/sleeve seam with twill tape, because I hadn't left enough seam allowance to hem over all that scrunchy, ruffly bit. Twill tape is probably not historical practice for such a shirt; I think this only became a thing after Spinning Jenny was invented, but it served me well. I also need to work on my sewing vocabulary, because I learned most of it online - and thus, English, confusing the hell out of my friend when I didn't understand my mother tongue's term for "seam allowance" because I had literally never heard it XD
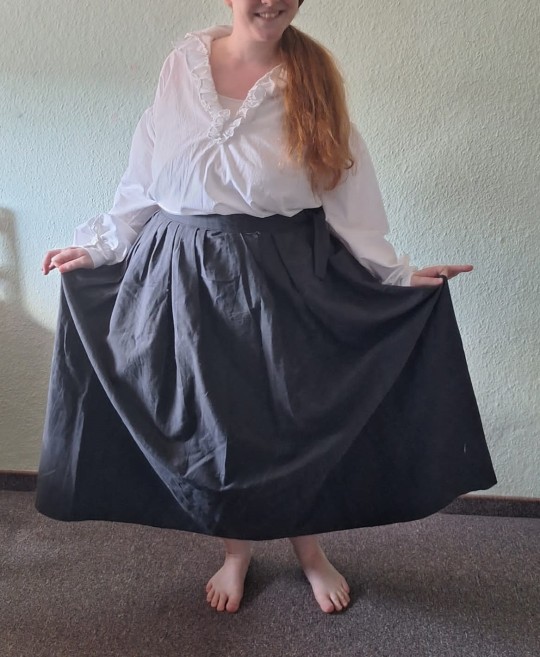
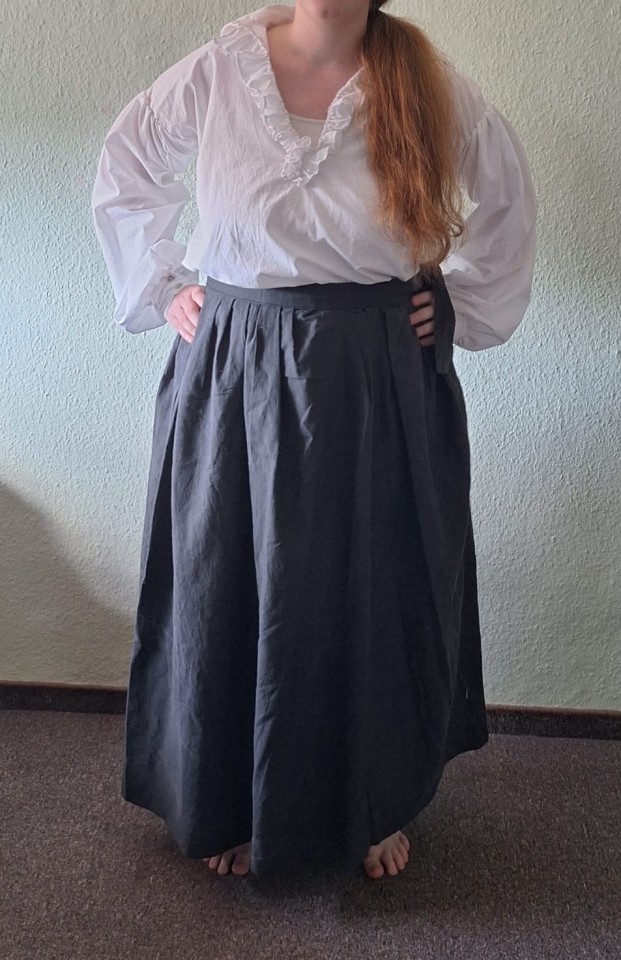
Fun fact: I bought the linen for this literally years ago (a bed-set, because it's a lot of yardage for a relatively cheap price; I still have lots leftover). But only now did I sit down and make a shirt out of it, and I love it. The sleeves are so poofy! And all that seaming was worth it; the shirt already had a round in the washing machine, and it's perfectly intact. I think I did a good job!
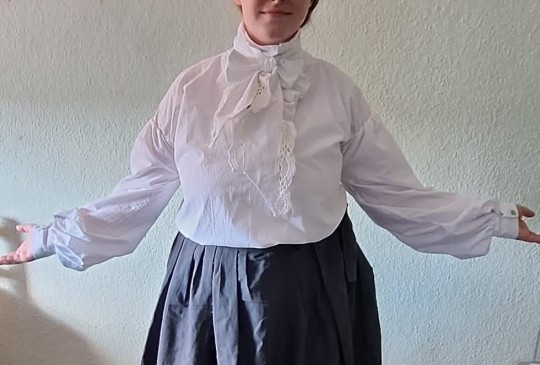
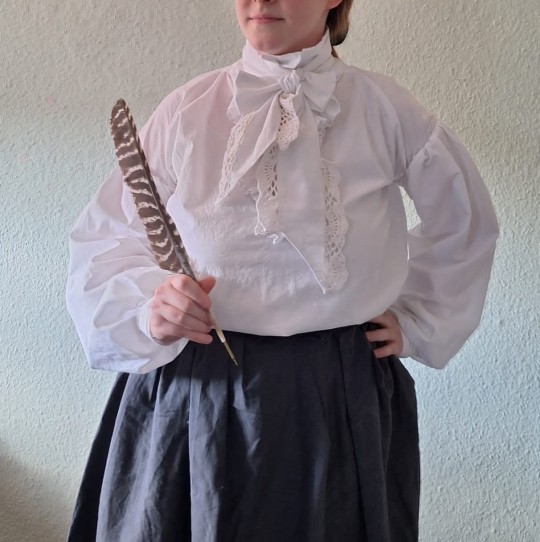
The cravat is, aside from the twill tape inside and the buttons, the only thing that's not 100% linen, because my mom crocheted the lace trim for me from cotton yarn. My draft is not quite how a historical cravat from the 18th / 19th century turn would look, but I honestly don't care; the combination makes the shirt so goddamn fabulous! I love this; it was super worth the work. Time to get on a snazzy waistcoat to go with this <.<
#sewing#needlework#the goddamn pirate poet shirt#amateur making a piece of clothing#also behold probably the last pictures of my long hair before I get it chopped off XD
8 notes
·
View notes
Note
All your ongoing projects look great, how about an ourobos scrunchie! (And a simpple plant one, like, green with a little bow for leaves perhaps?)
And if I may ask, whats your process for the scrunchie making? Besides cutting out a rectangle I mean
Thank you!! I love the idea of a plant one, I don't think I'm going to get to it this time but I'll definitely keep it in mind for next time, I feel like I could make a cool Poison Ivy-esque scrunchie I'm planning on making one more scrunchie sometime soonish and taking photos so I can explain it better, but just in writing, here's how I make scrunchies:
Take a rectangle of fabric, 5" wide, 18-21ish inches long (does not have to be exact on the length) Fold it in half, right sides together, to make a rectangle just as long but only 2.5" wide Sew along the long open edge, using a 1/4" seam allowance, but leave about an inch and a half unsewn at each end Turn right side out I use the chart in this scrunchie guide to determine elastic length even though I use different construction techniques. Once you have your elastic cut to size, thread it through your scrunchie tube (I put a quilting clip on each end of the elastic to make it easier to thread through, but a safety pin will work) Sew the two ends of your elastic together (this is the trickiest part). Your scrunchie tube is not closed yet but will be looking pretty scrunchie-like because you have to kinda shove the fabric out of the way to get enough slack on the elastic to sew it Now for the second trickiest part*: you are going to flip the ends of the tube around so the short ends of your original rectangle match up, pin them in place (right sides together), and sew that short straight line. This will make the tube into a loop. Once you have sewn that seam, if you kind of pull on the scrunchie it'll flip that bit back right side out. Then, you just have to sew closed the opening for turning (that inch and a half at each end you left at the beginning) and your scrunchie is done! *if you have a lot of trouble lining this piece up, you can leave more than 1.5" at each end of the first seam, which will make it easier but will mean more hand sewing at the very end All this might not make sense without photos, but I'll make a photo tutorial next time I make a scrunchie
#ask away!#scrunchie making!#I learned how to do this in a tutorial#and promptly lost the tutorial and have been unable to find it again#it's so much better than the other methods of scrunchie making I've found#and faster! so fast and it looks nice!
5 notes
·
View notes
Text
Today is the day I try out my new sewing machine!!! My wife's grandmother gave it to me as a wedding present — FULLY expecting me to make use of it professionally, so I mustn't dawdle. 😤
I'm coming at this as a beginner, so I've downloaded the English manual and decided I'll start by making a couple of cute little scrunchies via this video tutorial:
youtube
And I'll try and liveblog about it on Mastodon, then update y'all here later.
7 notes
·
View notes
Note
May I ask what else did you already sew? And how did you started? 😁
Of course you may ^^ I love sewing so I'm always down to talk about it!! I'm sorry, this got kind of long xD I hope you don't mind!!
So I started over a year ago. My mom has a sewing machine so I started with her, she taught me the basics of how to use it (how to install the thread, how to change a needle, how to select the stitch you want, how to hold the fabric,...). Then after about two months I bought my own machine because it was a bit restrictive to have to go to her house and everything! The machine cost me around 70 euros, so I'd say it's a manageable investment if you enjoy sewing! But in general if you can't afford it, you can find someone to lend you their machine, or even clubs that have machines available.
I started with very easy things. My very first alone project was just to make little pouches, then I tried a cushion cover. Basically, I sewed two rectangles together and tried to make the stitches go in a straight line (not as easy as it sounds 😂)
Then I graduated to slightly more complex projects: scrunchies and snoods that I made for Christmas. Still pretty easy but with a few more steps.
Then I... went a little crazy 😂 and decided I would try to make a dress without a pre-existing pattern (a pattern is a set of instruction that you have to follow, as well as lifesize representations of the pieces of fabric that you need, I don't know if that's clear haha but it's a guide basically). It did not go well xD it took me and my mom over two months to complete despite being a really simple dress, and I had to ask my grandma for help a few times (she's been a seamstress since she was 16 so she's really good!! But she doesn't want to teach, sadly. The only way she helps is if I go with a very specific question and then she answers me haha). We completed it in the end, but it wasn't an experience I wanted to try again soon lmao so I bought patterns for the dresses I made since then ^^
Since then I've sewn a lot of different projects!! Basically I always try to push the boundaries of what I can currently do, cause at first I wanted to only try things I was already good at (I was afraid of wasting fabrics if I messed up), but obviously when you do that, it's almost impossible to improve. So I try out new things and sometimes it works and sometimes it doesn't and I have to start over, but I still learn something when it doesn't work.
If you want to know what kind of things I made, here's a non comprehensive list
about five dresses (if I could I would only make dresses!! but it requires a lot of fabric and fabric is kind of expensive..!)
one skirt
a few tote bags/beach bags (those are fun cause once you figure out the steps to making one, the others are similar and you can play around with colors and patterns and stuff)
a hair towel
a messenger bag for my boyfriend (a very simple one, though, for gathering mushrooms, nothing fancy)
aprons for a friend's daughter (one for gardening and one for baking ^^ they were so cuuuuute! Sewing for a four year old is the cutest thing kajsjdhja)
A Christmas hat ^^
Right now I'm working on a mobile for my cousin, she's having a baby! So I'm making animals and trees and clouds out of felt. I'm only in the beginning of the project though
I'm sorry I don't have any pictures, it's literally the middle of the night right now and I'm min bed writing this xD
Overall, I'd say you have to be patient and handle frustration well if you want to sew. It's a very methodical hobby! You follow a procedure, you try to picture in what order you have to work for the project to work out. Since I don't take classes, sometimes I spend an hour looking up tutorials for a specific technique and then another hour trying it out on scraps of fabrics, just for one detail in a project. I also bought a few books that explained sewing techniques and stuff, so I spend a lot of time on that, too. Also, the reality is that you don't spend that much time using the machine, overall, cause the most time-consuming part is cutting the fabric, pinning it, ironing it,....
But it's also very satisfying when the project comes together!! And as someone who generally has issues staying focused, I've found that I can spend an entire day sewing and not see the time go by!
I'm sorry this got so long, I saw in your tag you were interested so I went a little overboard!
#look at me ramble lmao and this is me trying to be concise 😂😂#thanks for asking though!! I hope i wont scare you away for crazy long answer lmao
4 notes
·
View notes
Text
you can get scrunchies made from towel material or follow a sewing tutorial to make some yourself
i know that make up and skin care type places/online geared stores sell wrist bands type things that are meant to keep water from dripping when washing your face
shopmissa which sell very nice quality items for around $1 sell both the towel scrunchies and the wrist bands.
I've bought from them before and their customers service is very good.
everyone with touch aversions who hate doing the dishes please 1. try dish gloves 2. put some scrunchies around the wrists so they don't get water inside 2a. fold the cuffs about an inch to catch drips 3. make sure you check for cracked rubber before you put them on because flooded gloves are a nightmare 4. if your gloves have a tendency to get sweaty try putting some cornstarch, baby powder (don't use talcum based powder, it has asbestos in it) or or antiperspirant on your hands before they go in the gloves
i see tons and tons of people posting about how much they hate doing the dishes or other wet chores because of the horrible touching, and i want you to know dish gloves exist and are extremely cheap. you can also wear gloves for literally any task you don't want to touch. folding laundry for example or moving wet laundry to a dryer. using a microfiber cloth to clean windows. dusting. putting moisturizer on your legs. whatever. if it's not a wet task you can use normal gloves. i really like using leather gloves for dry tasks, they're comfortable and breathable and not hot.
this post is not for people who also have a touch aversion to gloves too, if i find a good solution for you guys I'll let you know
19K notes
·
View notes
Text
DIY Satin Scrunchie - tintofmintPATTERNS
DIY Satin Scrunchie – tintofmintPATTERNS
Hi there, Hi and welcome to yet another tutorial. My name is Karolina and today I’ll show you how to make a satin scrunchie, using a FREE pattern that you’ll find and the end of the booklet when you purchase any of my patterns. A few of you asked for this tutorial for a while so I’m glad to finally make it. See all available patterns at Things I used in this video: – Sewing machine: Brother…

View On WordPress
#diy#diy hair elastic#diy tutorial#free#how to make a satin scrunchie#patern#satin scrunchie#Scrunchie#scrunchie sewing tutorial#sew along video#sewing tutorial#tintofmint#tintofmintPATTERNS#tutorial
1 note
·
View note
Text
youtube
Easy DIY Knot Bow Headband Tutorial ✂️💖 Want a cute new headband in minutes? Watch my easy DIY video to learn how to make a knot bow headband! Perfect for beginners. Click to see the full tutorial! 💖🎥
#DIYHeadband #QuickCraft #DIYHeadband #HeadbandTutorial #EasyDIY #CraftyIdeas #HandmadeHeadband #BowHeadband #SewingProjects #CraftingCommunity"
#subscribe#tutorials#handmade#scrunchie#sewing#craft#youtube#scrunchies#diy#headband#bowknotheadband#Youtube
1 note
·
View note
Text
Easy Gifts to Make: DIY Christmas Presents That Stand Out
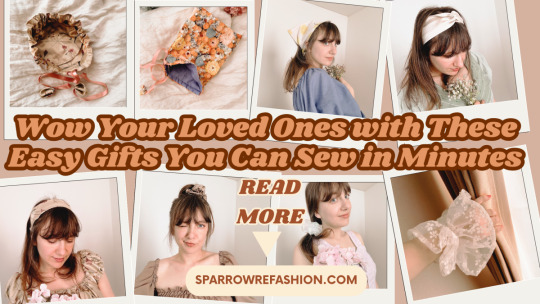
In this post you learn how to make easy gifts for any occasion. Are you looking for some easy gifts to make for your loved ones? Do you enjoy sewing and creating beautiful accessories? If so, you will love this creative trio of sewing tutorials that will show you how to make chic scrunchies, stylish headbands, and eco-friendly wrap gift bags. These are perfect for any occasion, whether it’s a…
View On WordPress
#DIY#DIY Christmas Gifts#DIY Headbands#DIY Scrunchies#Easy Gifts to Make#eco-friendly#Eco-Friendly Presents#free PDF patterns#gift bags#handmade accessories#Handmade Presents#Holiday Crafts#Reusable Gift Packaging#sewing tutorials#Sustainable Gifts
0 notes
Video
youtube
Sewing scrunchies tutorial
1 note
·
View note