#Rotary Printing Machine Parts
Explore tagged Tumblr posts
Visit Tumblr Blog
Explore Tumblr blogs with no restrictions, modern design and the best experience.
Last Seen Tumblr Blogs


Fun Fact
25% of US internet users with an annual income of $80-100K use Tumblr.
Photo
Top 10 Inventions of the Industrial Revolution
The British Industrial Revolution transformed life at work and at home for practically everyone. Noise, pollution, social upheaval, and repetitive jobs were the price to pay for labour-saving machines, cheap and comfortable transportation, more affordable consumer goods, better lighting and heating, and faster ways of communication.
Any shortlist of inventions is bound to be far from complete, but the following have been chosen not only for what they could do but also for how they permitted other inventions to become possible and how they transformed working life and everyday living for millions of people. The period under consideration is also important and here is taken as 1750 to 1860. With these criteria in mind, the top 10 inventions of the Industrial Revolution were:
The Watt Steam Engine (1778)
The Power Loom (1785)
The Cotton Gin (1794)
Gas Street Lighting (1807)
The Electromagnet (1825)
The First Photograph (c. 1826)
Stephenson's Rocket (1829)
The Electrical Telegraph (1837)
The Steam Hammer (1839)
Mass Steel Production (1856)
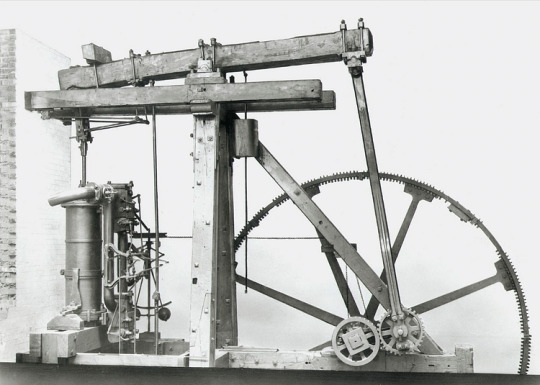
The Watt Steam Engine
The steam engine, which harnessed power from the expansion of heated water, is often cited as the single most important invention of the Industrial Revolution, principally because so many other important subsequent inventions used it as their power source. The steam engine was born from the necessity to pump out flooded mine shafts and enable deeper mining. The first steam pump was invented by Thomas Savery (c. 1650-1715) in 1698. In 1712, Thomas Newcomen (1664-1729) perfected his more powerful steam pump to drain coal mines of water in Dudley in the Midlands.
To make the steam engine more useful for other purposes, it had to be made more efficient both in terms of fuel consumption and power. The Scottish instrument maker James Watt (1736-1819) and Matthew Boulton (1728-1809) kept tinkering with the workings of the steam engine until, in 1778, they had perfected a separate condenser to vastly increase the engine's efficiency. Power was also increased by the steam powering the piston down not just up (hence its name, a double-acting engine), increasing the 'horsepower', a term coined by Watt. The engine also had its power converted to a more versatile rotary motion using a flywheel. Using just one-quarter of the fuel of Newcomen's engine, Watt's engine was cheap enough to use almost anywhere. Steam engines kept on evolving, notably with the expansion steam engine, and they benefitted from ever-better tool machinery that could make stronger and better-fitting parts.
By 1800, Britain boasted over 2,500 steam engines, most of them used in mines, cotton mills, and manufacturing factories. 500 of these engines were made by the Watt and Boulton factory in Birmingham. Every walk of life was affected. Steam now powered fountains, threshing machines, sewage pumps, and printing presses. Essentially, any work that required pushing, pulling, lifting, or pressing could be made much more efficient using steam-powered machines. Steam engines were harnessed for trains and steamships, and, aptly, all these uses caused a boom in the coal mining industry, which had been the origin of the machine in the first place.
Continue reading...
35 notes
·
View notes
Text
What is the maintenance process for an automatic paper bag machine?
Investing in an automatic paper bag machine is a smart move for businesses looking to scale their packaging operations and deliver eco-friendly solutions. However, like any high-performance industrial equipment, it’s essential to maintain the machine properly to ensure consistent output, reduce downtime, and maximize its operational lifespan.
At Prakash Machineries Pvt Ltd, we not only manufacture high-quality automatic paper bag machines but also guide our clients on the best practices for maintaining them. In this article, we’ll walk you through the maintenance process—from daily upkeep to long-term care—so your machine stays efficient and productive for years to come.
Why Maintenance Matters
Regular maintenance isn’t just about avoiding breakdowns—it’s about:
Extending the life of your machine
Reducing unexpected production halts
Maintaining bag quality and consistency
Minimizing repair costs
Ensuring safety for your operators
A well-maintained machine operates smoothly, uses less energy, and supports faster return on investment.
Daily Maintenance Checklist
The foundation of a good maintenance routine starts with daily attention. These are simple yet effective steps your operator should follow every day:
✅ 1. Clean the Machine Surfaces
Wipe down the external surfaces to remove dust, paper scraps, and glue residue.
Make sure the rollers and cutters are clean to avoid smudges or improper cuts.
✅ 2. Inspect Glue Nozzles and Tanks
Check if glue tanks are full.
Clean any dried glue from nozzles to prevent clogging and uneven application.
✅ 3. Check Paper Roll Alignment
Ensure the paper is feeding smoothly without shifting or wrinkling.
Misalignment can affect bag folding, printing, and sealing.
✅ 4. Observe for Unusual Noises or Vibrations
Any unfamiliar sound might indicate a loose component or potential fault. Report and log such issues.
Weekly Maintenance Tasks
Once a week, your machine operators or technical team should perform a more detailed inspection:
🛠️ 1. Lubricate Moving Parts
Apply grease or oil to the bearings, gearboxes, and other moving components as per manufacturer recommendations.
Use high-quality lubricants to avoid buildup or corrosion.
🛠️ 2. Inspect Belts and Chains
Check for signs of wear or tension issues.
Replace any frayed belts or loose chains promptly.
🛠️ 3. Clean Sensors and Electrical Panels
Debris and dust near sensors can cause automation issues.
Use dry air to clean the control panel and PLC components safely.
🛠️ 4. Check Cutters and Blades
Inspect the sharpness and alignment of rotary or flat cutters.
Dull blades should be replaced or sharpened to ensure clean, accurate cuts.
Monthly Maintenance and Calibration
Once a month, it’s good practice to schedule deeper preventive checks:
🔧 1. Check Motor and Drive Units
Examine the servo motors, drive belts, and coupling systems.
Look for overheating signs, oil leaks, or abnormal wear.
🔧 2. Calibrate Sensors and PLC Systems
Recalibrate bag length sensors, glue sensors, and print registration systems.
Ensure your touchscreen panel (HMI) settings match production specifications.
🔧 3. Examine the Handle Unit and Printing Section (if equipped)
Inspect the handle-pasting mechanism for adhesive buildup or wear.
If using inline printing, clean the anilox rollers, plates, and ink tanks.
Spare Parts and Inventory Management
To minimize downtime, always keep critical spare parts in stock, such as
Cutting blades
Glue nozzles
Sensors
Belts
Bearings
Control relays
At Prakash Machineries Pvt. Ltd., we offer full support with spare part kits and supply you with a recommended inventory list during machine installation.
Operator Training and Documentation
A well-trained operator is your first line of defense against machine issues. Ensure your team:
Understands the machine’s interface and alert systems
Follows safety protocols during cleaning or part replacements
Keeps a maintenance logbook for tracking issues and routine service
We provide comprehensive training sessions during installation and offer ongoing support to help your operators become proficient in both operation and maintenance.
When to Call for Professional Service
While most maintenance tasks can be handled in-house, you should schedule a professional service visit in the following cases:
Sudden drop in production speed
Irregular bag sizes or gluing errors
Motor or PLC malfunctions
Electrical safety alerts
After 6–12 months of continuous use for full inspection
Our team at Prakash Machineries Pvt. Ltd. offers annual maintenance contracts (AMCs), remote troubleshooting, and on-site technician visits across India for complete peace of mind.
Conclusion: Maintenance = Maximum Uptime
An automatic paper bag machine is a powerful asset for any packaging business—but like any industrial machine, it performs best when well cared for. A simple, consistent maintenance routine can dramatically improve your machine’s efficiency, reduce breakdowns, and extend its lifespan.
At Prakash Machineries Pvt Ltd, we believe in building machines that last—and supporting them with expert guidance, spare parts, and proactive service.
Need help setting up a maintenance plan for your paper bag machine? Get in touch with Prakash Machineries Pvt Ltd today for personalized service support, spare part kits, and AMC options tailored to your machine and production goals.
#paper bag manufacturer#manufacturer#machines#paper bag#bags#v bottom#square bottom#flexo#breakfast#delicious#chocolate#cake#critical role#chris sturniolo#baking#alien stage#cooking#dan and phil
1 note
·
View note
Text
Revolutionizing Fabric Printing: How a Print Cloth Machine is Changing the Textile Industry
In the fast-paced world of textile manufacturing, speed, quality, and customization are no longer optional—they’re essential. One of the most significant game-changers in this space is the Print Cloth Machine. Whether you're a fabric printing startup or an established garment brand, adopting this advanced technology can redefine your production standards.
In this blog, we’ll explore what a Print Cloth Machine is, how it works, its benefits, key features, and why investing in a high-quality machine from a trusted manufacturer like Orange O Tech can be a smart business move.
What Is a Print Cloth Machine?
A Print Cloth Machine is an industrial-grade textile printer designed specifically for printing designs, patterns, and images onto cloth and fabric materials. These machines use a variety of printing technologies—such as rotary screen printing, digital inkjet printing, and heat transfer printing—to apply complex and high-resolution designs directly onto textiles.
It has become an integral part of modern textile production, replacing traditional methods that were slower, less precise, and more labor-intensive.
How Does a Print Cloth Machine Work?
The mechanism varies based on the printing technology used. Here are three common types of Print Cloth Machines and how they function:
1. Rotary Screen Print Machine
Uses engraved cylindrical screens that rotate and press dye through to the fabric.
Great for high-speed, large-volume printing.
2. Digital Inkjet Print Cloth Machine
Works like your home printer but on a massive scale.
Sprays color droplets directly onto fabric with extreme precision.
Ideal for custom designs, small batches, or on-demand textile printing.
3. Heat Transfer Print Machine
Transfers designs from a printed paper onto fabric using heat and pressure.
Often used for polyester or synthetic fabrics.
Each of these types has unique advantages depending on your production needs.
Why the Textile Industry is Shifting to Print Cloth Machines
There are several reasons why businesses are making the switch from traditional to digital or automated cloth printing methods:
🔹 Faster Production
Modern Print Cloth Machines drastically reduce printing time. What used to take hours can now be done in minutes.
🔹 Greater Design Flexibility
Whether you're printing floral patterns, abstract graphics, or photo-quality prints, these machines can handle it all.
🔹 High Precision and Quality
Automated settings ensure consistent quality. Every print is uniform—no smudges, no color bleeding.
🔹 Cost Efficiency Over Time
Though the initial investment might seem high, the reduction in manual labor and errors results in long-term cost savings.
🔹 Eco-Friendly Options
Digital Print Cloth Machines use less water and dye compared to traditional methods, supporting sustainable manufacturing practices.
Key Features to Look for in a Print Cloth Machine
When evaluating which Print Cloth Machine to purchase, consider the following features:
✅ Print Resolution
Look for machines that offer at least 1200 DPI for high-definition print output.
✅ Fabric Compatibility
Ensure the machine supports the types of fabrics you work with—cotton, polyester, silk, rayon, etc.
✅ Speed & Throughput
Check the meters per hour the machine can handle. Higher speeds mean higher productivity.
✅ Ink System
Choose between pigment, reactive, disperse, or sublimation inks based on your business needs.
✅ Automation & Software
Smart machines come with design preview options, job tracking, and remote operation capabilities.
✅ Maintenance
Go for a model that is easy to clean and maintain. Some even come with auto-cleaning systems.
Applications of Print Cloth Machines
The use of Print Cloth Machines spans across industries:
Fashion & Apparel: Custom t-shirts, dresses, scarves, and designer fabrics.
Home Furnishing: Printed curtains, bedsheets, pillow covers.
Interior Design: Customized upholstery and wallpaper fabrics.
Sportswear: High-quality, durable prints on gym wear and jerseys.
Corporate Branding: Uniforms and promotional merchandise.
Why Choose Orange O Tech for Your Print Cloth Machine Needs?
When you're investing in a Print Cloth Machine, you want a brand that combines innovation, reliability, and after-sales support. That’s where Orange O Tech excels.
Here’s what sets them apart:
💼 Industry Expertise
With years of experience in advanced textile machinery, Orange O Tech understands the needs of modern manufacturers.
🛠️ Cutting-Edge Technology
They offer machines equipped with the latest features like multi-nozzle printheads, advanced drying systems, and precision feeders.
🔧 End-to-End Support
From installation and training to maintenance and repairs, they offer full lifecycle support for every machine.
📈 Proven Results
Businesses that switch to Orange O Tech machines often report improved print quality, reduced turnaround times, and increased profitability.
0 notes
Text
Global Rotary Die Cutting Machine Market : Key Drivers, Significant Analysis
Global Rotary Die Cutting Machine Market valued at USD X.X Billion in 2024 and is projected to reach USD X.X Billion by 2032, growing at a CAGR of X.X% from 2025 to 2032. Global Rotary Die Cutting Machine Market Report Global Rotary Die Cutting Machine Market: Significant Analysis The global rotary die cutting machine market is poised for significant growth over the forecast period, driven by increasing demand across multiple manufacturing sectors. Rising automation in industrial processes and the need for high-precision cutting tools have propelled market demand. Advancements in rotary die technology and integration with smart manufacturing systems are further enhancing operational efficiency, making these machines more attractive to end-users. Additionally, rising consumption of packaged goods and labels worldwide is contributing to the expansion of the market. Emerging economies are witnessing an upsurge in industrial activities, which is expected to bolster the demand for advanced die cutting solutions. With consistent technological improvements and increased application in electronics, medical, and packaging sectors, the market is anticipated to grow at a steady pace. The combination of automation and precision will be crucial in shaping the next phase of the market’s evolution. Get the full PDF sample copy of the report: (Includes full table of contents, list of tables and figures, and graphs) @ https://www.verifiedmarketresearch.com/download-sample/?rid=451365&utm_source=Glob-VMR&utm_medium=265 Global Rotary Die Cutting Machine Market Key Drivers The growth of the global rotary die cutting machine market is primarily driven by the need for high-speed, efficient, and precise cutting in manufacturing environments. As industries evolve, the requirement for streamlined production processes with minimal human intervention has intensified. Rotary die cutting machines meet this demand by providing consistent performance, reduced material waste, and faster turnaround times. Additionally, the rise in demand for customized and short-run products has increased the adoption of these machines in label printing and packaging. Developments in materials used for die production and enhanced machine durability have further contributed to market expansion. Environmental concerns and the push for sustainability are also prompting industries to invest in machines that improve efficiency while minimizing resource consumption. With the growing emphasis on accuracy and cost-effectiveness, rotary die cutting machines are becoming an integral part of modern manufacturing strategies across several verticals. Global Rotary Die Cutting Machine Market: Future Scope The future of the global rotary die cutting machine market appears robust, fueled by continuous innovation and rising industrial demand. Smart technologies such as IoT integration, real-time monitoring, and predictive maintenance are transforming how these machines are used in production lines. As manufacturing processes become more digitized, the demand for intelligent and adaptive rotary die cutting machines is expected to rise. The increasing shift towards eco-friendly packaging solutions and the growing importance of precision in electronic components and medical devices will further open new avenues for market expansion. Moreover, investment in research and development is likely to yield machines that are more energy-efficient, faster, and capable of handling complex materials. These advancements are expected to cater to both high-volume and niche market requirements, ensuring steady market growth. The sector is set to benefit greatly from emerging technological trends and expanding industrial applications. Refractive Optical Element Ma Download Full PDF Sample Copy of Rotary Die Cutting Machine Market Report @ https://www.verifiedmarketresearch.com/download-sample/?rid=451365&utm_source=Glob-VMR&utm_medium=265 Key Competitors in the Rotary Die Cutting Machine Market These companies
are renowned for their broad product offerings, sophisticated technologies, strategic efforts, and robust market presence. Each competitor's primary advantages, market share, current events, and competitive tactics—such as collaborations, mergers, acquisitions, and the introduction of new products—are highlighted in the study. Duplo USA Bograma AG DeltaModTech MarquipWardUnited SUN Automation Group Sysco Machinery Co. Get Discount On The Purchase Of This Report @ https://www.verifiedmarketresearch.com/ask-for-discount/?rid=451365&utm_source=Glob-VMR&utm_medium=265 Rotary Die Cutting Machine Market Trends Insights Rotary Die Cutting Machine Market Trend Insights offers a thorough examination of the market's current and developing trends, providing insightful data-driven viewpoints to assist companies in making wise decisions. This study explores the major consumer trends, market forces, and technology developments influencing the sector. By Machine Type By End-Use Industry By Application By Geography • North America• Europe• Asia Pacific• Latin America• Middle East and Africa For More Information or Query, Visit @ https://www.verifiedmarketresearch.com/product/rotary-die-cutting-machine-market/ Detailed TOC of Rotary Die Cutting Machine Market Research Report, 2026-2032 1. Introduction of the Rotary Die Cutting Machine Market Overview of the Market Scope of Report Assumptions 2. Executive Summary 3. Research Methodology of Verified Market Reports Data Mining Validation Primary Interviews List of Data Sources 4. Rotary Die Cutting Machine Market Outlook Overview Market Dynamics Drivers Restraints Opportunities Porters Five Force Model Value Chain Analysis 5. Rotary Die Cutting Machine Market, By Geography North America Europe Asia Pacific Latin America Rest of the World 6. Rotary Die Cutting Machine Market Competitive Landscape Overview Company Market Ranking Key Development Strategies 7. Company Profiles 8. Appendix About Us: Verified Market Research®Verified Market Research® is a leading Global Research and Consulting firm that has been providing advanced analytical research solutions, custom consulting and in-depth data analysis for 10+ years to individuals and companies alike that are looking for accurate, reliable and up to date research data and technical consulting. We offer insights into strategic and growth analyses, Data necessary to achieve corporate goals and help make critical revenue decisions.Our research studies help our clients make superior data-driven decisions, understand market forecast, capitalize on future opportunities and optimize efficiency by working as their partner to deliver accurate and valuable information. The industries we cover span over a large spectrum including Technology, Chemicals, Manufacturing, Energy, Food and Beverages, Automotive, Robotics, Packaging, Construction, Mining & Gas. Etc.Having serviced over 5000+ clients, we have provided reliable market research services to more than 100 Global Fortune 500 companies such as Amazon, Dell, IBM, Shell, Exxon Mobil, General Electric, Siemens, Microsoft, Sony and Hitachi. We have co-consulted with some of the world's leading consulting firms like McKinsey & Company, Boston Consulting Group, Bain and Company for custom research and consulting projects for businesses worldwide. Contact us:Mr. Edwyne FernandesVerified Market Research®US: +1 (650)-781-4080UK: +44 (753)-715-0008APAC: +61 (488)-85-9400US Toll-Free: +1 (800)-782-1768Email: [email protected]:- https://www.verifiedmarketresearch.com/ Global Talent Marketplace Platform Market
0 notes
Text
Chain Machine Drive - Types, Working & Benefits | Fricon Systems
Chain Machine Drive systems play a pivotal role in ensuring seamless power transmission across various applications. Whether in manufacturing, agriculture, automotive, or heavy machinery industries, the right Industrial Chain Drive solution enhances productivity and ensures consistent performance.
At Fricon Systems, we are a trusted Chain Machine Drive Manufacturer dedicated to delivering high-quality, durable, and precision-engineered chain drive solutions tailored to diverse industrial needs. Our commitment to innovation and reliability makes us a preferred partner for industries across India and beyond.
What is a Chain Machine Drive?
A Chain Machine Drive is a mechanical system that transmits power from one shaft to another using a chain and sprocket mechanism. Unlike belt drives, chain drives offer higher torque capacity, better load-handling capabilities, and do not suffer from slippage, making them ideal for high-power applications.
Chain drives consist of the following core components:
Drive Sprocket (connected to the power source)
Driven Sprocket (connected to the machinery)
Power Transmission Chains (linking both sprockets)
Tensioners or Idlers (to maintain chain tension)
Lubrication System (optional, for longevity)
Chain drives are widely used in various industries such as packaging, printing, textiles, food processing, agricultural machinery, and conveyor systems due to their robustness and low maintenance.
Working Principle of Chain Machine Drive
The operation of a Chain Machine Drive is straightforward yet highly effective. Power generated by the prime mover (electric motor, engine, etc.) is transmitted to the drive sprocket. As the sprocket rotates, it engages with the chain's links, converting rotary motion into a consistent and synchronized movement, which is transferred to the driven sprocket.
This type of drive is highly efficient (up to 98%) and capable of operating in harsh environments. Additionally, chain drives can handle both short and long distances between shafts, offering flexibility in industrial layouts.
Types of Chains Used in Chain Machine Drive
Understanding the Types of Chains is critical when choosing a chain drive system for specific applications. Different chains are designed for varied operational loads, environments, and speed requirements. At Fricon Systems, we provide a wide range of chain solutions, including:
1. Roller Chains
Most common type of power transmission chains
Consists of pins, bushings, rollers, and side plates
Offers low-friction and smooth operation
Used in bicycles, conveyors, agricultural and industrial machinery
2. Silent Chains (Inverted Tooth Chains)
Designed for quiet operation and smooth engagement
Ideal for high-speed, high-power transmission
Often used in automotive timing systems and gearboxes
3. Leaf Chains
Consist of stack link plates with pins, no rollers
High tensile strength
Widely used in lifting applications such as forklifts and hoists
4. Double Pitch Chains
Extended pitch compared to standard roller chains
Reduces weight and cost
Perfect for low-speed, high-load applications like conveyors
5. Conveyor Chains
Customized for conveying material loads
Equipped with attachments to carry items
Used extensively in packaging, bottling, and food processing
6. Attachment Chains
Feature additional parts like brackets or extended pins
Used where the chain needs to perform added functions (e.g., pushing, pulling, lifting)
These Types of Chains cater to a wide array of applications, and selecting the right type depends on the power load, working environment, speed, and transmission distance.
Advantages of Industrial Chain Drive Systems
An Industrial Chain Drive offers several advantages over other transmission systems like belts or gears. Here are some of the key benefits that make them indispensable in many sectors:
High Efficiency and Power Transmission: Chain drives have minimal slippage and very high mechanical efficiency (up to 98%), making them ideal for high-torque and high-load applications.
Compact and Versatile Design: Chain drives can fit into compact spaces and operate across various orientations—horizontal, vertical, or inclined—without performance loss.
Durability and Strength: Made from high-grade steel and treated for wear resistance, Power Transmission Chains can handle heavy-duty industrial environments with ease.
Temperature and Environmental Resistance: Chain systems perform reliably in extreme temperatures, dusty conditions, and corrosive environments when combined with appropriate lubrication and material selection.
No Slippage: Unlike belt systems that rely on friction, chain drives provide positive engagement between the chain and sprocket, eliminating slippage and maintaining consistent speed ratios.
Cost-Effective Maintenance: Chains are easier to inspect, repair, or replace than complex gear systems. Proper tensioning and lubrication extend the system’s life and reduce operational downtime.
Applications of Chain Machine Drive Systems
Chain drive systems are used across a wide range of industrial sectors, including:
Automotive: Camshaft drives, timing mechanisms, gearboxes
Food & Beverage: Conveyor belts, bottle filling, packaging lines
Pharmaceutical: Tablet sorting, packaging, and material handling
Agriculture: Harvesters, tractors, irrigation equipment
Textile Industry: Fabric transport systems, looms, spinning machines
Construction: Lifting equipment, cranes, mixers
Mining and Heavy Equipment: Conveyor belts, crushers
Fricon Systems provides tailored solutions to each industry, ensuring optimized performance and durability in every application.
Choosing the Right Chain Machine Drive Manufacturer
The performance of your machinery is only as good as the components used. Choosing a reliable Chain Machine Drive Manufacturer is essential for ensuring operational continuity and reduced downtime.
At Fricon Systems, we are known for:
Precision Manufacturing: All our chains and sprockets are produced using advanced CNC and forging technology.
Material Quality: We use high-strength alloy steel and ensure heat treatment for enhanced durability and resistance.
Custom Engineering: We provide chain drives tailored to client specifications and industrial needs.
Technical Support: Our team offers end-to-end support, from product selection to installation guidance and maintenance planning.
Competitive Pricing: We ensure superior value through cost-effective pricing and long-term performance benefits.
Whether you're upgrading a legacy system or setting up a new plant, we offer complete solutions in Industrial Chain Drive technology.
Maintenance Tips for Chain Drives
To get the most out of your Power Transmission Chains, proper maintenance is essential. Here are a few best practices:
Lubricate Regularly to prevent wear and reduce friction
Check Tension periodically to avoid slack or overtightening
Inspect for Wear on pins, bushings, and rollers
Clean Debris and avoid contaminant build-up
Replace Damaged Components promptly to avoid chain breakage
Fricon Systems also provides maintenance training and support to ensure the longevity of your chain drive systems.
A well-designed and properly installed Chain Machine Drive can be a game-changer in your industrial process, offering unmatched efficiency, durability, and cost-effectiveness. With a wide variety of Types of Chains available, choosing the right one for your application is essential to ensuring optimal performance and extended machine life.
As a reputed Chain Machine Drive Manufacturer, Fricon Systems delivers innovative and reliable power transmission solutions to industries across the spectrum. From standard roller chains to custom-engineered attachment chains, we offer comprehensive solutions backed by engineering excellence and technical support.
Looking for robust and high-performance Chain Machine Drive systems? Contact Fricon Systems today for expert guidance, precision manufacturing, and dependable service. Let us power your industry with the best in Industrial Chain Drive technology!
For more info: https://www.friconsystems.com/
Email id: [email protected]
Phone: 9899811999
Location: 123A & 124A Type A , H.S.I.I.D.C. Sector 59, Faridabad, Haryana - 121004, India
#Chain Machine Drive#Types of Chains#Industrial Chain Drive#Power Transmission Chains#Chain Machine Drive Manufacturer
0 notes
Text
Slip Ring Market Growth Forecast: Opportunities in Motion Control
In an increasingly dynamic industrial world, continuous electrical connection within rotating systems is essential. Whether it's in wind turbines generating clean energy, advanced radar systems in aerospace, or automated production lines in smart factories, slip rings play a silent yet critical role. Often overlooked, these compact rotary electrical connectors enable transmission of power and signals between stationary and rotating parts — keeping complex systems running smoothly.
As automation, renewable energy, and aerospace technologies evolve, so does the demand for advanced slip ring solutions. Here's a comprehensive look at where the global slip ring market is headed, the innovations driving it, and who the key players are shaping its future.
Slip Ring Market Outlook 2035
The global slip ring market was valued at US$ 1.5 billion in 2024, and its trajectory is poised for steady expansion. According to recent market analysis, the industry is projected to grow at a CAGR of 4.2% from 2025 to 2035, reaching a market size of over US$ 2.3 billion by the end of 2035.
This growth is fueled by rising applications across verticals like wind energy, aerospace & defense, robotics, medical imaging, and packaging automation. Industries are increasingly relying on slip rings not only for electrical power transfer but also for advanced capabilities like data transmission, fluid rotation, and signal integrity.
Request for Sample Copy of this report- https://www.transparencymarketresearch.com/sample/sample.php?flag=S&rep_id=70119
What’s Driving the Growth?
1. Boom in Wind Energy Installations
As governments across the globe push for clean and renewable energy, wind power installations are expanding rapidly. Slip rings in wind turbines are used to transmit electrical signals and power from the nacelle to the control systems. The increasing number of offshore wind farms, where reliability and compact design are crucial, is driving demand for durable and maintenance-free slip ring technologies.
2. Rise in Industrial Automation
From packaging to process industries, automated machinery depends heavily on rotating assemblies. Slip rings allow uninterrupted communication and power supply in robotic arms, rotary indexing tables, and printing machines. With smart factories becoming the norm under Industry 4.0, slip rings are being designed to support higher bandwidth communication protocols like Ethernet, CANbus, and HDMI.
3. Advancements in Aerospace & Defense
Slip rings in this sector are mission-critical. They are found in satellite tracking systems, radar platforms, drones, and missile systems. With national defense budgets increasing and satellite communication surging, especially for low Earth orbit (LEO) applications, demand for lightweight, rugged, and high-frequency compatible slip rings is rising.
4. Growing Demand for High-Speed Data Transmission
The evolution of fiber optic slip rings (FORJs) is a response to the need for higher data throughput, particularly in applications like medical imaging systems (CT scanners, MRI machines), surveillance systems, and broadcasting equipment. Fiber optic variants offer immunity to electromagnetic interference (EMI) and can support gigabit data transmission rates.
Slip Ring Market Major Players’ Analysis
Market leaders are not merely competing on price; they are focusing on innovation, customization, and reliability. From miniaturization for compact devices to ruggedization for harsh environments, the competition is centered on application-specific performance.
Leading companies are also investing in research and development, material science, and digital integration to improve product lifespans, reduce maintenance costs, and enable seamless integration into smart devices.
Here are some of the top players shaping the global slip ring market:
Moog Inc.
MERSEN
MOFLON TECHNOLOGY
Conductix-Wampfler
Combinent Oy Ab
Schleifring GmbH
Pandect Precision Components Ltd
Stemmann-TECHNIK
ROTAC Co., Ltd.
EVERAXIS
These players bring decades of experience and a strong portfolio tailored to varied industries including wind power, aviation, medical diagnostics, and defense.
The slip ring market report provides a deep dive into each of these companies, highlighting:
Company overview
Business segments
Product portfolio
Recent developments
Business strategies
Financial performance
Global Slip Ring Market: Key Developments
🔹 Servotecnica's Game-Changing Innovations
In October 2024, Servotecnica announced a strategic collaboration with Diamond Antenna, a leading U.S. provider of rotary joints and RF subsystems. This partnership is expected to strengthen their position in aerospace and defense markets, providing cutting-edge solutions for ground, shipboard, aviation, and space communications.
This alliance is particularly notable because it brings together two leaders in rotary connectivity technology, enabling more sophisticated slip ring and rotary joint hybrid systems that can support both electrical and radio frequency (RF) transmissions.
🔹 Multi-Wire Brush Option for Longevity
In September 2024, Servotecnica also launched a multi-wire brush upgrade for its SVTS A capsule slip ring series. This new configuration significantly enhances operational life — lasting 5 to 10 times longer than traditional single-wire models.
These upgrades feature gold-based alloy contacts, ensuring superior conductivity and resistance to corrosion. Thanks to their compact size and high adaptability, these slip rings are ideal for applications where reliability is non-negotiable — such as in military drones, CT scanners, and industrial robots.
Trends to Watch in the Slip Ring Market
✅ Fiber Optic Slip Rings (FORJs) Go Mainstream
Fiber optic slip rings are becoming a must-have for high-speed data transmission in medical, military, and marine environments. Their ability to transmit large volumes of data without interference is particularly important in modern applications involving HD video, control signals, and telemetry.
✅ Modular and Customizable Designs
As equipment designs grow more compact and specialized, there's increasing demand for custom slip rings that can fit into tight spaces and meet specific electrical or mechanical requirements. Modular slip rings that can be easily scaled up or integrated with fluidic or pneumatic channels are gaining popularity.
✅ Integration with Smart Technologies
The future of slip rings lies in smart diagnostics and predictive maintenance. By embedding sensors that monitor temperature, RPM, and wear, companies can reduce downtime and extend equipment lifespans — a critical benefit in mission-critical applications.
✅ Sustainability in Design
As part of global ESG commitments, manufacturers are focusing on eco-friendly materials, longer product life cycles, and recyclability. Slip rings designed for wind turbines, in particular, are being optimized for low-maintenance, oil-free operation, aligning with green energy goals.
Opportunities & Challenges Ahead
📈 Opportunities:
Expansion of wind power infrastructure in Asia-Pacific and Europe
Defense modernization programs in North America
Demand for minimally invasive medical imaging systems
Growth of Industry 4.0 and smart manufacturing initiatives
⚠️ Challenges:
High competition from alternative wireless power transmission technologies
Maintenance issues in harsh environmental conditions
Technical limitations in miniaturization and high-speed applications without heat generation
Final Thoughts
The slip ring market may not grab headlines, but it is quietly powering the backbone of modern technology — enabling rotation, data transfer, and electrical continuity across vital industries. With a projected valuation of US$ 2.3 billion by 2035, this market is not only growing, but evolving.
For stakeholders in renewable energy, aerospace, industrial automation, and healthcare, investing in next-gen slip ring solutions will be key to staying competitive. As leading manufacturers continue to innovate and collaborate, the humble slip ring is being reimagined as a high-tech enabler of future connectivity.
#SlipRingMarket #IndustrialAutomation #WindEnergy #AerospaceTech #SmartManufacturing #FiberOpticSlipRings
0 notes
Text
Enhancing Product Presentation with High-Speed Rotary Premade Bag Packaging Machines
In today's fast-paced consumer market, packaging is a crucial factor in ensuring product success. A product’s presentation plays a significant role in grabbing the consumer's attention and communicating its value, making packaging more than just a protective cover—it’s an essential part of the marketing process. One of the most advanced solutions to improve both the speed and aesthetics of packaging is the high-speed rotary premade bag packaging machine. This innovative technology enhances not only the presentation but also the efficiency and sustainability of packaging processes. In this blog, we will explore how high-speed rotary premade bag packaging machines are transforming the world of product packaging and why they are an essential investment for modern businesses.
The Importance of Product Presentation
First impressions matter, and for businesses, the first impression of a product often comes from its packaging. Consumers are highly influenced by the visual appeal of packaging, which can communicate the product’s quality, brand image, and even its environmental impact. In industries like food, tray sealing machine cosmetics, pharmaceuticals, and more, packaging is an integral part of the brand identity and consumer trust.
A well-packaged product not only attracts attention but also contributes to consumer confidence. For example, clear, sleek packaging with high-quality print can signal to consumers that the product inside is premium, safe, and trustworthy. In addition to aesthetic appeal, packaging functionality, such as ease of opening, resealing, and portability, plays an essential role in user experience.
As consumers become more discerning and competitive pressures mount, businesses must look for ways to enhance product presentation without compromising on efficiency or sustainability. This is where high-speed rotary premade bag packaging machines come into play.
What is a High-Speed Rotary Premade Bag Packaging Machine?
A high-speed rotary premade bag packaging machine is an advanced packaging system designed to fill and seal premade bags in a highly efficient manner. Unlike traditional packaging systems, which require bags to be formed from flat rolls of film, rotary premade bag machines utilize pre-manufactured bags that are loaded into the machine. vacuum packaging machine This method offers significant benefits in terms of speed, consistency, and flexibility.
The machine works by placing a pre-made bag on a rotary wheel, where it is then opened, filled with the desired product, and sealed—all within a matter of seconds. The high-speed rotary action allows for high output and continuous production, making it ideal for industries where time and volume are critical.
Advantages of High-Speed Rotary Premade Bag Packaging Machines
Increased Efficiency and Speed One of the most significant advantages of using high-speed rotary premade bag packaging machines is their unparalleled efficiency. These machines can fill and seal bags at much higher speeds compared to traditional packaging methods, which can significantly increase production output. For example, in industries like food packaging, where demand is high and fast delivery is essential, this speed can make a world of difference in meeting tight deadlines and reducing lead times. The high-speed operation also translates to lower labor costs and less time spent on manual packaging processes, ultimately improving the overall profitability of production.
Improved Product Presentation High-speed rotary premade bag packaging machines are capable of producing precise, uniform bags with a high-quality seal, which is essential for an attractive product presentation. The machine’s ability to handle pre-made bags ensures that the finished product maintains a professional and consistent appearance. Additionally, these machines allow for better customization options in terms of bag design and printing. The premade bags can be printed with various branding, labels, and designs that align with the product's branding strategy. Whether it’s a clear window to display the product inside, intricate artwork for luxury products, or simple, clean designs for eco-friendly goods, these machines can accommodate a wide range of customization needs, enhancing the product's overall appeal.
Versatility and Flexibility One of the key benefits of high-speed rotary premade bag packaging machines is their versatility. They can handle a variety of bag sizes, materials, and product types, making them suitable for many industries, from food and beverage to cosmetics and pharmaceuticals. The machines are capable of packaging solid, liquid, and powder products, allowing businesses to use a single machine across multiple product lines, improving cost-efficiency and flexibility in production. Whether you’re packaging snacks, health supplements, beauty products, or household goods, the rotary premade bag packaging machine provides the flexibility to adapt to the unique needs of each product, ensuring the best packaging solution for the specific application.
Consistency and Precision Consistency is essential when it comes to product packaging. Consumers expect uniformity in their product experience, and any deviations in packaging can lead to a negative perception of the brand. High-speed rotary premade bag packaging machines are designed to deliver consistent results every time, reducing the chances of human error and ensuring that each bag is filled and sealed to perfection. These machines are equipped with advanced sensors and monitoring systems to ensure that the correct amount of product is dispensed into each bag, preventing overfilling or underfilling. This precision ensures that each product looks the same and meets quality standards.
Sustainability Benefits Sustainability is a growing concern for both businesses and consumers. With an increasing focus on reducing waste and minimizing environmental impact, the packaging industry is under pressure to adopt eco-friendly practices. High-speed rotary premade bag packaging machines contribute to sustainability in several ways. By using pre-made bags, businesses reduce the amount of material waste associated with traditional packaging methods, which often involve cutting and trimming excess film. Additionally, the machines can be configured to work with recyclable or biodegradable materials, further reducing the environmental footprint of packaging. Moreover, the speed and efficiency of these machines allow for more streamlined production processes, reducing energy consumption and improving the overall sustainability of the packaging operation.
Enhanced Shelf Life and Protection In industries such as food and pharmaceuticals, product integrity is of utmost importance. High-speed rotary premade bag packaging machines ensure that each bag is properly sealed, providing an airtight, secure environment that helps extend the shelf life of the product. The precision sealing process prevents contamination, moisture, and air from entering the packaging, which is critical for products that require preservation. This level of protection ensures that consumers receive products in optimal condition, while also helping to reduce waste caused by damaged or spoiled goods.
Conclusion
High-speed rotary premade bag packaging machines are revolutionizing product presentation and packaging efficiency across various industries. With their ability to enhance both the speed and quality of packaging, these machines offer significant benefits, including improved product presentation, higher production efficiency, and greater flexibility. They also contribute to sustainability efforts by reducing waste and enabling the use of eco-friendly materials.
For businesses looking to stay competitive in today’s fast-paced market, investing in high-speed rotary premade bag packaging machines is a smart decision that can enhance the customer experience and improve the bottom line. With the ability to deliver precise, high-quality packaging at scale, these machines are shaping the future of packaging and helping companies meet the demands of the modern consumer.
As businesses continue to innovate and push the boundaries of product presentation, high-speed rotary premade bag packaging machines will undoubtedly remain at the forefront of packaging technology, offering endless possibilities for improved product packaging and enhanced consumer satisfaction.
0 notes
Text
I've been looking at commercial UV printers for a long time —
(These are essentially 6-color inkjets, CMYK plus white and clear, with an ultraviolet light to cure the ink instantly, so they can build up layers much like a 3d printer; they can print on a variety of materials, including uneven surfaces or, with optional print bed attachments, round things like a mug or thermos. Fascinating stuff, but definitely priced for big commercial shops.)
— but now there's a big company crowdfunding a more desktop level machine that'll still print on just about anything that I would care to use it for, and it got a demo on the Tested YouTube channel, showing things like photos on A3 canvas and LCARS screens on the backside of acrylic and decals directly onto models and oh how I want one, for guitar pedals and Eurorack panels and all manner of bas-relief stickers and so on.
The worst part is that it's at a price point — about $2500 for the full kit with rotary attachment and UV laminator and all — that I could never conceivably save up the money for, but which I actually could pay for with a credit line I have access to. It's just that paying it off would require me to go from a hobbyist to a successful professional print shop immediately, something this disabled me is not particularly suited for, and which would carry all kinds of knock-on effects, from zoning issues to insurance ones. So I'm probably not going to pull the trigger on this.
But man, I don't think I've wanted to play with a printing technology this badly since I first saw laser printers in the '80s.
1 note
·
View note
Text
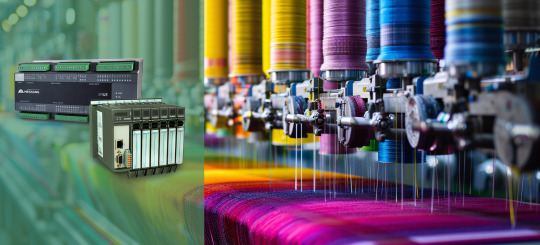
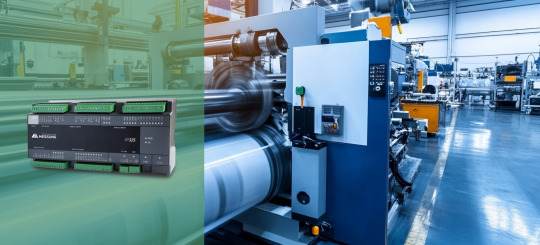
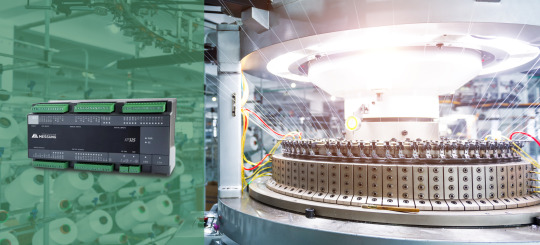
Enhancing Textile Machinery Efficiency with Messung's NX-ERA Xpress PLC

The textile industry, being a part of global manufacturing, has witnessed a massive transformation in recent years due to accelerated technological advancements. From yarn making to dyeing yarns with complex patterns, each process of textile production has been streamlined for higher productivity, accuracy, and efficiency. The need for high-quality products and shorter production cycles has generated fertile ground for automation, especially with the use of Programmable Logic Controllers (PLCs)in textile manufacturing.
This is where we at Messung Industrial Automation come in the picture with our cutting-edge automation solutions. With our strong heritage of delivering strong and scalable automation solutions, we have been the industry leader in industrial automation. Our innovative and compact PLC, NX-ERA Xpress has been crafted to specifically address the specific requirements of industries such as textile manufacturingwith the ideal combination of performance, flexibility, and energy efficiency. In this blog, let’s explore the revolutionary potential of NX-ERA Xpress PLCand its impact on textile machinery, with an emphasis on how it improves operational efficiency, cuts costs, and accelerates the journey towards Industry 4.0.

The Role of PLCs in Modern Textile Manufacturing
Programmable Logic Controllers (PLCs) form the foundation of automation in textile manufacturing, especially in the "cotton to yarn" and "yarn to fabric" segments where their role is most critical. These rugged, industrial-grade controllers ensure precision, speed, and efficiency by managing machinery and processes in real time. From ginning and bale plucking to spinning, carding, drawframe, combing, ring frame machines, and autoconers, PLCs are deeply embedded in every stage of the cotton-to-yarn journey.
In the yarn-to-fabric sector, PLCs continue to play a significant role in the operation of warping machines, twisting machines, and various types of looms such as shuttle, airjet, and rapier looms. They are equally vital in fabric processing lines, managing singeing, bleaching, dyeing, and a wide range of finishing machines designed to enhance textile properties like softness, wrinkle resistance, or water repellency. Printing lines, including rotary and flat bed printing machines, also rely heavily on PLC-controlled automation.
Across these applications, PLCs are integrated with Human Machine Interfaces (HMI), Variable Frequency Drives (VFDs), and in high-speed machines like spinning lines, Servo amplifiers and Servo motors are used for superior speed and torque control.
While the garment sector (fabric to garment) does involve automation, Messung’s core expertise and solutions, including the NX-ERA Xpress PLC and NX-ERA Jet PLC, are primarily focused on the earlier and more automation-intensive stages of textile manufacturing.
Benefits of Implementing PLCs on Textile Machinery
Increased Efficiency: PLCs allow streamline operations by automating processes that were previously manual, significantly reducing downtime and increasing throughput
Improved Accuracy: The high-level precision control afforded by PLCs ensures each activity in the fabric process, whether spinning or weaving, is undertaken with perfection.
Real-Time Monitoring: PLC-based systems make equipment monitoring in real-time a certainty, where defects are flagged off early and avoid costly downtime along with plant operation performance improvements.
As the textile industry advances, compact PLCs are not an indulgence but a must-have. Automation is the key to staying competitive, and industrial automation PLC systems like the NX-ERA Xpress are at the forefront of this revolution.
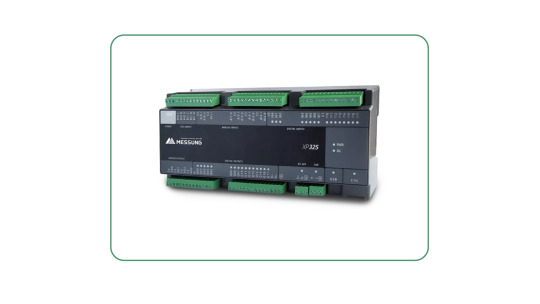
Learning More About NX-ERA Xpress PLC
The NX-ERA Xpress PLC is our response to the increasing needs of the textile industry. By harnessing the capability of Programmable Logic Control Systems and the flexibility of contemporary communication protocols, the NX-ERA Xpress provides a powerful and scalable solution for numerous industrial automation applications.
Features of NX-ERA Xpress PLC:
High-Density Digital and Analog I/O: The NX-ERA Xpress PLC features a high-density I/O design that is capable of processing vast amounts of data input and output at one time. This is important for the textile industry, where real-time data from many machines need to be processed efficiently in order to optimize performance.
Programming through Codesys® (IEC 61131 Standard): Among the most impressive aspects of the NX-ERA Xpress PLC is its support for Codesys®, an open-source programming platform. This standardization enables seamless integration with industrial equipment across the board, which makes it an attractive option for PLC manufacturing companies.
Integrated Communication Protocols: With inbuilt compatibility for communication protocols such as Ethernet TCP/IP, Modbus, and CANopen, the NX-ERA Xpress PLC facilitates smooth connectivity among various machines and devices on the shop floor. This connectivity is vital for ensuring smooth operation throughout the complete manufacturing process.
Industry 4.0 Readiness: NX-ERA Xpress PLC comes with OPC-UA and MQTT readiness, making it Industry 4.0-ready. These are technologies that support data exchange over different platforms, and they simplify the integration of machines by manufacturers into a smart factory environment.
Integrated HTML Web Server for Remote Monitoring: Remote monitoring has never been simpler. The integrated HTML web server enables operators to monitor and control the PLC remotely, offering flexibility and real-time visibility into machine performance.
The high-performance features and compact PLC design of NX-ERA Xpress PLC make it perfect for the textile industry. Whether you're automating cotton spinning, weaving, or dyeing, the NX-ERA Xpress provides all the power you need to optimize your operations.
Advantages of NX-ERA Xpress in Textile Applications
The textile industry requires solutions that are capable of providing not just high performance but also cost-effectiveness and sustainability. Our NX-ERA Xpress PLC provides a number of benefits for applications in textile machinery, such as:
Energy Efficiency
In the textile industry, energy consumption is a major operational expense. The NX-ERA Xpress PLC is built to maximize control and minimize power consumption, especially in power-hungry processes such as spinning. Through automation processes and optimizing machine efficiency, the PLC ensures textile plants make substantial savings on energy.
High-Speed Processing
Textile production processes often involve rapid and adaptive control systems that are necessary for handling high-speed manufacturing lines. The processing of high speeds facilitated by the NX-ERA Xpress PLC helps data move faster to provide instant adjustment capabilities, ensuring minimum lags in manufacturing processes.
Precision Control
The clothing industry is based on the effective control of variables like thread tension, fabric alignment, and dying processes. NX-ERA Xpress PLC ensures accurate control in order to match every parameter in the manufacturing process to the prescribed specifications. The result is repetitive product quality, and less it is defective.
Scalability
As textile factories develop and expand, scalable automation systems become increasingly relevant. NX-ERA Xpress PLC uses a modular construction that means that automation systems can be expanded as they are required by manufacturers, presenting a great solution for expanding businesses in the textile industry in the long term.
Cost-Effectiveness
Automation must not be expensive. The NX-ERA Xpress PLC is an affordable solution for textile producers that offers high-end features without an exorbitant price tag. It is meant to offer high-performance at an affordable rate, so any textile firm can use it.

Textile Machinery Applications: PLC Precision for a Modern Mill
As textile factories embrace digital transformation, the NX-ERA Xpress PLC emerges as a compact yet powerful solution tailored for automation-ready textile machinery. With its robust control features and Industry 4.0 connectivity, the NX-ERA Xpress brings intelligence and agility to a wide range of textile processes.
Let’s explore key use cases across the textile value chain:
Yarn Steaming Machine:
Steaming is a critical stage in yarn preparation where temperature, pressure, and timing must work in harmony. The NX-ERA Xpress PLC ensures:
Precise control of temperature and steam pressure for consistent yarn conditioning
Regulation of steaming duration to match different yarn types and production speeds
Automation of loading and unloading mechanisms, reducing manual intervention and boosting throughput
With its real-time responsiveness and compact design, the NX-ERA Xpress PLC enhances efficiency, consistency, and reliability in yarn steaming operations.
Heat Setting and Space Dyeing Machine Integration:
In advanced textile finishing, seamless integration between heat setting and dyeing is essential. NX-ERA Xpress PLC brings synchronization and control to:
Temperature management for precise heat setting, improving dimensional stability and dye fixation
Control of dye application in the space dyeing process, enabling unique patterns with consistent results
Coordination of material flow between machines, ensuring smooth transitions and avoiding process bottlenecks
The result is an integrated, high-performance workflow for specialty dyeing applications, digitally governed for optimal output and reduced waste.
Integration with Messung's Automation Ecosystem
One of the major strengths of the NX-ERA Xpress PLC is that it can integrate smoothly with all our other products, like the XM-PRO remote I/O modules. This makes it possible to have a unified automation solution that simplifies the control and monitoring of your entire textile plant.
With a single provider for all automation needs, textile manufacturers can enjoy streamlined operations, reduced complexity, and improved support. The synergy between the NX-ERA Xpress PLC and our other products ensures that your factory is fully equipped to tackle the challenges of modern textile manufacturing.
Conclusion
In summary, our NX-ERA Xpress PLC is a game-changer in the textile sector, providing powerful, scalable, and affordable automation. With its high-performance capabilities, energy efficiency, and accurate control, the NX-ERA Xpress PLC is ideally positioned to address the changing needs of textile producers.
With the NX-ERA Xpress PLC, you can elevate your textile manufacturing process to the next level. Whether you want to optimize spinning, weaving, or dyeing processes, Messung's automation solutions provide the reliability and performance that you require to remain ahead in a competitive market.
So, why wait? Consult Messung today for a customized automation solutionthat suits your textile manufacturing needs. It’s time to embrace the future of textile production with the NX-ERA Xpress PLC - where automation meets innovation
#textile manufacturers#Programmable Logic Controllers (PLCs)#textile manufacturinG#cutting-edge automation solutions#compact PLC#NX-ERA Xpress PLC#textile machinery#Industry 4.0#spinning#carding#drawframe#combing#ring frame machines#autoconers#singeing#bleaching#dyeing#PLC-controlled automation.#NX-ERA Jet PLC#industrial automation#PLC systems#IEC 61131 Standard#Ethernet TCP/IP#Modbus#CANopen#cotton spinning#automation processes#remote I/O modules#automation needs#customized automation solution
0 notes
Text
Choosing the Right Digital Inkjet Printing Machine Supplier for Your Needs
Choosing the Right Digital Inkjet Printing Machine Supplier for Your Needs
Digital inkjet printing machines have completely transformed the printing sector by providing fast and flexible prints of high quality. They can print intricate pictures on different substrates thereby used in a variety of applications ranging from commercial printing to personalized gifts.Get more news about Printing Machine,you can vist our website!
Understanding Your Printing Needs
You must know what you need in terms of printing before choosing a supplier for digital inkjet printers machines. Find out about the types of materials, quality, volume, and pricing. These details will help minimize your options so that you can choose the right provider who is capable of meeting your specific requirements.
Digital Inkjet Printing Machine Supplier: PSI
PSI is a well-known digital inkjet printer supplies company. We have a wide range of products that meet the specific needs of consumers for printing. Some of these include rotary inkjet printers as well as cylindrical inkjet printers, flatbed inkjet printers, and many other products that effectively fulfill their respective roles.
Cylindrical Inkjet Printers S1 and S2
When it comes to printing on cylindrical materials such as bottles, cups, and tubes, PSI’s S1 and S2 cylindrical inkjet printers are perfect. These printers are known for their accurate image positioning capabilities and they can work with different types of inks to give bright long lasting pictures.
T4 Rotary Inkjet Printer for Tubes
The T4 rotary inkjet printer is a good choice for anyone looking forward to printing on tubes or other similar items. It consistently provides high-quality prints while still being able to handle different tube sizes hence making it suitable for use in various industries.
SPR10 Rotary Digital Inkjet Machine
PSI’s SPR10 rotary digital inkjet machine is one of the best products out there that has been designed specifically for high volume cylindrical printing. With its advanced features, it promises fast and efficient printing which makes it ideal for businesses that want to increase production rates.
SP55 One Pass Flat Inkjet Printer
The SP55 one pass flat inkjet printer is highly regarded by many when it comes to flat surface printing. It can print at high speeds without compromising picture quality; hence, this machine is applicable across various printing functions.
F600/900 Visual Positioning Flatbed Inkjet Printer with Conveyor
For firms that need exact positioning and high-throughput, F600/900 visual positioning flatbed inkjet printer with conveyor is the best. It has a conveyor system that enhances the efficiency of printing through continuous printing.
What to Consider When Choosing a Supplier
When choosing a supplier for digital inkjet printing machines several factors should be considered:
Quality and Reliability of Product
Make sure you buy from a reputable company that sells machines that are durable and work efficiently. PSI is known for making powerful and efficient printers, so you can trust us.
After-sales Support
It may also be worth considering whether there is after-sales support, such as maintenance services, spare parts supply, and technical guidance. PSI ensures that we will not only buy products for our customers, but also take good care of them.
Compatibility with Your Business Needs
Depending on whether it is for small scale customization or large scale production, go for a supplier whose machines match your business operations.
Therefore, selecting a good supplier of digital inkjet printing machines is an important decision that could affect the performance of your printing business. PSI has many high-quality printers to choose from and is committed to customer satisfaction, which makes us a reliable partner for companies looking to increase their printing capabilities. To make the best decision and benefit from cutting-edge printer technology, consider your unique needs in conjunction with these points.
0 notes
Text
Air Compressors and Their Impact on Manufacturing Productivity

In the world of manufacturing, where speed, precision, and efficiency determine success, air compressors stand as unsung heroes. These versatile machines quietly power countless tools and processes, enabling industries to meet high production demands. From streamlining operations to supporting cutting-edge technology, air compressors play a key role in boosting productivity. But how do they make such a profound impact? Let’s explore the world of compressed air and uncover how it pushes innovation, reduces costs, and ensures sustainable growth in modern manufacturing.
Impact of air compressors on manufacturing productivity:
Powering seamless operations:
Air compressors are the backbone of efficiency in manufacturing, delivering reliable energy for an array of tools and machinery.
Uninterrupted power: Unlike electric tools prone to fluctuations, air-powered systems maintain constant performance, ensuring smooth workflows.
Multi-tool capability: A single air compressor can power multiple devices simultaneously, eliminating the need for multiple energy sources and reducing working complexities.
Ease of maintenance: Pneumatic tools powered by air compressors have fewer moving parts, resulting in reduced wear and tear and less downtime.
Imagine an assembly line breaking due to tool failure; it’s costly and time-consuming. Air compressor manufacturers minimise such risks, keeping production lines buzzing efficiently.
Lowering costs:
One of the biggest advantages of high pressure air compressor manufacturers in India is their ability to reduce production costs while increasing output.
Energy efficiency: Modern air compressors, like rotary screw and oil-free models, consume less energy while delivering high output, making them cost-effective.
Durable and long-lasting: Air-powered tools have longer lifespans compared to their electric counterparts, reducing the need for frequent replacements.
Labour savings through automation: Many manufacturing processes, such as material handling and packaging, can be automated using compressed air, cutting labour costs and enhancing precision.
For example, automated spray painting powered by air compressors not only saves paint but also ensures a flawless finish, reducing waste and rework.
Driving advanced manufacturing techniques:
Modern high pressure air compressor manufacturers in India thrive on innovation, and air compressors are key enablers of advanced techniques.
Laser cutting and 3D printing: Compressed air ensures precise cutting by removing waste and keeping systems cool. In 3D printing, it powers pneumatic systems to control material deposition accurately.
Robotics: Many robotic arms depend on pneumatic systems for their movements, offering flexibility and speed in tasks like assembly and quality checks.
By empowering such techniques, air compressor manufacturers stay ahead in an increasingly competitive market.
Ensuring workplace safety and quality:
Safety and quality are non-negotiable in manufacturing, and air compressors contribute greatly to both.
Cleaner processes: Oil-free air compressors ensure contamination-free production, which is important in industries like food, pharmaceuticals, and electronics.
Noise reduction: Advanced models operate quietly, creating a safer and more comfortable environment for workers.
Enhanced tool safety: Air-powered tools are commonly lighter and safer to use than electric tools, reducing the risk of injuries.
In a factory producing electronics, for example, even minor contamination can lead to defective products. Oil-free compressors ensure the highest standards of cleanliness and reliability.
Customisation for diverse industries:
One of the standout features of air compressor manufacturers is their adaptability to different manufacturing needs.
Automotive: From spray painting to assembling components, air compressors support various processes.
Textile: They automate weaving, spinning, and dyeing machines, improving speed and consistency.
Food and beverage: Compressors help in packaging, cooling, and even producing carbonated drinks.
Healthcare: Oil-free compressors provide the clean air required in pharmaceutical manufacturing.
This versatility allows air compressor manufacturers across industries to tailor air compressor solutions to their unique requirements, maximising efficiency.
Supporting sustainable manufacturing:
Sustainability is no longer a choice; it’s a necessity. Air compressors align with this vision by promoting eco-friendly operations.
Energy conservation: Variable speed drive (VSD) compressors adjust their output to match demand, significantly reducing energy waste.
Waste reduction: Compressed air systems minimise material wastage in processes like painting, packaging, and assembly.
Lower emissions: Efficient air compressors contribute to reduced carbon footprints, making them a vital component of green manufacturing initiatives.
Innovation in compressor technology:
The evolution of air compressors continues to redefine their role in manufacturing.
IoT and smart systems: Internet-connected compressors allow real-time monitoring, predictive maintenance, and operational insights, preventing downtime and maximising productivity.
High-pressure models: These are ideal for heavy-duty tasks like forging and metal fabrication.
Portable compressors: Lightweight and mobile, they offer flexibility for smaller manufacturing setups.
By investing in these advancements, high pressure air compressor manufacturers in India can future-proof their operations and adapt to changing industry demands.
A future built on compressed air:
The role of air compressors in manufacturing is only set to grow. As industries adopt poor practices and aim for higher efficiency, these machines will remain indispensable. Arising trends like additive manufacturing, smart factories, and sustainable production further underscore the importance of investing in advanced air compressor systems.
Summary:
Air compressors are more than just tools; they are motivations for transformation in manufacturing. By powering critical operations, enabling innovation, and supporting sustainability, they help manufacturers achieve higher productivity and profitability. As the industry evolves, air compressor manufacturers will resume to play a central role, ensuring businesses remain competitive and environmentally responsible. Investing in the right air compressor technology can unlock significant productivity gains and give manufacturers a competitive edge in today’s dynamic market.
0 notes
Text
CNC Machining vs. Additive Manufacturing: Understanding the Key Differences
In today's manufacturing world, CNC machining and additive manufacturing are two key methods that serve different production needs. Each has its own strengths and weaknesses, so it's important to know how they differ to make the best choices in manufacturing.
This blog explains the main differences between CNC machining and additive manufacturing, focusing on their benefits and uses.
CNC Machining: Precision Through Subtraction
Overview:
CNC machining is a traditional manufacturing method that involves the precise removal of material from a solid block using computer-controlled tools. This subtractive process utilizes rotary cutters, drills, and mills to achieve the desired shape and dimensions.
Materials and Techniques:
CNC machining is compatible with a broad range of materials, including metals (such as aluminum, steel, and titanium), plastics, and composites. The process is renowned for its ability to produce high-precision components with tight tolerances, making it ideal for applications that demand rigorous accuracy, such as aerospace, automotive, and medical industries.
Advantages:
High Precision: CNC machining excels in producing parts with tight tolerances and detailed specifications.
Material Versatility: Capable of working with a variety of materials, including high-strength metals and complex composites.
Consistency: Once set up, CNC machines can produce consistent results across large production runs.
Limitations:
Waste Generation: As a subtractive process, CNC machining can result in significant material waste, impacting overall efficiency and cost.
Setup Time: The initial setup for CNC machining can be time-consuming and costly, particularly for complex or custom parts.
Additive Manufacturing: Innovation Through Addition
Overview:
Additive manufacturing, commonly known as 3D printing, is a cutting-edge technology that builds objects layer by layer from a digital model. This additive process allows for the creation of complex geometries and intricate designs that are challenging to achieve with traditional methods.
Materials and Techniques:
Additive manufacturing supports a diverse range of materials, including thermoplastics, resins, metal powders, and even bio-materials. Technologies such as FDM (Fused Deposition Modeling), SLA (Stereolithography), and SLM (Selective Laser Melting) enable the production of parts with varying degrees of complexity and material properties.
Advantages:
Design Flexibility: Capable of producing highly complex and customized parts with intricate internal structures.
Rapid Prototyping: Ideal for quick prototyping and low-volume production, allowing for rapid iterations and design changes.
Material Efficiency: Minimizes material waste by using only the necessary amount of material to build the part.
Limitations:
Production Speed: Additive manufacturing can be slower for large-scale production compared to traditional methods.
Precision Variability: While precise, the level of detail may vary depending on the technology and material used.
Comparative Analysis
1. Production Process
CNC Machining: Subtractive process that removes material from a solid block to achieve the final shape.
Additive Manufacturing: Additive process that builds up layers of material to form the final part.
2. Material Handling
CNC Machining: Effective with a range of solid materials, including metals and plastics.
Additive Manufacturing: Utilizes a variety of raw materials, including powders and filaments, suitable for complex designs.
3. Precision and Tolerance
CNC Machining: Known for high precision and tight tolerances, suitable for detailed and exact specifications.
Additive Manufacturing: Offers design flexibility with varying precision depending on the technology and material.
4. Production Volume and Speed
CNC Machining: Efficient for medium to high-volume production, though initial setup can be time-consuming.
Additive Manufacturing: Excels in low-volume production and rapid prototyping, but may be less efficient for large-scale manufacturing.
5. Environmental Impact
CNC Machining: Can generate material waste due to the subtractive nature of the process.
Additive Manufacturing: More material-efficient with minimal waste, supporting sustainable manufacturing practices.
CNC machining and additive manufacturing are both useful options for any kind of production demands. CNC machining is still a popular alternative for high-precision, high-volume production, but additive printing offers unique flexibility for complicated and customised items. Understanding these differences allows manufacturers to choose the best technology for a given project, material requirements, and production goals.
In many circumstances, combining the two methods may take use of their individual strengths, delivering a holistic solution to current production difficulties. Businesses may improve their production processes and promote development in their respective industries by carefully evaluating the different features of CNC machining and additive manufacturing. To get an instant quote, upload your file here: https://hlhrapid.com/instant-quote/
0 notes
Text

How Do You Take Care of Your Printed Clothes
Hello, in this blog we will discuss how to master the art of caring for your clothes.
DO YOU KNOW BY DOING PROPER CARE OF YOUR GARMENT, YOU CAN BE A SUSTAINABILITY CHAMPION?
The most important part of sustainable movement is how to care for your clothes. The washing machine has entered every household In last one decade. The fast fashion has made the concept of mass production a success. Unfortunately, mass production directly affects the quality of fabrics, textiles & other processes like sourcing, dyeing, washing, etc.
Welcome to the Ultimate Guide on how to care for your printed garments! We all love our printed clothes, but maintaining their vibrant colors and designs can be a challenge. At Wildmoss, we understand the importance of preserving the quality and longevity of your printed garments. That's why our team of experts has compiled their knowledge and experience into this ultimate guide, so you can enjoy your favorite prints for years to come.
Hand washing clothes isn't merely an antiquated practice, but a viable laundry solution, especially for delicate items. A direct & indirect impact on the environment. This simple guide applies to all the other loving clothes in your wardrobe.
First of all- WHY BLOCK PRINTED FABRICS NEED SEPARATE WASHING CARE?
The garments made from Natural materials and processed in traditional technologies often benefit from hand washing preventing potential damage that could arise from machine washing. The block printing technique Is a labour intensive process That gives unique patterns with each impression. The fabrics which are printed through hand block printing technique do have lesser penetration of colour as compared to The screen printed or rotary printed. These fabrics require as much special attention in washing, as much carefully the fabric has been printed.
For Know More Click Here
0 notes
Text
Types of Textile Machinery Used in Textile Industries
The textile industry, a cornerstone of contemporary production, is predicated heavily on advanced equipment to produce fabrics and different textile products. As the era evolves, so does the range and class of textile equipment. Understanding these machines is crucial for all and sundry worries inside the industry. In this weblog, we will discover the varieties of fabric machinery utilised in fabric industries, that specialise in their roles and features, and how they contribute to the production method.
Introduction to Textile Machinery
Textile machinery encompasses a wide range of devices used to method raw fibres into completed merchandise. These machines perform numerous functions, from spinning and weaving to dyeing and finishing. Each system performs a vital role in ensuring the high-quality and performance of textile production.
Spinning Machines
1. Spinning Frames:
Spinning frames draw yarn out of uncooked fibres by twisting them, the fibres being cotton or wool. There are several grades in this technique: carding, drawing and roving. Spinning frames come in various forms; namely the ring spinning and rotor spinning, each having its advantages.
2. Open-End Spinning Machines:
These machines are recognised for his or her potential to course of yarn’s production at high pace and in giant portions successfully. These vary from the conventional spinning frames in a way that eliminate the use of roving; thus, making the process more efficient.
Weaving Machines
1. Power Looms:
Power loom is a mechanical weaving machine used for shedding and beats the warp and weft yarns to form material. They have in large part substituted handlooms mainly on the basis of velocity as they supply constant first-rate materials.
2. Rapier Looms:
Rapier looms are modern weaving units that are acknowledged for their flexibility. They are versatile for an extensive variety of yarn sorts and material patterns that make them suitable for complicated fabrics.
3. Air-Jet Looms:
These looms use air to propel the weft yarn through the warp shed, allowing for quicker and more green weaving. Air-jet looms are particularly appropriate for lightweight fabrics and excessive-velocity production.
Knitting Machines
1. Circular Knitting Machines:
Circular knitting machines create tubular fabric with the aid of knitting yarn in a non-stop round movement. They are commonly used for generating seamless garments, socks, and other hosiery products.
2. Flat Knitting Machines:
These machines knit fabrics in a flat form and are used for growing items like sweaters, scarves, and different flat-knit clothes. Flat knitting machines provide more flexibility in design and sample variations.
Dyeing and Printing Machines
1. Jet Dyeing Machines:
Jet dyeing machines are used to dye fabric in a closed system, wherein the dye liquor is circulated at excessive pressure. This method ensures uniform dyeing and is appropriate for diverse material types.
2. Rotary Screen Printing Machines:
Rotary display printing machines follow styles to material by forcing dye via a cylindrical display screen. They are recognised for his or her performance and ability to provide elaborate designs on a large scale.

Finishing Machines
1. Stenter Machines:
Stenter machines stretch and dry fabrics, ensuring they meet the desired dimensions and satisfactory requirements. This system improves the fabric’s texture, appearance, and stability.
2. Calendering Machines:
Calendering machines consist of heated rollers that press and easy fabric, enhancing their end and lustre. They are often used for fabric like cotton, polyester, and blends.
Embroidery Machines
Computerized Embroidery Machines:
These machines are used to create intricate embroidery designs on fabrics. With the aid of computer software, they can produce detailed and consistent patterns, making them essential for high-quality embroidery work.
Textile Testing and Quality Control Machines
1. Tensile Testing Machines:
Tensile testing machines measure the strength and elasticity of fabrics, ensuring they meet industry standards. They play a crucial role in quality control and product development.
2. Color Fastness Testing Machines:
These machines assess the colour fastness of dyed fabrics by subjecting them to various conditions, such as washing, light exposure, and rubbing. This ensures the durability and longevity of the fabric’s colour.
Generally, textile industry uses a broad category of equipment in the conversion process from textile material to the final product. All machines ranging from spinning and weaving to dyeing and finishing are very important in the process. It is worthwhile to study the functions as well as the capacities of these machines for anyone that is involved in the textile business.
It has been a well-known fact at Weavetech organisation that accurate textile machinery guarantees good fabric production. The awareness of the most recent innovations and the wide spectrum of machinery guarantees that clients get the most appropriate items and services.
It is critical for any textile factory to ensure that they acquire the right textile factory machine that will make their production to be more efficient and of high quality as well as be versatile in use. Whether you operate within spinning, weaving, knitting, and finishing categories, it is very important that you are able to get the right equipment so as to also be able to compete in the complex textile market.
Read More:- Types of Textile Machinery Used in Textile Industries
0 notes
Text
may 6
The purple strips are all sewn to black strips but in small units that now need to be arranged in a pleasant order and sewn in to one sold piece which will then be sewn in a tube which will be cut in to strips and then only one seam will need to be undone to make the final piece.
The goal is to have the purple and black staggered, it will be either a purple or black stripe but at regular intervals it will be a different purple or patterned black. And for the love of me I can't find the pic I saw of a quilt top that inspired me to do it that way.
Oh well, pics when it's pieced. It will look far more complicated than it is.
Also have a set of rose print strips and Kona black but no idea what Ill do with them exactly, I have half yards of the same fabric so a checkerboard sashing or boarder isn't out of the question. Kind of want to see how big the purple one comes out.
Will also be looking for a sale or good coupon on the least amount of safe rotary cutter and mat combo I can get away with unless I cna figure how to cut what I want with scissors.
Or I make a friend with a rotary cutter and buy them a new blade in return for doing my cuts for me.
Also had the thought that only having a mending machine is a great way to remind cheapskates I don't do commissions. "It will cost you more than purchasing this exact same sewing machine and doing it yourself."
In other projects I started taking notes for the boy band story to try and rewrite it again and I suppose after having let it rest this current draft is okay to the point that it can be typed up and as I'm doing that I'll be working on what ever parts feel like they need it.
Also puttering with the notes I took about Grease 2 reviews. I thought I'd be writing some sort of article(s) but in a way it's looking like a lot of the work might have been jsut to give me something to do at the shit shack.
I'm not throwing the notes away, I'm trying to organize them and then work out how to do the write up. The goal kind of was a retelling to make it a more readable story, and perhaps some inspired by stories, along with some insightful commentary. All posted for free like fan fiction stuff.
Another thought that hit me is to divide the plot up if it were being done as a miniseries, six episodes easily, can we make it up to 9-10, and of my inspired by ideas where would they fit in to pad things out in a meaningful way.
How would you expand a movie in to a miniseries is a good writing exercise anyway.
0 notes
Text
Top 10 Uses for Roller Chain Sprockets
Roller chain sprockets are essential components used in various mechanical systems and applications where rotary motion and torque transmission are required. They work in conjunction with roller chains to drive machinery and equipment efficiently. Here are the top 10 uses for roller chain sprockets:
1. Industrial Machinery: Roller chain sprockets are extensively used in industrial machinery such as conveyor systems, packaging equipment, printing presses, and textile machines. They facilitate smooth and reliable power transmission in these applications.
2. Automotive Applications: Roller chain sprockets are used in automotive timing systems, engine components, and power transmission systems. They play a critical role in synchronizing the movement of various engine parts and accessories.
3. Material Handling Equipment: Roller chain sprockets are integral components of material handling equipment like forklifts, cranes, and hoists. They provide the necessary torque and motion to lift, transport, and position heavy loads.
4. Agricultural Machinery: In agricultural equipment such as tractors, harvesters, and seeders, roller chain sprockets are used for transmitting power from the engine to various operational components like wheels, belts, and augers.
5. Power Transmission Systems: Roller chain sprockets are fundamental in power transmission systems for transmitting rotational motion and torque between shafts. They are commonly used in gearboxes, drive systems, and mechanical assemblies.
6. Mining Equipment: Roller chain sprockets are employed in mining machinery and equipment for conveying materials, operating drills, and driving heavy-duty components underground or in open-pit mining operations.
7. Construction Machinery: Construction equipment like excavators, bulldozers, and concrete mixers use roller chain sprockets to drive and operate various moving parts and attachments effectively.
8. Marine and Offshore Applications: Roller chain sprockets are utilized in marine vessels and offshore platforms for powering winches, cranes, propulsion systems, and auxiliary equipment essential for maritime operations.
9. Printing and Packaging Machinery: In printing presses, packaging lines, and labeling machines, roller chain sprockets ensure precise and synchronized movement of rollers, belts, and gears to maintain accurate production processes.
10. Recreational Vehicles and Equipment: Roller chain sprockets are found in recreational vehicles like motorcycles, bicycles, and ATVs (All-Terrain Vehicles), providing the necessary power and torque for propulsion and maneuvering.
In summary, roller chain sprockets are versatile components used across a wide range of industries and applications where reliable power transmission and motion control are essential. Their durability, efficiency, and ability to handle heavy loads make them indispensable in various mechanical systems and equipment.
0 notes