#Punk buttons
Explore tagged Tumblr posts
Visit Tumblr Blog
Explore Tumblr blogs with no restrictions, modern design and the best experience.
Last Seen Tumblr Blogs


Fun Fact
Tumblr has a 66 index score for customer satisfaction in the US.
Text

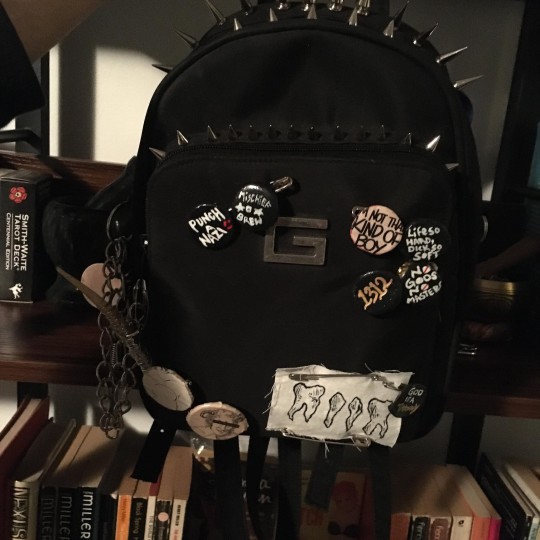
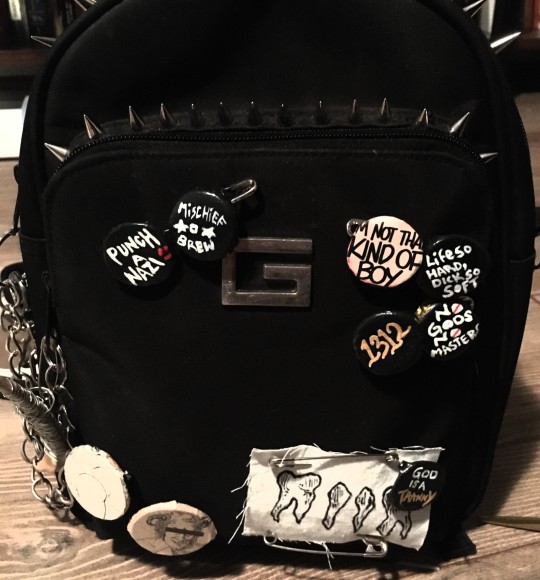

Projects of the day 🥳 ❤🌻
Buttons and pins, lil cheeky teeth patch and new journal I've patched over!
First buttons I've made so super happy how they turned out, currently hunting down more bottle caps for now!
Buttons - 1312, punch a nazi, T4T, occupy empty property, mischiefbrew, no gods no masters, god is a tranny, im not that kind of boy, life so hard dick so soft, cheeky lil booty (cut out from a old gay magazine) , lil devil man (cut out from a old gay magazine)
Will post photos of the new patches ive made as well! ❤❤
#diy punk#punk#punk diy#diy#punk buttons#punk pins#folkpunk#diy fashion#punk bag#craft update#give me bottle caps please
324 notes
·
View notes
Text

#book bag#satchel#laptop bags#backpack#punk patches#punk buttons#buttons#button pins#safety pin#misfits#nirvana
10 notes
·
View notes
Text


THE BAND EVERYONE LOVED TO HATE -- RIGHT DOWN TO THE BADGES & GRAPHIC ART.
PIC(S) INFO: Spotlight on an anti-FLIPPER badge/button and gig/show flyer, c. early '80s (I think). 📸: Punk Archives Intern at the San Francisco History Center.
Source: www.facebook.com/photo.php?fbid=898921185609834 (Facebook 2x).
#FLIPPER band#FLIPPER punk#FLIPPER#Buttons/badges#Badges/buttons#Punk buttons#Punk memorabilia#Noise punk#Punk rock#Post punk#San Francisco punk#SF hardcore#Bay Area punk#80s Style#Punk Art#1980s#FLIPPER Still Rules OK?#Sludge punk#SF punk#Punk badges#Badges#80s punk#Buttons#American Style#Anti-hardcore#Graphic Art#Punk#80s#Heavy punk#San Francisco
10 notes
·
View notes
Text


random button pngs
#my pngs#png#moodboard pngs#pngs#mood board#transparent#transparent png#pins#button pins#vintage#vintage pins#grunge pngs#punk#punk pins#vintage pngs
11K notes
·
View notes
Text
Hot take it’s not actually accessible if I have to ask an abled body person for help or assistance
#yes this is about the wheelchair platforms that someone else has to hit the button to make it go up and down#accesibility#rubie bangers#cripple punk#chronic illness#spoonie#actually disabled#chronic panic#mobility aid#crutch user#wheelchair user#cane user
5K notes
·
View notes
Text
The aluminium from the cans was very sharp so I had to be careful not to get a cut, but other than that it was pretty easy
Tiktok i just found with a hack on using the bottoms of old cans as the base for diy buttons. Make sure to cover the sharp edge with something!
#ive started using tiktok again as a lil treat#god its embarrassing when my ass comes on here and is like GUYS LOOK AT MY TIKTOKS#punk#diy#diy pins#buttons#pins#diy buttons#recycling#upcycling#accessories#handmade#diy punk#punk diy#diy or die
2K notes
·
View notes
Text


"...VICIOUS, MINDLESS VIOLENCE THAT OFFERS NOTHING NEW."
PIC(S) INFO: Mega spotlight on a vintage, late '70s era SWP Socialist Workers Party UK "Pogo on a Nazi" (Anti-Nazi, Anti-fascism, punk rock) pin-back button/badge.
Source: www.etsy.com/listing/1281713691/vintage-late-70s-swp-socialist-workers.

#70s punk#SWP Socialist Workers Party UK#Pogo on a Nazi#Anti Nazi#Anti-fascism#Pin-back buttons#Button/Badges#SWP#Socialist Workers Party UK#Anti Fascism#Punk rock#Buttons/badges#Badges/buttons#Badges#Buttons#Socialist Workers Party#First Wave UK punk#UK punk#SWP UK#Anti-Nazism#Punk badges#Punk buttons#Pin-back badges#Super Seventies#1970s#CRASS UK#CRASS punk#CRASS#Punk#70s
25 notes
·
View notes
Text
I've always been curious to know this about the people around me. Most people have been in severe pain, but in my experience few have had what they would say is their 10/10 experience. I guess it's just something I find fascinating, as I had my 10/10 experience quite young and I sometimes forget that not everyone has. In my opinion it changes your relationship with pain and how you engage with it afterwards. If you answered yes, feel free to elaborate on your circumstances in the tags!
(reblog for a bigger sample size etc)
#I was 13 and mine was after spinal fusion surgery for scoliosis. T6-L4 fusion and when i woke up in spinal shock it was agonising pain#they had to give me ketamine before the pain died down and even then it was only 9/10#i was on a fentanyl drip for a few days afterwards and ever 5mins and 50sec id be dosing myself#my dad would take over my button while i was sleeping and set a timer on his watch to push it at those intervals#it was the only way i could rest as without it id wake up in blinding pain#definitely the hardest experience of my life. sometimes i forget that i went through that and came out the other side.#polls#chronic pain#disability#spoonie#cripple punk#cripplepunk#the tags ive chosen kinda skew the balance in favour of the yes but idk what else to tag it with.#it would be interesting to see if other disabled people have also had a 10/10 and how common that is
5K notes
·
View notes
Text
my fashion inspiration btw


#it’s all about the layering guys#flannel with the last button being the only one buttoned 💪#gender envy#boy meets world#eric matthews#shawn hunter#back to the future#bttf#marty mcfly#john bender#the breakfast club#breakfast club#bill and ted#bill and ted’s excellent adventure#ted theodore logan#bill s preston esquire#bill and ted’s bogus journey#reservoir dogs#mr orange#freddy newandyke#rodrick heffley#rodrick rules#diary of a wimpy kid#Trainspotting#mark renton#slc punk#90s#80s#90s movies#80s fashion
942 notes
·
View notes
Text

assortment of pins with a general "fuck off" sentiment
#punk diy#pins and patches#diy pins#bottle cap pins#upcycling#my art#button pins#alternative fashion#punk fashion#punk pins#diy#transmascs and dog boys this one is for you
457 notes
·
View notes
Text


Made some button pins! They turned out great, now all that’s left is to put in some safety pins.
#diy or die#diy projects#recycling#diy punk#punk diy#queer punk#pins#button pins#green day#bottlecap pins#bottle caps#can tabs#can tab project#can tab craft
190 notes
·
View notes
Text
the myth, the rat, the bastard
1K notes
·
View notes
Text


FILE UNDER: MISFITS FIEND CLUB, HORROR PUNK, PUNK ROCK, PUNK ART, BUTTONS, BADGES, VINTAGE HORROR, ETC...
PIC(S) INFO: Mega spotlight on assorted early MISFITS graphics, pin-back buttons/badges, and three vintage-as-fuck, screened Fiend Club envelopes sent out by Glenn Danzig himself.
Source: www.picuki.com/media/2233920003212375778 (all found @fiendcrypt).
#THE MISFITS#MISFITS band#MISFITS 1978#MISFITS#THE MISFITS 1978#Crimson Ghost#The Crimson Ghost#Horror punk#Punk Art#70s punk#80s punk#American hardcore punk#Hardcore punk#Horror Business 1978#THE MISFITS Horror Business#Punk badges#THE MISFITS band#80s hardcore punk#80s hardcore#80s Style#American Style#Horror Art#Horror Business#Buttons/badges#Badges/buttons#Punk buttons#Super Seventies#American hardcore#Buttons#Punk rock
5 notes
·
View notes
Text

A few buttons and bottle caps to attach on the something
#art#pins#buttons#bottle caps#diy punk#diy fashion#eyes#anarchist#spiders#my art stuff#my art#chaos crow arts
236 notes
·
View notes
Text


random button pin pngs
#my pngs#png#moodboard pngs#pngs#mood board#transparent#clothing pngs#clothing png#transparent png#clothes#filler pngs#accessories pngs#punk pins#buttons#button pins#snoopy#peanuts#vintage png#vintage pngs#vintage#retro#random pngs#pins#punk
4K notes
·
View notes
Text

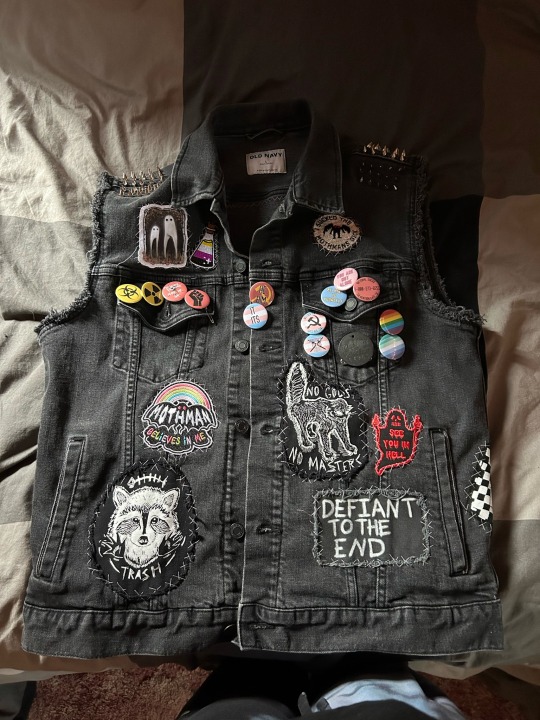
Added some of my buttons from my collection :]
271 notes
·
View notes