#My Resources
Explore tagged Tumblr posts
rachamemories · 4 months ago
Text
Tumblr media
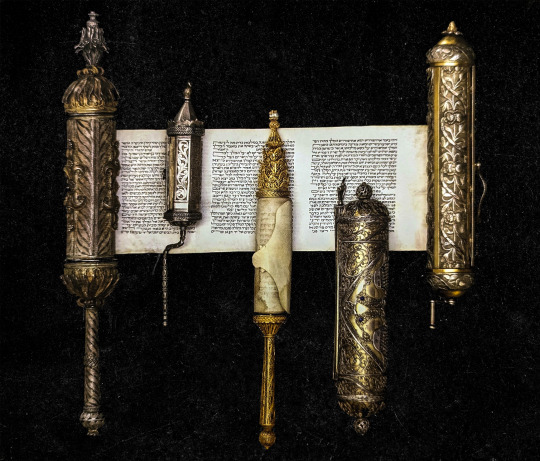
Megillah cases Left to right: Ioannina, Greece ca. 1900; Aleppo, Syria ca 1875; Ukraine ca 1850; Turkey ca 1875
1K notes · View notes
bcnds · 1 year ago
Text
Tumblr media Tumblr media Tumblr media Tumblr media
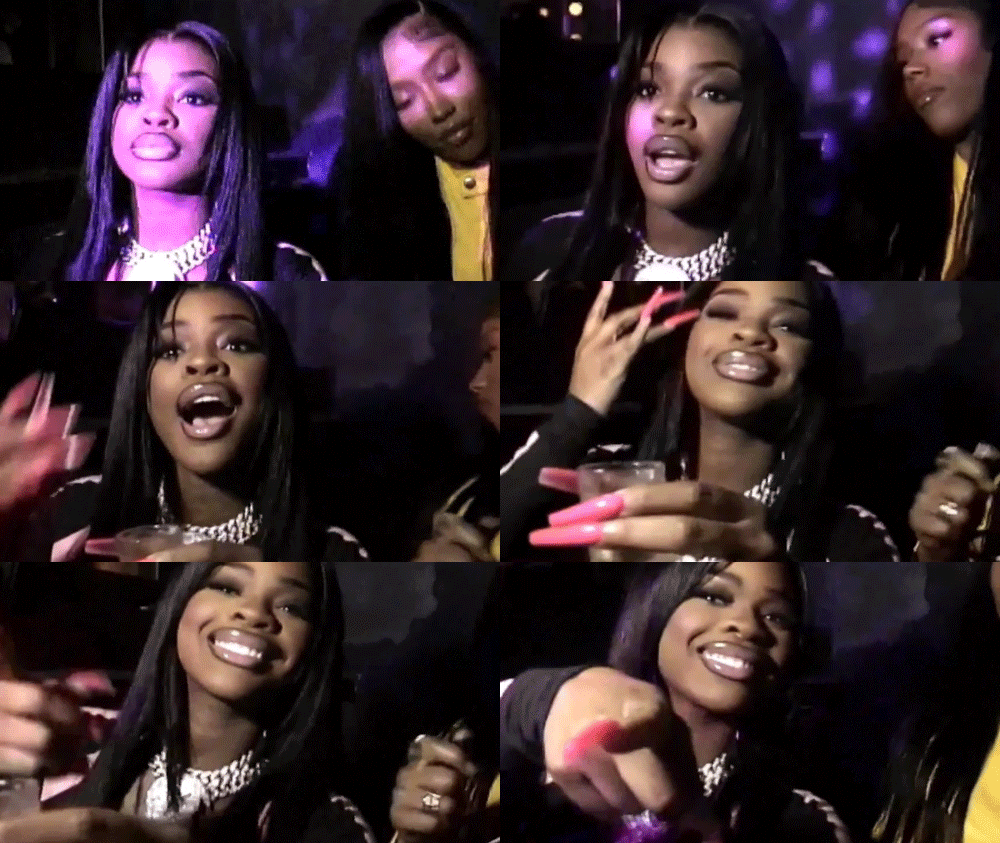
JT & RAVEN TRACY VIA INSTAGRAM.
7K notes · View notes
izicodes · 1 year ago
Text
I made a beginner coding resource! 👩🏾‍💻💗
Tumblr media Tumblr media Tumblr media
Hiya! 👩🏾‍💻💗
I made a coding infographic/slideshow for anyone getting into coding and are stuck! I'm seeing a lot of new codeblr blogs coming up recently and they're all beginners and I have been getting a lot of asks which basically all ask "I'm new to coding, how do I start?", so I decided to make this at 1am in the morning real quick! 🥲😭
I genuinely hope that this resource proves beneficial to someone out there. And remember, if you find yourself still facing challenges or need assistance with anything else, please don't hesitate to reach out. I'm here to help! ✨
Link to the PDF: LINK
2K notes · View notes
alleesaur · 5 months ago
Note
do you have a tag for when you do tutorials? like when you explained how you pick colours?
ah no unfortunately, my tagging system is a complete mess and i haven't really tagged at all for my resources and tutorials
i suppose i should just..start!
----------
-color adjustment with gradient maps
-'paper' animation in blender (general steps)
-'paper' animation in blender (rambling yt video)
-general animation steps i take
it's difficult to find my brushes ask post so i'll just put the diagram here (procreate only)
Tumblr media
380 notes · View notes
inkysresources · 11 days ago
Text
Tumblr media Tumblr media Tumblr media
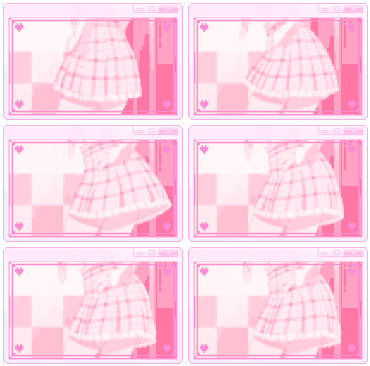
various windows templates. Credit absolutely needed if reuploading elsewhere, credit appreciated if using!
while youre here check out @fleaseditstuff post here about commonly used stamp borders! (Which is what inspired me to make these.
240 notes · View notes
lavendergalactic · 9 months ago
Text
Tumblr media
i get a lot of asks about how i make my dividers, so i just decided to make a video on how i would typically make one, but the thing is i’m super sick so i have no idea if any of this makes sense LMAO

Tumblr media Tumblr media
713 notes · View notes
moths-wc-aus · 1 year ago
Text
psst! hey! guess what! i make warriors name generators based on specific places!
-- central american (+ mexican) names -- florida names -- tundra names -- desert names (american & australian) -- new england, america names (made this one for my coastal fanclans, since they're based in maine) -- alaska names -- mesa biome names -- canadian names -- prairie names -- north carolinan swamp names -- u.s. desert names -- cave names (worldwide) -- southeast asian names -- californian coast names -- arizona names -- gobi desert names -- vermont, usa names -- australian names
here's a generator with all of the prefixes/suffixes i use regularly! -- moth's name gen
and here's a whole clan generator! -- moth's clan gen
(go ahead and yell at me if you find something missing/something that shouldn't be there)
2K notes · View notes
simspaghetti · 2 months ago
Text
Puddlewick Place DOWNLOAD
Hello! I made a new build for Generation 3 of my Piccolo LEPacy, and thought I'd share it with you all as it turned out to be a pretty cute family house :)
I've also made this with minimal CC and as I built it for my LEPacy it only requires WA & Ambitions - so hopefully it will be more acessible than my other builds!
Tour Pictures:
Tumblr media Tumblr media Tumblr media Tumblr media Tumblr media Tumblr media Tumblr media Tumblr media Tumblr media Tumblr media
Download & more info under the cut! ⬇️
Basic Information:
Price: Furnished = §196,177 / Unfurnished Shell = §88,901
Lot Size: 40x40 - Built on '16 Puddlewick Road' in Twinbrook
3 Bedrooms / 3.5 Bathrooms
Furnished for 4 Sims: A Couple, a teen & a baby/toddler
This home was built with my sim Ra and his future (potential) family in mind, so it also has a fire truck in the driveway for the firefighter career & a lot of ambitions skill objects around the house
Floorplan: (click to expand)
Tumblr media Tumblr media Tumblr media Tumblr media Tumblr media Tumblr media
Expansions Needed: ⛺️World Adventures / 🏆Ambitions
Unfurnished Shell CC:
TS1 montecello door - ilgrandelama
DIY curtains - single 2x1 shutter (MTS)
Black & White Shingle Roof (MTS)
Additional CC for Furnished Version:
‼️You also need everything from the ‘Unfurnished Shell’ CC list‼️
Lemmylou eyelet curtains (all)
Deniisu's gently draping curtains collection
Unlocked painting stencils (via Tedhi)
9thWaveSims Height Adjustable Fire Alarm
TOU: Don’t reupload or claim as your own, tags on posts aren’t necessary but are definitely appreciated :) - Feel free to modify or refurnish the build however you want!
Credits: Based off of this floorplan, and of course thank you to the lovely CC creators I've used!
➡️ DOWNLOAD IT HERE
Link to Simfileshare folder with both Furnished & Unfurnished versions included - CC is not included you have to download it separately from the links above!
These are library files, so they go in your The Sims 3 -> Library folder
As always please let me know if you encounter any issues using this build!
Have fun using this build in your game! I’d love to see pictures of your sims using the build if you do tag me - and happy bonfire night! 🎇✨
159 notes · View notes
mikelogan · 1 month ago
Text
Tumblr media Tumblr media
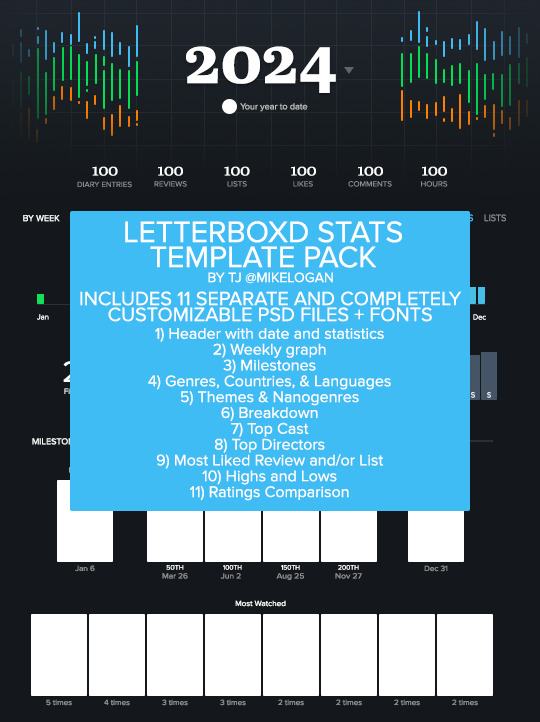
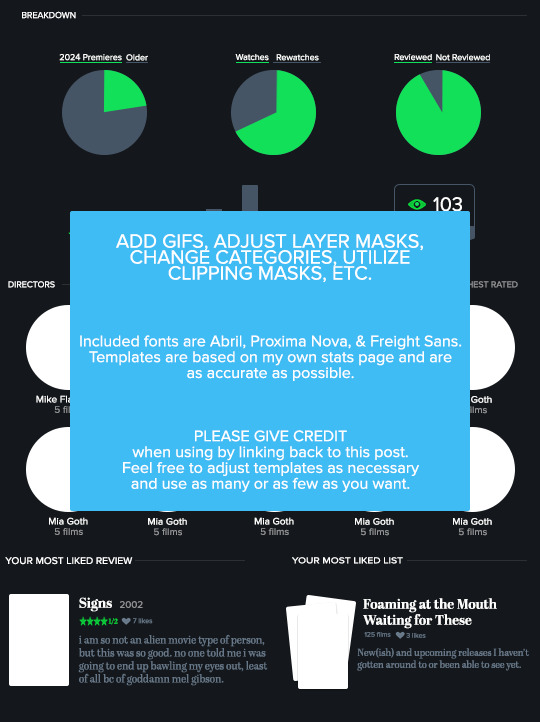
LETTERBOXD STATS TEMPLATE PACK by tj @mikelogan Includes 11 separate and completely customizable .psd files + 3 font families
Header with date and statistics Weekly graph Milestones Genres, Countries, & Languages Themes & Nanogenres Breakdown Top Cast Top Directors Most Liked Review and/or List Highs and Lows Ratings Comparison
WHAT YOU NEED*:
Basic gifmaking knowledge Including: layer masks and clipping masks
TO USE:
PLEASE GIVE CREDIT BY LINKING BACK TO THIS POST PLEASE DO NOT REPOST/CLAIM AS YOUR OWN REBLOGS ARE APPRECIATED FEEL FREE TO TAG ME IN ANY SETS YOU MAKE WITH #USERTJ
MEDIAFIRE DL | MEGA DL MY LETTERBOXD
*A FEW NOTES:
All graphs are completely customizable using layer masks. For all the bar graphs, I find them easiest to edit using the rectangular marquee tool to select the proper area and then using your brush tool. For the pie charts, I had the best luck using the polygonal lasso tool to select the slice I wanted to mask. All the information used was taken directly from my Letterboxd stats page. I believe there are a few sections only available to patrons of the site, such as the Ratings Comparison. The only parts I left out were the lists integrated into the stats page and the Crew & Studios section. The fonts included in the folder are the exact ones used by Letterboxd, so you could always use them to create your own templates for those if you want to. I have no issue with anyone using these templates to help create their own, but please give proper credit. Making these took literal hours.
IF YOU HAVE ANY QUESTIONS OR PROBLEMS WITH THE TEMPLATES, PLEASE SEND ME AN ASK OR A MESSAGE AND I'LL HELP HOWEVER I CAN!
147 notes · View notes
antoniosvivaldi · 11 months ago
Text
Tumblr media Tumblr media Tumblr media Tumblr media Tumblr media
Neural Filters Tutorial for Gifmakers by @antoniosvivaldi
Hi everyone! In light of my blog’s 10th birthday, I’m delighted to reveal my highly anticipated gifmaking tutorial using Neural Filters - a very powerful collection of filters that really broadened my scope in gifmaking over the past 12 months.
Before I get into this tutorial, I want to thank @laurabenanti, @maines , @cobbbvanth, and @cal-kestis for their unconditional support over the course of my journey of investigating the Neural Filters & their valuable inputs on the rendering performance!
In this tutorial, I will outline what the Photoshop Neural Filters do and how I use them in my workflow - multiple examples will be provided for better clarity. Finally, I will talk about some known performance issues with the filters & some feasible workarounds.
Tutorial Structure:
Meet the Neural Filters: What they are and what they do
Why I use Neural Filters? How I use Neural Filters in my giffing workflow
Getting started: The giffing workflow in a nutshell and installing the Neural Filters
Applying Neural Filters onto your gif: Making use of the Neural Filters settings; with multiple examples
Testing your system: recommended if you’re using Neural Filters for the first time
Rendering performance: Common Neural Filters performance issues & workarounds
For quick reference, here are the examples that I will show in this tutorial:
Example 1: Image Enhancement | improving the image quality of gifs prepared from highly compressed video files
Example 2: Facial Enhancement | enhancing an individual's facial features
Example 3: Colour Manipulation | colourising B&W gifs for a colourful gifset
Example 4: Artistic effects | transforming landscapes & adding artistic effects onto your gifs
Example 5: Putting it all together | my usual giffing workflow using Neural Filters
What you need & need to know:
Software: Photoshop 2021 or later (recommended: 2023 or later)*
Hardware: 8GB of RAM; having a supported GPU is highly recommended*
Difficulty: Advanced (requires a lot of patience); knowledge in gifmaking and using video timeline assumed
Key concepts: Smart Layer / Smart Filters
Benchmarking your system: Neural Filters test files**
Supplementary materials: Tutorial Resources / Detailed findings on rendering gifs with Neural Filters + known issues***
*I primarily gif on an M2 Max MacBook Pro that's running Photoshop 2024, but I also have experiences gifmaking on few other Mac models from 2012 ~ 2023.
**Using Neural Filters can be resource intensive, so it’s helpful to run the test files yourself. I’ll outline some known performance issues with Neural Filters and workarounds later in the tutorial.
***This supplementary page contains additional Neural Filters benchmark tests and instructions, as well as more information on the rendering performance (for Apple Silicon-based devices) when subject to heavy Neural Filters gifmaking workflows
Tutorial under the cut. Like / Reblog this post if you find this tutorial helpful. Linking this post as an inspo link will also be greatly appreciated!
1. Meet the Neural Filters!
Neural Filters are powered by Adobe's machine learning engine known as Adobe Sensei. It is a non-destructive method to help streamline workflows that would've been difficult and/or tedious to do manually.
Here are the Neural Filters available in Photoshop 2024:
Tumblr media Tumblr media
Skin Smoothing: Removes blemishes on the skin
Smart Portrait: This a cloud-based filter that allows you to change the mood, facial age, hair, etc using the sliders+
Makeup Transfer: Applies the makeup (from a reference image) to the eyes & mouth area of your image
Landscape Mixer: Transforms the landscape of your image (e.g. seasons & time of the day, etc), based on the landscape features of a reference image
Style Transfer: Applies artistic styles e.g. texturings (from a reference image) onto your image
Harmonisation: Applies the colour balance of your image based on the lighting of the background image+
Colour Transfer: Applies the colour scheme (of a reference image) onto your image
Colourise: Adds colours onto a B&W image
Super Zoom: Zoom / crop an image without losing resolution+
Depth Blur: Blurs the background of the image
JPEG Artefacts Removal: Removes artefacts caused by JPEG compression
Photo Restoration: Enhances image quality & facial details
+These three filters aren't used in my giffing workflow. The cloud-based nature of Smart Portrait leads to disjointed looking frames. For Harmonisation, applying this on a gif causes Neural Filter timeout error. Finally, Super Zoom does not currently support output as a Smart Filter
If you're running Photoshop 2021 or earlier version of Photoshop 2022, you will see a smaller selection of Neural Filters:
Tumblr media Tumblr media
Things to be aware of:
You can apply up to six Neural Filters at the same time
Filters where you can use your own reference images: Makeup Transfer (portraits only), Landscape Mixer, Style Transfer (not available in Photoshop 2021), and Colour Transfer
Later iterations of Photoshop 2023 & newer: The first three default presets for Landscape Mixer and Colour Transfer are currently broken.
2. Why I use Neural Filters?
Here are my four main Neural Filters use cases in my gifmaking process. In each use case I'll list out the filters that I use:
Tumblr media
Enhancing Image Quality:
Common wisdom is to find the highest quality video to gif from for a media release & avoid YouTube whenever possible. However for smaller / niche media (e.g. new & upcoming musical artists), prepping gifs from highly compressed YouTube videos is inevitable.
So how do I get around with this? I have found Neural Filters pretty handy when it comes to both correcting issues from video compression & enhancing details in gifs prepared from these highly compressed video files.
Filters used: JPEG Artefacts Removal / Photo Restoration
Facial Enhancement:
When I prepare gifs from highly compressed videos, something I like to do is to enhance the facial features. This is again useful when I make gifsets from compressed videos & want to fill up my final panel with a close-up shot.
Filters used: Skin Smoothing / Makeup Transfer / Photo Restoration (Facial Enhancement slider)
Colour Manipulation:
Neural Filters is a powerful way to do advanced colour manipulation - whether I want to quickly transform the colour scheme of a gif or transform a B&W clip into something colourful.
Filters used: Colourise / Colour Transfer
Artistic Effects:
This is one of my favourite things to do with Neural Filters! I enjoy using the filters to create artistic effects by feeding textures that I've downloaded as reference images. I also enjoy using these filters to transform the overall the atmosphere of my composite gifs. The gifsets where I've leveraged Neural Filters for artistic effects could be found under this tag on usergif.
Filters used: Landscape Mixer / Style Transfer / Depth Blur
How I use Neural Filters over different stages of my gifmaking workflow:
I want to outline how I use different Neural Filters throughout my gifmaking process. This can be roughly divided into two stages:
Stage I: Enhancement and/or Colourising | Takes place early in my gifmaking process. I process a large amount of component gifs by applying Neural Filters for enhancement purposes and adding some base colourings.++
Stage II: Artistic Effects & more Colour Manipulation | Takes place when I'm assembling my component gifs in the big PSD / PSB composition file that will be my final gif panel.
I will walk through this in more detail later in the tutorial.
++I personally like to keep the size of the component gifs in their original resolution (a mixture of 1080p & 4K), to get best possible results from the Neural Filters and have more flexibility later on in my workflow. I resize & sharpen these gifs after they're placed into my final PSD composition files in Tumblr dimensions.
3. Getting started
The essence is to output Neural Filters as a Smart Filter on the smart object when working with the Video Timeline interface. Your workflow will contain the following steps:
Prepare your gif
In the frame animation interface, set the frame delay to 0.03s and convert your gif to the Video Timeline
In the Video Timeline interface, go to Filter > Neural Filters and output to a Smart Filter
Flatten or render your gif (either approach is fine). To flatten your gif, play the "flatten" action from the gif prep action pack. To render your gif as a .mov file, go to File > Export > Render Video & use the following settings.
Tumblr media
Setting up:
o.) To get started, prepare your gifs the usual way - whether you screencap or clip videos. You should see your prepared gif in the frame animation interface as follows:
Tumblr media
Note: As mentioned earlier, I keep the gifs in their original resolution right now because working with a larger dimension document allows more flexibility later on in my workflow. I have also found that I get higher quality results working with more pixels. I eventually do my final sharpening & resizing when I fit all of my component gifs to a main PSD composition file (that's of Tumblr dimension).
i.) To use Smart Filters, convert your gif to a Smart Video Layer.
As an aside, I like to work with everything in 0.03s until I finish everything (then correct the frame delay to 0.05s when I upload my panels onto Tumblr).
For convenience, I use my own action pack to first set the frame delay to 0.03s (highlighted in yellow) and then convert to timeline (highlighted in red) to access the Video Timeline interface. To play an action, press the play button highlighted in green.
Tumblr media
Once you've converted this gif to a Smart Video Layer, you'll see the Video Timeline interface as follows:
Tumblr media
ii.) Select your gif (now as a Smart Layer) and go to Filter > Neural Filters
Tumblr media
Installing Neural Filters:
Install the individual Neural Filters that you want to use. If the filter isn't installed, it will show a cloud symbol (highlighted in yellow). If the filter is already installed, it will show a toggle button (highlighted in green)
Tumblr media
When you toggle this button, the Neural Filters preview window will look like this (where the toggle button next to the filter that you use turns blue)
Tumblr media
4. Using Neural Filters
Once you have installed the Neural Filters that you want to use in your gif, you can toggle on a filter and play around with the sliders until you're satisfied. Here I'll walkthrough multiple concrete examples of how I use Neural Filters in my giffing process.
Example 1: Image enhancement | sample gifset
This is my typical Stage I Neural Filters gifmaking workflow. When giffing older or more niche media releases, my main concern is the video compression that leads to a lot of artefacts in the screencapped / video clipped gifs.
To fix the artefacts from compression, I go to Filter > Neural Filters, and toggle JPEG Artefacts Removal filter. Then I choose the strength of the filter (boxed in green), output this as a Smart Filter (boxed in yellow), and press OK (boxed in red).
Note: The filter has to be fully processed before you could press the OK button!
Tumblr media
After applying the Neural Filters, you'll see "Neural Filters" under the Smart Filters property of the smart layer
Tumblr media
Flatten / render your gif
Example 2: Facial enhancement | sample gifset
This is my routine use case during my Stage I Neural Filters gifmaking workflow. For musical artists (e.g. Maisie Peters), YouTube is often the only place where I'm able to find some videos to prepare gifs from. However even the highest resolution video available on YouTube is highly compressed.
Go to Filter > Neural Filters and toggle on Photo Restoration. If Photoshop recognises faces in the image, there will be a "Facial Enhancement" slider under the filter settings.
Tumblr media
Play around with the Photo Enhancement & Facial Enhancement sliders. You can also expand the "Adjustment" menu make additional adjustments e.g. remove noises and reducing different types of artefacts.
Tumblr media
Once you're happy with the results, press OK and then flatten / render your gif.
Example 3: Colour Manipulation | sample gifset
Want to make a colourful gifset but the source video is in B&W? This is where Colourise from Neural Filters comes in handy! This same colourising approach is also very helpful for colouring poor-lit scenes as detailed in this tutorial.
Here's a B&W gif that we want to colourise:
Tumblr media
Highly recommended: add some adjustment layers onto the B&W gif to improve the contrast & depth. This will give you higher quality results when you colourise your gif.
Go to Filter > Neural Filters and toggle on Colourise.
Tumblr media
Make sure "Auto colour image" is enabled.
Play around with further adjustments e.g. colour balance, until you're satisfied then press OK.
Important: When you colourise a gif, you need to double check that the resulting skin tone is accurate to real life. I personally go to Google Images and search up photoshoots of the individual / character that I'm giffing for quick reference.
Add additional adjustment layers until you're happy with the colouring of the skin tone.
Tumblr media
Once you're happy with the additional adjustments, flatten / render your gif. And voila!
Tumblr media
Note: For Colour Manipulation, I use Colourise in my Stage I workflow and Colour Transfer in my Stage II workflow to do other types of colour manipulations (e.g. transforming the colour scheme of the component gifs)
Example 4: Artistic Effects | sample gifset
This is where I use Neural Filters for the bulk of my Stage II workflow: the most enjoyable stage in my editing process!
Normally I would be working with my big composition files with multiple component gifs inside it. To begin the fun, drag a component gif (in PSD file) to the main PSD composition file.
Resize this gif in the composition file until you're happy with the placement
Tumblr media
Duplicate this gif. Sharpen the bottom layer (highlighted in yellow), and then select the top layer (highlighted in green) & go to Filter > Neural Filters
Tumblr media
I like to use Style Transfer and Landscape Mixer to create artistic effects from Neural Filters. In this particular example, I've chosen Landscape Mixer
Select a preset or feed a custom image to the filter (here I chose a texture that I've on my computer)
Tumblr media
Play around with the different sliders e.g. time of the day / seasons
Important: uncheck "Harmonise Subject" & "Preserve Subject" - these two settings are known to cause performance issues when you render a multiframe smart object (e.g. for a gif)
Tumblr media
Once you're happy with the artistic effect, press OK
To ensure you preserve the actual subject you want to gif (bc Preserve Subject is unchecked), add a layer mask onto the top layer (with Neural Filters) and mask out the facial region. You might need to play around with the Layer Mask Position keyframes or Rotoscope your subject in the process.
After you're happy with the masking, flatten / render this composition file and voila!
Tumblr media
Example 5: Putting it all together | sample gifset
Let's recap on the Neural Filters gifmaking workflow and where Stage I and Stage II fit in my gifmaking process:
i. Preparing & enhancing the component gifs
Prepare all component gifs and convert them to smart layers
Stage I: Add base colourings & apply Photo Restoration / JPEG Artefacts Removal to enhance the gif's image quality
Flatten all of these component gifs and convert them back to Smart Video Layers (this process can take a lot of time)
Some of these enhanced gifs will be Rotoscoped so this is done before adding the gifs to the big PSD composition file
ii. Setting up the big PSD composition file
Make a separate PSD composition file (Ctrl / Cmmd + N) that's of Tumblr dimension (e.g. 540px in width)
Drag all of the component gifs used into this PSD composition file
Enable Video Timeline and trim the work area
In the composition file, resize / move the component gifs until you're happy with the placement & sharpen these gifs if you haven't already done so
Duplicate the layers that you want to use Neural Filters on
iii. Working with Neural Filters in the PSD composition file
Stage II: Neural Filters to create artistic effects / more colour manipulations!
Mask the smart layers with Neural Filters to both preserve the subject and avoid colouring issues from the filters
Flatten / render the PSD composition file: the more component gifs in your composition file, the longer the exporting will take. (I prefer to render the composition file into a .mov clip to prevent overriding a file that I've spent effort putting together.)
Note: In some of my layout gifsets (where I've heavily used Neural Filters in Stage II), the rendering time for the panel took more than 20 minutes. This is one of the rare instances where I was maxing out my computer's memory.
Useful things to take note of:
Important: If you're using Neural Filters for Colour Manipulation or Artistic Effects, you need to take a lot of care ensuring that the skin tone of nonwhite characters / individuals is accurately coloured
Use the Facial Enhancement slider from Photo Restoration in moderation, if you max out the slider value you risk oversharpening your gif later on in your gifmaking workflow
You will get higher quality results from Neural Filters by working with larger image dimensions: This gives Neural Filters more pixels to work with. You also get better quality results by feeding higher resolution reference images to the Neural Filters.
Makeup Transfer is more stable when the person / character has minimal motion in your gif
You might get unexpected results from Landscape Mixer if you feed a reference image that don't feature a distinctive landscape. This is not always a bad thing: for instance, I have used this texture as a reference image for Landscape Mixer, to create the shimmery effects as seen in this gifset
5. Testing your system
If this is the first time you're applying Neural Filters directly onto a gif, it will be helpful to test out your system yourself. This will help:
Gauge the expected rendering time that you'll need to wait for your gif to export, given specific Neural Filters that you've used
Identify potential performance issues when you render the gif: this is important and will determine whether you will need to fully playback your gif before flattening / rendering the file.
Understand how your system's resources are being utilised: Inputs from Windows PC users & Mac users alike are welcome!
About the Neural Filters test files:
Contains six distinct files, each using different Neural Filters
Two sizes of test files: one copy in full HD (1080p) and another copy downsized to 540px
One folder containing the flattened / rendered test files
How to use the Neural Filters test files:
What you need:
Photoshop 2022 or newer (recommended: 2023 or later)
Install the following Neural Filters: Landscape Mixer / Style Transfer / Colour Transfer / Colourise / Photo Restoration / Depth Blur
Recommended for some Apple Silicon-based MacBook Pro models: Enable High Power Mode
How to use the test files:
For optimal performance, close all background apps
Open a test file
Flatten the test file into frames (load this action pack & play the “flatten” action)
Take note of the time it takes until you’re directed to the frame animation interface 
Compare the rendered frames to the expected results in this folder: check that all of the frames look the same. If they don't, you will need to fully playback the test file in full before flattening the file.†
Re-run the test file without the Neural Filters and take note of how long it takes before you're directed to the frame animation interface
Recommended: Take note of how your system is utilised during the rendering process (more info here for MacOS users)
†This is a performance issue known as flickering that I will discuss in the next section. If you come across this, you'll have to playback a gif where you've used Neural Filters (on the video timeline) in full, prior to flattening / rendering it.
Factors that could affect the rendering performance / time (more info):
The number of frames, dimension, and colour bit depth of your gif
If you use Neural Filters with facial recognition features, the rendering time will be affected by the number of characters / individuals in your gif
Most resource intensive filters (powered by largest machine learning models): Landscape Mixer / Photo Restoration (with Facial Enhancement) / and JPEG Artefacts Removal
Least resource intensive filters (smallest machine learning models): Colour Transfer / Colourise
The number of Neural Filters that you apply at once / The number of component gifs with Neural Filters in your PSD file
Your system: system memory, the GPU, and the architecture of the system's CPU+++
+++ Rendering a gif with Neural Filters demands a lot of system memory & GPU horsepower. Rendering will be faster & more reliable on newer computers, as these systems have CPU & GPU with more modern instruction sets that are geared towards machine learning-based tasks.
Additionally, the unified memory architecture of Apple Silicon M-series chips are found to be quite efficient at processing Neural Filters.
6. Performance issues & workarounds
Common Performance issues:
I will discuss several common issues related to rendering or exporting a multi-frame smart object (e.g. your composite gif) that uses Neural Filters below. This is commonly caused by insufficient system memory and/or the GPU.
Flickering frames: in the flattened / rendered file, Neural Filters aren't applied to some of the frames+-+
Scrambled frames: the frames in the flattened / rendered file isn't in order
Neural Filters exceeded the timeout limit error: this is normally a software related issue
Long export / rendering time: long rendering time is expected in heavy workflows
Laggy Photoshop / system interface: having to wait quite a long time to preview the next frame on the timeline
Issues with Landscape Mixer: Using the filter gives ill-defined defined results (Common in older systems)--
Workarounds:
Workarounds that could reduce unreliable rendering performance & long rendering time:
Close other apps running in the background
Work with smaller colour bit depth (i.e. 8-bit rather than 16-bit)
Downsize your gif before converting to the video timeline-+-
Try to keep the number of frames as low as possible
Avoid stacking multiple Neural Filters at once. Try applying & rendering the filters that you want one by one
Specific workarounds for specific issues:
How to resolve flickering frames: If you come across flickering, you will need to playback your gif on the video timeline in full to find the frames where the filter isn't applied. You will need to select all of the frames to allow Photoshop to reprocess these, before you render your gif.+-+
What to do if you come across Neural Filters timeout error? This is caused by several incompatible Neural Filters e.g. Harmonisation (both the filter itself and as a setting in Landscape Mixer), Scratch Reduction in Photo Restoration, and trying to stack multiple Neural Filters with facial recognition features.
If the timeout error is caused by stacking multiple filters, a feasible workaround is to apply the Neural Filters that you want to use one by one over multiple rendering sessions, rather all of them in one go.
+-+This is a very common issue for Apple Silicon-based Macs. Flickering happens when a gif with Neural Filters is rendered without being previously played back in the timeline.
This issue is likely related to the memory bandwidth & the GPU cores of the chips, because not all Apple Silicon-based Macs exhibit this behaviour (i.e. devices equipped with Max / Ultra M-series chips are mostly unaffected).
-- As mentioned in the supplementary page, Landscape Mixer requires a lot of GPU horsepower to be fully rendered. For older systems (pre-2017 builds), there are no workarounds other than to avoid using this filter.
-+- For smaller dimensions, the size of the machine learning models powering the filters play an outsized role in the rendering time (i.e. marginal reduction in rendering time when downsizing 1080p file to Tumblr dimensions). If you use filters powered by larger models e.g. Landscape Mixer and Photo Restoration, you will need to be very patient when exporting your gif.
7. More useful resources on using Neural Filters
Creating animations with Neural Filters effects | Max Novak
Using Neural Filters to colour correct by @edteachs
I hope this is helpful! If you have any questions or need any help related to the tutorial, feel free to send me an ask 💖
497 notes · View notes
alltoowsll · 3 months ago
Text
Tumblr media Tumblr media Tumblr media Tumblr media
gif sharpening action by alltoowsll
like or reblog if you download
do not modify or claim as your own
created with photshop cc
up to 116 frames (wish i did more but i was exhausted lol i also made it mainly for 540 px gifs)
download
how to use:
create your gif as usual, open your timeline and click here
Tumblr media
then click on your frame 1, play the action and voilà! you're done. color it and you should be done! you don't need to reopen it to adjust the timing :) this action looks wayyy better in 540 px gifs. example:
Tumblr media Tumblr media
91 notes · View notes
peytonsawyers · 2 years ago
Text
Tumblr media
this pack contains 20 templates both transparent and with background, to use on headers, gifs etc.
like or reblog if you download
do not repost or claim as your own
preview under the cut
D O W N L O A D  
Tumblr media Tumblr media
658 notes · View notes
bcnds · 1 year ago
Text
Tumblr media Tumblr media Tumblr media Tumblr media
RAVEN TRACY VIA INSTAGRAM
6K notes · View notes
izicodes · 1 year ago
Text
How to learn: HTML | Resources ✨
Tumblr media Tumblr media Tumblr media
Sunday 10th September 2023
I have come back with a new resource I've made! This time about how to learn HTML! I'm starting from the basics right now and working my way up of 'how to learn' info resources!😅
I've made a HTML resource in the past (one | two) but this one is a bit more detailed and has tips of how I studied HTML. I use HTML on the daily so though I would share my knowledge with more people. Again, just like my previous resource "Starting your coding journey", this is more targeted towards absolute beginners or for people who want to learn how to customise their Tumblr blog/Neocite! 👩🏾‍💻
Anyhoo, check it out and let me know what you think: LINK
2K notes · View notes
alleesaur · 3 months ago
Note
how do you add such texture and colours to your art? like is it overlays or something?
Yep! Just a texture/textured brush on an overlay of some sort (i experiment and see which one looks nice)
I use the currawong and hartz brush mostly, which are default in procreate
Using the sharpen tool as well can help get a crispy crunchy look
199 notes · View notes
inkysresources · 6 days ago
Text
Tumblr media Tumblr media
Lace divider from ibispaint! These are recolorable and seamless! To recolor make sure to make the second image is set to clipping! (Copy and paste and move over to the left or right to make it longer) As usual credit appreciated but only needed if re-uploading to a caard/reentry!
Here's one where it's just overlaid!
Tumblr media
37 notes · View notes