#How to draft a sewing pattern
Explore tagged Tumblr posts
Visit Tumblr Blog
Explore Tumblr blogs with no restrictions, modern design and the best experience.
Last Seen Tumblr Blogs


Fun Fact
The KCSC sent more than 20K requests to delete posts related to prostitution and porn to Tumblr from January to June 2017.
Text
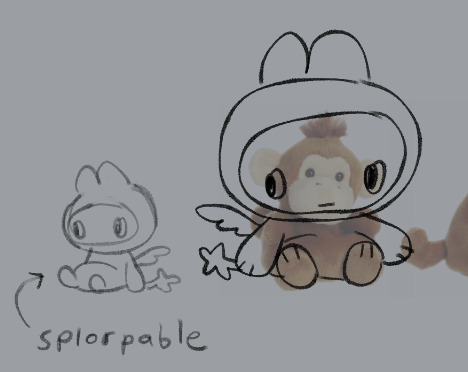
Babydoll Shoulder Straps: How to Draft and Sew
In this post, you’ll discover how to self draft and sew babydoll shoulder straps. Love what you see ? Support me by snagging some cool items from my shop! Every purchase helps me bring you more awesome content. Thank you! Shop Now Are you looking to add a delicate, custom touch to your sewing projects? Babydoll shoulder straps are a perfect addition to any garment, offering both style and…
#Babydoll shoulder straps#Custom garment straps#DIY Sewing Projects#easy sewing patterns#Fashion design patterns#Home Sewing Projects#How to draft a sewing pattern#How to sew shoulder straps#pattern drafting tutorial#Sewing Techniques for Beginners#sewing tips and tricks#Sewing Tutorial for Beginners#step-by-step sewing guide
4 notes
·
View notes
Text
Sometimes you gotta look back to see how much you've improved:


On the left is my first lacy on a whim petticoat, made in 2021. On the right the one I made this year.
Three years can make such a difference in creating the level of lacy floofiness I want in my life!
#i learned how to project and draft historical patterns#i learned to love coarser lace#i got to go to museums and fairs where old ladies give away yellowed lace with anyone with excitement in their eyes#a talia original#talia's adventures in dressmaking#excerpts from my life#sewing progress#lace petticoats#historical costuming#image id in alt text#idk i was cleaning up my phone#and i didn't really realise how closer I've gotten to my dreams#with 3 years of just sewing on a whim#let's call this one a december introspective
408 notes
·
View notes
Text
im not big enough to use a plushy manu for him but i want yall to know if digit got plushified he'd be so good. he'd be palm pals esque with loose tummy of bean filling. ouggh
#i feel like a lotta plushies thru like. makeship. and like fangamer ones and stuff. are so rigid looking. he needs empty space to live#PLUS no ofense but a lot of the time i feel like ppl without an understanding of fabrics will give plushie makers sm flak#and make like engagement bait videos about how bad the manu did on the first pass even tho they gave them nonsense reference drawings#id be so good. i done sewing i done pattern drafting i knows how it gows. thered be a dignified back and forth and id be so clear...#id need an inconcievable amt of followers to use a big manu like them tho idk how so many ppl are doing it#dont mind my complaining my friends have all logged off#my bemoanings
66 notes
·
View notes
Text
indie clothing companies tell me what cup size your patterns are drafted for challenge
#frustrating to know how to make things fit but not be given enough information to actually Do it#i just want to make some fun hobbit vests i don't want to have to make three mockups to reverse-engineer what pattern size fits my shoulder#(for the record all Big Four sewing patterns are drafted with a B sewing cup#which explains why they do not fit most people)
37 notes
·
View notes
Text
I haven’t touched a sewing machine in years but the part of my brain that likes crafting is trying to convince me I could make a custom corset in two weeks
#like I ain’t hand sewing that shit#which means a machine#and I could probably borrow my parents’ easily enough#but I don’t remember how to use it#and I certainly don’t know how to draft a corset pattern
5 notes
·
View notes
Text
it is very on-brand for it to be july and for me to be stressing about my halloween costume
#i'll give you one (1) guess as to what it's going to be.#hint: look at my layout.#anyway i'm stressing because i can't find a decent pattern for the coat which means i'll have to try and draft it myself#i was already planning on sewing everything else so i want to be consistent#but there's some little details that i don't know if i'd know how to do unless i had the original in front of me to like.#look at the stitching and stuff. which i obviously don't#so it will be. a journey. a learning experience!#luckily i have a pattern for the pants and the shirt should be easy to draft it's like 4 pieces and i've sewn tshirts before no problem#but this coat.#it doesn't have to be ~screen-accurate~ necessarily but i want it to look nice!#what do you have to say doll?
2 notes
·
View notes
Text

gotta wind a new bobbin
#i learned that on pleather you have to clip the curves BEFORE you sew. much more pleasant experience#im sooo excited for how this is turning out#especially bc i drafted the pattern myself?#ive modified patterns before and made simple garments (skirts#& tank tops and whatnot)#without a pattern#but this is my first nonstretch knitted garment!!#estelcosplays#indara past and present
8 notes
·
View notes
Text
I do not consider myself experienced or educated enough to be qualified to give sewing advice in most circumstances. But you all have GOT to be sewing your pockets into the waistbands of your garments
Why do I always see pocket patterns that are that dumb little mirten shape. You know the one. Hang on.

(Not calling out anyone in particular, I don’t know the source of this, it was just the first image result).
You’re out here only anchoring your pockets to the side seam opening? On pants and skirts and everything??? What are you going to put in that pocket, paperclips? You can’t put anything substantial in this pocket. It will pull weirdly and mess up the whole line of the garment.
What you want here is a straight line up top, going the whole width of the pocket, and then coming down to meet that lower curve. (I would also lengthen the pocket bag, as a pockets enthusiast, but that’s not the point right now). Line that straight top line up with the top of the fabric when you’re pinning the pocket in place. Sew in the pocket as usual. Then, when you go to attach your waistband, treat the top opening of the pocket as just part of the same fabric as the front of your garment, and sew it in.
Put whatever you want in that pocket. That shit is not going anywhere. It’s not dragging the side of your skirt in weird directions or swinging around when you walk, because now it’s pulling all of its support from the waistband, which is much more stable. Also, the amount of bunching off to the side or turning inside out the pocket is capable of is now super minimized, because it has two sides that are sewn down flat instead of just one.
#sewing#garment construction#pockets#sewing pockets#pattern drafting#I’m so certain this is how Maya Kern’s skirts are done btw. I don’t own any (love love the vibes they’re just not quite my style) but those#pockets are so seamless (pun intended but also I couldn’t think of a clearer word)#may update with progress/process pics of the pockets for the skirt I’m doing now we’ll see how the night goes
5 notes
·
View notes
Text
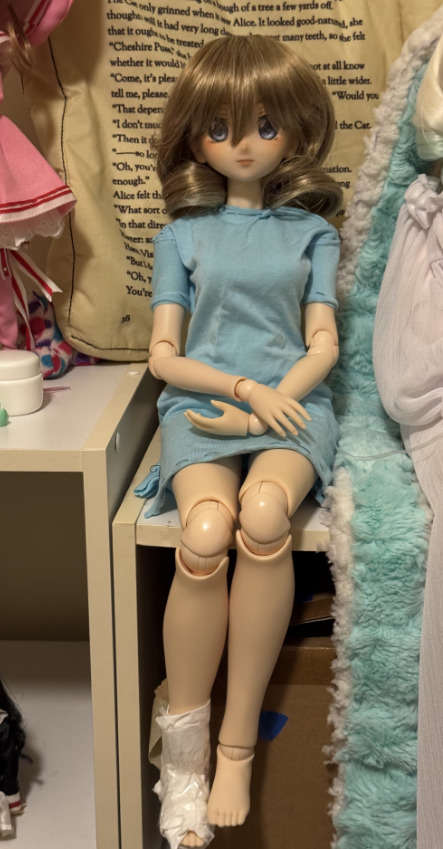
girl's ankle joint is broken and i can't really afford a replacement rn sooooooooo instead i wasted 2 hours on this instead of my homework. hashtag hospital gown fit
#not counting the time i spent on it last night lol#her foot fell off again when i went to put this on her and i was like yeah ok i get it#also this thing fits so badly and one of the seams is already coming apart lol#i don't know how to sew i ESPECIALLY don't know how to draft patterns
2 notes
·
View notes
Text
Crotch Depth Drafting: Beginner's Guide to Perfect Fit
In this post, you will learn how to take measurements and draft perfect crotch depth in pants, jumpsuits and shorts . Drafting crotch depth is a crucial step in creating well-fitting pants, jumpsuits, overalls, rompers, or shorts. Understanding and accurately measuring crotch depth ensures comfort and proper garment fit, especially around the hips and thighs. This comprehensive guide will walk…
#Adjusting Crotch Depth#Beginner Sewing Tips#Clothing Pattern Drafting#Crotch Depth#Crotch Depth Formula#Crotch Depth Measurement#Drafting Crotch Depth#How to Calculate Crotch Depth#How to Measure Crotch Depth#Increase Crotch Depth in Pants#Measuring Crotch Depth for Pants#Pants Fit Measurement#Sewing Pattern Adjustment
16 notes
·
View notes
Text
Every year I know what I want to be for Halloween by like, August
And every year I wait til October to actually commit to making it
#panic#brought to you by#I have to learn how to smock fabric#in 2 weeks#I swear the ghost of a expert seamstress possesses my body only in the month of October#cause the rest of the year I don’t know how to see#and I have to learn a bunch of new skills in not a lot of time#last year was pattern drafting#the year before was straight up just learning how to use a sewing machine#but I am dedicated to accuracy and committing to the bit 💅
2 notes
·
View notes
Text
Pattern links! I have not added any since the last time I shared this, but as always, if you are seeing this and it's been a while since I added this update, check back to the original post because I will update it with links whenever I share new patterns
Links to my free sewing patterns! - big manta ray - smaller manta ray - monster friend (those monsters with horns I’ve been making lately, but without horns) - pie slice - Fred, the Fish of Minimal Effort - tiny cat (aka Jiji) - mini mothman - whale shark/donut whale shark - juggling frog/toad (aka my smallest, simplest frog pattern of the three I’ve made) - large frog - tiny hedgehog - minecraft bee - minecraft zombie - blorbo - Strawberry Hearts quilt pattern - starfish - little octopus - canvas tote - basic bat and ghost - mini mushroom friends Tutorials: - flannel baby blanket tutorial - onigiri bag tutorial - tomato pattern design walkthrough (how I design the pattern, not a link to the pattern itself)
#maybe that's what I'll do with my weekend#get another pattern shared#I think I have the whale one traced and scanned already it's just waiting on directions#I could probably make a whale this weekend and use it for wip pictures#because if I remember correctly it's a little weird to assemble#one of those patterns that I made and then was like. how did I do that. that's a more complicated technique than I knew that I knew#not that complicated to sew just a little more complex to draft than I usually go for#because in my experience creating patterns for plushies: you can either make the pattern drafting complicated in a way#that makes the sewing easier or you can make the pattern drafting easy in a way that makes sewing more complicated#and I usually opt for the latter. except in things like the octopi
12K notes
·
View notes
Text

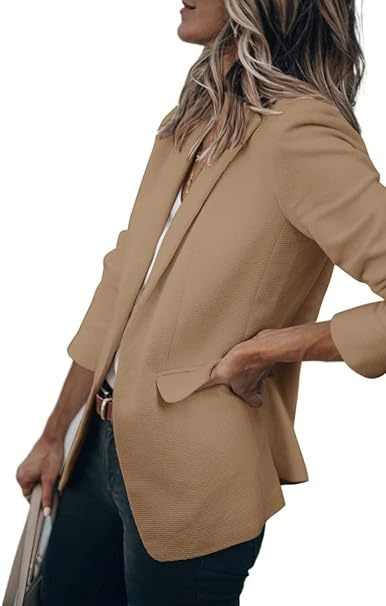

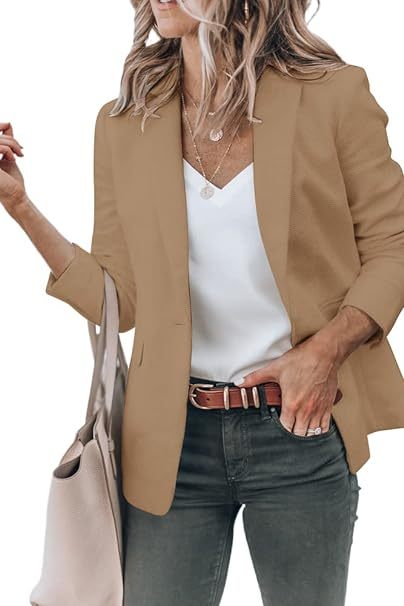

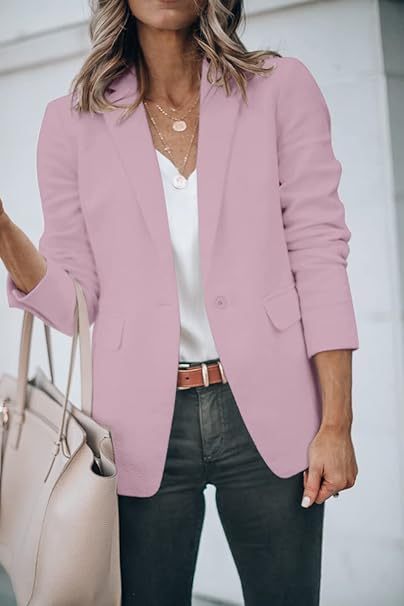
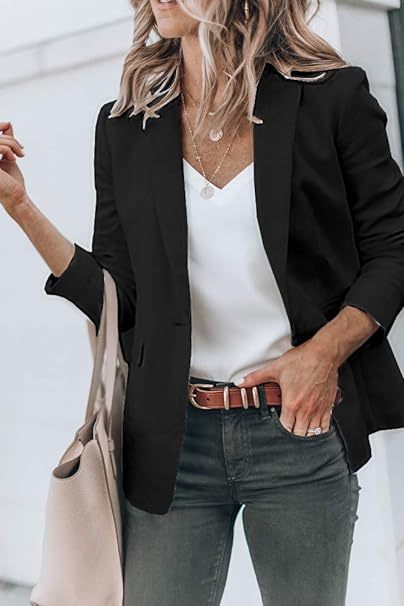
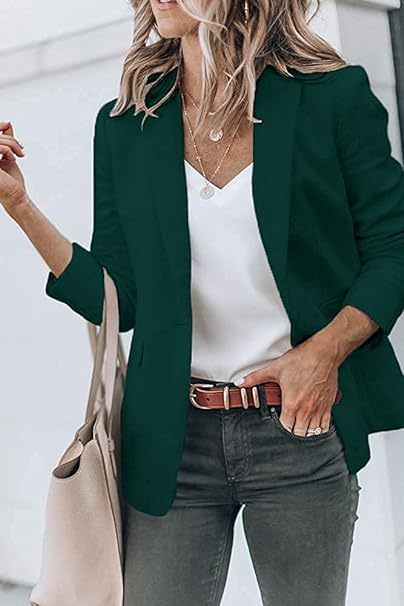

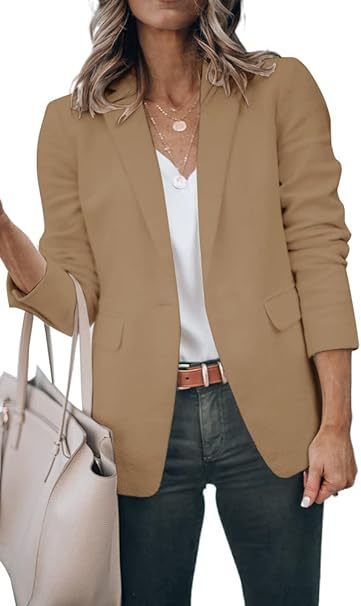


#blazer#blazer jacket#mens blazers jackets#suit jacket vs blazer#blazer vs suit jacket#suit jacket#sport coat vs blazer vs suit jacket#jacket#sports jacket#how to wear a blazer#jeans and blazer#suit jacket vs sport coat vs blazer#blazer jackets#how to draft a blazer jacket pattern#blazer for men#mens jackets#sport jacket#how to sew a blazer#navy blazer#blazer coat#how to make a blazer#suit jacket blazer sport coat what's the difference
0 notes
Text
tbh i've always found sewing patterns uncomfy. there's literally no way they can fit most bodies regardless of how you size them. they rely on people not knowing or not being willing to pattern draft themselves, which is a relatively simple thing to get started with even if it takes a while to perfect (i've been pattern drafting since 2023 and i've made a lot of things that fit me really well - it takes time but it's worth it!). buying patterns requires you to have a printer or be able to print them out, money to buy the pattern, and at least one mockup to adjust the fit, whereas pattern drafting just requires paper, a pencil, a ruler and a measuring tape. you can easily make a bodice block/sloper that you can easily adjust for every new project, but buying new patterns means going through the whole process again and again.
if you want to get started pattern drafting, i suggest watching TheClosetHistorian (all of her projects involve pattern drafting), Minji Lee's bunnysuit series, Mariah Pattie's Secret Formula for Drafting Stays, this tutorial on how to draft a bodice or this one or this one like there is a wealth of information on how to pattern draft please please you can do this you can draft patterns yourself i believe in you
244 notes
·
View notes
Text
Need to rant for a minute because even though I have very much been enjoying the fruits of my efforts learning how to sew vintage style clothes, I just swapped out old fatphobia (nice plus size vintage clothes never making it to stores) for new fatphobia (trying to find patterns). Cause it doesn't end at what clothes you're able to buy already made.
I finally bought a Friday Pattern Company pattern the other day, and man it made the bare minimum feel like I was being spoiled. The sizes go up to 7X (that's XL, XXL, 1X, 2X, etc, so there's 9 sizes above L) they had a thin and a fat model on the cover! Usually I'm barely lucky enough to get an XL, and I'm just expected to guess how it's going to look on my body. The majority of their patterns have two differently sized models on the covers, and all of them have that full range of patterns inside.
It is so hard to find good plus size patterns, even if they're available, many companies just scale up their mediums and I can't guarantee they're actually sized correctly for a different shape. As good as Friday is, them and other modern indie pattern companies aren't easy to find.
Okay well what if I went another step deeper, what if I forgo patterns all together and decide to be completely independent and draft things myself?
Then I'll need a plus size dress form. I got lucky and found one at an antique mall for 50$ but these are incredibly rare and more expensive than smaller ones. I'll need to learn how to draft patterns, something that was taught to me on a XS form by my college and nearly every tutorial out there. Drafting close fitting clothes for fat bodies is a completely different skillset, because all that extra fat is much squishier and shifts more. Measuring yourself correctly and getting the shape you're looking for is far more important. Before I even got there I'd need to sketch out what I wanted to make, right? Well the patterning book my family got me only shows you how to draw tall, skinny people. A beginner would have to look up their own drawing references and tutorials because what what supposed to be a super accessible beginner's guide to fashion has decided their body isn't normal enough for the baseline tutorial.
We're expected to be the ones who put in the extra effort. Digging to find the pattern companies that fit our shape and actually prove they can, paying extra in shipping or driving farther to pick them up. Having to search specifically for plus size tutorials for drafting and sketching. It's always treated like it's not part of the beginner's experience to be working with a fat body, that's just going to make people more frustrated and lost and less likely to pursue something they're excited about! Especially if it's in response to already being frustrated about the lack of clothing options.
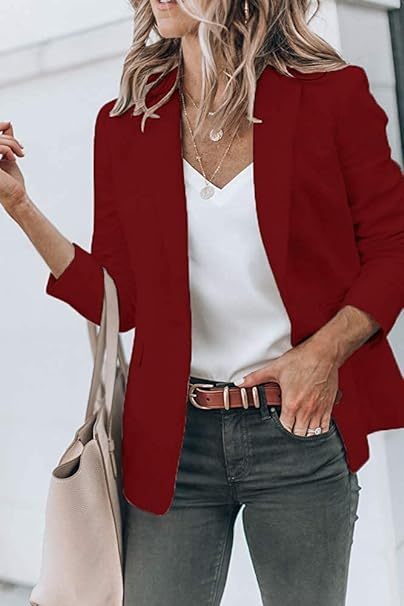
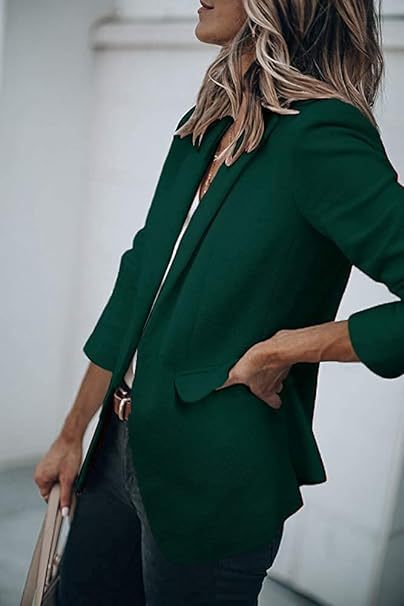
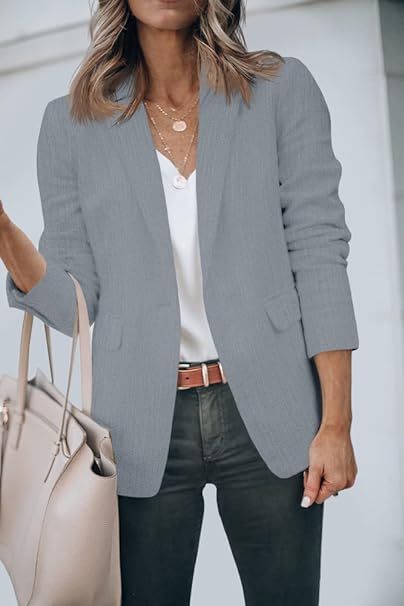
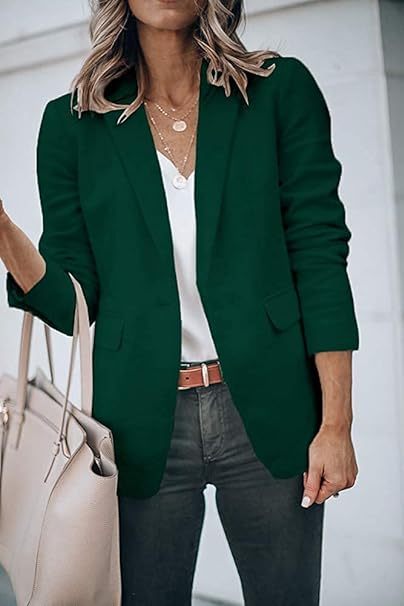
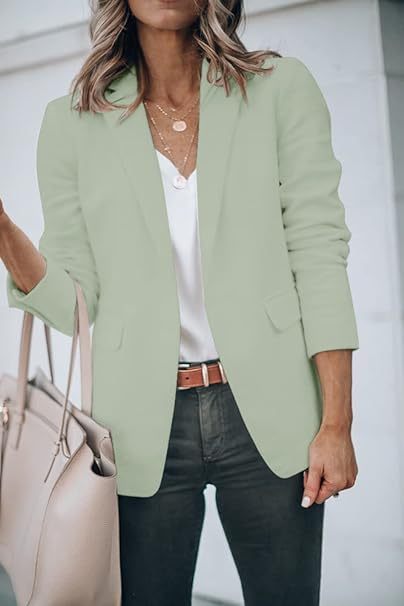
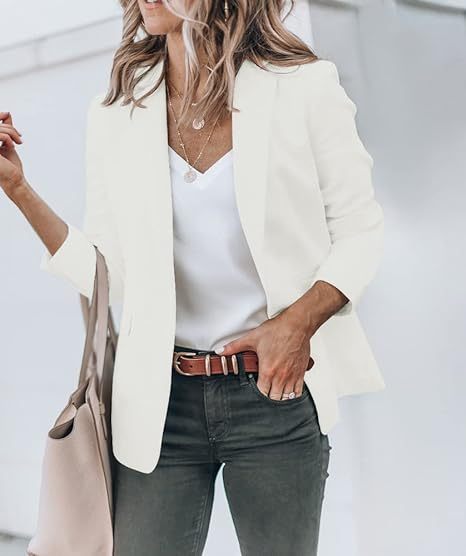
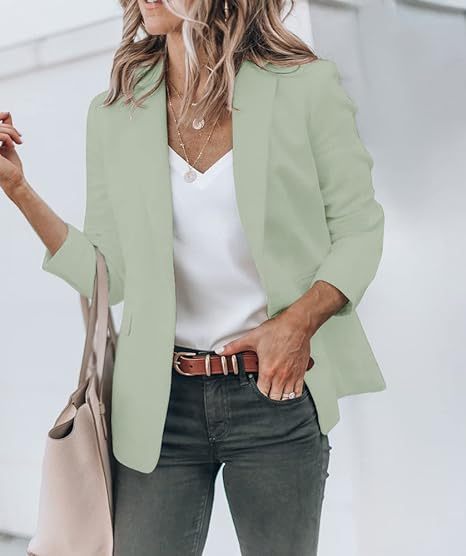
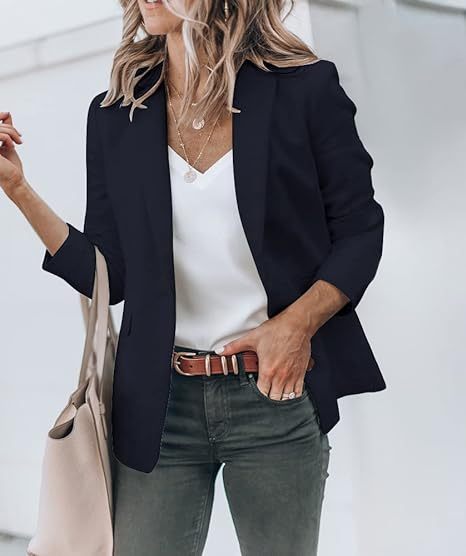
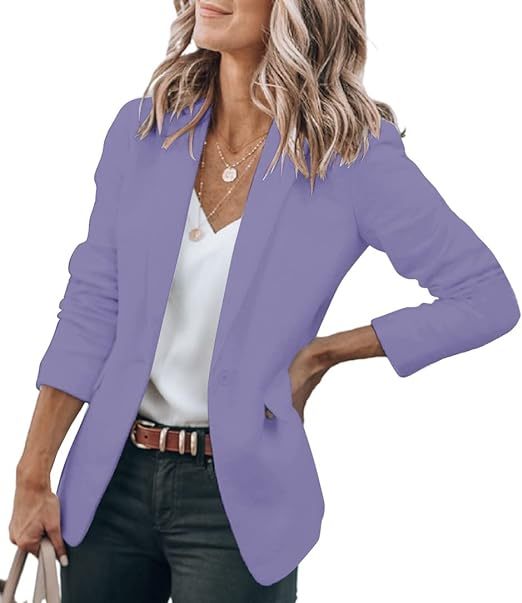
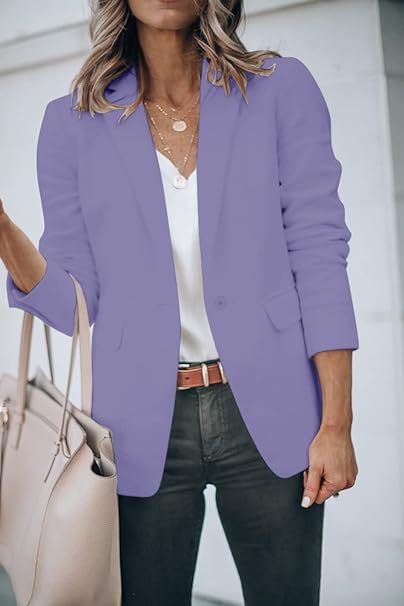
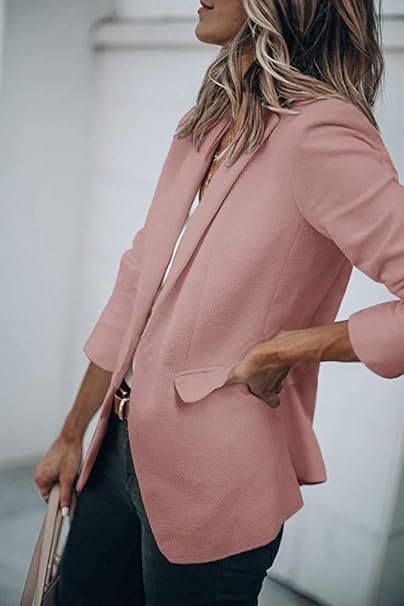
We need a little positivity to this post so to end on a high note, here's me modeling the blazer I just finished with a shirt I made a couple years ago!
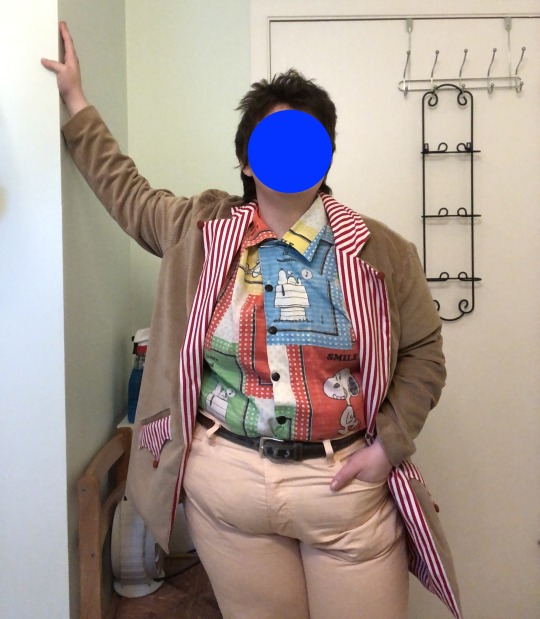
Being able to finally wear clothes I really feel like me in has been an amazing confidence boost. It's not fair that there's so many roadblocks in the way for someone who looks like me who just wants to wear things they enjoy.
#fatshion#cw fatphobia#fatphobia#body posititivity#fat positvity#how the fuck is it hard to find clothes to fit MY body I see people with my body type all the damn time#stay strong out there#fashion#clowncore
2K notes
·
View notes
Text
also here's something. i don't knock anyone for leaning in this direction but isabeau specifically says he wants to be a fashion designer, which is a different subset of skills and traits than a sewist or seamstress or tailor.
and Yes this is a period of time where i don't think you can run and buy your own clothes at a tj maxx or whatever. mirabelle says euphrasie had to teach her how to sew her own clothes when she first came to the House, this is an era where 90% of the clothes you wear are made by you or a close family member/friend. or are like. things you got from a neighbor because they grew out of it (wool and linen and cotton were even MORE expensive in eras where mass fabric production was not available yet)
and Yes you need to know how to sew and construct outfits if you're a fashion designer. but my part time job in college often had me cut muslin and fabric for the fashion design students (INSANE conversations i had talking shop with those kids) and in general, if you're a fashion designer, your job is to make like. One of something. the proof of concept. or if you're famous enough you sit in your little office and make a lot of drawings and then pay junior designers to make the proof of concept for you
in Fantasy Past Times, isabeau is not doing this though. but do you know what he IS doing, most likely?
he's making home pattern drafting books. so that people can make his designs in their own home. these are books that are full of tables where you take your own measurements and use them to calculate what pattern you need to draw to make the jacket as per the instructions that are also in the book
which is all math. by the way. pattern drafting is all math. you have to be a huge nerd to do pattern drafting.
406 notes
·
View notes