#How To Cook Basmati Rice in The Rice Cooker
Explore tagged Tumblr posts
Visit Tumblr Blog
Explore Tumblr blogs with no restrictions, modern design and the best experience.
Last Seen Tumblr Blogs


Fun Fact
The “We are the 99%” Tumblr blog became the slogan for the Occupy Wall Street movement.
Text
How To Cook Basmati Rice in The Rice Cooker?
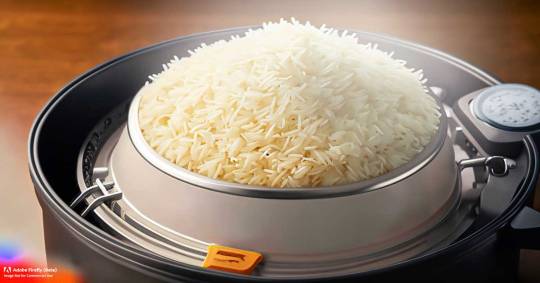
How to Cook Basmati Rice in the Rice Cooker: A Step-by-Step Guide
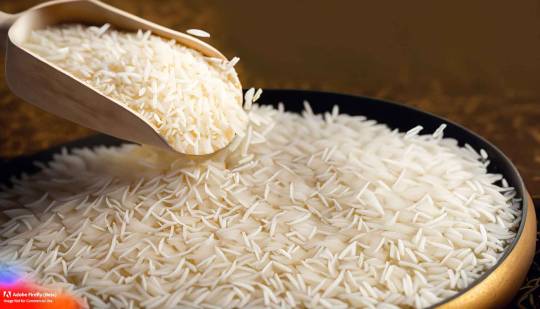
Basmati rice is a fragrant, long-grain rice that is commonly used in various cuisines, especially in Indian and Middle Eastern dishes. It is known for its delicate flavor, fluffy texture, and distinct aroma. Cooking basmati rice in a rice cooker is a convenient and foolproof method that ensures perfectly cooked rice every time. In this article, we will guide you through the step-by-step process of cooking basmati rice in a rice cooker, allowing you to enjoy this versatile grain with minimal effort.
Introduction
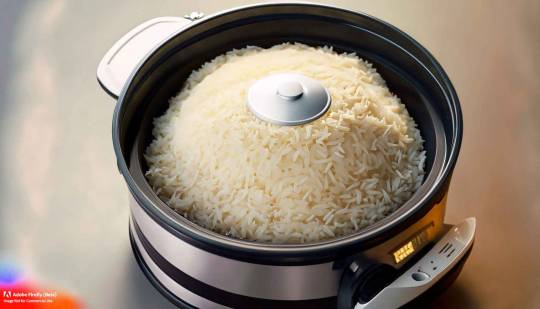
Cooking basmati rice in a rice cooker simplifies the process and ensures consistent results. It eliminates the need for constant monitoring and allows you to focus on other aspects of your meal preparation. With the right techniques and a quality rice cooker, you can achieve perfectly cooked, fluffy basmati rice with ease.
Choosing the Right Basmati Rice
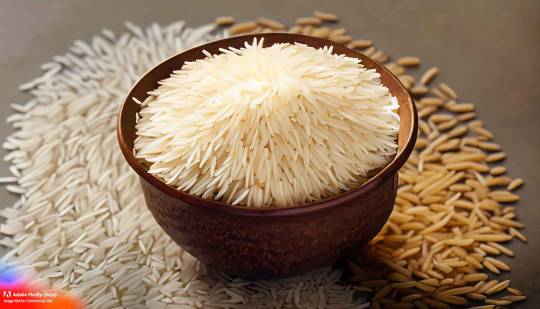
Selecting high-quality basmati rice is crucial for achieving delicious results. Look for aged basmati rice, as it tends to have better flavor and texture. Read the packaging to ensure that you are purchasing genuine basmati rice.
Rice-to-Water Ratio
To cook basmati rice in a rice cooker, it’s essential to maintain the correct rice-to-water ratio. A general guideline is to use 1.5 cups of water for every cup of rice. However, you may need to adjust the ratio based on your rice cooker’s instructions and personal preference.
Preparing the Rice
Before cooking the rice, it’s important to prepare it properly. Follow these steps to ensure the best results:
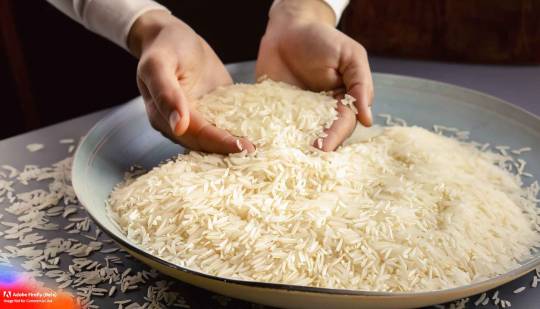
Washing the Rice
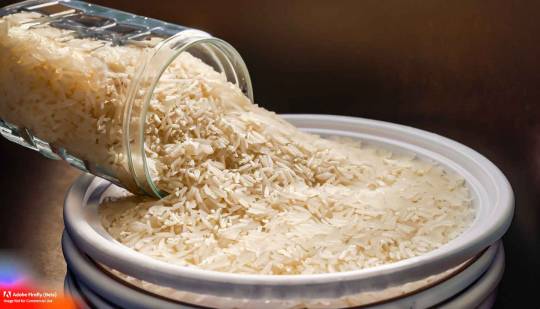
Thoroughly rinse the basmati rice under cold water until the water runs clear. This step removes excess starch and helps prevent the rice from becoming sticky.
Soaking the Rice
Soaking the rice for 30 minutes to 1 hour before cooking can enhance its texture and reduce cooking time. This step is optional but recommended for fluffier rice.
Adding Water
After washing and soaking the rice, drain any excess water. Measure the desired amount of rice and add it to the rice cooker’s inner pot. Add the corresponding amount of water based on the rice-to-water ratio you determined.
Cooking Process
Place the inner pot into the rice cooker and secure the lid. Turn on the rice cooker and select the appropriate setting for basmati rice. Allow the rice cooker to work its magic and let it complete the cooking process.
Letting the Rice Rest
Once the rice cooker indicates that the rice is done, resist the temptation to open the lid immediately. Let the rice rest for about 10 minutes. This allows the steam to distribute evenly and results in a fluffier texture.
Fluffing the Rice
After the resting period, open the rice cooker’s lid and use a fork or a rice paddle to gently fluff the rice. This separates the grains and prevents clumping. Take care not to press down too hard, as this may make the rice mushy.
Serving Suggestions
Basmati rice pairs well with a wide range of dishes. It can be served as a side dish to curries, stir-fries, or grilled meats. Additionally, you can incorporate the rice into salads or use it as a base for pilafs and biryanis. The fragrant aroma and fluffy texture of basmati rice add a delightful touch to any meal.
Storing Leftover Rice
If you have leftovers, allow the rice to cool completely before transferring it to an airtight container. Refrigerate the rice promptly to prevent bacterial growth. When reheating, sprinkle a little water over the rice and gently fluff it with a fork before microwaving or using a stovetop method.
Troubleshooting Tips
If the rice turns out too dry: Increase the water-to-rice ratio slightly in your next batch.
If the rice turns out too sticky: Rinse the rice more thoroughly before cooking and reduce the soaking time.
If the rice is undercooked: Add a small amount of hot water to the rice cooker and cook for an additional few minutes.
Conclusion
Cooking basmati rice in a rice cooker is a convenient and foolproof method that yields perfectly cooked, fluffy rice. By following the steps outlined in this article, you can enjoy the delicate flavor and aroma of basmati rice without any hassle. Experiment with various serving suggestions and embrace the versatility of this wonderful grain.
Frequently Asked Questions
1. How do I choose the best basmati rice?
When selecting basmati rice, look for aged rice with a pleasant aroma. Check for reputable brands and read customer reviews for guidance.
2. Can I use a different type of rice in a rice cooker?
Yes, rice cookers can be used for different types of rice, but the water-to-rice ratio and cooking times may vary.
3. Can I add vegetables or meat to the rice cooker?
Yes, you can add vegetables or meat to the rice cooker, but ensure that they are cut into small, uniform pieces and that they cook well within the rice cooker’s cooking time.
4. How long can I keep cooked basmati rice at room temperature?
To prevent the growth of bacteria, it’s recommended to consume cooked basmati rice within 2 hours. After that, refrigerate or freeze it.
5. How can I make the rice cooker cleaning process easier?
To make cleaning the rice cooker easier, soak the inner pot in warm, soapy water for a few minutes before cleaning. Use a soft sponge or cloth to remove any residue, and avoid using abrasive materials that could scratch the non-stick surface.
6. Can I add salt to the rice cooker when cooking basmati rice?
Yes, you can add salt to enhance the flavor of the rice. It is recommended to add salt to the water before starting the cooking process.
7. How do I prevent the rice from sticking to the bottom of the rice cooker?
To prevent the rice from sticking to the bottom, make sure to rinse the rice thoroughly before cooking. Additionally, avoid stirring the rice during the cooking process, as this can cause it to become sticky.
8. Can I use a rice cooker to make flavored or seasoned basmati rice?
Yes, you can add various seasonings, such as spices, herbs, or broth, to the rice cooker along with the rice and water. This allows you to infuse the rice with delicious flavors as it cooks.
8. What should I do if the rice cooker automatically switches to “keep warm” mode before the rice is fully cooked?
If the rice cooker switches to “keep warm” mode prematurely, it may indicate that the rice needs more time to cook. Simply switch the rice cooker back to the cooking mode and allow it to continue cooking until the rice is fully done.
10. Can I cook other grains, such as quinoa or couscous, in a rice cooker designed for basmati rice?
Yes, many rice cookers have settings that can accommodate other grains as well. However, it’s important to follow the specific cooking instructions for each grain and adjust the water-to-grain ratio accordingly.
You may like to know more about:
How to Make Delicious Spanish Rice in a Rice Cooker?
Dash Mini Rice Cooker Recipes
How to Make Rice in Aroma Rice Cooker?
We have ideas about different types of Kitchens related to our rights. You can check our social media for more posts in the future.
Facebook
Connect Us Visit My Website: Kitchenkosmos - Equipment
#Basmati Rice#Basmati Rice Recipe#Best Basmati Rice#Cooking Basmati Rice#How To Cook Basmati Rice#How To Cook Basmati Rice in The Rice Cooker#Indian Basmati Rice Recipe#Perfect Basmati Rice#What is Basmati Rice
1 note
·
View note
Text
rice cooker attempt 2. we are using Different Rice, both for the sake of variety in my diet and also because i wasn't sure my elderly basmati would have been any good no matter how well i cooked it. this one is long grain & wild rice. so far i have learned that one should not have the rice cooker below the cupboards when in operation as it gives off a lot of steam, lesson duly learned.
#i am also not trying to steam frozen vegetables at the same time this time#i think that was too ambitious for a first attempt#we'll do sweet potato chunks next time if this works out okay#pearsanta
15 notes
·
View notes
Text
i went to bed after having a wee bit of a psychotic episode (wanted to complain about garlic, was not feeling solutions-oriented about it, least of all medical solutions-oriented, so perhaps i yelled at my friends a little more than was rational) and in the fading delirium, i was gifted… another dream recipe
this time the prophecy was for Frozen Burrito Meal Prep.
given the successes of all my former prophetic dream recipes, the only logical solution was to get ingredients immediately.
While I am still piecing together the clues from what I remember of my dream, making my own refried beans from scratch will be the key component (to be made with bacon drippings, shallots, and black beans… canned this time, but i may try going all the way from scratch next time). Planned seasonings for the ground beef include paprika and chili powder, a little cayenne maybe. Green bell peppers, onions, and a little tomato for the veg (might add mushrooms another time). Cheddar, of course, is a must… but I also saw “quesadilla cheese” and was too curious to pass it up (i hope it melts real good). A little basmati rice (because it’s my favourite). Some plain flour tortillas to wrap it all up. Wrap in foil, then put in a freezer bag, and chuck em in the toaster oven at 350° F for an hour while the rice cooker makes more to serve it with. This is my design.
I will report back with the results once I know how well this actually works.
Mostly, I’ve planned it this way because it was foretold in my dream, but it was probably foretold that way because I REALLY like the Amy’s vegetarian frozen burritos, and they’re fantastic for a quick and easy meal if you toss ‘em in the toaster oven while your rice cooks, but they all have garlic in them so unfortunately i absolutely have to stop eating them. I highly recommend those if you have no such issues, however. They even have gluten-free and dairy-free ones.
#rixa's rants#previous food prophecies included ramen which received rave reviews from the chinese exchange students in high school#my first vision of shakshouka in the WEIRDEST road trip dream ever#and… honestly i know theres at least two other recipes on this list. my cabbage leek potato soup is one too i think#either way i would be a fool not to try my hand at it and well. it certainly was a rational solution to a problem.#cant really argue with that either. so im looking forward to seeing how well this works!
6 notes
·
View notes
Text
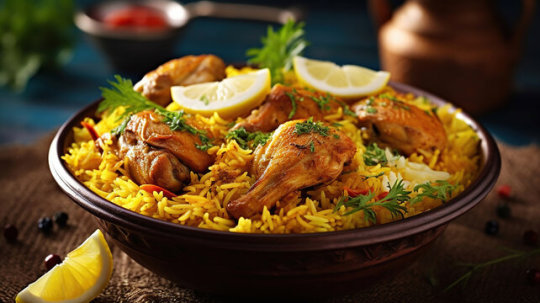
Bachelor's Biryani
I'm glad to say this because biryani is our Indian culture and traditional food follows from those periods. This is our proud moment because we spread our cuisine to the world over . which means everybody likes biryani to enjoy it with their family. so we will discuss how to make bachelor chicken biryani or biryani recipe.
Shall we start slogan of biryani:
“Biryani is not just food; it's an emotion.”
This biryani is especially made for bachelor. Even family people also do this at your home. MUST TRY ONE DON'T MISS IT.
QUANTITY :- 4 TO 5 PERSON
COOKING TIME :- 25 TO 30 MINS
PREPARATION:- 10MINS
INGREDIENTS & QUANTITY :-
Basmati Rice - 500 grams
Chicken - 500 grams
Oil - 150ml
Onion - ( 2 Medium size )
Tomato - ( 4 Medium size )
Lemon - 1/2 (Not shown in video)
Cinnamon - 2
Cardamom - 2
Bay leaf -2 To 3 (OR) As required
Clove - 2
Mint Leaves - As required
Ginger & Garlic paste -50 grams
Red Chilli powder - 2 tsp
Gram masala - 2tsp
Aachi Kolambu masala-3tsp
Curd - 100ml
Green Chilli - 4(medium size)
Water - 1000ml
COOKING PROCESS:-
STEP-1 :
TAKE ALL THE INGREDIENTS BEFORE START YOUR COOKING
STEP-2:
TAKE THE COOKER AND PLACE IT ON THE STOVE FOR 2 MINS AFTER IT GETS HEATED ADD THE REFINED OIL (150 TO 200ML) AS YOUR REQUIRED .
OIL GETS HEATED ADD THE MASALA LIKE(CINNAMON, CARDOMAN, ELACHI, BAYLEAF ,FENNEL ETC..)

STEP-3:
SAUTE IT WELL FOR A FEW MINUTES. ADD THE CHILLI (5 NO) IN MEDIUM SIZE AND SAUTE IT WELL HERE ADD SOME AMOUNT OF ONION (2 OR 3 ONIONS)AND SAUTE IT WELL UNTIL THE ONION COLOR TURNS NAVY PINK. AFTER THIS ADD THE GINGER & GARLIC PASTE(50 TO 60 ML).


STEP-4:
SAUTE IT WELL UNTIL THE RAW SMELL WENT OUT. IN THIS STAGE ADD A FEW AMOUNTS OF MINT LEAF AND 3 OR 4 TOMATOES (FRUITY STAGE) BECAUSE THEY GIVE A TASTE AND FLAVOR AS GOOD AS BIRYANI. SAUTE IT WELL WITH THE GRAVY FOR A FEW MINUTES UNTIL TOMATOES GET MIXED WITH THE GRAVY HERE IS THE STAGE IS GOOD TO ADD THE CURD(100 TO 200 ML ) SAUTE IT WELL WITH GRAVY.


STEP-5:
HERE ADD THE 500 GRAMS OF CHICKEN AND MIX IT WELL FOR 5 MINUTES AND THE MASALA SUCH AS
RED CHILLI POWDER :- 2 TO 3 TSP
GRAM MASALA POWDER :- 2 TSP
AACHI KOLAMBU MASALA :- 4 TSP
SALT :- AS REQUIRED
LEMON :- 3TSP
NOTE:- CHECK THE MASALA RATIO IS CORRECT FOR YOUR COOKING PROCESS


STEP-6:
SAUTE IT WELL WITH THE ADDED MASALA FINALLY ADD WATER (200ML) AND LEAVE FOR A FEW MINUTES NOW IT IS THE CORRECT TIME TO MEASURE THE RATIO OF MASALA CORRECTION. IF IT IS CORRECT MEANS FINALLY ADD THE (450 TO 500 GRAMS OF RICE) HERE ADD THE WATER REMAINING 800 ML OF WATER DOUBLE THE RATIO OF THE RICE QUANTITY


STEP-7:
FINALLY, CLOSE THE COOKER (LOCK THE GAS CUT )AND LEAVE 30 TO 40 MINUTES LOW FLAME. AFTER 45 MINUTES .


*******************IT WILL READY TO SERVE***********************

READ MORE
youtube
WATCH OUR VIDEO
சமையல் செயல்முறை:
உங்கள் சமையலைத் தொடங்கும் முன் அனைத்துப் பொருட்களையும் எடுத்துக் கொள்ளுங்கள்.
குக்கரை எடுத்து 2 நிமி��ங்களுக்கு அடுப்பில் வைக்கவும், அது சூடாக்கப்பட்ட பிறகு, உங்களுக்குத் தேவையான சுத்திகரிக்கப்பட்ட எண்ணெயைச் (150 முதல் 200 மில்லி வரை) சேர்க்கவும்.எண்ணெய் சூடாக்கப்பட்ட பிறகு மசாலாவைச் சேர்க்கவும் (இலவங்கப்பட்ட, எலச்சி, பேய்லீஃப், பெருஞ்சீரகம் போன்றவை..).
சில நிமிடங்களுக்கு நன்றாக வதக்கவும். மிளகாயை (5 எண்கள்) நடுத்தர அளவில் சேர்த்து நன்றாக வதக்கவும். இங்கு சிறிது வெங்காயம் (2 அல்லது 3 வெங்காயம்) சேர்த்து, வெங்காய நிறம் நேவி டின்க் மாறும் வரை நன்றாக வதக்கவும். இதற்குப் பிறகு இஞ்சி மற்றும் பூண்டு விழுது (50 முதல் 60 மில்லி) சேர்க்கவும்.
பச்சை வாசனை போகும் வரை நன்றாக வதக்கவும். இந்த கட்டத்தில், சில அளவு புதினா இலை மற்றும் 3 அல்லது 4 தக்காளி (பழ நிலை) சேர்க்கவும், ஏனெனில் அவை பிரியாணியைப் போலவே சுவையையும் சுவையையும் தருகின்றன. தக்காளி கிரேவியுடன் கலக்கும் வரை சில நிமிடங்களுக்கு கிரேவியுடன் நன்றாக வதக்கவும், இதோ தயிரை (100 முதல் 200 மிலி வரை) சேர்ப்பது நல்லது.
இங்கே 500 கிராம் கோழியைச் சேர்த்து 5 நிமிடம் மற்றும் மசாலா போன்றவற்றை நன்கு கலக்கவும்.
சிவப்பு மிளகாய் தூள்: - 2 முதல் 3 டீஸ்பூன்
கிராம் மசாலா தூள் :- 2 டீஸ்பூன்
ஆச்சி கொலம்பு மசாலா :- 4 டி.எஸ்.பி
உப்பு :- தேவையான அளவு
எலுமிச்சை :- 3டி.எஸ்.பி
மசாலாவுடன் சேர்த்து நன்றாக வதக்கி இறுதியாக தண்ணீர் (200ML) சேர்த்து சில நிமிடங்கள் விடவும், இப்போது மசாலா திருத்த விகிதத்தை அளவிட இதுவே சரியான நேரம். இது சரியாக இருந்தால், இறுதியாக (450 முதல் 500 கிராம் அரிசி) சேர்க்கவும், மீதமுள்ள தண்ணீரை 800 மில்லி தண்ணீரை சேர்க்கவும்.
குறிப்பு:- உங்கள் சமையல் செயல்முறைக்கு மசாலா விகிதம் சரியானதா என சரிபார்க்கவும்
இறுதியாக, குக்கரை மூடி (LOCK GAS CUT) மற்றும் 30 முதல் 40 நிமிடங்கள் குறைந்த தீயில் விடவும். 45 நிமிடங்களுக்குப் பிறகு.
***********இது சேவை செய்ய தயாராக இருக்கும்***********
DESCRIPTION:-
Simple Chicken Biryani with Biryani masala| கோழி பிரியாணி | Cooker Dum Biryani | Spice Eats Chicken Biryani | Chicken Biryani Recipe | Simple Chicken Biryani for Beginners | Chicken Biryani Recipe for Bachelors. சிக்கன் பிரியாணி குக்கரில் குழையாமல் 😋 எப்படி செய்வது | CHICKEN BIRIYANI RECIPE IN PRESSURE COOKER
#chicken #chickenbiryani #bachelorchickenbiryani #briyani #dumbiryani #recipe
Thank you for visiting my blog
The blog was written by JEGANATHAN A (SAMATHANAM KITCHEN)
7 notes
·
View notes
Text
My sister texted me to tell me the dinner i made tonight was great, but her phone autocorrected her exclamation point to a question mark. So here's how to make Great Soup?
Ingredients for 4 servings:
1 lb chicken breast
1 dry cup brown basmati rice
1 cube chicken boullion
1 can cannellini beans
1 can coconut milk
1 1/2 tsp salt
1/2 cup pickle juice
3/4 cup chopped baby spinach
3/4 cup diced carrot, either peeled or baby carrots
2 tsp curry powder
2 tsp neutral oil
Instructions:
Cut raw chicken breast into bite-sized pieces (should be able to fit on a spoon) and brine in tupperware with the salt, 1 tsp of the curry powder, and the pickle juice. I used pickled jalapeño juice, but pickled cucumber juice shouldn't alter the taste too much as long as it's acidic.
Leave the chicken to brine for at least 2 hours in the fridge.
Cook rice separately from rest of soup. Some brown rice doesn't require washing beforehand, so you can test by washing a handful in a bowl to see if the water runs clear.
If you have a rice cooker, follow the necessary instructions for brown rice. If you don't, boil on high heat in a large pot starting with a 2:1 water-to-rice ratio.
(If using pot) Periodically stir from the bottom of the pot to avoid the rice sticking or burning, and occasionally add 1 cup of water from time to time until rice is thoroughly cooked and the water has evaporated.
Cut up carrots and spinach until they're fine enough to not give your blender such a hard time later. Store them together.
When the chicken's brined long enough, add the oil to another pot (or the same one, if there's no rice in it) and turn the stove heat to low.
Add the chicken only half a minute after, separating the pieces with a spatula.
Pour out the aquafaba from the bean can, you won't need it.
When you begin to hear the chicken sizzle, blend the beans and half of the coconut milk in a blender until smooth, then add to the pot.
Smoothly blend the chopped vegetables and the other half of the coconut milk, and add it to the pot as well. Stir thoroughly, and the soup should be a light brownish-green.
Add the bouillon cube and the other 1 tsp of the curry powder, mix together and continue to let it simmer until chicken is cooked. You do NOT need to add any more salt.
Test chicken for doneness by skewering a piece. It should be easily punctured, but still relatively tender. cooking for too long or on too high heat will give the chicken a rubbery texture.
Finally, add the rice to the pot and stir until well-mixed, then serve in 4 separate bowls with a ladel.
The final result should have elements of creaminess from the beans, sweetness from the coconut milk, acidity from the brine, and savoriness from the meat, bouillon, and curry flavor. You probably won't taste the vegetables.
2 notes
·
View notes
Text
3 Kingdoms Chicken Recipe
This one's a little more involved than burrito glop, but I'm up to making it most nights and I'm a depressive lump who can barely drag himself out of bed half the time so it's gotta be relatively low-spoons, right? Right.
First things first: the name is a joke. It's got nothing to do with the 3 kingdoms period in Chinese history. Instead it's because the dish includes chicken (animalia), lots of veggies (plantae) and mushrooms (fungi).
You will need:
rice and a means of making rice
a big pot
a pan (if you've got non-canned chicken)
boneless chicken breasts, thighs, or canned chicken
butter or sesame oil
cream of mushroom soup concentrate
chicken broth
bok choi, broccoli, carrots, mushrooms of your choice.
seasonings of your choice.
My seasonings:
powdered garlic (lots)
onion flakes (also lots)
soy sauce (not as heavy as the garlic but not light)
kitchen bouquet/maggi (a modest amount)
fish sauce (a modest amount; like a single 'bloop' per can of soup. you can sub with oyster sauce if you've got that instead; both are good, if a bit different end results)
lemon juice (added in to cut the flavor if it gets too heavy/dark, to taste)
pepper (as desired)
sesame seeds (as desired)
chilli powder (as desired; I go light, you do you)
Prep:
Chop up your vegetables (and mushrooms if they're not pre-cut)
Defrost your chicken, tenderize it such that it's relatively flat and will cook more evenly.
Cooking:
Dump the can(s) of cream of mushroom concentrate into the big pot. Add about half a can's worth of chicken broth per can you're using. Set the burner to a low-ish heat, like 3 to 4.
Add your seasonings to the soup, stir thoroughly. Add your vegetables and turn the heat up to 4 or 5. Cover so it heats up faster, but leave the lid off once it's bubbling well so some of the liquid can boil off.
Make your rice. I recommend about a cup of rice per person you're serving, but maybe you really like rice and want to make loads of it. Don't let me stop you. Minute rice is fine, but you can literally use minute rice proportions (one cup water per cup of rice) to make basmati rice in the goddamn microwave if you don't have a rice cooker. Feel free to add a bit of ginger if that tickles you. I don't always, but sometimes I'm in the mood for it.
Heat up the pan, add a thin layer of sesame oil OR throw a pat or two of butter in and make sure it melts and covers the whole pan. Or do both, fuck, do what you want; rules are made up. Lay out your chicken breasts or thighs and sautee them, flippin' 'em and cutting them open as necessary to ensure they're thoroughly cooked.
Note: There is no such thing as 'medium rare' chicken. That is how you get food poisoning. Don't do it. Cook your chicken all the way through. No more pink should be showing. Love yourself, love your family, cook your food thoroughly.
Serve rice, serve chicken, pour soup/veggies over both. Eat it with a knife and fork unless you're the sort to pick up pieces of chicken and just tear them apart with your teeth.
Alternately, if you're not feelin' it, you can just throw some canned chicken in the pan for a bit, or even directly in with the soup and veggies and serve that over rice. If you're cooking for yourself, just throw it all in one big bowl, eat your fill, and put any leftovers in the fridge for later.
You can also cut up the chicken into chunks if you're gonna eat it with chopsticks, or if you just like it better that way. Ideally you sautee the breasts or thighs whole, then cut them up after they're cooked (they're juicier that way) but you can cut 'em up and then fry 'em if you like, make yourself happy.
This one has a lot more prep time involved (mostly in remembering to defrost the chicken, then tenderizing it, and in chopping up veggies) but you can cut corners by using pre-chopped frozen veggies and/or canned chicken. It's not as good, but it's still pretty great compared to the alternative depression meal of like, a whole sleeve of saltines or a few pre-cooked hot dogs.
There are no hard and fast rules to seasoning. I like to add it as I go, sampling the broth and judging what it needs more of. Too tangy? You overdid the lemon juice; add more carrots and a bit more kitchen bouquet/maggi. Too salty? You overdid the soy sauce; add more carrots and a bit of chilli powder to hide it from the people you're serving it to. You'll know, at least, for the next time.
11 notes
·
View notes
Text


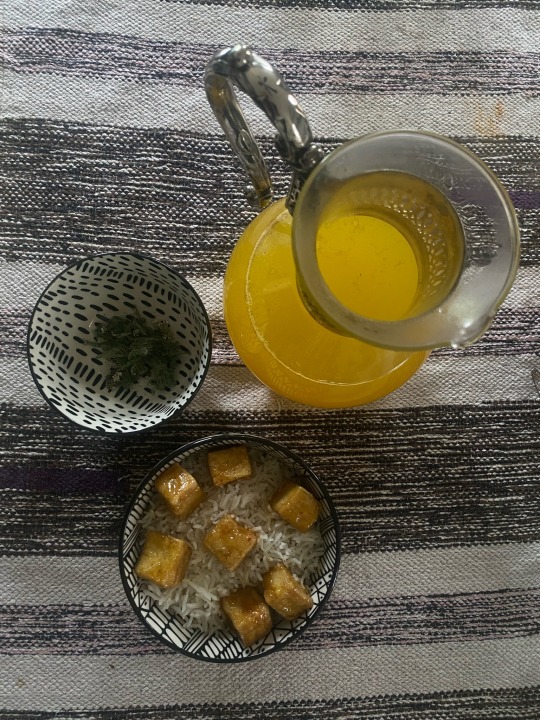
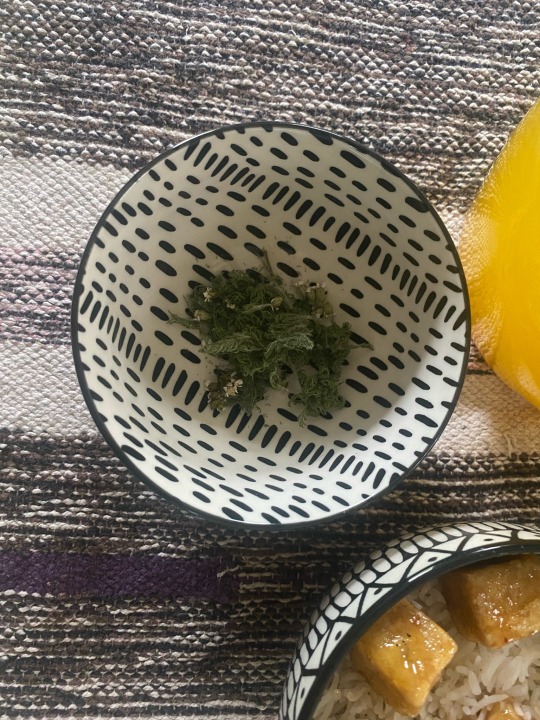
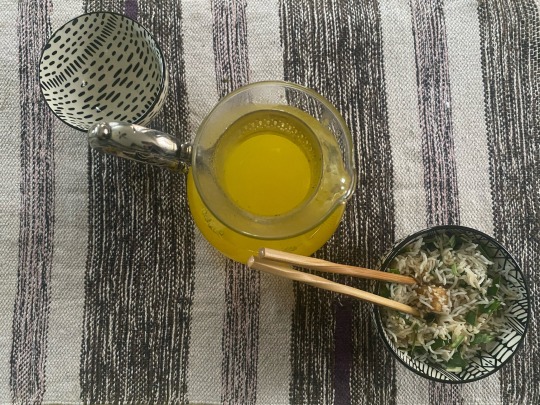

Dinner: Orang Tofu w/Basmati Rice and Hosta Greens
Tea: Lemon Ginger Turmeric Tea w/ Black Pepper & Yarrow
Recipes!!(:
Dinner:
Ingredients:
1 block of drained super firm tofu
Panda Express Orange Sauce: ~2 tbsp
Corn Starch: 1/3c
Basmati Rice: 3c dried
Water: 3.5c
Hosta: (quantity varies by portion, for the portion pictured 1/4c chopped in 1/2c rice )
How To:
Start by preparing your rice and seasoning it in your preferred way ( I like to use rice vinegar, salt, and pepper, while some also add oil in as well), rinsing the rice and draining it before adding the 1:1.5 ratio of rice to water and seasonings. If you have a rice cooker it will take a lot of the work out of making rice, but you can also use a covered pot on the stove. Typically once you bring it to a boil and reduce it to a simmer, the rice should be done in about 20 minutes. Stove cooking requires you to know how to balance the heat you use in an efficient way so that you reduce the amount of scorching. You'll also want to have a tight-fitting lid for the pot since the steam is the most crucial part of the rice cooking process. Once the rice has been reduced to a simmer you're going to want to avoid removing the lid until it's done cooking. After the 20-25 minutes have passed, you'll see that all of the water has cooked away and it is time to remove the pot from the heat. Allow the rice to rest in the pot for a few minutes before removing the lid and fluffing it to have a fluffier result.
Once your rice is cooking, then you can start cooking your tofu. You'll want it to be pressed and drained before you cut it into your desired-sized pieces. Once it's cut, you'll toss it in some corn starch, rice starch, or perhaps arrowroot powder (if you have that) for extra benefits. A light coating that covers all sides is plenty for this process, but if you want a crunchier outer shell on the tofu, you can simply increase the amount of starch/powder coating the tofu. To do this, just cover it in the powder and allow it to rest for a couple minutes. Once the water has moistened the existing layer of powder, you can toss them back into the dry powder to coat again, repeating as many times as desired.
From there, you can take your coated tofu over to a pan of heated oil, just high enough to cook your tofu halfway - this is referred to as shallow frying. The pieces shouldn't be fully submerged in the oil in this process, but any pieces that are will cook in half the time so keep that in mind. Tofu can get quite hard if it's overcooked - sometimes almost inedibly hard - so keep that in mind as well. If kept on medium heat, the tofu should take only a few minutes to cook before turning a beautiful golden color. If you want a harder crunch, allowing the sides to cook a bit longer will turn them a darker color - signifying to you that you have an uber-crunchy piece of tofu on your hands (or, rather, in your chopsticks...) Just simply flip a piece or two over to check the color before flipping all of them and repeat on the other side. Sometimes you may need to rotate the sides that are down on the pan in order to get an even crunch on the entire piece (this will vary with the cut sizes). After every side is cooked, remove from the oil, placing on a clean towel to absorb any excess oil. From there you can toss it in any sauce of your choice! Tofu takes any flavor quite well so feel free to experiment with your sauces.
After your rice and tofu are finished cooking, chop up some hosta greens (portions will vary by preference) or add in any other fresh greens and enjoy!! I often enjoy making a large salad and then adding a cup of hot rice and some tofu on top to increase the amount of fiber in my diet, so try that out as well!!! Play around with the ratios to find what works best for you. (: Always make sure you enjoy your creation and thank God for the blessings in your life, asking for His blessing before enjoying your meal.
To make the tea, simply boil some water and add in some turmeric, ginger, black pepper, lemon juice, and yarrow. You can play with the ratios here to suit your taste as well as your needs. If you're in a significant amount of pain, adding extra yarrow would likely help. I usually just swallow the pieces of yarrow as if they were pills or chew it up before swallowing. Straining it seems like an unnecessary waste to me, as you can always benefit from a little extra fiber. Also by ingesting the spices and herbs with the tea it seems to me that you'd get more benefits that way, but to each their own!(:
I hope yall share this with your loved ones and have a wonderful bonding experience in enjoying sustenance together. Remember to be loving to all of those who love you, and try to extend an olive branch to those who don't - because you never know what is going on inside a person.
7 notes
·
View notes
Video
youtube
How to cook rice in a rice cooker
As a rule of thumb, if you're cooking white rice, the amount of cups of water added ought to be equivalent to the amount of cups of rice added (for example 2 cups of rice to 2 cups of water). This is an aide and can be explored different avenues regarding to suit individual preferences. The manufacturer's directions are based on the measuring cup gave, so make sure you utilize the provided cup to measure rice and liquid.
A few other valuable tips while utilizing a rice cooker:
Place uncooked rice (white or brown) in a sifter and flush well under running water until the water runs clear. This will eliminate most of the starch and keep the rice from becoming gluggy. Utilize cold water from the tap, not cold water from the ice chest as this will increase the cooking time.
How to cook brown rice in a rice cooker
Adhere to the manufacturer's guidelines utilizing the provided measuring cup or potentially the brown rice evaluating inside the bowl. The proportion of water to brown rice is by and large 1 cup of rice to 1.5 cups of water (for example 2 cups of rice to 3 cups of water). Select the brown rice program. Brown rice can take twofold the hour of white rice depending on the quantity.
How to cook coconut rice in a rice cooker
While making coconut rice in a rice cooker, use jasmine or basmati rice to add a legitimate flavor. To make coconut rice utilizing 2 cups of uncooked rice:
measure the rice utilizing the provided measuring cup
wash the rice well to eliminate the starch
add the rice to the bowl with a 400mL container of coconut milk
measure out 1.5 cups of water utilizing the provided cup and select the white rice program
when the program is finished, fluff the rice up utilizing a fork.
2 notes
·
View notes
Text
I was taught by my parents, who were taught by my Chinese uncle (who's old enough that they weren't all using rice cookers there). I've added my own bits of experience since.
Add white rice to pan (I use one handful per person). For standard long grain, wash it well. For basmati it doesn't seem to matter if you don't wash it.
Add cold water until it is one knuckle above the surface of the rice. Like, stick your finger in until it touches the surface of the rice, and if the water reaches the first knuckle, it's the right amount. Add salt. put the lid on.
Bring the rice to the boil, turn it down, LEAVE IT ALONE (never stir rice unless you're making a risotto!), wait until the water is absorbed. Lift the lid and listen. If you can still hear wet bubbling, it needs longer. If it's just starting to sizzle, time's up. This will take around 10 minutes for Basmati, standard long grain takes longer.
Turn off the heat and leave it with the lid on for ideally at least 10 minutes. This will allow the rest of the water to finish evaporating and steam the rice. Then fluff it with a fork, and serve.
It takes a bit of practice to reliably get the amount of water right - e.g. for small amounts of rice you need a little bit less than a knuckle of water over the surface.
Ultimately the answer to "how to stop it burning" is turning off the heat when it is still very slightly wet on the bottom, and letting it steam the rest of the way with the heat off. If you wait until it is fully sizzling before turning the heat off, it will burn. Honestly, though, that's not the end of the world, just don't scrape up the burnt layer and the rest will be fine.
Brown rice, short grain and sticky rice have totally different cooking methods, this only works for white long grain.
I'm just interested in this. Pls reblog for a bigger voting block.
12K notes
·
View notes
Text
How to Cook Unpolished Basmati Rice for Maximum Flavor and Nutrition
1. Why Choose Unpolished Basmati Rice?
Unpolished Basmati rice is packed with: ✅ Fiber – Aids digestion and keeps you full longer. ✅ Vitamins B1, B3, and B6 – Supports energy production and metabolism. ✅ Magnesium and Zinc – Essential for muscle function and immunity. ✅ Antioxidants – Reduces inflammation and protects against diseases.
By cooking it properly, you can maximize these benefits while enjoying a flavorful, aromatic, and perfectly textured dish.
2. Prepping the Rice for Cooking
Step 1: Selecting the Right Rice
Always opt for high-quality, organic unpolished Basmati rice to ensure purity and the best nutritional value.
Step 2: Rinsing the Rice
Rinse the rice 2-3 times under running water to remove excess starch and prevent stickiness. Avoid over-rinsing, as this can wash away some nutrients.
Step 3: Soaking for Better Texture
Soak the rice for at least 30 minutes to 2 hours. This: ✔ Softens the grains for even cooking. ✔ Reduces cooking time. ✔ Helps retain the aromatic flavor.
3. Cooking Methods for Maximum Flavor and Nutrition
Method 1: Absorption Method (Best for Everyday Cooking)
✔ Ratio: 1 cup rice to 2.5–3 cups water ✔ Instructions:
Boil water in a deep pan.
Add the soaked and drained rice.
Cook on medium heat until most of the water is absorbed.
Reduce heat to low, cover with a lid, and let it simmer for 10-15 minutes.
Turn off the heat and let it rest for 5 minutes before fluffing with a fork.
Tip: Adding a teaspoon of ghee or coconut oil enhances flavor and prevents grains from sticking together.
Method 2: Pressure Cooker Method (Quick & Efficient)
✔ Ratio: 1 cup rice to 2.5 cups water ✔ Instructions:
Add rice and water to a pressure cooker.
Cook on medium heat for 2-3 whistles.
Let the pressure release naturally before opening the lid.
Tip: Avoid overcooking to retain nutrients and texture.
Method 3: Steaming Method (Best for Retaining Nutrition)
✔ Ratio: 1 cup rice to 3 cups water ✔ Instructions:
Boil water in a separate pot.
Place rice in a steaming basket over the boiling water.
Cover and let it steam for 25-30 minutes until tender.
This method keeps the rice light, fluffy, and nutrient-dense.
4. Enhancing the Flavor
Use vegetable broth instead of water for added depth.
Infuse with whole spices like bay leaves, cloves, and cinnamon for a subtle aroma.
Add fresh herbs like coriander or mint after cooking for freshness.
5. Serving Suggestions
Enjoy unpolished Basmati rice with: 🍛 Dal and curries for a balanced meal. 🥗 Salads for a fiber-packed dish. 🍲 Khichdi or pulao for a nutritious one-pot meal.
Cooking unpolished Basmati rice the right way enhances both flavor and nutrition, making it a perfect addition to a healthy diet. By soaking, using the right water ratio, and choosing a suitable cooking method, you can enjoy its rich aroma, delicate texture, and wholesome goodness.
0 notes
Text
The Best Rice Cooker for Fluffy Rice: The Only Guide You’ll Ever Need

This is a quick insight from the article Best Rice Cooker for Fluffy Rice Originally published on March 20, 2025
Let’s face it—cooking rice can be a nightmare. Mushy one day, crunchy the next, and don’t even get me started on the burnt bottom layer. But what if I told you there’s a way to make perfect, fluffy rice every single time? Here’s everything you need to know, broken down into an easy-to-follow listicle.
1. Why Fluffy Rice Matters
Fluffy rice elevates any meal—curry, sushi, stir-fry, you name it.
Bad rice ruins the entire dining experience.
Cooking rice is tricky because it absorbs water differently depending on the type.
Too much water = mushy mess. Too little water = crunchy disaster.
2. The Secret to Perfect Rice: A Rice Cooker
A rice cooker takes the guesswork out of cooking rice.
Add rice, add water, press a button, and walk away.
No more lifting the lid to check (which ruins the steam process).
3. How to Cook Perfect Rice: 4 Simple Steps
Rinse Your RiceRinsing removes excess starch, which causes stickiness.Use a strainer and rinse until the water runs clear.
Use the Right Water RatioWhite rice: 1 cup rice = 1.5 cups waterBrown rice: 1 cup rice = 2 cups waterJasmine/Basmati: 1 cup rice = 1.25 cups water
Let the Rice RestAfter cooking, let it sit with the lid on for 10 minutes to distribute moisture evenly.
Fluff It UpGently fluff the rice with a fork or rice paddle. No mashing!
4. The Best Rice Cookers for Fluffy Rice
Here’s a breakdown of the top picks for every budget:
(s) Budget Pick: Good Cook Rice Measuring Cup & Strainer Set (~5–5–8)
Pros: Super cheap, easy to use, perfect for stovetop cooking.
Cons: Still requires you to watch over your rice.
Best for: Beginners or those who don’t want to invest in a cooker yet.
(b) Best Budget Rice Cooker: Aroma Housewares 6-Cup Rice Cooker (~20–20–25)
Pros: Automatic cooking, keep-warm function, easy cleanup.
Cons: No fancy features, but it gets the job done.
Best for: Anyone who wants an easy, no-fuss way to cook rice.
(c) Premium Pick: Zojirushi Neuro Fuzzy Rice Cooker (~150–150–180)
Pros: Precise cooking, perfect texture, keeps rice warm for hours.
Cons: Expensive, but worth it if you eat rice daily.
Best for: Serious rice lovers who want perfection every time.
5. Why a Rice Cooker is Worth It
No Guesswork: The water-to-rice ratio is always right.
Consistent Results: No more undercooked or overcooked rice.
Hands-Free Cooking: Set it and forget it.
Versatility: Some models can cook quinoa, oatmeal, and even soup.
6. Extra Tips for Perfect Rice
Try different grains like quinoa, barley, or couscous in your rice cooker.
Use broth instead of water for extra flavor.
Never open the lid mid-cooking—it ruins the steam process.
Clean your rice cooker regularly to keep it working well.
7. Final Thoughts: Which One Should You Get?
On a budget? Start with the Good Cook Rice Measuring Cup & Strainer Set.
Want a no-fuss cooker? Go for the Aroma Housewares 6-Cup Rice Cooker.
Want perfection? Splurge on the Zojirushi Neuro Fuzzy Rice Cooker.
No matter which one you choose, you’re about to have much better rice. And that’s a win.
What’s your pick? Budget, mid-range, or premium?
0 notes
Text
How to Make a Biryani in cooker
Making biryani in a pressure cooker is a quick and flavorful way to enjoy this classic dish without spending hours in the kitchen. Here’s a simple recipe for Chicken Biryani in a Cooker:
Ingredients
For Marination:
500g chicken (bone-in, cut into pieces)
½ cup yogurt
1 tsp turmeric powder
1 tbsp red chili powder
1 tbsp ginger-garlic paste
1 tsp salt
1 tbsp lemon juice
For Cooking:
2 cups basmati rice (soaked for 30 minutes)
2 tbsp oil or ghee
1 bay leaf
2 cloves
2 cardamoms
1 cinnamon stick
1 star anise
1 large onion (sliced)
1 large tomato (chopped)
½ tsp garam masala
1 tsp biryani masala
2 cups water
Salt to taste
Fresh coriander and mint leaves (for garnish)
Fried onions (optional)
Instructions
Step 1: Marinate the Chicken
In a bowl, mix chicken with yogurt, turmeric, red chili powder, ginger-garlic paste, salt, and lemon juice.
Let it marinate for at least 30 minutes (or overnight for better flavor).
Step 2: Cooking the Biryani in a Cooker
Heat oil or ghee in a pressure cooker. Add bay leaf, cloves, cardamoms, cinnamon, and star anise. Sauté for a few seconds.
Add sliced onions and sauté until golden brown.
Stir in chopped tomatoes and cook until soft.
Add marinated chicken and cook for 5 minutes, stirring occasionally.
Sprinkle garam masala and biryani masala, mix well.
Drain the soaked rice and add it to the cooker. Stir gently to mix.
Pour in 2 cups of water and adjust salt.
Step 3: Pressure Cooking
Close the cooker lid and cook on medium heat for 1 whistle.
Turn off the heat and let the pressure release naturally.
Open the lid, fluff the rice gently, and garnish with fresh coriander, mint leaves, and fried onions.
1 note
·
View note
Text
Chole Bhature & Rice
How to Prepare Chole Bhature and Rice
Introduction
Chole Bhature is a classic North Indian dish that combines spicy chickpea curry (Chole) with deep-fried, fluffy bread (Bhature). It is a popular dish, often enjoyed for breakfast or lunch, and is known for its rich flavors and indulgent taste. While Chole Bhature is the star of the dish, serving it with fragrant rice makes for an even more fulfilling meal. In this guide, we will walk through the step-by-step process of making Chole, Bhature, and rice to help you prepare a restaurant-style dish at home.
Gathering Ingredients
Before you start cooking, it is essential to gather all the necessary ingredients. Having everything prepared in advance will ensure a smooth and efficient cooking process.
For Chole (Chickpea Curry):
1 cup dried chickpeas (or 2 cups canned chickpeas)
2 large onions (finely chopped)
2 tomatoes (pureed)
1 tablespoon ginger-garlic paste
2 green chilies (chopped)
1 teaspoon cumin seeds
1 teaspoon turmeric powder
1 teaspoon red chili powder
1 teaspoon coriander powder
1 teaspoon garam masala
1 teaspoon chole masala (optional but recommended)
1 teaspoon salt (or to taste)
2 tablespoons oil or ghee
1 bay leaf
2 cloves
1 small cinnamon stick
1 tablespoon lemon juice
Fresh coriander leaves for garnish
For Bhature (Deep-fried Bread):
2 cups all-purpose flour (maida)
2 tablespoons semolina (sooji)
1/2 cup yogurt
1/2 teaspoon salt
1/2 teaspoon sugar
1/2 teaspoon baking powder
1/4 teaspoon baking soda
1 tablespoon oil
Water (as required for kneading)
Oil (for deep frying)
For Rice:
1 cup basmati rice
2 cups water
1/2 teaspoon salt
1 teaspoon ghee or butter (optional)
Preparing the Chole (Chickpea Curry)
Soaking and Cooking the Chickpeas
If using dried chickpeas, first rinse them thoroughly and soak them in enough water overnight or for at least 8 hours. This will help soften them and reduce cooking time.
Once soaked, drain the chickpeas and transfer them to a pressure cooker. Add 3 cups of water, a pinch of salt, and a cinnamon stick for extra flavor. Pressure cook on medium heat for 4-5 whistles or until the chickpeas are soft. If using canned chickpeas, simply rinse them and set them aside.
Making the Gravy
Heat 2 tablespoons of oil or ghee in a pan over medium heat.
Add cumin seeds, bay leaf, cloves, and cinnamon stick, sautéing until fragrant.
Next, add chopped onions and cook until golden brown.
Stir in the ginger-garlic paste and green chilies, cooking until the raw smell disappears.
Pour in the pureed tomatoes and cook until the mixture thickens and the oil starts separating.
Now, add all the spices (turmeric, chili powder, coriander powder, chole masala, and garam masala) and mix well.
Add the cooked chickpeas and some water (about 1/2 cup) to adjust the consistency.
Let the curry simmer for 10–15 minutes, stirring occasionally.
Finally, add��lemon juice and garnish with fresh coriander leaves before serving.
Preparing the Bhature (Deep-fried Bread)
Kneading the Dough
In a large bowl, mix all-purpose flour, semolina, salt, sugar, baking powder, and baking soda.
Add yogurt and oil, then gradually add water while kneading to form a soft and smooth dough.
Cover the dough with a damp cloth and let it rest for at least 1 hour.
Rolling and Frying
After the dough has rested, divide it into equal portions and roll them into smooth balls.
Lightly grease a rolling pin and board with oil.
Roll each ball into a circular or oval shape, ensuring it is neither too thick nor too thin.
Heat oil in a deep frying pan over medium-high heat.
Once the oil is hot, carefully slide a rolled-out Bhatura into the oil.
Press lightly with a spatula to help it puff up.
Fry until golden brown on both sides, then remove and place on paper towels to absorb excess oil.
Preparing the Rice
Cooking the Rice
Rinse the basmati rice thoroughly under cold water until the water runs clear. This step helps remove excess starch and prevents the rice from becoming sticky.
In a pot, bring 2 cups of water to a boil.
Add rinsed rice, salt, and ghee (if using).
Cover the pot, reduce the heat to low, and let it simmer for 12–15 minutes or until the water is fully absorbed.
Once cooked, turn off the heat and let the rice rest for 5 minutes before fluffing it with a fork.
Bringing Everything Together
Now that all components are ready, it’s time to plate the dish. Serve the hot Chole in a bowl, garnished with extra coriander leaves. Place Bhature on the side, and add a serving of fragrant basmati rice to complete the meal. You can also serve it with sliced onions, lemon wedges, and pickles for added flavor.
Tips for the Best Chole Bhature and Rice
Use fresh ingredients – Fresh tomatoes, onions, and spices enhance the flavor of the dish.
Adjust spice levels – Increase or decrease chili powder based on your preference.
Fermentation enhances Bhature texture – Resting the dough for a longer time results in softer and fluffier Bhature.
Perfectly cooked rice – Make sure to rinse the rice properly and use the correct water-to-rice ratio.
Avoid soggy Bhature – Fry them in hot oil to achieve a crisp and puffy texture.
Conclusion
In conclusion, making Chole Bhature with Rice at home is a rewarding experience. With proper planning and attention to detail, you can enjoy this delicious North Indian meal with your family. The combination of spicy chickpea curry, crispy Bhature, and fluffy rice creates a well-balanced dish that is perfect for any occasion. Whether for a weekend brunch or a special celebration, this meal is sure to impress everyone. Enjoy your homemade Chole Bhature with Rice!
Write something...
0 notes
Text
South Indian Lemon Rice Recipe (Instant Pot)
Introduction One of the classic South Indian dishes is lemon rice, or "Elumichai Sadam" in Tamil. It is a household favourite due to its zesty lemon touch, fragrant tempering, and vivid flavours. This Instant Pot version of Lemon Rice is the perfect solution for anyone seeking a quick lunchbox idea, a hearty supper, or a tasty side dish. Let's get started on how to quickly make this flavourful, tangy dinner in your Instant Pot.

Why Make Lemon Rice in an Instant Pot? When it comes to cooking quickly and effectively, the Instant Pot is revolutionary. The Instant Pot allows you to: - Its pressure-cooking capability saves time. - Preserve the vibrant flavours of the spices and lemon. - Without worrying about burning or overcooking, cook rice to perfection.
Ingredient List The following ingredients are needed:
1.To Cook Rice: -One cup of sona masoori or basmati rice -Two cups of water -Half a teaspoon of salt -One teaspoon of optional oil to keep things from sticking
2.For Tempering: -Two teaspoons of oil, ideally sesame or coconut oil -One teaspoon of mustard seeds -One teaspoon of cumin seeds -Two to three dried red chillies -One or two slit green chillies -Ten to twelve curry leaves -One tablespoon of split Bengal gramme, or chana dal -One tablespoon of broken black gramme, or urad dal -Half a teaspoon of hing (asafoetida) -Half a teaspoon of powdered turmeric -Add salt to taste. 3.Last Touch: -One or two lemons' juice (modify to taste) -Garnish with fresh coriander leaves. -Cashews or roasted peanuts (optional, for crunch)
Step-by-Step Recipe
Step 1: Cook the Rice
Rinse rice until water runs clear.
Add rice, water, salt, and oil to the Instant Pot.
Pressure cooks for 5 minutes; natural release for 10 minutes.
Fluff rice and let it cool.
Step 2: Prepare the Tempering
Sauté mustard seeds in oil until they splutter.
Add cumin, chilies, curry leaves, chana dal, urad dal; sauté until golden.
Mix in asafoetida and turmeric.
Step 3: Combine and Flavor
Mix rice with tempering and lemon juice.
Adjust salt as needed.
Step 4: Garnish and Serve
Garnish with coriander and nuts.
Serve warm with papad, yogurt, or pickle.
Tips for Perfect Lemon Rice
Fresh Lemon Juice: For a bright flavour, always use freshly squeezed lemon juice. chill Rice: To prevent breaking, let the rice chill a little before mixing. Spice Control: Modify the chillies to your preferred level of heat. Flavour Twist: For more depth, try adding sliced ginger or grated coconut.
Conclusion
This South Indian Lemon Rice recipe, inspired by the flavors you’d find at Barbqnite, is a quick, delicious, and versatile dish perfect for any occasion. Its tangy and aromatic profile pairs wonderfully with a variety of sides or can be savored on its own. Try this recipe to bring a slice of South India to your kitchen, and let us know how it turns out in the comments below.
FAQ
1. Can I use brown rice instead of white rice? Yes, you can use brown rice, but keep in mind that brown rice requires more cooking time. If using brown rice, set the Instant Pot to cook for 22-25 minutes on manual mode, and allow for a natural pressure release.
2. Can I make this without an Instant Pot? Yes, you can! Cook the rice separately in a pot or pressure cooker and prepare the tempering in a pan. Then, combine the rice with the tempering and lemon juice.
3. Can I skip nuts if I have allergies? Yes, you can skip the peanuts and cashews if you have allergies. The recipe will still taste delicious without them.
4. Can I use lime juice instead of lemon juice? Yes, lime juice works just as well as lemon juice for this recipe. It will give a slightly different flavor but will still be refreshing and tangy.
5.How can I make this dish spicier? Increase the amount of green chilies or dried red chilies in the tempering. You can also add a pinch of red chili powder or ground black pepper.
0 notes
Text
How to Make Tomato Rice: A Flavorful and Easy Recipe

Tomato rice is a simple yet flavorful dish that combines the goodness of ripe tomatoes with fragrant rice. This recipe is quick to make, requires minimal ingredients, and is perfect for busy weeknights or as a side dish for special occasions. If you love rice dishes with a burst of flavor, learning how to make tomato rice will surely become a go-to in your kitchen. Whether you're a beginner or an experienced cook, this easy tomato rice recipe will guide you step-by-step to prepare a delicious meal in no time.
Ingredients for Tomato Rice
To make tomato rice, you will need the following ingredients:
1 cup Basmati rice or any long-grain rice
2 large tomatoes, finely chopped
1 medium-sized onion, finely chopped
1 green chili (optional)
1/2 teaspoon ginger-garlic paste
1/2 teaspoon mustard seeds
1/2 teaspoon cumin seeds
1/2 teaspoon turmeric powder
1 teaspoon red chili powder
1/2 teaspoon garam masala
Salt to taste
1 tablespoon oil or ghee
Fresh coriander leaves for garnish
2 cups water
1 bay leaf (optional)
1 cinnamon stick (optional)
This combination of spices and ingredients will give your tomato rice an irresistible flavor that is perfect for any meal.
How to Make Tomato Rice: Step-by-Step Instructions
Step 1: Prepare the Rice
Start by washing the rice thoroughly to remove excess starch. Soak it in water for about 20-30 minutes before cooking. This will help the rice grains to cook evenly and remain separate.
Step 2: Temper the Spices
In a pan or pressure cooker, heat the oil or ghee over medium heat. Add mustard seeds and cumin seeds. Let them splutter for a few seconds. If you're using whole spices like bay leaf and cinnamon stick, add them now as well. The aroma of these spices will set the base for your tomato rice.
Step 3: Sauté the Onions and Tomatoes
Next, add the finely chopped onions and sauté until they turn golden brown. Once the onions are browned, add the ginger-garlic paste and green chili. Sauté for another minute until fragrant.
Now, it's time to add the chopped tomatoes. Cook the tomatoes for about 5-6 minutes, until they soften and release their juices. You can also add a pinch of salt at this stage to help the tomatoes cook faster.
Step 4: Add Spices and Cook the Tomato Mixture
Add turmeric powder, red chili powder, and garam masala to the tomato mixture. Stir well to combine the spices with the tomatoes. Let it cook for another 2 minutes until the oil begins to separate from the masala. This ensures that the spices are well cooked and infused in the tomato mixture.
Step 5: Add Rice and Water
Drain the soaked rice and add it to the pan with the tomato mixture. Stir gently to coat the rice with the tomato and spice mixture. Add 2 cups of water and bring it to a boil. Once the water starts boiling, reduce the heat to low, cover the pan with a lid, and let the rice cook for about 15-20 minutes. If you're using a pressure cooker, cook for just one whistle and then allow the pressure to release naturally.
Step 6: Fluff and Garnish
Once the rice is cooked and the water is absorbed, turn off the heat and let the rice rest for 5 minutes. This allows the rice to firm up and fluff up perfectly. After resting, use a fork to gently fluff the rice and separate the grains.
Garnish your tomato rice with fresh coriander leaves for a pop of color and extra flavor.
Tips for Perfect Tomato Rice
Rice Variety: Basmati rice is the best choice for tomato rice due to its aromatic flavor and long, fluffy grains. However, you can use any variety of rice you prefer.
Spices: Adjust the level of spices based on your heat tolerance. If you like your tomato rice to be spicier, add more green chilies or red chili powder.
Tomato Quality: Ripe, juicy tomatoes work best in this dish. They add sweetness and tang to the rice, making it more flavorful.
Add Vegetables: You can enhance the nutritional value of tomato rice by adding vegetables like peas, carrots, or beans. Simply chop them finely and add them with the tomatoes.
Cooking Method: If you want to make tomato rice even quicker, you can use a rice cooker or an Instant Pot. Both methods will save you time while still giving you delicious results.
Conclusion
Tomato rice is a versatile, delicious dish that can be enjoyed on its own or paired with curry, raita, or pickle. It's a great choice for lunch or dinner, and its vibrant flavor makes it a family favorite. By following the simple steps on how to make tomato rice, you can create a meal that is not only tasty but also easy to prepare. Whether you are a beginner or an experienced cook, this recipe is sure to impress.
For more mouth-watering recipes and cooking tips, visit bestrecipesofindia and discover how to make tomato rice and many other delicious Indian dishes!
0 notes
Text
How to Use a Proctor Silex Rice Cooker
The Proctor Silex Rice Cooker is simple and easy to use. Follow these steps to get the perfect rice every time:
Prepare the Rice
Add Rice and Water
Set Up the Cooker
Start Cooking
Allow Rice to Cook
Serve the Rice
Clean the Rice Cooker
Additional Tips:
Do not overfill: Avoid exceeding the maximum capacity of the inner pot to avoid overflowing. Using the right rice: Varieties of rice (white, brown, jasmine, basmati) may require slight adjustments in water levels. Use Additives: For variety, cook rice with spices, vegetables, or broth instead of water.
1 note
·
View note