#HB PENCIL BRUSH SAVE ME
Explore tagged Tumblr posts
Text
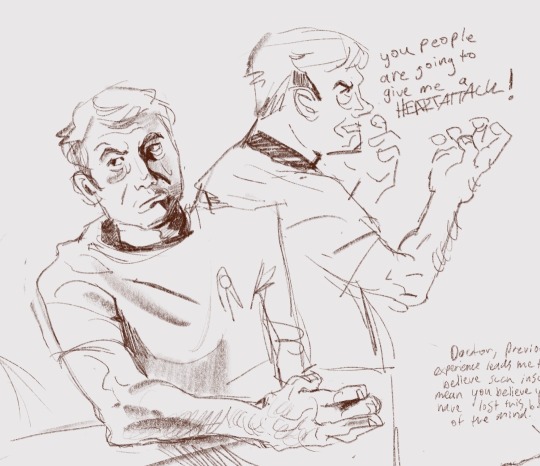
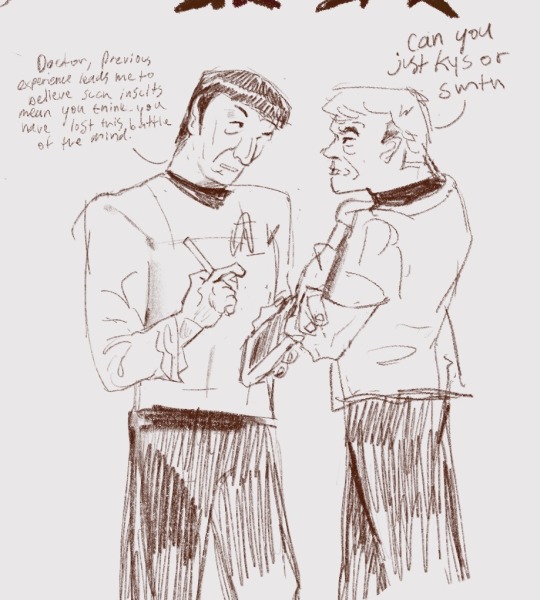
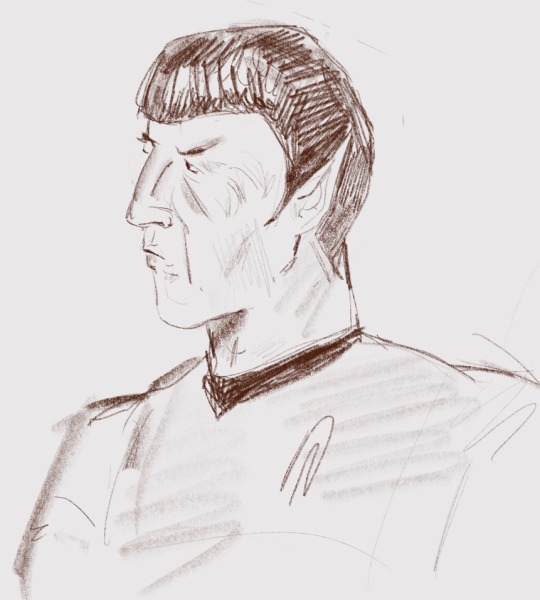
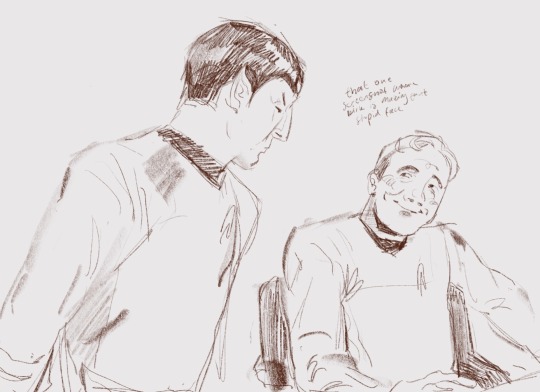
da three stooges
#HB PENCIL BRUSH SAVE ME#i’m trying to learn to draw bones so hard. these are pretty good but i still need to get better#star trek#spock#jim kirk#leonard mccoy#my art#tos#my trek
522 notes
·
View notes
Text

✨Welcome to my silly little blog✨ (18+, mdni)
my collective writings can be found on this navigation page🎀✨ some works contain +18 content - please make sure to read through content warnings (CW), your comfort comes first. for non-writing and general nonseriousness, #blog stuff
request guidelines for art and writing requests can be found on this page🌸✨ my inbox is always open to CoD content - asks, opinions, and requests! if anyone submits something to my inbox that I am not comfortable making content for I will update my guidelines. personal asks (get-to-know me sort of asks) are also okay! they follow the same guidelines, sfw and nsfw are alright. I love answering stuff, feel free to pop in my inbox
this post touches on my audience, I hope your stay here is enjoyable💕✨
hello! welcome to my blog!! we love König (CoD) so much here that he gets daily sketches<3 as stated above, my inbox is always open for you to talk to me
basic information: 20|she/they|Panromantic|currently running a CoD blog
I use MediBang Paint (pencil brush, 3.0px) and Procreate (HB Pencil)! this post goes over my thoughts/process when it comes to drawing, also includes a link to my Pinterest🌷✨ feel free to browse through my Pinterest, I have a wide variety of reference material saved to different boards! I also have this post going over how I usually draw König
my personal asmr playlist can be found on this post💤✨
I made this CoD themed divider that’s free to use🍓✨
taken anon symbols: 🐸, 🐰, 🦊, 🦥, 🍄, 🫂, 🦒, 🦦, 💐, 📖, 👻, ☕️, 💎, 🦤
I’m in the following fandoms:
CoD - most active, Genshin Impact, Honkai: Star Rail, Wuthering Waves, Zenless Zone Zero, Cookie Run (any of the games), Pokemon (any of the games)

I do not have commissions open currently🤍✨ OC x OC and OC x Canon doodle requests are on hold (as of July 26)! thank to the requesters, your art is being worked on at leisure so stayed tuned
CoD requests - written and sketches - are always open to my inbox! my inbox is also generally open if you want to discuss stuff with me🎀✨
if you have questions feel free to ask! all I ask of you is to keep this blog friendly, folks
User IDs:
Wuthering Waves (NA server): 500222943
Honkai: Star Rail (NA server): 603047229
Genshin Impact (NA server): 606126104
Zenless Zone Zero (NA server): 1000594841 —————————————————————— Request guidelines can be searched as a tag — there are three clarifying asks/responses
Do not repost my work (fics and artwork), all accounts that I personally own are listed below - if you see my work elsewhere don’t be afraid to hit me up🤙🏼✨
I have accounts on Tumblr (MachVeil - 18+ content), Instagram (MachVeil, MachSpam - irl content), Twitch (MachVeil), Twitter (MachVeil), YouTube (MachVeil), Bluesky (MachVeil), and Pinterest (MachVeil)
144 notes
·
View notes
Note
What brushes do u use in procreate?
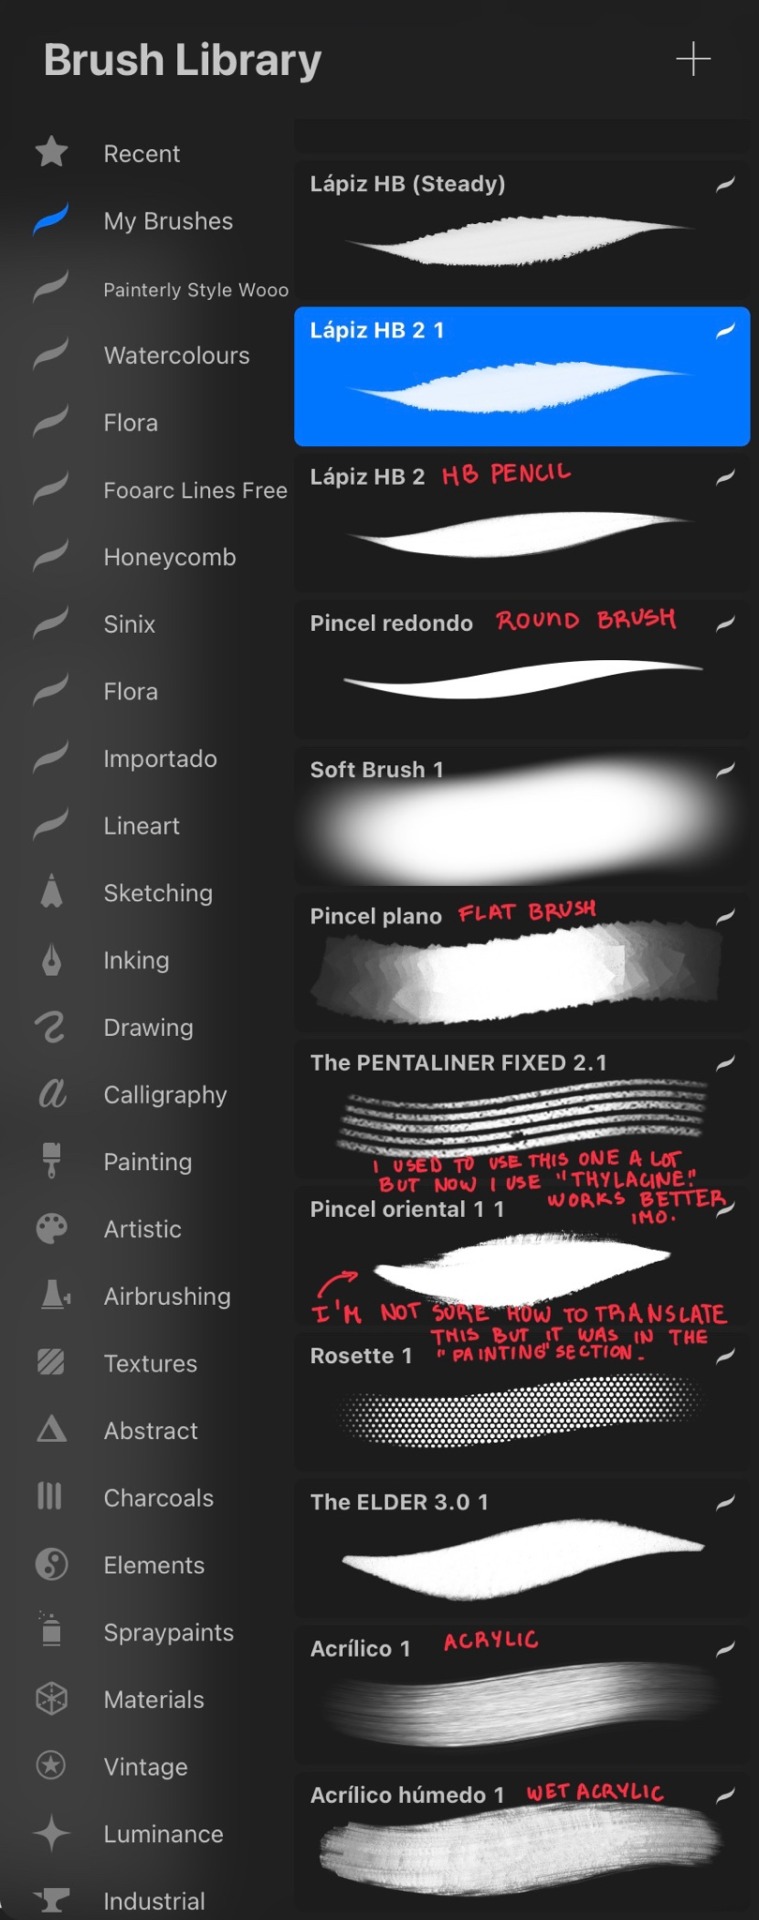
This is actually a hard question to answer 💀😂 I use a lot of brushes 👀 Depends on how I want my drawing to look like. Sometimes I’m going for more of a smooth, noticeable lineart style. Other times it can be more painterly. I also like to experiment a lot. I will put all the brushes I have used for sure several times 😊 I hope it helps 😊
These are my main ones for sure. Some of them downloaded in Spanish fsr??? But I translated them 😊 the brushes on the left are for the more cartoony, lineart style. The other ones I use for painting 😊 (Though I sometimes mix them up a bit)
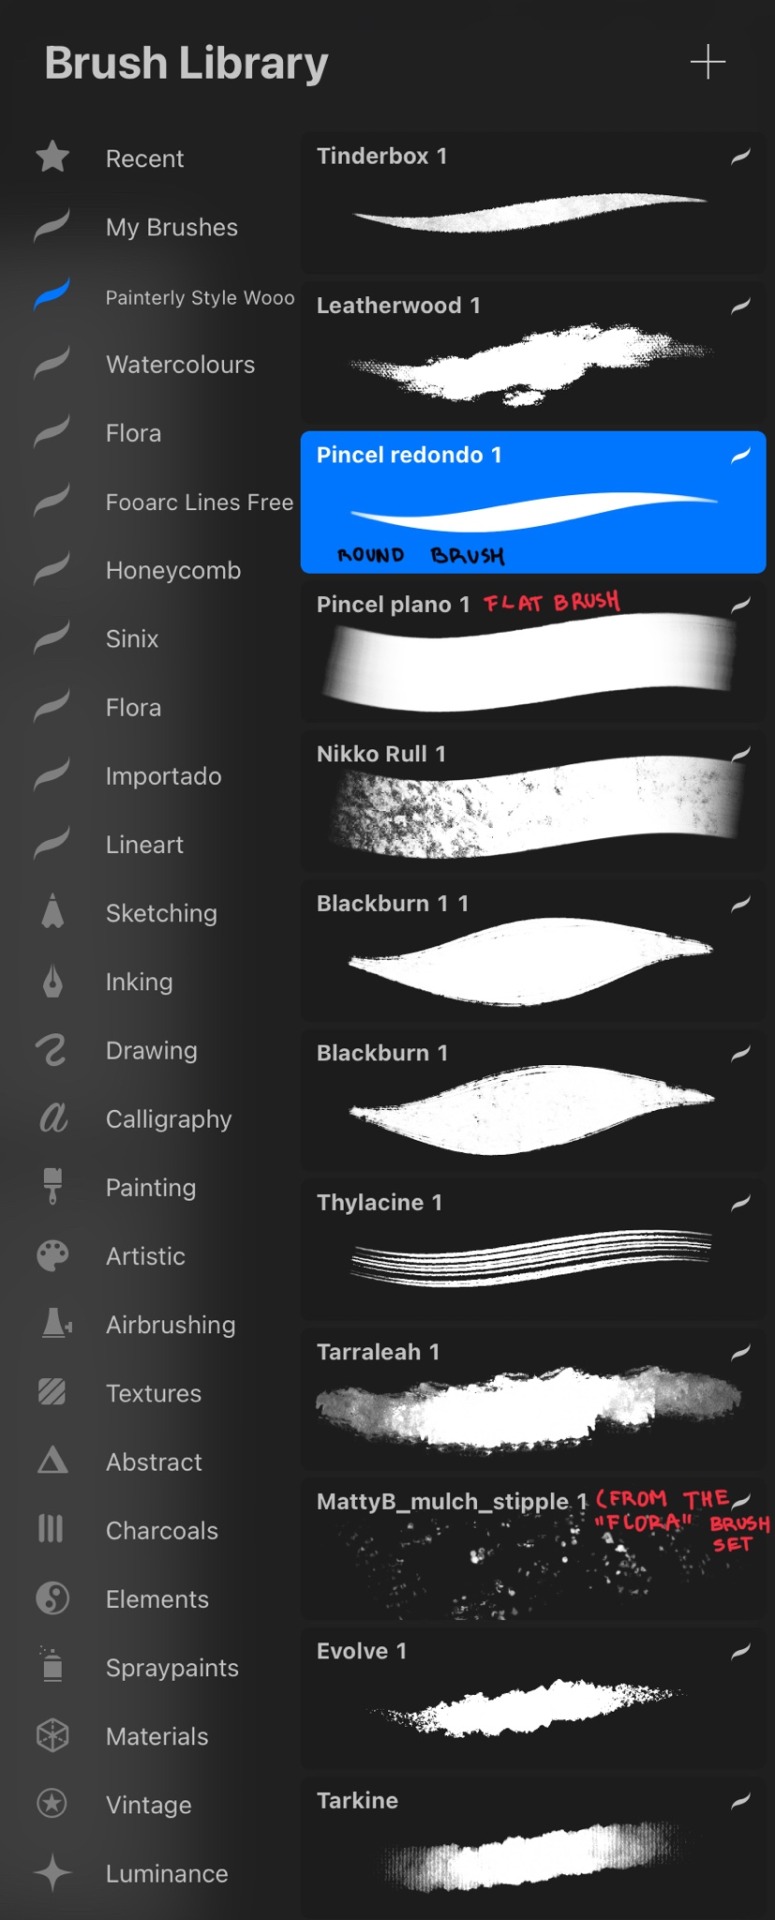
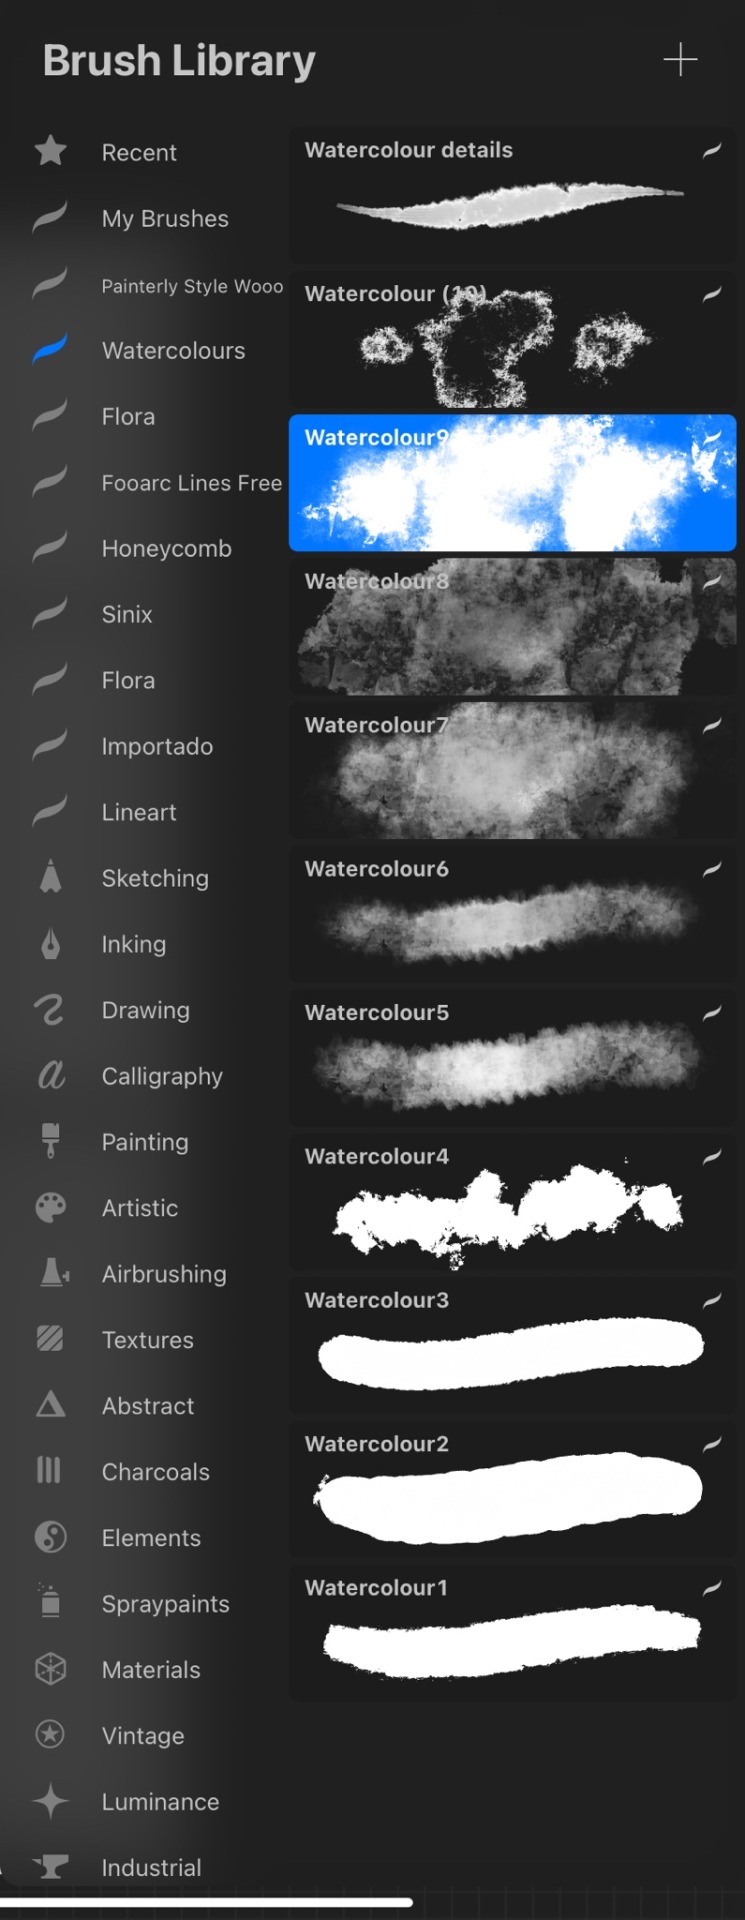
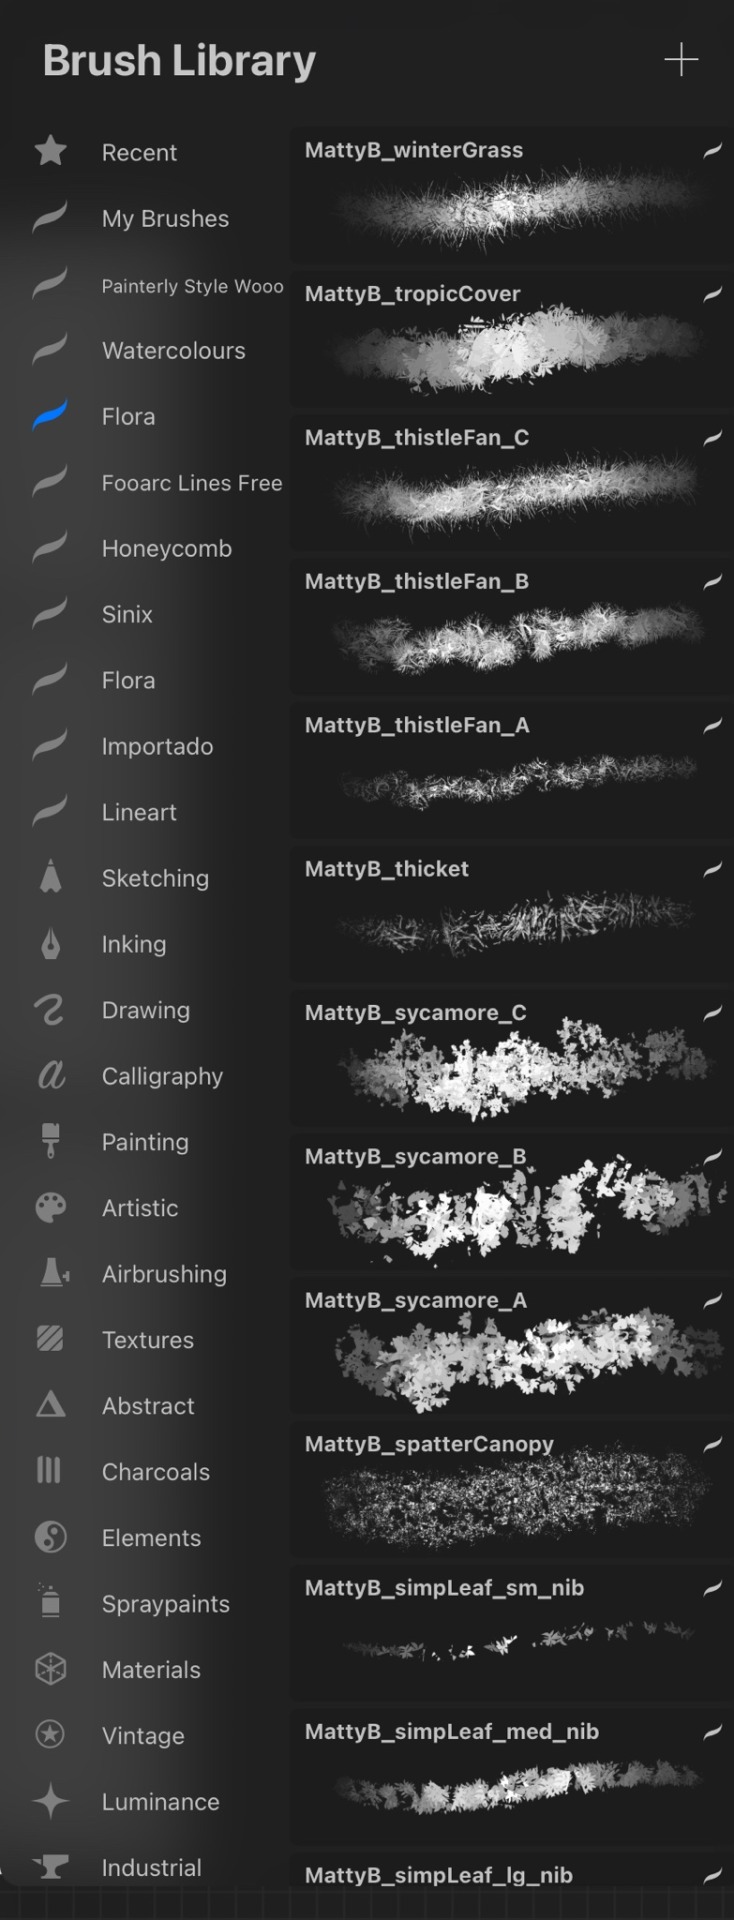
(Left) I use anything in the watercolor section :) (right) This is a nice set of vegetation brushes called “Flora” I found here. I have used them several times and they are pretty nice and helpful 😊
Little side note: The ones that have numbers on them (like 1 1, 2, etc) are just duplicates of the originals so I could save them in a separate, personal brush set. Very few of them have been slightly altered by me but the changes are barely noticeable. The one I’ve changed the most is the HB Pencil. That’s the one I use for lineart and sketching.
I hope this is helpful! 🐸✨
109 notes
·
View notes
Note
Hola! Just dropping in to say I love your style so much! The looser look is done perfectly because your art still looks clean and cohesive and I didnt even start on the shape language- its *mwa* perfect!
So, on this, what software and brushes do you use? I know the tools don't make the artists but I can't help but look, point and go 'I GOTTA GET ME THAT'
Lotsa love! <3
hello! god, thank you for the kind words, that means a lot. im constantly trying to improve. your input makes me really happy 🥺 let me answer your question under the cut!
so i mainly draw in clip studio paint and magma.com. uh... the latter i actually dont really recommend unless you want to draw with other people. (its honestly not too bad, my only real gripe with it is that it only lets you undo like 10 times.)
unfortunately i dont have all the brushes i ever used on magma saved. ive played around with the settings a lot and even drew without pen pressure at times, rendering a lot of the brush's features useless. i'm gonna do my best to share as many as i can recall using:
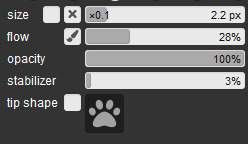
^ this one i used for the one i posted most recently (along with a simple big brush for the colored parts)

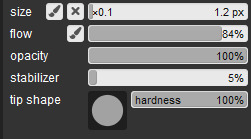
On clip studio paint i dont recall using any brushes other than the basic G-pen recently, which looks like this on my end:

Stabilizer is set to 0.
And though you didn't ask, as for traditional art, i've been drawing with an HB pencil on bristol paper lately.
I hope that's helpful!
13 notes
·
View notes
Text
vvenuspng FAQ
Main: @vvenushalo
I’m also vvenushalo on insta/twitter/bluesky (on twt/bsky i also have a priv that’s vvenuspng) but im only active on tumblr :) maybe bluesky soon too idk (social media scares me lol)
About me
I’m Venus! i go by they/them but any pronouns are ok tbh. i’m a 21yr old american-peruvian lesbian in EST. me olvide muchísimo español, solo hablaba cuando era pequeño :( I’ve been drawing all my life, but it’s mostly a hobby atp.
What's the point of this sideblog?
Well, really I just wanted to post abt helluva boss (idc abt hazbin btw) without it being connected to my main blog. I don't rlly care for vivzie & ppl are quick to judge so I’d rather keep a separate blog, especially given the adult nature of the show. I also want to hoard my aesthetic shit here and anything funny that won’t fit in my main’s queue.
Art info
I use procreate on ipad with an apple pencil (btw if ur thinking of getting a second gen pencil—do not LMAO this shit is annoying and i miss my first gen one).
Recently I’ve been using procreate’s ‘shale brush’ to line my works, but in my older drawings you’ll see me using a modified ‘HB pencil’. I have various brushes from packs and bundles I’ve saved that I sometimes use, such as Retro Supply, Joes set, clem’s brushes, feast’s pencils, and LP’s painting set, but I mainly stick to a few favorites and modify them.
Top ships?
Stolitz & Verbie are my top faves, followed by Fizzmodeous, M&M, and HoneyMoon. I like blitzfizz and stolitzarozzie (?) as well.
Fave characters?
My faves are Verosika, Stolas, Blitz, Barbie, Fizz, Millie, and Beelzebub! Anything including them will make me happy emote :)
I’m new to tumblr and I want to reblog, but don’t want to be annoying. What can I do?
Tumblr lives off reblogs! reblog anything and everything u like! all the time! that’s the point of a blog! u can use tags to essentially whisper ur thoughts, u can directly add on to a post by reblogging with ur opinions, and u can comment within the post itself! Do not be afraid to leave tags especially, bitches (me, along with many others) LOVE seeing peoples tags on stuff. It’s also pretty widely accepted that spam is super cool too btw, but if ur REALLY worried about that, there’s an option to queue ur reblogs or schedule it for a later time :) but again, don’t stress! <3
REQ FAQ
keep in mind these are requests, and not commissions. I do reqs for fun and because ideas are hard for me to come up with, I do not owe you any type of drawing because u are not paying me. effort given to each req varies purely on my own whims lol (as in, some will be sketches, others may end up full drawn)
What would you not draw?
as my pinned states, i’m not into stereotypical freak proship stuff. By that I mean what proship has come to be defined as of recently with extreme gross tropes, I do not mean silly little crackships that ultimately do no harm. this applies to all reqs and everything I draw.
I’ll do most (helluva) ship reqs but as a lesbian i’m obligated to heavily favour any sapphic pairs LMAO. for nsfw reqs ill only do that with stolitz and verbie and just use common sense for these types of reqs, yknow? kink is alright but please know im not personally active in the community, im more passively interacting n learning so I won’t be accurate in my depictions. I’m also not gonna get into my whole hard/soft limits list—if i don’t like what u req i’m just gonna delete the ask lol.
Would you draw multi panel comics?
yes! but please keep in mind I am not a comic artist, therefore it will be choppy and possibly rushed. I’m less likely to do these types of reqs simply because of the effort it takes to complete these (no matter how much i want to) :(
Do you do commissions?
Not really, but if you sincerely want a comm from me, feel free to reach out and we can negotiate! I will not do any fully rendered art, but I am open to sketches and/or lined flat colored works (example)
#xx venus#faq#less a faq since these haven’t been ‘frequently’ asked more just an info sheet#info. post.? whatever#i’ll update this as needed#req faq#art requests#vvenuspng info#vvenuspng#vvenuspng faq
1 note
·
View note
Text
ibis paint x VS procreate VS clip studio paint ios review
DISCLAIMER: i’ve been using procreate since i got my ipad in 2020 while i just picked up ibis paint x yesterday. i have been using clip studio paint for desktop since ~2016, though i mostly use the desktop version over the ios version. this review will mostly be my first impressions of ibis paint x compared to procreate and csp for ios!
PROCREATE:
at this point, procreate is probably THE industry standard for ipad drawing programs. it’s got a very minimal layout designed for use on your ipad and lots of options for touch and gesture controls.
i find that procreate feels less like drawing on a display tablet and more like just drawing on an ipad if that makes sense? display tablets have a very specific feel to them when you use them with desktop programs, and procreate doesn’t have that same feeling to me. it’s very intuitive and you can definitely tell it’s designed FOR ipad.
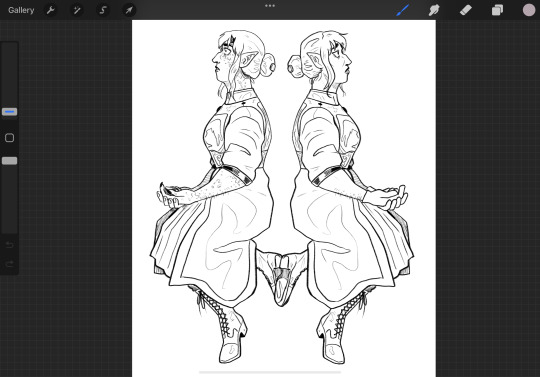
THE PROS:
the layout
its simple, minimalistic layout is extremely accessible for the ipad specifically and once you get used to it, becomes easy and convenient to navigate (especially if you customize the settings to your liking)
THE BRUSHES!!
good god i could sing my praises for the default brushes all day long. to this day, i use a slightly revised version of the default HB pencil brush for EVERYTHING from sketching to coloring and refining.
in addition to the default brushes, which are relatively simple to customize and adjust in the brush editor, you can also import brushes other people have made into the software. since procreate is so widely used, it’s really easy to find some nice ones online!
tilt support with apple pencil
procreate is compatible with tilt support on your apple pencil, meaning that the way your apple pencil tilts impacts the brush’s effect on the canvas! notably, i use this like a normal pencil where i will hold the brush at a low angle as i’m drawing and shading to produce a less opaque and wider line (mimicking the effect you get when you use the side of the pencil tip as opposed to the point)
THE CONS:
limited amount of layers
depending on how big your canvas is, procreate limits the amount of layers you can use to prevent overloading your ipad. while i haven’t run into any problems with this since i merge my layers as i go, it’s an important factor to consider if you tend to do big complicated pieces with lots of layers. (on an 8x10″ 300DPI canvas, you can have up to 70 layers. if you were to make the canvas bigger, that number would noticeably go down)
ipad exclusive
you can ONLY download procreate on ipads, which means that if you have an android tablet or have a display tablet that hooks up to a computer, you’re out of luck.
cmyk support is slightly glitchy
while yes procreate DOES technically support cmyk mode, it’s not as straightforward as you’d expect. if you save a cmyk document as a PSD file with the layers intact, this results in a small white border around each of your layers. not entirely sure why it does this but it’s kind of annoying :/ (i am unsure whether they fixed this in any recent ios OR procreate updates though!)
TL;DR:
procreate is an overall excellent software to pick if you have an ipad! that’s not to say it doesn’t have its flaws, but overall it’s the industry standard for a reason.
IBIS PAINT X
while i’m a new user of this program, i gotta say i do like it a lot from what i’ve seen! ibis paint has two options on the app store: Ibis Paint and Ibis Paint X.
ibis paint is the free-to-use version, in which you can either pay to unlock the brushes OR watch ads to unlock them for a certain amount of time.
ibis paint x is the paid app, but it only cost ~$10 which is honestly not bad. i splurged on this version because i do NOT have the patience to watch ads for brushes LOL
i find that ibis paint definitely feels different than procreate. there’s a nice stabilizing feel to the brushes so they aren’t wobbly in any places, but i think you can turn that off too. in my opinion, this app feels more like a desktop app on a display tablet except condensed and optimized for ipad use!
(NOT like clip studio paint, where they basically took the entire desktop app and threw it on an ipad, making it feel very cluttered)

THE PROS:
brushes galore
oh my god there are so many cool brushes that feel very distinct and different from the procreate brushes?? these feel much more like the brushes you’d find on clip studio paint or paint tool sai almost. the stabilization, like i mentioned, is very nice as well! it feels very natural and doesn’t result in too much lag in the stroke like you see sometimes in other programs. it looks like you can also customize every brush to your liking, though i have not done any experimenting with that yet!
also, when you use a brush it shows the outline of that brush on the canvas wherever you use it, much like photoshop and clip studio paint for desktop!
no layer limit! (that i’ve found yet)
while if you make a large document the app gives you a small warning pop-up claiming that larger canvases result in more lag in the app, i have yet to see that lag in action with my usual 8x10″ 300DPI canvases.
THE CONS:
no tilt support
i think this is the main reason why this app feels more like a desktop app on a display tablet for me, because all the display tablets i’ve used have not had tilt support on them. this isn’t a huge world-shattering problem though imo? it’s just something to note when comparing the two softwares
i have no idea if this app supports imported brushes
since this app isn’t as widely used as procreate, i have no idea if it supports exporting and importing custom brushes. if it does, it might be kind of hard to find good brushes for it since it’s not as notorious as other drawing softwares out there
(i’m also unsure whether it even has cmyk support too!)
TL;DR:
this app is really great for what it is! it only costs 10 bucks on the app store to unlock all the brushes, but it offers a paid subscription to unlock more features. i haven’t felt the need to upgrade though since there is already so much packed into Ibis Paint X as is.
CLIP STUDIO PAINT IOS
i honestly only use csp for ios when i have to work out the perspective of a piece because the perspective rulers are RIDICULOUS in csp. however, i figured i’d throw it in the review since i do have experience with it! (mostly on desktop tho)
csp is my go-to software when drawing on desktop now because it is so much easier to use and so much handier than photoshop for illustration, since it was designed FOR comic/manga artists and illustrators specifically.
i find i don’t usually use this app for casual sketching though because it’s essentially the same as the desktop version, just shrunk down for an ipad. this makes the screen feel very cluttered and somewhat complicated to navigate since an ipad screen is so small. (especially since i rely a lot on keyboard shortcuts when using desktop csp, but most of the time do not have my bluetooth keyboard handy for my ipad)

THE PROS:
no layer limits!
again, unlike procreate, there’s no layer limit on here! i would imagine if you made an absurdly big file and then added a ton of layers to it, the performance of the app would be impacted since it’s not the desktop app, but other than that there are no restrictions!
RIDICULOUS perspective ruler
when i learned how to use the csp perspective ruler it changed my LIFE. easily the best part of csp by far. (with the addition of other assets created by others, it can be even easier to use too!)
3d models in the app
clip studio paint has a library of free-to-use 3d models you can access from the program, and then pose or change the angle of as you see fit. you can also download more from the online store!
lots of brush options
since many people use clip studio paint for desktop, there are so many options for custom brush packs, which iirc are all compatible with ios! (my personal recommendation is frenden’s 800 brush pack for 15 dollars)
if you know how to use the desktop app, you know how to use the ios app
like i mentioned before, the ios version is essentially the same as the desktop version with a few shortcuts for easy ipad access. (EXAMPLE: if you swipe to the right on the left side of the screen, you can access a small menu of keyboard shortcuts in case you don’t have access to a bluetooth keyboard)
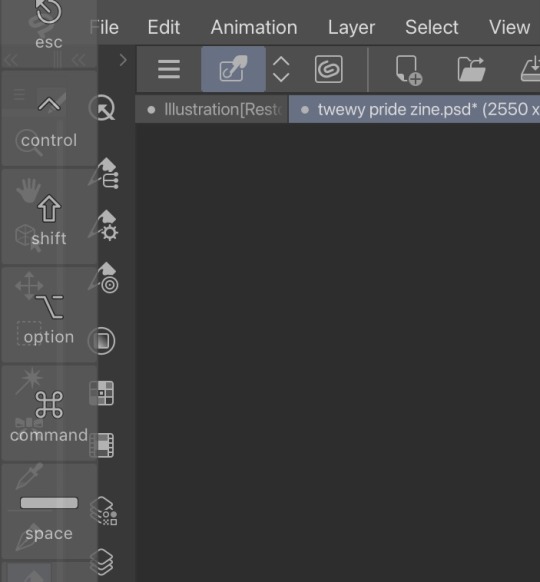
THE CONS:
subscription-based service
unlike its desktop app, the ios app is a subscription-based service. CSP Pro is $4.99 per month, while EX is $8.99 per month. annually, Pro is $24.99 per year while EX is $71.99 per year. (csp for desktop is a one-time payment that goes on sale for 50% off basically every month)
really cluttered
there’s so much going on in the app that it can be sort of overwhelming, esp on an ipad’s smaller screen. there’s a lot of clicking the different menus open and closed because if you keep them constantly open they take up too much space on the screen, and give you very little drawing room.
no tilt support
again, i don’t think there’s tilt control on this app either. but it doesn’t severely impact the performance or feel of anything. it’s just something to keep in mind!
TL;DR:
i personally think that if you want to use clip studio paint you’re better off getting the desktop version since that is what it was designed for and also it’s only a one-time payment that goes on sale pretty often. but if you do a lot of perspective drawing on your ipad like i do, it’s handy to have!
12 notes
·
View notes
Text
Traditional art supplies I like: ✨Cheap Edition✨
❤️🧡💛💚💙💜🤎🖤
I noticed my last post had a lot of more expensive materials, which are great if you save up or are able to get them more easily, but I figured I’d make another post about more affordable materials for my friends out there who don’t have access to an employee discount at a craft store like I do, or family members who like to give gift cards and such!
Pens:
1. I mentioned this in my last post, but ballpoint pens will never fail you. I recommend BIC if at all possible. You can get a pack of 60 in red, blue, and black for around 6 bucks, as well as just a 60 pack of one of those colors for the same price. You can get some really nice shading out of these, surprisingly, and a pack that big will last you years!
2. Paper mate flair felt tip pens. I used to love these growing up!! They still hold up pretty well, and have the same basic effect as, say, a tombow brush pen, which is my favorite. A pack of 3 in black is around $3-4, which is half the price for a pack of tombows! You can also get them in a lot of different colors. A 12 pack in rainbow is about 12 bucks. If a dollar per pen seems a little much, trust me- if you’re able at all to save up for these guys, they’ll last forever and won’t let you down!
3. I also mentioned pentel sign pens in my last post, and they are just slightly more expensive than the paper mate flair. You can get a box of 12 for $14, which is still more on the expensive side, but if you’re able to then these guys are really fun to use and really reliable!
Pencils:
1. In the school supply section of walmart, you can get a pack of generic HB pencils. They usually have either stars, pastel or neon colors, or are holographic on the barrel. Especially in the back to school season, go and get you a pack of these; any sharpener will do. They are surprisingly soft and lay down pretty dark! I get a pack every year and they never fail me. A pack of 20 is only a couple dollars. (Dixon and ticonderoga I do NOT recommend. Ticonderoga has great colored pencils, but their regular pencils are WACK. They’re way too hard so their lines are way too weak for my taste. As for dixon, they don’t erase cleanly, and splinter when they sharpen. No bueno.)
2. BIC mechanical pencils. These are probably the best mechanical pencils on the cheaper side. They write nice and dark, and you can get a pack of 40 for about 8 bucks, which will last you literally years!! Just like their ballpoint pens! If you really want a good cheap sketching set, I’d get a pack of their ballpoint pens and pencils. Basic as basic gets, but it’ll get you far.
3. For colored pencils: I swear, you can never go wrong with crayola. They’re not the softest or most pigmented, but when you’re balling on a budget they’re perfectly fine! I also love crayola crayons. They are my #1 most favorite affordable art material!
Markers:
1. Back to crayola: crayola super tips markers. These are PERFECT for sketching. You can layer the colors pretty nicely with these, and they start out nice and transparent, almost like watercolor. With the shape of the nib, which is almost cone shaped, you can get some pretty nice line variation! I recommend a pack of 50, which is around 7 bucks, and if you’re feeling really fancy, a pack of 100 is about 14 bucks.
2. Artist’s loft fundamentals triangle markers. When I was in high school, I had a pack of these that I wore absolutely ragged. They are pretty much always worth it, and also perfect for sketching. I even still have a set today, along with the super tips! They’re just that good! These babies are skinner than the super tips, so they’re more like the width of a pen, but not exactly like the penmate flair, which you can press down like a brush. With these you can also take a brush with water and use them like watercolor pencils and get some beautiful results! A pack of 36 is about $5 at michael’s. Probably one of the best purchases you could ever make at that price and I cannot recommend them enough, no matter how experienced you are.
3. For alcohol markers: Ohuhu is fantastic. They’re a bit on the pricier side, but that’s mostly because alcohol markers usually are compared to water based markers. A pack of 60 is usually around $20 on amazon, which is how much I got mine for, but I just checked and they’re about $25. Don’t panic though- prices change all the time! The colors on these are absolutely lovely, and it comes with a nice carrying case with a handle, and a plastic sheet you can place underneath the paper you’re working on so it doesn’t bleed through to your desk or the next page of your sketchbook. Absolutely worth the price tag. Ohuhu also has water based markers for slightly cheaper, but I can’t speak for those since I haven’t tried ‘em.
4. Sharpie is a household name, and there’s a reason why! I don’t always prefer them since at times they CAN be overpriced, but depending on which set you get, the price tag becomes more reasonable. For regular black, I recommend getting a pack of 6 with 2 chisel tips, two fine (regular) tips, and two ultra fine tips for around $7. They last forever, and that way you’re getting a pretty wide range of lines you can get! As for their colored markers, I honestly can’t recommend them as much since I find their colors to be a little darker than I’d personally prefer as compared to the ohuhu markers, but if you so choose you can get a pack of 12 for about $9 on amazon! My favorite color has to be the fuchsia. No matter what they’re fun to color with and easy to obtain just about anywhere!
Sketchbooks:
What’s this? A sketchbooks section? (You didn’t have that in your previous post, Cricket! Well, no, I did not, but I’ll have to fix that soon!)
1. Artist’s loft hardbound sketchbooks. You can get these at michael’s for about $6, and they pretty frequently go on sale for bogo or bogo 50%. The paper is actually super nice, a little on the smoother side, and just thick enough where you’ll feel pretty fancy using it, and also not guilty if you need to tear out a page. They’ve got classic black, and also currently they have a lovely pink, blue, and green. The inner cover page is the same color as the cover, and it gives for a more professional, almost published feel. They come in 6x9 and 9x12 sizes. Artist’s loft is generally a pretty reliable, affordable brand!
2. Pacon sketch diary. If you prefer spiral bound, these guys are also pretty nice! They’re about $5, and there are other similar generic brand sketch diaries you can get that will never lead you astray. Walmart has some pretty good ones too for around the same price, and some even have a clear plastic pocket on the front where you can insert whatever you like!
3. Spiral bound notebooks are easily accessible, and during back to school season in certain places you can get them for a dollar or less. There’s no shame in needing to use lined paper! It works just as good as other paper when it comes to needing to draw something, and no matter what your art is your art, no matter what materials you use! I love getting lisa frank notebooks or notebooks with puppies or kittens on them during the back to school season. (Walmart back to school season SLAPS for cheap art supplies if you can’t tell already.)
4. Daler-rowney simply soft cover sketchbook, 3.5x5.5 in. I list this one because it’s the nicest cheapest sketchbook you can get at Walmart for about 2 bucks. It’s a much smaller size and very flat so you can keep it in your pocket or bag and take it with you. The hardbound 5x7 is also super nice, and it used to be my ultimate top choice. It’s about $4-5. I would get one like once every 3 months, and if you’re able to afford it, they’re great for stocking up and great to take with you anywhere. The paper is a pretty unusual texture that I haven’t seen anywhere else, and in my experience there’s very little transference from one page to another if you’re using pencil, which is always pretty annoying and great to avoid when you can.
5. Royal and langnickel essentials hardbound sketchbook. I came across this one when I was shopping at Ross. Yeah, Ross!! A good tip for cheap art supplies is to check Ross! I’ve gotten some pretty great things from the art section there for very cheap. Since it’s a discount store though, it’s usually a crap shoot regarding what you might find. These sketchbooks have pretty similar paper to the daler and rowney, and you can get a 4x6 for about $3 at Walmart. A larger one, depending on where you look, has pretty inconsistent pricing, but when I was at Ross I found some 9x12’s for 2.99. Although I can’t promise you’ll have the same luck as I did!
Paints:
Watercolor:
1. Jerry Q watercolor palette. I had one of these right before I first tried gansai watercolors, which are my favorite and a little more expensive, but the set I had I kept for around 2 years with almost constant use. They can be a little light and not super pigmented, but if you’re able to get something like a spray bottle and wet them before hand, let the water soak in a little bit, they’re much easier to activate and you’ll get brighter colors out of them. They just need time to soften. You can get a 24 color set for $14, and a 36 set for $18. If you’re able to, I recommend the 36 set since that’s what I had, but 24 works just fine and it’ll be better for learning color mixing!
2. Rule of thumb is crayola is usually the way to go if you can’t afford much else. I will say the older formula for their watercolor paints was much better. Brand new is still good though, and you can’t go wrong with a regular 12 set. (I do NOT recommend prang, which is their similar competitor. Their paints are sticky as hell if you use too much.)
Acrylic:
Craftsmart or apple barrel craft paints. These guys were my first acrylics I ever used, and I still have some older pieces that I made with them that still hold up in my eyes today. They have a much different formula than most acrylics, and are powder based, so you’ll notice they sort of have a different texture. Careful not to glob it on too thickly, however! If you do the paint will form huge cracks in it when it dries. I’m pretty sure it’s because of the formula and that it shrinks when it dries, which can also make thinner paper buckle. Also, if you’re painting on paper, if the paper is on the smoother side, areas where the paint is thicker might crack and flake off. It’s still good reliable paint just as long as you’re able to avoid this! You can get a set of 16 colors for $11, or if you’re able to, a set of 36 for $25 at michael’s. You can also buy them individually if you’re only able to afford the primaries like red yellow and blue, or cyan magenta yellow and black (CMYK.) The individuals sell for about $1 each, and the craftsmart paints in particular come in a few different finishes like matte, satin, and metallic. I recommend just the matte to start with though.
Paper/canvas:
1. Canson XL watercolor paper. You can get a pad of 30 sheets in 9x12 at walmart for about $5. The 11x15, if you’re able to afford it, fluctuates from $10-18 depending on where you shop, but michael’s often has a sale on this particular brand of paper pads for bogo or bogo 50% off. They also now have spiral bound books of the same paper that you could tear the pages out of and display, or use as a watercolor sketchbook. Canson also has mixed media paper for about the same price, and the spiral bound book is a very popular choice for a sketchbook, although I’ve used it and I personally prefer the watercolor paper texture much more. If you like your paper on the smoother side though, the mixed media is probably the way to go!
2. Creatology is, I think, a michael’s brand of kids’ art supplies, and they honestly make some pretty nice paper. If you like to draw on thicker paper, they’ve got a paint pad that you could use as just mixed media or regular drawing paper. It’s nice and thick and smooth. Their watercolor paper is also pretty nice! The 9x12 pad is around $3, and has 40 sheets. It’s slightly thinner than the canson watercolor paper, but you get 10 sheets more and it’s cheaper! Also, most regular price items at michael’s (there are a few exclusions, such as their artist’s loft value canvas packs, and their sets of rolling shelves, and cricut products) can be discounted with a coupon! Pretty much every single day the site has a 20% off regular price items coupon, for in store and online (the online code is usually 20MADEBYYOU), so you can always get basically anything for a discount! If you have a rewards account, which you can access through the site or on the app, you’ll get points with the more you buy, and you’ll eventually get $5-10 vouchers! If you’re still trying to be frugal, it’s great for getting basically free items. But I digress.
3. Canvas is expensive as hell, I know. I barely buy it myself, and only started getting it recently, since I mostly worked on paper beforehand. But if you’d like to hang your work easily and are able to put pins/nails in your wall or use command strips, you could get a value pack of canvas from michael’s. I mentioned these before, and they’re one of the items that can’t be discounted with coupons, but they work great and you can get a pack of several at a time. Each pack is the same exact price- $12.99- so it’s easy to remember since it’s consistent. The smaller the size of the canvas, the more canvases you’ll get. For example, in a pack of 8x10, you get 10! If you want the best value and want to create more pieces for less, that’ll be what I recommend! You can also get canvas panels, which lay flat and are easier to store if you’re low on space. The best value there is a pack of 5, size 9x10, for $10. So, it’s not as much material for the price, but if you need the canvas to be smaller, that’ll work just fine!
4. Copy paper!!!!!!!!!!!!! Get a pack of copy paper!!!!!!!!!! It’s literally hundreds of sheets for very cheap, like $5 or less!! Walmart has a pack of 500 for $5. That’s 100 sheets for a dollar. While it won’t work well with paints, it’s great for drawing with basically any drawing material. It’s thin and more fragile than most art paper, but if you need to discard it you won’t feel bad, and there’s literally another sheet right there if you gotta start again. I had a period where I would only basically draw on copy paper when I lost access to free art materials from art school, and it’s fantastic for sketching. Just get a cheap paper folder for about 50 cents to keep your drawings safe, and you’re golden. It’s also great if you don’t wanna use lined paper but can’t afford a sketchbook.
As for digital art; digital is often the most affordable option for a lot of folks, since it requires only, at the minimum, a computer or phone and a drawing program. I’m not as experienced with digital art, but I highly recommend the XP pen tablet. It’s a 4x7 inch little usb tablet, and you can get one on amazon for $20. One purchase that will last you a long time! I’ve had mine for 2 years now, and I haven’t even had to replace the nib yet! For a drawing program, I recommend Krita, which is the only art program I’ve ever used other than microsoft paint 3D. It’s completely free, and has some really lovely brushes. My absolute favorite is the 4B pencil tool, which I use for basically every single digital drawing I make, no joke.
I’d like to also mention that if you’re not able to buy art supplies at all, recycling is a great way to gain materials! Go dumpster diving! Cut open a cereal box and draw on the inside! Draw on old envelopes! Paint on cut open cardboard boxes! Borrow a pencil or pen from a friend! There is sooooo much waste in this country (USA), and even if you’re not on a budget, if you’re able to reduce and reuse, you’ll feel better about reducing your carbon footprint and giving back to the planet.
Lastly, I just wanna say that you don’t need fancy materials to make wonderful art. Nice art materials are good to have, but they’re absolutely not a requirement. You don’t need to pay thousands upon thousands of dollars to go to art school, most often just to get torn down by instructors who don’t care about you or your well being. YOU know what’s best for yourself. Do what feels right. Make art however and whenever you like. Make it for yourself. Learn from yourself and which materials you prefer. I’ve been making art for a long time so I’ve tried a lot of things and a lot of materials, hence why I can make these recommendations, but you might discover something completely different that you really love! Materials do not make the artist, full stop. The art you make will always be valuable and important, no matter what. If you’re still in school, live at home, don’t have a job, or are just not able to buy art supplies for whatever reason, there’s always, always a way to make art. You might have to get a little creative in finding out ways to make art, but I promise you there’s always a way. If later in life you’re able to afford having art as a hobby or a career, you’ll look back on the time you could only access these cheaper materials, and cherish the work you made then. Especially if you’re just starting out, and by the time you’re able to afford higher quality materials, you’re a more experienced artist. I personally think it’s so important to remember where you’ve come from, so you can feel proud of yourself as you grow. There’s nothing more fulfilling than looking back on everything you’ve done and the improvements you’ve made throughout your journey. And like I said, you don’t need to spend thousands on art school to learn. The internet is an amazing resource for tutorials, and there’s no shame at all in using any resource you can to learn and expand your skillset. You deserve to create. You deserve to learn. You deserve to feel proud of yourself and what you make.
❤️🧡💛💚💙💜🤎🖤Art is for everyone.🖤🤎💜💙💚💛🧡❤️
30 notes
·
View notes
Note
Hey Noodle! How's life been? I was wondering a few things...if you wouldn't mind answering a couple of questions!
What kinds of landscapes do you really enjoy painting/drawing?
Are there colours you find yourself really gravitating to?
What do you reference when drawing/painting? Your own pictures? Other peoples? Real life subjects?
Favourite watercolour method?
Do you pick out the size of your canvas/paper or just grab one on a whim?
What kind of subjects draw your attention? (e.g Happy people, colourful flowers, or maybe even still life's you create yourself?)
Favourite pencils/charcoal for drawing?
Do you have any tips for younger artists getting into traditional art? Anything you wish younger you knew?
:] No pressure to answer all of these, if any, btw! Have a good one :D
Hello there :D life has been decent and I hope you've been well too!! Let's see
-i really like to paint very green and saturated landscapes. It can be anything from flowers to trees to mountains, I just love it when there's lots of strong colours. But I mostly like to paint landscapes that are a bit messy? It helps me be a little looser with the painting and not obssess over details, if that makes sense. I try to use techniques that give the illusion of details and depth, though i don't know if i succeed but I try lol
-at the beginning, when I started out with art, I was always quite worried about it being realistic. But after a while I now feel that real life is quite desaturated, everything in nature is a tone of grey, and absolute colours are not very common to find. So I now try to make my art as colourful as possible for it to look lively and more my style, becasue when I was aiming for realism, all my art would turn out dull and muted and I couldn't figure out why. Some colours I really use a lot are greens, all kinds really. I love all colours, but I think green is the colour I enjoy using the most these days.
-i use a lot of places to find my reference photos- pinterest, tumblr, Instagram, Google, and my mom is always sending me random pictures of clouds and landscapes and mountains too. Sometimes when I'm drawing people and I need to understand anatomy I use myself as a reference, although I don't really draw full human anatomy much, only portraits. Sometimes I use my own pictures of flowers and clouds and all that as reference too. I actually have a folder in my phone gallery for references, and I put at least 5 pictures I find in it everyday, because I'm always finding weird things to use as references. I save a lot of old paintings by classical painters too so that I can study them later, learning from the masters is the best way to learn :)
-ehh I don't really know the formal names for methods, you know? But I do like the wet on wet method, I love the look of it. I also like making clouds in watercolour, also fun hack- put down a wash of your blue watercolour, take a paper towel and blot where you want clouds to be-voila pretty clouds!!
-i just grab stuff on a whim and use whatever I feel like whenever I want and make it fit to my art, I don't really plan much, although I'm trying to do that more lol
-i actually don't have a definite favorite subject, I think it really depends on my mood, but I think most of the time I really like making simple things you know, like goats, urban sketches, simple portraits. I don't try to overthink about it, and just draw whatever I feel like. Although in portraits I really love drawing people candid lately
-i use the Staedlr pencils and Faber castle Matt black hb pencils for graphite drawing, and for charcoal pencils I use a local brand. I also have charcoal pencils from General Pencil Co. And they're really good too
-well I think one thing about traditional art is it can be expensive. So what I used to do when trying out a new medium was buy a cheap one and if I like it then get a better quality one. Also when it comes to brushes, I think it's best to buy good quality brushes. I used to buy cheap brushes and use them until they were in horrid condition and then buy new ones every few months. It wasn't a very good system, so I bought better quality brushes and learned how to take care of them and now I have had some of my brushes for years and they're still in really good condition. So learn how to take care of your art supplies!! Also do research about art mediums and supplies, so that you know what you should start with when you're trying something new and don't get overwhelmed
When trying out a new medium, don't feel bad if you don't get it at first, it takes time and the first painting will probably be muddy, but don't give up without trying your best!!
I also think that when it comes to art, it's very important to practice. So draw everything! Fill lots of sketchbooks. And not everything has to be good or perfect, it's quite cruel to expect such perfection from yourself. I still struggle with practicing regularly but it really does help.
And as I mentioned earlier, learn form the masters! Whatever art style you're trying to do or learning, studying and drawing older artworks of masters will help you a lot
thats all I can think of now, thank you so much for this ask galen, you have a good one too <3333
7 notes
·
View notes
Text
Art by Vitkaninn - The Art Showcase
How did I start drawing?
I've been drawing ever since I can remember. It has always been something I really enjoyed doing. I have spent so much time drawing silly comics of some characters I'd come up with or drawing fan art of my favourite cartoon characters. I got my first tablet when I was 15, so that's when I started drawing digitally. I never took any art classes. I've been teaching myself almost everything I know about digital software and art. After graduating high school I decided to study graphic design. I thought it had the potential to be fun, and I liked well designed things. Studying graphic design has taught me a lot about many art related things so far, but learning how to paint digitally and developing my current style is something that I did on my own.
What inspires me?
I mainly find my inspiration looking through other people's work on the internet. It's usually Pinterest, where I save interesting artworks from other painters, photographers, animators etc. I also play a lot of video games which are a source of inspiration too.
What mediums do I use?
I'm often asked what medium do I use, as people mistake my art for traditional paintings. I'm a digital artist. I'm using Procreate for all my art. In the past I've used Adobe Photoshop CC and Painttool Sai. I'm drawing on the 12.9 iPad Pro 2020 using the Apple Pencil 2nd Gen. In the past, I’ve also used various Wacom and Huion tablets.
What brushes do I use?
Procreate itself comes with a handful of really cool brushes. Some of my faves include the 6B pencil, HB pencil, Peppermint, Gesinki Ink brush, Shale brush, and the Kunanyi brush.
Other than the default brushes, I really love using True Grit Texture Supply’s brushes and textures. My favourites from them would be the Rusty Nib Inkers and the Beat Tones.
Some of illustrations by Vit - Vitkaninn:

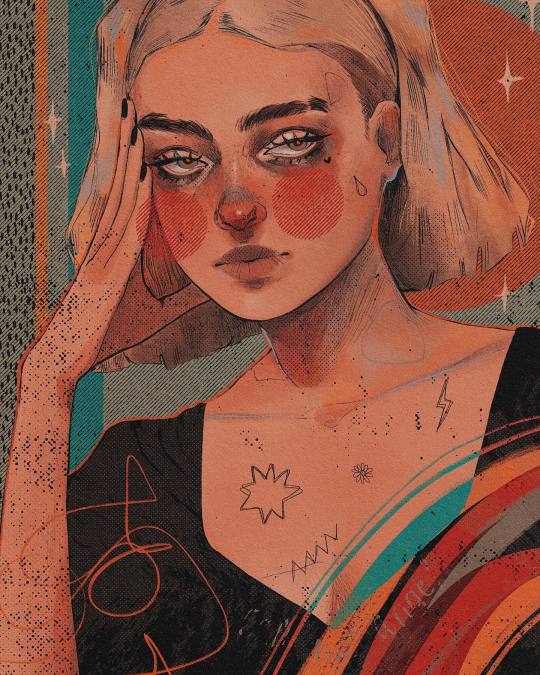
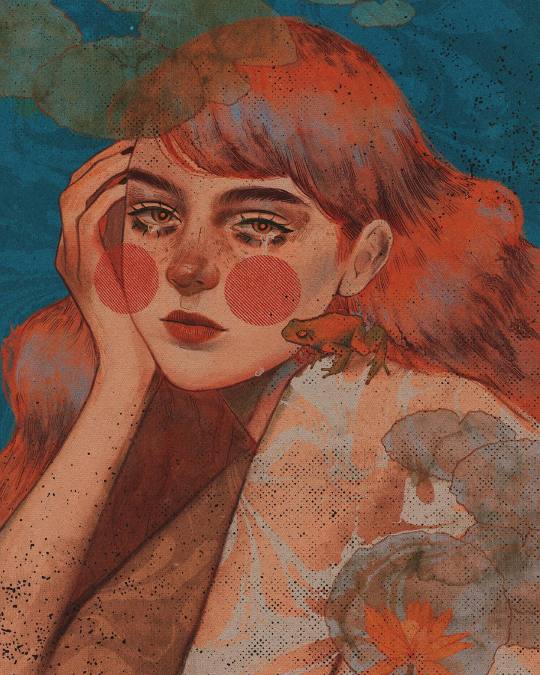
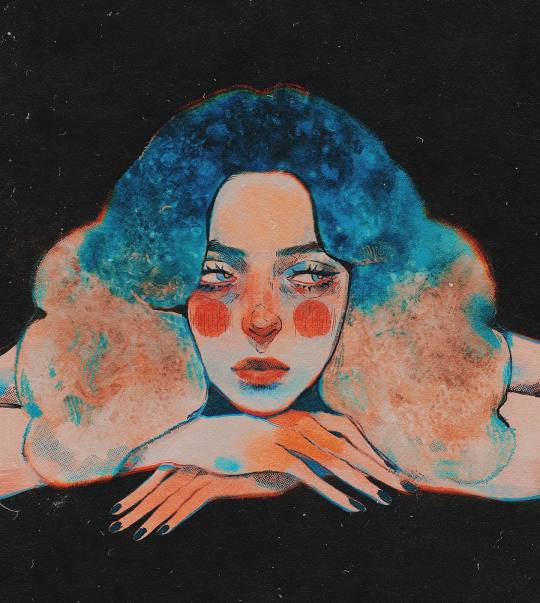
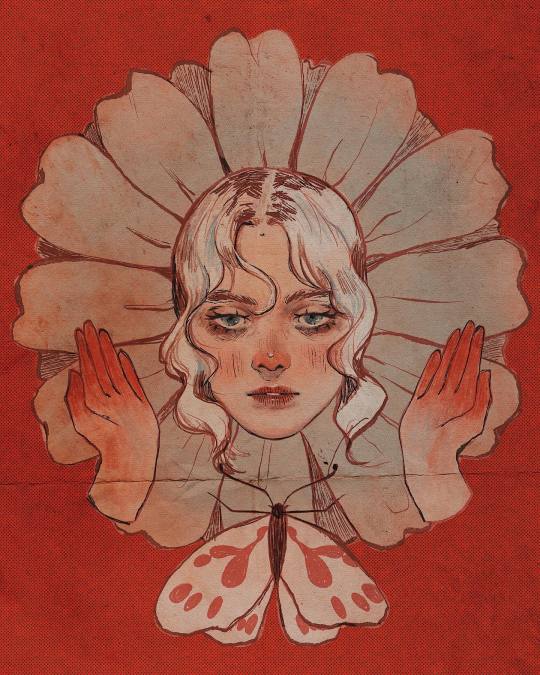
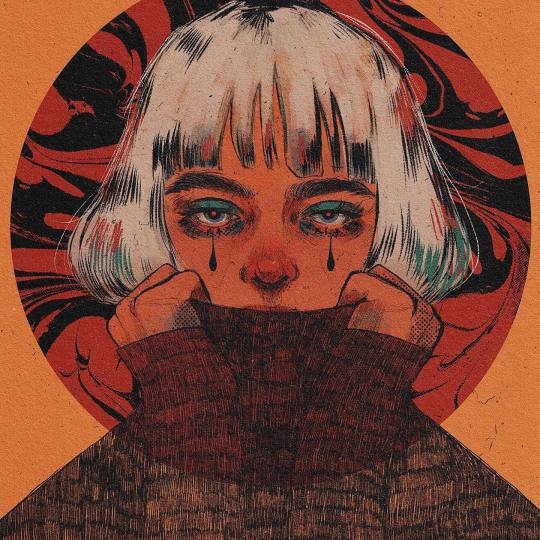
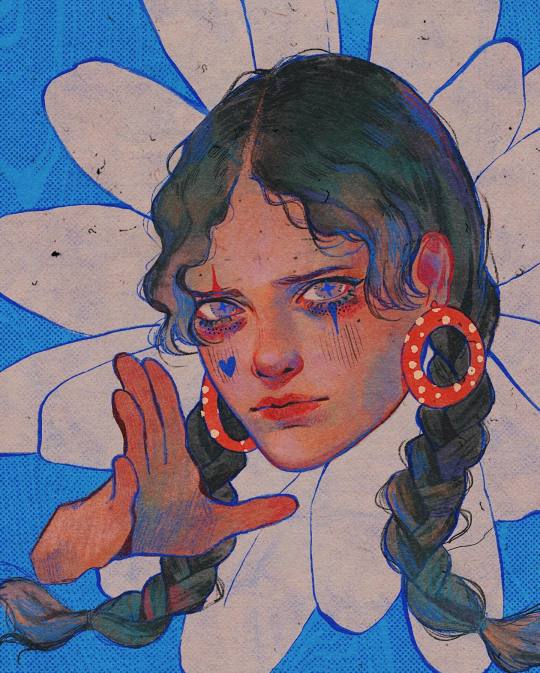
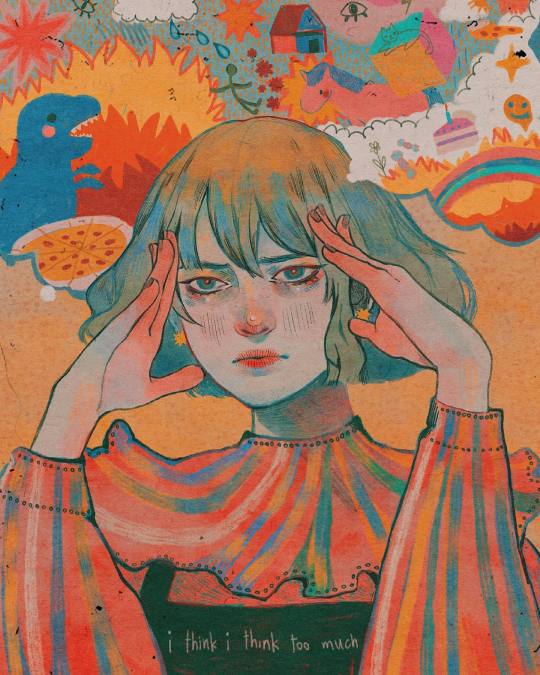
Vitkaninn: Instagram
14 notes
·
View notes
Text
Save Us // 01
Pairing: OT7 x reader
Genre: fluff, angst, idol!bts, non idol!reader
Warnings: non yet
Word count: 1,5k (italics is Korean and ‘...’ are thoughts)
Summary: getting lost in a city that you don’t know is never an ideal situation. But getting run over by 3 guys chasing a dog doesn’t really make it better, especially since the fall broke your phone. Guess you just have to become a pro map reader, right?
Taglist: @child-ofthe-moon-and-leaves, @detectivebourbon,
Authors note: I can’t believe how many people liked the prologue UWU thank you guys so much. Please enjoy this chapter (even though it sucks)! I’m not planning to do a posting schedule just because I don’t know when I’m going to have time considering school and other stuff.
Y/N POV
‘The first day in Korea and I’m ready to start this adventure! Now I just got to get out of bed and begin this beautiful day!’ Waking up feeling quite refreshed I cheered myself and got out of bed. As soon as I pulled the bedsheets aside I was greeted with the cold morning air. ‘You know what, let me just stay here until it gets warmer. Yeah let’s do that.’ Slowly I get back into bed not wanting to face the hell of a cold morning air.
Well at least that was the plan until the devil itself decided to join me, and by devil I mean the need to pee. Anyone else relate to that? Yeah, it sucks. So, since I didn’t want to get my bed wet, I got up and went to the toilet.
Being fully awake now, I decided to make myself some breakfast. Enjoying the idea of a delicious feast I almost ran to the kitchen. It was only then I realised that I didn’t go shopping yet. ‘I’m so stupid.’ I facepalmed. “Ughhh now I have to get dressed and go grocery shopping first!”
-~~~~~~~-
While walking to a grocery store I saw a nice looking café just around the corner. Being too lazy to cook I thought ‘why not’. Walking into the café I was immediately hit by the smell of coffee and tea (I don’t like coffee but I know a lot of people do, so I’m gonna give you the choice). Walking to a table in the corner a waitress immediately walked up to me.
“What would you like, miss?”
Even though I couldn’t really understand her, I know that she asked for my order. Looking at the menu I decided to go with F/Y/W (food you want) and D/Y/W (drink you want).
“Euhm… I would like a F/Y/W and a D/Y/W please”
Looking at me with wide eyes, she nodded and scurried of. ‘I guess she really didn’t expect that.’ After a few minutes the waitress came back with my order and I began eating the delicious meal. And let me tell you, that was probably the best breakfast I’ve ever had. I knew going to Korea was a good idea!
After paying the bill it was time to go outside, into the cold morning air. To be honest, Korea is so fricking beautiful I still can’t believe it. Luna really knows how to pick out the good places. Not wanting to waste any precious time with my useless thoughts I hurried outside ready to explore the city.
-~~~~~~~-
No one's POV
After hours and hours of exploring Y/N eventually became tired, so she decided to go back to her apartment. Well, that was the original plan until she saw a beautiful park appearing in the corner of her eye. Being the nature loving girl she is, Y/N just had to check the park out. She heard some stories about how beautiful the parks in Korea could be, but nothing could prepare her for this breathtaking scene. Since it was a spring day, the cherry blossoms where in blossom and everything was green. Not to mention the amazing pond located in the middle of everything, the water was crystal blue and you could see the reflection of the sky in the water.
“This is perfect.” she mumbles.
Walking around the park for what seemed like hours to calm her mind, she eventually found a good spot to lay down and take in the scenery. Searching around in her bag Y/N pulled out a sketchbook and some HB pencils. After searching for a comfortable seating, she began sketching. Drawing has always been something that resembles relaxation for her, whether she was good at it or not Y/N just enjoyed the peace that comes with drawing.
“YAAA!!!”
Well there goes the peace……
Jumping up in shock Y/N looked around to search where the noise was coming from, afraid something had happened . In the distance she could see three men, probably in their twenties, speaking screaming at eachother. The thing that stood out the most, however, was that they were all wearing black face mask. “Hmm, maybe they are some famous people.” Y/N said, sitting down again, relieved that nothing bad had happened. She was about to go back to her drawing when, again, the three men began screaming.
“How did you lose him?! You idiots!”
“Well it’s not our fault! It’s your dog after all!”
Y/N looked at the men with a glare but said nothing, it’s not like she was able to, she couldn’t even understand what they were screaming talking about. And they would probably not even notice her, since they were screaming so loudly. Packing her back, making sure she didn’t leave anything behind, Y/N began walking home.
“I guess I’m going home then, there is no way I could draw with this noise.”
Not even bothering to tell them to shut up, she quietly walked past them. After walking out of the park, she could still hear them screaming. Other people walking by were clearly also bother with the noise, Y/N could see them glaring towards the direction of the men. Shaking her head, she plugged in her headphones and began listening to some music.
-~~~~~~~-
Y/N POV
I’m lost..
Great, just…. great.
It felt like I was walking around in circles for ages. Now normally I wouldn’t be bothered by this, but since I didn’t know this city, I was beginning to get worried. Grabbing my phone I was about to open Google Maps when I saw the same three guys from the park running towards me. It looked like they were chasing a… dog? A really cute dog that is.
“Ya! Yeontan come back!”
“Taehyung, wait up!”
Yeontan? Taehyung? I feel like I’ve heard these names before….
While being in deep thoughts I didn’t notice one of the guys was running straight towards me, and clearly he didn’t see me either. With great force I was thrown of the sidewalk and fell on my butt. But, of course, the man who ran into me just kept running, together with the other two.
“Hey! Come back here! Look at what you did!”
I pouted as they turned around the corner. “Ouchh….” I slowly got up. As I brushed my jeans of (or skirt, whatever you prefer) I noticed my missing phone. “Oh no, nonononono.” I panicked while looking for my phone. After a minute I found it, broken, laying on the road.
“Fuck…”
‘What am I’m going to do now? I don’t know anything about this city and now my phone is also broken.’ Looking around I saw a merchandise shop. ‘Maybe they have a map!’ I quickly walked the the little shop.
Walking into the cozy little store I was lucky to find that they had some maps, I did get a few weird stares while paying for it though. Being outside once again I took a look at the map. My hope immediately crumbled, there is no way that I can read this, everything is in Korean! But then again what did I expect. Looking around once more before letting out a long sight i began the long journey home.
When I finally arrived at the hotel it was around night time. While being half asleep I walked towards the elevator. On my way to the right floor I was staying at, I recalled the events that happened that day. ‘Those weird men… I wonder who they were.’
Finally walking into my room I immediately went to bed, relieved that I was finally able to not stress about anything at all. Until I remembered that I still had a lot of unpacking to do. Deciding not to think about that I fell into a dreamless sleep.
#ot7 x reader#poly!bts x reader#bangtan x reader#jin#yoongi#hoseok#namjoon#jimin#bts taehyung#jungkook#x reader#chapter one#Save Us#idol!bts#non idol!reader#jin x reader#yoongi x reader#hoseok x reader#namjoon x reader#jimin x reader#taehyung x reader#jungkook x reader#bts#bts x reader
375 notes
·
View notes
Text
Tutorial Tuesdays--Getting Started
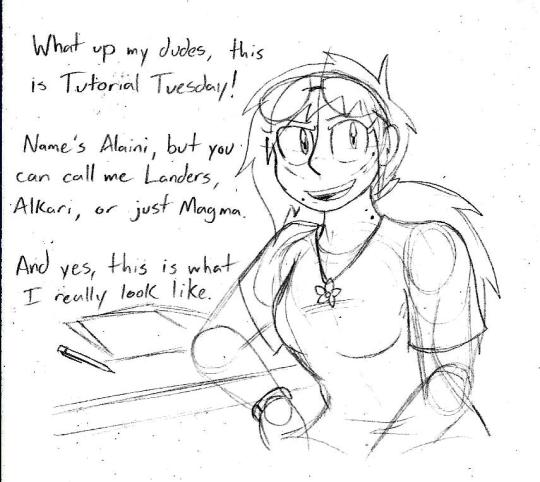
Tutorial Tuesdays is a new block on my blog in which I give art advice and tutorials for anyone looking to improve their art. But before we get into the good stuff, a quick obligatory background.
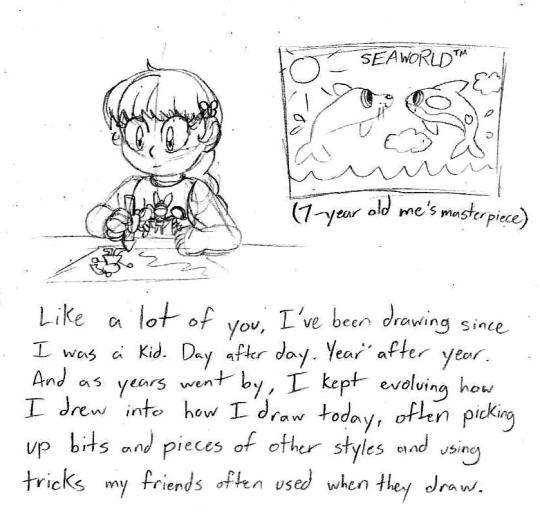
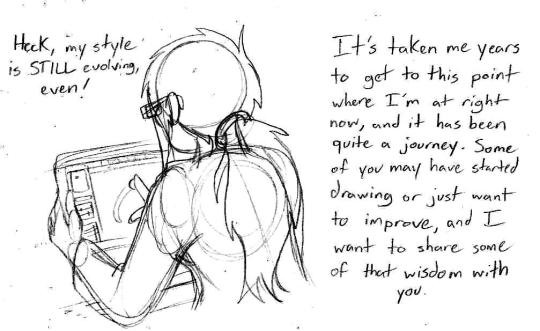
I know it’s tempting to look at my art and the art of people you look up to and come to the conclusion you’ll never get to that level no matter how hard you try, but it is possible to get to that level. You just gotta practice regularly and before you know it you’ll have it down-pat.
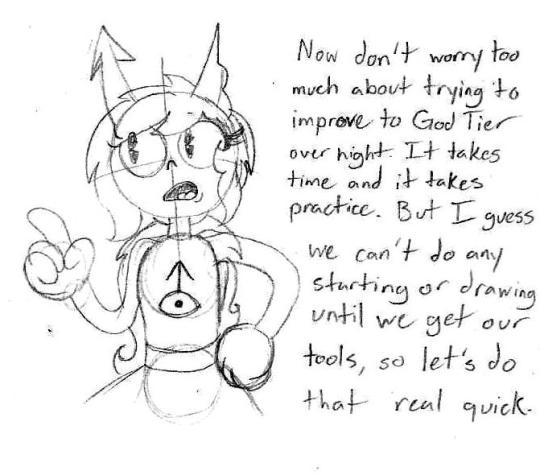
These posts will be pretty long, so to save Dashboard space, I’ll put the meat of things under a Keep Reading link so you can visit them in full. Alright, with that out of the way, are ya ready kids? Let’s go get some art tools!

I only say this because I’ve seen people make fantastic things with very limited materials and people with some of the finest tools but don’t use them to their full capacity. Again, it’s not what you use, but how you use it. When I talk about art tools, I’m mostly going off of what I use since those are the tools I’ve worked with a lot.
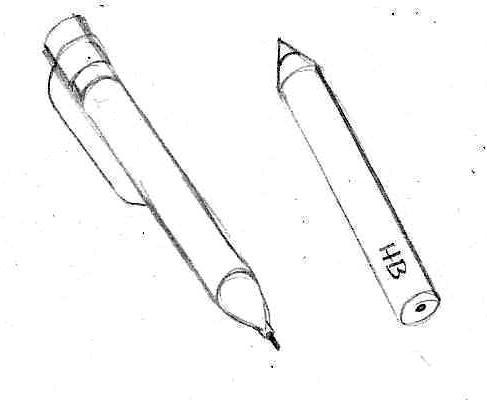
Pencils. Your most basic writing and drawing tool. For sketching and drawing, I use a 0.7 mm mechanical pencil with a good eraser. It’s quick, it’s convenient, and I often stick it in my ponytail when I’m not using it so I have easy access to it. They’re also pretty cheap. For commissions and grayscale shading, I use drawing pencils that come in various hardnesses. The hardness of your pencil will be noted by a number and a letter. A pencil with an H stamped on it will be harder, won’t smudge very easily, and has a very light load when the graphite is on the paper. A pencil stamped with a B will be softer, smudges very easily, and has a darker streak on the paper. The number on the pencil following the letter lets you know how hard or soft it is (4H is a very hard pencil, 8B is a very soft pencil). Your typical No. 2 pencils from school are in the HB category, which is middle of the road. You can find them individually at art stores or in packs. Walmart in my town offers a package of 6 drawing pencils bundled with two animation colored pencils, two markers, and an eraser for about $9. Pretty good deal. Speaking of...
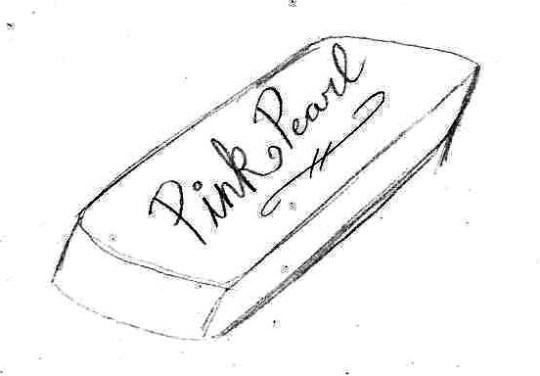
Erasers. A pink rubber eraser will do you just fine, though make sure your pencil has a nice one on it for finer details and while you’re drawing. You can use a kneadable eraser if you have one, they’re squishy, you can mold them to how you see fit and they don’t leave any crumbs to clean up, but I’m not quite fond of them.
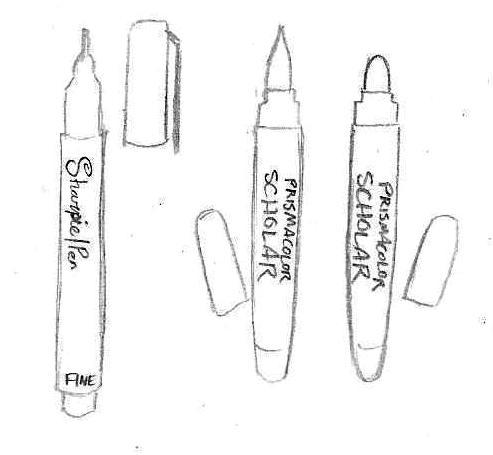
Markers and ink pens. Let me tell you, once you use a pen like one of these, you’ll never go back to ballpoint, which often has far too many broken lines to be practical to use and make your lineart look like trash. I use a Fine Tip Sharpie Pen, preferably in the no-bleed variety so the lineart doesn’t sink into the opposite side of the page. Recently I’ve been using Brush and Bullet tip Prismacolor Scholar markers for comics and good drawings. They’re a bit erratic to use at first, but it takes practice.
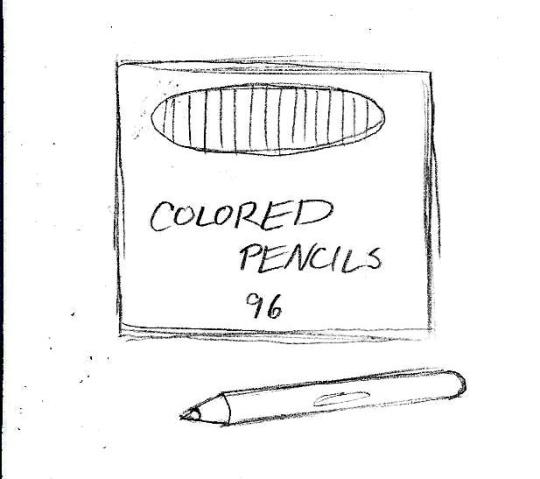
Colored pencils. Now these are my go-to for coloring since they give a wide range of color, combinations, and effects. For best results, I stick with Crayola or Cra-Z Art since the color tend to remain consistent from box to box and you can get a big box of them for a pretty good price. Prismacolors would be nice, but they’re pretty expensive and I don’t quite like the feel.
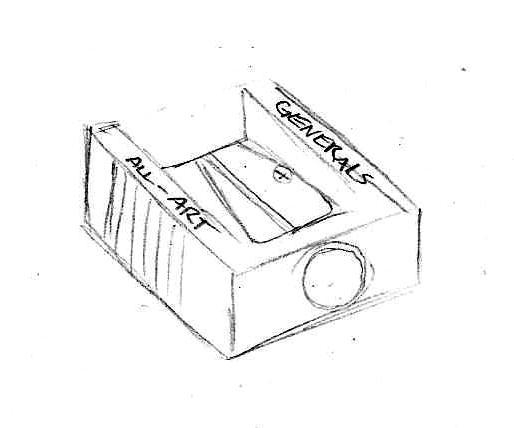
Sharpeners. Electric ones you can just keep at home, but for on the go I recommend a small manual one you can throw in your bag. Bonus if you get one that has a shavings catch so you don’t have shavings making a mess of your space.
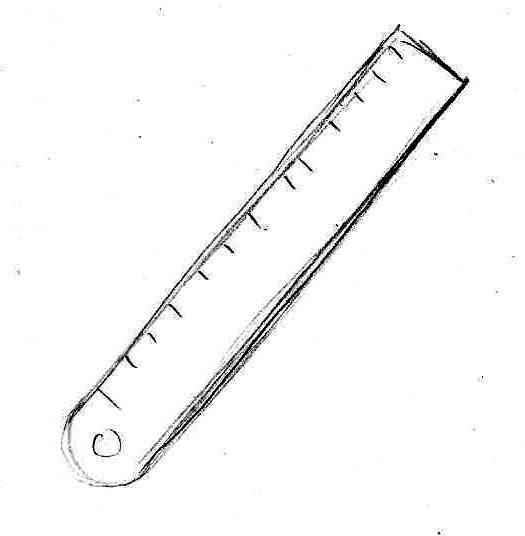
Ruler/straight edge. You’ll want one of these for comic panels, perspective guidelines, and, well, straight lines, though in some cases you might want to practice making straight lines without the use of it. I use a metal one, but a plastic will do you good as well.
And now, the most important thing of all, your drawing canvas!
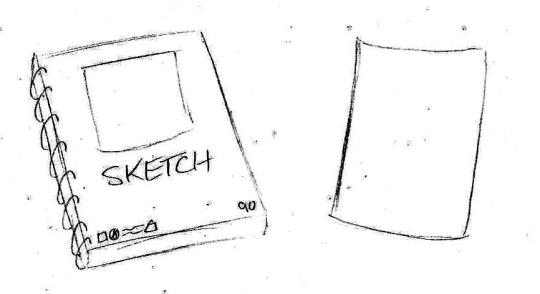
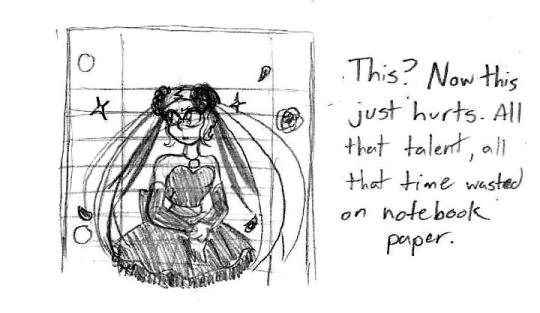
For starters, I recommend you get yourself a good sketchbook. Nothing too fancy, just one of those spiral-bound ones ideal for sketching. For your really good art, copy paper will work just fine. Really any kind of paper (or even cardboard!) will work but I implore you to avoid using loose-leaf notebook paper. I cannot tell you how much it hurts to see something so beautifully drawn wasted on lined paper. Not saying you can’t doodle in your notebook and show off something silly you sketched, but if you’d count a drawing as your magnum opus, your drawing probably deserved being on blank paper where it can shine.
I was considering making this an entry for Digital Art tutorials, but I’ll put these here just in case.
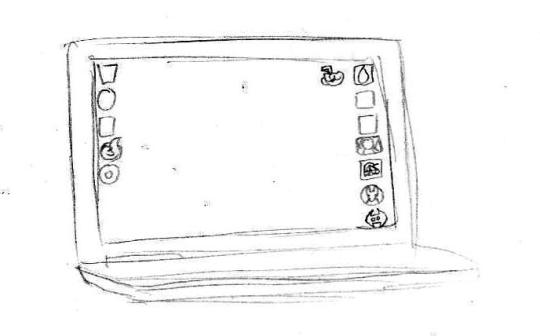
I do a lot of digital art using my HP laptop built with a touch screen. It can’t stream for sh1t but it runs single player Steam games alright and I use it for homework a lot. Before this, I had a desktop computer and used a mouse. I would like to own a Wacom tablet in the future, but until then this setup is nice enough. Remember, it’s about how you use your tools, not the quality of tools at your disposal.
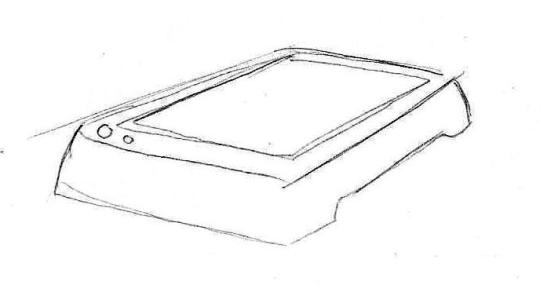
Now this is a scanner that’s used only for pictures/documents. You can’t print or fax anything with it, but it’s good for just pictures. I own an HP printer/scanner combo, but it is pretty finicky and no longer prints. Alternately, you can just use your cell-phone camera to take pictures of your finished piece, but I do not recommend doing so for comics unless you’re giving previews of one panel.
For my programs, these are the three that I use:
Good for doodles, already on your computer (probably), and I use this program to make authentic looking Homestuck drawings (like, you could mistake it for being an actual panel in Homestuck).
My primary art program. Operates much like Paint Tool SAI and photoshop. Very good for general art and comics.
Still learning this one, but it’s just like Medibang and is equipped with tools for animation.
And yes, these three programs are downloadable for free. I do want to try out Clip Studio Paint EX, but the cheapest I can get it is $80 when it goes on sale during the holidays. Normally, it costs $250.
Next time, we go over some drawing basics and some tips that will save your sanity while sketching. Stay tuned!
#tutorial tuesdays#art tutorials and refs#sh1t magma-paint does#getting started#art supplies#art software
16 notes
·
View notes
Text
For my final theme I have chosen The Human Body. In this unit I will continue researching everything about my theme, experimenting with different medias, designing and making a garment and finally doing a photoshoot.
Sketchbook Layout - Title Page
For my first page in my sketchbook I wanted my theme to be as clear as possible and for the presentation to stand out. After researching the human body I knew that I wanted to create an artistic/ realistic portrait of inside the human body. I started out my sketching the outline of the bone structure using a HB pencil. As I wanted it to look perfect it took me quite a while however when I finished sketching I was extremely happy with the outcome. Next I moved onto adding colour. I had a vision of what I wanted it to look like and I didn’t want the colours to be too overpowering which is why I chose to use watercolours. First I created a light grey wash to cover the whole piece for my base layer. Next using a slightly darker grey I started to add in shading. I found that using two paintbrushes, one with colour on, and one with water on allowed me to create a perfect gradient. I then moved on to blue. When I first brushed it on I didn’t think that it was bright enough and noticeable so I chose to add A deeper blue tone to it. I then moved onto adding darker shades and tones using pencils. By doing this it pulled the piece together and after a few final touches such as blue and orange coloured pencils I had finished. Overall I am extremely happy with the final outcome of this piece. I have successfully combined three different photos together and used multiple medias together.
0 notes
Photo
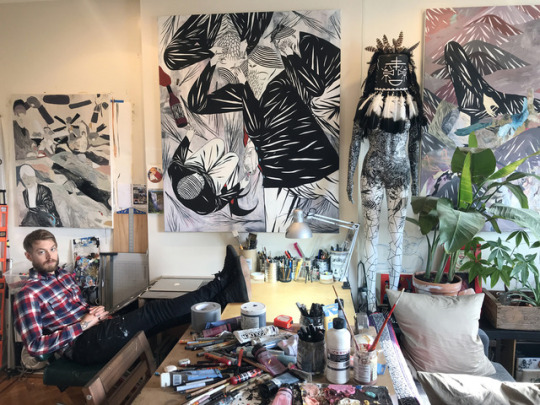
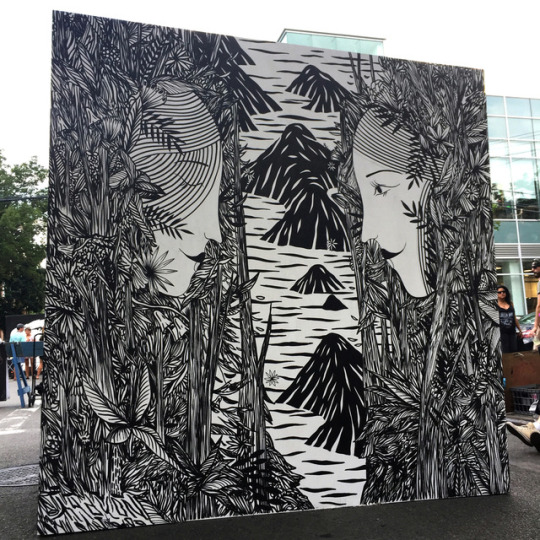
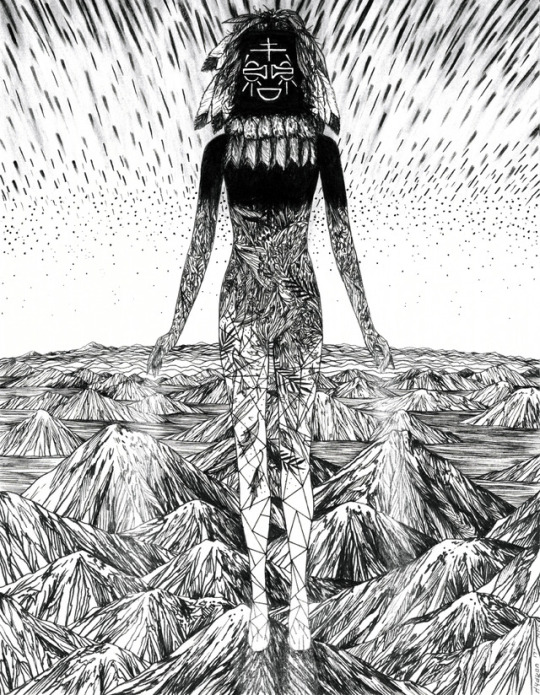
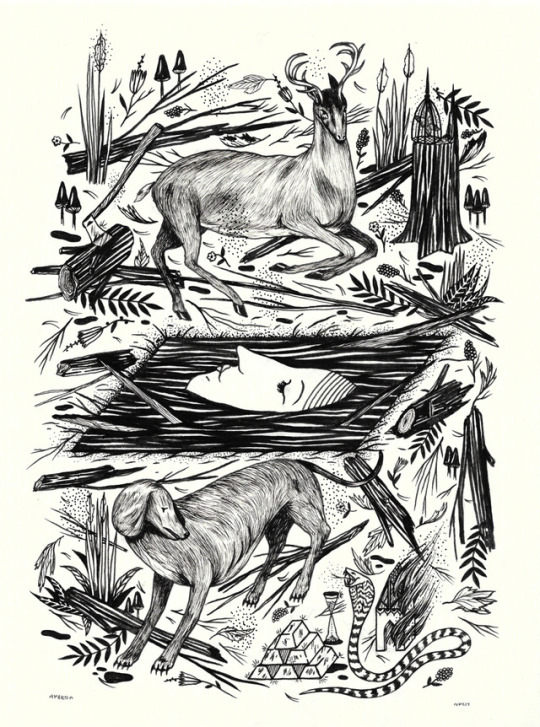
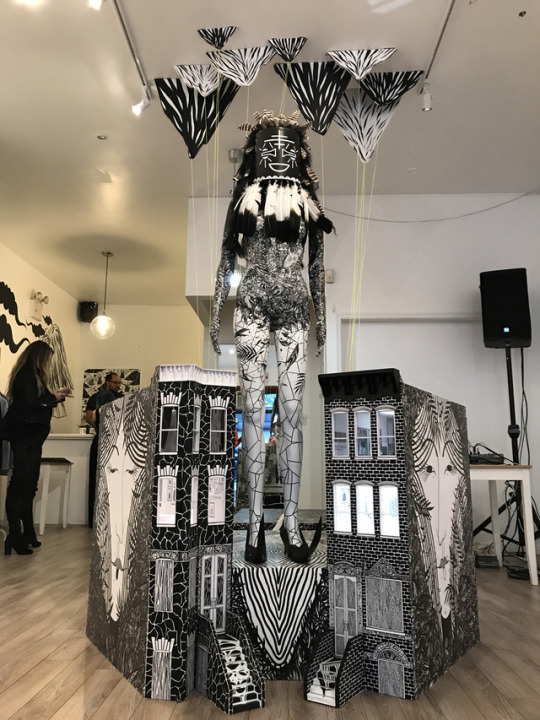
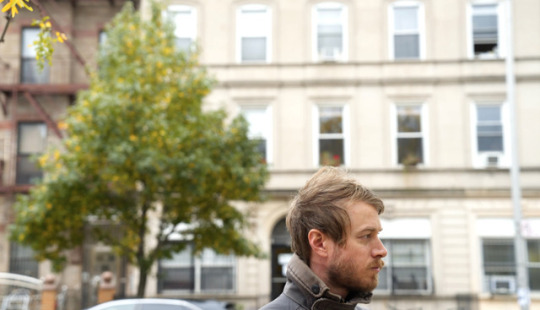
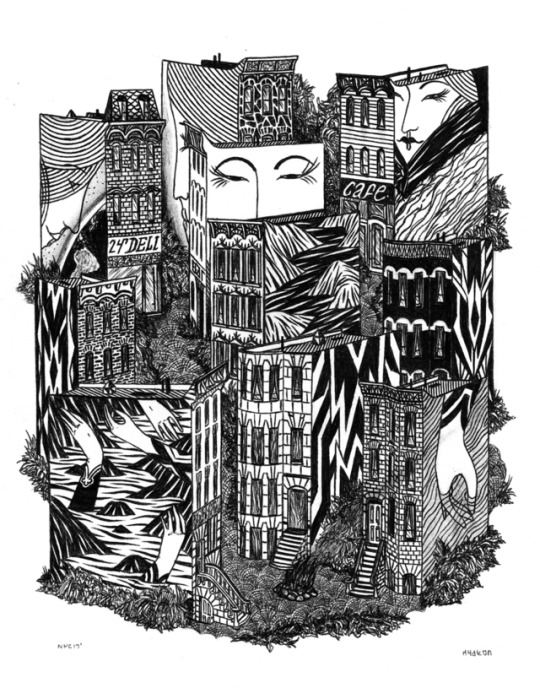
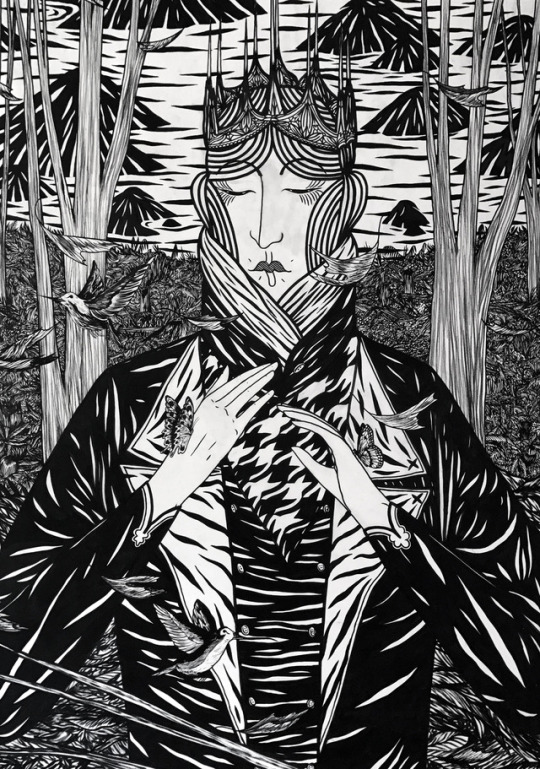
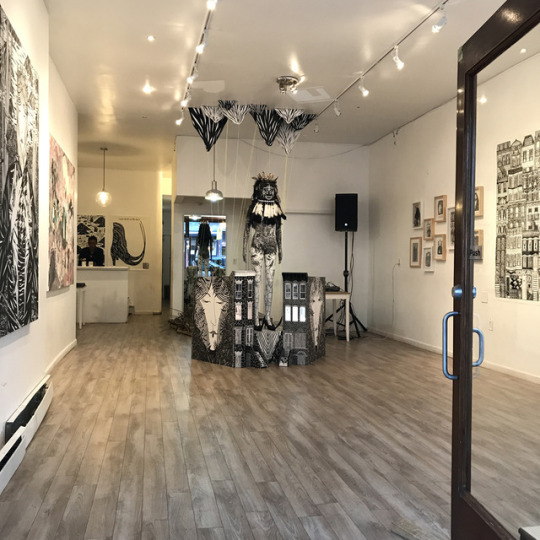
ART SCHOOL | HYDEON (Brooklyn, NY)
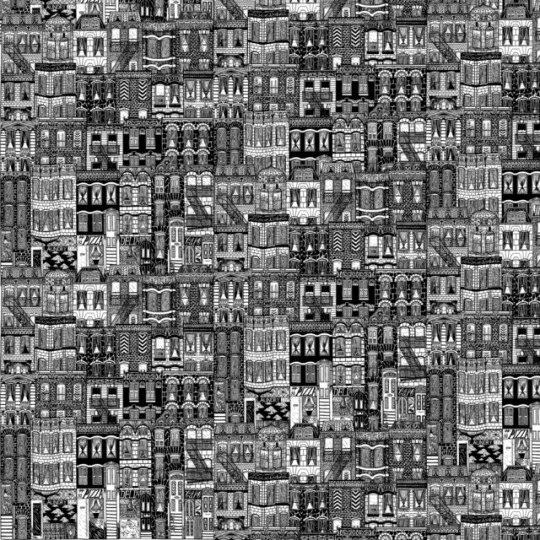
Visual artist and designer Ian Fergurson aka HYDEON is known for his simple monochromatic black and white works, often featuring old gothic buildings, Colonial style witches, and eye catching installations and murals. Not only one thing, Ferguson was most recently employed as a silk screen printer an wallpaper company, until his works were purchased by a private collector in the summer of 2017, launching his art career. We’re really excited to chat with Ian about his art journey, his works and processes, as well as a mural he completed on the 69th floor of 4 World Trade Building.
Photographs courtesy of the artist.
Can you tell folks a little about yourself? We’re always curious about artist handles, sometimes there is a good story behind it, just curious what’s the significance of @hydeon? My name is Ian Ferguson. I’m a visual artist and designer living and working in Brooklyn, NY. I work out of my home studio. I’ve been publishing my work under the name Hydeon for about 15 years now. The name Hydeon is partially derived from the avant-garde animated series Æon Flux which aired on MTV in the 90’s. Eon Flux became a nickname I had in Middle School. My friends at the time would call me Flox or Eon or both. Years later when I was in college studying graphic design In the early-mid 2000’s I wanted to have an alias to sign my work under as a way to create my own unique identity and branding. I used the Eon part from my nickname in middle school and added the Hyd part in front of it. It can be pronounced two different ways, It can be like “Hid-Ian”, or “Hide-Ian”. The idea is that my own name is hidden within the alias.
When did you first get into drawing, and what were you drawn too? How did your early interest evolve into something more? I grew up in a family of artists in San Diego, CA. I was born in 1985. My mom had me drawing very early before I could hold a pencil on my own. She would hold my hand with the pencil or brush and help me make drawings and paintings. I must have been 2 years old maybe when she started teaching me, I’m not entirely sure. My earliest memory of creative inspiration that really spoke to me was seeing the work of M.C. Escher. I was absolutely obsessed with his work as a child. One of my first ever art exhibits I ever saw was an M.C. Escher exhibit at the San Diego Museum of Art. All throughout my youth I was always making art. I was obsessed with drawing and how it would make me feel. It always seemed to calm me down and I was eventually able to discover a form of meditation through it. I grew up skateboarding as well, wearing Vans, hiking and going to the beach, classic Southern California activities. Through skateboarding my influences in art and music evolved. The drawings and paintings I grew up making would eventually evolve into designing posters for shows. I think thats where I got the initial start into my career. Everything seemed to stem from making the posters. My first ever art show was a group show on skateboard decks in 2003 at King Cassius Gallery in San Diego.
Having attended Art Institute of California, San Diego, what was your experience with art school, and what was your experience after art school as an artist? Did you find the transition difficult, challenging, easy, and/or just totally off the rails? My experience at AI-SD overall was positive. I met some amazing friends there and that was the best part of it. I studied graphic design so almost everything I did in college involved a computer. Once I figured out the Adobe programs I just wanted to get through school and do my own thing.
My career transition after college was very textured and difficult. I had moved to Seattle in 2006 right after school to explore the mountains, forests, music, and art scene there. I was hoping to land a design job up there with my new degree, but It never really panned out and the school couldn’t really help much with jobs because I was out of state. I ended up working mostly at a thrift store and would just do art and music on the side. After several years in Seattle I had a crazy mental breakdown at the thrift store I was working at and shortly after that I got some help and was diagnosed with bi-polar disorder. I fled back to San Diego for a few months to get some sun and just chill out at home. During that period I worked at an art store in downtown San Diego for about 6 months.
After that I felt a strong magnetic pull to move to Chicago and explore the architecture, art, and music scene there. I figured I would have more opportunity in a bigger city and I knew I wanted to live outside of California. I saved up money at the art store and moved to Chicago. I tried to get a design job there, but It wasn’t working out so I quickly ended up working as a full time cashier at a grocery store. I did that for a while until I completely burned out on the register and they fired me. I was able to get unemployment, so I took advantage of it and hustled my art as hard as a could with the time I had. After that I worked a weird retail shoe stocking job, worked at a fast food chain, and did bike messaging in the loop. I basically took whatever job I could get to support myself on a basic level and then just hustled my art and design stuff as much as possible on the side. I started doing allot of shows and after a while I had built up a little success in Chicago but It wasn’t until I moved to NYC in 2014 that everything really changed and I started having significant success with my work.
Often times artists are not only ONE thing, each juggles art and or is making a real effort to hustle at it? How do you balance art and life? What is your other hustle and how does that factor into what you do? Good question. As I mentioned in the previous question I had many different types of jobs I would do to support myself so I could do my art. When I moved to NYC in 2014 I landed a job working as a silk screen printer for Flavor Paper, an amazing wallpaper company in collaboration with the Warhol foundation. This was the first real art job I’ve ever got and the best job I have ever had. I worked there for about two and a half years full time making hand silk screen wallpaper and then hustling my art on the side.
It wasn’t until just this past summer of 2017 that I had a career breakthrough with my work. I sold a giant painting to a private collector in Washington D.C. that had discovered me on Instagram. This was the sale that changed everything for me. I was able to quit my job at Flavor Paper and work entirely for myself. I work every single day for myself now. It’s the most gratifying feeling. It feels more than a full time job, it’s a full time commitment and a lifestyle. I’m always working. Aside from doing drawings and paintings for gallery shows I do commission work involving anything from murals to branding design and illustration work. I’ve also been collaborating with Brazilian fashion brand 1994. and an NYC based fashion brand The Very Warm. Flavor Paper has also released my first wallpaper pattern “Brownstoner” which has been a great success.
How would you describe the black-and-white works you create? Amongst the various things you illustrate, buildings and old style victorian structures play a role. How did this come about? I became fascinated with old world gothic architecture and the victorian era around 2009 when I first left the west coast and visited Chicago and New York for the first time. Seeing the brownstones and old gothic buildings in both cities really impacted me in a significant way. I fell in love with these types of buildings. They have a romantic historical quality to them that makes me feel transported back in time to another world. I feel a deep connection of energy in them and it makes me feel good, its a beautiful feeling. I had never really seen buildings like this before I came out to these cities. I have always done black and white work, but started working exclusively in black and white about a year ago. I felt like I needed a break from color for a while to just focus on the simplicity of monochromatic work. I love the quality of black and white and the versatility of it. You can put a black and white piece in almost any home or environment and it will look good. Black and white doesn’t fight any other colors, its its own thing. I’ve recently been doing color work again and loving it, but will always keep the black and white pieces going.
Do you keep a sketchbook for ideas or do you find yourself just sitting down, hitting the paper off to the races, so to speak? Sometimes and it’s a little bit of both! I keep a few different sketchbooks of various sizes. I like to go to cafes and parks and chill and sketch out ideas when I have them. I ride my bike everywhere and find allot of inspiration while riding the bike or running. I get allot of inspiration from my environment and life experience so I like to wait for the inspiration to hit me and then act on it with the sketchbook. Often times I use basic computer printer paper to sketch out final ideas before they go to nice paper, canvas, or wood panel.
Who were some of your artistic influences? Some of my absolute favorite artists and influencers are: Marcel Dzama, Thomas Campbell, Tim Kinsella, Cleon Peterson, M.C. Escher, Mamma Anderson, Henry Darger, Ed Templeton, Toulouse Lautrec, Andrea Joyce Heimer, Pitseolak, Egon Schiele, Danny Fox, and More..
What are your top 5 art materials to work with? Faber-Castell PITT artist pens Ticonderoga HB #2 pencils Bic Black Ballpoint Pen Montana Paint markers OR Molotow Paint markers (both are great!) Golden Acrylics
You recently installed your work at 4 World Trade Center as well as created a mural in the East Village? How did this project come about? What was the best part of the overall experience? The World Trade Center mural happened through my good friend Joohee Park AKA Stickymonger. We both show at this gallery in the financial district of Manhattan called World Trade Gallery, which is a gallery affiliated with the WTC.
The gallery had access to the 69th floor of 4 World Trade and asked a number of artists to do murals on the floor. Stickymonger was really the catalyst for me getting into the tower. She’s an amazing artist and a very good friend of mine. The experience working in the tower was absolutely amazing and beautiful. There were several nights where I got to work up there entirely alone on the 69th floor. It was just me and my music and jamming away on my mural. The experience was ethereal seeing the whole city glowing from above with 360 degree views. I felt like I was on top of the world and the mural came out fantastic. I did a black and white architectural motif of New York City with the Hudson River as the floor and the Palisades on the other wall.
My mural covered an entire corridor of the Woman’s bathroom. It was one of the only spaces left for a mural and no one wanted it, so I jumped on it! I loved the whole experience and everyone took good care of me throughout the process. I met some amazing people through that project, one of which was curator Joshua B. Geyer who eventually asked me to do the mural in the East Village which was apart of the Centre-Fuge Public Art Project.
What would your dream collaboration be like? Oh wow! I have allot of ideas for this one, but I would love to do a collaborative drawing with Marcel Dzama sometime.
What are your favorite Vans? The Sk8-Hi all the way!
What advice would you give someone thinking about art as a career? Really dive deep within yourself and make sure you love doing it first. Then decide if you’re willing to make the full commitment. Consider it a lifetime investment and learn to trust and believe in yourself against all odds. Be ready and willing to take big risks at any given moment. Always be prepared to take criticism of all sorts, good or bad. Know that a career in art takes allot of time, allot of hard work, and a 100% commitment and belief in yourself. Be willing to network and expose yourself to the art world. Explore as many galleries/museums as possible. Always do your absolute best work, put everything you have into it, experiment, take chances, and never give up. Celebrate every success no matter how big or small and eventually if you work hard enough and you believe in yourself, you will be able to achieve your goals. Anything is possible.
What are you looking forward to the rest of this year and beginning of next? For the remainder of 2017 I’ll be working on large scale works in color on paper and canvas. I’m going camping soon with my family in Joshua Tree where I hope to discover some fresh insight and inspiration. I’ll be showing new work at Spoke Art NYC in March 2018 for a really amazing group show. I have a few other things lined up but thats about it for now.
Who is an artist you’d like to see on Art School one day? Lala Abaddon !
Follow Hydeon: Instagram | Vimeo | Website
142 notes
·
View notes
Photo

It has been a while! ( I always seem to say this but its true (’: )
Here I am, making another masterpost in the hopes that this will help every single one of you :) This time, I will be rambling about stationery because I know it is quite a big topic in the studyblr community and i get quite a few asks about it.
I will try to give some links, but you will typically see most things in your local stationery store (hopefully)
** for muji stationery, i did not link the australian website since you can’t buy online for australia :(
Disclaimer: I personally love pens and stationery, so usually most of my pocket money will go towards that as I feel as if it encourages me to study, you don’t need to have a lot of black pens if one is going to be enough. It all depends on the person :)
Study Essentials (simple with some of my personal thoughts):
Black pen
A black pen is a good foundation for writing you notes, they are plain and simple and can easily be manipulated (highlighted, underlined or annotated with colours to make specific things stand out)
Pens can come in many forms: ballpoint, gel, or ink pens. I smudge with pens but I don’t like the outcome of ballpoints so I choose gel pens.
Some branded gel pens include: Pilot G-2, Zebra Sarasa & Uniball Signo to name a few
There are so many simple black biros at any store that you can get for very cheap!
Red/Coloured pen
I personally think a red pen or coloured pen is essential for marking or to highlight key/other points and annotating
Some cheap coloured pens are the Papermate Inkjoy, other slightly more costly are the Zebra Sarasa ones, the Pilot Juice and the Muji Gel Ink pens
Some brands like Bic and Papermate have a 4 coloured pen so if you did not want to carry 200 pens, you can save room with 1!
Pencil
Wooden or Mechanical pencils???
I like mechanical personally because you don’t need to sharpen them lol, I use the Muji one but I also like the Pentel twist one (kinda expensive but very sturdy)
HB lead is much lighter/harder than 2B :) (2B is softer, and produces more pigment)
There are lots of sizes, the most common being 0.5mm and 0.7mm (0.5 is smaller)
Eraser
Any eraser is fine, I like the Staedtler ones (but they are expensive so I never buy them lol)
I just get the cheap $1 ones from morning glory (very good quality tbh) there is no need to spend so much on an eraser bc it will end up getting lost tbh HAHAHA
Ruler
Many come in 30cm or 15cm, get the size that will fit in your pencil case!
Great help for maths and art!!
White out
There are many types of white out; liquid, tape and even stickers
I personally prefer the tape version because I hate the smell of the liquid and also I always smudge liquid white out, but whatever suits you!
Highlighter
There are many highlighters out there in the market; the mildliners, the sharpie ones, the stabilo ones, there’s a highlighter in every brand tbh
Mildliners are more expensive and aren’t necessary but I really like them for the diverse colour range
A VERY cheap alternative to the mildliners are the Daiso soft markers (LOVE THESE), they have the same shades (less shades though) are only one sided but they give the same effect as the mildliners for a fraction of the price! bless
If you don’t like the bright neon highlighters; try the Daiso soft markers, the pilot frixion erasable pastel range or even the mildliners if you want to splurge:)
Extras that are not necessary but may be useful:
Scissors
Glue stick/Glue Tape
Stapler
Sticky tape
Sharpener (I use mechanical pencils so never need one)
Common Studyblr cult favourites:
Just a warning that even though everyone seems to love these products, it does not mean that you will, try them out at the store and don’t waste your money because you may not like them! (I wasted money buying the staedtler fineliners cries)
Staedtler Fineliners
Stabilo Fineliners
Mildliners
Pilot Juice Pens
Tombow Brush Pens (quite pricy be warned)
Artline Stix Brush markers (I quite like these but make sure you buy the BRUSH markers if you were planning to do brush lettering as I have seen people buy the wrong type, cheap alternatives to the tombows)
Moleskine notebooks
Muji Gel Ink Pens
Stores:
~ = stores I have bought from
* = I have a discount code which you can save 10% off your purchase: ACADEHMIC10 ! there is also free worldwide shipping c:
Common places for people to buy stationery from include:
Muji [ us | uk | sg ] ~
Amazon
Officeworks ~ (for australians only hehe) (I really like their X brand range btw, reminds me of muji!!)
Aliexpress ~
Ebay ~
Bricks x Castle *
Kawaii Pen Shop * ~
Miss Rosie Shop *
Typo (kinda expensive) [ au | us | sg ] ~
Kikki k (so pretty but so expensive ;;;;;;)
Target ~
Even your local newsagency should sell stationery
Daiso! and other asian stores that are similar :-) ~
Some less common places:
Some studyblrs sell some stationery on carousell, however it is mostly sg studygrams/studyblrs
Notemaker (idk they seem pricy)
DailyLike (sells cute washi tape but eXPENSIVE CRIES)
Etsy
Jetpens (tbh expensive, probably benefits americans more than others)
Your local art store (the ones where I live sell things really overpriced rip)
There are plenty of small and big instagram stores which sell cute things :-))
My personal faves:
Favourites:
Zebra Sarasa Clip pen 0.5mm black
Muji gel ink pens in 0.38mm and 0.5mm (I can’t tell much of a difference between these two sizes for these pens) [ muji us | muji uk | muji sg ]
Mildliners (I’ll link places below)
Commonly seen in my studyspo photos:
the dotted notebook that everyone asks me about is this one (that link is australia only but muji sells a notebook exactly the same!!)
Gridded loose leaf paper from Muji [ muji us (this one is the ruled version) | muji uk | muji sg ]
My bujo
I used to use the A5 version of the dotted notebook but I have ran out
Currently using a Whitelines notebook [ my review here ]
Mildliners... Where can I find them?
Kawaii Pen Shop (Only the Pastel, Cool and Warm pack)
Bricks X Castle (Sells all 4 packs, yes the rare pack!!)
Ebay
Popular (in Singapore and Malaysia)
Kinokuniya
Jetpens
My other masterposts:
chinese masterpost
app masterpost
bullet journaling
maths masterpost
advice for new studyblrs
physics masterpost
chemistry masterpost
studygram: acadehmic
This was severely long and I should have placed a read more sorry :’)
I hope this masterpost helped you if you were interested in what stationery I own and what I would recommend for anyone :)
#mine#mine:masterposts#stationery#studyblr#studyspo#supplies#pens#mildliners#studygram#study#notes#tbhstudying#areistotle#elkstudies#academla#emmastudies#morningkou
2K notes
·
View notes
Photo

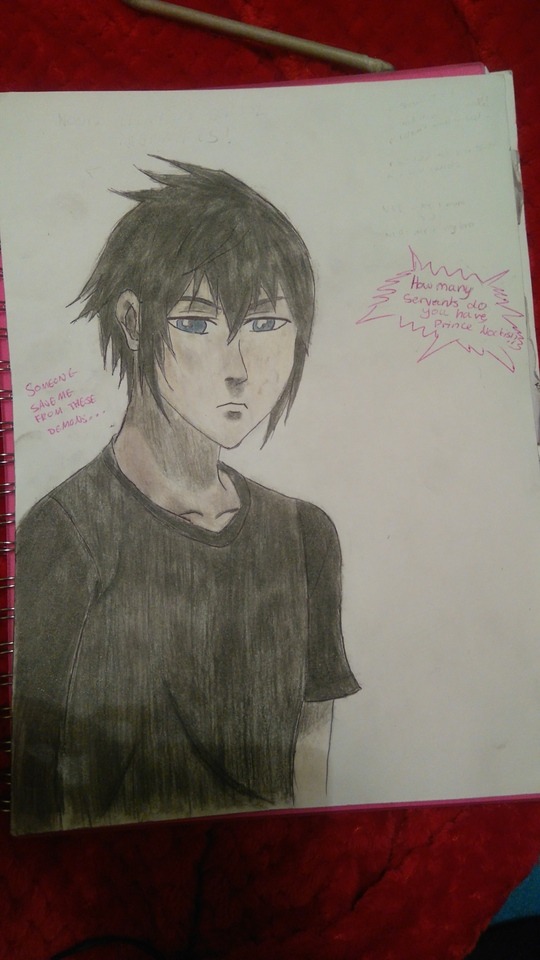
He is so done.... Girls: How many servants do you have, Prince Noctis? Noctis: *someone save me from these demons* -_- Materials: normal colouring pencils, HB pencils for the outline, normal black biro for lining, baby oil and blending stump (and a blending makeup brush that irritates my eyeballs) for blending. I realised that I should have used either a different brush or gotten a new blending stump to do the face but I did not think until afterwards XD Additional Notes: this is only face #1 out of 30 XD PLEASE LORD SAVE ME BUT I LOVE HIM TOO MUCH
#noctis lucis caelum#prince noctis#ffxv brotherhood#final fantasy xv brotherhood#my art#you be welcome
14 notes
·
View notes
Text
@exotic-crystal-dancer
Hello! Chipping in on some art tips because my grimoire is my going ohshitohfuck I’m using ink and a dip pen and calligraphy Iwillruinit-
So I’m not even gonna touch grimoire parts specifically lol.
I agree that watercolors are tricky. If you’re hellbent on them, rather try gouache. It’s a considerable bit thicker, but you can water it down bit by bit to get some amazing results. You do need a palette though (a small plastic one is usually more than enough) because gouache tends to come in tubes. I would recommend getting another journal to play and experiment with technique and such, though.
Or, and this is something I haven’t tried yet, (at least since putting around with it as a third-grader with soaking the tip in my spit lol (please don’t do that😂)), you can get watercolor pencils.
Now, they work just like normal pencils. All the control you could dream of, but if you wet the tip in water, you can ‘paint’. Or, you use a wet brush over the finished drawing.
I think they might be a little less intimidating than actual paint, to be honest, but that’s me, lol. I’m terrified of going straight to paint😂🙈
As for straight pages, you want them to be kinda thick, and probably support that page so it doesn’t bleed into the one especially behind it, with cardstock/thin plastic while painting and drying. Especially if the pages are thin/the paper is really wet.
I’d also say get some decent art supplies within your price range. Staedtler is fairly cheap and commercial but good, and Derwent starts getting more expensive but they’re more artist-level. But the latter come in packs of various sizes and individual pencils so you get to pick a base and later expand from there if you like. Staedtler comes in set packs and that’s it, so expanding between them might give you different pigments and textures, idk. I got watercolor Staedtlers for my birthday this year and I still haven’t used them😅 I do make good use of my Derwent colored pencils (but they’re colored pencils, not watercolor) though.
And get a good quality eraser too. Colored pencils don’t like being erased, and I imagine watercolor pencils will be the same. I also have a so-called ‘artists sharpener’ (which actually does make a difference. No flaky bits or broken tips), but I’m pedantic and have an urge to have everything in a ‘collection’. Which is expensive for me😂 Some standard HB pencils are good too. Mechanical is awesome because no sharpeners, but if you wanna do greyscale they’re a little harder to manipulate.
Oh! Something else that’s nice are paperstubs. They’re paper pencils you use to blend things with, and when they get dirty you peel that layer off. They usually come in packs of 3 or 6 and they’re all different sizes.
But tissues, Q-tips, and your fingers work perfectly too, when blending pencils.
I almost forgot fixative sprays😂 They’re usually in cans in art stores, and a light coat preserves what you’ve arted so it doesn’t fade excessively, or smudge (once it’s dry/that layer of art is done). It is my saving grace when I do line art I love and want to color straight onto it with pencils (I usually scan it in and print then go on that😅).
With aesthetic… I guess that comes with time. Whatever you wanna draw you might wanna practice drawing in a separate place, and then I would shove you in the direction of gesture drawings to practice. Some of my best horses and horse heads are 30-second gestures, and that’s saying something since I’m pretty damn good at drawing horses in general.
Tracing is another good way of practicing the shape and flow of an object, I used to do it a lot, (especially horses), and should try it on people lol.
I think I’ve gone way off track on bits (especially switching from paint to pencils), but I hope it helps a little?
I’m definitely a self-taught tinkerer when it comes to art, with a helping heap of talent to push me just beyond disasters most of the time, so I sure as hell don’t know most of what I’m doing. I’ll often turn to my friend who does art on a daily basis and sort of poke at her until she explains something I’m interested in, lol.
But where that meandering thing is going is, you definitely get better with practice. You develop some intuition and an eye and a feel for it. Experimentation is key. Laugh at yourself when something doesn’t turn out quite right and try again another time. I promise it’ll work out eventually☺️
And uh. I guess if you want links to two gesture-drawing sites here they are, too:
Here’s one
And here’s another
And here’s what gesture drawings are
Grimoire/Art Journal help?
@tenderspeck @orriculum @maddiviner
Hey! So I’m tagging you three because I was hoping for some opinions, and all of your have phenomenal aesthetics. But, sincerely, I would love any opinions, links, etc from anyone who wants to share their art tips! I have a Moleskine journal that I want to make all artsy, and some pages painted with watercolor.
I haven’t done anything art-related since the 8th grade, and I remember always having trouble with paint. I was wondering if you guys had tips about not making my pages all soggy or crinkly, or just a little prettier in general. Thank you! ❤️❤️
106 notes
·
View notes