#Guilt-free garlic bread
Explore tagged Tumblr posts
Visit Tumblr Blog
Explore Tumblr blogs with no restrictions, modern design and the best experience.
Last Seen Tumblr Blogs


Fun Fact
There are dozens of funny blogs to kill time on Tumblr.
Text
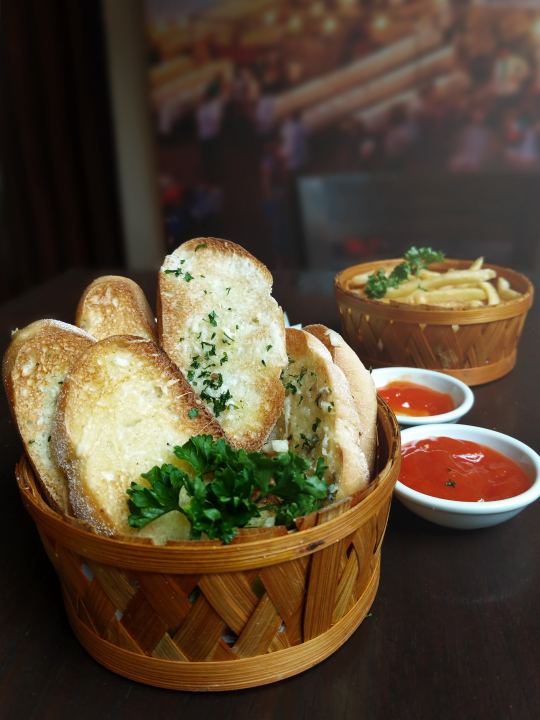
How to make Keto Garlic Bread & Low Carb Garlic Bread with Cheese
Keto and low carb diets have gained immense popularity in recent years due to their potential for weight loss and health benefits. However, finding suitable bread options that fit within these dietary restrictions can be challenging. In this article, we will explore how to make delicious keto garlic bread and low carb garlic bread with cheese, allowing you to satisfy your bread cravings without compromising your diet. See our full keto tips site here.
Understanding the Keto and Low Carb Diets
Before diving into the recipes, let's briefly understand the principles behind the ketogenic diet and low carb diets. The ketogenic diet focuses on drastically reducing carbohydrate intake and increasing fat consumption to induce a state of ketosis, where the body burns fat for fuel instead of carbohydrates. Low carb diets, on the other hand, aim to limit carb intake to a moderate level, promoting stable blood sugar levels and weight management.
Choosing the Right Ingredients for keto garlic bread
When making keto garlic bread or low carb garlic bread with cheese, ingredient selection is crucial. Traditional wheat flour is high in carbs, so it's necessary to explore low carb flour alternatives such as almond flour, coconut flour, or flaxseed meal. Additionally, using keto-friendly fats and oils like butter or olive oil is essential for achieving the right texture and taste. Don't forget to incorporate low carb seasonings and herbs like garlic powder, oregano, or rosemary for added flavour.
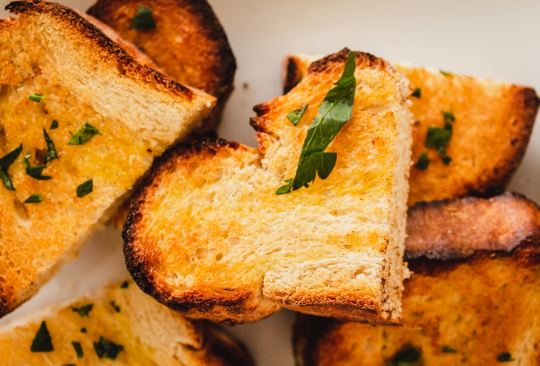
Recipe 1: Keto Garlic Bread
Let's start with the recipe for keto garlic bread. Follow these steps to create a delicious low carb version of this classic dish:
Preheat your oven to the specified temperature.
In a mixing bowl, combine the almond flour, baking powder, garlic powder, and a pinch of salt.
In a separate bowl, whisk together the melted butter and beaten eggs.
Gradually add the wet ingredients to the dry ingredients, mixing well until a dough forms.
Transfer the dough onto a baking sheet lined with parchment paper.
Shape the dough into a rectangular or oval shape, approximately half an inch thick.
Bake in the preheated oven for about 15-20 minutes, or until the bread turns golden brown.
Remove from the oven and let it cool for a few minutes before slicing and serving.
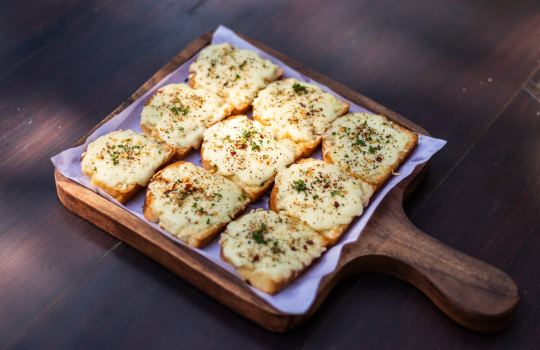
Recipe 2: Low Carb Garlic Bread with Cheese
If you're looking to take your garlic bread to the next level, try this recipe for low carb garlic bread with cheese:
Follow the instructions for the keto garlic bread recipe until step 7.
Once the bread is baked and slightly cooled, sprinkle shredded mozzarella or cheddar cheese evenly over the top.
Place the bread back into the oven for an additional 5 minutes, or until the cheese has melted and turned bubbly and golden.
Remove from the oven and allow it to cool for a couple of minutes.
Slice into portions and serve warm, allowing the gooey cheese to delight your taste buds.

Tips for Perfecting Your Garlic Bread
Here are a few tips to help you perfect your keto garlic bread and low carb garlic bread with cheese:
Experiment with different herbs and spices to add variety to your bread. Consider adding dried basil, parsley, or even a sprinkle of chili flakes for a kick.
Get creative with cheese options. Besides mozzarella and cheddar, try using provolone, Monterey Jack, or a blend of cheeses for a more complex flavour.
Don't be afraid to explore variations of garlic bread, such as garlic knots or breadsticks.The process remains similar, but the shaping and presentation can vary for added fun.
Adjust the level of garlic flavour to suit your preferences. If you're a garlic lover,eel free to add more garlic powder or minced fresh garlic to the dough.
Make sure to store any leftovers in an airtight container in the refrigerator. To reheat, simply pop them in the oven or toaster for a few minutes until warmed through.
How to Adjust Your Keto Garlic Bread to Include Other Toppings
While keto garlic bread is already a delicious treat on its own, you can take it to the next level by incorporating other mouth-watering toppings. Here's how you can adjust your keto garlic bread recipe to include various toppings and enhance its flavour:
Cheesy Spinach and Artichoke:
Spread a layer of creamy spinach and artichoke dip over the baked garlic bread. Top it with a generous amount of shredded mozzarella cheese and broil until the cheese is golden and bubbly.
Pepperoni Pizza Style:
Transform your keto garlic bread into a mini pizza by adding sugar-free marinara sauce, sliced pepperoni, and grated Parmesan cheese. Pop it back in the oven until the cheese is melted and the pepperoni is crispy.
Buffalo Chicken:
Toss cooked shredded chicken in buffalo sauce and layer it over the garlic bread. Sprinkle with crumbled blue cheese or shredded cheddar cheese for an irresistible combination of flavours.
Caprese Delight:
Spread a thin layer of basil pesto over the garlic bread, then top it with slices of fresh mozzarella cheese, cherry tomatoes, and fresh basil leaves. Drizzle with balsamic glaze for a refreshing and tangy twist.
Mediterranean Medley:
Spread a layer of creamy tzatziki sauce over the garlic bread and top it with diced cucumbers, tomatoes, black olives, and crumbled feta cheese. Garnish with fresh dill for a burst of Mediterranean flavours.
Feel free to experiment with other toppings like grilled vegetables, bacon, avocado, or even a combination of different cheeses. By adjusting your keto garlic bread to include various toppings, you can create endless flavour combinations and satisfy your cravings while staying true to your low carb lifestyle.
Benefits of Homemade Keto and Low Carb Garlic Bread
Making your own keto garlic bread and low carb garlic bread with cheese offers several advantages:
By preparing it at home, you have control over the ingredients, ensuring you avoid additives and preservatives often found in store-bought options.
You can customize the recipe to suit your taste preferences. Feel free to adjust the seasonings, cheese types, or even experiment with different low carb flours.
Enjoying a guilt-free indulgence is possible while sticking to your diet plan. These recipes provide a satisfying alternative to traditional high carb garlic bread.
Conclusion
In conclusion, with the right ingredients and simple techniques, you can easily make delicious keto garlic bread and low carb garlic bread with cheese. These recipes allow you to enjoy the flavours you love while maintaining your commitment to a keto or low carb lifestyle. Give them a try and savour the taste of homemade bread without the guilt.
FAQs
· Can I freeze the keto garlic bread?
Yes, you can freeze keto garlic bread. Ensure it is properly wrapped in foil or placed in an airtight container before freezing. To enjoy later, thaw it in the refrigerator overnight and reheat in the oven for a few minutes.
· What are the best low carb flours for making bread?
Some popular low carb flour options for making bread include almond flour, coconut flour, and flaxseed meal. Each has its own unique properties, so feel free to experiment and find the one that suits your taste and dietary needs.
· Can I substitute almond flour with coconut flour?
Yes, you can substitute almond flour with coconut flour, but the ratio may differ. Coconut flour absorbs more liquid than almond flour, so you'll typically need less coconut flour compared to almond flour in a recipe. It's best to follow a specific recipe that calls for coconut flour to ensure the right texture and consistency.
· How many carbs are in a serving of low carb garlic bread?
The number of carbs in low carb garlic bread will vary depending on the specific ingredients and quantities used. However, compared to traditional garlic bread, low carb versions typically contain significantly fewer carbs, making them a suitable option for those following a low carb or keto diet.
· Can I make keto garlic bread without eggs?
Yes, you can make keto garlic bread without eggs. Instead of using eggs as a binding agent, you can try using alternatives such as flax eggs (ground flaxseed mixed with water) or chia eggs (ground chia seeds mixed with water). These alternatives work well in most bread recipes and provide a similar binding effect.
#keto#keto garilic bread ketobread keto bread keto cheese#Garlic bread transformation recipe#Baked keto goodness#Flavorful low-carb twist#Keto-approved bread option#Carb-conscious garlic bread#Guilt-free garlic treat#Creative low-carb snack#Keto-friendly bread innovation#Low-carb garlic bread recipe#Healthy garlic bread alternative#Garlic-infused bread recipe#Savory keto side dish#Innovative low-carb recipe#Crispy keto delight#Low-carb garlic indulgence#Garlic-inspired keto dish#Keto snack option#Guilt-free garlic bread#Low-carb garlic twist#Low-carb garlic infusion#Keto-friendly bread alternative#Baked garlic goodness#Flavorful keto creation#Low-carb garlic bread#Keto-friendly garlic bread#Garlic bread transformation#Keto-friendly Low-carb Garlic-infused Savory delight Healthy indulgence Low-carb bread Guilt-free pleasure Low-carb comfort food Flavorful t
3 notes
·
View notes
Text

Following a ketogenic diet doesn't mean giving up bread entirely. With a few modifications, you can enjoy the pleasure of freshly baked bread while staying within your low-carb limits. In this article, we'll explore some mouthwatering keto bread recipes that are both satisfying and easy to make. Whether you're new to the keto lifestyle or a seasoned follower, these recipes will add variety to your meal plan while keeping you on track. Let's dive in!
Almond Flour Bread:
Ingredients:
2 cups almond flour
¼ cup ground flaxseed
¼ cup psyllium husk powder
1 teaspoon baking powder
½ teaspoon salt
4 large eggs
¼ cup melted butter or coconut oil
½ cup unsweetened almond milk
Instructions:
Preheat the oven to 350°F (175°C) and line a loaf pan with parchment paper.
In a mixing bowl, whisk together the almond flour, ground flaxseed, psyllium husk powder, baking powder, and salt.
In a separate bowl, beat the eggs, melted butter (or coconut oil), and almond milk.
Combine the wet and dry ingredients, stirring until a thick batter forms.
Pour the batter into the prepared loaf pan, smoothing the top with a spatula.
Bake for 50-60 minutes or until a toothpick inserted into the center comes out clean.
Allow the bread to cool before slicing. Enjoy!
Coconut Flour Bread:
Ingredients:
¾ cup coconut flour
¼ cup psyllium husk powder
1 teaspoon baking powder
½ teaspoon salt
6 large eggs
¼ cup melted butter or coconut oil
1 cup unsweetened almond milk
Instructions:
Preheat the oven to 350°F (175°C) and grease a loaf pan.
In a bowl, mix together the coconut flour, psyllium husk powder, baking powder, and salt.
In a separate bowl, beat the eggs, melted butter (or coconut oil), and almond milk until well combined.
Combine the wet and dry ingredients, allowing the coconut flour to absorb the liquids for a few minutes.
Transfer the batter to the greased loaf pan and smooth the top.
Bake for 55-65 minutes, or until a toothpick inserted into the center comes out clean.
Let the bread cool before slicing. Enjoy!
Click here Indulge in guilt-free snacking with these tasty keto-friendly options:
Tips for Perfect Keto Bread:
Use eggs as a binding agent: Eggs provide structure and texture to keto bread recipes. Beating the eggs well before combining them with other ingredients ensures a light and fluffy loaf.
Experiment with flavors and add-ins: Enhance the taste and texture of your bread by adding herbs, spices, or cheese. You can also incorporate nuts, seeds, or low-carb sweeteners like erythritol or stevia.
Don't skip the resting time: Keto bread recipes often call for allowing the batter to rest for a few minutes. This step helps the dough absorb the moisture, leading to a better final texture.
Adjust baking time and temperature: Ovens can vary, so keep an eye on your bread while it bakes. If the top is browning too quickly, cover it with aluminum foil to prevent burning.
Conclusion:
With these simple keto bread recipes and helpful tips, you can indulge in delicious homemade bread while maintaining your low-carb lifestyle. Whether you choose almond flour or coconut flour as your base, these recipes offer a satisfying alternative to traditional bread. Experiment
with different flavor variations and add-ins to tailor the bread to your preferences. Get creative by adding garlic and rosemary for a savory twist, or cinnamon and nutmeg for a delightful sweet option.
Remember, keto bread may have a slightly different texture compared to traditional bread due to the absence of gluten. Embrace its uniqueness and enjoy the wholesome and nutritious ingredients that go into making it.
Additionally, keto bread is best stored in the refrigerator or freezer to maintain its freshness. Slice the loaf before freezing so you can easily grab individual portions whenever you crave a slice.
Lastly, while keto bread can be enjoyed on its own, it also serves as a fantastic base for sandwiches, toast, or even low-carb French toast. It's a versatile option that allows you to stay on track with your ketogenic goals without sacrificing flavor or satisfaction.
Incorporate these keto bread recipes into your meal plan, and let the aroma of freshly baked bread fill your kitchen while indulging in a guilt-free treat. Happy baking!
The Benefits of Keto Bread: Explore the advantages of incorporating keto bread into your low-carb lifestyle, such as maintaining ketosis, improved blood sugar control, and increased satiety.
Understanding Keto-Friendly Ingredients: Learn about the key ingredients used in keto bread recipes, such as almond flour, coconut flour, psyllium husk powder, and flaxseed, and their role in creating a nutritious and low-carb bread alternative.
Tips for Successful Keto Bread Baking: Discover helpful tips and techniques to ensure your keto bread turns out perfectly every time, including proper mixing, resting the dough, adjusting baking time and temperature, and storing for freshness.
Flavor Variations and Add-Ins: Get inspired with a variety of flavor options to elevate your keto bread, such as incorporating herbs, spices, cheese, nuts, seeds, or low-carb sweeteners, to add excitement and personalization to your baked goods.
Using Keto Bread in Everyday Meals: Explore creative ways to enjoy keto bread beyond plain slices, including using it as a base for sandwiches, toast, or even low-carb French toast, and discover new ways to incorporate it into your ketogenic meal plan.
Frequently Asked Questions about Keto Bread: Address common queries related to keto bread, such as its carb content, potential alternatives for specific dietary restrictions, and troubleshooting common issues that may arise during the baking process.
Other Keto-Friendly Baked Goods: Expand your low-carb baking repertoire by exploring other keto-friendly recipes, such as muffins, bagels, and pizza crusts, to add more variety to your ketogenic meal plan.
Conclusion: Wrap up the article by emphasizing the versatility and enjoyment of keto bread while highlighting its compatibility with a ketogenic lifestyle. Encourage readers to try the recipes, experiment with flavors, and embrace the satisfaction of indulging in delicious bread while staying on track with their health goals.
Click here Indulge in guilt-free snacking with these tasty keto-friendly options:
#weightloss#fitness#keto#exercise#hydration#cardio#healthyeating#healthyliving#wellness#diet#custom keto diet#keto diet#ketogenic#ketolife#ketogenic diet#ketofood#ketomeals
47 notes
·
View notes
Note
Could you write a fic where Sam and Tara seem finally happy, they’ve just finished up their meal at a pizza place that is just a lil bit too cheap to not raise an eyebrow and are now walking home to their apartment before they get bombarded by conspiracy theorists. They go to hassle Sam aggressively shoving her and interrogating her before Tara charges at the theorist, knocking them over and pummelling their face with punches. This protection doesn’t come free,though as the theorists grab Tara and beat her up while same is unable to help. Sam’s guilt would drive her crazy after this
“Loomis”-
————————————————-
“You know, for someplace that only had two stars on Yelp, that hit!”
Sam threw her head back and laughed, pulling her sister in for a side hug. The pair had just finished eating at Guido’s Pizzeria, a family restaurant down the block from their new place. Tara had begged to try it, even though the Yelp reviews were dismal. So they did.
Kissing the side of Tara's head, Sam sighed. “You know, it wasn’t half-bad. The tomato sauce was a little sweet for my taste, but I’d try it again,”.
Tara hummed. “The garlic bread was good. I love garlic bread,”.
“I know you do, my love. I know you do,”.
Sam was so busy fussing with Tara's jacket that she didn’t notice the crowd of men approaching them.
That was her first mistake.
“Oh boys, look what we have here. The killer of Woodsboro!” crowed the ringleader, a shit-eating grin on his face.
Sam moved Tara behind her, eyeing the men forming a circle around her. The two sisters both had tasers and knives on them, but six full-grown men were surrounding them. They would have to be smart about this.
“I think you’ve heard wrong. I’m no such thing,” she carefully said, watching as one of the men started cracking his knuckles.
The ringleader laughed again, a cold, calculated laugh. Tara gripped her wrist harder, her hands shaking. Sam stood straighter, one hand in her coat pocket, grasping the knife hiding there.
He quickly got up in Sam’s face, grinning wider at how both sisters flinched. “No, I think I’m right. You’re the bitch who murdered all those people. And enjoyed it. You’re bold to walk around this city, Sam, the murderer,”.
She bristled, eyes darkening. “I’m not my father. But if you ask nicely, I’m sure I can do a good impersonation of his work. Now back up before I make you,” she growled.
Grinning, he got nose-to-nose with Sam. “I’d like to see you try, Loomis,.”
Her second mistake was not punching him first.
Instead, chaos erupted. Within a blink of an eye, Tara jumped on the guy, screaming that she was not like her father, and pummeled him with a barrage of punches. The other guys, along with Sam, were frozen in shock, watching the man get beat up by a five-foot girl.
Her third mistake was not reacting first.
As she reached down to pull Tara off the guy, the other boys regained their confidence quicker. Two guys yanked Sam up, forcing her to her knees, her arms behind her back. The other three easily plucked Tara off their ringleader, holding her up in the air by her armpits.
The ringleader got up, wiping blood off his nose. He pointed at Sam, and she smiled at the damage Tara had done, despite the fear running through her.
“I’m surprised you let your sister hit first. Maybe you’re not your father's daughter,”.
Tara squirmed in their grip, trying to get free. The ringleader smiled a cold, bone-chilling smile. Before he spoke, Sam connected the dots on what would go down.
“But somebody has to pay for the deaths in Woodsboro. And your sister will be our penance,”.
With that, he advanced on Tara, despite Sam’s pleas and Tara's squirming. Reaching into Tara's jacket pocket, he pulled out the pocketknife.
He waved the knife in Tara's face, smirking at her eyes widened with fear. “Aw. You were gonna use this on me, weren’t you? I wish you did. It would’ve made what would happen next more fun,”.
And with that, he punched Tara in the gut, and Sam let out a scream she never knew she could make.
She doesn’t remember much after that. For every two punches they threw at Tara, one was thrown at Sam. Eventually, she lost track, and Tara stopped crying out.
They gave up after a while, throwing down Sam and letting Tara's limp body hit the ground.
Fighting the urge to black out, Sam reached out for her baby sister. Tara was covered in blood, bruising blossoming over her closed eyes. She wasn’t moving, yet Sam could tell she was still faintly breathing.
The whole image of her sister tore Sam apart. It was yet again another bloodbath she could’ve stopped.
But what made Sam’s breath catch in her throat were the words that were scratched onto her sister’s arm.
Sam Loomis
—-
Sam doesn’t remember getting to the hospital. It was all so sudden.
Flashing lights, questions, and people strapping her down into a gurney.
“I need to see my sister. I need to be by her,” she gasped, wincing as the paramedic stuck a needle in her arm.
The paramedic gently pushed her down again, silencing her. “She’s in the other vehicle. I need you to lay down, Ms. Loomis,”.
She jerked back up, crying out at the pain in her ribs. “It’s not fucking Loomis. I’m Sam, Sam Carpenter!” she spat out.
“Okay, I’m sorry, Ms. Carpenter. My mistake. It was just written on your sister’s arm, that’s all,”.
Laying back, Sam felt woozy. The medication was hitting. Was that a sedative? She hasn’t been sedated in so long. Where was Tara? She should be here.
“Loomis,” she mumbled, drifting off into a drugged sleep for the rest of the ride.
——
“Listen, if you don’t let me see my fucking sister right now, I’ll add more bodies to my list. I swear to god!”
The nurse pushed Sam back down into the bed. “I told you, I’m not afraid to restrain you. Your sister is in the ICU recovering from surgery. No guests right now. Now sit!” she said crossly.
Sam threw her hands back in exasperation. “I’m already stuck in this fucking bed. I want to see her, please!”
She wasn’t above begging anymore. She was stuck in a hospital with her ribs wrapped in gauze and stitches above her eye- and heavily medicated. It wasn’t like she was going anywhere else besides her sister’s side.
“No, Sam. I’m sorry. Maybe later,” the nurse sympathetically said, closing the door softly behind her.
Groaning, Sam laid her head back against the bed. She fucked up. She fucked up tremendously. Once again, due to her lack of awareness, she had gotten the sisters into a perilous situation.
And once again, Tara was hospitalized.
It was as if Sam was incapable of being a protector. She is incapable of taking care of someone that depended on her.
Sam knew deep down that those men were right. She was a killer. She took after her father. She knew all that, and she knew it well.
But she always took pride in how much she loved Tara. How Sam could anticipate her needs, calm her fears, and make Tara feel loved. She knew she could provide that stable love and home Tara craved and deserved.
Yet again, Sam repeatedly proves to the world that she’s a complete and total fuck-up. Unable to take care of the one person who truly matters. She was a failure in all accounts of the world.
She kept her eyes closed and breathed slowly. Deep down, she knew that if she looked into her reflection, she would see Billy.
And he would smile back at her, thanking her for following in his footsteps.
Sam Loomis.
#scream#sam carpenter#tara carpenter#carpenter sisters#this one was specific but fun#ao3 author#my writing tag#sorry! an attempt to be happy was made!#AU: i’ve got blood on my hands
49 notes
·
View notes
Text
Echance your Culinary with Vezlay Veg Chicken: Trends
Introduction
In recent years, there has been a significant shift towards plant-based diets and alternative meat products. Vezlay Veg Chicken, a plant-based substitute, has gained popularity for its meat-like texture and versatility in cooking. Not only does it offer a nutritious and healthy option, but it also allows individuals to explore exciting culinary trends. In this article, we will delve into the top culinary trends involving Vezlay Veg Chicken, providing you with easy language explanations and inspiring ideas to enhance your cooking skills.
Fusion Cuisine
Fusion cuisine is a blending of different culinary traditions, creating unique and exciting flavor combinations. With Vezlay Veg Chicken, you can explore fusion dishes that bring together various cultural influences. Here are some examples:
Tex-Mex Tacos:
Combine Vezlay Veg Chicken with Mexican-inspired flavors such as cumin, chili powder, and lime juice. Serve it in a tortilla with salsa, guacamole, and fresh toppings for a delicious Tex-Mex twist.
Asian-inspired Stir-Fry:
Create a fusion stir-fry by combining Vezlay Veg Chicken with soy sauce, ginger, garlic, and vegetables like bok choy, bell peppers, and mushrooms. Serve it over rice or noodles for a satisfying meal.
Mediterranean Wraps:
Incorporate Vezlay Veg Chicken into a Mediterranean-inspired wrap with tzatziki sauce, tomatoes, cucumbers, and fresh herbs. The combination of flavors will transport you to the sunny shores of the Mediterranean.
Indian Curry Pizza:
Top a pizza crust with Vezlay Veg Chicken cooked in a flavorful Indian curry sauce. Add vegetables like onions, bell peppers, and cilantro for a fusion of Italian and Indian cuisines.
Middle Eastern Kebabs:
Skewer Vezlay Veg Chicken pieces with colorful vegetables and grill them to perfection. Serve with pita bread, hummus, and a side of tabbouleh for a Middle Eastern-inspired feast.
Plant-Based Comfort Food
Comfort food is all about indulgence and satisfaction. Vezlay Veg Chicken can be used to create delicious and comforting plant-based versions of classic comfort foods. Here are some ideas:
Veg Chicken Pot Pie:
Make a creamy and comforting pot pie using Vezlay Veg Chicken, mixed vegetables, and a savory plant-based gravy. Top it with a flaky crust for a hearty and satisfying meal.
Vegan Buffalo Wings:
Coat Vezlay Veg Chicken in a spicy buffalo sauce made from hot sauce and vegan butter. Serve with vegan ranch dressing and celery sticks for a delicious and guilt-free indulgence.
Veg Chicken Noodle Soup:
Simmer Vezlay Veg Chicken in a flavorful vegetable broth with noodles, carrots, celery, and herbs. This comforting soup is perfect for chilly days or when you're feeling under the weather.
Plant-Based Chicken Parmesan:
Bread Vezlay Veg Chicken cutlets with breadcrumbs and vegan Parmesan cheese. Top with marinara sauce and vegan mozzarella, then bake until golden and bubbly. Serve with pasta for a satisfying Italian-inspired meal.
Vegan Chicken and Waffles:
Prepare crispy Vezlay Veg Chicken and serve it on top of fluffy vegan waffles. Drizzle with maple syrup and enjoy the perfect blend of sweet and savory.
Street Food-Inspired Creations
Street food is known for its bold flavors and creative combinations. With Vezlay Veg Chicken, you can recreate popular street food dishes in a plant-based and healthier way. Here are some street food-inspired ideas:
Veg Chicken Shawarma:
Marinate Vezlay Veg Chicken in a blend of Middle Eastern spices like cumin, coriander, and paprika. Grill or sauté it and serve it in a pita bread with tahini sauce, pickles, and fresh vegetables.
Veg Chicken Tacos:
Season Vezlay Veg Chicken with Mexican spices like chili powder, cumin, and oregano. Grill or sauté it and stuff it into tortillas with salsa, avocado, and your favorite taco toppings.
Veg Chicken Banh Mi:
Create a Vietnamese-inspired sandwich by filling a baguette with Vezlay Veg Chicken, pickled vegetables, fresh herbs, and a drizzle of sriracha or vegan mayo.
Veg Chicken Gyro:
Season Vezlay Veg Chicken with Greek-inspired flavors like garlic, lemon juice, oregano, and thyme. Serve it in a warm pita bread with tzatziki sauce, tomatoes, and onions.
Veg Chicken Satay:
Skewer Vezlay Veg Chicken and grill or bake it until cooked. Serve it with a peanut sauce for dipping, along with a side of cucumber salad or jasmine rice.
Gourmet Plant-Based Creations
Elevateyour culinary skills with gourmet plant-based creations using Vezlay Veg Chicken. These dishes are perfect for special occasions or when you want to impress your guests. Here are some gourmet ideas:
Veg Chicken Wellington:
Wrap Vezlay Veg Chicken in puff pastry along with a flavorful stuffing like mushrooms, spinach, and vegan cheese. Bake until golden brown for an elegant and delicious dish.
Veg Chicken Roulade:
Pound Vezlay Veg Chicken to flatten it, then roll it with a filling of your choice, such as roasted red peppers, vegan cheese, and herbs. Secure with toothpicks and bake until cooked through. Slice and serve with a sauce of your liking.
Veg Chicken Risotto:
Prepare a creamy risotto by cooking Arborio rice with vegetable broth, onions, garlic, and white wine. Add diced Vezlay Veg Chicken towards the end and finish with vegan butter and nutritional yeast for a cheesy flavor.
Veg Chicken with Mushroom Sauce:
Sauté Vezlay Veg Chicken until cooked, then serve it with a rich mushroom sauce made from sautéed mushrooms, garlic, plant-based cream, and herbs. Serve with roasted vegetables or mashed potatoes for a gourmet meal.
Veg Chicken Caesar Salad:
Create a vegan version of the classic Caesar salad by using Vezlay Veg Chicken as a protein source. Toss it with crisp romaine lettuce, vegan Caesar dressing, croutons, and vegan Parmesan cheese for a refreshing and satisfying salad.
Conclusion
With Vezlay Veg Chicken, the possibilities for enhancing your culinary skills are endless. Whether you're exploring fusion cuisine, recreating comfort foods, experimenting with street food-inspired dishes, or creating gourmet plant-based creations, Vezlay Veg Chicken offers a versatile and delicious alternative to traditional meat. Get creative in the kitchen and enjoy the benefits of a plant-based diet while satisfying your taste buds with these trending culinary ideas. Start your culinary journey today and let Vezlay Veg Chicken take your cooking to new heights.
5 notes
·
View notes
Text
ʚ 7.4.23 ✦ WIEIAD+steps ɞ


m34nsp() is not just permitted, but appreciated!
𓂃 steps ꒦꒷ 15,108
𓂃 total ꒦꒷ 1,068
𓂃 breakfast ꒦꒷ 2
✧ 1/3 of oi ocha green tea bottle ✰ 2
𓂃 lunch ꒦꒷ 279
✧ whole wheat double fiber bread w/out crust ✰ 70
✧ 1/2 of cheeseheads string cheese ✰ 171
✧ 2 tsp garlic powder ✰ 19
✧ strawberry ensure max protein ✰ 150
𓂃 dinner ꒦꒷ 787
✧ cheddar bay biscuit ✰ 162
✧ 38% of kids popcorn shrimp ✰ 94
✧ 1/3 cup of new england clam chowder ✰ 77
✧ 1/4 serving of calamari ✰ 250
✧ 40% of kids side fries ✰ 204
oh my gosh right after the day i got to a new lw too??? i feel so guilty rn, i remember i was like "i won't ruin any holidays for myself!! :))))", your family only started celebrating red white and blue independence day in 2020 and before that you guys just watched the fireworks at night since you could see them from your windows. there will always be more opportunities to eat like that but guilt-free after you reach your ugw.
#ana and mia#ana trigger#@n0r3xia#ed not ed sheeran#i want to be weightless#skinnni#need to lose more weight#tw ana fast#tw ana shit#ana butterfly
4 notes
·
View notes
Text
[ad_1] Did you know that there’s a super nut, grown under the golden California sun, sitting in your kitchen that can elevate all kinds of meals? We’re talking about California Walnuts-the gold standard in quality and taste. Known for their exceptional flavor, versatility, and numerous health benefits, these walnuts are carefully nurtured by multi-generational family farmers, ensuring every nut delivers unmatched quality. Whether you’re snacking, cooking, or baking, these golden delights are the perfect addition to brighten up your plate. Here’s how you can use these premium walnuts to add texture, crunch, and nutrition to your meals: In Salads California walnuts add a wonderful crunch and depth to all kinds of salads. Add a handful into your favorite greens or try a classic Waldorf salad for a wholesome twist. For a heartier salad, lightly roast walnuts and layer them with roasted veggies, crumbled feta, and a drizzle of olive oil. With their rich, nutty flavor, California walnuts are the ultimate way to enhance your salads while adding the goodness of omega-3s and antioxidants. In Mains Did you know California walnuts can transform your main courses? Turning walnuts into a rich, creamy paste can thicken curries and soups while adding a layer of indulgence. Simply blitz together walnuts and olive oil (add garlic and chilies for extra zest), and store this paste in the refrigerator for your next culinary adventure. Use it to enrich pasta sauces, create creamy curries, or as a meat substitute in dishes like walnut Bolognese. Alternatively, create a crunchy crust of walnuts on fish or paneer for a premium dining experience. Known for their golden color and mild flavor, these walnuts bring both taste and nutrition to every bite. California Walnut Curry As a Snack Snacking gets a whole new meaning with California walnuts. Packed with healthy fats, protein, and essential nutrients, a handful of walnuts makes for a wholesome snack to keep you full between meals. Elevate your snack time by lightly roasting walnuts and tossing them with your favorite masalas for an irresistible crunch. As a bonus, their health benefits-like supporting heart, brain and gut health-make snacking on walnuts a guilt-free indulgence. California Walnuts As a Snack In Dessert When it comes to baked goods, California walnuts truly take the cake! Whether it’s banana bread, chocolate brownies, or walnut cookies, their signature crunch and buttery flavor takes any dessert to the next level. Pair them with chocolate for an unforgettable combination-dip them in melted chocolate and refrigerate them for a quick, luxurious treat. For a healthier option, whip up honey walnut bars to satisfy your sweet tooth while staying mindful of your nutrition. California Walnut Energy Bars So, whether you’re satisfying a sweet craving, preparing a hearty main, or assembling a quick salad, California walnuts are your go-to ingredient for elevating meals. With their premium quality, sun-ripened perfection, and exceptional taste, these versatile nuts truly embody the gold standard of culinary excellence. Indulge your palate and brighten up every plate with the goodness of California walnuts. !function(f,b,e,v,n,t,s) if(f.fbq)return;n=f.fbq=function()n.callMethod? n.callMethod.apply(n,arguments):n.queue.push(arguments); if(!f._fbq)f._fbq=n;n.push=n;n.loaded=!0;n.version='2.0'; n.queue=[];t=b.createElement(e);t.async=!0; t.src=v;s=b.getElementsByTagName(e)[0]; s.parentNode.insertBefore(t,s)(window,document,'script', 'https://connect.facebook.net/en_US/fbevents.js'); fbq('init', '311356416665414'); fbq('track', 'PageView'); [ad_2] Source link
0 notes
Text
Creamy Keto Chicken Korma: A Low-Carb Twist on a Classic Indian Dish
Craving the rich, aromatic flavors of traditional Indian cuisine without the carbs? This Keto Chicken Korma recipe delivers all the creamy goodness of the classic dish while keeping it low-carb and keto-friendly. Perfect for weeknight dinners or impressing guests, this recipe combines tender chicken thighs with a velvety coconut milk sauce infused with warm spices. Let’s dive in!

Recipe Information Card
Prep Time: 15 minutes Cook Time: 35 minutes Total Time: 50 minutes Course: Main Course Cuisine: Indian-Inspired Servings: 6 Calories: ~480 per serving
Recipe Ingredients
(Measurements for 6 servings)
Protein:
2 lbs boneless, skinless chicken thighs (cut into bite-sized pieces)
Aromatics:
1 medium onion, finely chopped (use a low-carb variety like yellow onion)
4 garlic cloves, minced
1 tbsp fresh ginger, grated
Spices:
1 tbsp garam masala
1 tsp ground turmeric
1 tsp ground cumin
1 tsp ground coriander
1/2 tsp chili powder (adjust to taste)
1/4 tsp ground cardamom
Liquids:
1 (13.5 oz) can full-fat coconut milk
1/2 cup chicken broth (unsalted)
Thickening Agents:
2 tbsp almond flour
1 tbsp coconut oil or ghee
Sweetener:
1 tsp erythritol (or preferred keto-friendly sweetener)
Garnish:
2 tbsp fresh cilantro, chopped
1/4 cup sliced almonds (optional)
Recipe Instructions
Step 1: Sauté the Aromatics
Heat coconut oil or ghee in a large skillet or Dutch oven over medium heat.
Add the chopped onion and sauté for 5–6 minutes until translucent.
Stir in garlic and ginger, cooking for 1–2 minutes until fragrant.

Step 2: Toast the Spices
Add garam masala, turmeric, cumin, coriander, chili powder, and cardamom to the skillet. Toast the spices with the onions for 1–2 minutes to deepen their flavor.
Step 3: Cook the Chicken
Add chicken thighs to the skillet, stirring to coat with the spice mixture. Cook for 4–5 minutes until lightly browned.
Pour in coconut milk and chicken broth, stirring to combine. Bring the mixture to a gentle simmer.

Step 4: Thicken the Sauce
Sprinkle almond flour over the sauce and mix well to prevent clumping.
Simmer uncovered for 20–25 minutes, stirring occasionally, until the chicken is cooked through and the sauce thickens.

Step 5: Adjust Seasoning and Serve
Stir in erythritol to balance the spices. Taste and adjust salt or chili powder as needed.
Garnish with cilantro and sliced almonds. Serve hot with cauliflower rice or keto naan.
Nutrition Information Card
(Per serving)
Calories: 480
Total Fat: 36g
Protein: 32g
Total Carbs: 8g
Dietary Fiber: 3g
Net Carbs: 5g
Recipe Notes
Ingredient Swaps:
Replace chicken thighs with breast for leaner protein (note: thighs retain moisture better).
Use heavy cream instead of coconut milk for a dairy-friendly version.
Storage:
Refrigerate leftovers in an airtight container for up to 3 days.
Freeze for up to 2 months; thaw overnight before reheating.
Spice Adjustments:
Omit chili powder for a milder korma. Add a pinch of cayenne for extra heat.
Nut-Free Option:
Substitute almond flour with sunflower seed flour and skip the almond garnish.
Why This Recipe Works for Keto
Traditional korma relies on yogurt, cream, and sometimes sugar, which can derail a keto diet. This version swaps in coconut milk for creaminess and uses almond flour to thicken the sauce without carbs. With only 5g net carbs per serving, it’s a guilt-free way to enjoy bold flavors.
Pairing Suggestions
Cauliflower Rice: Soaks up the sauce beautifully.
Keto Naan: Use a fathead dough recipe for a bread-like side.
Cucumber Raita: Mix full-fat Greek yogurt with diced cucumber and mint.
Final Thoughts
This Keto Chicken Korma proves that you don’t need to sacrifice flavor for a low-carb lifestyle. Creamy, aromatic, and satisfying, it’s a meal that’ll keep you on track with your goals while feeling indulgent. Save this recipe for your next meal prep day or dinner party – it’s sure to become a staple!
Love this recipe? Share your creations with #KetoKormaMagic on social media!
Looking for more keto inspiration? Check out these resources:
The Ultimate Keto Meal Plan
Custom Keto Diet
0 notes
Text
Pasta with Cherry Tomatoes

If you’re looking for a simple, flavorful, and satisfying dish, this cherry tomato basil pasta recipe is exactly what you need. Bursting with the fresh sweetness of cherry tomatoes, the comforting bite of al dente spaghetti, and the fragrant aroma of fresh basil, this dish is perfect for any day of the week. Whether you're short on time or just craving something light yet filling, this is one of those mini tomato recipes that will become a staple in your kitchen. Why You Will Love This Pasta with Cherry Tomatoes Recipe - Quick and Easy: This cherry tomato pasta can be whipped up in under 30 minutes, making it ideal for busy weeknights. - Minimal Ingredients: With just a handful of pantry staples and fresh produce, this dish delivers maximum flavor with minimal effort. - Healthy and Vegan: This recipe is naturally vegan and can be enjoyed guilt-free. It’s a fantastic way to include fresh produce like cherry tomatoes and basil in your diet. - Customizable: Love spice? Add more chili flakes. Prefer grape tomatoes? Swap them in. This recipe works beautifully with a variety of small tomatoes. - Versatile: Pair this dish with a fresh salad, crusty bread, or even a plant-based protein for a complete meal. Ingredient Notes

- Spaghetti: Choose your favorite brand of spaghetti or swap it for gluten-free pasta if needed. - Cherry Tomatoes: The star of the show! These little gems are sweet, juicy, and perfect for this dish. You can also use grape tomatoes for a slightly different flavor profile. - Garlic: Smashed garlic cloves release their flavor without overwhelming the dish. Feel free to adjust the amount to your liking. - Olive Oil: Use high-quality extra virgin olive oil for the best flavor. - Basil: Fresh basil is essential for that classic cherry tomato basil pasta taste. - Chili Flakes (Optional): For a touch of heat, chili flakes add depth to the dish without overpowering the other flavors. - Salt and Pepper: Simple seasonings that enhance the natural flavors of the ingredients. Instructions How to Make This Cherry Tomato Basil Pasta - Cook the Spaghetti: Bring a large pot of salted water to a boil. Add the spaghetti and cook according to the package instructions until al dente. Reserve ½ cup of pasta water, then drain. - Prepare the Sauce: In a large skillet, heat olive oil over medium heat. Add the smashed garlic cloves and sauté for 1-2 minutes until fragrant but not browned. Add the cherry tomatoes and season with salt, pepper, and chili flakes (if using). Cook for 5-7 minutes, stirring occasionally, until the tomatoes soften and start to burst. Use the back of a spoon to gently press some of the tomatoes to release their juices.

- Combine Pasta and Sauce: Lower the heat and add the drained spaghetti to the skillet. Toss the pasta to coat it in the sauce. Add a splash of the reserved pasta water if the sauce is too thick.

- Add Fresh Basil: Tear the fresh basil leaves and stir them into the pasta just before serving. - Serve: Divide into bowls, drizzle with a little extra olive oil, and garnish with more chili flakes if desired. Pasta with Cherry Tomatoes Recipe Tips - Don’t Overcook the Garlic: Keep an eye on the garlic as it sautés. Burnt garlic can give the dish a bitter taste. - Burst the Tomatoes Gently: Use the back of a spoon to press only a few tomatoes, leaving others intact for a mix of textures. - Adjust the Spice Level: If you’re not a fan of spice, skip the chili flakes entirely. If you love heat, feel free to add more. - Use Fresh Basil: Dried basil won’t provide the same aromatic freshness as the real thing. - Add Nutritional Yeast: For a cheesy, vegan twist, sprinkle some nutritional yeast on top before serving. Serving Suggestions and Pairings - As a Main Dish: Serve this cherry tomato pasta with a side of garlic bread or a fresh green salad for a complete meal. - With Vegan Proteins: Pair this dish with baked tofu, grilled tempeh, or chickpeas for added protein. - Wine Pairing: A crisp white wine like Sauvignon Blanc or Pinot Grigio complements the freshness of the cherry tomato basil pasta. - Family Dinner: This dish is light yet satisfying, making it a perfect option for family meals. Storing Instructions for Pasta with Cherry Tomatoes - Refrigeration: Store leftovers in an airtight container in the fridge for up to 3 days. - Reheating: Reheat gently on the stovetop or in the microwave. Add a splash of water or olive oil to refresh the sauce. - Freezing: While this dish is best enjoyed fresh, you can freeze the tomato sauce separately for up to 2 months. Thaw and toss with freshly cooked pasta when ready to eat. Frequently Asked Questions about Pasta with Cherry Tomatoes 1. Can I use grape tomatoes instead of cherry tomatoes? Yes! Grape tomatoes work just as well in this recipe and provide a slightly sweeter flavor. 2. What’s the best type of pasta for this recipe? Spaghetti is a classic choice, but you can use any long pasta like linguine or fettuccine. Short pasta like penne or fusilli also works well. 3. Is this recipe spicy? Not inherently. The chili flakes add optional heat, which you can adjust to your preference. 4. Can I make this dish gluten-free? Absolutely. Substitute regular spaghetti with your favorite gluten-free pasta. 5. What can I use instead of fresh basil? If fresh basil isn’t available, try parsley or a small amount of dried basil. However, the fresh basil really elevates the dish.

Equipment Needed - Large Pot: For cooking the spaghetti. - Skillet or Frying Pan: To prepare the sauce. - Tongs or Pasta Spoon: For tossing the pasta and sauce together. - Sharp Knife: To smash the garlic and tear the basil. - Serving Bowls: To plate your beautiful cherry tomato and pasta recipes creation. This cherry tomato pasta recipe is a celebration of simple, fresh ingredients. Whether you’re looking for recipes for using cherry tomatoes or just a quick dinner idea, this dish delivers every time. With its vibrant colors, delightful textures, and harmonious flavors, it’s no wonder that cherry tomato recipes with pasta are loved by so many. So, next time you find yourself with a pint of cherry tomatoes and some spaghetti, you know exactly what to make. It’s one of those cherry tomato recipes that’s sure to impress without the stress. Do you love cooking with cherry tomatoes? What’s your favorite way to use them? Share your twists on this cherry tomato basil pasta recipe or your favorite cherry tomato and pasta recipes in the comments below. Let’s keep the conversation delicious! More Pasta Recipes: - Mushroom and Truffle Pasta - Coconut Milk Pasta - Vegan Lentil Bolognese - Pasta alla Norma - Vegan Pumpkin Pasta Read the full article
#angelhairpastawithtomatoes#bakedfetapasta#bakedpastawithtomatoes#cherrytomatopastasalad#chickenpastawithcherrytomatoes#creamypastawithcherrytomatoes#garlicandbasilpasta#healthylivingenthusiast#hle8424#italianpastawithcherrytomatoes#pastarecipewithcherrytomatoes#pastawithcherrytomatoes#pastawithcherrytomatoesandcheese#pastawithcherrytomatoesandspinach#pastawithfetaandtomatoes#pastawithmozzarella#pastawithmozzarellaandcherrytomatoes#pestopastawithcherrytomatoes#shrimppastawithcherrytomatoes#simplepastawithcherrytomatoes#tunapastawithcherrytomatoes#VeganDinnerIdeas#Veganfood8424#VeganGirl
0 notes
Text
Italian Bread Crostini: A Guilt-Free Snack For Every Occasion.
When it comes to snacks, finding a balance between flavor and health can be challenging. Italian Bread Crostini is the perfect guilt-free snack that satisfies appetites without sacrificing nutrition. Crostini is an excellent option whether entertaining at a classy event, relaxing at home, or searching for an inventive appetizer. Let's introduce Panemontella, the Italian bread made especially for crostini.
What Makes Panemontella Unique?
Panemontella offers perfect and unique flavourful Italian Bread Corstini. What makes it unique is this:
1- Crispiness: Because Panemontella naturally contains more gluten, the bread toasts beautifully. Thanks to this, every crostini will retain its structural integrity while absorbing toppings without getting soggy.
2- Flavor: This bread's delicate, slightly nutty flavor pairs well with various toppings. It's the ideal medium for highlighting the tastes of your selected components.
3- Versatility: Panemontella has a wide range of applications. It can make traditional crostini with roasted veggies, goat cheese, and smoked salmon as savory toppings. Additionally, it excels when combined with sweetener ingredients like honey, almonds, and fruit compotes.
Why Choose Guilt-Free Crostini?
Even while eating tasty food is essential, many of us are becoming more conscious of our health. There are several ways that Panemontella can assist you in making guilt-free crostini:
1- Whole Grain Selections: Seek out Panemontella, produced using whole grains such as rye or whole wheat. These choices give your snack additional nutrients and fiber, making it healthier.
2- Portion Control: Because they are naturally bite-sized, crostini are perfect for controlling portion sizes. You can enjoy a couple of slices without going overboard.
3- Healthy Toppings: Load your crostini with nutritious toppings such as:
Fresh vegetables: Avocados, bell peppers, cucumbers, and tomatoes all contribute vital vitamins and vivid color.
Lean protein: You can increase your protein intake by eating grilled shrimp, smoked salmon, or chicken.
Healthy fats: Avocados, nuts, and seeds contain heart-healthy fats.
Fresh herbs: Thyme, basil, and oregano provide taste without adding unnecessary calories.
Creating the Perfect Italian Bread Crostini with Panemontella:
1- Toasting: Toast the Panemontella slices until golden brown and crisp. A toaster oven or broiler works well.
Top Picks:Traditional: bruschetta with olive oil, tomatoes, garlic, and basil
Mediterranean: olives, feta cheese, roasted red peppers, and hummus
Vegetarian: Balsamic-glazed roasted bell peppers, zucchini, and eggplant
Seafood: cream cheese, smoked salmon, and dill
Sweet: Honey, toasted almonds, and fruit compote
2- Presentation: Place the crostini on a dish or serving board for an attractive presentation. Garnish with edible flowers or fresh herbs for an added touch.
Panemontella: A Culinary Journey
Using Panemontella for your Italian Bread Crostini enhances the experience. It celebrates elegant flavors, essential ingredients, and Italian cooking heritage. Take a gastronomic adventure with Panemontella the next time you're craving a tasty and filling snack.
Advice & Techniques:
1- Marinating: Marinating meats or vegetables before adding them to your crostini to improve flavor.
2- Grilling: Grill the Panemontella for a smokey flavor before adding the toppings.
3- Experimentation: Try out various flavor combinations without fear. There are countless options!
Why Panemontella?
Authentic Italian baking is brought into your kitchen with Panemontella. Their breads are the ideal foundation for crostini because of their dedication to using high-quality ingredients and traditional methods. Panemontella guarantees that your crostini will stand out from the crowd, whether you choose their artisan baguettes or traditional ciabatta.
Conclusion
Italian Bread Crostini celebrates flavors, textures, and inventiveness rather than merely a nibble. You can make decadent and guilt-free crostini with Panemontella's high-quality bread and a little imagination. They are a testament to the adage that the best things come in small packages and are appropriate for any occasion. Why wait, then? Get a loaf of Panemontella bread, add as many toppings as you like, and savor the perfect guilt-free snack!
0 notes
Text
Chicken Tender Hacks: 5 Easy Ways to Upgrade Your Homemade Tenders with Pro Tips
Homemade chicken tenders are a family favorite, but with a few tweaks, you can elevate them from simple to sensational. Here are five easy hacks and professional tips to upgrade your chicken tenders like the chicken tender restaurant:
Marinate for Maximum Flavor Before breading, marinate your chicken tenders to infuse them with flavor. Buttermilk is a classic choice for tenderizing and adding a tangy kick. For extra flavor, mix in garlic powder, paprika, and a dash of hot sauce. Let the chicken marinate for at least 30 minutes or up to 24 hours for the best results.
Double-Coat for Extra Crunch To achieve that crispy, restaurant-style coating, use a double-dipping technique. First, dredge the tenders in seasoned flour, then dip them in an egg wash, and finally coat them in panko breadcrumbs or crushed cornflakes. For an even crunchier texture, lightly spray the tenders with cooking oil before baking or frying.
Experiment with Seasoned Breadcrumbs Add flair to your breading by mixing in Parmesan cheese, dried herbs, or spices like smoked paprika, cayenne, or Italian seasoning. This customization lets you tailor the flavor to your liking and keeps the tenders exciting every time.
Bake Instead of Fry for a Healthier Option For a guilt-free alternative, bake your tenders in the oven. Preheat to 400°F, place the tenders on a wire rack set over a baking sheet, and bake for 15-20 minutes, flipping halfway through. The rack ensures even cooking and keeps the coating crisp.
Serve with Gourmet Dips Elevate your tenders with a variety of homemade dipping sauces. Try honey mustard, sriracha mayo, or garlic aioli for an added burst of flavor. A tangy barbecue sauce or creamy ranch can also make your tenders irresistible.
Conclusion With these simple hacks, you can transform basic chicken tenders into a gourmet treat. Whether you’re cooking for a weeknight dinner or impressing guests, these pro tips will make your tenders the star of the table. Enjoy experimenting and savor the delicious results!
0 notes
Text
Why Aurea Cafe is the Best Cafe in Kandivali: A Customer’s Delightful Experience

In the heart of Kandivali East lies a hidden gem that has been winning the hearts of locals and visitors alike — Aurea Café. Renowned for its delectable food, cozy ambiance, and top-notch customer service, Aurea Café is more than just a coffee shop; it’s a destination that promises delightful experiences.

1. The Ultimate Culinary Haven
At Aurea Café, every dish tells a story. Whether you’re a foodie seeking new flavors or someone who enjoys the classics, the cafe’s menu is a gastronomical treat.
What Makes Our Menu Special?
Signature Coffees: Indulge in expertly brewed beverages like our Barista’s Special Cappuccino or the rich and creamy Aurea Mocha Delight.
Satisfying Meals: Our Classic Alfredo Pasta and Cheesy Garlic Bread are customer favorites, blending flavor and comfort in every bite.
Delectable Desserts: Try our Chocolate Lava Cake, a decadent dessert that melts hearts with every spoonful.
Health-Conscious Options For health enthusiasts, Aurea Café also offers fresh salads, smoothies, and guilt-free snacks that don’t compromise on taste.
2. Ambiance That Feels Like Home
The moment you enter Aurea Café, you’re greeted by an inviting vibe that makes you feel at home.
Cozy Seating: Whether you’re on a casual coffee date, a brainstorming session, or just some alone time with your book, we have the perfect spot for you.
Instagram-Worthy Decor: From rustic wooden furniture to charming greenery accents, every corner is picture-perfect.
Relaxing Atmosphere: Unwind with soft music playing in the background as you sip on your favorite drink.
3. Unparalleled Customer Service
At Aurea Café, customers are not just guests; they’re part of our family. Our staff is trained to ensure every visitor feels special, with:
Friendly and professional service.
Prompt attention to your needs.
Personal touches that make each visit memorable.
Customer testimonials often highlight the warmth and attentiveness of our team, making Aurea Café a standout in Kandivali.
4. Strategic Location: Easy to Reach
Conveniently located at Shop №1, Kalpataru Avenue, Akurli Road, Opp ESIS Hospital, Kandivali (East), Mumbai — 400101, Aurea Café is the perfect pit stop for anyone in or around Kandivali. Its central location makes it ideal for quick coffee runs, casual meetups, and even remote work sessions.
5. Community-Centric Initiatives
Aurea Café is more than a café; it’s a hub for community engagement. We host regular events to connect with our patrons:
Open Mic Nights: A platform for local talent to shine.
Live Music Evenings: Enjoy soulful tunes with your favorite brew.
Festive Specials: From themed decor to exclusive menus, we celebrate every occasion with our patrons.
6. Affordable Luxury

What Our Customers Say
Here’s what some of our loyal customers have shared about their experiences:
“Aurea Café is my go-to spot for a quick coffee and relaxing ambiance. Their Peri-Peri Fries are to die for!”
“The staff here is so welcoming, and the food is consistently amazing. Love the vibe!”
“Best café in Kandivali! Their Chocolate Lava Cake is unmatched.”
Why Choose Aurea Café?
Key Highlights That Set Us Apart:
Wide-ranging Menu: From classic coffees to exotic dishes, there’s something for every taste.
Family-Friendly Environment: Suitable for all age groups, including kids.
Work-Friendly Space: Free Wi-Fi and quiet corners for productivity.
Visit Us Today!
Ready to experience the best café in Kandivali? Drop by Aurea Café to explore our menu, soak in the ambiance, and create memorable moments.
📍 Address: Shop №1, Kalpataru Avenue, Akurli Road, Opp ESIS Hospital, Kandivali (East), Mumbai — 400101 📞 Contact: +91 86557 21926 / 022 45070035 🌐 Website: www.aureacafe.com
0 notes
Text
Fresh Flavors: Exploring Salads with Grilled Chicken
When it comes to fresh, flavorful, and nutritious meals, few options compare to the delightful appeal of a salad topped with perfectly grilled chicken. Whether you're enjoying a Grilled Chicken House Salad or indulging in a Grilled Chicken Caesar Salad, these culinary creations strike the perfect balance between taste and health. With vibrant greens, savory grilled chicken, and complementary dressings, these salads cater to diverse palates and dietary preferences.
A Celebration of Fresh Ingredients
At the heart of these salads is a commitment to fresh, high-quality ingredients. The Grilled Chicken House Salad features a medley of crisp lettuce, juicy tomatoes, crunchy cucumbers, and sweet red onions. Combined with tender, seasoned grilled chicken, this salad is a symphony of flavors and textures. The addition of house-made dressings takes the dish to another level, providing just the right tanginess or creaminess to suit your taste.
Meanwhile, the Grilled Chicken Caesar Salad offers a classic twist. It combines romaine lettuce, grated Parmesan cheese, crunchy croutons, and creamy Caesar dressing with the star of the dish: grilled chicken. This salad is a perfect choice for those seeking comfort and tradition in every bite.
The Perfect Blend of Nutrition and Flavor
Grilled chicken is not just delicious; it’s also a protein powerhouse. Including it in salads adds a hearty element that keeps you feeling full and energized. The combination of lean protein with nutrient-rich vegetables ensures you’re getting a meal that is as nourishing as it is tasty.
The Grilled Chicken House Salad is a versatile option for those who enjoy variety. You can personalize it with additional toppings like avocado, nuts, or seeds for an extra nutritional boost. On the other hand, the Grilled Chicken Caesar Salad provides a sense of indulgence with its creamy dressing and Parmesan accents, making it a go-to choice for satisfying cravings.
Why Choose These Salads?
Convenience and Customization: These salads are easy to customize, whether you want extra toppings or prefer to adjust the dressing to your liking.
Health Benefits: Packed with vitamins, fiber, and lean protein, they support a balanced diet without compromising on taste.
Universal Appeal: Their versatility makes them suitable for lunch, dinner, or even a light snack.
Experience Culinary Excellence
At Hard Rock Cafe, every dish reflects a dedication to quality and flavor. While the menu offers an array of mouthwatering options, the salads stand out for their fresh, wholesome appeal. The Grilled Chicken House Salad and the Grilled Chicken Caesar Salad embody this ethos, offering a dining experience that is both satisfying and memorable.
With an emphasis on fresh ingredients and expertly prepared grilled chicken, these salads are perfect for anyone seeking a delicious and guilt-free meal. Whether dining in or ordering takeout, you can savor these delightful creations while enjoying the vibrant atmosphere of the cafe.
Pairing Suggestions
To elevate your meal, consider pairing your salad with a refreshing beverage or a side dish. A cool lemonade or sparkling water complements the salads’ flavors beautifully, while sides like garlic bread or soup make for a more filling experience.
0 notes
Text
From Oven to Health: Craft Baking for Wellness Enthusiasts
Introduction: Craft Baking Meets Wellness
Introduce the concept of wellness baking, emphasizing its focus on nourishing ingredients, mindful preparation, and balanced indulgence. Highlight the growing interest in wellness-oriented foods and why craft baking, where each ingredient and process is thoughtfully chosen and aligns perfectly with a healthier lifestyle.

1: Ingredients that Heal – Choosing Healthful Basics
Dive into ingredient selection, discussing nutritious alternatives that enhance both taste and health benefits.
Whole Grains: Explain the benefits of whole grains like spelled, oat, and buckwheat flour. Describe how they offer fiber, vitamins, and minerals, and compare their properties for baking (taste, texture, etc.).
Natural Sweeteners: Cover natural options like honey, maple syrup, coconut sugar, and dates, discussing their glycemic impact and distinct flavors.
Healthy Fats: Include options such as coconut oil, avocado oil, and nut butter. Talk about their health benefits and how they affect the texture of baked goods.
Superfoods and Boosters: Highlight superfoods like chia seeds, flaxseeds, turmeric, and matcha, which can be incorporated into recipes for added wellness benefits.
2: Techniques for Mindful Baking
Explain how mindfulness in baking improves the process and promotes mental well-being.
Mindful Preparation: Encourage slowing down and focusing on each step, from measuring ingredients to mixing and baking.
Kitchen Setup for Mindfulness: Suggest setting up a clean, calm space, organizing ingredients beforehand, and using sustainable utensils or baking tools.
Savoring Aromas and Textures: Talk about the sensory enjoyment of baking and why engaging fully with the process can be a form of
3: Recipes for a Healthful Start – Wellness Breakfast Bakes
Share delicious, nutrient-packed breakfast recipes that promote energy and satiety.
Seeded Multigrain Muffins: Made with oats, chia seeds, and almond flour for a fiber-rich start to the day.
Avocado Banana Bread: A sugar-free recipe using avocado for healthy fats and natural sweetness from bananas.
Golden Turmeric Scones: With a hint of ginger and a vibrant color from turmeric, these scones support immune health and add warmth to mornings.
4: Guilt-Free Indulgence – Health-Conscious Desserts
Focus on desserts that satisfy cravings without the sugar crash, crafted to keep wellness in mind.
Almond Butter Dark Chocolate Cookies: Rich in antioxidants and made without refined sugar, these cookies balance indulgence with health.
Matcha Coconut Bliss Balls: High in antioxidants, these no-bake treats combine the benefits of matcha and the natural sweetness of dates.
Flourless Sweet Potato Brownies: A unique take on brownies, using sweet potato for moistness and added nutrients like beta-carotene.
5: Breads and Savories for Balance
Share recipes that bring balance to a meal, emphasizing nutrient density and natural flavors.

Whole Wheat Herb Focaccia: Infused with rosemary and garlic, this bread combines the heartiness of whole wheat with the boldness of fresh herbs.
Chickpea Flatbread: Naturally gluten-free and high in protein, this Mediterranean-inspired bread pairs well with hummus or salads.
Spinach and Feta Savory Muffins: Ideal for a filling snack, these muffins pack fiber and protein into a tasty, portable treat.
6: Baking for Special Diets – Allergen-Free and Gut-Friendly Options
Address the need for allergen-free recipes for those with specific dietary requirements.
Gluten-Free Almond Flour Loaf: A simple, versatile bread for those avoiding gluten, with a nutty flavor from almond flour.
Dairy-Free Coconut Yogurt Cheesecake: A creamy, satisfying dessert using coconut yogurt and a crust made from nuts and dates.
Low-Sugar Carrot Cake with Cashew Frosting: Sweetened with dates and made with gut-friendly almond flour, topped with a smooth cashew-based frosting.
7: The Wellness Baker’s Pantry – Stocking Essentials for Everyday Health
Guide readers on creating a pantry stocked with wellness-focused staples.
Baking Flours: Discuss a variety of flours like almond, coconut, spelled, and oat, with tips on storage and usage.
Sweeteners and Flavor Enhancers: Explain how to use natural sweeteners and spices like cinnamon, cardamom, and vanilla for health and taste.
Nuts, Seeds, and Superfoods: Encourage readers to stock nuts and seeds, rich in healthy fats, as well as superfoods that add both flavor and nutrition to recipes.
8: Sustainability in Wellness Baking – Ethical and Eco-Friendly Choices
Talk about how wellness goes beyond health and encompasses ethical and eco-conscious choices.
Sustainable Ingredient Sourcing: Discuss the importance of choosing locally sourced or organic ingredients when possible.
Eco-Friendly Baking Tools: Recommend durable, reusable tools like silicone baking mats, bamboo mixing spoons, and compostable parchment paper.
Reducing Waste: Suggest ways to minimize waste, like using food scraps creatively (e.g., citrus zest, nut pulp).
Conclusion: Baking as a Journey to Wellness
Encourage readers to view wellness baking as an ongoing journey. Emphasize that experimenting with recipes and exploring new ingredients can be both joyful and beneficial. Remind readers that the heart of wellness craft baking is the balance between enjoying the process and nourishing the body.
0 notes
Text
Unlock the Power of Vitamix: Top Recipes for Every Meal

The Vitamix blender has become a staple in kitchens worldwide, celebrated for its power, versatility, and ability to create everything from smoothies to soups. But what sets Vitamix apart isn’t just its ability to blend ingredients—it's the way it helps you maintain a nutritious, whole-food lifestyle with minimal effort. Whether you’re looking to boost your morning with nutrient-packed smoothies, prepare plant-based meals, or create guilt-free desserts, a Vitamix can do it all.
In this article, we’ll explore a variety of easy and nutritious recipes you can make with a Vitamix to upgrade your meals and snacks.
Benefits of Using a Vitamix for Your Health
Vitamix blenders aren’t just about convenience—they allow you to take control of the ingredients in your food. By blending whole fruits, vegetables, nuts, and seeds, you retain essential fiber and nutrients that are often lost in processed foods. Additionally, homemade recipes help you avoid added sugars, artificial flavors, and preservatives. Here are five essential recipes that will help you embrace healthy eating every day.
1. Morning Boost: Green Detox Smoothie
Start your day with a burst of energy and hydration. This green smoothie combines leafy greens with tropical fruits for a delicious, nutrient-rich beverage.
Ingredients:
1 cup spinach
1/2 cup kale
1/2 avocado
1 banana
1/2 cup pineapple chunks
1 cup coconut water
Nutritional Highlights:
Spinach & Kale: High in vitamins A, C, and K, which promote healthy skin and immunity.
Avocado: A great source of healthy fats and fiber for sustained energy.
Instructions:
Add all ingredients to your Vitamix blender.
Blend until smooth, adding ice if desired.
Enjoy as a quick breakfast or post-workout refreshment.

2. Lunchtime Delight: Creamy Vegan Tomato Soup
This soup is as nourishing as it is delicious. Thanks to the Vitamix, the soup achieves a creamy texture without dairy—perfect for vegan and lactose-intolerant diets.
Ingredients:
4 fresh tomatoes, chopped
1/4 onion
1 garlic clove
1/2 cup vegetable broth
1/4 cup coconut milk
Salt and pepper to taste
Nutritional Highlights:
Tomatoes: Rich in lycopene, an antioxidant linked to heart health.
Coconut Milk: Provides healthy fats that aid digestion and boost metabolism.
Instructions:
Blend all ingredients on high for 5-6 minutes until steam escapes from the top.
Serve with whole-grain bread for a satisfying meal.

3. DIY Snack: Almond Butter
Store-bought nut butters often contain added sugars and oils. Making your own almond butter ensures you get a pure, nutrient-dense snack without any additives.
Ingredients:
2 cups roasted almonds
1/2 teaspoon salt
Optional: Honey or cinnamon for added flavor
Nutritional Highlights:
Almonds: Packed with vitamin E, magnesium, and protein to promote heart health and muscle recovery.
Instructions:
Blend almonds on high for 1-2 minutes, scraping down the sides as needed.
Continue blending until smooth. Store in a jar and enjoy as a spread or smoothie addition.

4. Sweet Treat: Berry Sorbet
This refreshing dessert satisfies your sweet tooth without the need for added sugar. Using frozen berries makes it easy to whip up a healthy treat in minutes.
Ingredients:
2 cups frozen mixed berries
1/2 cup unsweetened almond milk
2 tablespoons honey (optional)
Nutritional Highlights:
Berries: High in antioxidants that fight inflammation and support cognitive function.
Instructions:
Place all ingredients in the Vitamix blender.
Blend until thick and creamy.
Serve immediately or freeze for later.

5. Crowd-Pleaser: Classic Hummus
Hummus makes for a versatile dip, sandwich spread, or snack. Making it at home allows you to experiment with flavors while ensuring it stays free from preservatives.
Ingredients:
1 can chickpeas, drained
1/4 cup tahini
1 garlic clove
2 tablespoons olive oil
Juice of 1 lemon
Salt and paprika to taste
Nutritional Highlights:
Chickpeas: A plant-based protein source that supports muscle health.
Tahini: Provides calcium and healthy fats for bone and joint support.
Instructions:
Blend all ingredients until smooth and creamy.
Adjust seasoning to taste. Serve with vegetables or pita chips.

Final Thoughts
The Vitamix is more than just a blender—it’s a tool for creating wholesome meals and snacks that support your health goals. From smoothies and soups to spreads and desserts, the possibilities are endless. By preparing food at home with your Vitamix, you’re not only saving money but also taking control of what goes into your meals, promoting a healthier lifestyle.
Ready to take the plunge? Start blending today, and see how these recipes can transform your approach to nutrition. Your Vitamix will quickly become one of your most valued kitchen tools!
Embrace the versatility of the Vitamix to make eating well easier and more enjoyable. With just a little creativity, you’ll be amazed at how it simplifies nutritious cooking!
0 notes
Text

Enjoy a delicious low-carb, gluten-free grilled cheese sandwich made with almond flour bread and a flavorful blend of mozzarella and Parmesan cheese. It's a guilt-free twist on a classic favorite!
Ingredients: 2 slices of almond flour bread. 2 tablespoons of butter. 1/2 cup of shredded mozzarella cheese. 1/4 cup of grated Parmesan cheese. 1/4 teaspoon of garlic powder. 1/4 teaspoon of Italian seasoning. Salt and pepper to taste.
Instructions: Shred the mozzarella and Parmesan cheeses and mix them with garlic powder, Italian seasoning, salt, and pepper in a small bowl. To make a cheese blend, mix it well. Warm up a nonstick pan over medium-low heat. On one side of every slice of almond flour bread, put one tablespoon of butter. In the pan, put one slice of bread with the buttered side down. Quickly spread half of the cheese mixture out over the slice of bread in the pan. Cover the cheese with the second piece of bread, butter side up. The bread should be golden brown and the cheese should be melted and gooey. Cook the sandwich for two to three minutes on each side. Let the Low Carb Gluten Free Grilled Cheese sandwich cool for a minute after taking it out of the pan. Cut the sandwich in half across the middle, and serve it hot and crispy.
Prep Time: 10 minutes
Cook Time: 10 minutes
Eva Little
0 notes