#Fried rice tips and tricks
Explore tagged Tumblr posts
Visit Tumblr Blog
Explore Tumblr blogs with no restrictions, modern design and the best experience.
Last Seen Tumblr Blogs


Fun Fact
In Q3 of 2020, 31% of US users access the Tumblr app daily.
Text
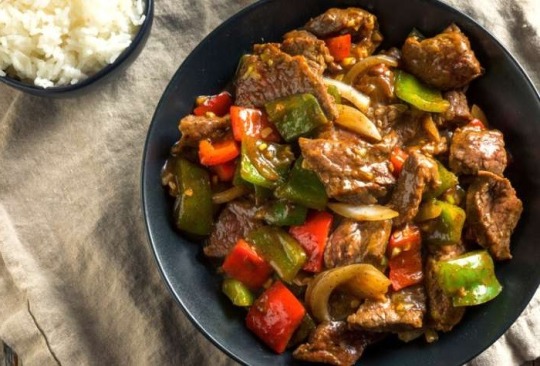
Fried Rice with Prawns
Fried rice with prawns or shrimp! Inspired by the seafood fried rice from Zelda Breath of the Wild and Tears of the Kingdom, this is the story of my decade-long journey learning how to make restaurant-quality light and fluffy fried rice at home. An amazing, tasty recipe to use up leftover rice, combined with other ingredients of your choosing, from seafood to pork to tofu – plus as many…
#Egg fried rice recipe#Fried rice recipe easy#Fried rice tips and tricks#seafood fried rice recipe#shrimp fried rice recipe#Simple fried rice recipe#zelda fried rice#Zelda: Tears of the Kingdom and Breath of the Wild Recipes
2 notes
·
View notes
Text
some tips for people who just started living on their own
It's been 4 years now, and I'm not regretting a single day that I moved out. No more adapting to what my parents want, no more reporting where I'm going or who I'm bringing over, I can create my save haven the way I like it. For me, it was really the start of becoming myself.
But, there's a bunch of stuff here and there that would've been nice if I had known it from the get-go. And I thought: let's share them!
1 what appliances to invest in?
one thing that is going to come back every single day is cooking. and food is expensive AF if you're not careful. I found 2 great ways to save a bunch of money and they both rely on one thing: Invest in a good freezer! Many grocery stores have systems where they price down things that are close to the shelf life date. One of our local grocery stores can go up to 70% discount! But the problem with those is, you need to eat it right away.... OR DO YOU??? Freezing things close to expiring will let them last for a full freaking month extra. and vegetables go even longer. Plenty of time to use it when you need it (just don't forget to thaw) Be careful though: once you thawed it, you can't freeze it again.
Items are usually also WAY cheaper if you buy them in bulk. Chop them up and in the freezer they go! This one's also great if you don't always have the energy or drive to cook: cook up a large pot of whatever you like, put it in containers and freeze them. I always like doing so with pasta sauce and then cook the pasta fresh~ But it also works great with stews, curry and other types of sauces. stores like IKEA have containers that are just the right size for one meal.
For some of you, the next one may be a no-brainer, but.... My mom was really proud of how fast she was with doing the dishes. She was always like 'why get a dishwasher, I'm faster if I do it myself'. And I have lived up to that same idea up until half a year ago. My kitchen was always a mess, I didn't feel like cooking, inviting people over was embarrassing. I exhausted myself every time visitors would come and I had to fight that monster pile. Please, if you recognize these problems: invest in a dishwasher. Life became SO MUCH easier. My house is clean, my mind is more at ease, social contact increased cuz it's not as big a hassle to clean before guests show up. I really wish I wouldn't have wasted those 3 years fighting a monster that was this easy to tackle in the end...
2 easy cooking
Though it's also a bit of an investment: cooking becomes fucking easy with an airfryer. No oil is added, so it's a bunch healthier. you just put the temperature and timer and it's done. and a lot of things can just fry simultaneously. chuck in some meat and potato's at 400F (200C) for 20 minutes and all you'll have to worry about is adding some vegies with it. springrolls, pizza, potato's, meat. it all gets nice and crunchy too. (prepare vegies in a rice cooker for the same don't-have-to-keep-an-eye-on-it experience. you can cook them simultaneously with rice too!)
Something that became one of my fave dishes of the late is 'stir fried whatever'. it goes like this: Bake whatever meat you fancy, great with egg or tofu too. add whatever vegies (straight out of the freezer is fine). add stir fry sauce in whatever amount seems nice (little for coating, more if you want it to be saucy). make some carbs and you're fucking DONE! no measuring, no thinking what spices to use, it goes with anything and everything. and your local grocery has probably like 5 different flavors. (or at least, it does here. dunno if that's true for America...) like it creamy? add half a cup of soya milk. it takes like 10 minutes tops (not counting the cooking of rice/pasta/potato/bread)
3 think in money or think in space
With tricks like a good freezer, saving money with discount products becomes a whole lot easier. But there are also different discount products that can save you a lot of money. my mom always used to buy like.... packs of 4 toilet rolls. and if you calculate it, buying 3x4 rolls is so much more expensive than buying a 12 pack. But what you'll need for that is space. Try keeping account of a spot like that in your house. cupboard underneath the sink, the spot where they installed the boiler, top shelves you don't often use cuz it's high up, on top of the fridge, garage. I live in an apartment and have a small storage space for my bicycle. Perfect spot for non-consumables. (be careful to keep them out of reach for mice) think toilet paper, tissues, cat litter, soap, shampoo, toothpaste. they'll be good in 2 years too, and you'll still be needing them all the same. I once found this 6 pack of toothpaste for like 3,-! aint no one selling 1 tube for 0,50 when I buy it once I need it.
dunno if this is of any use to someone, but I hope this can help out anyone to safe some money, time or energy! Because it sure did for me.
#it may take some money at first but it'll safe you a lot on the long run#I've easily saved the amount the freezer cost me over the last 4 years. probably 2 freezers even#be sure to check the energy label!#household tips#household#life hacks#tips and tricks#living on your own#living on my own#kitchen tricks#kitchen#healthy living
11 notes
·
View notes
Text
𝐌𝐢𝐥𝐠𝐫𝐚𝐦 𝐨𝐜𝐬 𝐢𝐧 𝐓𝐰𝐬𝐭 (𝐌𝐚𝐧𝐢𝐩𝐮𝐥𝐚𝐭����𝐨𝐧)
Author’s notes:
I went in with low expectations, so the pictures came out better than expected. Daisuke looks cool in his own special way, even though his hair isn't very accurate. SD picrew
Daisuke ♡

Other names:
Seahorse (Floyd)
Monsieur Independent (Rook)
Jade (Slyvan)
Tower (Xenon)
Homeland: Sunset savannah
Dorm: Octavinelle
Family:
Unnamed father
Unnamed mother

Appearance
Eye colour: Light blue
Hair colour: Jet black
Race: Beastman (Black fox)
Uniform: Most of his uniform is in place, his tie being the only exception (he finds it too stuffy). The top two buttons of his shirt are unbuttoned, and he wears black gloves for whatever reason.
School information
School year: Third
Class: 3E (Student no. 8)
Best subject: Alchemy
Club: Science Club
Fun Facts
Dominant hand: Right
Likes: Playing pool ball, flirting, getting his salary
Dislikes: People who try to trick him, having to rely on people, being nagged for his attire
Favorite Food: Shrimp dumpling
Least Favorite Food: Fried rice
Hobby: Gambling
Talents: Converting materials into gold
Unique Magic: Knowledge is power - He can gain information of a target by touching them and activating his UM. The longer he touches his target, the more information he gains. He can choose what information he would like to gain, but will face trouble when it comes to certain details that the target is guarded about.
Trivia
He was giving me beastman vibes and who am I to ignore? I think being a fox suits him really well. Sly and cunning.
He has many acquaintances, but only a few friends. He's considered more on the friendly side for an Octavinelle student for even admitting he has friends. Funny how that works.
Yes, Slyvan's nickname confused him at first (considering his vice dorm leader is literally named Jade). But the goat boy explained the nickname to him and he came to like the ring of it.
He isn't always in the mood for makeup, but manages to come to class everyday wearing perfect eyeshadow because his friend helps him with it.
He joined the science club to do more alchemy experiments.
He works as a waiter for the Mostro Lounge. He gets tips often.
Suzume ♡

Other names:
Humpback whale (Floyd)
Mademoiselle Jewel (Rook)
Chrysocolla (Slyvan)
Lover (Xenon)
Homeland: Coral sea
Dorm: Pomefiore
Family:
Unnamed father
Unnamed mother
Unnamed older sister

Appearance
Eye colour: Baby blue
Hair colour: Garnet red
Race: Humpback whale mermaid
Uniform: She dresses prim and proper as any Pomefiore student should, with everything ironed neatly and worn in place. Her skirt reaches slightly above her knees, paired with knee-length black socks and loafers. Her bangs fall into her eyes sometimes, so she pins it up with a purple flower hairclip. It compliments her purple eyeshadow and (occasional) pale pink lip gloss too.
School information
School year: Third
Class: 3B (Student no. 29)
Best subject: Magical potions
Club: Science Club
Fun Facts
Dominant hand: Right
Likes: Strawberry milk, anime and manga, making jewelry (with plastic charms)
Dislikes: Feeling outcast, mirrors, socialising
Favorite Food: Salmon roll
Least Favorite Food: Edamame
Hobby: Reading
Talents: Humming
Unique Magic: Ideal self - She can alter her target's perception and impression of her. Basically, her appearance in their mind and their feelings towards her. The effect is only temporary though, unless she keeps her UM running constantly (risking overblot).
Trivia
I couldn't decide on her race at first because I could imagine her being a fae, mermaid, and human. So I let a randomizer decide for me. Why did I decide to make her a humpback whale mermaid? I just thought it suited her. Big but gentle, with a soothing song.
She doesn't like mirrors because her reflection unnerves her.
She joined the science club because she heard that they do a little bit of everything there.
#*looks at daisuke's trivia and then at everyone else's* I'm not biased I swear#the fun thing about these posts is that I can give clues that would normally never be revealed in milgram#you don't have a milgram version of UMs or xenon's nicknames#prisoner 003: iwamoto daisuke#prisoner 004: toma suzume
3 notes
·
View notes
Text
Why Couples Prefer Hibachi Catering Over Fancy Restaurants for Anniversaries?
Anniversaries are special. They’re a celebration of love, memories, and the journey two people share. And when it comes to celebrating such an important occasion, the food experience matters just as much as the setting. Over the years, many couples have started ditching formal, fancy restaurants for something more personal and exciting—hibachi catering in Santa Rosa Beach, FL.
But what makes a hibachi anniversary party so appealing? Why are couples swapping candlelight dinners for flaming grills and live cooking shows? Let’s dive into what’s making hibachi the new favorite for celebrating love.
A Personal Touch That Fancy Restaurants Lack
At a traditional restaurant, you sit, order, eat, and leave. Sure, the food might be great, the lighting dimmed just right, and the music soft and romantic—but is it memorable? Most couples today crave more than just good food—they want an experience. And that’s exactly what hibachi catering delivers.
With a hibachi chef right in your backyard or chosen venue, the vibe is instantly more intimate and engaging. You’re not just sitting at a table. You’re part of the show—watching your meal being cooked right in front of you with fun tricks, fire bursts, and friendly banter.
It Brings Everyone Together
Anniversary dinners are no longer just about the couple. They’re about celebrating with close friends and family too. With hibachi anniversary party catering, the shared table setup, interactive cooking, and communal dining experience make everyone feel involved.
Guests enjoy a front-row seat to live cooking
Interactive moments like catching food add fun to the evening
Perfect for families or friend groups to bond over laughter and food
Creates a cozy atmosphere where everyone feels included
People laugh, cheer, ask questions, and even try to catch shrimp in their mouths. It’s more than dinner—it’s a celebration that breaks the ice, starts conversations, and creates lasting memories.
Customization That Matches Your Tastes
Another big reason couples love hibachi catering is the flexibility. Have dietary restrictions? Prefer more veggies or want extra fried rice? A hibachi chef can easily personalize the dishes right on the spot.
Adjust meals for vegetarian, vegan, or gluten-free needs
Choose favorite proteins like shrimp, chicken, or steak
Control spice levels and portion sizes right then and there
Add or remove ingredients based on personal preferences
Compared to a fancy restaurant where you’re limited by a menu, hibachi allows you to shape your dinner exactly how you want it. That kind of freedom can be refreshing—especially on a day as personal as your anniversary.
Budget-Friendly Without Losing the Charm
Fine dining restaurants can get very expensive, especially when you add in drinks, dessert, tips, and transportation. With hibachi catering, you get a complete culinary experience without the overpriced extras.
You also control the guest list, the location, and the timing. Want a sunset celebration in your backyard? Go for it. Want to keep it cozy with just the two of you? Done. Hibachi catering offers luxury without breaking the bank.
The Food? Absolutely Unforgettable
And of course, we can’t forget the main reason: the food. Fresh seafood, sizzling steak, stir-fried noodles, fried rice, and perfectly grilled veggies—all cooked on a teppanyaki grill with bold flavors and flair.
There’s something comforting yet exciting about hibachi food. It satisfies cravings while offering something new each time. For couples who love food, this is a memory made with every bite.
Final Thoughts:
When you think about it, anniversaries are not just about dressing up and going out. They’re about creating moments you’ll talk about for years. That’s what hibachi catering brings to the table—literally and emotionally. It's fun, flavorful, and full of love.
So, if your anniversary is coming up, maybe skip the reservation this year. Instead, bring the celebration home with a hibachi anniversary party that’s all about you.
#Catering Santa Rosa Beach Fl#Family Vacation Hibachi#Catering Santa Rose Beach#Mobile Hibachi near Me#Family Hibachi Party
0 notes
Text
Junk Food and Weight Gain: The Hidden Dangers You Need to Know
Junk Food and Weight Gain: The Hidden Dangers You Need to Know
In today's fast-paced world, junk food has become a convenient and tempting option for many. However, consuming processed and unhealthy foods regularly can have severe consequences on your weight management and overall health. If you're struggling with weight gain junk food consumption, it's essential to understand how these unhealthy choices impact your body mass index (BMI) and hinder your journey toward a lean shape diet and workout routine. In this blog, we will delve into the hidden dangers of junk food and how to manage and maintain a healthy weight effectively.
The Link Between Junk Food and Weight Gain
Junk food is often high in calories, unhealthy fats, sugar, and sodium, all of which contribute to weight gain. The excessive intake of processed foods can disrupt your body's natural metabolism, leading to an increase in stored fat. Here’s how junk food impacts your body:
1. High-Calorie Intake and Fat Storage
Junk food items like burgers, fries, and sugary beverages contain excessive calories that surpass your maintenance calorie calculator recommendations. If your daily intake exceeds your maintenance calorie counter, the surplus is stored as fat, leading to an increase in body weight. To determine maintenance calories, you need to consider factors like activity levels, age, and metabolism.
2. Disrupts Your Body's Natural Hunger Signals
Processed foods are designed to be addictive, often leading to overeating. Artificial additives trick your brain into craving more, making it difficult to control body fat and adhere to a healthy BMI.
3. Leads to Poor Nutrient Intake
Junk food lacks essential nutrients required for maintaining a lean body shape. Without adequate protein, fiber, and healthy fats, your body struggles to build muscle and burn fat efficiently. Instead of relying on junk food, incorporating weight management products and weight management supplements can support better nutrition.
The Dangers of Junk Food Consumption
Obesity and Related Health Risks
One of the most significant risks of consuming junk food is obesity weight management challenges. Being overweight or obese increases the risk of serious health conditions such as:
Heart disease
Type 2 diabetes
High blood pressure
Joint pain and arthritis
Negative Impact on Digestion
Unhealthy eating habits can disrupt gut health, leading to issues like bloating and indigestion. Incorporating weight loss probiotics and digestive enzymes can help maintain a balanced gut microbiome and support healthy weight loss.
Hormonal Imbalance and Metabolic Disorders
Junk food consumption can cause insulin resistance, affecting how your body processes glucose. This imbalance can make it harder to maintain weight and achieve an ideal weight for your height.
How to Achieve and Maintain a Lean Body Shape
If you’re wondering how to achieve a lean body shape, the key lies in the right balance of diet and exercise. Here are some practical lean shape diet and workout tips to help you on your journey:
1. Adopt a Nutrient-Rich Diet
Instead of relying on junk food, switch to whole foods that provide essential vitamins and minerals. Your diet should include:
Lean proteins (chicken, fish, tofu)
Whole grains (brown rice, quinoa, oats)
Healthy fats (avocados, nuts, olive oil)
Fiber-rich vegetables and fruits
2. Monitor Your BMI and Body Fat Percentage
Regularly conducting a BMI test can help you understand if you're within a healthy BMI range. Additionally, learning how to measure fat percentage ensures that you track fat loss rather than just weight fluctuations.
3. Stay Hydrated and Avoid Sugary Drinks
Sugary sodas and flavored drinks contribute to weight gain without offering any nutritional benefits. Instead, opt for water, herbal teas, or natural fruit-infused drinks.
4. Regular Exercise for Weight Control
A well-balanced workout routine should include:
Cardio exercises (running, cycling, swimming)
Strength training (lifting weights, resistance training)
Flexibility exercises (yoga, stretching)
5. Use Supplements Wisely
The best supplements for a lean body can support your fitness goals. Consider adding weight management supplements such as protein powders, weight loss probiotics and digestive enzymes, and weight control supplements to aid metabolism and digestion.
How to Check and Maintain Your Weight Effectively
If you’re asking how to check weight or how to check BMI, consider using digital scales and BMI calculators. Understanding proper weight for height helps you set realistic weight goals.
To manage weight, you should:
Track your calorie intake with a maintenance calorie calculator
Find your maintenance calories to avoid overconsumption
Determine the maintenance calorie counter that fits your lifestyle
Engage in nutrition and weight management strategies that work for you
Final Thoughts: Say No to Junk Food for a Healthier Future
Weight gains due to junk food consumption is a serious issue that requires conscious effort to overcome. By prioritizing whole foods, staying active, and using weight management products, you can take control of your health. If you’ve ever wondered how to maintain weight or how to control weight, the answer lies in making sustainable lifestyle changes.
By following these strategies and using the right weight loss management techniques, you can achieve a healthy, balanced body while reducing your risk of obesity and related health conditions. Start making mindful choices today and take charge of your nutrition and weight management for a healthier tomorrow!
#weight management#healthy weight management#healthy weight loss#junk food and weight#junk food and weight management#weight management products#weight gain junk food#Best supplements for a lean body#How to achieve a lean body shape#Lean shape diet and workout tips#weight loss probiotics and digestive enzymes#junk food
0 notes
Text
Your Weight Loss Secret Weapon: Delicious Healthy Dinners
Introduction Are you tired of the endless cycle of fad diets, bland salads, and hunger pangs that leave you more frustrated than fulfilled? What if I told you that the key to sustainable weight loss isn’t deprivation—it’s dinner? That’s right. Your evening meal can be your secret weapon in shedding pounds while savoring every bite. In this article, we’ll dive into how a simple meal plan to lose weight—centered around mouthwatering, nutrient-packed dinners—can transform your health journey. No gimmicks, no starvation. Just delicious food that works for you, not against you.
Why Dinner Matters More Than You Think
Dinner often gets a bad rap in the weight loss world. Some swear by skipping it; others drown it in guilt after indulging. But here’s the truth: A well-balanced dinner does three critical things:
Boosts Metabolism: Eating a nutrient-rich meal keeps your metabolism active, even as you wind down.
Curbs Late-Night Cravings: A satisfying dinner reduces the urge to raid the pantry at 10 p.m.
Supports Recovery: While you sleep, your body repairs itself. Protein, veggies, and healthy fats fuel this process.
The trick? Designing dinners that are simple, flavorful, and aligned with your goals. That’s where a simple meal plan to lose weight comes in—structured yet flexible, so you never feel trapped in a culinary rut.
Building Your Simple Meal Plan to Lose Weight
A successful meal plan isn’t about counting every calorie or memorizing macros. It’s about balance, variety, and ease. Here’s how to build yours:
1. Prioritize Protein
Protein keeps you full, builds muscle, and burns calories during digestion. Aim for 20–30 grams per dinner. Think:
Grilled chicken or turkey
Fatty fish like salmon or tuna
Plant-based options like lentils, tofu, or tempeh
2. Load Up on Veggies (Half Your Plate!)
Vegetables are low in calories but high in fiber, vitamins, and antioxidants. Roast them, sauté them, or toss them into stir-fries. Pro tip: Frozen veggies are just as nutritious and save time.
3. Choose Smart Carbs
Not all carbs are evil. Opt for complex carbs like quinoa, sweet potatoes, or brown rice. They digest slowly, keeping blood sugar stable.
4. Don’t Fear Healthy Fats
Avocado, olive oil, nuts, and seeds add richness and help absorb fat-soluble vitamins (A, D, E, K).
5. Flavor Without the Fuss
Herbs, spices, citrus, and vinegar add zing without empty calories. Say goodbye to bland meals!
5 Delicious Dinner Recipes for Your Simple Meal Plan
Ready to put this into action? Here are five easy, drool-worthy dinners that fit seamlessly into your simple meal plan to lose weight.
1. Lemon Garlic Salmon with Asparagus
Ingredients:
2 salmon fillets
1 bunch asparagus
2 tbsp olive oil
3 garlic cloves (minced)
1 lemon (zested + juiced)
Salt, pepper, and red pepper flakes
Method:
Preheat oven to 400°F.
Toss asparagus with olive oil, garlic, and half the lemon juice. Spread on a baking sheet.
Season salmon with salt, pepper, and red pepper flakes. Place beside asparagus.
Bake 12–15 minutes. Drizzle with remaining lemon juice and zest before serving.
Why It Works: Salmon’s omega-3s fight inflammation, while asparagus provides fiber. Perfect for a light yet filling meal.
2. Spicy Chickpea & Spinach Curry
Ingredients:
1 can chickpeas (drained)
1 cup coconut milk (light)
2 cups fresh spinach
1 onion (diced)
1 tbsp curry powder
1 tsp turmeric
1 tbsp ginger (grated)
2 garlic cloves (minced)
Method:
Sauté onion, garlic, and ginger until soft.
Add spices and toast for 1 minute.
Stir in chickpeas and coconut milk. Simmer 10 minutes.
Fold in spinach until wilted. Serve over cauliflower rice.
Why It Works: Plant-powered protein and spices like turmeric boost metabolism.
3. Zucchini Noodle Chicken Alfredo
Ingredients:
2 chicken breasts (sliced)
4 zucchinis (spiralized)
1 cup Greek yogurt
1/2 cup grated Parmesan
2 garlic cloves (minced)
1 tsp olive oil
Method:
Cook chicken in olive oil until browned. Set aside.
Sauté garlic, then add Greek yogurt and Parmesan to create sauce.
Toss in zucchini noodles and chicken. Cook 3–4 minutes.
Why It Works: Zoodles slash carbs, while Greek yogurt adds creaminess without the guilt.
4. Turkey-Stuffed Bell Peppers
Ingredients:
4 bell peppers (halved)
1 lb lean ground turkey
1 cup cooked quinoa
1 cup diced tomatoes
1 tsp cumin
1 tsp paprika
Method:
Preheat oven to 375°F.
Brown turkey with spices. Mix in quinoa and tomatoes.
Stuff peppers, bake 25–30 minutes.
Why It Works: Lean turkey and quinoa pack protein and fiber to keep you satisfied.
5. Shrimp & Avocado Salad Bowl
Ingredients:
1 lb shrimp (peeled)
2 avocados (sliced)
4 cups mixed greens
1 cup cherry tomatoes
1 tbsp olive oil
Lime juice + cilantro for dressing
Method:
Sauté shrimp in olive oil until pink.
Assemble greens, tomatoes, avocado, and shrimp.
Drizzle with lime juice and cilantro.
Why It Works: Shrimp is low-calorie yet protein-rich, and avocado adds healthy fats.
Tips to Stick With Your Simple Meal Plan to Lose Weight
Prep Ahead: Spend Sundays chopping veggies, marinating proteins, or batch-cooking grains.
Portion Control: Use smaller plates to avoid overeating.
Stay Hydrated: Drink water before meals to curb appetite.
Spice It Up: Rotate herbs and sauces to keep meals exciting.
Allow Flexibility: One “off” meal won’t ruin progress—consistency matters most.
The Bigger Picture: Why This Approach Works
A simple meal plan to lose weight isn’t just about dropping pounds—it’s about creating habits that last. By focusing on dinners that delight your taste buds and nourish your body, you’re more likely to stick with the plan long-term. Remember, weight loss isn’t a sprint; it’s a marathon fueled by patience, balance, and meals you genuinely enjoy.Conclusion Your journey to a healthier, happier you doesn’t have to be bland or punishing. With these delicious dinner ideas and a simple meal plan to lose weight, you’re armed with everything you need to succeed. So, tie on that apron, fire up the stove, and let your kitchen become the launchpad for your transformation. After all, the best weight loss secret isn’t a pill or a potion—it’s the food on your fork.
#weight loss#weight loss journey#weight loss tips#weight loss diet#keto diet#diet plan#dieting#diet#low cal diet#@n@ diet
1 note
·
View note
Text
How to Cook Green Beans Perfectly

Green beans, also known as fine beans, string beans, or snap beans, are a versatile and delicious vegetable that can complement almost any meal. Whether you are preparing a fresh beans recipe for a special occasion or simply looking for a quick and healthy side dish, green beans are an excellent choice. In this guide, we’ll walk you through exactly how to cook green beans fresh, share tips for perfect results, and provide creative serving suggestions to elevate your meals. This green beans recipe is simple, quick, and guarantees tender yet crisp beans that retain their vibrant green color. Whether you’re a beginner or a seasoned cook, you’ll find this guide packed with useful information to master the art of snap beans cooking. Why You Will Love This How to Cook Green Beans Recipe - Easy and Quick: Learn how long green beans cook to perfection in just a few minutes, making it ideal for busy weeknights. - Healthy and Nutritious: Green beans are packed with vitamins, minerals, and fiber, making them a great addition to any diet. - Versatile: This recipe with French beans can be served as a side dish, added to salads, or incorporated into more elaborate string beans dishes. - Family-Friendly: The mild flavor and satisfying texture make string beans fresh a hit with all age groups. - Vegan and Gluten-Free: Perfect for everyone, including those with dietary restrictions. What Do You Need For this recipe using fresh green beans, you will need: - 1 pound (450g) fresh green beans (fine beans or string beans): Look for vibrant green, firm beans with no blemishes. - 4 cups water: Enough to fully submerge the beans during cooking. - 1 teaspoon salt (optional): Enhances the natural flavor of the beans. - Optional seasoning or toppings: Lemon juice, olive oil, garlic, or herbs for added flavor. This simple list of ingredients ensures you can prepare a classic beans recipe green with ease. How to Cook Green Beans Tips and Tricks - Choose the Best Beans: When selecting string beans fresh, look for ones that are firm, bright green, and free of blemishes. Avoid beans that are limp or have brown spots. - Trim Properly: Always trim the ends of the beans to remove tough stems. This step makes a big difference in the final texture. - Timing is Key: Knowing how long green beans cook is crucial. For tender yet crisp beans, cook them for 4-6 minutes. Overcooking will make them mushy and dull in color.

- Use an Ice Bath: To retain the vibrant green color and stop the cooking process, immediately transfer the boiled beans to a bowl of ice water.

- Season Creatively: Green beans are a blank canvas. Try tossing them with olive oil, garlic, lemon zest, or fresh herbs like parsley or thyme for added flavor. - Cook in Batches: If you’re cooking a large quantity, boil them in batches to avoid overcrowding the pot. Vegan Serving Suggestions and Pairings This fresh beans recipe pairs beautifully with a variety of dishes. Here are some vegan-friendly ideas: - As a Side Dish: Serve the green beans with roasted vegetables or a hearty vegan main like lentil loaf or mushroom steaks. - In Salads: Add the cooked green beans to a salad with cherry tomatoes, olives, and a tangy vinaigrette. - In Stir-Fries: Incorporate them into stir-fries with tofu, bell peppers, and soy sauce for a quick and delicious meal. - Topped with Nuts and Seeds: Sprinkle with toasted almonds or sesame seeds for extra crunch and flavor. - With Grain Bowls: Pair with quinoa, brown rice, or couscous for a complete and nourishing meal. - As Part of String Beans Dishes: Use them in casseroles or combine them with vegan pasta sauces for a unique twist. Storage Tips - Refrigeration: Store leftover green beans in an airtight container in the refrigerator for up to 3-4 days. - Freezing: Blanch the beans for 2-3 minutes, then freeze them in a single layer on a baking sheet. Once frozen, transfer to a freezer-safe bag or container. They can be stored for up to 3 months. - Reheating: Warm up green beans in a skillet with a bit of olive oil or steam them for a couple of minutes. - Avoid Overheating: Reheat only the amount you need to preserve their texture and flavor. Frequently Asked Questions 1. How long should I cook green beans? Green beans should typically be boiled for 4-6 minutes, depending on your desired texture. If you prefer them tender-crisp, aim for the lower end of the range. 2. Can I use frozen green beans for this recipe? Yes, you can use frozen green beans. While the texture may differ slightly, you can cook them by boiling or steaming until heated through, usually 5-7 minutes. 3. How do I keep green beans bright green after cooking? To maintain their vibrant green color, immediately transfer the cooked green beans to an ice water bath. This stops the cooking process and helps preserve their color. 4. Can I season the green beans while boiling them? Yes! Add a pinch of salt to the boiling water for a touch of seasoning, or toss the beans in your preferred spices or dressings after cooking. 5. What’s the difference between green beans, snap beans, and string beans? These terms are often used interchangeably to describe the same vegetable. However, string beans historically had a tough "string" along their seams, which modern varieties no longer have. 6. Can I make this recipe ahead of time? Yes, cooked green beans can be stored in an airtight container in the fridge for up to 3 days. Reheat them gently before serving. 7. Are green beans vegan-friendly? Absolutely! Green beans are a versatile and naturally vegan ingredient that pairs well with various plant-based seasonings and toppings. 8. Can I roast or sauté green beans instead of boiling? Yes! Green beans can be roasted at 400°F (200°C) for 15-20 minutes or sautéed in a skillet with olive oil and garlic for 5-7 minutes. 9. How do I prepare fresh green beans before cooking? Rinse the beans thoroughly under cold water, trim the ends, and remove any remaining strings, if necessary. 10. Can I use green beans in other dishes? Definitely! Green beans are perfect for stir-fries, salads, casseroles, and side dishes. They are versatile and can complement many recipes.

Equipment Needed - Large Pot: For boiling the green beans. - Colander: To drain the beans after cooking. - Cutting Board and Knife: For trimming the ends of the beans. - Mixing Bowl: For the optional ice bath. - Tongs or Slotted Spoon: To handle the beans easily. Having the right equipment ensures this fine beans recipe is a breeze to prepare. Cooking green beans fresh is a simple yet rewarding way to add vibrant and nutritious vegetables to your meals. Whether you’re using them in string beans dishes, salads, or as a standalone side, this recipe with French beans offers endless possibilities. By following the tips and tricks outlined in this guide, you’ll always achieve perfectly cooked green beans that are tender, flavorful, and a joy to eat. Mastering how to cook green beans fresh is a skill you’ll use time and again, whether you’re preparing a fine beans recipe for guests or enjoying a quick weekday meal. With so many creative serving options and simple storage tips, you can make the most of this versatile vegetable year-round. We love hearing from you! Have you tried this green bean recipe or do you have your own twist on cooking snap beans? Share your favorite string bean dishes in the comments below! Let us know if you have any tips, questions, or ideas for recipes using fresh green beans. Don’t forget to tag us on social media if you try this recipe – we can’t wait to see your creations! More Green Beans Recipes: - Green Bean Casserole - Vegetable Soup Read the full article
#bestwaytocookgreenbeans#easygreenbeansrecipe#finebeanscookingtips#freshbeansrecipe#greenbeanscookingguide#greenbeanssidedish#healthycooking#healthygreenbeansdish#howtocookgreenbeans#howtosautégreenbeans#perfectgreenbeansrecipe#plant-basedgreenbeansdish#quickgreenbeanscooking#simplefinebeansrecipe#snapbeans#steamedgreenbeansrecipe#stringbeansdishes#tendergreenbeansrecipe#vegangreenbeansrecipe
0 notes
Text
A guide to the best gluten-free Indian food from local deliveries.
youtube
Introduction
Are you craving delicious gluten-free Indian food but don't want to leave the comfort of your home? Look no further, because we have compiled a guide to the best gluten-free Indian food options available for local delivery. Whether you're searching for traditional curries, flavorful biryanis, or aromatic tandoori dishes, this guide will help you discover the tastiest and healthiest options in your area. Say goodbye to culinary restrictions and explore the rich flavors of gluten-free Indian cuisine from the convenience of your own doorstep.
A Guide to the Best Gluten-Free Indian Food from Local Deliveries Why Choose Gluten-Free Indian Food? The Health Benefits of Gluten-Free Diets Exploring Celiac Disease and Gluten Sensitivity Weight Management and Digestive Health Increased Energy Levels The Diversity of Indian Cuisine A Melting Pot of Flavors and Ingredients Vegetarian-Friendly Options Spice Blends and Ayurvedic Principles Finding Indian Delivery Near Me: Tips and Tricks Utilizing Online Food Delivery Platforms Seamless Integration with Local Restaurants User Reviews and Ratings Exploring Social Media Influencers and Bloggers Authentic Recommendations from Food Enthusiasts Instagram-Worthy Dishes Engaging with Local Indian Communities Facebook Groups and Online Forums Recommendations from Friends and Neighbors Must-Try Gluten-Free Indian Dishes for Delivery Flavorful Curries that Pack a Punch Classic Butter Chicken with Tender Chicken Pieces in a Rich Tomato Gravy. Fragrant Lamb Rogan Josh: Slow-Cooked Lamb in Spices and Tomato Sauce. Tantalizing Tandoori Specialties Sizzling Chicken Tikka: Succulent Chicken Marinated in Yogurt and Spices. Paneer Tikka: Grilled Cottage Cheese Cubes with Vibrant Tandoori Flavors. Mouthwatering Biryani Varieties Fragrant Vegetable Biryani: Aromatic Basmati Rice with Assorted Vegetables. Spicy Chicken Biryani: Tender Chicken Cooked with Fragrant Spices and Rice. Delectable Indian Street Food Delights Pani Puri: Crispy Fried Dough Balls Filled with Spiced Water and Chickpeas. Aloo Tikki: Pan-Fried Potato Patties Served with Tamarind and Mint Chutney. FAQs about Gluten-Free Indian Food Delivery Is all Indian food gluten-free? https://topofindiarestaurant.com/contact-us/ While many Indian dishes are naturally gluten-free, some may contain wheat-based ingredients such as naan bread or samosas. It is important to check the menu or inquire with the restaurant to ensure gluten-free options. How can I ensure that my food is prepared in a gluten-free environment? When placing your order, be sure to specify your dietary requirements for a gluten-free meal. Restaurants that cater to gluten-free diets often have separate preparation areas and take extra precautions to avoid cross-contamination. Are there any specific Indian dishes that are commonly gluten-free? Yes, there are several Indian dishes that are traditionally made witho
0 notes
Text
How to Make Chargha in Restaurant Style

How to Make Chargha in Restaurant Style: A Delicious Guide
Learn how to make chargha in restaurant style and impress your guests with this mouthwatering recipe. Discover the secrets to achieving a crispy, flavorful chargha at home.
If you're a fan of succulent, crispy, and well-seasoned chicken, then you're in for a treat! In this comprehensive guide, we will take you through the steps to create chargha in restaurant style that will leave your taste buds dancing with joy. Making chargha at home may seem daunting, but with our expert tips and tricks, you'll master this dish like a pro.
Introduction
Chargha, also known as Lahori Chargha, is a popular Pakistani dish that boasts tender and flavorful chicken with a crispy exterior. It's a delightful blend of spices and cooking techniques that create a mouthwatering experience. While ordering it from a restaurant is tempting, making chargha at home can be an equally satisfying and cost-effective option.
In this article, we'll guide you through the process of preparing chargha in restaurant style, from selecting the best chicken to marinating it to perfection and achieving that irresistible crispiness. Let's dive into the world of flavors and create a culinary masterpiece.
1. Choosing the Right Chicken
Before you start, it's crucial to select the right chicken. The quality of the chicken plays a significant role in the final taste and texture of your chargha.
When choosing chicken for your chargha:
Opt for a whole chicken with skin intact for the best results.
Check to make sure the chicken is fresh and smells good.
You can also use chicken pieces if you prefer, but a whole chicken is traditional and offers a more authentic experience.
2. Preparing the Marinade
The marinade is the heart of any delicious chargha recipe. It infuses the chicken with flavor and tenderizes it. Here's what you'll need for the marinade:
Ingredients:
1:Yogurt
2:Lemon juice
3:Ginger-garlic paste
4:Salt
5:Red chili powder
6:Turmeric powder
7:Cumin powder
8:Garam masala
9:Coriander powder
Mix these ingredients together to create a thick, aromatic marinade. Coat the chicken generously with the marinade, making sure to get it under the skin for maximum flavor penetration. Allow the chicken to marinate for at least 4 hours, or overnight for the best results.
3. Achieving Crispy Skin
The secret to achieving that crispy skin lies in the cooking technique. Traditionally, chargha is deep-fried to perfection. Here's how you can do it:
Deep-frying steps:
In a wok or deep frying pan, heat the oil.
Carefully place the marinated chicken in the hot oil.
Fry the chicken until it is crispy and golden brown all over.
Remove the chicken from the oil and let it rest on paper towels to drain excess oil.
4. Serving Your Chargha
Once your chargha is beautifully golden and crispy, it's time to serve it to your eager guests. Here are some serving suggestions:
Garnish with fresh coriander leaves and lemon wedges.
Serve with naan, paratha, or steamed rice.
Accompany it with a tangy mint chutney or a creamy raita.
Conclusion
Now that you have the step-by-step guide on how to make chargha in restaurant style, it's time to roll up your sleeves and embark on a culinary adventure. With the right chicken, a flavorful marinade, and the perfect cooking technique, you'll be savoring your homemade chargha that rivals your favorite restaurant's version.
Impress your family and friends with this delectable dish, and watch their faces light up with joy as they savor each crispy, flavorful bite. Get ready to become the chargha expert in your circle, and enjoy the satisfaction of mastering this classic Pakistani recipe.
FAQs
Q: Can I use boneless chicken for chargha? A: While traditionally chargha uses a whole chicken, you can use boneless chicken pieces if you prefer. Just ensure they are marinated and cooked thoroughly for that authentic flavor.
Q: How can I make my chargha less spicy? A: Adjust the amount of red chili powder in the marinade to control the spiciness. You can also serve it with a cooling yogurt-based sauce to balance the heat.
Q: Is it possible to bake chargha instead of deep-frying? A: Yes, you can bake chargha in the oven for a healthier version. Preheat your oven, place the marinated chicken on a rack, and bake until it's crispy and cooked through.
Q: Can I freeze leftover chargha? A: Yes, you can freeze leftover chargha. Make sure it is adequately wrapped to avoid freezer burn.
Q: What side dishes pair well with chargha? A: Chargha pairs wonderfully with naan, paratha, rice, and various chutneys. You can also serve it with a fresh salad for a lighter option.
Q: How long does it take to marinate the chicken? A: It's best to marinate the chicken for at least 4 hours, but overnight marination yields the most flavorful results.
0 notes
Text
Repeating the Same Boring Meals? Here's the First Step to Meal Prep for a Week!

Image Credit: Kad
Cooking is art......an inspiring experiment (well, that's just my perspective) but it'll really help if you see it that way. Sure, you'll get tips to level up your kitchen game, but I want you to hit that sweet spot where, as you’re thinking about tonight’s dinner, you suddenly know what you’ll be whipping up two or three days from now effortlessly (yeah, I'm serious.....no kidding)
Mix and Match
Lightly steam or roast a bunch of veggies, cook some grains like rice or couscous, and prep proteins like chicken, tofu, or beans. Now, you’ve got a set of ingredients for endless possibilities!
Change the game by switching up sauces, spices, or combinations. Monday can be a plain rice bowl with veggie or chicken sauce, then maybe beans with a bit of couscous and sauce on Tuesday. Next, you can toss everything into a stir-fry for a whole new flavor adventure.
Later you can use carrots, peas, fresh chili or ground nuts for your sauce instead of veggies like spinach, celery, or broccoli. Tubers like sweet or Irish potatoes can accompany those sauces.
The trick is to first get those basics boiled, steamed, roasted, or fried and stashed in your fridge or somewhere….anywhere….lol…. just preserve them properly. (Get what I mean?)
In case you still find this explanation confusing, chat me up in the comment section. My next blog will reveal and explain more on the second step!
Signing out, kad
#meal prep tips#tips#Avoid Boring Meals#boring#weekly meal prep#weekly meal plan#Easy Meal Prep Ideas#Creative meal planning#Beginner Meal Prep Guide#simple meal prep steps#Healthy Meal Prep for Beginners#meal prep#meal prep for a week#Time-Saving Cooking Ideas
1 note
·
View note
Text
Cooking in an RV: Mastering Meal Prep in a Small Kitchen

by Benjamin Venegas Are you planning a road trip in your RV and worried about how you're going to manage cooking in a small kitchen without losing your patience?.... Cooking in an RV can feel like a balancing act, managing the joys of preparing meals on the road with the constraints of a compact kitchen. Working without a full-size oven or expansive countertop might seem daunting at first. But don't worry! With some preparation and creativity, cooking in an RV can be both enjoyable and surprisingly efficient. Let’s dive into some strategies I’ve learned from my own RV adventures that can help you master the art of RV meal prep without losing your patience—or your sanity. Meal Planning Essentials From my experience, planning meals ahead of time is one of the most valuable steps you can take when cooking in an RV. Unlike a typical kitchen setup, RV kitchens demand more foresight due to their limited space and resources. I always start my journey cooking in an RV by creating a weekly meal plan that reflects my travel schedule, dietary preferences, and the storage capacity of my RV.I once found myself in a remote location with only a tiny corner store nearby. I had to make do with the limited ingredients available, which would have been frustrating if I hadn’t planned for such a scenario. Now, I always include versatile ingredients that can be used in multiple dishes, like pasta, rice, canned beans, and sauces. These staples save space and cut down on the number of grocery trips needed. Stocking a Compact Pantry When stocking your RV pantry, every item needs to earn its place. I've learned to focus on versatile, shelf-stable ingredients that can be the foundation for multiple meals. For instance, canned goods like beans, tomatoes, and corn are fantastic because they don’t require refrigeration and have a long shelf life. Dry goods like pasta, rice, quinoa, and oatmeal are great staples.One tip I picked up early on was to use clear storage bins. This simple trick lets me see what I have at a glance, avoiding the frustration of buying duplicates or forgetting about what’s hidden in the back of a cupboard. I also regularly rotate my stock, placing newer items behind older ones to ensure nothing goes to waste. Labeling bins and containers has saved me countless times, especially when I’m cooking in an RV and need to find something quickly. Multi-Functional Kitchen Tools Every inch counts in a small RV kitchen, so choosing the right kitchen gadgets is essential. Multi-functional appliances have been game-changers for me, allowing me to cook various meals without needing multiple devices. One of my favorites is the Instant Pot. It combines a pressure cooker, slow cooker, rice cooker, steamer, sauté pan, and even a yogurt maker all in one. This compact design fits well in most RV kitchens and is energy-efficient, which is great when you’re on limited power.I also highly recommend an air fryer. It’s compact and allows you to 'fry' food using hot air, making it a healthier option and reducing cooking times. There’s nothing like having some crispy fries or chicken wings on the road without needing to use a deep fryer. Must-Have Utensils for Cooking in an RV Choosing the proper utensils is just as important as picking the right gadgets. I’ve found that non-stick cookware is perfect for RV kitchens because it’s lightweight and easy to clean. A set of non-stick frying pans, a medium-sized pot, and a small saucepan should cover most cooking needs.For utensils, I focus on multipurpose items. A good chef’s knife, a small paring knife, a spatula, tongs, and a wooden spoon can handle most tasks. Magnetic strips are a fantastic way to store knives and utensils, freeing up drawer space and keeping everything easily accessible. One-Pot and One-Pan Meals One-pot and one-pan meals are lifesavers in an RV kitchen. They simplify cooking in an RV and reduce the number of dishes you must wash—a critical consideration when water is limited. I’ve made everything from hearty stews to pasta dishes in just one pot, saving time and effort.One of my favorite recipes is a One-Pot Chicken Alfredo. I start by sautéing chicken pieces in a pan with garlic and spices, then pour in chicken broth and heavy cream. I add pasta directly to the pan and let it cook until tender. Finish with a handful of spinach and grated Parmesan cheese for a simple, satisfying meal that uses only one pot. Maximizing Outdoor Cooking Opportunities Cooking outside isn’t just about enjoying the scenery; it’s also an intelligent way to keep your RV cool and expand your cooking options. I often use a portable grill or camp stove to prepare meals. Grilling is perfect for steaks, burgers, vegetables, and even pizzas, providing a versatile cooking surface that’s easy to transport and set up.Camp stoves are compact, easy to use, and invaluable when I want to cook with pots and pans without using the RV's stovetop. Whenever I’m grilling or using a camp stove, I always set up away from flammable materials and ensure the grill or stove is on a stable surface..... Read More... Read the full article
0 notes
Text
Boost Your Metabolism and Burn Fat with Superfoods
Let’s get real: If you’ve ever stared at a slice of pizza and wished it could somehow boost your metabolism, you’re not alone. Sadly, pizza’s magical metabolism-boosting properties haven’t been discovered yet (someone get on that), but there are foods that can help rev up your metabolism and torch fat.
These so-called "superfoods" are like your metabolism’s personal cheerleaders, quietly pushing you to burn a few more calories while you do basically nothing. And that, my friend, is what we call a win.
So, What Exactly Is Metabolism, Anyway?
Before we start throwing superfoods at you, let’s talk metabolism. It's that thing you blame when you eat a doughnut and suddenly your jeans fit like they shrunk in the dryer. But technically, metabolism is the process by which your body converts what you eat and drink into energy. In short: it’s your body’s internal engine.
A faster metabolism means more calories burned at rest. A slower one? Well, let’s just say those extra fries won’t be disappearing anytime soon. But don’t worry, you don’t need to sign up for a marathon to speed it up. Let’s talk superfoods.
The Superfoods That Get Your Metabolism in Gear
Green Tea: The "Not-So-Secret" Weapon
Ah, green tea. This stuff’s been the poster child for metabolism-boosting foods forever—and for good reason. Green tea contains catechins, which are like the drill sergeants of fat-burning. They get your metabolism moving faster and help you burn fat more efficiently. Plus, green tea’s got a little caffeine in it, and we all know caffeine gives your metabolism a much-needed kick in the pants.
But don’t think chugging an entire pot of it will make you shed pounds overnight. If it were that easy, we'd all be sipping green tea lattes and waving goodbye to our muffin tops by now. Still, a cup or two a day? It’s a solid start.
Chili Peppers: Spice Up Your Life (And Your Metabolism)
Ever eaten something so spicy that you start sweating like you’re in a sauna? That’s not just your taste buds on fire; it’s your metabolism. Chili peppers contain capsaicin, the compound that gives them their heat. Capsaicin revs up your metabolism and helps you burn more calories.
It’s basically like tricking your body into thinking it’s working harder than it is. So, go ahead and sprinkle some chili flakes on your food or add a dash of hot sauce to that boring salad. You’ll feel like a champ as your metabolism gives you a high-five (well, sort of).
Lean Protein: Your Metabolism’s Best Friend
Okay, lean protein might not sound as fun as chili peppers, but it’s just as important. Protein is basically your metabolism's personal trainer. When you eat it, your body has to work harder to digest it, which means you burn more calories in the process. It’s like making your metabolism do a little extra cardio every time you eat.
Think chicken breast, fish, eggs, or if you're feeling fancy, quinoa. Not only do these foods help build muscle (which also burns more calories at rest), they keep you feeling full longer, so you’re not raiding the pantry 30 minutes after lunch.
Coffee: Your Caffeine BFF
If green tea’s the drill sergeant, coffee is like your metabolism’s overenthusiastic gym buddy. Caffeine is one of the few natural substances that’s actually been shown to help burn fat. It increases your energy expenditure and makes your metabolism work harder.
Just don’t go overboard. Too much caffeine can leave you jittery and wide awake at 3 AM, pondering life’s big questions like, "Why do I always lose one sock in the laundry?" So, yeah, moderation is key.
Whole Grains: The Slow Burners
Whole grains like oatmeal, quinoa, and brown rice are your metabolism’s slow and steady friends. They’re packed with fiber, which takes longer to digest and keeps you full for longer periods. Plus, whole grains help regulate your blood sugar levels, which means fewer sugar crashes and fewer desperate hunts for the nearest vending machine.
Pro tip: skip the highly processed white bread and refined grains. They’ll just mess with your blood sugar and leave your metabolism sitting in neutral, which is exactly what you don’t want.
Avocado: The "Good Fat" We All Love
Avocado is basically the Beyoncé of superfoods. It’s everywhere, it’s versatile, and it’s got the kind of healthy fats that make your metabolism swoon. These fats (specifically monounsaturated fats) help reduce inflammation, keep your blood sugar steady, and even help your body burn more fat.
Plus, avocados are loaded with fiber, so they fill you up without making you feel like you just ate a brick. So, go ahead and enjoy that avocado toast—it’s doing more for you than just looking pretty on Instagram.
Can You Really Eat Your Way to a Faster Metabolism?
Here’s the thing: No single superfood is going to magically turn you into a fat-burning machine. If that were the case, we’d all be living on green tea and chili peppers and calling it a day. But by incorporating these metabolism-boosting foods into your diet, you’re giving your body a little extra help in the fat-burning department.
Sure, you still need to move your body and not binge-watch every Netflix show in one weekend (as tempting as that may be). But with the right combination of foods and some regular exercise, you’ll be doing your metabolism a huge favor.
A Few Final Tips to Boost Your Metabolism:
Stay hydrated: Drink water like it’s your job. Being even mildly dehydrated can slow your metabolism down, and no one wants that. Plus, water helps with digestion, so you’re doing yourself double the favor.
Get enough sleep: Sleep-deprived people tend to have slower metabolisms. Not to mention, when you're tired, you're more likely to reach for the donuts instead of the healthy snacks. Don’t skip breakfast: Your metabolism doesn’t wake up until you do, so make sure you fuel it with a healthy breakfast. No, coffee doesn’t count as a meal.
Final Thoughts
Boosting your metabolism isn’t some mystical quest—it's more like tweaking a few habits and making smarter food choices. And while you’re not going to wake up tomorrow looking like an Olympic sprinter, you can start making gradual changes that’ll help you burn more fat, feel more energized, and not have to wonder if that second piece of cake is going straight to your hips.
So go on, give your metabolism a little TLC. Eat the chili peppers, sip the green tea, and maybe—just maybe—try to fit in a walk between Netflix episodes. Your body will thank you (even if you don’t get instant pizza metabolism powers).
1 note
·
View note
Text
Eat Clean, Feel Great: Navigating the Cafe Menu for Optimal Health

It’s possible to eat outdoors and not necessarily junk your eating habits. Whether it is a cup of coffee while on the go and a sandwich or chilling with friends over brunch, cafes are great if you know how to order intelligently. Let's discover the proven ways you can eat healthy, tricks and strategies for choosing the best menu at a cafe and more.
The Challenge of Eating Healthy at Cafes
Cafes in particular are famous for fatty and sweet recipes such as pastries, sweet non-carbonated drinks and other products containing carbohydrates which can easily be avoided by learning the techniques of healthy eating. Most of the cafes are now aware of the different healthy foods that one might prefer hence they incorporate different healthy foods into their menu.
1. Know What to Look For: Key Nutritional Principles

Some of the principles of an understanding of nutrition will assist one in making good decisions in the above areas. Concentrate on any meal that contains proteins, good fats, carbohydrates and fiber, vitamins, and minerals.
Key Tips:
Prioritize Protein: Protein is useful in aspects of satiety as well as muscle repair. Choose dishes with less fat in the form of lean meats such as; eggs, chicken, turkey, beans or Greek yogurt.
Choose Whole Grains: In choosing your carbohydrate sources go for complex carbohydrates such as brown rice, quinoa or whole grain bread rather than simple carbohydrates.
Healthy Fats Matter: Avoid foods that contain no cholesterol but have a lot of calories and fats such as avocado, olive oil, nuts, and seeds. These give long-term energy and help the brain.
Fiber-Rich Foods: Make sure you have vegetables, fruits and legumes in your meals since they are high in fiber and help one to have a less frequent intake of food.
2. Cafe Menu Hacks for Healthier Choices
Consumption of an unhealthy diet is quite common especially when one gets knocked off balance by a cafe menu. Here are the tricks that will allow you to turn any cafe meal into a healthy one without any difficulty.
Key Tips:
Build Your Own Salad: If offered, select the salad bar or make your own salad choice. Pay special attention to such groups of products as greens, proteins, and fats, as well as a wide range of colorful vegetables. Avoid getting your salads smothered in richness such as croutons or creamy based dressings and go for the olive oil and vinegar dressings.
Go for Eggs: Another popular food that is rich in protein found in many cafes is eggs. Have boiled, poached or scrambled eggs, free from butter or cream, accompanied with vegetables for breakfast or as a light lunch.
Watch Out for Sugar Bombs: Cafe beverages contain a lot of sugar. Choose water or black/ green tea, if you like to use additives in your coffee or tea, use a small amount of almond milk and cinnamon.
Swap Sides: If for instance your meal is served with fries, chips or white bread, try and ask the waiter to substitute the options with side salads, steam vegetables or whole grain breads. This change alone can enhance the healthfulness of what you’re eating by a great deal.
Skip the Sauces: Sauces or dressings you don’t really need can contain a lot of unwanted sugars fructose and unhealthy fats. Order it on the side or don’t order it at all and substitute with herbs and spices that contribute to the taste without increasing calorie content of the food.
3. Mindful Eating: Enjoying Your Cafe Meal Without Overindulging

Food doesn’t matter just as to its quality, but how it is consumed. Mindful eating is a technique that assists people to appreciate their food, identify when they are full and therefore reduce their chances of overeating.
Key Tips:
Eat Slowly: Eat slowly and taste every morsel because this way your body can easily convey to your brain that you’re full.
Stay Hydrated: Before a particular meal and during its consumption, try to take some water. This is true in many occasions where people get it wrong and take thirst for hunger.
Watch Your Portions: Some cafe portions are especially generous, still, there is no need for it. If the portion looks too enormous do not hesitate to ask for it to be split, or take half of it home.
Conclusion
Decoding the best meals when going to a cafe does not have to be a difficult task to accomplish. Your ability to embrace change and adopt better habits can help you make healthier food choices that will not see you becoming supple, sluggish or dull. From the ‘building blocks’ of a wholesome diet to the ‘landmines’ of processed foods containing loads of sugar and unhealthy sauces, eating clean and feeling super charged is very much doable even when one is in his favorite café.
Frequenting cafes or even going for a cup of coffee now and then makes it effortless to make healthy choices if you have the right mentality toward making these changes. In other words, do not eliminate your favorite foods but change small portions of them and reap the benefits of a healthy diet in the long run.
Trifler’s Bonus Tip: Cataloging joints that serve foods that are slightly less unhealthy? Apply Trifler to find new places for consuming tasty, healthy dishes and communicating with people of the same mindset.
FOR MORE INFORMATION VISIT: www.trifler.in
#healthy eating#healthy food#cafe menu#networking#healthy diet#nutrition#nutritious#application#trifler
0 notes
Text
How To Make Perfect Chicken Biryani- step by step

Aromatic, flavorful, and undeniably delicious, Chicken Biryani is a culinary masterpiece enjoyed across the globe. But have you tried it with the unique nuttiness of Anjali Sesame Oil? This twist adds a delightful depth of flavor that elevates the dish to a whole new level.
Ingredients:
1.5 kg Chicken, cut into pieces
1.5 kg Basmati rice, soaked for 30 minutes
600 gms Anjali Sesame Oil(nallennai)
300 gms Ginger Garlic Paste
50 gms Chilli Powder
15 Green Chillies (medium sized)
500 gms Ripe Tomatoes, chopped
1 small bunch Mint, chopped
2 small bunches Coriander, chopped
8 Cloves
1 medium Cinnamon stick
5 Cardamom pods
250 gms Onion, thinly sliced
2 Lemons, juiced
1 liter Curd
Salt to taste
Instructions:
Marinate the Magic: In a large bowl, combine chicken pieces with curd, lemon juice, and salt. Marinate for at least 30 minutes, allowing the flavors to meld.
Temper the Symphony: Heat Anjali Sesame Oil in a heavy-bottomed pot or pressure cooker. Add cloves, cinnamon, and cardamom, letting them splutter for a few seconds.
Sauté the Stars: Add half the sliced onions and cook until translucent. Then, introduce the ginger-garlic paste and cook until fragrant.
Spice Up the Story: Stir in the chilli powder and green chillies, releasing their fiery aroma.
Welcome the Hero: Add the marinated chicken pieces and cook on medium heat for 15 minutes, stirring occasionally.
Introduce the Supporting Cast: Add the remaining onions, tomatoes, mint, and coriander leaves. Cook until the tomatoes soften and release their juices.
Layer the Masterpiece: In a separate pot, cook the soaked basmati rice until half done. Drain and spread half the rice over the cooked chicken mixture.
Seal the Deal: Top with the remaining rice, drizzle with Anjali Sesame Oil, and season with salt to taste.
The Grand Finale: Close the pot tightly and cook on low heat for 20–25 minutes, or until the rice is fully cooked and fluffy.
Tips and Tricks:
For an extra layer of flavor, fry a few fried onions (golden brown) and sprinkle them on top of the biryani before serving.
Adjust the amount of chili powder according to your spice preference.
#Chicken Biryani, Anjali Sesame Oil, Sesame oil recipe, Biryani recipe, Indian recipe, Easy Biryani recipe
Enjoy this flavorful Chicken Biryani with Anjali Sesame Oil and impress your family and friends!
#Easy Biryani recipe#Biryani recipe#Anjali Sesame Oil#Chicken Biryani#cooking with sesame oil#sesame oil#best sesame oil mill in madurai#sesameoil#gingelly oil online#gingelly oil for cooking#gingelly oil benefits for hair#sesame oil benefits#sesame oil price#oil
1 note
·
View note
Text
The Wok: The Definitive Guide to Cooking with the Most Versatile Pan in Your Kitchen by J. Kenji López-Alt is a fantastic addition to any home cook's collection. With over 200 recipes and more than 1,000 full-color photographs, this cookbook is perfect for those who love to experiment with different cuisines. López-Alt, the author of the best-selling cookbook The Food Lab, is known for his science-based approach to cooking. In The Wok, he applies this method to the wok, the most versatile pan in the kitchen. Whether you're stir-frying, deep frying, steaming, simmering, or braising, López-Alt shows you how to get the most out of your wok. The first section of the book covers the basics, including the mechanics of stir-frying and how to get that sought-after smoky wok hei (flavor) at home. Once you've mastered these techniques, López-Alt takes you on a culinary journey across Asia and the United States. The recipes include everything from Kung Pao Chicken and Pad Thai to San Francisco–Style Garlic Noodles and Beef Chow Fun. But that's just the beginning. López-Alt breaks down the science behind other dishes, including fried rice, dumplings, tempura vegetables or seafood, and dashi-simmered dishes. He also includes simple no-cook sides, along with explanations of knife skills and how to stock your pantry. What sets this cookbook apart from others is López-Alt's attention to detail. For example, he includes a recipe for dashi, a Japanese stock made from kelp and bonito flakes, which is a key ingredient in many Japanese recipes. He also shows you how to make your own chili oil, which can be used in a range of dishes. The photographs in The Wok are stunning. Every recipe is accompanied by a full-color photo that shows you exactly what the finished dish should look like. In addition, López-Alt provides step-by-step photos for some of the more complicated dishes, such as dumplings and scallion pancakes. One of the standout features of The Wok is the thermal imaging photographs. López-Alt uses a thermal imaging camera to show you how the heat is distributed throughout the wok during cooking. This is particularly helpful for those who are new to stir-frying and want to make sure they're using the right amount of heat. The recipes in The Wok are easy to follow and include detailed instructions. López-Alt also provides tips and tricks throughout the book, such as how to properly season your wok and how to make sure your wok stays nonstick. In summary, The Wok is a must-have cookbook for anyone who loves to cook. With its science-based approach, stunning photography, and comprehensive range of recipes, this cookbook is sure to become a staple in kitchens around the world. When it comes to producing quick, flavorful meals, the wok beats every other pan in the kitchen, and López-Alt shows you how to use it to its full potential. So, get your wok out of the cabinet and start cooking! Take a step towards unlocking a world of knowledge and inspiration. Buy the book now or sign up for Audible's 30-day free trial and experience the power of audiobooks today! Price: [price_with_discount] (as of [price_update_date] - Details)
0 notes
Text
Chop Steak Hawaiian Recipe - A Delicious Chopped Steak Hawaii Adventure
Calling all island food lovers! Dive into the sun-soaked flavors of Hawaii with this quick and easy Chopped Steak Hawaii recipe. Forget pricey restaurants and say hello to a tropical taste treat made right at home in just 30 minutes.
What Makes Chop Steak Hawaiian Recipe Special?
- Sweet & Savory Symphony: Soy sauce and white sugar marinade infuse the juicy ground beef with a hint of Hawaiian sweetness, balanced by the tangy white wine vinegar sauce. - A Tropical Explosion: Fresh ginger, garlic, and bell peppers add a burst of vibrant flavor, transporting you straight to a palm-fringed beach. - Simple & Affordable: Made with basic ingredients, this recipe is budget-friendly and perfect for whipping up a satisfying weeknight meal. - Impress Your Guests: This dish is not just delicious, it's visually stunning. The vibrant colors and enticing aroma will have everyone asking for seconds! Let's get cooking!

Chop Steak Hawaiian Recipe Ingredients:
- For the Marinade: - 30 ml soy sauce - 1 tablespoon white sugar - For the Sauce: - 1 tablespoon cornstarch - 1 tablespoon white wine vinegar - 1 tablespoon water - The Hawaiian Fiesta: - 500 g ground beef meat - 2 small onions, finely chopped - 2 cloves garlic, minced - Salt and pepper to taste - 30 g ginger, finely chopped - Vegetable oil for cooking - 1 red bell pepper, sliced - Serving Suggestions: - Fluffy white rice - Grilled vegetables - Side salad - Sweet potato fries

Chop Steak Hawaii Recipe Instructions:
- Hawaiian Marination: Combine soy sauce and sugar in a bowl. Add the ground beef and marinate for at least 1 hour, or overnight for maximum flavor. - Sauce with a Zing: In a separate bowl, mix cornstarch, white wine vinegar, and water until smooth. Set aside. - Aloha Heat Up: Heat oil in a wok or large pan. Add garlic and ginger, stir-fry for 10 seconds. Toss in the marinated beef and cook for 3 minutes. Remove from the pan and set aside. - Veggie Paradise: In the same pan, add oil and onions. Cook until golden brown, then add bell peppers for another minute. - The Grand Finale: Return the beef, vegetables, and sauce to the pan. Simmer for 2-3 minutes until thickened and flavors meld. - Island Feast Awaits: Plate your Hawaiian masterpiece over fluffy white rice and enjoy!
Hawaiian Chopped Steak Recipe Tips and Tricks:
- Go Bold: For a richer flavor, add diced bacon or chopped ham to the pan before the vegetables. - Spicy Kick: Sprinkle in a pinch of red pepper flakes for a touch of heat. - Get Creative: Experiment with different vegetables like zucchini, mushrooms, or asparagus. - Leftovers Galore: This dish reheats beautifully, perfect for lunch or quick dinners. More than just a meal, this Chopped Steak Hawaii recipe is an experience. It's a delicious escape to the sun-kissed shores of paradise, made with love and simplicity. So gather your ingredients, crank up the island tunes, and prepare to be swept away by a wave of flavor! Can I make substitutions?Absolutely! This recipe is all about adaptability. Ground beef: Swap it for ground chicken, turkey, or pork for a lighter feel. Soy sauce: Tamari or coconut aminos offer gluten-free options. Vegetables: Experiment with zucchini, mushrooms, asparagus, or pineapple for added sweetness. Spices: Add a pinch of red pepper flakes for heat, or a touch of curry powder for an exotic twistDo I have to marinate the beef?Marinating enhances the flavor, but it's not mandatory. For a quick fix, skip the marinating step and simply stir-fry the beef before adding the vegetables and sauce.Can I skip the white wine vinegar?Sure, substitute with rice vinegar or lime juice for a similar tangy note. If you prefer a milder dish, simply omit the vinegar and adjust the sauce thickness with some water.What can I serve with it?Steamed rice is the classic partner, but get creative! Grilled vegetables, a refreshing side salad, sweet potato fries, or even pineapple chunks add tropical vibes.Can I freeze leftovers?Absolutely! Cool the cooked dish completely, then store it in an airtight container in the freezer for up to 3 months. Reheat gently in a pan or microwave until steaming hot.Is it suitable for kids?This recipe is family-friendly! Adjust the spice level to suit your little ones' palates. You can even offer plain cooked rice alongside the saucy beef for pickier eaters.Where can I find more Hawaiian-inspired recipes?Dive deeper into the culinary wonders of Hawaii! Explore online recipe databases, browse cookbooks dedicated to island cuisine, or even check out food blogs by passionate Hawaiian home cooks. Read the full article
#chopsteakhawaiirecipe#chopsteakhawaiianrecipe#chopsteakrecipehawaii#hawaiianchopsteak#hawaiianchoppedsteakrecipe
1 note
·
View note