#DIY Jewelry Tools
Explore tagged Tumblr posts
Text
#jewelry tools#Ring Stretcher Tool#Jewelry Making Supplies#Rathburn Style Mandrel#Ring Sizing Tool#Wedding Band Enlarger#Jewelry Resizing Tool#DIY Jewelry Tools#Portable Ring Expander#Compact Mandrel Tool#Economical Ring Resizer#Durable Jewelry Tools#Easy-to-Use Stretcher#Professional Ring Sizing
0 notes
Text
3️⃣ Tips for Conditioning Polymer Clay
1. If your edges of your clay are jagged, your clay is not fully conditioned
2. Always run your clay through your pasta machine with the crease on the side to prevent air from getting trapped in your clay
3. As a rule of thumb, you should be running your clay through your pasta machine AT LEAST 20 times (usually even more than that) do this until you have smooth edges around your piece of clay- that’s how you’ll know it’s conditioned.
Conditioning your clay helps prevent bubbles, and drastically increases the durability of your clay piece. That’s how you achieve the “bend test” results.
If you liked these tips, I’d really appreciate it if you could LIKE & SAVE this video, and comment below what tutorial you’d like to see next 🤍
.
.
.
.
.
#clay #clayart #clayartist #claycutters #clayearrings #clayjewelry #earrings #earringsoftheday #etsy #etsyfinds #etsyshop #fimo #handmadeearrings #handmadejewelry #polymerclay #polymerclayart #polymerclaycreations #polymerclaycutters #polymerclayearrings #polymerclayjewelry #polymerclayloves #polymerclaytools #sculpey #slowfashion #smallbusinesses #smallbusinessowner #smallbusinessowners #smallbusinesstips #statementearrings
#polymer clay earrings#clay makers#clay tools#clay tiles#clay earrings#diy earrings#diy ideas#polymer jewelry#polymer earrings
9 notes
·
View notes
Text
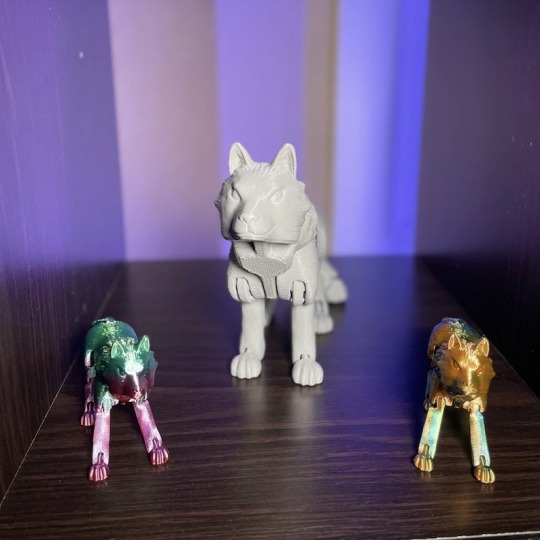


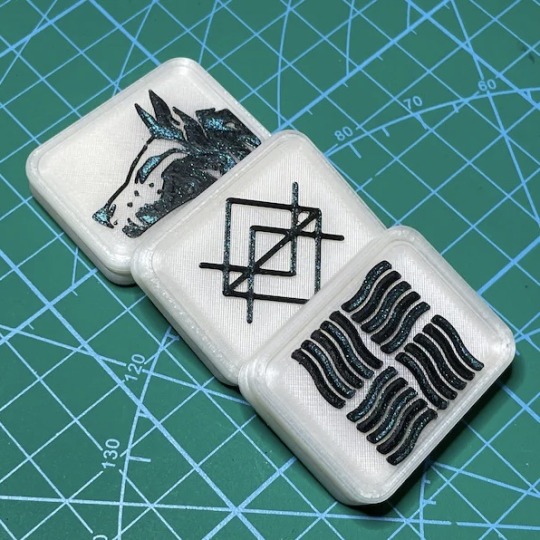

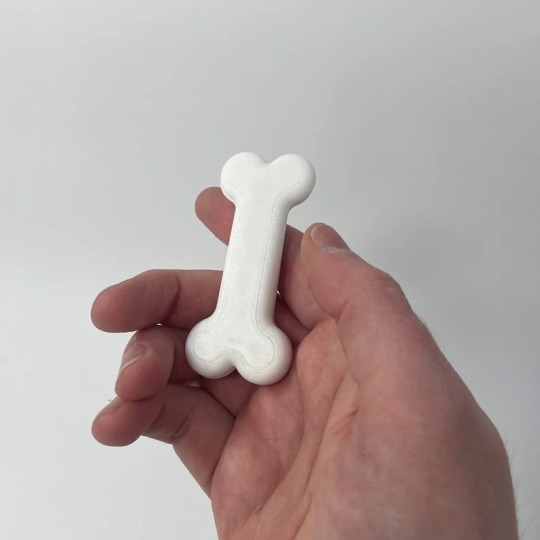


Wolf stims again
x x x x x x x x x Banner
#themed lists#budget stimming#stim tools#diy#multiuse#discreet#plushies#jewelry#chewy#3d printed#stone#plastic#silicone#fabric#animals#wolf#canines#tactile#kinesthetic
4 notes
·
View notes
Text
Top 10 Applications for Noel Solder and Desolder Tools
Soldering and desoldering are essential processes in various fields, and Noel solder and desolder tools are trusted for their precision and reliability. From professional applications to DIY projects, these tools have a wide range of uses. Here are the top 10 applications for Noel solder and desolder tools.
1. Electronics Repair and Maintenance
Noel soldering tools are widely used for repairing and maintaining electronic devices, including smartphones, laptops, and gaming consoles. Their precision makes them ideal for soldering and desoldering small components on circuit boards.
2. DIY Electronics Projects
For hobbyists and makers, Noel tools are perfect for assembling DIY kits, creating custom circuits, and modifying electronic gadgets. Their user-friendly design makes them accessible to beginners and professionals alike.
3. PCB Assembly and Prototyping
Noel soldering tools are indispensable for assembling printed circuit boards (PCBs) and creating prototypes. They allow for precise placement and connection of components, ensuring functional and reliable circuits.
4. Automotive Repairs
In the automotive industry, soldering tools are used to repair wiring harnesses, connect sensors, and replace electrical components. Noel tools are particularly useful for ensuring durable and secure connections.
5. Jewelry Making and Repair
Noel soldering tools are excellent for delicate work in jewelry making and repair. They provide precise heat control for joining metals without damaging intricate designs.
6. Audio Equipment Assembly
From building custom amplifiers to repairing headphones, soldering plays a critical role in the audio equipment industry. Noel tools are trusted for creating high-quality audio connections.
7. Aerospace and Aviation
In aerospace and aviation, precision is paramount. Noel soldering tools are used for assembling and maintaining avionics systems, ensuring safety and reliability in critical applications.
8. Robotics and Automation
Robotic systems rely on intricate circuitry and precise connections. Noel tools are ideal for assembling robotic components, enabling smooth and efficient operation.
9. Renewable Energy Systems
Soldering tools are essential in renewable energy applications, such as assembling solar panels and connecting battery systems. Noel tools ensure efficient energy transfer and long-lasting connections.
10. Educational and Training Purposes
Noel soldering kits are widely used in educational institutions to teach students the fundamentals of electronics and soldering. Their ease of use and reliability make them a popular choice for beginners.
Why Choose Noel Solder and Desolder Tools?
Noel tools are known for their:
Precision: Perfect for delicate components and intricate work.
Durability: Built to withstand regular use.
Ease of Use: Designed for both beginners and professionals.
Versatility: Suitable for a wide range of applications.
Final Thoughts
Noel solder and desolder tools are invaluable for anyone working with electronics, whether for professional purposes or as a hobby. With their precision and reliability, they empower users to create, repair, and innovate across a variety of industries.

#Noel soldering tools applications#Uses of desolder tools#Electronics repair tools#PCB soldering and desoldering#DIY electronics tools#Automotive soldering tools#Jewelry soldering applications#Robotics and automation tools#Renewable energy soldering#Audio equipment repair tools#Aerospace soldering tools#Soldering for educational purposes#Best soldering tools for beginners
0 notes
Video
youtube
Shower Curtain Rings - The Unsung Heroes of Household Hacks
#youtube#Shower Curtain Rings Hacks Organization Tools Jewelry Storage DIY Creative Home Solutions tips
0 notes
Text
Help I wanna do craft projects
But steps are in my way 😭

#i wanna try a new thing but i gotta diy a thing. which means tools and materials and putting it together. beforei ca ee get to the crafting#lol#also theres another thing. but id need to buy the pattern. but i dont have a card to do online purchases#also i gotta finish this damn blanket#and also i keep watching jewelry making videos and wanna try new techniques designs#also i promised an art or two#i backed off drawing so i could physically recover and im not keen on going back to the pain tbh#le sigh#just whining#chronic pain#spoonie#executive dysfunction
0 notes
Video
youtube
Stone Setting Tool Making, Making Prong Setting Tool from Setting Bur
#youtube#tools#diy tools#grstool#toolmaking#stonesetting#diamond setting#prong setting#prong set#jewelry tool#jewellery tool making#huiyi tan
0 notes
Note
Found your work through desperate searches for sylvanian family customisation or recolour resources and WOW your art/characters/worldbuilding are also astoundingly good... gonna be scrolling here a while. Out of curiosity do you do custom/commissioned sylvanian figures or do you have a tutorial/materials list someplace? Thanks for reading!!
Aw gosh, thank you, Anon!
I did one custom commission as an experiment (which I'm sure you've seen if you looked through the tag) and it was pretty fun, but man are these things a time suck! I tried to do too many dolls in too short of a time, got kind of burned out on them, and haven't touched them in months... I'm currently trying to work up motivation to get back into it and finish the projects I have materials for. If I do, I'll take pictures this time and put together a proper tutorial.
Unfortunately I can't take any commissions right now, but I'd be happy to share a materials list! It's under the cut:
The paint used is basic acrylic paint, like the kind you can get from Walmart or craft stores for under two bucks. There's a bit of a trick to painting them without making the fur clumpy, I described the painting process here!
For the hair, you'll want doll hair ("My Little Pony" size is way more than sufficient), a hair rooting tool/kit, and either a heat gun or blow dryer. I wrote some notes on hair rooting Sylvanian Family dolls here.
For the clothes, you can use a number of different fabrics, but you want it to be very, very thin. That super cheap, thin cotton fabric you can find at Joann Fabrics is pretty perfect and comes in a wide variety of colors and patterns, though some stuff like doll-sized flannel you might have to look online for (or DIY--you can use acrylic paint on fabric, it just makes it stiffer). I use ribbon for trim. Other accessories like jewelry, buttons, chains, crystals, and belts can be sourced from craft stores, too... I usually just bring my WIP doll with me in my pocket and hold it up next to anything I'm interested in buying to check if the sizing is right (the lady at the fabric cutting station was incredibly charmed by them, hah). For more specialty items, like tiny hats and replica firearms, you will probably need to look online.
If you can't find a specific accessory, or need to sculpt something like armor, you can try making it out of epoxy clay and painting it with the same acrylic paint you used for the figure. Mod Podge will help seal it and give it a nice glossy finish. (Do not use Mod Podge on Sculpey--it makes it sticky!)
Tails are generally pipe cleaners or occasionally pom poms. Cut the original tail off with wire cutters, digging out as much of it as you can, and super glue the new tail in the hole.
Horns are done with epoxy clay. For big horns on the head, I use wire cutters to cut the pointy part off a pin, embed that in the clay horn, and then stick the end of the pin into the plastic head to more securely anchor it.
Bat and dragon wings are done with leather sheets you can buy from a craft store.
Other essentials: Super glue, sewing kit, Dritz fray check. Super glue is essential for both tails/horns/etc and clothing (it's often better for ultra-fine detail than sewing). Sewing kit is needed for clothing. You will not have much success with clothing without Dritz fray check. It keeps the edges of the fabric from disintegrating, which is a major concern when working on such a tiny scale.
Also this isn't a material so much as a tip: I often use the pointy end of a pin to do fine detail painting. It's also useful for sculpting miniatures.
Hope that helps! Good luck on your customization ventures, and feel free to ask if you have any more questions!
#sylvanian families#calico critters#doll custom#doll customization#anon#ask#not an art post#ALSO THANK YOU FOR THE KIND WORDS ON MY WORLDBUILDING AND CHARACTER STUFF... it is what I live for
21 notes
·
View notes
Photo


This is a commission set of embroidery bobbin charm earrings I made! The custom color request was for DMC #3844. You can order a set of your own with colors of your choice with custom metal finding options over on my kofi’s commission page. (Or check out the shop section for DIY charm pieces to make your own!) The rainbow ones sold at a craft show, but I’d like to make more of those.
[ID: First photo shows two small embroidery bobbin charm pieces wrapped with blue thread next to metal jewelry jump rings and earring findings. To the right of the pieces waiting to be assembled are various tools including needle-nose pliers, embroidery scissors, tweezers, and embroidery needles. The second photo shows the assembled blue embroidery bobbin charm earrings hanging from a black display card with several sets of other bobbin charm jewelry dangling in the background. End.]
127 notes
·
View notes
Text
haaiii hello!!, about me+my blog!
MINORS GO AWAY!
i block, pls stop following
•my name(s): effie/eff/efren :3c
• 21 yrs old ^_^
• gender+pronouns: he/it agender transmasc thing??? cutie
• I <3 (brace yourself)
cultures, subcultures, psychology, visual kei music+fashion, lolita+kawaii fashion+history, scene fashion+crunkcore music, honestly any electronic music especially industrial stuff and anything with screaming, photo+video editing, drawing, poetry, art as a whole, oc creation, my little pony, roblox, animal jam classic, anime+manga, psychological horror+bait and switch media, weird horror films like A24, stuffed animals, littlest pet shops, the san-x character korilakkuma, pink+black+white colors, piercings, makeup, and hair, youtube video essays, spirituality and greek deities, electronic toys, dolls, educating about age regression, making kandi, making jewelry or DIYing stuff, furry and kemonomimi stuff, making collages and crafts, sewing, and calling friends!
• im a system and i have other mental illnsess, and disorders! most notably a dissociative disorder and borderline personality disorder, i also experience hallucinations and im severely agoraphobic (i have been for 9 years “on and off”), im unmedicated so hoping to get help soon :,)
• stupid and affectionate digital-angel puppy sparkledog boything plushie <3 - basically,,
• im otherkin and therian!! dog angel, and plushie most often
• i age regress to around the age of 4!! it is mostly involuntarily but is also used as a relaxation tool of sorts !! it helps me cope with trauma
• what 2 expect: mostly reblogs, my art, maybe light NSFW/kink stuff, poetry, ranting, and silly ramblings, etc!
• my tags for my blog are #puppyeffspeaks (text post shiz) and #effdoodlez (some art and doodles!) all tagged below!!
• i do not use trigger or content warnings here, prob unless its some like bloody themed art of some sort, but idk. so pls follow at yr own risk!!
• dont interact if you are a: minor, so bodily below the age of 18, legally. pls!! and uuh idk, ill block anyone if they make me uncomfy so
aaand with that being said!
lets get into it!!! X3

#age regression#age regressor#new blog#2000s web#scene kid#otherkin#angelkin#dogkin#digitalkin#bjdkin#t4t love#puppyboy#feminine boy#digital art#poetry#sillyposting#vent blog#vkei#roblox#animal jam#pony town#crunkcore#photo edit#bait and switch#rpg maker#magical girl anime#horror anime#puppyeffspeaks#effdoodlez
9 notes
·
View notes
Text
Tag directory
Not Archive tags:
Not Archive - Posts that aren't from the original blog
Archivist update - An update from me! This is to differentiate it from which-item-poll's original tag 'update'
Archivist responds - If I reblog with a comment or reply to an ask, it's under this tag
Archivist reblog - I've reblogged something not related to the archive. Probably myself.
Survey - Asking for your opinions before doing something new, changing something or updating something
Archivist pinned - My pinned posts! This is to differentiate it from which-item-poll's original tag 'pinned'
Scheduled - A non-archive post that I scheduled to post later.
Image restoration - Sometimes images get broken. This is for posts where I find the original image and re-upload it to the post. (usually as a reblog). There's none that have been published yet but there's some in the queue.
Tag directory - This post! I might break this post up into three smaller posts to make it easier to use (especially as more months get added). In which case, they'll all have this tag!
Archival tags:
Which-item-poll archive - All archived posts have this tag, unless I've made a mistake on one of them. This way you can browse the blog without seeing non-archive posts, but you don't have to pick a category
No original tags - If a post didn't have tags on it when I archived it, I added this tag. This way everyone knows (including me) that I didn't just forget to add them when I reblogged the post.
Posts by month of when they were originally posted
(More month tags will be added as posts from those months are published)
January 2024
January 2024 (chronological order)
February 2024
February 2024 (chronological order)
March 2024
March 2024 (chronological order)
Categories
Please keep in mind that I am having to adjust the tags on posts as they exit the queue as I can only see one of the images in the mass post editor. If something is in the wrong tag or should be in a category but isn't please let me know!
The original blog added descriptive tags to items starting in June. However, since a lot of them are quite item-specific, I've decided to tag some broad categories for the sake of browsing.
Clothing and accessories - Where you'll find clothes, bags, jewelry, watches and wearables
Charms and Keychains - Items that are meant to be attached to accessories or your keys. In days of yore they would adorn your phone.
Cosmetics and Bathoom - Bath mats, soap dispensers, nail products, soap and bath products
Stickers and stationary - Stickers, notebooks, pens, memo pads and other related items (Cardboard, paper, staples ect)
Art and prints - Prints, posters, postcards and bookmarks. Digital art and adoptables. If its by an etsy artist and it's not a sticker, charm or keychain then its in here.
Crafts and activities - Anything with a DIY element, whether it's a set of yarn, crocheting needles, or a 3D sculpture that you assemble at home
Home Decor - Furniture, decorative items for homes, plant related items, display knick knacks.
Kitchenwares - Plates, cups, bowls, kitchen tools and appliances. And also drink bottles.
Food and drink - Edibles and drinkables. Snacks, lollies and sodas. It's food and drink, its what it says on the tin (and not water bottles)
Toys and games - Board games, cards, figures, toys and plushies are in here
Plushies - Plushies also have their own category, because sometimes a plushie is a toy and sometimes it is a bag (or socks or some other item)
Sensory and Fidgets - Fidget toys, slimes, fidget wearables and other sensory products.
Electronics and related items - Electronics, computer accessories, accessories for computer accessories such as custom keycaps and anything that needs to be plugged in or have a battery. Phone cases too.
Instruments - Musical instruments. Some of them are also in electronics if they are electric guitars or such.
Smoking and related paraphernalia - Anything to do with weed or smoking. I have no idea how tumblr acts if you tag something with weed, hence the name. Also I think some THC gummies are in here.
Sex toys - A tag from the original blog. None are posted yet but they're coming soon. Please remember to block the tag #tw nsfw if you don't want to see these items!
Misc - Anything that I had trouble categorizing or was too specific for its own categories ¯\_(ツ)_/¯
Jokes and Japes - Polls that are meant to be funny or memeish. Includes April Fools and Halloween.
Which-item-polls original recurring tags (such as "not a poll") should eventually have their own category, but its difficult to document them properly when they're not all posted. I'll get to it sometime. 🛌🏼
2 notes
·
View notes
Note
gwag............ tell me about Agki's tent- whats in it
OKAY... this is subject to change but:
small tiamat idol, painting, and candles to set up an altar
spear sharpening supplies (she's too afraid of lae'zel to ask her to do it)
clothing and blankets
miscellaneous jewelry and trinkets (sometimes used as religious offerings)
miscellaneous medical tools and equipment like bandages, knifes (for badly done diy extractions), she kinda becomes the party's de facto medic
venom vials
when oposs (her pet viper) joins the party, some branches for him to climb on and/or rest on
7 notes
·
View notes
Text
DIY Home Repairs on a Budget: Tips and Tricks
Introduction: Are you looking to spruce up your home without breaking the bank? DIY home repairs on a budget are a great way to improve the look and functionality of your space without spending a fortune. In this comprehensive guide, we will provide you with tips and tricks to tackle common home repair projects on your own, saving money and adding value to your home in the process. Section 1:…
#beginnerʼs guide to knitting#best craft ideas for kids#budget-friendly DIY home repairs.#crafting with recycled materials#creative scrapbooking techniques#DIY gift ideas#DIY organization solutions#Easy DIY home decor projects#essential tools for DIY enthusiasts#home improvement DIY tips#how to make handmade jewelry#how to start a DIY project#painting techniques for beginners#seasonal craft projects#upcycling old furniture
0 notes
Text
20 Pieces Valentines Day Heart Diamond Painting Keychain Kit
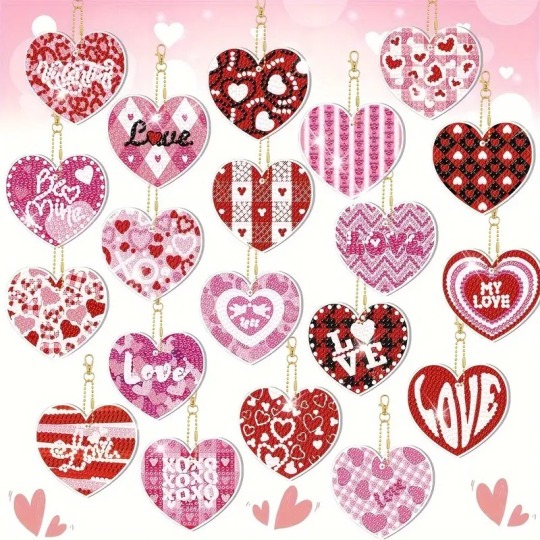
20pcs Valentine's Day Diamond Painting Keychain Kit With Tools, Love Style Diamond Painting Keychain Hanging Diamond Painting Keychain DIY Decorations 👉 -15% off discount+EXTRA 30% OFF❤️ 🎉 Coupon price[$11.78] -15% off 👉 item link: https://temu.to/m/uzrlx5sqpfq
#20 piece#valentines day#hearts#diamond painting#keychain#kit#arts and crafts#diy#fyp#deals#shopping#temu#temufinds#temu shopping
3 notes
·
View notes
Text
Art Workshop in Jaipur – Unlock Your Creativity with Core Creator
Jaipur, the Pink City of India, is not just a historical and cultural marvel but also a thriving hub for art and creativity. Whether you are an aspiring artist, a hobbyist, or a seasoned professional looking to refine your skills, Jaipur offers an enriching environment to explore your artistic potential. At Core Creator, we bring a unique blend of tradition and modern art techniques through our exclusive art workshops in Jaipur. Our workshops are designed to cater to artists of all levels, helping them unlock their creativity, master new techniques, and experience the joy of art in a vibrant setting.
Benefits of Attending Core Creator’s Art Workshops
1. Boost Your Creativity
Engaging in artistic activities stimulates creativity and enhances problem-solving skills. Our hands-on sessions allow participants to experiment with colors, textures, and techniques, encouraging them to think outside the box.
2. Stress Relief & Mindfulness
Creating art is a therapeutic experience. It helps reduce stress, improves focus, and promotes mindfulness. Whether you’re an art lover or someone looking for a creative escape, our workshops provide the perfect setting for relaxation and self-expression.
3. Network with Fellow Artists
One of the best aspects of attending an art workshop is the opportunity to connect with like-minded individuals. You get to interact, share ideas, and collaborate with fellow artists, building lasting friendships and a strong creative network.
4. Personalized Learning Experience
Our workshops are customized to suit different skill levels. Whether you’re a beginner exploring the basics or an experienced artist refining advanced techniques, we provide personalized guidance to help you grow at your own pace.
5. Take Home Your Masterpiece
At the end of each session, participants leave with their own handcrafted artwork, a proud reminder of their creative journey.
Types of Art Workshops at Core Creator
Core Creator offers a range of workshops to suit different artistic interests. Some of the most popular workshops include:
1. Painting Workshops
Explore different painting techniques, from watercolors, acrylics, and oil painting to abstract and modern art styles. These workshops help participants understand color theory, brush techniques, and composition.
2. Resin Art Workshops
Resin art has gained immense popularity for its glossy and aesthetic appeal. Core Creator’s resin art workshops teach participants how to create stunning resin pieces, including coasters, trays, wall art, and jewelry.
3. Mandala Art Workshops
The ancient art of Mandala is not just visually captivating but also meditative. This workshop teaches the intricate techniques of Mandala drawing, helping participants relax and create mesmerizing patterns.
4. Sketching & Illustration Workshops
For those who love to sketch, Core Creator offers pencil sketching, portrait drawing, and digital illustration workshops, where participants learn shading, proportions, and detailing techniques.
5. Sculpture & Clay Modeling Workshops
Experience the joy of working with clay in sculpture and pottery workshops. Learn the art of hand-building and sculpting, and create your own masterpiece using different types of clay and tools.
6. Calligraphy & Hand Lettering Workshops
From modern brush lettering to traditional calligraphy, these workshops help participants improve their writing aesthetics and experiment with different styles.
7. Kids’ Art Workshops
Specially designed for young artists, these workshops include finger painting, doodling, origami, and DIY craft projects, encouraging creativity from an early age.
Conclusion
Core Creator is redefining the way art is experienced and learned in Jaipur. Whether you are a beginner looking to try your hand at painting or an experienced artist exploring new techniques, Core Creator’s art workshops in Jaipur provide the perfect platform to unleash your creativity. With expert guidance, a diverse range of art forms, and a welcoming community, Core Creator is the ideal place to embark on an artistic journey.
So, if you’re in Jaipur and looking for a fulfilling and inspiring creative experience, don’t miss out on Core Creator’s exceptional art workshops. Book your spot today and let your imagination flow!
0 notes
Text
Metal Stamps: Uses, Types, and How to Choose the Right One
A metal stamp is a tool used to imprint letters, numbers, or designs onto metal surfaces. Whether for jewelry making, industrial marking, or crafting, metal stamps offer precision and durability. In this article, we’ll explore the different types of metal stamps, their applications, and tips on selecting the right one for your needs.
What is a Metal Stamp?
A metal stamp is a hardened steel tool designed to leave a permanent impression on metal surfaces. It is typically used in hand-stamping or machine-assisted engraving. Stamping creates a clear, deep, and long-lasting mark, making it ideal for identification, branding, and decoration.
Common Uses of Metal Stamps
Metal stamps are widely used in various industries and crafts, including:
Jewelry Making: Stamping initials, names, or designs onto rings, bracelets, and pendants.
Industrial Marking: Engraving serial numbers, barcodes, or company logos onto tools and machinery.
Personalized Gifts: Customizing metal keychains, dog tags, and other accessories.
DIY Crafting: Creating embossed patterns on metal sheets for artistic projects.
Types of Metal Stamps
There are several types of metal stamps, depending on their function:
1. Letter and Number Stamps
Used to engrave words, initials, or serial numbers onto metal surfaces.
Available in different fonts and sizes.
2. Design Stamps
Feature unique symbols, patterns, or logos for decorative marking.
Commonly used in jewelry making and crafts.
3. Industrial Stamps
Made for heavy-duty applications like marking machine parts, tools, and industrial equipment.
Can be used manually or with a hydraulic press for deeper impressions.
4. Custom Metal Stamps
Designed specifically for branding or unique designs.
Useful for businesses that need customized logos or markings.
How to Choose the Right Metal Stamp
When selecting a metal stamp, consider the following factors:
Material Compatibility: Ensure the stamp is suitable for the metal you are working with (e.g., aluminum, brass, stainless steel).
Size and Font: Choose a size that fits your design needs and a font that is clear and readable.
Durability: Opt for hardened steel stamps for long-term use.
Ease of Use: Hand stamps are ideal for small projects, while machine-assisted stamps work best for high-volume production.
Final Thoughts
A metal stamp is a versatile tool for craftsmen, jewelers, and industrial manufacturers. Whether for creating personalized designs or marking essential details, investing in the right metal stamp can enhance both creativity and efficiency.
For more info visit here:- stamping metal
0 notes