#DIY Aesthetics
Explore tagged Tumblr posts
Visit Tumblr Blog
Explore Tumblr blogs with no restrictions, modern design and the best experience.
Last Seen Tumblr Blogs


Fun Fact
Tumblr has 16.74 million mobile monthly users in the US.
Text
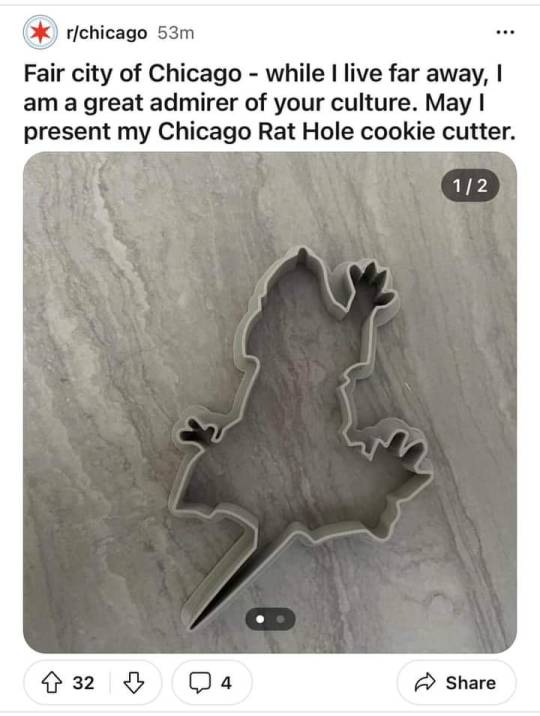
Because we can remake him. We have the technology.
https://www.etsy.com/listing/1665263199/cookie-cutter-the-chicago-rat-hole
#diy#make your own rat hole#the rat god riseth#chicago#rat hole#ratposting#goblincore#goblin#goblin aesthetic#goblim#crowcore#feralpunk
51K notes
·
View notes
Text
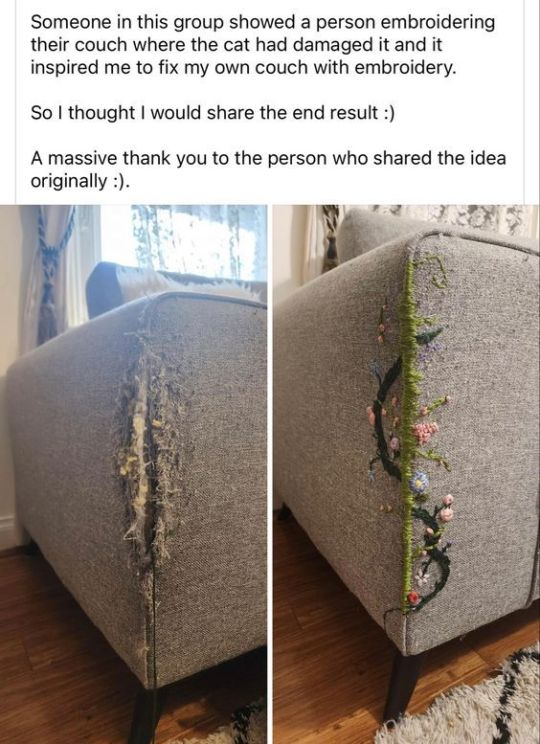
#art#animals#cats#funny#lol#haha#humor#meme#memes#diy#creative#flowers#flowercore#grandmacore#naturecore#cottagecore#aesthetic#cute animals#baby animals#wholesome#aww
7K notes
·
View notes
Photo
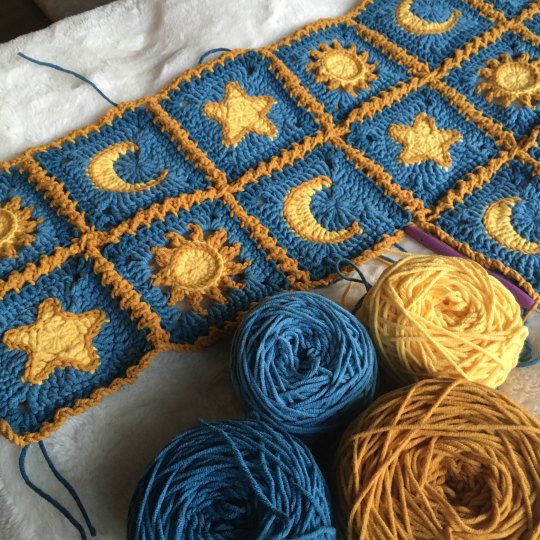
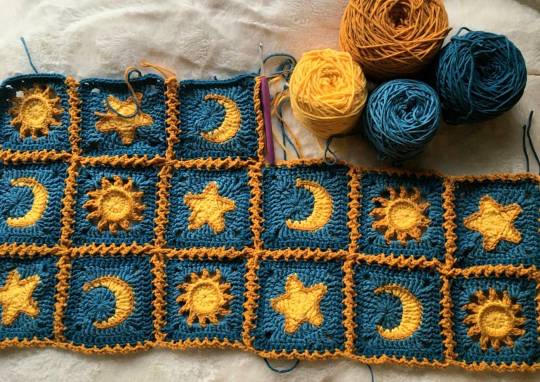
#wip#art#fiber art#yarn#crochet#crocheters of tumblr#small business#artists on tumblr#sun and moon#sun and stars#moon and stars#celestial#aesthetic#yarn art#instagram#tumblr girl#lol#fashion#diy#cottagecore#space
88K notes
·
View notes
Text
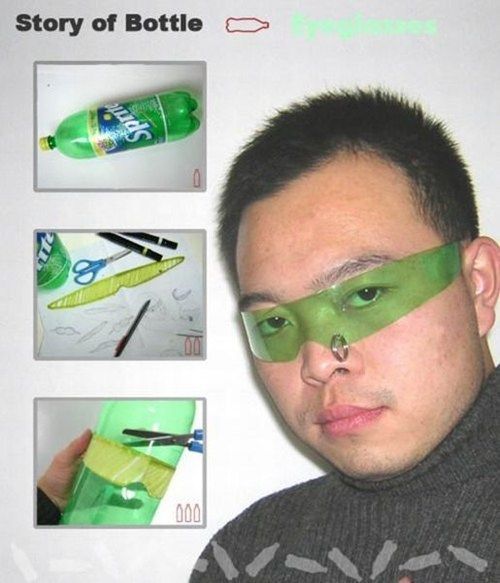
Make your own futuristic shades out of a Sprite bottle
#accesories#art#cool#cybercore#cyber y2k#design#diy#eyeglasses#eyewear#fashion#future#futuristic#futurism#green#kaybug#photography#plastic#sprite#sunglasses#y2kclothing#y2kore#y2k aesthetic#y2k art#y2k clothes#y2k core#y2k cyber#y2k design#y2k fashion#y2k futurism#y2k
4K notes
·
View notes
Text
Had a few folks interested in how I made the patches I posted for Solarpunk Aesthetic Week, so I thought I'd give y'all my step-by-step process for making hand-embroidered patches!

First, choose your fabric and draw on your design. You can use basically any fabric for this - for this project I'm using some felt I've had lying around in my stash for ages.

Next, choose your embroidery floss. For my patches I split my embroidery floss into two threads with 3 strands each, as pictured. You can use as many strands in your thread as you prefer, but for the main body of my patches I prefer 3 strands.
Next you're going to start filling your design using a back stitch.

First, put in a single stitch where you want your row to start.

Poke your needle up through the fabric 1 stitch-length away from your first stitch.

Poke your needle back down the same hole your last stitch went into so they line up end-to-end.
Repeat until you have a row of your desired length (usually the length of that colour section from one end to the other). Once you have your first row, you're going to do your next row slightly offset from your first row so that your stitches lay together in a brick pattern like this:

Make sure your rows of stitches are tight together, or you'll get gaps where the fabric shows through.
Rinse and repeat with rows of back stitch to fill in your patch design.

When you're almost to the end of your thread, poke your needle through to the back of the fabric and pull the thread under the back part of the stitching to tuck in the end. Don't worry if it looks messy - no one's gonna see the back anyway.
This next step is fully optional, but I think it makes the patch design really pop. Once your patch is filled in, you can use black embroidery floss to outline your design (or whatever colour you want to outline with - it's your patch, do what you want). I use the full thread (6 strands, not split) of embroidery floss to make a thicker outline.

I use the same back stitch I used to fill the piece to make an outline that adds some separation and detail. You could use most any 'outlining' stitch for this, but I just use back stitch because it's just easier for me to do.
Once you're finished embroidering your patch, it's time to cut it out!

Make sure to leave a little border around the edge to use for sewing your patch on your jacket/bag/blanket/whatever, and be careful not to accidentally cut through the stitches on the back of the patch.
If you have a sturdy enough fabric that isn't going to fray, you can just leave it like this. If not, I recommend using a whip stitch/satin stitch to seal in the exposed edges (I find that splitting your embroidery floss into 3-strand threads works best for this).

And then you're done! At this point you can put on iron-on backing if you want, or just sew it on whatever you wanna put it on. Making patches this way does take a long time, but I feel that the results are worth it.
Thanks for reading this tutorial! I hope it was helpful. If anyone makes patches using this method, I'd love to see them! 😁
#solarpunk aesthetic week#sewing#tutorial#sew on patch#punk diy#diy punk#punk aesthetic#handmade#solarpunk#handcrafted#embroidery#embroidered patch#how to#how to make a patch
18K notes
·
View notes
Text
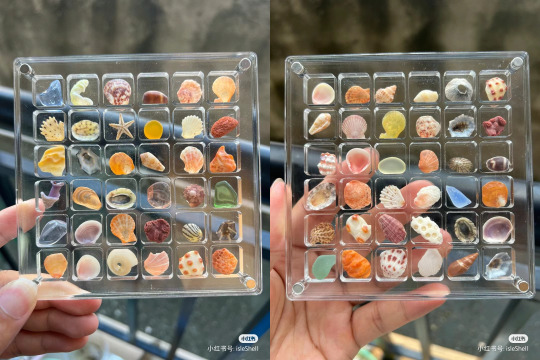

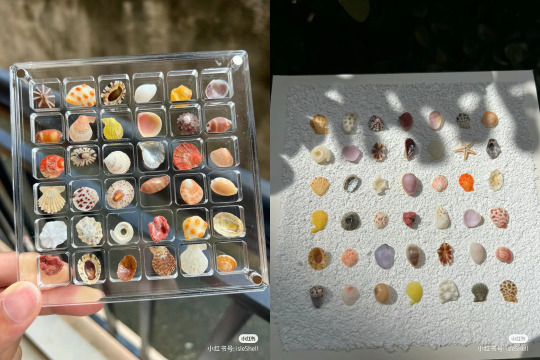

seashells collected in 三亚sanya, hainan by isleShell
7K notes
·
View notes
Text
Punk is about love <3
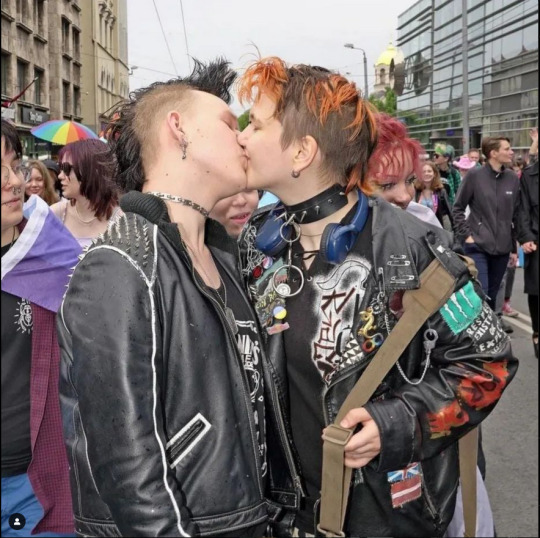
Photograph of me and my boyfriend at 2022 pride taken by photographer Arnis Balcus
#punk#alternative#hardcore punk#diy punk#punk aesthetic#punk rock#queer punk#queer community#pride#lgbtq community#punk queer#punk jacket
5K notes
·
View notes
Text
Stamp :3
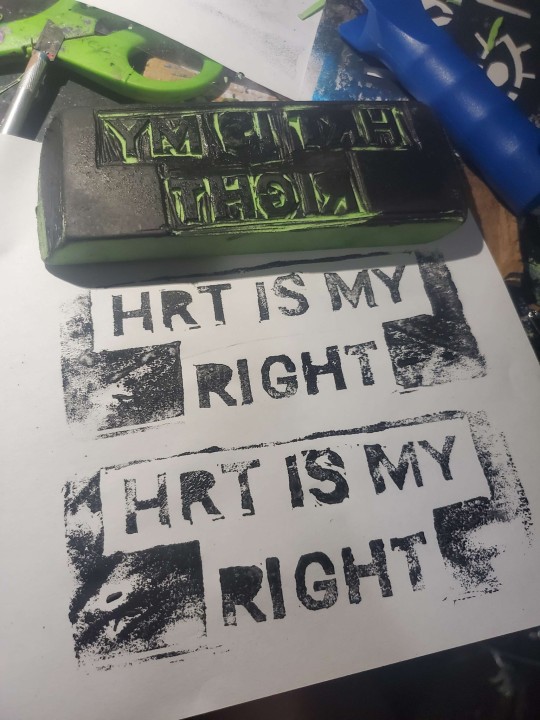
For patches and public walls (lol totally kidding Im a law abiding citizen/j)
Making more patches and spencils about gender affirming healthcare because yk, I live in Florida and still can't access it (Please help)
#trans hrt#hrt#ftm trans#transmasc#trans#queer punk#punk#punk diy#diy#punk aesthetic#stamp#transgender#ftm#graffiti#transgender rights#trans rights#trans boy
2K notes
·
View notes
Text
🏳️🌈 new additions to our shop! consider taking a look to help a trans intersex lesbian during pride month! 🏳️🌈


hello, i'm equinox! happy pride month! i'm a disabled intersex trans lesbian who is stabilizing after 6 months of homelessness! i sell jewelry in my ko-fi shop as well as zines and paintings, this is my primary form of income as i am too disabled to work a 'formal' job. i deal with psoriatic arthritis, fibromyalgia, hypermobile ehlers danlos, schizophrenia, bipolar disorder and other health conditions. i am struggling right now due to the very high temperatures in my area. if you can help, it would mean the world
#queer punks#queer punx#trans punx#trans punks#diy punk#alternative fashion#alt fashion#goth fashion#punk fashion#emo fashion#ooak jewelry#one of a kind#handmade jewelry#indie art#indie artist#independent artist#jewelry#jewelry shop#kandi#kandi necklace#kandicore#scenecore#y2kcore#y2k#scene kid#y2k aesthetic#y2k fashion#2000s fashion#90s fashion#our shop
1K notes
·
View notes
Text


Made some more patches :) I made these designs (feel free to use I love it when y’all do) but the broken missile is from anarchostencilism
432 notes
·
View notes
Text
Patchwork makeup bags


Made patchwork makeup bags out of secondhand and recycled materials to ask my BFFs to be my bridesmaids using this tutorial
#diy#upcycle#upcycled#upcycling#crafts#handmade#ecofriendly#reduce reuse recycle#quilts#quilting#quiltblr#quilt#quilters of tumblr#patchwork#sewing#makeup#makeup bag#wastelesscrafts#wasteless crafts#zero waste#zerowaste#cozytumblr#cozycore#cozy aesthetic#cozy vibes#cozy#secondhand#thrifting#thrifstorefinds#secondhand crafts
439 notes
·
View notes
Text

#art#animals#cats#funny#lol#haha#humor#meme#memes#diy#creative#flowers#flowercore#grandmacore#naturecore#cottagecore#aesthetic#cute animals#baby animals#wholesome#aww
4K notes
·
View notes
Text
diy!
#altfashion#punk fashion#diy punk#punk aesthetic#diy fashion#punk#crust punk#crust pants#patch pants#emo fashion#sewing#diy patches#patches
3K notes
·
View notes
Text
Fabric bracelets part 2: embroidery


These took so long but it was so worth it, I'm very proud of these
[Image ID: six images of three different fabric cuff bracelets. One is a blue/purple cuff with green wavy leafy vine embroidery that curls towards both ends of the bracelet. The design is on both sides of the spikes down the length of the bracelet, same placement as the others. All three bracelets have small metal spikes down the middle. The second bracelet is a desaturated red color, with a gray barbed wire design along both sides of the spikes. The third bracelet is a red and black flannel pattern, with a lighter silvery gray barbed wire embroidery in a slightly different style. The first barbed wire design is a little more stylized while the one on the black and red cuff is a little more realistic looking in its shape, but both are simplistic designs. All bracelets have button closures and three buttons to allow the wearer to adjust the size. All bracelets are roughly 9-10.5 inches long when open and flat and 2.5 inches wide. End ID]
#punk#punk diy#punk fashion#punk clothes#punk jewelry#jewelry#fashion#diy#upcycled fashion#upcycled jewelry#upcycling#upcycle#solarpunk#solarpunk diy#solarpunk fashion#solarpunk aesthetic#hopepunk#ecopunk#sustainable fashion#sustainability#recycling#hatchet makes stuff#embroidery#sewing#jewelry making#bracelets#hand sewing#hand embroidery
836 notes
·
View notes
Text

Made myself a swanky little headset stand for my Radio Demon themed gaming space. I love that it’s both functional and beautifully creepy when not in use
#hazbin hotel#hazbin hotel alastor#alastor#diy#I make things besides illustrations sometimes haha#my personal aesthetic is quickly becoming southern gothic deer beast charm and I’m not mad#crafts#desk decor#gaming setup
1K notes
·
View notes
Text
if you’re looking for a cool new punk band to listen to, i highly recommend looking for local small bands before searching “punk” into spotify.
don’t know how to find them?
what i did is i looked up what some punk bars in my area, i started going on random nights and found bands i liked that way. (if you’re under 21, you can still look up the bars, but go to their instagram, see what bands are playing and see if they are on band camp, spotify, etc.)
this has worked amazing for me, i’ve made so many friends, it’s to the point where certain bands shows feel like monthly family reunions full of so much love and genuine compassion.
hope this helps anyone wanting to be more involved in the subculture
EDIT: if you live in a small town, just search the nearest big city. or honestly any city that you vibe with. every area has a slightly different sound and scene find what you blend with!!
#punk#punk aesthetic#punk community#diy punk#hardcore punk#punk fashion#punk girl#garage punk#crust punk#punk music#punk subculture#los angeles#los angeles punk#concert#long beach#spotify#long beach punk#live music#concerts#queer punk#looking for new music#new music#new artists#small bands#local bands
4K notes
·
View notes