#Cricut heat press guide
Explore tagged Tumblr posts
Visit Tumblr Blog
Explore Tumblr blogs with no restrictions, modern design and the best experience.
Last Seen Tumblr Blogs


Fun Fact
28.6 is the average number of monthly visits per US mobile user.
Text
How to Upload Fonts to Cricut? [Easy Ways]

The use of the right font is essential in creating crafts projects. Each font you select gives your project a different feeling and emotional effect. Fonts are an important element in the process for a crafter using Cricut. The good news is they can learn how to upload fonts to Cricut and use them for their project.
Here is a useful tutorial that you can read and learn how. It will teach you quick ways of uploading fonts to the Cricut Design Space software and using them on Windows and Mac. After that, you can use them to give a personalized touch to your project. But to upload a font, you first need to download it. Before starting the uploading process, let's first know where you can find fonts to download.
Where to Find Eye-catching Fonts to Download?
There are several places where crafters can discover both free and paid fonts to download for their projects. They can select from beautiful and high-quality font collections and include them in the Design Space to begin with their project. Most often, their free font downloads option includes a personal use license. It makes them use those fonts for free in their projects. Thus, if you want to sell items with certain fonts, include only the one for commercial use.
Easy Steps to Access Fonts in Cricut Design Space
You can access Fonts in the Cricut Design Space with some basic steps. Here are some of the steps you need to execute for the purpose.
First, download the font you want.
After that, unzip your font file folder.
Double-click on the individual font file.
Follow the prompts to install the font file on your computer.
Now, open Cricut Design Space.
Start to create a New Project.
In the next step, add a new text box to your canvas.
Click on the font drop-down menu to change the font.
How to Upload Fonts to Cricut Design Space on Windows/Mac?
You can access the font on several devices. You only need to download and install the font onto each device you want to use. Here are some easy steps that can help you add fonts to this Cricut's software on Windows and Mac computers.
For Windows
Follow these instructions if you use Windows to access the Cricut Design Space. Once you learn how to upload fonts to Cricut on Windows, you can include those fonts in your project.
First of all, download the font file you want to have in your project.
Next, navigate to your Downloads folder.
Find the downloaded font file and right-click on it.
Choose the Extract option to extract those files.
In the following step, right-click on the font file and choose Install.
Once you perform these steps, the fonts will get installed on your windows. You can find them in the Design Space to access.
For Mac
Do you want to add fonts on your Mac device? Here are a few of the directions that you need to follow.
First, download the font you prefer.
Double-click on the downloaded zip folder.
Once unzipped, select the fonts and use ctrl+click to launch the menu.
Now, select Open with > Font Book option.
Now, you will see a pop-up to install fonts.
Tap on the Install tab to begin the installation process.
It will make your fonts appear in the FontBook. From there, you can use it in the Design Space.
Conclusion
The text gives an emotional touch to the project. Thus, every craft lover should know how to upload fonts to Cricut. The process is also quick and straightforward. Moreover, Design Space makes it effortless and time-saving too. First, download the font from a specific site and then add it on a device - windows or Mac to use it in your project. Keep experimenting with crafts and fonts for attractive projects.
Frequently Asked Questions
How Can I Add Fonts to Design Space on My iPhone?
For this purpose, you first need to install Fonts, a free font manager app. Below are some instructions to make your fonts available in the Design Space app.
Begin to download and install the Fonts app.
Unzip the file after downloading.
Now, open the iFont and choose Font Finder.
After selecting Open Files, move to the font file and select the file you want to install.
Next, select the Installer tab and click on Install to continue.
Now, close the app and open Settings.
Tap on the tab Profile Downloads.
In the end, press install.
Why are My Downloaded Fonts Not Showing Up in Cricut?
Have you downloaded your favorite font, but it's not showing? It can be because of several reasons, which include the following:
After downloading, you still need to install the fonts.
There was no successful installation.
Your font file format was not .ttf or .otf.
You still need to restart the app after installation.
How Can I Unzip the Downloaded Fonts File?
Make sure to execute these easy steps to unzip your downloaded font file. Here they are.
Right-click on the .zip folder with font files.
Next, click on Extract.
Select the TrueType or OpenType font files.
Subsequently, right-click on them and then install them.
At last, click Yes to allow the program to change your device.
Source: How to Upload Fonts to Cricut
Visit: design.cricut.com/setup
Cricut.com/setup
Cricut EasyPress 3 Setup
Cricut heat press guide
Cricut Design Space Login
#Cricut.com/setup#Cricut EasyPress 3 Setup#design.cricut.com/setup#cricut design space#install cricut design space app#cricut design space for mac#Cricut heat press guide#how to upload fonts to cricut
2 notes
·
View notes
Text
Cricut EasyPress
Cricut EasyPress 2 Heat Press Machine (9 in x 9 in), Ideal for T-Shirts, Tote Bags, Pillows, Aprons & More, Precise Temperature Control, Features Insulated Safety Base & Auto-Off, Raspberry
For More Details /Order on Amazon Link
#cricut easypress#🚀 Keyword Tool Pro#Do you need this information?#Keyword Tool Pro provides search volume data for English keywords.#cricut easypress mini#cricut easypress 2 vs 3#cricut easypress mini how to use#cricut easypress 3 tutorial#cricut easypress 2 12x10#cricut easypress 2 temperature guide#cricut easypress vs heat press#cricut easypress 2 unboxing#cricut easypress 2 9x9#cricut easypress mini t shirt#cricut easypress app
1 note
·
View note
Text
0 notes
Text
Mastering the Art of T-Shirt Vinyl Printing: A Complete Guide for Beginners
T-shirt vinyl printing is a popular and versatile technique for creating custom apparel. Whether you're starting a business or simply want to design personalized shirts for yourself, vinyl printing provides a way to make high-quality, unique designs. The process is accessible, but like any skill, it requires the right tools and a bit of practice to master. In this guide, we’ll explore everything you need to know about t-shirt vinyl printing, from the basics to the finer details, to help you get started.

What is T-Shirt Vinyl Printing?
T-shirt vinyl printing, also referred to as heat transfer vinyl (HTV), involves applying a vinyl design to a fabric surface using heat and pressure. The process requires cutting out shapes or images from a vinyl sheet, weeding out the excess material, and then transferring the design onto a t-shirt with a heat press. This method allows for vibrant colors, intricate details, and long-lasting results, making it a popular choice for personalizing garments or creating small runs of custom apparel.
Key Equipment for T-Shirt Vinyl Printing
To begin your t-shirt vinyl printing journey, it’s essential to have the right tools. These tools are relatively easy to acquire and provide everything you need for a professional finish.
Vinyl Cutter
A vinyl cutter is a machine that uses a blade to cut vinyl sheets into designs. These cutters are available in various models, but the most popular ones among beginners are brands like Cricut and Silhouette. These machines work by taking a digital design file and cutting the vinyl accordingly. Vinyl cutters are a must-have for anyone looking to produce precise and intricate designs that are ready for heat transfer.
Heat Press
The heat press is one of the most important tools in the vinyl printing process. It applies the necessary heat and pressure to transfer the vinyl design onto the fabric. Heat presses come in different types, such as clamshell, swing-away, and draw models. While some people use an iron for this step, investing in a heat press will give you more control and consistency, leading to a more durable and professional-quality print.
Heat Transfer Vinyl (HTV)
HTV is the material used for creating the designs that will be transferred to the t-shirt. It comes in a variety of colors, finishes, and textures, such as matte, glossy, glitter, and even holographic. HTV has an adhesive backing that activates when heated, allowing it to bond to the fabric. The choice of HTV can affect the final look and feel of the design, so it’s important to select the right type for your project.

Weeding Tools
After cutting the vinyl, you’ll need to remove the excess vinyl surrounding the design. This is known as “weeding,” and it requires precision. Weeding tools are small, often pointed instruments designed to help you lift and remove unwanted pieces of vinyl without damaging the design itself. Weeding can be time-consuming, especially for intricate designs, but it is an essential step to ensure a clean, professional-looking result.
Design Software
Designing your graphics requires software that can work with your vinyl cutter. Programs like Adobe Illustrator, CorelDRAW, and Cricut Design Space are commonly used for this purpose. These design platforms allow you to create and manipulate vector-based designs that can then be sent to your cutter for precise cutting. The software gives you the flexibility to create custom artwork or edit pre-existing designs, depending on your skill level and needs.
The Vinyl Printing Process: Step by Step
Once you have all the necessary equipment, you can begin the process of printing your own custom t-shirts using vinyl. The process is relatively simple but requires attention to detail to achieve the best results.
Design Your Graphic
The first step in the vinyl printing process is to design your graphic. Using your design software, create the artwork you want to transfer onto the t-shirt. Whether it's a text-based design, a logo, or a more intricate image, your software will help you manipulate the elements to fit the size and shape you desire. Don’t forget to mirror the design horizontally before cutting. This ensures that it will be properly oriented when applied to the shirt.
Cut the Vinyl
Next, load your heat transfer vinyl into the cutter and send the design file from your software to the cutter. The cutter will then trace the design into the vinyl sheet, using a small blade to cut through the material. Be sure to use the correct settings for the thickness and type of vinyl you're working with. Once the cutting is done, remove the vinyl from the cutter and prepare to weed out the excess material.
Weed the Vinyl
Weeding is the process of carefully removing the excess vinyl surrounding the design. Using your weeding tools, carefully peel away the unwanted pieces, leaving only the design you intend to transfer to the shirt. Be cautious with intricate designs, as they can be delicate and require patience. Proper weeding ensures that only the desired elements of your design are left behind, resulting in a sharp and clean image on the final product.
Prepare the T-Shirt
Before applying the vinyl design to your t-shirt, make sure the fabric is clean and smooth. Any wrinkles or moisture can interfere with the heat transfer process. If needed, use an iron or heat press to pre-press the t-shirt to remove any wrinkles. It’s also helpful to position the design where you want it on the shirt, ensuring that it is centered or aligned properly.
Apply the Vinyl
Once everything is prepared, it’s time to apply the vinyl to the t-shirt. Place the vinyl design onto the shirt, with the shiny side facing up. Position the shirt under the heat press and set the temperature and time according to the vinyl manufacturer's instructions (usually around 300°F for 10-15 seconds). Close the heat press and apply consistent pressure. The heat activates the adhesive on the vinyl, causing it to bond to the fabric.
Peel the Transfer Sheet
After the pressing time is complete, carefully peel off the transfer sheet while the vinyl is still warm. This step should be done slowly to avoid pulling up any vinyl with the transfer sheet. Allow the design to cool for a moment, and if necessary, you can give it a final press to ensure the vinyl is fully bonded.
Tips for Perfect Vinyl Printing
While the process of t-shirt vinyl printing is straightforward, there are a few tips that can help you achieve the best results. Always test the heat settings on a scrap piece of fabric to ensure you don’t overheat or underheat the vinyl. Additionally, investing in high-quality vinyl is key to producing designs that last, as cheap vinyl can peel or crack over time. Experiment with different textures and finishes of HTV to find the look that works best for your designs.

Conclusion
T-shirt vinyl printing is an accessible and rewarding method of creating custom clothing. By understanding the process, investing in the right equipment, and practicing your skills, you can produce professional-quality designs that are both durable and visually striking. Whether you’re creating shirts for a special occasion or launching a custom apparel business, mastering vinyl printing opens up a world of creative possibilities. With patience and practice, you’ll be able to design unique, high-quality t-shirts that stand out from the crowd.
0 notes
Text
How to Use DTF Transfers at Home or Office
InkMerge makes it easy to use DTF transfers at home or in your office, offering immense creative freedom with minimal setup.
Tools and Equipment Needed
You don't need a full-fledged printing setup to apply a DTF transfer. Your main tool is a heat source that can apply uniform heat and pressure. A heat press is ideal, but a Cricut EasyPress or a regular household iron will work. You'll also need a clean, flat surface for application and your chosen items to customize.
If you're ready to invest in reliable equipment, visit our website to learn about choosing the right heat press.

Ordering DTF Transfers
At InkMerge, we've simplified the process of ordering DTF transfers. Simply upload your design to our website, specify your transfer size, and place your order. We handle the DTF printing and ship your ready-to-press transfers directly to you.
Want to see the quality for yourself? Order a free sample pack from our website to try at home.
Applying DTF Transfers
Once your InkMerge DTF transfers arrive, it's time to bring your creations to life. While instructions may vary slightly for different materials, here's the general application process:
Prepare the substrate: Ensure your item is clean and wrinkle-free. A quick press can ensure a smooth surface.
Position the transfer: Carefully place the DTF transfer onto your item, ensuring proper alignment. Our placement tool set can help ensure consistent print locations.
Apply Heat: Use your heat press, Cricut EasyPress, or home iron, following our provided temperature and timing instructions.
Peel Away: After pressing and cooling, gently peel off the PET film to reveal your high-quality print. Our Fast Cool Air Blower can help accelerate this step.
For a more detailed guide, check out our step-by-step tutorial on applying DTF transfers on our website.
1 note
·
View note
Text
How to Make a Halloween Shirt with Cricut: DIY Guide
Halloween is quickly approaching, and you want to make something for yourself that designing a spooky shirt will be better. If you are looking for a tutorial on how to make a Halloween shirt with Cricut, then start readingthis blog to discover how you can get creepy and design your shirt with Cricut. Then, you just need to pick up a shirt, all the materials you need, and your favorite iron-on vinyl colors. Whether you are searching for a personalized shirt idea or want to make a cute, spooky new shirt for your family, you will need inspiration and the instructions to follow.
So, read this easy guide, where we will walk you through creating a Halloween shirt with Cricut. It is a fun way to get in the Halloween spirit.
Materials Required
Before designing and cutting, let’s gather the materials required to make the shirt.
How to Make a Halloween Shirt with Cricut
It is always fun and exciting to develop newideas, and this Halloween, you can create any design for your project that is festive, spooky, and perfect for Halloween celebrations. Let’s learn how to make a Halloween shirt with Cricut by following the step-by-step instructions:
Step 1: Design for Shirt
The Cricut Design Space app offers many design options. You can choose a design for your project from the project tab in the Design Space app or create your own. Click on the new project to create a design, or you can upload an SVG file to your blank canvas and resize it accordingly. Here, we have made a spider web for our shirt. You can add a black rectangle behind the shirt to visualize how they will look on the shirt. Now it's time to send it to cutting.
Step 2: Cutting Your Design
The design is ready. First, load the material onto the Cricut machine to cut the glitter iron-on. Ensure that the shiny side is down.
Step 3: Weeding the Design
Now that we have cut our design, it is time to remove the excess material. Carefully remove the extra part from the spider web you do not want on the shirt, and it is ready to be put on.
Step 4: Pressing Design on the Shirt
If you want the design to stick to your shirt perfectly, here is a tip: You can pre-heat the shirt by doing this to smooth out the area where you will be placing your design. It’s time to put your design, take it, and then cover it with a Teflon sheet and press it with EasyPress for a few seconds.
Step 5: Removing the Sheet
After pressing the design on your shirt, cool it for 5 to 10 minutes, then remove the Teflon sheet. Your spiderweb Halloween shirt is ready.
Important Instructions
Here are a few tips that you can keep in mind while making a shirt with Cricut for Halloween:
Wrap up
In conclusion, after reading this guide, you must have understood the easy process of making a shirt with Cricut. Halloween has always been a popular time for people and DIY crafters to express their creativity in different forms. In this guide, you explored how to make a Halloween shirt with Cricut. You followed a step-by-step process to make a spooky shirt. It is the best way to show your creativity and celebrate Halloween in a very different way. So, this Halloween, create this spiderweb shirt and get spooky.
FAQs
How long does the Cricut printed shirt last?
The longevity of the printed shirt depends on several factors—the quality of the material you are using and how it is applied. If you are using high-quality iron and applying it properly, it can last up to several washes. If you want to improve the longevity of the shirt, then you can use a mild detergent to wash and dry the shirt inside out after applying the vinyl.
What should you do to prevent the shirt from peeling?
To prevent the shirt from peeling, you can use these tips:
Can you use regular vinyl instead of HTV for shirts?
Yes, you can, but it is not recommended for shirts. HTV or infusible ink is better for creating durable and long-lasting designs. The design can come off after a single wash if you use regular vinyl. Using a heat press or sublimation ink, you can apply permanent vinyl to the shirt.
Visit: cricut.com/setup www.cricut.com/setup login
Source: https://cricricutdesigncut.wordpress.com/2024/10/16/how-to-make-a-halloween-shirt-with-cricut-diy-guide/
#design space setup#digital design#cricut.com/setup#www.cricut.com/setup login#cricut#cricutprojects#cricut crafts#cutfiles#cricut explore#cricut explore air 2#cricut.com setup mac#setup cricut design space setup#cricut design space app#cricut design space download#cricut design space login#design.cricut.com#design.cricut.com/setup#design.cricut.com download
0 notes
Text
How to Connect Cricut Wirelessly: A Guide for Beginners
Are you a Cricut enthusiast planning to start your crafting journey? Well, you have come to the right place! I am going to walk you through all the essential info you need to learn in order to connect Cricut wirelessly.
Cricut crafting machines come with Bluetooth and USB connectivity to provide the utmost comfort in setting up the device. Crafters familiar with the machine can easily get started with the machine. On the other hand, some new users can find it difficult to complete the setup. In this case, it is best to have a thorough understanding of the process beforehand. So, get through the whole blog and grasp all the vital details and steps to wirelessly set up heat presses and cutting machines.
How to Setup Cricut Cutting Machines Wirelessly?
You can wirelessly connect your cutting machine to both computer and smartphone devices. So, here you will find a quick guide to completing the setup on both devices.
Method 1: Connect Cricut Wirelessly to Your Computer
Begin by unboxing the cutting machine and placing it near your computer device. (Make sure both devices are within the 10-15 feet range.)
(If you are using the Explore One machine, then you should insert the Bluetooth toggle to establish the connection.)
Next, attach the machine plug to a power socket and turn it on by pressing the power button.
From the Settings window on your PC, choose the Devices option.
After that, go to “Bluetooth and other devices,” turn on the Bluetooth toggle, and select “+Add Bluetooth or other device.”
On the next open page, select the Bluetooth option and move forward.
Henceforth, the printer will start looking for the available printers within its range.
Once you see your cutting machine model number on the screen, click on it.
If a prompt comes on the screen to type a PIN, you need to enter 0000 to move forward.
Afterward, the wireless connection process will be complete.
In order to use the cutting machine, you need to complete the setup process through the Design Space app. In the next step, you will learn about the setup process.
Begin by visiting the Cricut official website on your PC.
From the screen, click on the Apps option, which will take you to the Design Space download page.
In the open window, you will see that the Download button is greyed out.
To enable the download button, move to the terms and conditions checkbox and click on it.
After that, you will see that the Download button is now green; click on the button to initiate the download process.
Wait for the design app download process to complete, and then open it after that. (Or you can access the file from the Downloads folder on your device to install it.)
Before the app installation process begins, it will ask if you trust this app and want to open it; click on the correct option to start the installation.
Afterward, a box will show up on the screen to indicate installation progress.
Once the installation process is complete, launch the software/app and complete the login process. (Or create a new account if necessary)
Then, choose the Machine Setup option to search for the cutting machine you are using.
From the result, click on your machine’s name, and the setup process will be complete.
Method 2: Connect Cricut to a Smartphone Wirelessly
The following method will allow you to get complete knowledge of how to connect Cricut wirelessly to a smartphone device.
For the first step, power on your cutting machine and bring the mobile device within its 10-15 feet range.
On the smartphone, tap on the Settings icon and then go to Bluetooth.
Now, turn on the Bluetooth toggle and tap on your machine name based on the result.
Follow the instructions to complete the machine’s Bluetooth connection process.
After completing the Bluetooth connection, the same as the computer device, you need to download the app on your mobile phone. Follow the below guide to do that.
First and foremost, launch the Apple App Store or Google Play Store app on your mobile phone device.
Next, type cricut design space in the search section by tapping on the search bar.
After that, tap on the Search option.
From the list of open results, tap on the correct app icon and then tap on Get to start the downloading. (You might need to type your iTunes password if you are downloading the app on your iOS device.)
Once the downloading is finished, the app icon will appear on your system home screen.
You can open the app from the home screen or from the application downloader you are in.
After opening the app, you are required to complete the account sign-in process. (If you are using the machine for the first time, you need to create a new account.)
On the app, you can tap on the Machine Setup option to search for your cutting machine.
Afterward, follow the on-display instructions, and your machine setup process will be complete.
Here you go! Your machine is ready to create beautiful and stunning DIY projects.
How to Set up Cricut Heat Press Wirelessly?
If you are planning to connect Cricut wirelessly to a heat press machine, then you can do it easily without using any app except EasyPress 3. The following guide will help you complete the process without any issues.
First of all, connect your heat press machine’s plug to a power outlet.
Afterward, go to the Bluetooth page on your phone and establish a wireless connection between both devices.
On your smartphone device, download the Cricut Heat app from the App or Play Store.
Once that process is complete, launch the heat app on your device.
Also, you need to tap on the Sign Up option to initiate the machine setup process.
From the heat press names open on the screen, select your machine’s name, and select Connect.
Now, the app will verify the heat press with your registered email address.
Moreover, select the Activate option after reading the terms and conditions.
Once the machine setup process is complete, a notification will show up on the screen.
Finally, you can use your machine to apply icon-on designs on various products.
Final Words
This piece of content shares all the need-to-know info about the machine setup. You can effortlessly complete the setup process of your device without any issues. However, before downloading the Design Space app, make sure to check the device compatibility and system criteria to avoid any complications. If everything is as required, you are good to go to start using the crafting devices. I wish you a happy crafting journey!
Frequently Asked Questions
Does Cricut Require Bluetooth?
All the newer models of the Cricut machines come with both USB and Bluetooth connectivity technology. However, if you are using the first model of the Explore series, then you need to use the Bluetooth adaptor to establish the wireless connection. All other devices come with built-in Bluetooth to set up the device to a smartphone and computer.
Why Can’t I Connect Cricut Machine Wirelessly?
There could be various reasons if you are unable to make a wireless connection to your machine. Some common ones are given below.
The machine is not compatible with your PC or mobile phone.
The OS of your device has not been updated.
Using the outdated or incompatible Design Space app.
Either of your devices is facing a technical problem.
You are not following the correct connection process.
If you are having these types of problems, then ensure that everything is required or seek help if the problem seems too complex.
Does My Cricut Need to Be Connected to Wi-Fi?
There is no need to connect your machine to Wi-Fi in order to use it. These devices have Bluetooth and USB connectivity options. However, you might need to connect your computer or smartphone to Wi-Fi while downloading the Design Space app to complete the setup.
Source :- https://cricuthelpcenter.wordpress.com/2024/08/29/how-to-connect-cricut-wirelessly-a-guide-for-beginners/
0 notes
Text
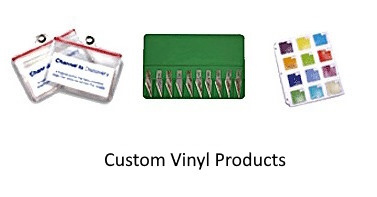
5 Simple Steps to Create Your Own Custom Vinyl Products
Creating your own custom vinyl products is an exciting way to personalize items for yourself or your business. To begin with, identifying your specific needs and goals is crucial. Whether you are making stickers, decals, or banners, understanding the purpose behind your custom vinyl products will guide the entire process. Next, choosing the right vinyl material is essential. With a variety of vinyl types available, such as permanent, removable, or heat transfer vinyl, each serves different purposes. Selecting the appropriate material ensures durability and the desired finish for your project.
After selecting your material, the design phase begins. Utilizing design software like Adobe Illustrator or Cricut Design Space allows you to create intricate and detailed designs for your custom vinyl products. If you are not confident in your design skills, consider using pre-made templates or hiring a designer. This step is where your creativity shines, so take the time to refine your design until it meets your vision.
Once your design is finalized, the cutting process follows. This step involves using a vinyl cutting machine, such as a Cricut or Silhouette, to precisely cut your design. Ensure that the settings on your machine are correctly adjusted for the type of vinyl you are using. Careful attention to detail during this stage prevents errors and ensures a clean, professional result.
Finally, applying your vinyl design to your chosen surface completes the process. Whether you are placing your custom vinyl products on a car, a window, or a t-shirt, make sure the surface is clean and smooth to ensure proper adhesion. Use transfer tape to move your design from the backing paper to the application surface, then press down firmly to secure it. This final step is critical to achieving a polished look that lasts.
In conclusion, creating custom vinyl products is a rewarding process that allows for endless creativity and personalization. By following these five steps—defining your purpose, choosing the right material, designing, cutting, and applying you will be well on your way to producing high-quality vinyl products that meet your needs and expectations. Whether for personal use or as a business venture, the possibilities with custom vinyl are vast and exciting.
0 notes
Text
How to Use a Pen on Cricut: A Beginner’s Guide
If you are a Cricut user, then you know that Cricut is a brand that offers crafting machines capable of making a variety of projects using different materials. But did you know that you can now create DIY projects using Cricut pens without cutting any design? Yes, it is possible! Cricut provides many pens and markers in different colors for beautiful crafts. To make projects involving pens, you must know how to use a pen on Cricut.
If you do not know what a Cricut pen is or how to use it, don’t worry. This blog will explain everything related to a pen. To learn all about these pens and how to use them, just read the blog!
What Is a Cricut Pen?
Before we find out how to use a pen on Cricut, we should know what a Cricut pen is. Cricut pens are specially designed to work with Cricut machines to write on various materials. Using this pen, you can make banners, greeting cards, bookmarks, labels, notes, and more.
With Cricut models like Maker, Venture, and Explore, you can use special-sized pens that you can fit into the machine’s pen holder. However, if you want to use a pen with Cricut Joy, you will need to buy a separate pen, which will not work with other Cricut machines. The Cricut Joy is a small machine, so any regular pen will not work with it. You will have to get a pen that is specially made for Cricut Joy.
Types of Cricut Pens
Cricut has a variety of pens, and you can use one of them depending on the project you are making. I am writing about all of them. Here, you will learn about these pens and which one is suitable for your project. It is important to know about pens before learning how to use a pen on Cricut.
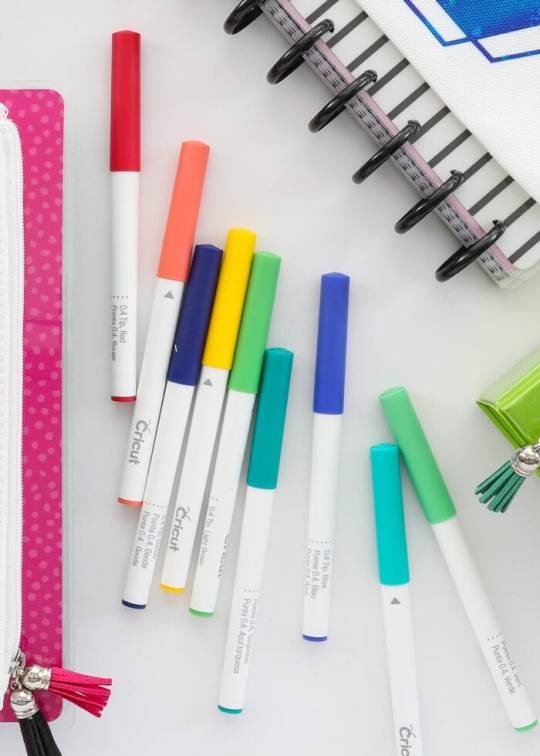
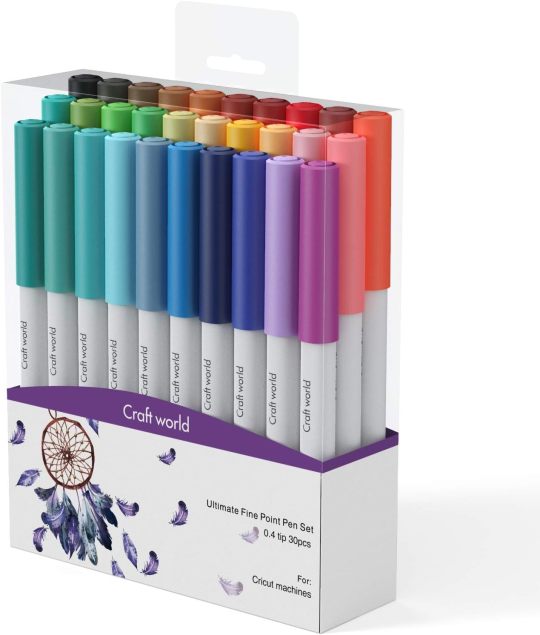
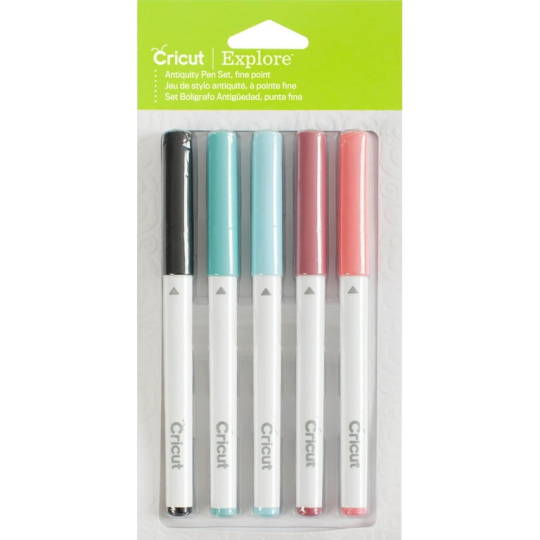
Pens
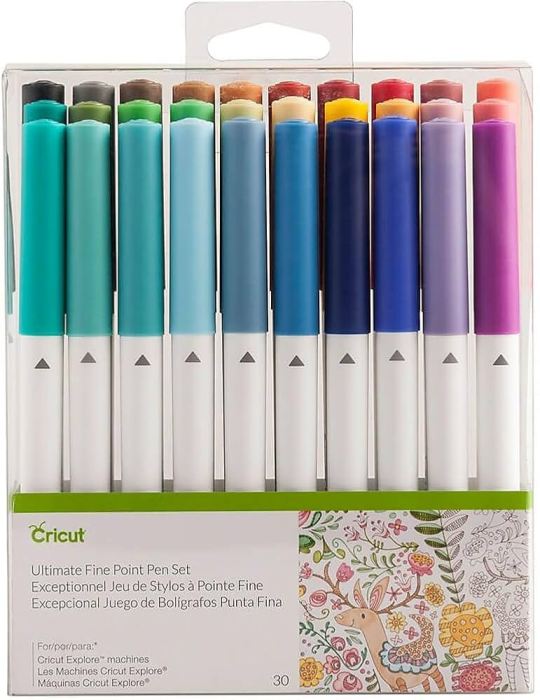
Most Cricut writing projects are made with Cricut pens. You can insert the pen into the machine clamp, which is good for writing. These pens come in a wide variety of thicknesses, colors, sheens, and weights. They have fun color combinations. These pens include fine-point pens, extra fine-point pens, and normal pens. Their thickness ranges from 0.3 to 0.8 mm.
Markers
When you need to write on projects that require thick writing, you can use markers instead of pens. Its thickness ranges from 0.6 mm to 1.0 mm.
Fabric Pens
This pen is specially created to draw on clothes. You can fit the pen into clamp A just like any other pen and start drawing. You can use the Cricut Maker/Explore machines to draw.
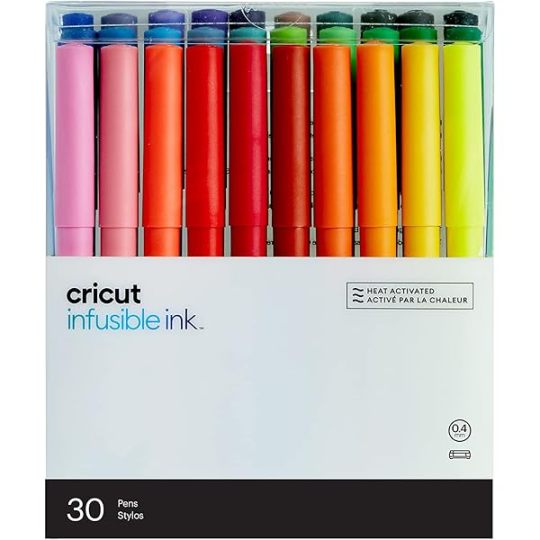
Infusible Ink Pens
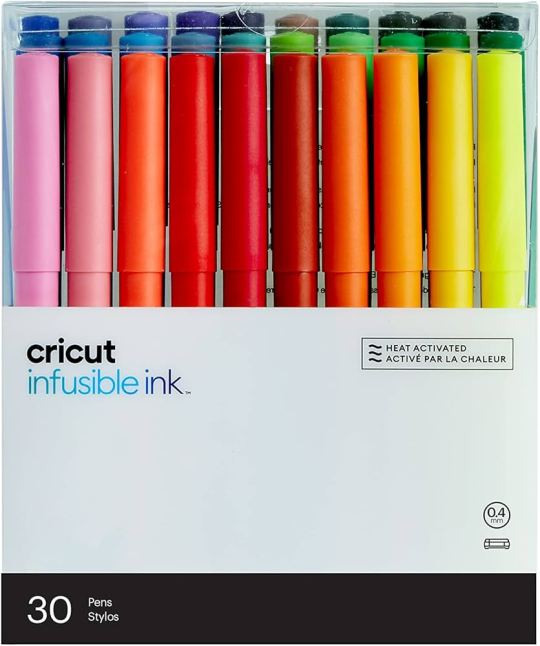
If you want to draw on your sublimation projects, you can use infusible ink pens. It will draw on the infusible ink sheet, and you can transfer it to a mug or coaster project using a heat press machine. Remember, do not use this ink with non-sublimation projects.
Free Hand Markers
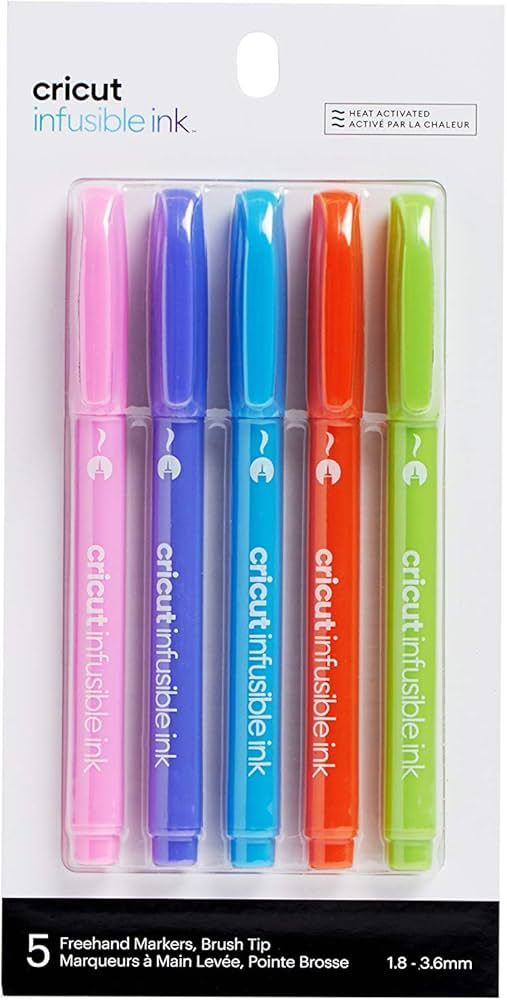
These are markers that do not fit in a Cricut machine. If you want to use it, color the design by hand.
How to Use a Pen on Cricut: 3 Easy Instructions
Now you know all you need to know before you go on to learn how to use a Criuct pen. Let’s learn how you can actually use a pen on your project.
Step 1: Insert a Pen into Your Cricut Machine
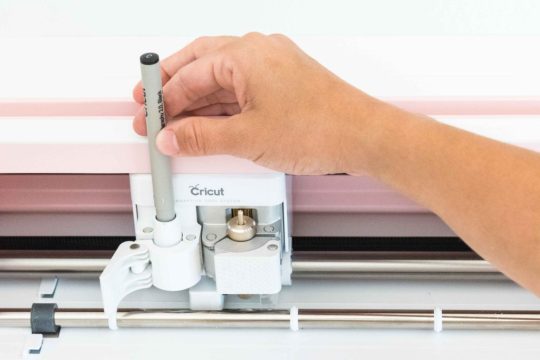
To install the pen, you have to turn the machine on and then open clamp A of your Cricut cutting machine, which is located on the left side. Once the clamp opens, you have to remove the pen cap and press it into the camp. When it reaches its limit, you will hear or feel a click. It means that the pen is well installed. Now, you close the camp.
Step 2: Choose a Design or Font
Before using a pen on your Cricut machine, you should first choose or create a design using the Design Space software. Cricut has thousands of ready-made designs, fonts, and images. You can select any one of them and draw on your machine. If you want, you can also create a design on your own. You also have an option to upload an image from the internet.
Step 3: Draw Your Design
After that, you can draw the design using your material. You must put the material inside the Cricut Maker, Explore, or Venture machine. Once the material is loaded, you can start drawing the design on it, and when it is done, you can unload the material. Your project is now ready.
Conclusion
In conclusion, you have to know that you have learned here how to use a pen on Cricut, and now you can easily create projects with the help of pens. Cricut has various pens, and you can use any that fit the needs of your project. To use a pen on your Cricut machine, you should choose a design that you will draw using your material. Once the design is ready, you can install the pen into the machine and draw the design on it.
Frequently Asked Questions
How Can I Install Cricut Pen?
To draw any image or font on a Cricut machine, you will need to install a pen. You can install it in a few steps. Here is how you can do it.
First, pick a pen suitable for your project.
Then, open the clamp A of your machine.
Next, insert the pen inside the clamp and close the camp
Now, the pen is installed. You can start crafting.
What Can I Make from a Cricut Pen?
A Cricut pen is a tool that can be used for multiple projects. You can create beautiful bookmarks, cards, invitations, coasters, t-shirts, and so much more. If it is someone’s birthday and you want to make banners, you can use a Cricut machine for it. Apart from these, you can make cute doodles, stickers, and labels using these pens. You can use these projects for your home decor, or you can also give them to someone you love.
Can I Write on Fabric with a Cricut Pen?
Yes definitely! Cricut has a fabric pen specifically designed for fabrics. You can use the pen with the Cricut machine and draw any design on the fabric. To use the fabric pen, you must first select a design on the Cricut Design Space app and then install the pen on your cutting machine. After that, load the fabric onto the machine and draw your design on it.
0 notes
Text
How to Use Cricut EasyPress 3: Mastering Iron-on Projects

If you are here to learn how to use Cricut EasyPress 3, you are at the right place! My husband is a huge wine fan and has a dedicated space called a bar section. In this section, he loves to collect different types of beverages or wines. Since my husband likes to have a collection of liquor or beverages, one day, he came to me and asked if I could make something unique that would get more attention.
On his request I decided to make wine bags. I showed him an idea about a design I had created in Design Space. After several trials, he finally agreed to a design that I will show you later in this tutorial. Also, there are some essential supplies required to make this project, which I have included in this blog. Despite that, you will also learn how to activate your press machine using the Cricut Heat app. Let’s take a look at this blog to know the proper usage of EasyPress 3.
How to Setup Cricut EasyPress 3 on Your Device?
Here, I am going to show you how to set up the EasyPress using the Cricut Heat app. This step is essential if you want to know how to use Cricut EasyPress 3. Besides, this press uses Bluetooth Lite technology to pair the Android or iOS device. Plus, the app is used to communicate with the heat press. So, follow the instructions below to set up the press.
Here are the steps to follow for EasyPress setup:
First of all, you will need to download a Cricut Heat app. This app is essential to set up your EasyPress.
Then, plug your machine into the power source and press the power button to turn it on.
After that, you will see the APP flashing on the screen, meaning it is ready to connect with the Cricut Heat app. This step is a must for activating and registering the machine.
Pair the device via Bluetooth, and ensure a minimum of 7 feet of distance between the machine and the mobile device.
Go to the app, and hit the option Set Up to begin the activation.
Afterward, you have to choose the unit from available presses and hit the Connect button.
Now, you will see “Connecting to EasyPress 3-0163” as shown in the picture below.
Then, select the check box to accept the Terms of Use and Privacy Policy and finally tap the Activate.
Lastly, you will see a “Success!” message on the screen, confirming the setup is done. During this time, your Cricut EasyPress 3 will start to heat up and be ready to use.
Here, I have explained the easy steps to set up your EasyPress 3 machine. However, you will need to ensure some essential supplies are needed for making a wine bag. So, let’s proceed further to know.
What Materials Do I Need to Make a Custom Wine Bag?
So, are you ready to collect the supplies needed to make a beautiful wine bag? For this project, I will use Infusible Ink materials. Here’s the list of supplies required for the wine bag:
Cricut cutting machines such as Maker, Explore, and Joy.
Cricut EasyPress 3
EasyPress mat
Cricut Infusible Ink wine bag
Brayer
Green StandardGrip mat
Cricut Infusible Ink Transfer Sheets, along with a butcher paper
Heat resistant tape
White cardstock
How to Use Cricut EasyPress 3 for Creating a DIY Project?
Finally, I am excited to share the complete tutorial on the usage of this machine. But the heat press alone can’t do everything. Hence, you will also need some other supplies that I have already mentioned above.
Step 1: Create Your Design
I have made a very simple design for a wine bag. If you want, you can also try different font styles and sizes to enhance the designs. Add extra elements to make it as beautiful as possible.
Step 2: Choose the Load Type
When you go for cutting your design, you will get a pop up screen. This pop-up screen will be visible to those who are using anyone from Cricut Maker 3, Explore 3, and Joy. Since I am working with Infusible Ink, I opted for the On Mat option.
Note: Older Cricut machine users will not get the pop-up screen to select the load type.
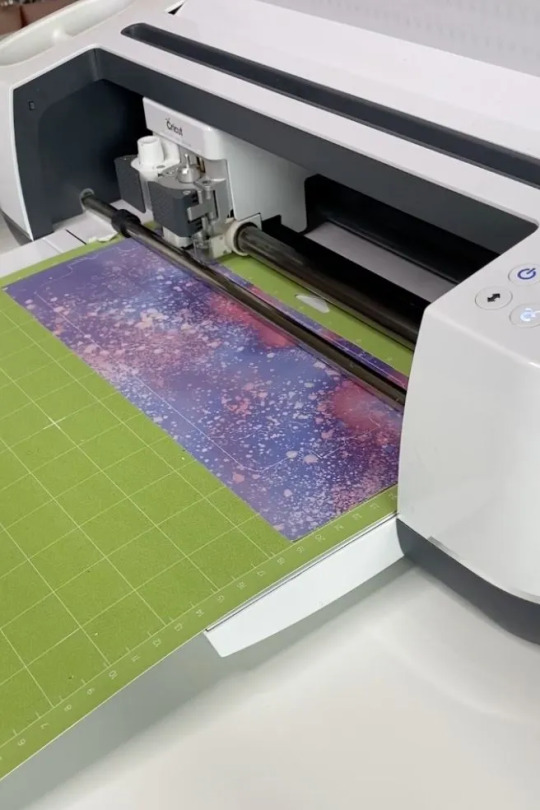
Step 3: Set Your Image on a Cricut Mat
On the mat in the Prepare screen, your image will be displayed. To ensure it transfers onto the wine bag correctly, click on the Mirror option located in the left panel.
Step 4: Cut & Weed Out the Design
Now, I have placed the infusible ink sheet on the mat, and I used a brayer to flatten the transfer sheet. After that, cut the design and weed it using the weeding tools.
Step 5: Apply Your Image
Finally, it’s time to transfer the design onto the blank wine bag. Here, you will be guided through your Cricut Heat app. Put your wine bag on the EasyPress mat and then place the design over the blank bag. On top of that, you have to place the butcher paper.
Step 6: Use the Cricut EasyPress 3
In the last step, you have to carefully preheat the blank as per the instructions given in the Cricut Heat app. Afterward, place your design on the blank and then heat up according to the Heat app. Once done, peel the design away, and your bag is ready. Here’s what it looks like. Finally, this easy guide on how to use Cricut EasyPress 3 ends here.
FAQs
What is the difference between Cricut EasyPress 3 and 2?
The EasyPress 3 is the latest version, which supports all the features that you can find in the EasyPress 2. In addition, the latest one comes with Bluetooth connectivity. There is a dedicated app called Cricut Heat app, which you can use to send the temperatures and times to your EasyPress 3. In EasyPress 3, you get a lot of benefits, such as it can heat up quickly, is easy to program, has a safety base, and two sizes are available, i.e., Cricut EasyPress 3 12×10 and 9×9. Whereas EasyPress 2 comes in 3 different sizes.
What projects can I make with Cricut EasyPress 3?
There are endless projects you can make using your press machine. Below, you can find the project list that you can make on your machine.
Baby Clothing and Blanket Set
Personalized Dog Bandana
Flower Coasters
Bird and Branch Pillow
Enjoy Wine Bag
Venice Infusible Ink Shirt
Rainbow Tote Bag
Amour Sweatshirt
Sprinkle Apron
Do I need to use Cricut EasyPress 3 with Cricut Heat app?
Yes, you will need a Cricut Heat app to set up or activate the EasyPress 3. But once it is complete, there is no need to use this app again and again. You just set up a device, and you are ready to use EasyPress on its own.
Final Words
The Cricut EasyPress 3 is an advanced device for crafters with many capabilities, such as making baby clothing, wine bags, and pillow covers. To use it, follow the setup instructions and gather the necessary supplies before following the tutorial. Before proceeding further, you will need to set up the device, which I have easily explained in this blog. So, follow the guide step-by-step tutorial on how to use Cricut EasyPress 3 and transform your projects to the next level.
For more information visit: Cricut.com setup Cricut machine setup cricut explore one software Cricut heat press guide
Source: How to Use Cricut EasyPress 3
#Cricut EasyPress 3 12x10#how to use cricut EasyPress 3#cricut heat app#Cricut heat press guide#Cricut EasyPress 3 Setup#Cricut design space download#design.cricut.com
0 notes
Text
How to Use a Cricut Mug Press: A Step-by-Step Guide
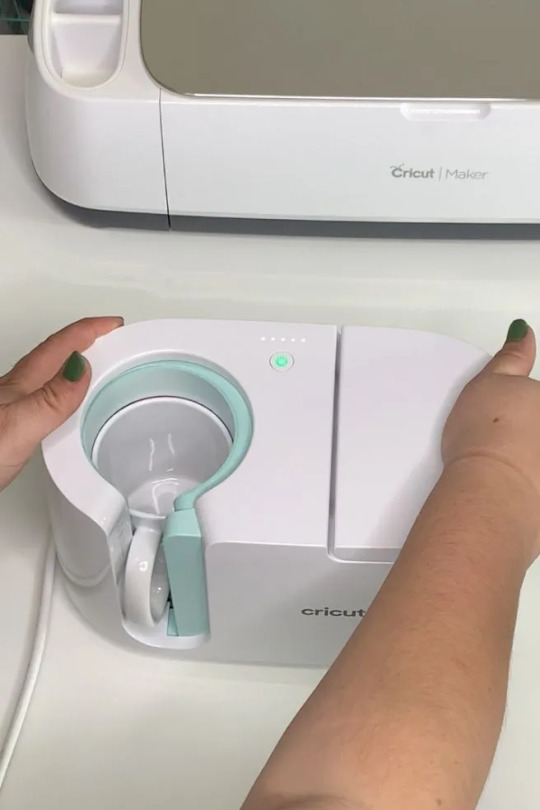
When I first bought my Cricut Mug Press, I was quite nervous about learning how to use a Cricut Mug Press. It took some time to read many articles and gather all the essential information. Now that I have gained experience using it, I want to share all the basic instructions for using this Cricut machine. If you are uncertain about using it, make sure to read this post to the end.
The Cricut Mug Press is a small yet impressive tool that transforms plain mugs into stylish designer pieces. Despite its compact size, it is incredibly capable and essential for crafting custom mugs for personal use or as gifts for loved ones. So, let’s start with the materials you will need for your project.
Tools and Supplies You Need to Create a Personalized Mug
Before learning how to use a Cricut Mug Press, it is important to know the necessary materials you are going to need. Here is a detailed list:
Cricut cutting machine: You will have to use this machine to cut designs from the infusible ink sheet. Suitable Cricut models are Cricut Maker 3, Explore 3, or Joy.
Cricut Mug Press: This is the machine used to transfer the infusible ink design onto your mug.
Sublimation mug: Specific mugs made for the Mug Press machine are necessary because they fit perfectly and ensure the best results. Using other mugs of different shapes and sizes may not fit or work well with the machine.
Infusible ink sheet: This material is basic as it is where you will cut your designs, which will later be transferred onto the mug using heat in the machine.
Heat-resistant tape: It is essential for securing the infusible ink sheet onto the mug during the pressing process.
Lint roller: Used to ensure the surface of the mug is clean and free of debris before applying the infusible ink design.
Weeding tools: These are used to remove excess or unwanted material from the design before transferring it to the mug.
Once you have assembled all these supplies and tools, ensure your setup is ready. Connect your Cricut machine to power and turn it on. Establish a connection between the machine and your device using Bluetooth or USB. Download the Design Space app on your device and log in with your account. This setup is essential before proceeding with the Mug Press.
Before beginning to use the Mug Press, ensure it is on and heating up properly. Following these steps ensures you are ready to create custom mugs with your Cricut machine.
How to Use a Cricut Mug Press in 4 Simple Steps?
When you have assembled all the necessary tools and completed the setup, you can start working on your project. Here are the 4 steps you need to follow to use the Mug Press:
Step 1: Create a Design on Cricut Software

Step 2: Cut and Weed Out the Excess Material

After completing the design, insert the material into the machine and press the Load button. The design will be cut quickly. Once the cutting is done, unload the material and use a weeding tool to peel away any unwanted parts from the design.
Step 3: Transfer the Design to Your Mug

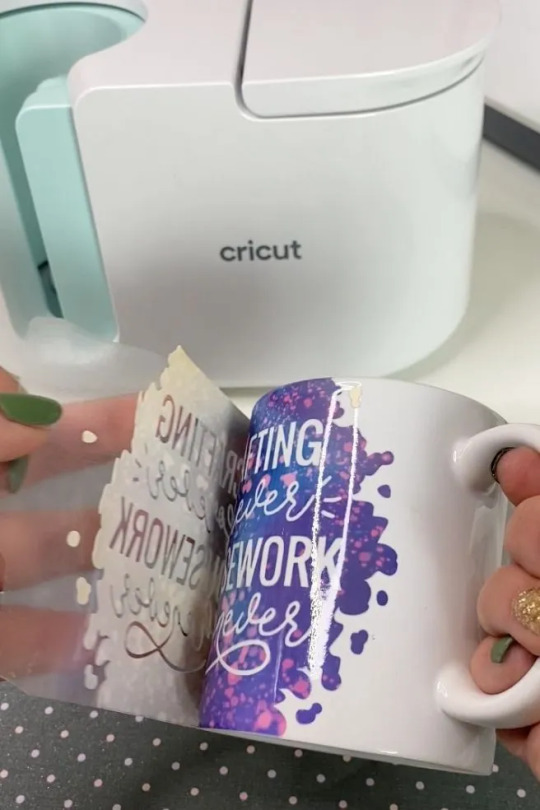
Step 4: Reveal the Final Result

When the pressing is complete, carefully remove the mug from the machine, handling it by the handle to avoid burns. Allow the mug to cool for 20–30 minutes. During this time, it’s important to avoid touching the heated areas to prevent injury. Once the mug has cooled down completely, it will be ready for use, showing your newly transferred design beautifully.
Conclusion
In short, learning how to use a Cricut Mug Press is quite easy. As you can see, the process is simple. First, gather all the necessary tools and accessories and set them up. Once the setup is done, create a design on the Design Space app, cut it on the Cricut cutting machine, and press the design onto the mug using the Mug Press machine. Once the pressing is finished, you will have a beautiful mug ready to use however you like.
FAQs
What Are the Supplies Required for Cricut Mug Press?
To work with a Cricut machine and create designer mugs, you will need some essential supplies:
Cricut cutting machine
Cricut Mug Press
Infusible Ink
Heat-resistant tape
Weeding tool
Lint roller
Sublimation Ink
These tools are important to prepare and execute projects with Cricut effectively.
Do I Need a Computer to Use Cricut Mug Press?
No, not necessarily! You can download the Cricut Design Space app on your computer or any device. If you don’t have a computer, you can use your Android or iOS mobile instead. However, using a computer for the app allows you to work on projects more effectively. Just ensure your computer runs on either Windows or macOS, as Chromebooks do not support the software.
Can I Use Any Mug in Cricut Mug Press?
No, you cannot! The mug used in the Cricut Mug Press must meet specific criteria. It should have a maximum height of 4.72 inches and a diameter between 3.2 to 3.4 inches, with a capacity of 10 to 16 ounces (295 to 450 ml). Also, the mug’s surface should be plain; textured or rough mug surfaces are not suitable for the machine. Ideally, the mug should be white for best results.
Source: how to use a Cricut Mug Press
Visit here to Know More: Cricut Easy Press
Pinterest
0 notes
Text
Cricut Installation Software: Easy Steps to Get Started
Are you in need of Cricut installation software? If you’re a beginner looking to download and install Cricut Design Space on your desktop or smartphone, you’re in the right place. As a professional Cricut crafter, I’m here to guide you through the step-by-step process.
I rely heavily on my Cricut machine for all sorts of crafts. To do this, we need to set up our machine. Whether it’s a heat press or cutting machine, all require a setup before we can use them. But do you know which software we need to use for this setup? It is a Cricut Design Space that is compatible with Mac, Windows, Android, and iPhone/iPad devices.
So, whichever device you are using, installing the Cricut app is a piece of cake for me. Be a part of my journey, and let’s delve into this blog to install the software.
Cricut Installation Software on Desktops
Installing the Cricut Design app on my desktop computer is really a piece of cake. But before you download this app, you must know whether your device is compatible enough to run it. Thus, it’s important to ensure that your desktop, whether it’s a Windows or Mac computer, is running the most up-to-date operating system.
For Mac
Initially, you will need to open an internet browser.
After that, visit the site design.cricut.com.
On the next screen, you will see a checkbox saying I agree to Cricut’s Terms of Use and Privacy Policy. Click on the checkbox and select the Download button.
Next, you will need to wait and let it download the app in your default file folder.
Once downloaded, you have to open the downloaded .dmg file by double-clicking on it
Then, double-clicking the .dmg file will start the installation.
For the Cricut installation software, you will have to drag the Cricut icon to the Applications folder.
In the last step, your Cricut software will be added to the Applications folder.
That’s all you need to do if you want to download and install the Cricut app on your MacBook.
For Windows
The downloading steps are the same as those explained for the Mac above.
Once you have downloaded the Cricut software on your desktop, go to the Downloads folder or any file folder where you have saved your downloaded file.
Next, you have to double-click on the downloaded file to install it.
As you double-click on it, it will start showing the installation progress, meaning your Cricut app is being downloaded.
After that, you are ready to create your Cricut account and then set up your machine.
By now, you might have understood how to download Cricut Design Space on Mac and Windows. I am sure you found the steps easy and helpful.
Cricut Installation Software on Your Mobile
The best thing about Cricut is that we can use it on our mobile devices, including iOS and Android smartphones. All you need is the latest operating system on your device. Then, learn the basic steps below to install the Cricut Design app on your suitable device.
For iOS
To start, open the App Store and navigate to the search bar.
On the search bar, you have to type Cricut Design Space and hit Enter.
After tapping the Enter button, you will notice multiple results. Choose the one with a green Cricut icon in the center of the white box.
Then, hit the Get button and start the Cricut installation software.
After installation, you are ready for the Cricut machine setup.
For Android
In the beginning, launch the Play Store and search for Cricut Design Space.
Then, choose the app from the result and hit the Install button.
After that, the installation will start.
Finally, it will be added to your home screen.
FAQs
Question 1: What are Cricut system requirements for PC & Mac?
Answer: You should know the system requirements for your PC and Mac before downloading the Cricut app:
For Windows
● Operating System — Windows 10 or later (64-bit)
● RAM — Minimum 4 GB
● Disk — 2 GB free
● CPU — Intel Dual Core or equivalent to AMD processor
● Display — Minimum 1024px x 768px screen resolution
● A USB port or Bluetooth is required
For Mac
● Operating System — macOS 11 or later
● CPU — 1.83 GHz
● RAM — Minimum 4 GB
● Display — Minimum 1024px x 768px screen resolution
● A USB port or Bluetooth \is required
● Disk — 2 GB
Question 2: Can I use Cricut software on a Chromebook?
Answer: No, Cricut doesn’t support Chromebook laptops. However, it is only compatible with four platforms, including Windows, MacBook, Android, and iPhones. Plus, the Cricut software is incompatible with Unix/Linux. So, make sure you check the system compatibility of the Cricut Design app before downloading it to any device.
Question 3: How to download Cricut Design Space on Linux?
Answer: You can’t use the Cricut Design Space app on your Linux operating system as it is incompatible with the software. Cricut has officially launched its app for four devices, including MacBook, Windows 10/11, Android, and iPhone/iPad. Therefore, you should know the system requirements of the software before downloading and installing it.
Read more: cricut.com/setup
cricut.com/setup mac
Cricut Design Space
Cricut New Machine Setup
Source: Cricut Installation Software
#Cricut Installation Software#Cricut New Machine Setup#Cricut Design Space#cricut.com/setup mac#cricut.com/setup
0 notes
Text
How to Use Cricut Easy Press: A Guide for Iron-on Transfers

The Cricut Easy Press is great for use with traditional heat transfer vinyl. To use this machine, you will need other Cricut machines as well because you can only transfer a design after you’ve made the cut, and for that, you need a Cricut cutting machine. So, let’s discuss the difference between Easy Press and Easy Press 2.
Differences Between Cricut Easy Press and Easy Press 2
The Cricut Easy Press is a first-generation heat press machine that was launched in 2017. Cricut has since launched several other heat press machines. The Easy Press 2 is one of the most important among them. It comes with many updates, but Easy Press has its advantages.
Here are the main differences between the Easy Press and Easy Press 2.
The Cricut Easy Press comes only in one size: a standard size of 9 x 9. Whereas Cricut Easy Press 2 has 3 different sizes. One of them is 9 x 9, which is the same as Easy Press, and the others are 6 x 7 and 12 x 10.
The Easy Press 2 includes a higher temperature capacity, which reaches up to 400°F
The Easy Press 2 heats up 25% faster than the Easy Press.
Easy Press 2 has better edge-to-edge heating, which spreads on the material all over around.
The Easy Press can remember the temperature settings from the last use. Something you could not do in the Easy Press.
Why Do You Need a Cricut Easy Press?
Before you learn how to use Cricut Easy Press, you should know why you need an Easy Press. If you understand its uses, you also know that it is a heat transfer machine, and the same can be done by an electric iron. However, an electric iron will not provide the things that an Easy Press machine will. Here are the reasons why you need Easy Press.
Heat Dispersion
Regular household irons are not made for even dispersion of heat. In iron, heat is focused in the center, but as it moves away from the center, the heat decreases. In the Easy Press machine, the heat temperature is distributed evenly, which is good for the heat transfer of a material.
Temperature and Control Ability

Various materials have many heat transfer needs, so you need a completely different temperature for iron-on than you do for iron-on vinyl. The machine is great at understanding the temperature requirement of a material and can process the exact amount of heat it requires. Also, its heat pressure is easy to control, and it will be good for you if you use it.
Flat and Stable Surface
An Easy Press machine works best when it is used on a flat surface. Therefore, it is highly recommended that a flat surface be used for the heat press. It will help prevent material damage. The Easy Press is a powerful machine that takes care of the material when using it on a surface.
How to Use Cricut Easy Press: 3 Easy Steps
Now, I am going to tell you how to use Cricut Easy Press and print beautiful designs on shirts, t-shirts, and other fabrics:
Step 1: Choose and Cut Your Design
First, you have to choose a design on your Cricut Design Space app. You can select a pre-made design or create a design of your own. Then, the design is cut using a Cricut cutting machine. After that, you can go to use the Easy Press machine.
Step 2: Prepare Cricut Easy Press and Tools
Once you have the design cut out, you can use the Easy Press machine. Before using it, you will need to prepare it. You should place the base material on the mat and heat the machine. Next, adjust the temperature according to the material. You should use the buttons to increase and decrease the temperature. When the heat press is ready, the light turns green, and the machine will beep.
Step 3: Apply Heat and Peel
Once the machine beeps, you can place the design on your fabric along with the mat and apply heat from the heat press machine. You have to keep pressing for about 10 seconds, and then you can release the machine. Now, wait until the material cools down, and then you can peel off the protective sheet and reveal the design. Your beautiful design is done.
Conclusion
Now, you have learned how to use Cricut Easy Press to create beautiful designs on your favorite fabrics and more. Using the heat press machine is easy, and you can do it in a few quick and easy steps. To use the Easy Press machine, you must first cut out a design on the Cricut cutting machine and then prepare the Easy Press machine. After you prepare the machine, you can put the design on your fabric and apply heat to it. After the temperature decreases, peel the protective sheet down, and your design is ready.
FAQs
What Can I Make with My Cricut Easy Press?
The Easy Press machine is useful for all Cricut users. With the help of this machine, you can create multiple things on your own. It will help you make beautiful projects like shirts, coasters, masks, wooden signs, banners, belts, etc. With this heat press machine, you can apply pressure on almost any material cut on a Cricut machine and then stick it where you want.
Do I Need a Cutting Mat for Cricut Easy Press?
Yes, you do! To use the Cricut Easy Press machine, you must use a Cricut mat. If you apply heat to your material, your design may get messed up. The heat of the machine can burn the design, material, or even your fabric. It is this mat that protects them from the high temperatures produced by the machine. The mat is made of a heat-resistant cover, so using the Easy Press is a must.
Do I need a Cricut Easy Press, or can I use an iron?
To be honest, if you just need to use Easy Press once in a while, you can do without the machine. You can use a regular household iron, and your work will be done. But using a regular iron has its risks. It will not give you your desired results. The outcome may not be what you expect. The design may not last long. So, if you want a good and clean finish for your designs on your materials, you must buy an Easy Press machine.
Source: how to use Cricut easy press
Visit here For More Information: Cricut.com/setup
Pinterest
0 notes
Text
How to Use Cricut Infusible Ink: A Comprehensive Guide
Eager to learn about infusible ink and create a project with it? Here, you’ll get it all in detail. I’ve been using Cricut machines for the last five years, and there is nothing left that I haven’t used to date. I also started as a beginner, but soon, I experimented with many Cricut accessories. Today, you’ll learn how to use Cricut infusible ink to make a personalized T-shirt. You’ll get a step-by-step guide to learning how to use infusible ink.
Before I move on to the final steps, I would like to share with you something that you need to know about Cricut infusible ink, like what it is, how it works, and how you can best utilize it to create your projects. Let’s get started!
What You Need to Know about Cricut Infusible Ink?
I know creating a new project seems exciting, but at the same time, the chances of silly mistakes increase, too. It’s always better to learn before you start. Infusible ink is a different type of ink used for creating professional-looking projects using a range of materials. You might have used iron-on vinyl or HTV, which are usually applied over the surface or your material and then peeled off, leaving the design.
However, there is a different case with infusible ink. This ink works on the sublimation principle and fuses with your material without leaving any residue. Thus, it gives you a typical printing look but with ink. To make an infusible ink project, you’ll need to use infusible ink sheets and infusible ink pens.
How to Use Cricut Infusible Ink to Make a Shirt?
You know what infusible ink is and how it works. It’s way better than the vinyl projects and leaves a permanent design on your material. Get ready to learn how to use infusible ink transfer sheets on shirts and create customized T-shirts.
Step 1: Select an Infusible Ink Material and Apparel
You have two options: Either you can cut your designs onto an infusible ink transfer sheet or draw the designs using your infusible ink pens and markers. In this guide, you’ll learn to cut and apply your infusible ink transfer materials to your final project. Note that I’m not teaching you how to use the infusible ink and markers here. So, if your main focus is on them, I’ll recommend you move on to another tutorial. Here, we go with the other steps to learn how to use Cricut infusible ink.
Step 2: Draw a Design in Cricut Design Space
This step includes making a desirable design using special software from Cricut. I’m mentioning a few steps here that you can go through to understand how you can use this software.
Step 3: Cut Your Infusible Ink Transfer Sheets
It’s time to use an infusible ink transfer sheet to cut it. To proceed, use these steps:
That’s how you’ll finish the cutting process. Let’s continue learning how to use Cricut infusible ink transfer sheets.
Step 4: Get Ready With Your Materials
In this step, you’ll have to use a Cricut EasyPress to transfer the design onto your shirt. Follow the steps below to learn how to apply the transfer sheet.
Step 5: Preheat Your Blank
The first step to transfer your project to your blank is to preheat it as per the instructions in the Cricut Heat Guide. This process will remove the wrinkles and moisture from the blank and won’t interfere with the design transfer.
After that, take off your heat press from the apparel and also remove the butcher paper. Allow your blank to cool. Don’t be in a rush, and let your blank space fully cool down.
Step 6: Transfer the Infusible Ink
In this step, you need to put your cut design on the apparel. Make sure that the shiny side is facing down. Then, follow the steps mentioned here.
Finally, your customized shirt is ready. One more thing I want to suggest to you is that you can also use a pair of tweezers to lift the transfer sheet from your apparel. It will safely remove the material.
Conclusion
Hopefully, you’ve learned how to use Cricut infusible ink to create a customized shirt. The whole process is easy, and even beginners can perform it very well. Moreover, there are some tips and tricks that are useful while creating your project with the Cricut machine. For instance, always remember to mirror your design. Plus, always preheat your blank before applying the heat properly. The most important part is not to forget to weed off your cut design before using it for the final project.
Visit: install cricut design space app www.cricut.com setup login cricut create connect to computer cricut setup create account
Source: https://desincricut.wordpress.com/2024/04/30/how-to-use-cricut-infusible-ink-a-comprehensive-guide/
#install cricut design space#install cricut design space app#install cricut explore air 2#cricut install setup#cricut.com/setup#www.cricut.com setup login#cricut setup create account#cricut create connect to computer#cricut setup on computer#cricut setup#cricut setup maker#cricut setup log in#cricut.com setup mac
0 notes
Text
Cricut Mug Press Set Up: Easy Steps to Get Started
Cricut Mug Press is an incredible machine and one of the latest additions to the Cricut family. This machine transforms a simple mug into a beautiful designer piece. In order to use this press machine, it is essential to know the Cricut Mug Press set up. If you are not sure how to set up the Cricut Mug Press on your device and work on iron-on projects, keep reading this blog. By the end, you will have all the necessary info about the setup process. For the setup, you need a phone or computer and a Cricut cutting machine. Without any further delay, let’s go over the entire procedure.
Step 1: Cricut Mug Press Set Up
To work on this Cricut machine and design beautiful mugs, setting it up is the first step. Here’s the procedure to set up your press machine on your device:
Finally, you will have your Cricut machine set up and ready to make beautiful mug designs at home.
Step 2: Set Temperature on Cricut Mug Press
Once you have completed the Cricut Mug Press set up, the next step is to learn how to set the temperature for your machine. Proper temperature setting is important for a successful heat press transfer of your design onto the mug. Here’s how to perform it:
Now, you can easily set the correct temperature for your Cricut Mug Press machine, ensuring professional-looking results for your mug designs.
Step 3: Using Your Cricut Mug Press
Once you have learned the setup and temperature settings for the Cricut Mug Press machine, you are all set to start making iron-on projects with ease. Here’s a detailed guide to working with the press machine step-by-step:
Following the above steps ensures you get high-quality results with your Cricut Mug Press, turning plain mugs into personalized works of art easily.
Conclusion
After reading the blog, you saw how simple it is to learn the Cricut Mug Press set up. First, gather all the materials required for your project. Then, connect the machine to your device and download the Cricut Design Space app. After that, choose a design in the software and cut it with your Cricut machine. Lastly, use the press machine to transfer the design onto your mug by applying heat.
FAQs
Do I Need to Heat Cricut Mug Press Before Using It?
Yes, you do! Before placing the mug into the press machine, it is crucial to preheat the machine. If you insert the mug and then start the heating process, the ink won’t transfer properly, maybe ruining the mug. Proper preheating ensures that when you place the mug inside, the infusible ink transfers smoothly, giving the mug a beautiful finish.
Will I Need a Computer for Cricut Mug Press?
Not really. You can use the Cricut Mug Press machine or any other machine with your mobile device. Connect your Android or Apple phone to the press machine to work on heat transfer projects. Simply download the Cricut Design Space app on your phone, which allows you to control the machine’s heat, then choose and cut designs for pressing.
Do I Need Ink to Use Cricut Mug Press?
Yes, you do need it. Infusible ink is essential for transferring designs onto mugs using the press machine. This ink is used to create designs that are then cut out by the Cricut machine. Once cut, the design is applied to the mug with the infusible ink, which is heat-transferred using the Cricut machine.
Visit: cricut.com/setup
www.cricut.com/setup login
Source: https://cricricutdesigncut.wordpress.com/2024/08/03/cricut-mug-press-set-up-easy-steps-to-get-started/
#design space setup#digital design#cricut com setup#cricut.com/setup#cricut setup#cricut.com setup mac#www.cricut.com/setup\cricut explore air 2 setup#www.cricut.com/setup login#www.cricut.com setup#www.cricut.com/setup#cricut design space setupp#setup cricut design space setup#cricut explore air 2 setup#install cricut explore air 2 setup#install cricut air 2 setup#design.cricut.com/setup
1 note
·
View note
Text
Cricut Heat Press: Get Fast and Perfect Heat Transfer Results
Are you considering starting a craft business but need clarification about choosing the best among many variations? Choosing the right Cricut Heat Press is tricky since most of this decision rests on what one wants to make. If you know the answer to this question, your confusion is half removed already.
This guide will help you learn about every variation of a heat press and how to set them up. Let's get right into it and make your business journey decision easier!
What Is a Cricut Heat Press?
These machines are used for applying heat transfers to different types of products, such as T-shirts and mugs. They quickly apply heat transfer vinyl and infusible ink to a range of fabrics, along with other materials like mugs, shoes, and hats. These tools feature precision temperature control for consistently successful transfers compared to a household iron. These machines do heat transfer work by consistently maintaining a certain temperature required for both materials.
Different Types of Cricut Heat Press Machines
Cricut offers many heat press machines. With so many options, one has the flexibility to choose whichever machine is best for them. Some of the most popular ones are in the section below:
Cricut EasyPress
It was the first of Cricut's heat machines released in 2017. With its 9 in x 9 in heat plate, this amazing tool is speedy, convenient, and produces lasting heat transfer results, even after regular washes.
Cricut EasyPress 2
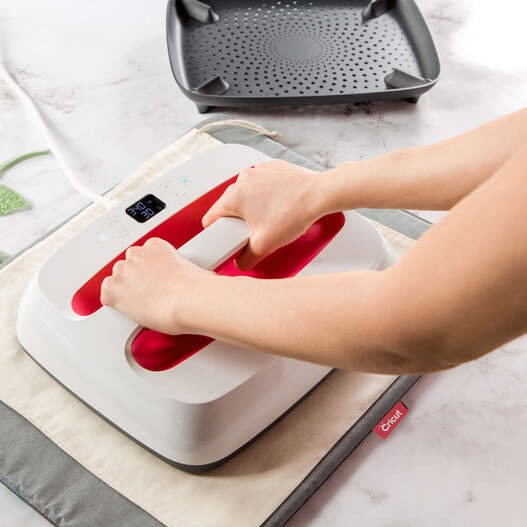
Cricut EasyPress got its updated version in 2018, which is suitable for a variety of iron-on projects. It allows users to choose various products in 3 sizes: 6 in x 7 in, 9 in x 9 in, and 12 in x 10 in, giving more flexibility to users. It was an upgrade to the original model and, therefore, is faster and can bear higher temperatures than its predecessor.
Cricut EasyPress Mini
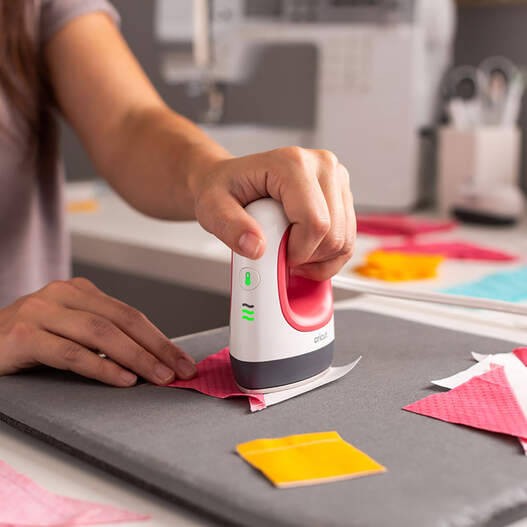
In 2019, Cricut added a new member to the heat press family: a mini version of EasyPress. This latest model is perfect for transferring heat to unusual and hard-to-reach places like caps, hats, shoes, and more. With its precision tip, it is also ideal for working around zippers and buttons.
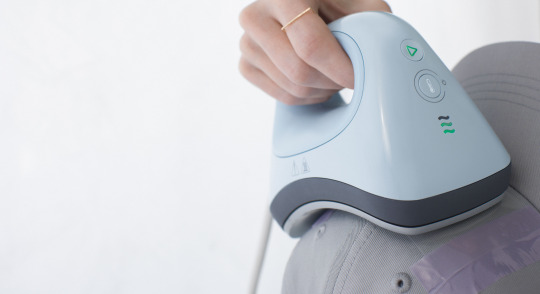
Cricut EasyPress 3
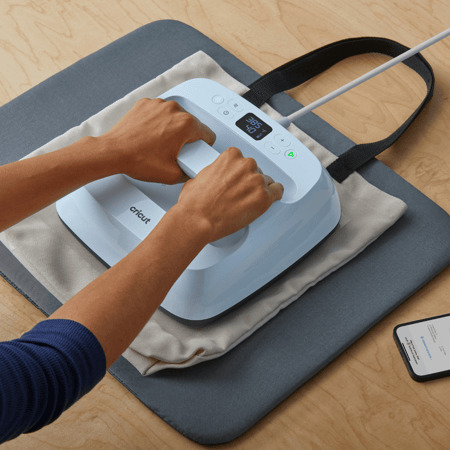
This is the latest in Cricut's series of heat presses. To use this product, one needs to install the app and connect it via Bluetooth. This model comes with a ceramic-coated heat plate. It also has an auto-off feature and an easy-to-grip handle. It works with nearly all major brands of iron-on, infusible ink, and sublimation materials.
Cricut Mug Press
This machine allows you to make custom-designed mugs with compatible ceramic mugs and infusible ink. You can use their Maker, Explore Air 2, or Joy to cut projects and apply them on a blank mug.
As this machine requires no manual temperature or pressure settings, customizing infusible ink-compatible mugs with unique art or text makes it easy to create a perfect sublimation mug anytime. One can also use this machine for infusible ink products, and it serves as the ideal choice for any cutting machine or heat press.
Cricut Hat Press
This unusual machine is perfect for designing hats. It comes with a heat plate, allowing heat up to 400ºF for consistency. Also, the machine comes bearing a hat-pressing form, which is best for making a firm pressing surface for almost any hat. Compatible with the app, one can send the suggested settings directly to your press and get the steps from your mobile device with the help of Bluetooth.
It also has an auto-off feature, which lets users not worry about the fabric getting destroyed. Its comfortable grip and safety base make it easier to use. It works with almost all major iron-on (HTV) brands, infusible ink, and sublimation products and can serve as the best thing for all cutting machines.
Cricut Autopress
This one-of-a-kind Cricut Heat Press machine is ideal for professionals and has a large ceramic-coated heat plate (15" x 12"). With edge-to-edge heating, it can raise the temperature up to 400 degrees and is the most advanced machine of all. It can adjust materials up to 2 inches thick and auto-releases when the transfer is done.
This amazing machine allows users to transfer designs on T-shirts, tote bags, pillows, and more. Like others in the Cricut Heat Press series, it also works with iron-on, infusible ink, and sublimation materials.
Download Cricut Heat App on a Mobile for Using Your Machine
One can download and install the app on their mobile device, which will reduce the manual work and burden of operating the press machine. To get the software, you must go to the Google Play Store (if you are using an Android device) and App Store (for iOS devices). Let's start the process with your Android device here:
The following steps are for downloading the app on Android. Please follow them word by word, as failing to do so will result in insufficient results.
Hop on to the Play Store app from your home screen or by searching for it.
Once inside the app, search for the Cricut Heat app and click the Search button. If you find the app, select the Install button and wait for the installation to finish.
This EasyPress 3 comes with warranty details, a user guide, and some test materials. After buying the product, one needs to download the app onto your mobile phone. Once you have downloaded it, follow the steps on your screen to set up the EasyPress 3. The firmware updates for your machine will be completed at the same time. If a Bluetooth icon appears on your machine, then it means that your app and the machine are now ready to use.
Along with the app, the heat press can also be used manually using the buttons on the machine. If you want to change the temperature manually, look for a wave button on the machine, press it once, and use the plus or minus keys to increase or decrease the temperature until the desired temperature is reached.
Now, press the heat button once more to set that particular temperature. The timer changes the same way, but in order to do that, you must press the stopwatch button instead. Upon reaching the desired heat and temperature, the play button on the app will turn green, and a beep will sound.
How to Control Cricut Heat Press Using Cricut Heat App?
You can also use the heat press machine through the app. First, make sure that the machine is on, and then open the app. Now, follow the steps below:
After opening the app, look for your machine model, and it will automatically connect via Bluetooth to your phone.
Once you connect it, you can move on to select a new project.
After opening it, search for the drop-down menu, which lets you set the transfer material type and what material you should apply to.
After selecting these, click the Next button. Upon tapping it, a project overview screen will appear, telling you about the details, the settings to press your project and the materials.
Also, you will need to send those settings to your device by hitting the send settings button on your heat press machine.
The next screen will tell you how long it will take for your heat press to reach the desired temperature. Set those things onto the machine and wait for it to reach that temperature. Once done, your machine's play button will turn green and make a beep sound.
How to Use a Cricut Heat Press: Quick and Easy Steps
After learning about the settings for your press machine, now it is time to know how you can use the machine by following these steps:
First, turn the machine on and look for a comfortable, flat, heat-resistant surface. (You must not use any ironing board that can be easily damaged.)
Now, set the time and temperature required by reviewing the Cricut Help Guide for your project.
Next, press the timer/watch button as per your suggested time. The orange light shows a rising temperature, while the green light means that you have reached the threshold temperature.
Once the temperature is reached, place your machine on the fabric for a time, as suggested by the app. It is crucial that the shiny, clear carrier face up.
After that, you will need to apply the heat.
Also, you must put your machine on the base material and then press the Go button in order to start the timer.
Now, hold the press machine and apply the amount of pressure.
To remove the carrier sheet, you can use the Cricut Heat app.
Following the above steps, one can have a seamless, hassle-free experience setting up and using their heat press machines.
Final Thoughts
Cricut Heat Press machines are wonderful for starting your craft business. After reading this blog, one can have a general idea about which heat press to start your business with and how to set them up. With these various machines available, you are now aware of how to start your iron-on project.
Visit here to Know More:" Cricut.com/setup
Twitter
Pinterest
0 notes