#how to use a Cricut Mug Press
Explore tagged Tumblr posts
Visit Tumblr Blog
Explore Tumblr blogs with no restrictions, modern design and the best experience.
Last Seen Tumblr Blogs


Fun Fact
China blocked Tumblr because of pornography and censorship problems in 2013.
Text
How to Use a Cricut Mug Press: A Step-by-Step Guide
When I first bought my Cricut Mug Press, I was quite nervous about learning how to use a Cricut Mug Press. It took some time to read many articles and gather all the essential information. Now that I have gained experience using it, I want to share all the basic instructions for using this Cricut machine. If you are uncertain about using it, make sure to read this post to the end.
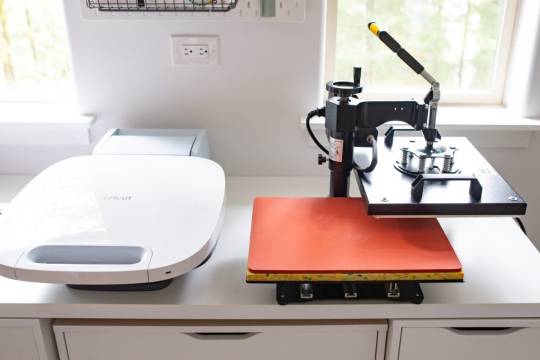
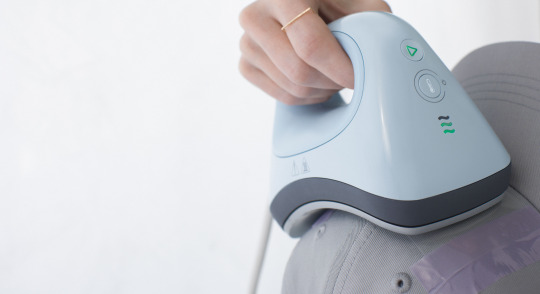
The Cricut Mug Press is a small yet impressive tool that transforms plain mugs into stylish designer pieces. Despite its compact size, it is incredibly capable and essential for crafting custom mugs for personal use or as gifts for loved ones. So, let’s start with the materials you will need for your project.
Tools and Supplies You Need to Create a Personalized Mug
Before learning how to use a Cricut Mug Press, it is important to know the necessary materials you are going to need. Here is a detailed list:
Cricut cutting machine: You will have to use this machine to cut designs from the infusible ink sheet. Suitable Cricut models are Cricut Maker 3, Explore 3, or Joy.
Cricut Mug Press: This is the machine used to transfer the infusible ink design onto your mug.
Sublimation mug: Specific mugs made for the Mug Press machine are necessary because they fit perfectly and ensure the best results. Using other mugs of different shapes and sizes may not fit or work well with the machine.
Infusible ink sheet: This material is basic as it is where you will cut your designs, which will later be transferred onto the mug using heat in the machine.
Heat-resistant tape: It is essential for securing the infusible ink sheet onto the mug during the pressing process.
Lint roller: Used to ensure the surface of the mug is clean and free of debris before applying the infusible ink design.
Weeding tools: These are used to remove excess or unwanted material from the design before transferring it to the mug.
Once you have assembled all these supplies and tools, ensure your setup is ready. Connect your Cricut machine to power and turn it on. Establish a connection between the machine and your device using Bluetooth or USB. Download the Design Space app on your device and log in with your account. This setup is essential before proceeding with the Mug Press.
Before beginning to use the Mug Press, ensure it is on and heating up properly. Following these steps ensures you are ready to create custom mugs with your Cricut machine.
How to Use a Cricut Mug Press in 4 Simple Steps?
When you have assembled all the necessary tools and completed the setup, you can start working on your project. Here are the 4 steps you need to follow to use the Mug Press:
Step 1: Create a Design on Cricut Software

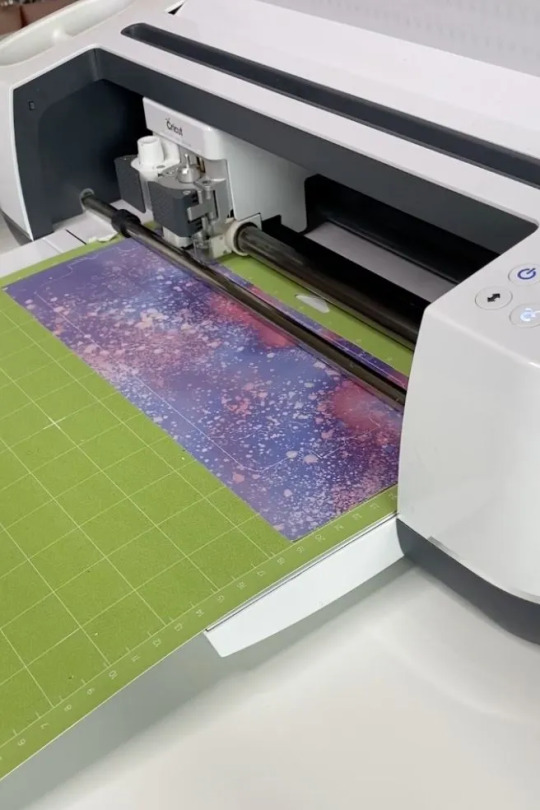
Step 2: Cut and Weed Out the Excess Material

After completing the design, insert the material into the machine and press the Load button. The design will be cut quickly. Once the cutting is done, unload the material and use a weeding tool to peel away any unwanted parts from the design.
Step 3: Transfer the Design to Your Mug

Step 4: Reveal the Final Result

When the pressing is complete, carefully remove the mug from the machine, handling it by the handle to avoid burns. Allow the mug to cool for 20–30 minutes. During this time, it’s important to avoid touching the heated areas to prevent injury. Once the mug has cooled down completely, it will be ready for use, showing your newly transferred design beautifully.
Conclusion
In short, learning how to use a Cricut Mug Press is quite easy. As you can see, the process is simple. First, gather all the necessary tools and accessories and set them up. Once the setup is done, create a design on the Design Space app, cut it on the Cricut cutting machine, and press the design onto the mug using the Mug Press machine. Once the pressing is finished, you will have a beautiful mug ready to use however you like.
FAQs
What Are the Supplies Required for Cricut Mug Press?
To work with a Cricut machine and create designer mugs, you will need some essential supplies:
Cricut cutting machine
Cricut Mug Press
Infusible Ink
Heat-resistant tape
Weeding tool
Lint roller
Sublimation Ink
These tools are important to prepare and execute projects with Cricut effectively.
Do I Need a Computer to Use Cricut Mug Press?
No, not necessarily! You can download the Cricut Design Space app on your computer or any device. If you don’t have a computer, you can use your Android or iOS mobile instead. However, using a computer for the app allows you to work on projects more effectively. Just ensure your computer runs on either Windows or macOS, as Chromebooks do not support the software.
Can I Use Any Mug in Cricut Mug Press?
No, you cannot! The mug used in the Cricut Mug Press must meet specific criteria. It should have a maximum height of 4.72 inches and a diameter between 3.2 to 3.4 inches, with a capacity of 10 to 16 ounces (295 to 450 ml). Also, the mug’s surface should be plain; textured or rough mug surfaces are not suitable for the machine. Ideally, the mug should be white for best results.
Source: how to use a Cricut Mug Press
Visit here to Know More: Cricut Easy Press
Pinterest
2 notes
·
View notes
Text
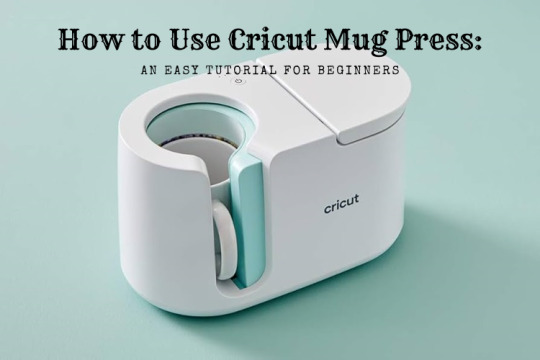
How to Use Cricut Mug Press: An Easy Tutorial for Beginners
Read this blog to learn How to use Cricut Mug Press? The Cricut Mug Press is a tool that transfers heat with a no-fuss, easy-to-use machine for making mugs. It allows you to create high-quality, permanent mug designs using a sublimation process. Using Cricut’s Infusible Ink Transfer Sheets or the Infusible Ink Pen, you can create your design in Design Space, draw or cut it, and place and transfer your design on the mug. Mugs made with the Cricut Mug Press are microwave-safe and dishwasher-safe.
It is so easy and fun to make. Read this write-up to learn about the Cricut Mug Press, the materials required, and some easy steps to make our customized Mug.
Materials Requirement
Here are the things that you will need to make custom, vibrant mugs using the Cricut Mug Press:
Cricut Cutting Machine
Cricut Mug Press
Infusible Ink
Heat resistant tape
Cricut Mug Blank
Standard grip-cutting mat
Now that you know what supplies to make your mugs, proceed to the next step: learning how to activate the Mug Press. Afterward, follow the tutorial for easy instructions on how to use the Cricut Mug Press.
How to Activate the Cricut Mug Press
Before you start using the Cricut Mug Press, you must know how to activate it. Follow the below steps to learn:
First, open your Design Space app on a Windows or Mac. If you do not have Design Space installed, download it and double-click on the file in your downloaded folder to Open or Run it.
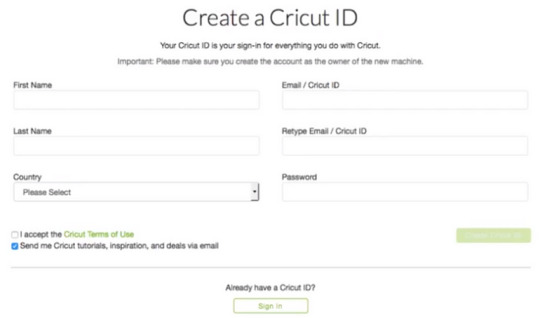
Now, Sign in with your Cricut ID and password. If you do not have a Cricut ID, then create one.
A page titled “Welcome to your Cricut Setup” will appear. Then, Select Heat Press and click on Cricut Mug Press.
Follow the on-screen prompts to connect your press, verify firmware, and complete activation.
Select Get Started to make your first mug when the activation is complete.
How to Use Cricut Mug Press: 4 Stepwise Tutorial
Now that you know what material to make your mugs using the Cricut Mug Press, follow the steps below to make one for yourself:
Step 1: Making Your Designs
First, open the Design Space app and select the machine from the drop-down menu. Next, you can look for pre-prepared projects or create your design using the fonts and images available in the app. When making a design for your mug, check the size of your design and mug to see if they are compatible. Then next, you can look for
Step 2: Cutting Your Designs
This process is very similar to any Cricut project. When you are done creating your design, do not forget to mirror it, especially if you choose a design with words or elements. Afterward, click “Make It” in the Design Space app when you can cut your design. Then, select Infusible Ink as your material and load your cutting mat into the cutting machine. When the machine is loaded, follow the prompt shown on the screen and click on the “Go” button once it flashes. When your machine is done cutting the design, remove the design from the mat and the extra part with the help of the weeding tool.
Step 3: Clean Your Mug
First and foremost, use a lint roller to remove dust from the mug. This step is important before applying the design to your blank Cricut Mag because you will only get an even and smooth transfer if there is fine dust on the mug. Once your mug is nice and clean, place your design where you would like it on the mug and firmly press it down to sit. Use the Cricut Scraper tool to avoid and press out any air bubbles.
Step 4: Transfer Your Design to the Mug Press
Turn on your Cricut Mug press so that it can start to heat up; the light will be red when it starts to heat up and green when it is ready.
When the press is heated, take your heat-resistant tape to secure the edges of your design. This step is necessary to ensure your design does not move around when we press it. Once done, simply slide your mug into the Cricut Mug Press by holding the handle. When it is ready, the lights will be full and beep. Then, remove your mug from the Mug Press with the help of the handle and put it into the mat to cool down. Wait 10-15 minutes to peel off the transfer sheet to reveal your design.
Summary
This guide teaches you how to use Cricut Mug Press. The Mug Press makes creating custom permanent dishwasher mugs at home easy. Whether you are a beginner or a Cricut newbie, following the simple instructions above will allow you to create the next level of professional mugs for yourself or your loved ones. So, start making your mug today.
FAQs
What should I do if the machine shuts off and the power button turns red?
If your Cricut Mug Press shuts off and the power button turns red, it could be due to a powerful related issue, or it could be due to an error. If the machine is on, check the temperature and allow it to adjust the room temperature.
Which mugs can be used with the Cricut Mug Press?
The Cricut Mug Press is designed for smooth, curved ceramic mugs, but it can also be used with non-Cricut mugs labeled sublimation-compatible. It is likely to work with infusible ink and Cricut Mug Press.
How does the Cricut Mug Press differ from other Mug Presses?
Cricut Mug Press is a press that passes heat and makes it easy to create custom, quality, and permanent mugs in minutes. It has sleek, safety-design features, one-touch settings with just the right temperature control, and an auto-off feature, distinguishing it from other mug presses. It has a user-friendly design and does not require manual adjustments.
Source: How to Use Cricut Mug Press
#how to use cricut mug press#cricut mug press#cricut design space#cricut explore air 2 setup#cricut machine setup#Cricut design space download#Cricut design space app
1 note
·
View note
Text
How to Use Cricut Mug Press to Create Customized Mugs?
Cricut Mug Press is an excellent machine for creating custom mugs for your regular DIY projects or your part-time business. I really like this Cricut machine for its unique performance and elegant design. It is tiny and does everything gracefully. If you want to make some beautiful-looking mugs from it, read this blog till the end and learn what it can do. Basically, I will suggest some quick ways how to use Cricut Mug Press. So, let’s get ready with the machine and discover something new.
Have you guys used it before? If not, I wouldn’t mind giving a brief introduction to this Cricut machine that I have been using for a while now. Cricut has the best collection of machines, and the Cricut Mug Press is one of those attractive machines that beginners look for.
Cricut Mug Press: An Overview
Cricut Mug Press is a Cricut’s heat press designed specifically for creating customized mugs. People from all over the world are adopting this machine for making their desired mugs for either personal use or to sell them to the market. So, if you are the one who wants to create mugs too, be with me till the end of this to learn everything.
How to Setup a Cricut Mug Press on Your Device?
When you finally get your Cricut machine, you need to set it up on a device in order to prepare it for upcoming projects. To set up your heat-press, you can use a USB connection to your devices, such as a computer or laptop. I assume you’ll do it easily without my instructions.
So, let’s come to the final setup process, which is to register your device or activate it. By doing this, you’ll be able to use it to make your first project. Follow my steps. So, are you ready for the final part? Check the steps below for Cricut Mug Press activation.
Initially, navigate to cricut.com/setup and get the Cricut Design Space.
After that, you have to open the software.
Now, a screen will ask you if you want to set up or activate your machine.
Next, select your Cricut model from the options.
Then, follow all the on-screen steps to continue.
Finally, you will set up your Cricut machine successfully.
That’s it for the Cricut machine setup. Now, it’s time to learn how to use it to make a first project.
How to Use Cricut Mug Press for Beginners?
When you know how to set up the Mug Press, it’s time to cover its use and see how you can prepare your first mug with this machine.
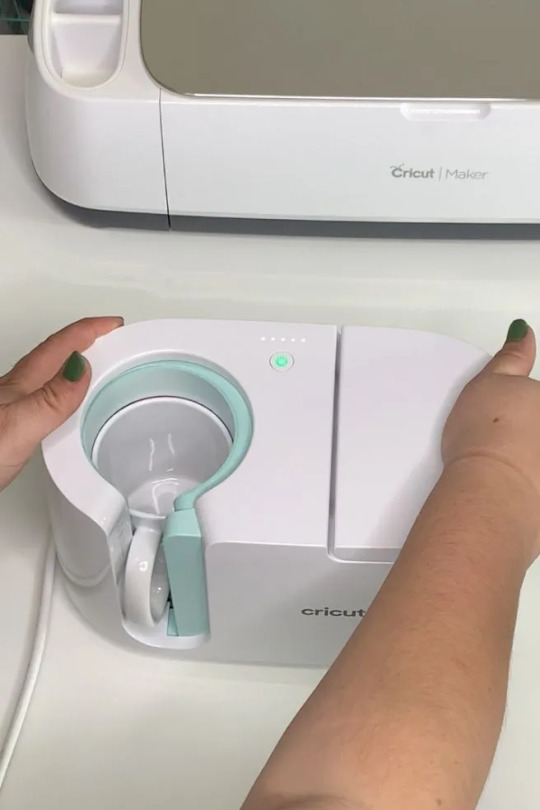
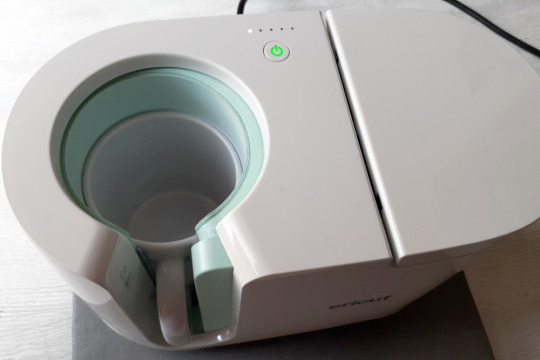
Step 1: Prepare Your Cricut Mug Press
To get started with the Mug Press, you need to first warm it up. You don’t have to do anything complicated. All you need is to put the Mug Press on a heat resistant surface and leave it turned on. When the machine is ON, you’ll see the orange light lit.
Step 2: Prepare Your Mug Design
So, create a design or use the premade design from the Cricut Design Space. Don’t forget to mirror your design to place it correctly on your final mug.
Step 3: Cutting Your Design
Now, you need to cut your sublimation design using your Cricut cutting machine. I like my Cricut Maker 3. What’s your favorite machine? As you are already a crafter, I know you are a pro at cutting materials. So, I won’t waste your time on all the small things in learning how to use Cricut Mug Press.
Step 4: Cleaning Your Blank Mug
Once you are ready with the design, you should clean your sublimation mug with rubbing alcohol and cotton to remove lint. Don’t touch the area you are putting the design on. Let it dry for a few seconds, and get ready to place your design.
Step 5: Transfer Your Design to Mug
After that, apply the sublimation paper to your mug. Ensure that the design is facing up on the mug. Next, the heat-resistant tape is used to fix the design tightly to avoid mishaps.
Also, make sure that there are no gaps in the design, as it will not provide you with a clean finish.
Step 6: Place the Mug Into Your Cricut Mug Press
In this step, you are finally learning how to use Cricut Mug Press. So, put your mug into the Mug Press. Keep the handle of the mug outside of the heat press. Then, close the lid and allow the process to begin.
When the Mug Press is working, you will see the light blinking on the machine. The heating process will take not more than 5-6 minutes to complete.
Step 7: Take the Mug Out
Once the process is complete, your Cricut Mug Press will beep a sound to indicate that the heating is over. Afterward, slowly release your fully heated mug out of the heat press. Also, place it on a heat resistant surface.
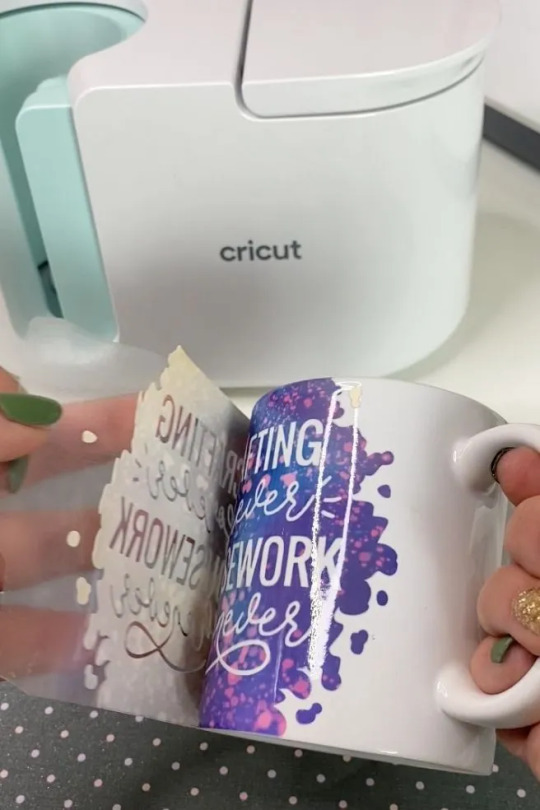
Let your mug cool down, as you may spoil your design by removing the sublimation paper early. When the mug is cooled, take off the sublimation paper.
Step 8: Reveal Your Project
Can you see the vibrant design on my mug? You can create it, too, with your brilliant Cricut machine. And enjoy your mug!
Conclusion
You finally read my blog to learn how to use Cricut Mug Press. It’s really great, and I appreciate it. Creating a mug with the Cricut machine is fun. I enjoy it, and I want all my readers to enjoy making their customized mug. Ensure that you create a lovely design in your Cricut Design Space to create a vibrant-looking mug. You can do it as a hobby or to earn a profit.
Frequently Asked Questions
Q.1 What Type of Ink Should I Use With Cricut Mug Press?
To use a Cricut Mug press, you should use infusible ink, which is specially designed for creating the sublimation projects. You can also use Cricut’s accessories such as infusible ink pens and markers. Usually, infusible ink is used for transferring designs permanently on a surface such as your coffee mug.
Q.2 Which Device Should You Use With a Cricut Mug Press?
To use a Cricut Mug Press, you should use a computer or laptop. You need to activate your machine before using it. Moreover, you need to update firmware. Beginners should note that you can’t set up your Mug Press with a mobile device like Android or iOS.
Q.3 Can You Use Any Mug in Cricut Mug Press?
No, you can’t use any mug with your Mug Press. You should use the Cricut mug, which is specially made for the sublimation process. Alternatively, you can use a mug that has a special ceramic coating to withstand the excessive heat. For convenience, you should use Cricut mugs, which are easily available on Cricut’s website.
Read more: cricut.com/setup mac
Cricut Design Space
Cricut New Machine Setup
cricut.com/setup
Source: how to use Cricut Mug Press
#how to use Cricut Mug Press#cricut.com/setup#Cricut New Machine Setup#cricut.com/setup mac#cricut explore air 2#cricut explore 3
0 notes
Text
How to Use Cricut Mug Press for Tumblers: Full Tutorial
Now, sublimating thin glass has become easier with a Cricut Mug Press. You can also learn how to use Cricut Mug Press for tumblers. In the beginning, I didn’t even know how to use my Mug Press machine to create a tumbler, so I thought about giving it a try. My attempt was really successful the first time. During this process, I learned effective methods that I will share in this blog.
I understand that it might be intimidating for many crafters, so I found an effective solution that works for all types of thin tumblers. In this tutorial, I made a 20-ounce tumbler using my Cricut Mug Press. Besides these, I will also tell you how to set up this machine. After that, we will learn the step-by-step instructions for making custom tumblers.
So, read the blog till the end and follow each and every instruction to avoid any common mistakes. Visit this blog to learn more!
How to Setup Cricut Mug Press on Your Device?
You can’t learn how to use Cricut Mug Press for tumblers until you set up your Mug Press. So, let’s start setting it up first. Here are the steps to set up a Mug Press:
First of all, you have to go to the browser and search for Cricut Design Space on your computer.
After that, install the Cricut app and launch it.
After launching, you need to create your Cricut ID if you haven’t created it yet.
On the next screen, you will see the Welcome to Cricut Setup page.
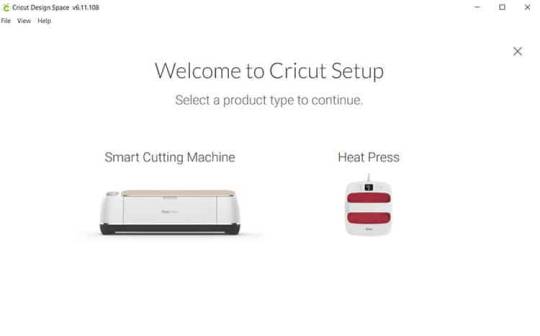
Next, you will need to select the Heat Press and then Cricut Mug Press.
Now, follow the screen prompts to connect your Mug Press, confirm the firmware, and complete the activation process.
Supplies Required for Cricut Tumblers
You will need the following items to make tumblers on Mug Press:
Artesprix Protective Paper
Heat Resistant Mat
Cricut Mug Press
Sublimation printer
Sublimation ink
Heat resistant gloves
Sublimation paper
Infusible Ink
Lint Roller
PYD Life Inserts
Heat Resistant Tape
Tape dispenser
Despite this, you will also need sublimation blanks, as I am using 20 oz skinny tumblers. Now we have gathered the supplies, let’s learn how to use Cricut Mug Press for tumblers. All the easy instructions will make it easier for beginners to sublimate their tumbler hassle-free.
How to Make Tumblers With Cricut Mug Press?
Here, I am going to teach you to make a tumbler with Cricut. Fortunately, my first try went really well without any mistakes. So, let’s see how you can sublimate the tumbler.
Since we are using skinny tumblers, it might not fit well inside the Mug Press. Hence, we need to use PYD life inserts for heat conductive inserts.
It comes in various sizes that are suitable for different blanks. So, the purpose of using these PYD Life inserts is that they can expand the size you press to fit in the Mug Press. Before placing the blanks inside the mug, make sure there are no plastic pieces or straws inside the tumbles, as they can melt. Also, clean the tumbler using the lint roller to remove the dirt and debris.
Besides, I use the protective paper on the outside to protect my heat press. You can also use the tape to secure the paper into its place.
Finally, the tumbler is ready to be pressed in the Mug Press. Now, you need to wrap these inserts around the tumblers, as shown in the picture below.
Tumblers are usually long in shape, so you need to flip it upside down and repeat the same process twice.
Here’s the final result! That’s all in this tutorial. Now, you might have understood how to use Cricut Mug Press for tumblers to make your own tumblers.
FAQs
Question 1: Can you use Cricut Mug Press for any mug?
Answer: Cricut Mug Press can sublimate only those mugs that are labeled as sublimation compatible. They are actually compatible with infusible ink. However, if you are using non-Cricut mugs blank, then I can’t say about the results. Hence, you should always use poly-coated, sublimation-coated products that are suitable for your requirements.
Question 2: Can I use a Cricut Mug Press for my glass cups?
Answer: Yes, you can use frosted glass cups or mugs. In other words, you will need a glass sublimation blank that can easily transfer your design onto it. A normal glass may break while pressing it into the Mug Press. So, make sure you are using the right glass mug, such as a frosted glass cup.
Question 3: How long does it take to sublimate a tumbler in Cricut Mug Press?
Answer: The duration for sublimating the tumbler is about 4 minutes. To sublimate it, however, you will need to wrap butcher paper all around the tumbler and then use tape to secure it. After that, you can put your tumbler into the Mug Press and let it transfer your cut vinyl design to the tumbler.
Final Words
In this blog, I explained how to use Cricut Mug Press for tumblers with an easy example. In size, tumblers vary, hence you need to sublimate them accordingly. For skinny tumblers, you can use the insert sheets to adjust the thickness so that your Mug Press can transfer the design. Despite these, you will need to set up your Mug Press by downloading the Design Space. Also, there are many supplies required to do this project. Ensure you have essential items with you.
Read more: cricut.com/setup mac
install cricut design space app
Cricut Design Space
Source: how to use Cricut mug press for tumblers
#Cricut Design Space#cricut design space for mac#cricut design space setup#cricut design space app#cricut design space download#cricut.com/create#cricut new machine setup#cricut design space login#cricut explore air 2#cricut.com sign in#cricut software app#how to use Cricut mug press for tumblers
0 notes
Text
How to Use a Cricut Mug Press? [A Comprehensive Guide]
Are you curious to learn how to use a Cricut Mug Press? Well, this guide explores everything you need to know about the use of this machine. With this ultimate guide, you will be ready to use the Cricut Mug Press easily without anyone’s help. However, the Cricut Mug Press is a perfect choice for people who want to create a customized mug with pro quality.
This fantastic tool is compatible with markers, pens, and Infusible Ink transfer sheets. You also need a Cricut Design Space to create a design that can be further cut on the Cricut cutting machine. Moreover, you will need different materials, such as HTV and Infusible ink, to get desirable designs on mugs. After that, we will learn the process of using the Mug Press with step-by-step instructions. Let’s dive into it.
Step 1: Supplies You Need to Use Cricut Mug Press
Before learning how to use a Cricut Mug Press, you first need to know the requirements of supplies. These supplies are essential for using the Cricut Mug Press.
A desktop or laptop for setting up your Mug Press.
You can use any Cricut machine (Maker series, Explore series, and Joy).
Cricut Blank Ceramic Mug
Lint Roller
Butcher Paper
EasyPress mat or heat-resistant surface.
Infusible Ink Transfer Sheets and Infusible Ink Markers/Pens.
Oven Glove
Heat Resistant Tape
Laser copy paper
Step 2: Set Up Your Cricut Mug Press
In order to learn how to use a Cricut Mug Press, you must know about the Cricut Mug Press setup.
Follow the steps carefully to set up the Cricut Mug Press:
Insert the power cable into the back of your Cricut Mug Press, followed by a USB cable. Insert one end into your machine and another end into the computer.
Open the Cricut Design Space on your computer or laptop.
Then, select New Product Setup from the right-side menu.
Afterward, select Heat Press, followed by Mug Press.
You can follow the displayed instructions on the screen to download any updates you need.
While following the instructions, you will need to continue the Activate button to activate your Mug Press.
After this, the update will be completed.
Then, you can unplug the USB cable.
Now, your Mug Press is ready to use. Let’s learn how to use a Cricut Mug Press.
Step 3: Use the Cricut Mug Press
The Mug Press is relatively easy to use. After setting up, you can easily create a pro-customized mug. You can choose the design from Cricut Design Space. Always ensure that you choose the design with the exact size that fits your mug.
Once you have selected the designs, start cutting them using your cutting machine. Make sure your design is mirrored before the cut. You can follow the design given below.
After cutting the material, weed the unwanted materials.
Ensure your mug is clean and there is no dust present on it.
Then, place the design around the mug.
Afterward, you have to place the Cricut Mug Press on an easy press mat or any other heat-resistant surface you have.
Press the power button in your Mug Press, and the button will light the green color.
After that, you will hear the beep sound, meaning it is ready to use. However, you don’t need to set any temperature as it is already smart enough to set the temperature automatically.
Then, put the mug into the press.
It will take 6 minutes to sublimate the design onto the mug.
Finally, it will beep when it is done.
Turn off the device and take out the mug using gloves.
Final Words
In short, you should understand that a Mug Press alone can’t help you customize your mug. For this, you need various types of supplies that we have already mentioned in this post. Once you have all these items, you can proceed with the setup process. For this setup, you need a laptop or computer with a Cricut Design Space. When you are done with your setup, your Mug Press will be ready to use. Finally, you can design your mug like a pro!
FAQs
Question 1: How much time does a Cricut Mug Press take to heat up?
Answer: The only time your Mug Press will take to heat up is 5 minutes. After placing your mug into the press, it will take approx 6 minutes to finish it. However, the Mug Press produces a beep sound when it has finished its task. When you finally take out the mug from the press, it takes 15 to 30 minutes to cool down. Therefore, you must be cautious while taking it outside.
Question 2: Do I need a computer to use the Cricut Mug Press?
Answer: Well, you don’t have to rely entirely on a computer to use the Mug Press. Still, a computer is needed when you want to set up or activate your Cricut Mug Press. Also, you can update your firmware using your computer or laptop. All this is done when you connect your computer to your Mug Press via a USB cable.
Question 3: Is a regular mug compatible with the Cricut Mug Press?
Answer: There is no issue using your regular mug until it is made up of ceramic. Other than this, no materials should be used, such as stainless steel, plastic, etc.). Plus, the mug must be coated with sublimation material, which is suitable for your printer’s sublimation ink and Infusible ink. In short, the regular you buy from a local store is not going to work with the Cricut Mug Press.
Visit - Cricut.com/setup
Cricut Design Space Login
Cricut maker setup
Cricut Mug Press
Cricut Maker Machine
#Cricut Maker Machine#Set Up Cricut Machine#Cricut Mug Press#How to Use a Cricut Mug Press?#How to Use a Cricut#How to Set Up Cricut Maker Machine
0 notes
Text
How to Use Cricut Autopress: Your Get Started Guide
If you are reading this blog, it’s because you want to learn how to use Cricut Autopress. Ever since I started my crafting journey, I have created a lot of crafts. But for the long term, I decided to start my own venture, which is a custom T-shirt business. Through this business, I have sold thousands of T-shirts using my press.

Since Cricut Autopress is designed for industrial purposes, it offers incredible features compared to conventional heat press machines. Since I am an expert in using this machine, I can guide you in getting started with your Cricut Autopress machine. Plus, I will show you how to make your first project using this heat press.
After reading this blog, you will be able to use it without anyone’s help. So, whether you want to make a bunch of T-shirts for your family or tote bags, this Cricut machine has you covered!
What Can You Do with Cricut EasyPress?
Earlier, we had a traditional heat press, which was not very user-friendly. That used to be so heavy, making it difficult to place it somewhere else. But Cricut launched its new version of heat-press which is called a Cricut Autopress. With this press, you can stick iron-on vinyl, Cricut Infusible Ink, and sublimation prints on a wide range of flat blanks. These blanks include T-shirts, coasters, tote bags, and much more.
I know you might be thinking about Cricut EasyPress, such as why we can’t use EasyPress instead of buying this bulky machine. After all, they both do the same things as EasyPress.

But, being the owner of a T-shirt designing business, I know the utmost importance of having an Autopress. In contrast, it was not made for personal use but for industrial use so that it could handle massive projects quickly. But for smaller projects, EasyPress is always a good option.
Steps for Cricut Autopress Setup on Your Computer
Before we move to how to use Cricut Autopress, every machine needs to be set up. However, setting up an Autopress is relatively easy. Follow the steps below to set your Cricut Autopress heat press:
First of all, unbox the machine by removing the black handles.
Take out the USB cord to connect your Autopress Control Pod to your computer.
Go to the Cricut Setup and follow the steps given on the screen to set up your heat press.
If you want to set it up via Design Space, then just go to the top left menu and select the New Product Setup.
Note for Mac users: Newer computer users who do not have a Standard USB driver will need to use a USB-to-USB converter. But if you have a Cricut Mug Press, then you must already have this converter.
How to Use Cricut Autopress for Making an Iron-on Project?
Let’s take an example to understand the usage of Autopress. In this example, I am going to use a Cricut Infusible Ink on my customer’s T-shirt. Before we use this press, we will first need to create a design on Design Space. Afterward, cut the same design using your Cricut cutting machine. After cutting the design, move to the step-by-step instructions given below to apply the design to the T-shirt:
Step 1: Set the Time & Temperature
First of all, I am going to switch on my Cricut Autopress. Next, I am going to preheat my blanks. For this, we need to set the time and temperature for our compatible materials based on a heat guide. For my blank, I have set the temperature to 400° for 15 seconds. You can modify your temperature and time according to your materials using the Cricut Heat Guide.
Step 2: Preheat the Blank

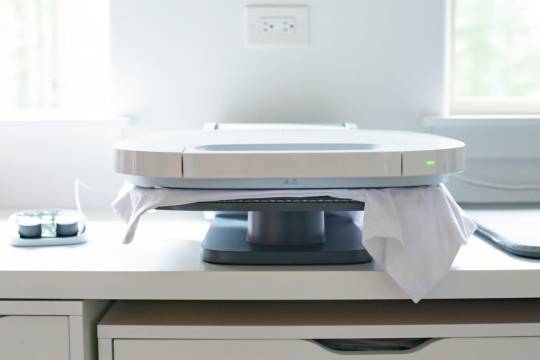
Let’s learn how to use Cricut Autopress for preheating. In order to preheat my blank, I simply put my shirt on the base of the heat press. Afterward, I close the Autopress and try to press the handle downward until it gives a click sound.
After closing it, the timer will start counting down. Then, the press will open up automatically once the timer reaches zero. Since it might be too hot, do not try to touch it very soon, and leave it to cool down.
Step 3: Place Your Design on the Blank T-shirt
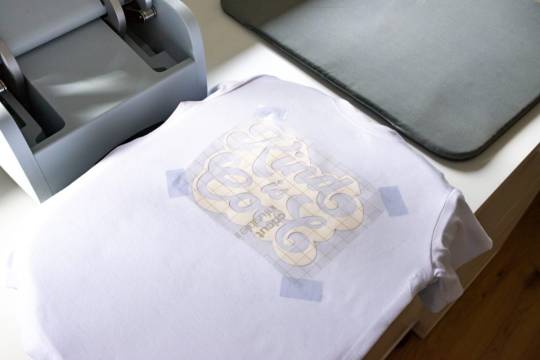
I always do preheat because it removes the crease, and the surface becomes evenly flat, making it an ideal surface for your design. So, after preheating, I place a cardstock inside my blank and then place the Infusible Ink design on my blank.
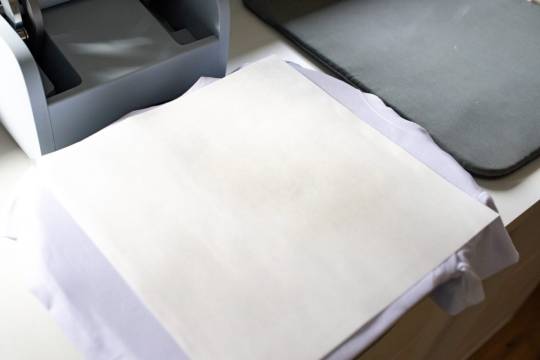
As you can see in the above image, I have used heat-resistant tape to keep the design in the center. Also, my design is facing downward. Afterward, I place the butcher paper on the top of my T-shirt blank.
Step 4: Apply the Pressure to Your T-shirt
Before applying the pressure, I reset the Pod for 45 seconds. Then, pull the handle down to apply the pressure until it produces a click sound. Once your countdown reaches zero, you should leave it for a while to cool down. Later on, you can remove the transfer!
Finally, our guide on how to use Cricut Autopress comes to an end. Here’s what my Infusible Ink design looks like on a white T-shirt.

FAQs
Question 1: What projects can I make with Cricut Autopress?
Answer: the upgraded version of the traditional heat press, Cricut Autopress, is mainly designed for bigger projects. However, the possibilities are endless with this advanced heat press. These projects include clothing such as T-shirts, tote bags, and any other oversized clothes. Besides, you can also make home Decor, e.g., personalized address sign plate/board and ceramic coasters.
Question 2: Should I use Cricut Autopress without the mat?
Answer: You can only use Autopress without a mat when you are using a thicker blank. However, thin blanks require you to use the mat. Then, just adjust the heat and temperature for your compatible materials and place the design onto your blank. Afterward, you can pull down the handle to press the heat press. As a result, your design will adhere to the blank. Make sure you do not touch it just after applying the design. Let it cool down and take it out.
Question 3: Can I adjust the pressure on Cricut Autopress?
Answer: No, you don’t need to apply pressure yourself, as Cricut Autopress comes with an automatic pressure feature. Thus, it can apply the necessary pressure automatically on any project with up to 2 inches of thickness. However, you just need to lower the heat plate and press down the handle so that the motor engages properly. Finally, the in-build mechanism will do the rest to adjust the pressure.
Conclusion
In a nutshell, I have written this guide on how to use Cricut Autopress for beginners. Using this guide, they can make their first project easily. To help the beginner, I have added points like what you can do with your Cricut Autopress. Further, I discussed the setup procedure of the press. Without this setup, we cannot get started with this device. Last but not least, the step-by-step tutorial to make your first project can help you apply your design on a T-shirt or any other blank effortlessly.
1 note
·
View note
Text
What are Smart Materials for Cricut? [Top 5 DIY Craft Tools]
Since the latest versions of Maker & Explore have been launched, all the crafters are looking for one question, “what are smart materials for Cricut?” However, the answer to this question can be easily understood. These clever cutting materials are designed and are directly fed inside the Maker & Explore machine without requiring a mat. Various versions of these cutting machine materials exist, such as Smart Vinyl, Iron-On & Smart Paper Sticker Cardstock.

Apart from that, they have allowed the creators to dream outside by cutting a single image or repeated image up to 12 ft (3.6m) in one go. It means no slicing and dicing the extra-long banners, wall decals, etc. The Cricut roll holder also keeps these materials organized for precise cuts. Learn the best smart materials for creating customized projects from this blog.
1. Matte Metallic Smart Vinyl- Permanent (3 ft)
Equally important, you can add immediate sophistication to big or small projects through this metallic effect. In the presence of this permanent smart vinyl, it isn’t a big task to create some sort of fashion decal for a mug. As per the designers, this permanent smart vinyl is ideal for all outdoor projects.
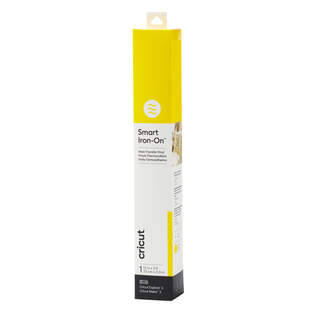
2. Smart Iron-On (3 ft)
Under the catalog of what are smart materials for Cricut, with the smart iron-on, you can carry your creativity along with you anywhere. This substance works perfectly on a wide array of materials and lasts up to 50+ washes. Moreover, the crafters prefer this material by giving little personality to T-shirts, jeans and other garments.
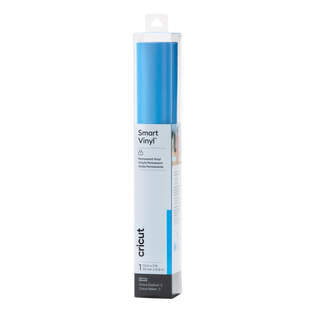
3. Smart Vinyl-Permanent (3 ft)
Furthermore, with smart vinyl, you can quickly make your personalized craft with the load & go button. Moreover, creating birthday banners or other labels has become quite easy, leaving a big impact. On the contrary, this vinyl comes with a matte finish look and a weather-resistant outdoor facility.
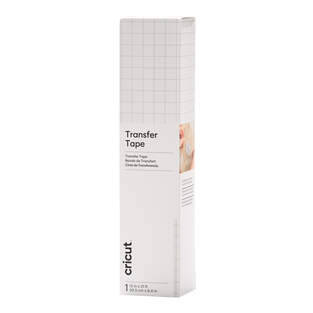
4. Transfer Tape (21 ft)
Among the smart materials for Cricut, the transfer tape has its individual importance. Through this, the user can shift the customized vinyl to various surfaces easily and precisely. Other than that, it is specially designed for some important materials for creating crafts, such as custom decals, labels, decor etc. Moreover, this isn’t recommended for glitter or shimmer vinyl.
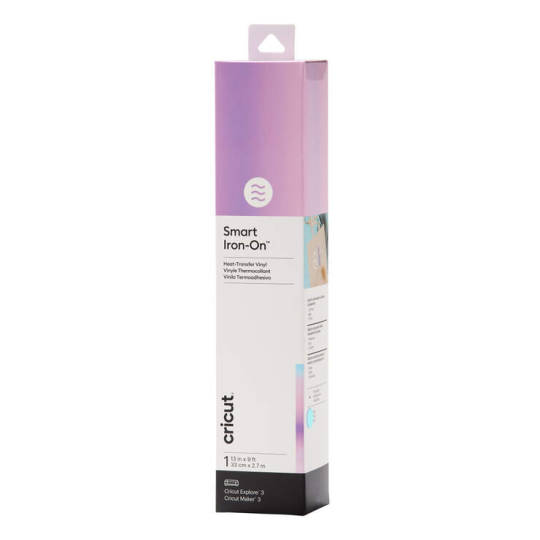
5. Smart Iron-On Holographic (9 ft)
Besides what are smart materials for Cricut, these holographic materials permit crafters to add glimmer and shine to the existing project. This material operates without the cutting mat during the cutting process. In addition, you can add more shine to projects compared to earlier times.
Frequently Asked Questions
Question: How to Prepare Smart Materials for Cutting?
Answer: Read the steps to know about the preparation process:
Align the loaded materials to the machine with the left material guide and slide under the mat guides and up against the rollers.
After that, press the Load button, trim the excess material and save it for future uses.
Try to trim the material straight across rather than at an angle if you plan to load it without the mat.
Question: How Do Cutting Machine Smart Materials Work?
Answer: The existing software will prompt you when it is time to load the respective materials and how much quantity. Followed by this, your machine will measure, ensuring the materials loaded are enough for the project. After that, the machine sensors will cross-check the materials fed inside it and will ask for the allowance. You’ve to wait till the trimming process comes to an end.
Question: What are Smart Vinyl and Its Types?
Answer: The brand-new smart vinyl comes in a huge range of colors, effects and material lengths from 3 ft to 75 ft. However, it has been categorized into two types: Permanent & Removable variables. If you want vinyl that lasts for many years indoors & outdoors, then choose permanent vinyl, as it has a longer time duration. However, if you love to display your creativity, then opt for removable vinyl, which can be easily removed and doesn’t damage the wall.
#What are smart materials for Cricut#Cricut.com/setup#design.cricut.com#cricut explore air 2#cricut design space login#cricut design space#cricut setup
2 notes
·
View notes
Text
god bless everyone out there still providing written-out walkthroughs on wikis/reddit/steam/their random personal websites, they are all real ones
also this applies to non-video game tutorials as well. i got a cricut machine for christmas 2023 and i have barely used it because it did not come with a manual, it came with links to video tutorials. the other day i was trying to figure out how to use the mug press i also got with the cricut so i can make mug gifts and i finally searched for "cricut infusible ink mug press -youtube" in the 2014 google and managed to find a nice simple blog post with clear, step-by-step instructions and i was so happy, lol.
I'm sure if we really tried we could come up with a video game walkthrough format that's even less convenient than unannotated nine-hour YouTube videos of someone playing the game badly. A handwritten manuscript of mad ravings, perhaps, or possibly a live audio broadcast of a machine-generated voice very slowly reciting puzzle solutions in Russian.
3K notes
·
View notes
Text
Why Small Businesses in Kuwait Are Turning to Cricut Heat Press Machines in 2025
In recent years, there’s been a clear shift in how small businesses in Kuwait produce custom merchandise. From startup brands in Salmiya to home-based ventures in Hawalli, more people are turning to compact tools like the Cricut heat press machine to bring creative ideas to life. But what’s driving this trend—and why now?
The answer lies in flexibility, affordability, and growing interest in local custom products. According to a report by Statista, the global market for custom t-shirt printing is expected to reach over $7 billion by 2030. Kuwait, with its active small business scene and strong demand for customized gifts and apparel, is steadily catching on.
What is a Cricut Heat Press Machine?
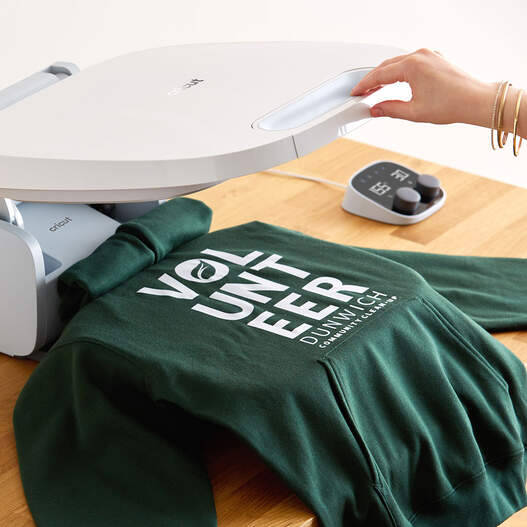
A Cricut heat press is a compact machine designed to apply heat and pressure to transfer vinyl or sublimation prints onto fabric and other materials. Unlike bulky industrial heat presses, Cricut’s models are tailored for small-scale use—making them ideal for home businesses, schools, or designers.
Who Actually Uses It in Kuwait?
Home-Based Entrepreneurs Mothers, students, and side hustlers running online stores through Instagram or TikTok often use Cricut to make customized t-shirts, tote bags, mugs, and phone covers. It’s easy to set up, doesn’t take much space, and works with Cricut’s design software.
Small Garment Brands Fashion startups in Kuwait are using heat press machines to make low-volume, quick-turnaround orders without depending on expensive suppliers.
Printing Shops Smaller print and gift shops across Kuwait are adopting Cricut presses for personalization services, especially for gifts during Eid, graduations, or company giveaways.
Teachers & Schools Some private schools use Cricut machines to create educational visuals, team uniforms, or personalized stationery, which can be made in-house.
Event Planners For events like weddings, birthdays, and corporate functions, Cricut presses help in creating branded merchandise, return gifts, and decorative items.
Why Is It Popular in 2025?
Compact and Affordable: Compared to industrial machines, Cricut presses are small, easy to store, and affordable for startups.
No Technical Training Needed: The learning curve is gentle. Even beginners can get started quickly.
Pairs with DIY Platforms: Platforms like Etsy, Shopify, and Instagram shops work perfectly with Cricut-made products.
Fast Customization: You can personalize orders on-demand, helping avoid inventory waste.
Supports Local Branding: With growing preference for locally-made products, Cricut helps creators in Kuwait meet that demand.
Best Cricut Models for Kuwait-Based Users
Cricut EasyPress 2: Great for beginners making shirts and bags.
Cricut Hat Press: Perfect for cap customization.
Cricut Mug Press: Ideal for mug designs, a top seller during holidays and events.
These are all available through reliable suppliers in Kuwait, including IT Care KW, which also stocks compatible vinyl and transfer sheets.
Wrapping Up: Why It Makes Business Sense
In 2025, Kuwait’s business environment is increasingly supportive of micro-enterprises, creators, and freelance professionals. With tools like the Cricut heat press, individuals have a chance to build income without heavy investment. Whether you're starting from your apartment or looking to scale your branding services, this compact tool lowers the barrier to entry.
It’s not just a hobby machine anymore—it’s a tool that empowers businesses to offer fast, personalized products without depending on high-volume production. And in a market that values unique, high-quality items, that edge matters.
FAQs
Q: Can I use Cricut heat press for professional-level products? Yes. While it’s compact, many businesses use it to produce sellable, high-quality apparel and gifts.
Q: Is it safe for home use? Absolutely. Cricut heat presses are designed with safety features like auto shut-off and even temperature control.
Q: Where can I buy it in Kuwait? You can find Cricut machines and compatible accessories at IT Care KW, a trusted supplier of creative and printing tools.
Q: Do I need a printer or vinyl cutter? Yes, for custom designs you’ll need a vinyl cutter (like Cricut Explore or Maker) and sometimes a sublimation printer depending on the material.
0 notes
Text
How to Set Up the Cricut Mug Press

Cricut Mug Press is an awesome tool for making customized cups. You can personalize the cups on your house and showcase your creativity. This machine does not require any prior understanding of crafting to use it. You can just complete its setup and start making amazing crafts right away.
In addition, the setup process is also simple. However, many new users may face some problems while doing so. In this case, it is best to acquire a thorough understanding of the process beforehand to avoid any mistakes.
You can get into various problems when you set up your Cricut Mug Press machine. following are some of the common problems many users usually face.
The machine doesn’t power on
Firmware update stopped or failed
Device not recognized by Design Space
The machine doesn’t heat properly
These are the quick steps you can follow if you want to complete the Cricut Mug Press setup and start using it right away.
First of all, you are required to unbox your Cricut Mug Press machine.
In the box, you’ll get a setup guide booklet, warranty information, a power cable, a USB cable, and the machine itself.
You need to take out the Cricut machine carefully from the box.
Now, it is time to insert the power cable into the back of the machine.
Afterwards, you should plug in the USB cable, securing one end at the back of the machine and the other end into your device (laptop or desktop).
Next, open the Cricut Design Space app on your computer or smartphone device. (If your device do not have the app then download it from the official website or app downloader.)
Then you need to go to the app's side menu and click on it.
From the open options, click on “New Product Setup.”
On the next page, click on the Heat Press option.
Next, you are required to choose the Mug Press option.
Go through the on-screen instructions to download and install any firmware updates for your Cricut Mug Press.
When the update process is complete, disconnect the USB cable from your device and the Cricut Mug Press.
Finally, your Cricut Mug Press machine will be ready to use.
Apart from that, make sure to look for more help if necessary!
1 note
·
View note
Text
How to Use Cricut Transfer Tape? Tips & Tricks
Are you a crafter looking for a material that allows you to apply your design to the desired surface? If yes, then this blog is for you! Transfer tape is a great material for transferring any design and vinyl pattern to your project’s surface. It is helpful for applying designs to curved surfaces. But ‘how to use Cricut Transfer Tape‘ to transfer your designs?
When you buy a Cricut machine and start using the Cricut Design Space app, you might not realize how important transfer tape is. Basically, transfer tape is a material that helps you transfer your design and can be removed once you’ve applied it to your chosen surface. This surface can be anything from a mug to a wall or frame. Also, it helps prevent your decal from getting damaged or sticking to the wrong areas.
This write-up outlines tips and basic steps for using transfer tape in your DIY projects. Let’s start by reading this blog to understand it better.
Types of Cricut Transfer Tape
If you don’t know, Cricut has two types of transfer tape. You should know about them before starting your project, and if you choose the wrong material, you can ruin your project. Here, we will explain the two different transfer tapes:
Cricut Transfer Tape
It is mostly known and commonly used for crafting projects. This material is also used for everyday vinyl projects, such as premium and permanent vinyl, foil vinyl, etc.
Cricut Strong Grip Transfer Tape
It is a strong transfer tape mainly used for glitter vinyl. Because glitter is a thick material, you will need a sturdy, strong grip transfer tape is essential for transferring it to your project.
How to Use Cricut Transfer Tape: Simple Steps
Transfer tape is necessary to transfer your vinyl projects. When you cut a vinyl design with your machine, the design is printed on the back paper. Here are the instructions which you need to follow to use transfer tape:
Step 1: Create a Design
The very first step is to create a design in the Cricut Design Space. You can make a design in the app or add your image and upload your SVG file. When you’ve finished generating your design, submit it to the machine for precise cutting.
Step 2: Cutting Your Design
When your design is ready after cutting, take off the extra parts using the weeding tool. After that, it is time to place your design with transfer tape.
Step 3: Use the Transfer Tape
Now, it is time to use the transfer tape. Simply cut a piece of transfer paper larger than your design. After cutting the tape, you need to peel off the back layer and put it on a sticky side on top of your vinyl design. But if your project is too large, you should start peeling off from the corner of the transfer tape and then place the design. Continue peeling until the vinyl is completely coated in transfer tape.
Step 4: Applying Your Design
Once you have a design on your transfer tape, and place it wherever you want it on your project. Before you apply the design with your transfer tape, make sure to clean the surface area. When applying your design, use the scraper tool to smooth out and prevent bubble formation, and then peel back your transfer paper. After placing your design, press down and smooth it with the scraper tool. Finally, you are done placing your design on your desired surface.
Basic Tips for Using Transfer Tape
Now you know there are two types of transfer paper and how to use them for your project. By following these tips, you can make sure that you are using it in the right way:
Before placing your design on the surface, clean the area to remove dust; otherwise, the design will not adhere smoothly.
Frequently Asked Questions (FAQs)
Why Is Cricut Transfer Tape Necessary?
This material is important for transferring vinyl designs smoothly to various surfaces which protects complex details during the procedure. Its adhesive strength allows for easy lifting without residue that ensures precise alignment and simplifies the application, making it perfect for newbies and pro crafters.
Why does your vinyl peel off slowly?
If your transfer tape is new, it may be very sticky, which can make it hard for the vinyl to release. If this happens, try pressing the tape onto a clean, flat surface to reduce its stickiness before applying your design. You can also use a hair dryer to help release the vinyl with gentle heat.
Can you reuse Cricut Transfer Tape?
You can reuse your Cricut transfer tape as long as it is sticky. Roll and store it; this will save you a lot of money. There is no need to throw it away after you use it each time. If you transfer paper that has to be back on it, you can reapply the tape to the paperback, and by doing this, you can minimize dust and lint particles sticking to your tape.
Visit: cricut.com/setup www.cricut.com/setup login
Source: https://cricutsetjoy.com/how-to-use-cricut-transfer-tape-tips-tricks/
#CricutTransferTape#cricutcomsetup#cricutdesignspace#wwwcricutcomsetuplogin#cricutexploreair2setup#designcricutcomsetup#installcricutexploreair2#cricutsetup#cricutsetupforpc#cricutdesignspacesetup#designcricutcomdownload#cricutdesignspacedownload#cricutdesignspaceonline#cricutdesignspaceapp#cricutdesignspacedesktop#cricutaccountsubscription#cricutaccess#Cricutexploreair2setuppdf#cricutexploreair2download#howtousecricutexploreair2withphone#howtosetupcricutexploreair2oniphone#cricutexploreair2bluetooth#cricutcomsetupmac#cricutcomsetupforwindow#supportcricutcom#cricutnewmachinesetup#cricutaccountlogin#cricutdesignspacelogin#cricutsoftwareapp#cricutdesignspacefree
0 notes
Text
UConn Huskies 2025 National Champions SVG – Cricut Design

They didn’t just play the tournament — They owned it. 🏀🔥
This UConn Huskies 2025 National Champions SVG celebrates the squad that turned March Madness into March Mastery. Bring that title energy to your craft table.
🐺 Files included: SVG, PNG, DXF, EPS ✂️ Works with Cricut, Silhouette, Brother 🏆 Use it for tees, mugs, banners, fan flags — or that hoodie you’ll wear every March from now on
Made for:
True Huskies fans
Crafty champions
Anyone who knows how sweet victory feels to cut
Because this isn’t just a logo — It’s a legacy, layered and ready to press.
#uconnhuskies#2025champions#svgcutfile#cricutbasketball#marchmadnesssvg#nationalchamps#collegebasketballdiy#oladino#diyfandom#huskynation
0 notes
Text
What Can I Do With a Cricut Machine: A Complete Overview
Whether you are an expert or a beginner, one question always comes to mind: “what can I do with a Cricut machine“ It can be clearly said that investing money in buying this craft plotter isn’t a wrong decision. Right from the beginning, this cut-die machine has had the same vision of motivating crafters to make new crafts from its models, tools, and accessories. By operating a Cricut cutting machine, you can make plenty of personalized crafts and projects in just a few minutes.
Before crafting, all DIYers must download Cricut Design Space on their devices (PCs and mobile devices). It is an easy-to-use app that allows them to create projects digitally. You will get the app for free of cost and support all craft plotter models. Besides, it has unlimited images, fonts, and ready-to-use projects for its users. Carry on by reading what Cricut is and how it can be used for various purposes.
What Is a Cricut Machine?
Cricut is an electronic cutting machine known as a cut-die machine or craft plotter. At this point, it is available in four different models that can accurately cut all kinds of fabrics. Its sharp blades and tools can form any design on vinyl, cardstock, paper, and wood. This craft plotter gives proper shape to your design during the cutting process.
On the other hand, this craft plotter can also cut, write, and draw as per the crafter’s need. It also comes with various supplies that make it easier for them to form the project quickly without making any mistakes. Apart from the cutting machine, the company has also launched Heat Presses in various ranges and prices.
What Can I Do With a Cricut Machine?
As the above paragraph of the blog shares, the cut-die machine can cut tons of fabric and comes with various supplies. With such unique features, versions, dimensions, and designing software, it can form uncountable crafts. To make your work easier, look at the names of projects that can be made from this electronic cutting machine.
Leather earrings
Etch glass
Cupcake toppers
Car decals
Stockings
Birthday banner
Wood sign
Custom wine bag
T-Shirt
Organization labels
Wall decals
DIY mugs
Greeting cards
If you want to do any DIY crafts, then collect supplies from Cricut’s official portal. Other than that, you can also buy it from nearby stores at a reasonable price range. You should also be thoroughly knowledgeable about operating and creating projects from a craft plotter without damaging anything.
How to Use a Cricut Machine for Making Paper Flowers?
After collecting essential content, I must learn how to create personalized paper flowers. The following steps will surely help me answer the question of what can I do with a Cricut machine. While going through the process, you should be aware of it without skipping any section. Have a look at the below steps and learn about the process:
Step 1: Cricut App Sign In and Draw a Design
Start your craft by getting Cricut Design Space from Cricut’s official website or Play Store/App Store. After that, create your account by entering the required details and clicking on the New Project option. Now, press the Images toolbar and enter the image you will use inside the Search section. Next, select the image from the gallery appearing in front of your screen and hit the Add to Canvas box.
Open your canvas and resize the flower image as per your choice. Now you need to check whether you’ve chosen the correct machine or not. If you have chosen the wrong machine, then press the Optimize experience for section and choose your machine from the drop box. Take a step further and click the Make It option. Afterward, press the Continue box given at the bottom right of the new page.
Step 2: Pick Your Material and Insert Tools
With the finalization of the flower design, while learning about making customized flowers, choose the material from the list, check the pressure, and then select the tools & materials. After doing that, hit the Go option.
Step 3: Load the Material Into Your Cricut Machine
Now, unbox your Cricut cutting mat and place the material on it using the brayer or scraper tool. After the material is properly stuck on the mat, gently hold the mat and put it inside the Cricut machine. Next, press the Go button on the right side of the machine and hold on until the machine cuts down the material.
After that, stop your Cricut and put the compatible blade inside the Clamp correctly without damaging anything. After loading the blade, hit the Go button again, and your cut-die machine will begin cutting the material. Then, you will see the status on your screen and instantly unload the mat from your Cricut machine.
Step 4: Remove the Material and Peel Off Your Design
At this stage, what can I do with a Cricut machine? You are supposed to fold your cutting mat and slowly remove the material. Now, keep the extra material safe for future purposes. Following this, gently remove the flower design from the mat in a circular manner.
Step 5: Paste Your Flower With Cricut Glue
In the final stage of making custom-made flowers out of the electronic cutting machine, fill in your Cricut gun with strong adhesive. Now, put a small amount of glue on the sides of the flower and stick them gently. Finally, you will get a final custom-made flower made out of Cricut machine & its supplies.
Give yourself a pat on the back. You have become capable of designing various custom-made flowers. With the help of this process, you make this craft by choosing the correct supplies and handling them appropriately.
Conclusion
Summing up what can I do with a Cricut machine blog, it’s crystal clear that you must have understood what exactly a cutting machine is, its capabilities, and how to make a DIY project from it. In order to start this craft plotter, you need to connect with PCs and mobile devices and download the Cricut app. Once it is done correctly, no one can stop you from making various customized crafts.
Frequently Asked Questions
What Supplies Do I Need to Create Flowers With Cricut?
In order to get the perfect formation of flowers, it’s compulsory for all the DIYers to carry certain supplies. It will help them efficiently design the craft, and the list is as follows:
Cricut cutting machine
Design Space software
Cricut Fine Point blade
Cricut cutting mat
Medium Cardstock
Strong adhesive glue
Cricut glue gun
Is It Worth Buying a Cricut Access Plan?
It isn’t a concern whether you are a beginner or an expert in creating customized crafts; it’s going to be best if you get Cricut Access. It is a monthly or yearly plan that offers an ever-growing library with images, fonts, and customized projects. You will also get a specific percent discount while buying any material from Cricut’s official portal. Also, you will get extra benefits after buying its plan.
How Can I Install Cricut Design Space on My Android Device?
In order to get the Cricut software on your Android device, read the below steps:
Start the process by turning on your smartphone and then go to the Play Store app.
Next, search for Design Space & hit the Install button given on the right side.
Now, open the installed app and create your account by filling in your credentials.
Finally, your app will be installed on your device, and you can create projects on your device.
What Are Some Projects That Can Be Made Out of Cricut?
As Cricut can cut 100+ materials with its tools, the crafter can create customized projects easily. The names of the projects are:
Greeting card
Christmas ornaments
Valentines cards
T-Shirts
Sublimation mugs
Stickers
Source: What Can I Do With a Cricut Machine
#cricut machine setup#cricut design space download#cricut design space login#cricut account login#cricut maker setup#install cricut design space#cricut login
3 notes
·
View notes
Text
Cricut Heat Press: Get Fast and Perfect Heat Transfer Results
Are you considering starting a craft business but need clarification about choosing the best among many variations? Choosing the right Cricut Heat Press is tricky since most of this decision rests on what one wants to make. If you know the answer to this question, your confusion is half removed already.
This guide will help you learn about every variation of a heat press and how to set them up. Let's get right into it and make your business journey decision easier!
What Is a Cricut Heat Press?
These machines are used for applying heat transfers to different types of products, such as T-shirts and mugs. They quickly apply heat transfer vinyl and infusible ink to a range of fabrics, along with other materials like mugs, shoes, and hats. These tools feature precision temperature control for consistently successful transfers compared to a household iron. These machines do heat transfer work by consistently maintaining a certain temperature required for both materials.
Different Types of Cricut Heat Press Machines
Cricut offers many heat press machines. With so many options, one has the flexibility to choose whichever machine is best for them. Some of the most popular ones are in the section below:
Cricut EasyPress
It was the first of Cricut's heat machines released in 2017. With its 9 in x 9 in heat plate, this amazing tool is speedy, convenient, and produces lasting heat transfer results, even after regular washes.
Cricut EasyPress 2
Cricut EasyPress got its updated version in 2018, which is suitable for a variety of iron-on projects. It allows users to choose various products in 3 sizes: 6 in x 7 in, 9 in x 9 in, and 12 in x 10 in, giving more flexibility to users. It was an upgrade to the original model and, therefore, is faster and can bear higher temperatures than its predecessor.
Cricut EasyPress Mini
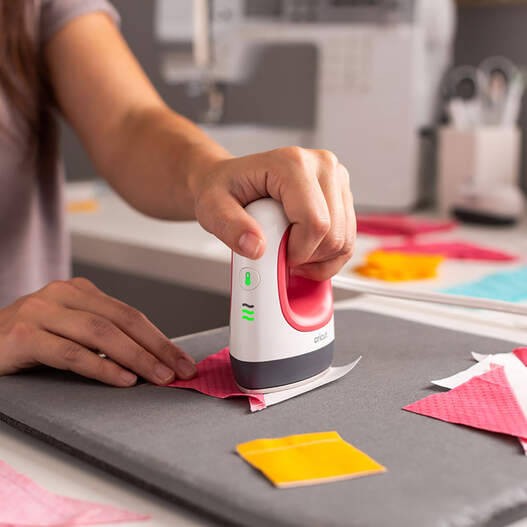
In 2019, Cricut added a new member to the heat press family: a mini version of EasyPress. This latest model is perfect for transferring heat to unusual and hard-to-reach places like caps, hats, shoes, and more. With its precision tip, it is also ideal for working around zippers and buttons.
Cricut EasyPress 3
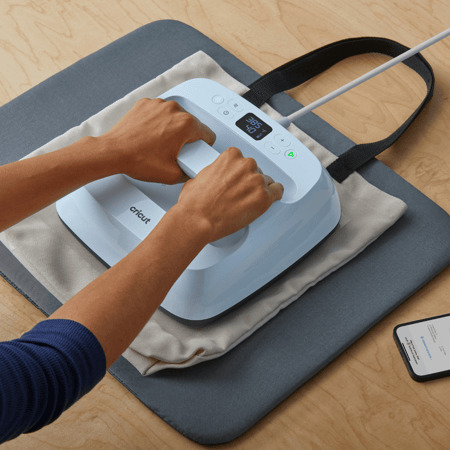
This is the latest in Cricut's series of heat presses. To use this product, one needs to install the app and connect it via Bluetooth. This model comes with a ceramic-coated heat plate. It also has an auto-off feature and an easy-to-grip handle. It works with nearly all major brands of iron-on, infusible ink, and sublimation materials.
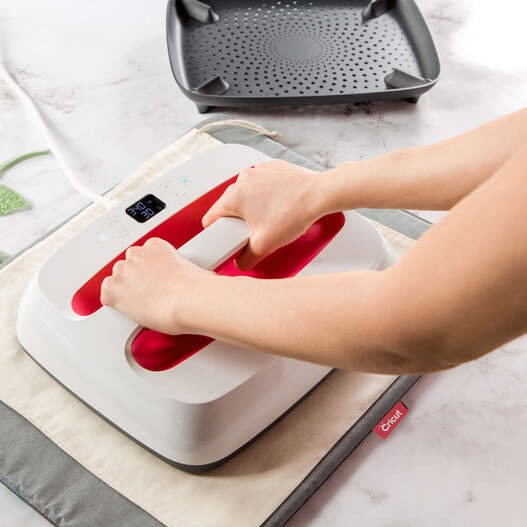
Cricut Mug Press
This machine allows you to make custom-designed mugs with compatible ceramic mugs and infusible ink. You can use their Maker, Explore Air 2, or Joy to cut projects and apply them on a blank mug.
As this machine requires no manual temperature or pressure settings, customizing infusible ink-compatible mugs with unique art or text makes it easy to create a perfect sublimation mug anytime. One can also use this machine for infusible ink products, and it serves as the ideal choice for any cutting machine or heat press.
Cricut Hat Press
This unusual machine is perfect for designing hats. It comes with a heat plate, allowing heat up to 400ºF for consistency. Also, the machine comes bearing a hat-pressing form, which is best for making a firm pressing surface for almost any hat. Compatible with the app, one can send the suggested settings directly to your press and get the steps from your mobile device with the help of Bluetooth.
It also has an auto-off feature, which lets users not worry about the fabric getting destroyed. Its comfortable grip and safety base make it easier to use. It works with almost all major iron-on (HTV) brands, infusible ink, and sublimation products and can serve as the best thing for all cutting machines.
Cricut Autopress
This one-of-a-kind Cricut Heat Press machine is ideal for professionals and has a large ceramic-coated heat plate (15" x 12"). With edge-to-edge heating, it can raise the temperature up to 400 degrees and is the most advanced machine of all. It can adjust materials up to 2 inches thick and auto-releases when the transfer is done.
This amazing machine allows users to transfer designs on T-shirts, tote bags, pillows, and more. Like others in the Cricut Heat Press series, it also works with iron-on, infusible ink, and sublimation materials.
Download Cricut Heat App on a Mobile for Using Your Machine
One can download and install the app on their mobile device, which will reduce the manual work and burden of operating the press machine. To get the software, you must go to the Google Play Store (if you are using an Android device) and App Store (for iOS devices). Let's start the process with your Android device here:
The following steps are for downloading the app on Android. Please follow them word by word, as failing to do so will result in insufficient results.
Hop on to the Play Store app from your home screen or by searching for it.
Once inside the app, search for the Cricut Heat app and click the Search button. If you find the app, select the Install button and wait for the installation to finish.
This EasyPress 3 comes with warranty details, a user guide, and some test materials. After buying the product, one needs to download the app onto your mobile phone. Once you have downloaded it, follow the steps on your screen to set up the EasyPress 3. The firmware updates for your machine will be completed at the same time. If a Bluetooth icon appears on your machine, then it means that your app and the machine are now ready to use.
Along with the app, the heat press can also be used manually using the buttons on the machine. If you want to change the temperature manually, look for a wave button on the machine, press it once, and use the plus or minus keys to increase or decrease the temperature until the desired temperature is reached.
Now, press the heat button once more to set that particular temperature. The timer changes the same way, but in order to do that, you must press the stopwatch button instead. Upon reaching the desired heat and temperature, the play button on the app will turn green, and a beep will sound.
How to Control Cricut Heat Press Using Cricut Heat App?
You can also use the heat press machine through the app. First, make sure that the machine is on, and then open the app. Now, follow the steps below:
After opening the app, look for your machine model, and it will automatically connect via Bluetooth to your phone.
Once you connect it, you can move on to select a new project.
After opening it, search for the drop-down menu, which lets you set the transfer material type and what material you should apply to.
After selecting these, click the Next button. Upon tapping it, a project overview screen will appear, telling you about the details, the settings to press your project and the materials.
Also, you will need to send those settings to your device by hitting the send settings button on your heat press machine.
The next screen will tell you how long it will take for your heat press to reach the desired temperature. Set those things onto the machine and wait for it to reach that temperature. Once done, your machine's play button will turn green and make a beep sound.
How to Use a Cricut Heat Press: Quick and Easy Steps
After learning about the settings for your press machine, now it is time to know how you can use the machine by following these steps:
First, turn the machine on and look for a comfortable, flat, heat-resistant surface. (You must not use any ironing board that can be easily damaged.)
Now, set the time and temperature required by reviewing the Cricut Help Guide for your project.
Next, press the timer/watch button as per your suggested time. The orange light shows a rising temperature, while the green light means that you have reached the threshold temperature.
Once the temperature is reached, place your machine on the fabric for a time, as suggested by the app. It is crucial that the shiny, clear carrier face up.
After that, you will need to apply the heat.
Also, you must put your machine on the base material and then press the Go button in order to start the timer.
Now, hold the press machine and apply the amount of pressure.
To remove the carrier sheet, you can use the Cricut Heat app.
Following the above steps, one can have a seamless, hassle-free experience setting up and using their heat press machines.
Final Thoughts
Cricut Heat Press machines are wonderful for starting your craft business. After reading this blog, one can have a general idea about which heat press to start your business with and how to set them up. With these various machines available, you are now aware of how to start your iron-on project.
Visit here to Know More:" Cricut.com/setup
Twitter
Pinterest
0 notes
Text
How to Use Cricut Transfer Tape to Create a DIY Project?

If you wonder about using your Cricut transfer tape, this blog is just for you. Here, I’ll cover the basics of how to use Cricut transfer tape. I’ll cover the main steps in this guide. If you want this method to be easier, keep following my tips and tricks to create a crafting project.
I can teach you its use based on my experience and help you create your first project with your transfer tape and vinyl. Hence, get ready and continue following this post, where you’ll find many informative things.
Introduction to Transfer Tape
As you know, Cricut machines help you design things using different types of materials. They offer certain accessories and tools to reduce your extra effort in using transfer tape. I want to introduce this new accessory under Cricut and reveal its use.
Its basic use is to transfer the vinyl design onto the blank, for instance a coffee mug or tumbler. With this amazing accessory, you can create multiple projects easily without hassle. If I talk about myself, I have explored this accessory many times to create customized items.
How to Use Cricut Transfer Tape With Vinyl?
Finally, you’ll be learning about using a transfer tape for your upcoming projects. In this section, you’ll get some easy steps to get started with your transfer tape project. Let’s explore together.
Step 1: Design a Project on Design Space Canvas
Your first step should be to design your favorite design on the Cricut Design Space canvas. Utilize all the features and tools under the Cricut Design Space. Now, cut that design through your machine using vinyl as a material. Then, remove the excess vinyl with the weeding tool.
Step 2: Cut a Transfer Tape

Once you’ve cut the design on vinyl, start cutting your transfer tape in a slightly bigger size than your design. A transfer tape is reusable; you should always cut it in a bigger size, even if your design is small. This is how you can sustain your accessories for longer.
Step 3: Take off the Backing Paper from the Transfer Tape
In this step, remove the backing or your transfer tape. After use, you can again stick your transfer tape to the backing paper for reuse. Let’s move ahead and learn how to use Cricut transfer tape.
Step 4: Apply Design to Your Transfer Tape

In this step, apply your transfer paper to the design and scrape it well with a scraper. Otherwise, you can use your old cards.
Step 5: Peel off the Backing Paper from Your Design

When you’ve burnished the design on the backing paper, it’s time to peel the backing paper off to get the final design on the tape. Please lift it slowly upside down to avoid ruining the design. Use a weeding tool to do it better.
Step 6: Apply the Design to Your Project

This is the correct time to fix your design on the project and press it gently to let the design stick well to the surface.
Step 7: Remove the Transfer Tape
Once your design is set on the project, you can remove the transfer tape. Before removing it, burn it down on the surface well. Do it again and again until you’re sure that the design stuck well. That’s how to use Cricut transfer tape.
What Else Can I Use Instead of a Transfer Tape?
Yes, there are a few alternatives to using a transfer tape. If you find your transfer tape too sticky or unsuitable for your project type, you can use some other things.
For instance, you can try using painter’s tape. Moreover, contact paper is another good option. Besides, seal saran wrap is also a good option in place of the transfer tape.
Conclusion
So, are you ready to use transfer tape for your projects? I have tried my best to tell you each step, and now it’s your turn to implement everything you’ve learned. This way of DIYing is super easy and cost-effective. As you can save your transfer tape for the next project, you will stay stress-free for the next purchase. As an expert, I will definitely come up with some new tips and tricks to excite all of you who are on this creative journey. Keep exploring new DIY ways till then.
Frequently Asked Questions (FAQs)
Why Choose Cricut Transfer Tape?
Transfer tape is an excellent accessory from Cricut. It helps you apply your cut designs onto the final project’s surface, providing an easy way to transfer the design to the desired blank. Also, it is reusable and sustainable for longer.
Can I Iron the Transfer Tape?
Yes, you can iron-transfer tape. You need a heat press or iron to apply heat to the transfer tape. It works best when you use a heat press to put the design on the blank. However, don’t directly apply the heat to the tape; use a towel instead.
Can I Use Regular Tape Instead of Cricut’s Transfer Tape?
You can use painter’s tape instead of transfer tape. This tape is lightly adhesive, making it ideal for temporary use.
Source: How to Use Cricut Transfer Tape
#how to use Cricut transfer tape#Cricut transfer tape#cricut design space app#cricut design space software#Cricut.com/setup#cricut setup
1 note
·
View note
Text
How to Use a Pen on Cricut: A Beginner’s Guide
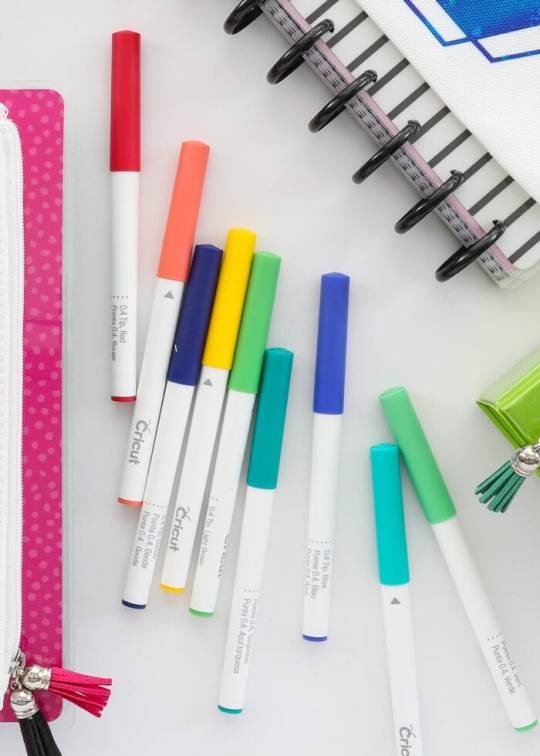
If you are a Cricut user, then you know that Cricut is a brand that offers crafting machines capable of making a variety of projects using different materials. But did you know that you can now create DIY projects using Cricut pens without cutting any design? Yes, it is possible! Cricut provides many pens and markers in different colors for beautiful crafts. To make projects involving pens, you must know how to use a pen on Cricut.
If you do not know what a Cricut pen is or how to use it, don’t worry. This blog will explain everything related to a pen. To learn all about these pens and how to use them, just read the blog!
What Is a Cricut Pen?
Before we find out how to use a pen on Cricut, we should know what a Cricut pen is. Cricut pens are specially designed to work with Cricut machines to write on various materials. Using this pen, you can make banners, greeting cards, bookmarks, labels, notes, and more.
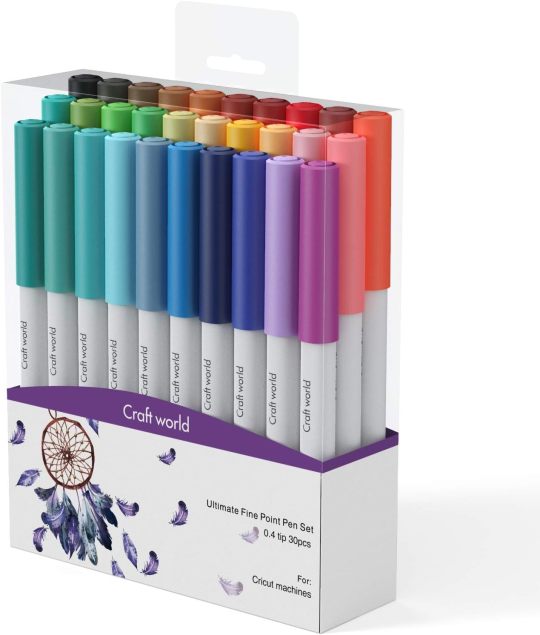
With Cricut models like Maker, Venture, and Explore, you can use special-sized pens that you can fit into the machine’s pen holder. However, if you want to use a pen with Cricut Joy, you will need to buy a separate pen, which will not work with other Cricut machines. The Cricut Joy is a small machine, so any regular pen will not work with it. You will have to get a pen that is specially made for Cricut Joy.
Types of Cricut Pens
Cricut has a variety of pens, and you can use one of them depending on the project you are making. I am writing about all of them. Here, you will learn about these pens and which one is suitable for your project. It is important to know about pens before learning how to use a pen on Cricut.
Pens
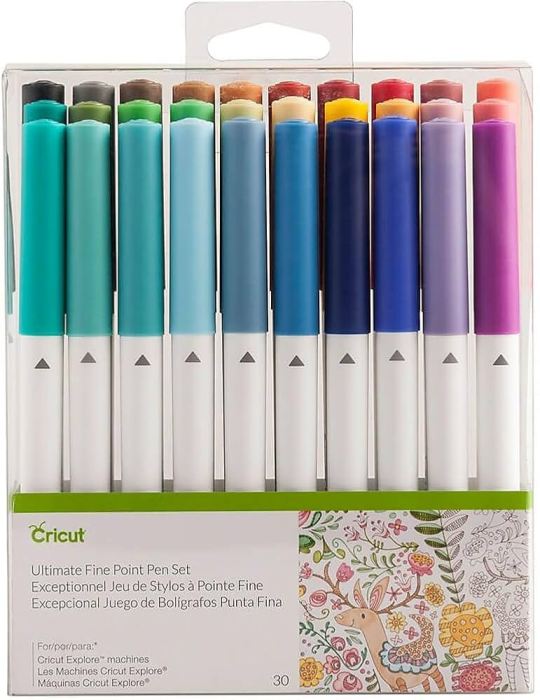
Most Cricut writing projects are made with Cricut pens. You can insert the pen into the machine clamp, which is good for writing. These pens come in a wide variety of thicknesses, colors, sheens, and weights. They have fun color combinations. These pens include fine-point pens, extra fine-point pens, and normal pens. Their thickness ranges from 0.3 to 0.8 mm.
Markers
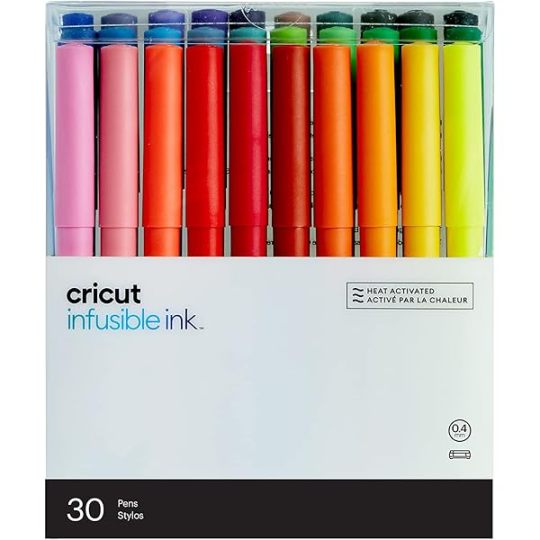
When you need to write on projects that require thick writing, you can use markers instead of pens. Its thickness ranges from 0.6 mm to 1.0 mm.
Fabric Pens
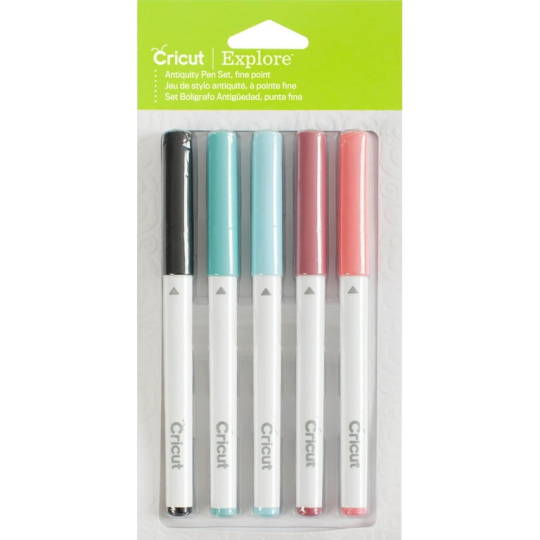
This pen is specially created to draw on clothes. You can fit the pen into clamp A just like any other pen and start drawing. You can use the Cricut Maker/Explore machines to draw.
Infusible Ink Pens
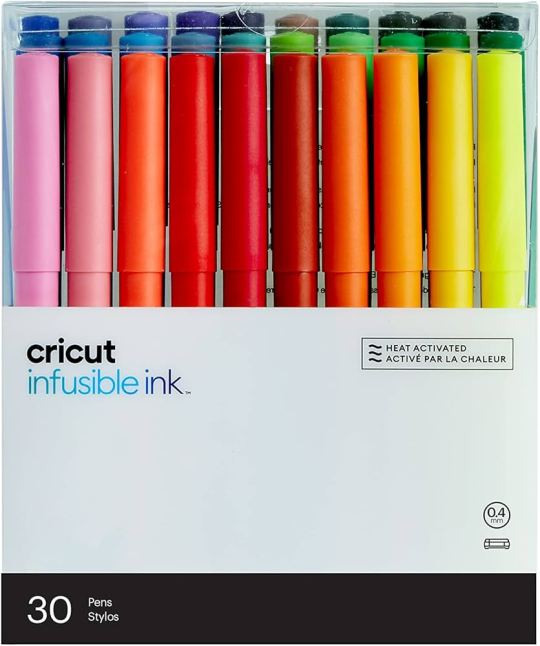
If you want to draw on your sublimation projects, you can use infusible ink pens. It will draw on the infusible ink sheet, and you can transfer it to a mug or coaster project using a heat press machine. Remember, do not use this ink with non-sublimation projects.
Free Hand Markers
These are markers that do not fit in a Cricut machine. If you want to use it, color the design by hand.
How to Use a Pen on Cricut: 3 Easy Instructions
Now you know all you need to know before you go on to learn how to use a Criuct pen. Let’s learn how you can actually use a pen on your project.
Step 1: Insert a Pen into Your Cricut Machine
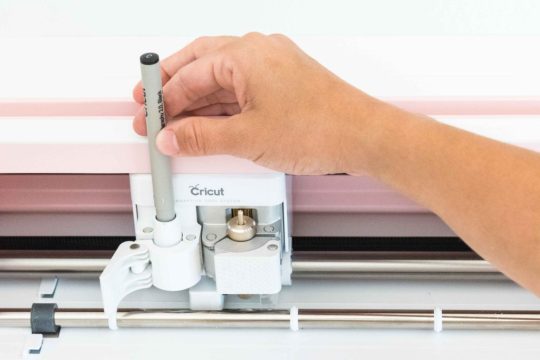
To install the pen, you have to turn the machine on and then open clamp A of your Cricut cutting machine, which is located on the left side. Once the clamp opens, you have to remove the pen cap and press it into the camp. When it reaches its limit, you will hear or feel a click. It means that the pen is well installed. Now, you close the camp.
Step 2: Choose a Design or Font
Before using a pen on your Cricut machine, you should first choose or create a design using the Design Space software. Cricut has thousands of ready-made designs, fonts, and images. You can select any one of them and draw on your machine. If you want, you can also create a design on your own. You also have an option to upload an image from the internet.
Step 3: Draw Your Design
After that, you can draw the design using your material. You must put the material inside the Cricut Maker, Explore, or Venture machine. Once the material is loaded, you can start drawing the design on it, and when it is done, you can unload the material. Your project is now ready.
Conclusion
In conclusion, you have to know that you have learned here how to use a pen on Cricut, and now you can easily create projects with the help of pens. Cricut has various pens, and you can use any that fit the needs of your project. To use a pen on your Cricut machine, you should choose a design that you will draw using your material. Once the design is ready, you can install the pen into the machine and draw the design on it.
Frequently Asked Questions
How Can I Install Cricut Pen?
To draw any image or font on a Cricut machine, you will need to install a pen. You can install it in a few steps. Here is how you can do it.
First, pick a pen suitable for your project.
Then, open the clamp A of your machine.
Next, insert the pen inside the clamp and close the camp
Now, the pen is installed. You can start crafting.
What Can I Make from a Cricut Pen?
A Cricut pen is a tool that can be used for multiple projects. You can create beautiful bookmarks, cards, invitations, coasters, t-shirts, and so much more. If it is someone’s birthday and you want to make banners, you can use a Cricut machine for it. Apart from these, you can make cute doodles, stickers, and labels using these pens. You can use these projects for your home decor, or you can also give them to someone you love.
Can I Write on Fabric with a Cricut Pen?
Yes definitely! Cricut has a fabric pen specifically designed for fabrics. You can use the pen with the Cricut machine and draw any design on the fabric. To use the fabric pen, you must first select a design on the Cricut Design Space app and then install the pen on your cutting machine. After that, load the fabric onto the machine and draw your design on it.
0 notes