#cricut easypress 2 unboxing
Explore tagged Tumblr posts
Visit Tumblr Blog
Explore Tumblr blogs with no restrictions, modern design and the best experience.
Last Seen Tumblr Blogs


Fun Fact
If you dial 1-866-584-6757, you can leave an audio post for your followers.
Text
Cricut EasyPress
Cricut EasyPress 2 Heat Press Machine (9 in x 9 in), Ideal for T-Shirts, Tote Bags, Pillows, Aprons & More, Precise Temperature Control, Features Insulated Safety Base & Auto-Off, Raspberry
For More Details /Order on Amazon Link
#cricut easypress#🚀 Keyword Tool Pro#Do you need this information?#Keyword Tool Pro provides search volume data for English keywords.#cricut easypress mini#cricut easypress 2 vs 3#cricut easypress mini how to use#cricut easypress 3 tutorial#cricut easypress 2 12x10#cricut easypress 2 temperature guide#cricut easypress vs heat press#cricut easypress 2 unboxing#cricut easypress 2 9x9#cricut easypress mini t shirt#cricut easypress app
1 note
·
View note
Text
How to Use Cricut Maker for DIY Crafting Magic?
Again, I am ready with my new tool, Cricut Maker. Using this machine, I am going to teach you how to use Cricut Maker to create your own shirt in a couple of minutes. At one time, I was also a beginner, and it was not easy for me to learn it. Somehow, I learned it from the internet. However, it took me a lot of time to gain practical expertise on this tool but believe me, it was worth learning.
Moreover, the machine is very easy to use, and it has a simple setup process, which I have already covered in this blog. My intention in writing this blog is for beginner crafters who have just bought the machine and want to learn how to use it from the beginning. So, are you ready to join me on this journey of learning about the Cricut Maker from the ground up? If yes, let’s get started!
The Process to Setup a Cricut Maker Machine
When I got my new Maker machine, I was too excited to unbox it. But after unboxing, I had to set it up. In the beginning, I was nervous as hell! I really didn’t want to make any mistake that would cause a technical problem. But the Cricut’s guide finally helped me. In addition, the setup is also easy for different platforms like Windows, iOS, Mac, and Android.
To learn how to setup Cricut Maker on computer and mobile device, follow the instructions given below:
First of all, plug the power cable into the back of the machine and connect it to the power source.
Next, you have to connect the machine to the computer. Here, you can either use a USB cord or Bluetooth feature.
Now, open a browser such as Chrome and search for cricut.com/setup.
On the next page, you will need to download the Design Space and then install it.
Here, you can simply follow the instructions available to you on the screen and set up your account.
Finally, you will be notified about the completion of the Cricut setup.
As soon as we complete our setup, we are always prompted to perform a test cut. This is easy, and you can do it by following the steps given to you on the screen.
What Supplies Will I Need to Make a Custom Shirt?
Before I teach you how to use Cricut Maker, let’s discover some of the essential Cricut supplies needed for making a shirt. Here is what you need to make your own shirt on Maker:
Iron-on Vinyl Material
Cotton Blank T-shirt
Cricut Maker (or any other cutting machine)
LightGrip cutting mat (or Standard Grip mat)
Weeding tools
EasyPress
EasyPress Mat
I have specifically chosen the cotton shirt, which has smooth textured and high-quality cotton. It really works well with Iron-on vinyl.
Important Note: I would recommend pre-washing your blank shirt before applying the vinyl on it. In this way, your vinyl won’t crack if the shirt shrinks. In addition, pre-washing will help you remove the dirt or any impurity that can hinder the ability to adhere to vinyl on the shirt.
How to Use Cricut Maker for the First Time?
So, are you ready to learn the process of making a shirt on the Maker machine? If yes, follow the steps one by one:
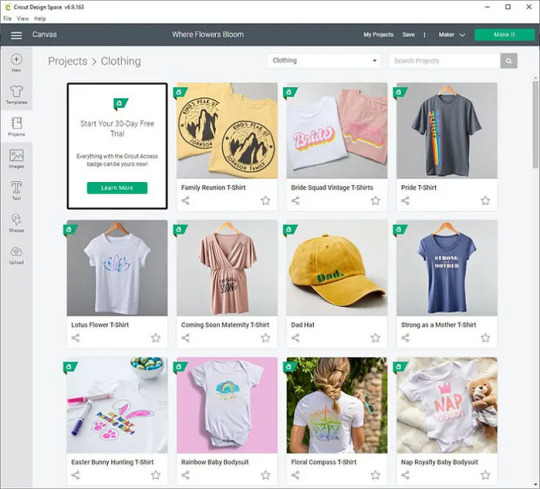
Step 1: Create a New Design or Upload
Step 2: Load the Vinyl and Cricut Mat
Now, you need to place the material on the mat for cutting. For this, you need to load the vinyl onto the mat. Make sure you are using the mat that has lost its stickiness a little bit. After that, you have to use the brayer tool to flatten and adhere the vinyl to the cutting mat.
Remember: The shiny side of the vinyl should be facing down. For patterned vinyl, the pattern side should be down.
Once done, you are ready to tap on the Load button to start the loading process of the cutting mat into the Maker machine. Next, you will need to send your design to the Cricut Maker.
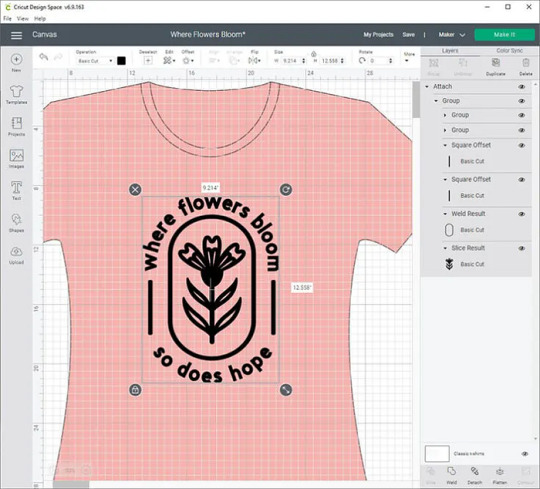
Step 3: Send Your Design to the Cricut Machine
Navigate to the Cricut app and click on the Make It button in the top-right corner.
Next, select the toggle button to turn on the Mirror.
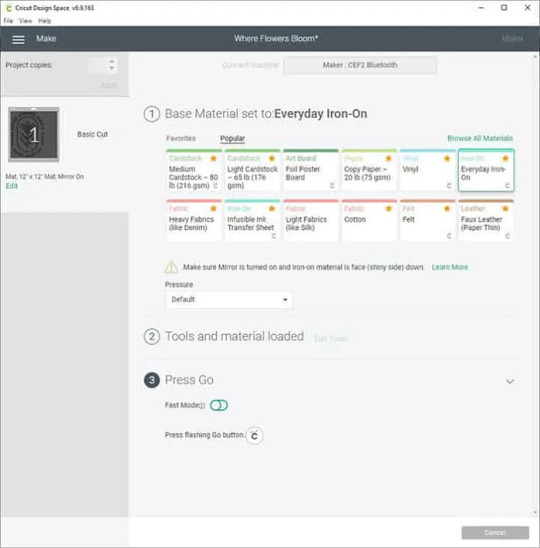
Afterward, you will be moved to the next screen, where you need to choose the base material. Choose the Everyday Iron-on from the list.
Step 4: Cut and Weed Out the Design
After choosing the material, you need to load the Fine-Point blade and the mat.
To start cutting, you need to press the Go button to cut the design.
Once cutting is done, unload the mat and weed the design using the weeding tools.
Step 5: Transfer Your Design
This is the step where your EasyPress comes into play. Preheat the blank shirt and then place your design on it. After that, set the recommended temperature and press gently on the design.
Wrapping Up
In this blog, I have explained to you how to use Cricut Maker along with the full setup process. This guide not only explores the setup process but also how to make a shirt using it. The process is easy for both setup and shirts. However, this guide can also help you if you want to add your design to a tote bag or any other fabric. The process will be almost the same for every project.
FAQs
Question 1: How to use smart vinyl with Cricut Maker?
Answer: Smart Materials doesn’t require you to use a cutting mat, making it easy to use. Below are the steps given that explain the usage of vinyl.
First, you need to load the material and ensure a 10-inch gap behind the machine.
Next, try to position the material. For example, keep the color side facing up.
Then, feed the material into the guides.
Now, you have to press the Load button and gently push the material forward.
Finally, it’s time to apply the vinyl on the clean, blank surface.
Question 2: How to use Cricut Maker for stickers?
Answer: Find the steps below to create amazing stickers using the Maker machine.
First, you need to create a sticker design on Design Space.
After that, print the image using a compatible printer.
Once you have printed the image, set the materials on the Cricut app.
Next, you should load the mat into the cutting machine.
After that, press the Go button to cut stickers.
Once the sticker is cut, unload the mat and remove the stickers.
Question 3: How to use pens with Cricut Maker?
Answer: In order to use the pens with Cricut Maker, you have to follow the instructions provided below:
First, you need to place the laser copy paper on a LightGrip mat and then load it.
On Design Space, create the design that fits your blank and assign a Cricut pen color.
Also, you must Mirror your design.
Then, browse all materials and then choose Copy Paper.
Insert your Infusible Ink Pen into Clamp A and hit the flashing Go button.
Once the design is done, you can unload the mat.
Read more: install cricut design space app
how to setup cricut maker
Cricut Design Space Login
Source: how to use Cricut Maker
#how to use Cricut Maker#Cricut Design Space Login#cricut design space#cricut.com/setup#cricut.com/create#how to setup cricut maker#install cricut design space app#cricut new machine setup#cricut.com sign in#www.cricut.com/setup login#cricut setup
0 notes
Text
What is Cricut/Setup Windows? How to perform the setup?
Cricut is the cutting machine and the link provided above is the path to complete the installation. The setup consists of Unboxing the Cricut machine, Physical setup of the Cricut setup windows machine, Installation of the Cricut.com/setup application, connecting your device to the Cricut, and then setting up the Cricut application. In this process, you will come across many odds as well as errors if you do not perform it in the right way. So to perform in the right way you need to follow the setup process given below;
· First, the user needs to order the Cricut maker machine.
· Here the user can purchase 3 types of Cricut machines i.e. Cricut Explore, Cricut Maker, and Cricut Joy.
· Then Ubox the Cricut machine safely.
· Place the machine on a plane surface.
· Lift up the machine lid and unbox the other parts.
· Assemble the machine parts by joining them in their respective places.
· Turn on the Cricut maker machine.
· Open the device which the user is going to connect to the Cricut machine.
· Then download and install the application on the respective device.
· Open the application and click on the setup Cricut button.
· Fill up the Cricut id details.
· Then create one Cricut Setup Windows id for you.
· Finally, connect your device using the Bluetooth connection.
· Then take a cut out and then load the pages and perform the cut.
· In this way your Cricut setup is ready.
Are you familiar with the Cricut machine?
Cricut provides a good range of machines to cut, craft and create. It’s a product or a cutting device that cuts various materials to craft and design using cardstock, paper, vinyl, and HTV. A few products are best for beginners; for example, you can go for Cricut Explore Air 2, Cricut Maker 3, Cricut Explore 3, Cricut Joy, and Cricut EasyPress 2 whereas pro users have more options available. The manual is available with each Cricut machine, where you require to get the cricut setup app from cricut.com/setup windows and take tours to learn different projects as a beginner.
Basic Hardware Setup Of Cricut – Unboxing
If you have purchased a new Cricut machine, then hardware setup is the first action you’ll have to take.
· Take your Cricut machine out from the box.
· Remove all packaging, including taps and plastic.
· You’ll receive a USB, Power cable, manual, and accessories. Keep all aside.
· Insert the power cable’s one side into the round hold in the Cricut machine.
· Plugin the other side of the power cord into the power switch.
· Connect one side of the USB cable to Cricut and another to the PC USB port.
· The initial setup is completed here.
Cricut.com/setup Account Creation Steps
· Go to the Cricut site – cricut.com/setup or cricut com setup windows .Select Sign in.
· Click on the “Create Cricut ID” option from the top bar.
· Enter an email ID.
· Type a suitable strong password.
· Fill in details, i.e., name, country.
· Accept the privacy policy and terms of use by checking the box.
· Hit on Create Cricut ID tab.
· Confirm all details to create Cricut Account successfully.
Download Cricut App – Cricut.com/setup
1. Open a web browser on your PC or Laptop system.
2. Enter cricut.com/setup on the search web address.
3. Select your product type in shown window.
4. Again, choose a particular machine that you are using.
5. Click Download when Cricut Design Space appears on the screen.
6. Wait for the application to download.
0 notes
Text
Wooden Christmas Ornaments With Cricut EasyPress 2 – VIDEO
Let’s use the Cricut EasyPress 2 to personalize wooden Christmas ornaments with iron-on!
One of my favorite things about my Cricut is that I can personalize anything, especially store bought goodies! I lovingly call it, semi-homemade!
Iron-On Wooden Ornaments
For this project, I’m using my new EasyPress 2 6×7″ that I like to call my mini. I love that it’s easy to take with me too when I craft at my mom’s especially during the holidays!
Supplies for Iron-On Wooden Christmas Ornaments
Glitter Iron-On
Foil Iron-On
Everyday Iron-On
Cricut Maker
Standard Grip Mat
Weeding Tool
Scissors
EasyPress 2 & Mat
EasyPress 2 Heat Guide
Ruler
Blank Wooden Ornaments (dollar store)
Design Space File
Optional: BrightPad for weeding
How To Apply Iron-On To Wooden Ornaments
Supplies For Iron-On Wooden Ornaments
Cut Iron-On and Place On Wood – Check Temperatures
Press With EasyPress 2 For Precision Heat
Finished Iron-On Wooden Christmas Ornament
Video – Unbox My Cricut EasyPress 2 With Me
Join me on Facebook for a replay of my Live, and I’ll show you everything in the 6×7″ EasyPress 2 box and we’ll make our first project together!
It’s perfectly petite and mobile. You can make perfect small-scale projects without working around seams. With a 6”x7” heat plate that heats up in just over a minute, make smaller projects in short order. And, don’t forget a new 8×10” EasyPress mat because “it’s all about that base!”
Watch EasyPress 2 Unboxing Video
Why You Need An EasyPress 2
More Projects. More Materials. More Possibilities. Cricut EasyPress 2 works well with more materials and sizes of iron-on projects with higher temperature settings, faster heat-up times and a thicker heat plate design for more uniform heating for long-lasting results
Heats up Faster. And Higher. EasyPress 2 heats up to 25% faster and can reach up to 400 degrees (F) for long-lasting results, much longer than your iron can achieve.
3 Sizes for All Projects. Choose the right EasyPress 2 for the types of projects you love to make most. EasyPress 2 comes in three sizes: 6×7″ (onesies, baby bibs, cosmetic bags), original 9×9 (T-shirts and tote bags), and 10×12 (blankets, beach umbrellas, banners).
More Cricut EasyPress 2 Craft Ideas
Farmhouse Hot Cocoa Bar With Cricut
Thankful Graphic Tee
As always, I hope you’re inspired to craft, bake, create and celebrate!
INSTAGRAM | FACEBOOK | PINTEREST | GOOGLE+ | TWITTER | YOUTUBE | BLOGLOVIN
This post contains affiliate links, which means if you purchase something through this post I will earn a small fee from the retailer at absolutely no cost to you. They pay me for bringing you to them and I use it to keep the craft room stocked and the coffee pot working! Don’t worry. All content, ideas, photography and opinions are that of my own and I’d have it no other way!
you may also like:
Pinecone Toss Christmas Party Game {FREE Download}
DIY Movie Ticket Shaped Chalkboard - Family Movie Night Fun
DIY Canvas Art - As For Me And My House We Will Serve The Lord
Wedding Stationery You Can Personalize
Easy DIY Snowman Wreath
The post Wooden Christmas Ornaments With Cricut EasyPress 2 – VIDEO appeared first on The Celebration Shoppe.
0 notes
Text
Cricut EasyPress 2: Your Guide to Effortless Iron-On Crafting
Leave the traditional way of pressing your design with a household iron. Now it’s time for you to switch to Cricut EasyPress 2. It’s been more than a year since I started using an EasyPress 2 machine instead of an iron. I complete my work in the blink of an eye without harming myself. This Cricut machine comes with a machine speed and an iron feature.
Apart from that, I prefer this press as it swiftly finishes iron-on projects without causing any serious damage. Besides, there are tons of DIY projects that I can create with my EasyPress with a snap of a finger. As an expert in this field, I want to ensure that you are well-versed with the concepts of this Cricut Heat Press, along with its features, supplies, and many more.
What are Cricut EasyPress 2 Salient Features?
Before helping you to make a final decision, give me a chance to share with you some of the prominent features of EasyPress 2. After coming across the features, it will get more straightforward for you to decide whether investing your savings in buying this press is going to be a good decision or not. Have a look at the features below:
This Cricut Heat Press is developed explicitly for heating purposes only. This press is compatible with all heat-transfer vinyl (HTV). In addition, EasyPress 2 gets heated up within 3 minutes and works by applying gentle pressure on the material.
Also, this press is available in different colors as well as sizes, giving me an option to choose as per my project type. It has been categorized into three different sizes: Cricut EasyPress 2 “6 x 7”, EasyPress 2 “12 x 10”, and EasyPress 2 “9 x 9”. On the other hand, this heat press is available in Mint, Lilac, and Raspberry colors.
Besides, it comes with a digital display panel that shares temperature and timing details. This machine can quickly heat up to 400*F, making me experience an effortless pressing experience. Moreover, I can change the press settings without manual work by installing the Cricut EasyPress 2 app.
On the contrary, this machine comes with an insulated Safety Base that allows it to take some rest after transfer. Equally important, this Cricut press has an auto-shutoff feature that instantly turns it off to avoid any accidents in the future.
After grabbing so much content about this versatile heat press, let’s take a step forward and learn about the supplies that come along with it.
What Supplies Come With Cricut EasyPress 2?
After getting the delivery to my doorstep, I will unbox the boxes and learn about the items inside. Have a look at the list of those supplies in the following pointers:
Since I’ve received all the crucial supplies, I am now capable enough to create a customized t-shirt using this EasyPress.
How to Use Cricut EasyPress 2?
After collecting details about this heat press’s features as well as supplies, I am now going to utilize my heat press to create a customized t-shirt. Now, to get the expected craft with my EasyPress 2, I am going to consider the given below steps:
Step 1: Log in to the Cricut App and Draw a Design
Step 2: Prepare the Mat for Your Design
Step 3: Load the Material With a Cricut Mat
Step 4: Transfer Your Design Using Cricut EasyPress 2
Frequently Asked Questions
Question: What Are Some Tips and Tricks to Use Cricut EasyPress 2?
Answer: Before using this Cricut Heat Press, all DIYers need to ensure that they follow some essential tips & tricks:
Question: What Projects Can I Make With My Cricut EasyPress 2?
Answer: Some famous projects that all the crafters can make out of their respective EasyPress 2 are as follows:
Question: Is Adding Cricut EasyPress 2 to the Craft Room a Good Decision?
Answer: If you are a keen crafter and want to take advantage of every opportunity to learn something creative, then you should definitely buy EasyPress 2. This lightweight and easy-to-carry machine is compatible with all HTV materials. Other than that, it can heat up to 400*F (205*C), giving fast and effortless results that last long. With so many great features, you should definitely add this machine to your craft room.
Visit: cricut.com/setup
cricut.com/setup
Source: https://cricutmakersetup.wordpress.com/2023/11/30/cricut-easypress-2-your-guide-to-effortless-iron-on-crafting/
#digital design#design space setup#cricut.com/setup#cricut.com/setup mac#cricut.com/setup explore air 2 setup#cricut new machine setup#cricut explore air 2#design.cricut.com#cricut design space login#Cricut EasyPress 2
0 notes
Text
How To Use Cricut Explore Air 2? [A Comprehensive Guide]
If you bought your Cricut Explore Air 2 machine and are wondering how to use it, this blog is all for you. You may want to know about Cricut's features and how it differs from its previous models. We have wrapped up a few easy projects for the newcomers. We will walk you through them. The use starts with unboxing the machine and ends with the troubleshooting steps. So, let's find out how to use Cricut Explore Air 2. You don't need to worry even if you have an older model.
What Is a Cricut Explore Air 2?
Cricut is a popular brand of cutting machines and PC-controlled cutting machines. However, Cricut doesn't only make cutting machines; it further makes heat presses such as Cricut EasyPress 2 and heat presses for mugs like Cricut MugPress.
How Is Cricut Explore Air Differ From Explore Air 2?
Cricut Explore Air and Explore Air 2 have similar features and appearance. The difference is in their color and speed. The Cricut Explore Air 2 has a 2X fast mode that works with vinyl, iron-on, and cardstock. Also, it comes in three beautiful colors: mint green, pastel pink, and sky blue.
How To Use Cricut Explore Air 2?
In order to use Cricut Explore Air 2, kindly follow the basic instructions in the section below:
Step 1: Unbox Your Cricut Explore Air 2
In the unboxing process, ensure that no item is missing. If any item isn't included in the box, you can contact Cricut support for a replacement. When you unbox the package, it will consist of the following items:
The machine is pink in color, and you will love its color and appearance. Otherwise, you can choose from options such as Mint, Raspberry, Boysenberry, Merlot, Peacock, Sunflower, Lilac, Rose, Blue, Black, or Sky.
Step 2: Prepare Your Cricut Explore Air 2
After purchasing the Cricut Explore Air 2 cutting machine, you may need to learn to prepare it. Hence, we will start with how you can place this machine. Cricut has made not only the high-value cutting machine but also created the most silent machines of all time. The Cricut Explore Air 2 has a Fast Mode feature, and when you activate it, the machine can perform all necessary cutting at double speed.
When the Fast mode increases the cutting speed, it makes the Explore Air 2 noisier. Thankfully, the Explore Air is smaller and lighter in size than other Cricut machines. So you don't have to worry about the space it will take.
Step 3: Connect Your Machine To The Internet And Update The Firmware
Cricut works well when creating and designing new machines, but it also improves the current machines. Also, they frequently release firmware updates. Hence, the first thing you should do after unboxing and plugging in your Explore Air 2 is to update the firmware.
You can update firmware via a wired (USB) or a wireless (Bluetooth) connection. Bluetooth has recently been added to the machine's features.
Step 4: Use The Right Tools
Six tools are compatible with the Cricut Explore Air 2. First, you have to create a new project in the Cricut Design Space and then input the materials you want to work with. At this point, Cricut Space will automatically assign you the right tools for the project. Not using the appropriate tools might result in bad or improper cuts and a short lifespan of the tools.
For instance, a delicate blade on a hard material will make it dull very fast or can even break it while cutting. Plus, the pens are specialized and are made to work on a few surfaces. Choosing the right type of cutting mat is also essential for the desired cutting process. Cutting mats are consumables, so it's important to know which to use in different situations.
Step 5: Setup Your First Cut
In this step, when you are finally setting up your project, ensure that your Cricut Explore Air 2 is plugged in and you have installed all the necessary tools. Then, you need to prepare your first cut with Cricut Explore. To get started, place your cutting mat into the machine and place material over it, so it adheres to the mat surface. After that, you can insert the mat and material into the machine and input your design through the Design Space.
Now, the machine will check whether you have attached the right tool for your specified project and move only to the cutting.
Step 6: Smart Materials
Smart materials are consumables that work without a cutting mat. These materials are pre-attached to their backers, which can feed through Explore Air2. Plus, it lets the users load them directly into the machine and continue cutting.
Step 7: Remove The Excess Material
After making your first cut, you have a rectangular piece of material made of cut-out design and residue. Hence, the next step is to weed out the excess material. You can do it manually.
Step 8: Finish Your Craft Project
Finally, you have made your design cut and weeded out the leftovers; you can use them in your project. Also, Cricut has many machines to assist you throughout the project. One more example is if you plan on printing a new design on a T-shirt, you will need something more than a heat press. You will have to use the Explore Air 2 to cut the vinyl into a design you like. Afterward, you must use a heat press to transfer the design onto the shirt fabric.
Source: https://cricutmachinemakersetup.blogspot.com/2023/06/how-to-use-cricut-explore-air-2.html
#cricut.com/setup#www.cricut.com/setup#design.cricut.com/setup#cricut setup#cricut explore air 2#cricut machine set up#cricut design space
0 notes