#Ceiling Texture
Explore tagged Tumblr posts
Text

i refuse to touch the ground so have a v2
#ULTRAKILL#v2 ultrakill#ultrakill v2#PROCREATE#ALL ART#FANDOM ART#DOODLE#NO COLOUR#THE GEIGER COUNTER#SMALL CAPTION#TAG YAP#moderators !!!! kill this machine with hammers immediately !!!!! /ref#i dangle her around like a mii /aff#man. if i knew who v2 was prior to getting into ultrakill like#the whole reason i got into ultrakill would have been entirely v2#thats because im gay#this is technically how i got hooked on portal.... giant robot ceiling lady.... hi......#“its been 15 years can i please stop liking robots” i asks my brain#“fuck you” says my brain (comma) which was actually the 'fuck you' organ /ref#i dont actually remember why i started playing ultrakill#just thought it was cool looking#best decision of my life. havent had robot yaouri like this in ages. thank you hakita#man..... i............ i need to learn how to paint#dude my mat i need it my body hates the floor#like that one dog online who cant walk on normal floors because of the texture and only walks on mats/rugs/carpet#please. mat. come back to me
249 notes
·
View notes
Text

Raymesis but decently drawn and full-bodied
#digital art#raymesis#rayman fanart#everything has texture if ya look close enough#mesis is such a silly specimen#i wanna chuck him at a ceiling fan
60 notes
·
View notes
Text
hmmm. drywall guy showed up completely unannounced so instead of sleeping in for the first time this week i got up at 8am to cover all the furniture. and the drywall replacement is happening in the kitchen so breakfast will be half a bottle of water and some of the terry's chocolate orange i got as a hanukkah present
#yes getting up at 8 is 'not sleeping in' for me i work 10-7 because i have sleep phase problems#in florida they only sell you weird chocolate oranges so this one has tiny m&ms coating pieces in it but that's fine. adds texture#box opener#it's good that he's here so my grandmother doesn't have a hole in the ceiling anymore. but i wish. he had told us#i could have not been wearing pajamas. we could have preemptively retrieved some bread
13 notes
·
View notes
Text


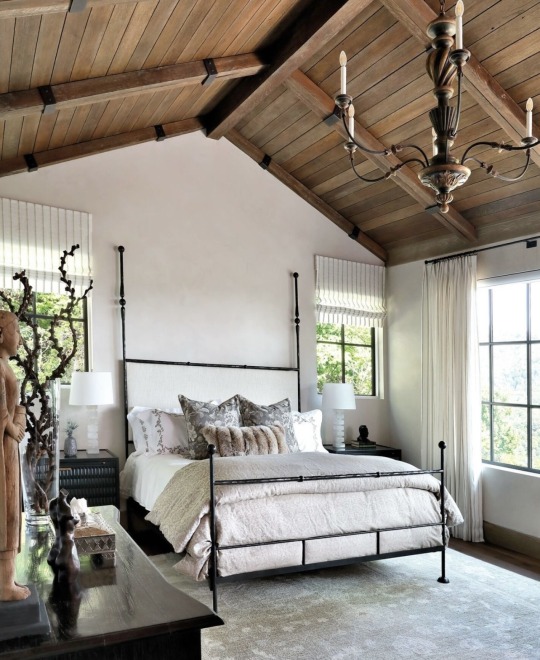
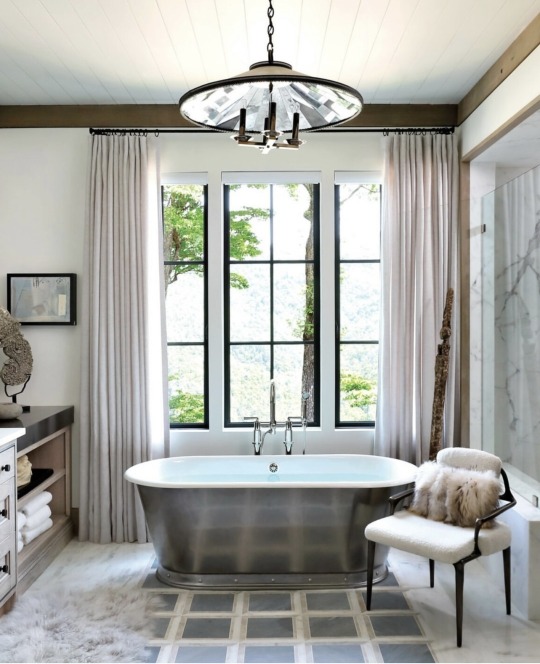

IG luxemagazine - North Carolina
#mountain retreat#beige & grey#living room#kitchen#open concept#wood#vaulted ceilings#bathroom#bedroom#stone#texture#sun room#screened porch#views#interior design#fireplace#mixed materials#harmony
83 notes
·
View notes
Text
i've been painting our house literally every moment i can manage, and i finally got the first full coat of Dark Moody Cozy blue up in our bedroom. i love it so much i cannot wait to wake up on a snuggly winter morning in this room


#feat. ya girl in a very responsible and cool respirator#the fireplace and ceiling will eventually painted too#to complete the Ultimate Cozy look#the ceiling is a bitch tho#it's a weird texture that will require a LOT of work if we don't want any white showing through#there's also so much cutting#my arms are so tired
5 notes
·
View notes
Text
I hate really good fanfic cause when you finish it you have to stare at the ceiling and feel a little empty inside. What am I supposed to do now? Read more fanfiction? Nothing can compare to what I just read. Start it over? What if it's not the same this time. Do HOMEWORK? Absolutely not
#my ceiling is a very interesting texture it kind of makes me nauseous#i guess i just have to cry about Them now#fanfic#ao3#ao3 my beloved#supernatural#spn
30 notes
·
View notes
Text

11 notes
·
View notes
Text
being in uni while writing a super long fic is kinda perfect for me because I have Uni Resources TM like constant access to whiteboards and a study room I can spend days in at a time
#i work for 18 hours. shower. sleep for two hours. go back to the same study room#wall to wall floor to ceiling whiteboards my beloved#oh you need to see a visual timeline? i gotchu#you need to plan an arc in one coherent line with flow? gotchu#you need to organize what every character in a scene is doing and why visually? i gotchu#outlines? done#motivations? done#character arc maps? already there babe#whiteboards for the win#if chalk wasn't a Bad Texture it would be chalkboards#song being loud#mando skywalkers au
2 notes
·
View notes
Text
There's a spider on my ceiling who is most definitely Not respectful of my space like Gary was... Jog on you lil arachnid 😡
#i have one of them crinkle texture ceilings#it's not easy for spiders to walk on#i am objecting bc it's over my head 🫠#it's not large but large enough to Not want it on my head lol
2 notes
·
View notes
Text
can i just say---FUCK "POPCORN TEXTURED" WALLS. AND CEILINGS.
Not only is it ugly as all hell and ridiculously expensive and a pain in the ass to remove (which is why we're stuck with it) but one of the cats just tripped my disabled ass which caused me to fall against a wall and slide down and now my arm is torn up and bleeding from being the point of contact
WAAAAAAAAUUUUUUUUGGGGGGGGGHHHHHHHHHHHHH
dumbest fucking problem to ever have jfc
#otter rambles#venting#fuck popcorn walls#fuck popcorn ceilings#fuck whoever made this popcorn texture shit popular#my cat knows better but he's also not responsible for fucking POPCORN TEXTURE so i'll forgive him#sorry about me lol
4 notes
·
View notes
Text
wanted 2 share how my room's lookin. or at least most of one wall of it
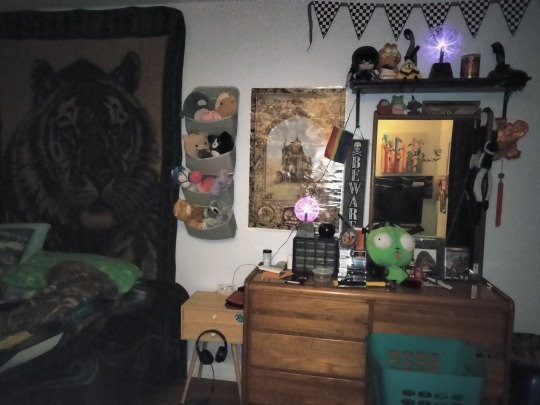
i don't have an overhead light or anything so it's lit with my little lamp and my phone's flash
#photos#the blanket i put up as a soet of tapestry back there has an abysmal texture to sleep under#like it's SOFT but not The Right Kind Of Soft. you get what i mean yeah ?#when i have a job i plan on getting one of those ceiling fans you plug in and hang. instead of full on install#because technically this is a formal dining or some shit and we're renting. cant put anything major in without permission#which wouldn't be hard to get but still. easier for everyone#plus deck fans are more powerful. i like my room arctic
2 notes
·
View notes
Text
Drywall, also known as gypsum board or plasterboard, is a fundamental element in interior construction. Over time, it can be subject to damage from various sources like accidental impacts, holes from nails or screws, moisture, or settling. Learning effective patching and repair techniques is essential for maintaining walls' aesthetics and structural integrity.
Flow Drywall : Importance of Drywall Repairs
Structural Integrity Properly repaired drywall ensures the structural stability of walls and ceilings, preventing further damage and maintaining their strength.
Aesthetic Restoration Repairing holes, cracks, or blemishes restores the visual appeal of walls, creating a seamless and polished finish.
Property Value Well-maintained walls contribute to the overall value and marketability of a property, making timely repairs essential for homeowners and property managers.
Types of Drywall Damage Small Holes and Dents Commonly caused by nails, screws, or accidental impacts, small holes and dents can be easily patched and smoothed out.
Large Holes and Punctures Larger holes resulting from doorknob impacts, furniture, or more significant damage require more intricate repair methods.
Cracks and Water Damage Cracks can form due to settling, temperature fluctuations, or moisture issues. Water damage can cause swelling, bubbling, or staining, requiring thorough repair and sometimes mold remediation.
Tools and Materials Required Patching Compound Patching compound, available in various forms such as spackling or joint compound, is used to fill holes and cracks. Lightweight compounds are ideal for smaller repairs.
Drywall Patch Kits Patch kits contain self-adhesive mesh or patches designed to cover larger holes, providing a stable base for applying compound.
Drywall Tape For reinforcing seams and preventing cracks, paper or fiberglass mesh tape is used with joint compound.
Sandpaper and Sanding Blocks Used for smoothing the patched areas and achieving a flush finish.
Putty Knife and Drywall Trowel Essential tools for applying patching compounds and spreading them evenly.
Primer and Paint To finish the repair, primer helps the patched area blend with the surrounding wall, and paint provides a uniform appearance.
Steps for Drywall Patching and Repairs Small Hole and Dent Repairs Preparation: Clean the damaged area, removing loose debris or chipped edges. Ensure the surface is dry and free from dust.
Application of Patching Compound: Using a putty knife, fill the hole or dent with patching compound. Feather the edges to blend with the surrounding wall. Let it dry as per manufacturer instructions.
Sanding: Once dry, sand the patched area gently to smoothen the surface. Wipe away dust with a damp cloth.
Priming and Painting: Apply primer to the patched area, allowing it to dry completely. Then, paint the repaired area to match the existing wall.
Large Hole Repairs using Drywall Patch Kits Prepare the Hole: Cut away any damaged or uneven edges around the hole to create a clean, rectangular shape.
Apply Patch: Affix the self-adhesive mesh or patch from the kit over the hole, ensuring it covers the entire area. Press firmly to secure it in place.
Layering Compound: Using a putty knife or trowel, apply multiple thin layers of joint compound over the patch, feathering each layer for a smooth transition. Allow drying between coats as recommended.
Sanding and Finishing: Once dry, sand the patched area gently to achieve a flush surface with the wall. Clean the dust, apply primer, and paint to match the wall color.
Repairing Cracks and Water Damage Assess the Damage: Identify the extent of the crack or water damage. For minor cracks, use joint compound directly. For larger or structural cracks, consider professional assessment.
Fill and Seal Cracks: Apply joint compound or spackling into the crack, using a putty knife or trowel. For better reinforcement, embed drywall tape in the compound for larger cracks.
Dry and Sand: Allow the compound to dry thoroughly, then sand the area to create a smooth surface. Clean the dust before applying primer and paint.
Tips for Successful Drywall Repairs Patience is Key: Allow sufficient drying time between compound layers for better adhesion and smoother finishes.
Feathering Technique: Blend the compound outward from the repair area to seamlessly merge it with the surrounding wall.
Proper Sanding: Use fine-grit sandpaper for a smoother finish. Sand lightly to avoid over-smoothing or creating uneven surfaces.
Quality Materials: Use high-quality patching compounds and tools for better results and durability.
Color Matching: Ensure primer and paint match the existing wall color to achieve a cohesive look.
Drywall repairs are essential for maintaining the integrity and aesthetics of interior spaces. Understanding the types of damage, necessary tools, and step-by-step repair processes empowers homeowners and DIY enthusiasts to effectively restore damaged drywall, achieving seamless and professional-looking results.
By following these techniques and tips, individuals can confidently address various types of drywall damage, ensuring a flawless finish that blends seamlessly with the surrounding walls.
#drywall#Flow Drywall#Drywall Repair#DRYWALL PATCHING#WALL & CEILING TEXTURE#BATHROOM UPGRADES#BASEMENT REMODELING#KITCHEN IMPROVEMENTS#Drywall Vacuum Sanding
2 notes
·
View notes
Photo

Guest - Bedroom Example of a mid-sized beach style guest medium tone wood floor bedroom design with gray walls
2 notes
·
View notes
Text
//flops on the ground. i finally unlocked room overlay #1. so here's some pics of the updated room! (updated in the sense that there's actual wallpaper and carpet now!)
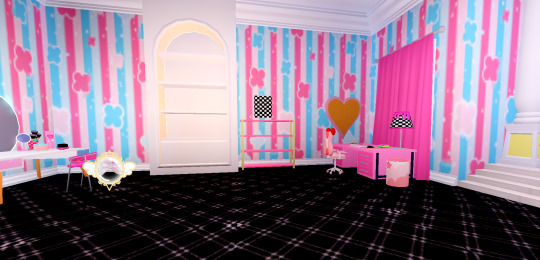


#//the wall texture isn't that crunchy i promise#//it's just the lag that was going on at the time :')#//but yeah it took a WHILE to decide on a wallpaper and carpet i liked lmao#//there is a LOT of cute wallpaper options alright?#//it was hard#//carpet was even harder to decide on bc i had to make sure it looked right with the wallpaper? and even then i might change it later#//couldn't figure out the ceiling but i went with glow in the dark stars :>#//it seemed like a fun idea so i went with it!#//will probs post more pics later when i unlock overlays 2 and 3 and toy around with things some more#//for now#//this!#backup log {ooc}
3 notes
·
View notes
Text
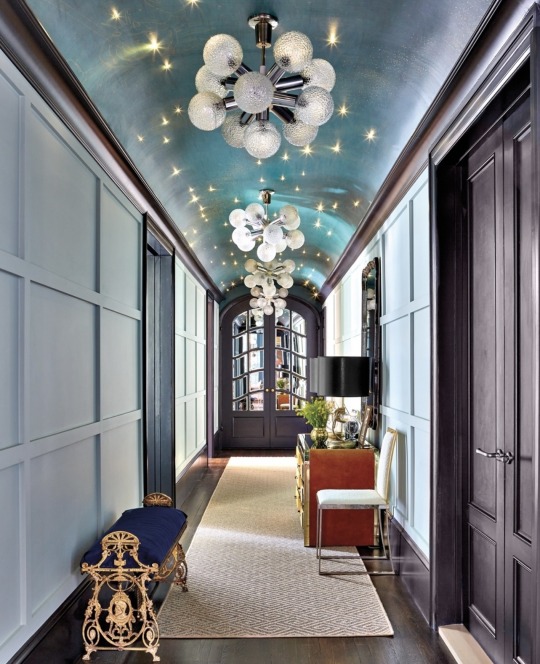

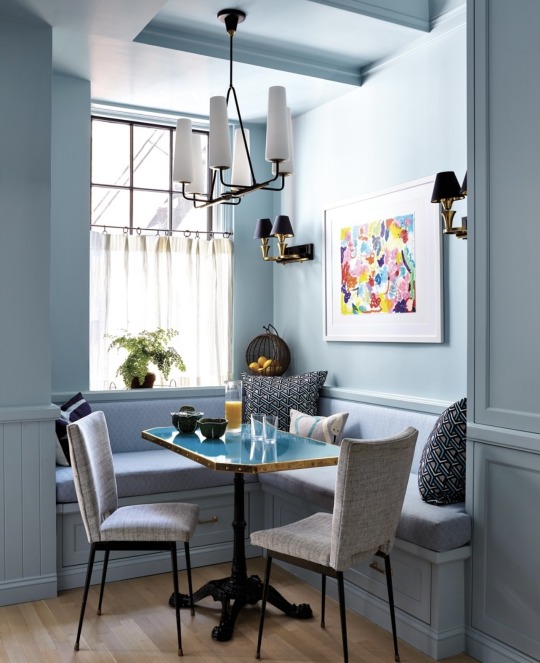

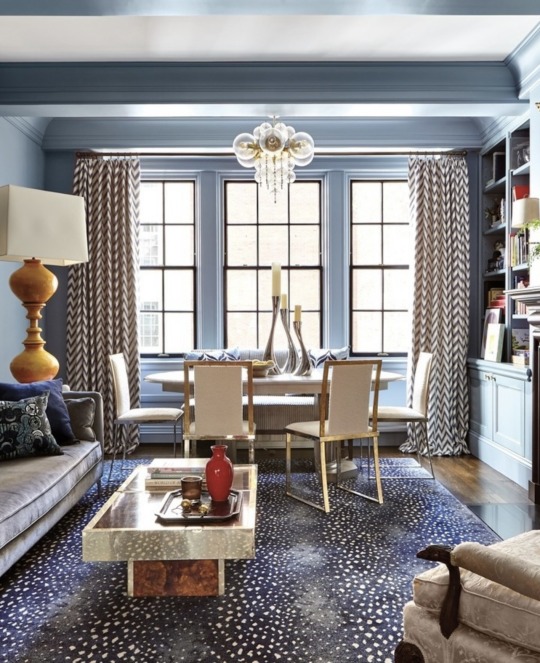
IG luxemagazine

#interior design#shades of blue#hallway#celestial ceiling#barrel ceiling#paneling#beams#breakfast nook#livingroom#kitchen#mouldings#built ins#chic#textures#mixed patterns#urban
31 notes
·
View notes
Text
sims added ceilings????
2 notes
·
View notes