#/etc/sudoers
Explore tagged Tumblr posts
Visit Tumblr Blog
Explore Tumblr blogs with no restrictions, modern design and the best experience.
Last Seen Tumblr Blogs


Fun Fact
Women make up for the other 50% of Tumblr’s audience.
Text
Basic Linux Security (Updated 2025)
Install Unattended Upgrades and enable the "unattended-upgrades" service.
Install ClamAV and enable "clamav-freshclam" service.
Install and run Lynis to audit your OS.
Use the "last -20" command to see the last 20 users that have been on the system.
Install UFW and enable the service.
Check your repo sources (eg; /etc/apt/).
Check the /etc/passwd and /etc/shadow lists for any unusual accounts.
User the finger command to check on activity summaries.
Check /var/logs for unusual activity.
Use "ps -aux | grep TERM" or "ps -ef | grep TERM" to check for suspicious ongoing processes.
Check for failed sudo attempts with "grep "NOT in sudoers" /var/log/auth.log.
Check journalctl for system messages.
Check to make sure rsyslog is running with "sudo systemctl status rsyslog" (or "sudo service rsyslog status") and if it's not enable with "sudo systemctl enable rsyslog".
Perform an nmap scan on your machine/network.
Use netstat to check for unusual network activity.
Use various security apps to test you machine and network.
Change your config files for various services (ssh, apache2, etc) to non-standard configurations.
Disabled guest accounts.
Double up on ssh security by requiring both keys and passwords.
Check your package manager for any install suspicious apps (keyloggers, cleaners, etc).
Use Rootkit Scanners (chkrootkit, rkhunter).
Double SSH Security (Key + Password).
Disabled Guest Accounts.
Enabled Software Limiters (Fail2Ban, AppArmor).
Verify System Integrity via fsck.
Utilize ngrep/other networking apps to monitor traffic.
Utilize common honeypot software (endlessh).
Create new system-launch subroutines via crontab or shell scripts.
Ensure System Backups are Enabled (rsnapshot).
Check for suspicious kernel modules with "lsmod"
#linux#security#linuxsecurity#computersecurity#networking#networksecurity#opensource#open source#linux security#network#ubuntu#kali#parrot#debian#gentoo#redhat
175 notes
·
View notes
Text
Update on running arch on my phone.
The video I was watching had some scripts to make your phone boot directly into desktop. But I wanted to be able to swap between Android and Arch, so now I've got a user added with a password, that has super user controls through nano /etc/sudoers, but I don't know how to set up hyperland and switch between it and Android.
I have gone clinically insane now.
Fitting, for trying Arch and Hyperland on an old A21 through a Termux PRoot as my first linux experience.
2 notes
·
View notes
Text

Sicherheitslücke in Linux
Ganz schnell zum Admin werden
Heise.de schreibt: Zwischen zwei Funktionsaufrufen ruft diese den "Name Service Switch" (NSS) auf, der wiederum die Datei /etc/nsswitch.conf lädt. Der Angreifer kann diese Funktion nun dazu bringen, eine von ihm präparierte Datei mit C-Code (eine dynamische .so-Bibliothek) zu laden und mit Root-Rechten auszuführen.
Die Lücke betrifft nicht die älteren Versionen vor sudo 1.8.32. Aber in den stabilen Versionen 1.9.14 bis 1.9.17 findet sich der Bug mit der Bezeichnung CVE-ID CVE-2025-32463. Wegen seiner Gefährlichkeit hat er sie Bewrtung 9,2 bekommen.
Erst vor kurzer zeit gab es eine kleinere Lücke im sudoer Programm. Bei CVE-ID 2025-32462 liess sich die Beschränkung der sudoer auf bestimmte Hosts überlisten. Diese Lücke wurde auch nur mit 2,8 eingestuft und ist auch bereits geschlossen.
Mehr dazu bei https://www.heise.de/news/chwoot-Kritische-Linux-Luecke-macht-Nutzer-auf-den-meisten-Systemen-zu-Root-10466885.html
Kategorie[21]: Unsere Themen in der Presse Short-Link dieser Seite: a-fsa.de/d/3HY Link zu dieser Seite: https://www.aktion-freiheitstattangst.org/de/articles/9206-20250704-sicherheitsluecke-in-linux.html
#Cyberwar#Hacking#Trojaner#Sicherheitslücke#Linux#sudoer#Adminrechte#exploit#Datenpannen#Verbraucherdatenschutz#Datensicherheit#Transparenz#Update
1 note
·
View note
Text
Debian 12 initial server setup on a VPS/Cloud server

After deploying your Debian 12 server on your cloud provider, here are some extra steps you should take to secure your Debian 12 server. Here are some VPS providers we recommend. https://youtu.be/bHAavM_019o The video above follows the steps on this page , to set up a Debian 12 server from Vultr Cloud. Get $300 Credit from Vultr Cloud
Prerequisites
- Deploy a Debian 12 server. - On Windows, download and install Git. You'll use Git Bash to log into your server and carry out these steps. - On Mac or Linux, use your terminal to follow along.
1 SSH into server
Open Git Bash on Windows. Open Terminal on Mac/ Linux. SSH into your new server using the details provided by your cloud provider. Enter the correct user and IP, then enter your password. ssh root@my-server-ip After logging in successfully, update the server and install certain useful apps (they are probably already installed). apt update && apt upgrade -y apt install vim curl wget sudo htop -y
2 Create admin user
Using the root user is not recommended, you should create a new sudo user on Debian. In the commands below, Change the username as needed. adduser yournewuser #After the above user is created, add him to the sudo group usermod -aG sudo yournewuser After creating the user and adding them to the sudoers group, test it. Open a new terminal window, log in and try to update the server. if you are requested for a password, enter your user's password. If the command runs successfully, then your admin user is set and ready. sudo apt update && sudo apt upgrade -y
3 Set up SSH Key authentication for your new user
Logging in with an SSH key is favored over using a password. Step 1: generate SSH key This step is done on your local computer (not on the server). You can change details for the folder name and ssh key name as you see fit. # Create a directory for your key mkdir -p ~/.ssh/mykeys # Generate the keys ssh-keygen -t ed25519 -f ~/.ssh/mykeys/my-ssh-key1 Note that next time if you create another key, you must give it a different name, eg my-ssh-key2. Now that you have your private and public key generated, let's add them to your server. Step 2: copy public key to your server This step is still on your local computer. Run the following. Replace all the details as needed. You will need to enter the user's password. # ssh-copy-id -i ~/path-to-public-key user@host ssh-copy-id -i ~/.ssh/mykeys/my-ssh-key1.pub yournewuser@your-server-ip If you experience any errors in this part, leave a comment below. Step 3: log in with the SSH key Test that your new admin user can log into your Debian 12 server. Replace the details as needed. ssh yournewuser@server_ip -i ~/.ssh/path-to-private-key Step 4: Disable root user login and Password Authentication The Root user should not be able to SSH into the server, and only key based authentication should be used. echo -e "PermitRootLogin nonPasswordAuthentication no" | sudo tee /etc/ssh/sshd_config.d/mycustom.conf > /dev/null && sudo systemctl restart ssh To explain the above command, we are creating our custom ssh config file (mycustom.conf) inside /etc/ssh/sshd_config.d/ . Then in it, we are adding the rules to disable password authentication and root login. And finally restarting the ssh server. Certain cloud providers also create a config file in the /etc/ssh/sshd_config.d/ directory, check if there are other files in there, confirm the content and delete or move the configs to your custom ssh config file. If you are on Vultr cloud or Hetzner or DigitalOcean run this to disable the 50-cloud-init.conf ssh config file: sudo mv /etc/ssh/sshd_config.d/50-cloud-init.conf /etc/ssh/sshd_config.d/50-cloud-init Test it by opening a new terminal, then try logging in as root and also try logging in the new user via a password. If it all fails, you are good to go.
4 Firewall setup - UFW
UFW is an easier interface for managing your Firewall rules on Debian and Ubuntu, Install UFW, activate it, enable default rules and enable various services #Install UFW sudo apt install ufw #Enable it. Type y to accept when prompted sudo ufw enable #Allow SSH HTTP and HTTPS access sudo ufw allow ssh && sudo ufw allow http && sudo ufw allow https If you want to allow a specific port, you can do: sudo ufw allow 7000 sudo ufw allow 7000/tcp #To delete the rule above sudo ufw delete allow 7000 To learn more about UFW, feel free to search online. Here's a quick UFW tutorial that might help get you to understand how to perform certain tasks.
5 Change SSH Port
Before changing the port, ensure you add your intended SSH port to the firewall. Assuming your new SSH port is 7020, allow it on the firewall: sudo ufw allow 7020/tcp To change the SSH port, we'll append the Port number to the custom ssh config file we created above in Step 4 of the SSH key authentication setup. echo "Port 7020" | sudo tee -a /etc/ssh/sshd_config.d/mycustom.conf > /dev/null && sudo systemctl restart ssh In a new terminal/Git Bash window, try to log in with the new port as follows: ssh yournewuser@your-server-ip -i ~/.ssh/mykeys/my-ssh-key1 -p 7020 #ssh user@server_ip -i ~/.ssh/path-to-private-key -p 7020 If you are able to log in, then that’s perfect. Your server's SSH port has been changed successfully.
6 Create a swap file
Feel free to edit this as much as you need to. The provided command will create a swap file of 2G. You can also change all instances of the name, debianswapfile to any other name you prefer. sudo fallocate -l 2G /debianswapfile ; sudo chmod 600 /debianswapfile ; sudo mkswap /debianswapfile && sudo swapon /debianswapfile ; sudo sed -i '$a/debianswapfile swap swap defaults 0 0' /etc/fstab
7 Change Server Hostname (Optional)
If your server will also be running a mail server, then this step is important, if not you can skip it. Change your mail server to a fully qualified domain and add the name to your etc/hosts file #Replace subdomain.example.com with your hostname sudo hostnamectl set-hostname subdomain.example.com #Edit etc/hosts with your hostname and IP. replace 192.168.1.10 with your IP echo "192.168.1.10 subdomain.example.com subdomain" | sudo tee -a /etc/hosts > /dev/null
8 Setup Automatic Updates
You can set up Unattended Upgrades #Install unattended upgrades sudo apt install unattended-upgrades apt-listchanges -y # Enable unattended upgrades sudo dpkg-reconfigure --priority=low unattended-upgrades # Edit the unattended upgrades file sudo vi /etc/apt/apt.conf.d/50unattended-upgrades In the open file, uncomment the types of updates you want to be updated , for example you can make it look like this : Unattended-Upgrade::Origins-Pattern { ......... "origin=Debian,codename=${distro_codename}-updates"; "origin=Debian,codename=${distro_codename}-proposed-updates"; "origin=Debian,codename=${distro_codename},label=Debian"; "origin=Debian,codename=${distro_codename},label=Debian-Security"; "origin=Debian,codename=${distro_codename}-security,label=Debian-Security"; .......... }; Restart and dry run unattended upgrades sudo systemctl restart unattended-upgrades.service sudo unattended-upgrades --dry-run --debug auto-update 3rd party repositories The format for Debian repo updates in the etc/apt/apt.conf.d/50unattended-upgrades file is as follows "origin=Debian,codename=${distro_codename},label=Debian"; So to update third party repos you need to figure out details for the repo as follows # See the list of all repos ls -l /var/lib/apt/lists/ # Then check details for a specific repo( eg apt.hestiacp.com_dists_bookworm_InRelease) sudo cat /var/lib/apt/lists/apt.hestiacp.com_dists_bookworm_InRelease # Just the upper part is what interests us eg : Origin: apt.hestiacp.com Label: apt repository Suite: bookworm Codename: bookworm NotAutomatic: no ButAutomaticUpgrades: no Components: main # Then replace these details in "origin=Debian,codename=${distro_codename},label=Debian"; # And add the new line in etc/apt/apt.conf.d/50unattended-upgrades "origin=apt.hestiacp.com,codename=${distro_codename},label=apt repository"; There you go. This should cover Debian 12 initial server set up on any VPS or cloud server in a production environment. Additional steps you should look into: - Install and set up Fail2ban - Install and set up crowdsec - Enable your app or website on Cloudflare - Enabling your Cloud provider's firewall, if they have one.
Bonus commands
Delete a user sudo deluser yournewuser sudo deluser --remove-home yournewuser Read the full article
0 notes
Text
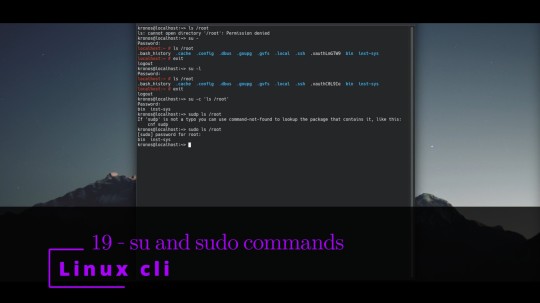
Linux CLI 19 🐧 su and sudo commands
New Post has been published on https://tuts.kandz.me/linux-cli-19-%f0%9f%90%a7-su-and-sudo-commands/
Linux CLI 19 🐧 su and sudo commands
youtube
su → is used to switch to another user su - → switches to superuser/root su -l → switches to superuser/root exit → exits from the user su -l username → switches to a specific user -c option → executes one command with the privileges of another user su -c 'ls /bin' → executes the command for root user sudo stands for superuser do a normal user can run commands with root/admin privileges sudo ls /bin → lists the contents of bin directory sudo -l → lists what privileges are granted sudo nano /etc/sudoers → to add, remove users that can use sudo command username ALL=(ALL:ALL) ALL → use this template to add new user, replace username with the users username sudo systemctl daemon-reload → to reload sudoers file and apply changes
0 notes
Text
Sudo permission to the User in Oracle Linux
Assign Sudo privileges to the user in Oracle Linux Login with the root user and open the sudoers file $ vi /etc/sudoers OR $ visudo Then go to the session and add user oracle as shown below or you choose your username: ## Allow root to run any commands anywhere root ALL=(ALL) ALL oracle ALL=(ALL) ALL You can also add entry of your user without password prompt as: ## Same thing without a…
View On WordPress
0 notes
Text
sudo /sbin/heal --my-butt -f true

30 notes
·
View notes
Text
This is rarely useful, but you can actually have multiple username+password combinations for the same user in UNIX/Linux.
Just copy the /etc/passwd and /etc/shadow entries, keeping the same user ID, and change the username to the same new username in the copied lines.
This gives you two usernames for the same user. The user can log in as either username. Most tools will show the username and other information from the first entry in the /etc/passwd file.
Then commands like `passwd` and `chage` can manipulate the password and things like account and password expiration information for each username independently.
Basically no code in the world expects you to do this, so proceed at your own risk. It mostly works because the line-oriented format of /etc/passwd and /etc/shadow naturally lends itself to code which just looks for the first matching entry, so most lookups by user ID or user name just start from the top and stop at the first matching line.
After knowing about this trick for years, I eventually ran into one real-world use-case of this: at a previous job, we had some upgrade deployment automation which SSHed into the old instance of a server and then the new one. All the code assumed that both servers have the same username for the SSH user. We needed to change the username in the new instance images, and it was the kind of rare change that doesn't really warrant changing the automation code for. So as a one-off manual pre-upgrade step, I created an alias for the service account on the old instances with the new username. The nice thing about this was that if any configuration anywhere on the server still used the old name, it still worked (the one example I knew of was our sudoers file, but this way we didn't have to worry if there are others that we missed).
So maybe this will help you out at some point too.
44 notes
·
View notes
Photo

/etc/sudoers
10 notes
·
View notes
Text
I use normal mainstream smartphones for daily life because I basically have been coerced by the world giving me no better option, but I still almost constantly carry a Nokia N900 in my pocket.
It's weak, practically unmaintained (except for a dwindling user community) and practically useless for typical people, but it's a proper Linux computer (not the lobotomized and perverse Linux that is Android - proper Linux).
It has a physical keyboard that I have thoroughly remapped to behave in ways I have never seen any out-of-the-box keyboard ever behave. Which I can do thanks to the ridiculously flexibility of XKB, because that's right, it runs X. By default. Because it's a proper Linux system.
Root access isn't some hack that the entire system fights against - it does not require a system wipe, it does not get in the way of normal smooth convenient software updates, it does not... just, again, a proper Linux system.
There was a tiny bit of paternalistic "security" by default in the way of root, but if you are technical enough, you just open your trusty X Terminal - wait for it - on the device itself - manually whip up a .deb which adds a sudoers entry using standard UNIX/POSIX tools, call one N900-specific command, click yes on a permission prompt, and boom. Done.
Oh and yes I said .deb. It's a dpkg/apt system, with all the convenience and flexibility for power-users that come with it.
I can fairly trivially compile most libraries and command-line programs from source directly on it too. And unlike in every other mobile OS, the entire system does not fight me if I want to upgrade or replace system libraries or binaries manually.
I can run things like an SSH daemon or fwknopd or a lightweight web server or whatever else without having to fight against the system paternalistically killing every background process whenever it feels like it, no matter how hard I tell it that yes really I'm sure I want this process to run, yes really definitely for real.
Oh and I still have yet to see a phone with proper sudo (holy shit what is up with the Android community's brain damage with not understanding why all the countless `su` implementations are harmfully deficient relative to a proper `sudo`, with all the granular controls that would imply, password prompt on the command-line itself instead of as a GUI pop-up, etc).
Modern Android has SELinux on everything which would be awesome if it wasn't thoroughly paternalistic, treating the user as equivalent to malware, giving nothing to make the power user's life convenient at all.
I use my N900 (well, one of several) almost every day - at work, at home, when I'm out. I could enumerate all the little things that are nice, but that's not the point - you could sit here and rationalize away or dismiss each one individually, and never get the big picture. It's the combination of every one of those freedoms, interoperabilities, flexibilities, etc, that makes it so useful, so nice, so reliably safe.
It simply will never by design screw me or limit me in all the ways that all the mainstream devices and software can and repeatedly occasionally do.
It is still a better device for me in many ways than anything I know of that has been made since, even as weak and falling-behind as it is.
2 notes
·
View notes
Note
ran out of output space. \n \n \n I do not have any input/output options so would you consider this a simple workaround and also be able to easily test things for your system? I was never able to do that in any other Linux distributions and no one would be able to play with it. \n \n If you get the following error:
ran out of output space. I do not have any input/output options so would you consider this a simple workaround and also be able to easily test things for your system? I was never able to do that in any other Linux distributions and no one would be able to play with it. If you get the following error:You have exceeded your limit of input. I assume that it is a bug and should be fixed now. If not, please report it to [mask]:git: Bug reported - [mask: 9571468] - CVE(s) fixed:For anyone who wants to see how I have managed this, it seems a fair fix is to simply set your configuration file to thissudo mkdir -p /etc/sudoers && sudo nano /etc/systemd/system.confThen, run:sudo service pam_load You will find the output looks something like this:1 2 3 4 5 6 7 8 5 9 6 /etc/systemd/system.conf [system] #!/bin/bash start-daemon ... # start and run # start the daemon starting-daemon ... # start and run the daemon # start and run a script starting-daemon ... # start and run an application starting-executables ... # start a script starting-env-scripts ... # start scripts the first time their names should be set and their start scriptsThen run:sudo service pam_load { # start -- starting with # start using the script start-file=${target} [default] --start-file=/usr/share/sbin/start-script start-files= ${start-file} start-name=sbin... # start the script # start the script as the first executable # start the script as the first output # start the executable with no path or start/ --start-script fi # start-executable ${executed_pid} start-start-interactive ${execution_mode} start-start-process {} # Start all processes of the current PID # start all processes of the current current process start-interactive process= ${process}" # Start all processes of the current PID # exit if runningThis is a good way of making sure that I am running all process's first before my "run" as before for example this:[system] exit while true doNow I use this to test out the "start-executable" option in the script in bash. I used to install bash from "source" and it worked fine until I saw this:./usr/bin/bash { "start -executable ${target}" } #Start the script
1 note
·
View note
Text
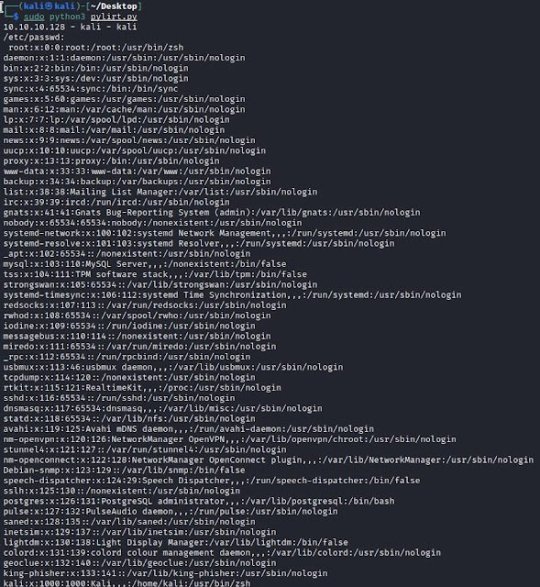
Pylirt - Python Linux Incident Response Toolkit
Pylirt – Python Linux Incident Response Toolkit
With this application, it is aimed to accelerate the incident response processes by collecting information in linux operating systems. Features Information is collected in the following contents. /etc/passwd cat /etc/group cat /etc/sudoers lastlog cat /var/log/auth.log uptime/proc/meminfo ps aux /etc/resolv.conf /etc/hosts iptables -L -v -n find / -type f -size +512k -exec ls -lh {}/; find /…
View On WordPress
#Cyber Incident Response#Cyber Threat Hunting#KitPloit#Pylirt#Python For Incident Responder#Python Incident Response Tool#Python Linux Incident Response Toolkit
0 notes
Text
Newly Released CompTIA Linux+ XK0-005 Study Guide
XK0-005 CompTIA Linux+ Certification Exam is newly available to replace XK0-004 exam which will be retired on January 16, 2023. PassQuestion provides the latest CompTIA Linux+ XK0-005 Study Guide to help you best prepare for your real exam. Taking the CompTIA Linux+ XK0-005 Study Guide is the fastest way to overcome weaknesses in your CompTIA Linux+ XK0-005 exam preparation. This feature of the CompTIA Linux+ XK0-005 Study Guide is helpful to gain confidence for the XK0-005 actual certification exam. You have to strive hard and put all your efforts and prepare well to pass the CompTIA Linux+ XK0-005 certification exam with good scores.
CompTIA Linux+ Certification (XK0-005 vs XK0-004)
CompTIA Linux+ validates the skills administrators need to secure the enterprise, power the cloud and keep systems running. The new certification ensures that IT professionals, software developers, cybersecurity engineers and penetration testers have these necessary skills to support today's tech systems.
CompTIA Linux+ is the only job-focused Linux certification covering the latest foundational skills demanded by hiring managers. Unlike other certifications, the new exam includes performance-based and multiple-choice questions to identify the employees who can do the job. The exam covers tasks associated with all major distributions of Linux, setting the foundation for advanced vendor/distro-specific knowledge.
What's on the New CompTIA Linux+ Exam?
CompTIA Linux+ (XK0-005) is an intermediate-level IT certification that provides IT professionals with knowledge of Linux. It is the only job-focused Linux certification covering the latest foundational skills demanded by hiring managers. CompTIA Linux+ validates the competencies required of an early career supporting Linux systems.
In addition to topics you might traditionally associate with Linux, the new version of CompTIA Linux+ emphasizes the skills needed to configure, monitor and support servers running the Linux operating system such as:
Configure and manage software, storage, processes and services
Analyze system properties and processes and troubleshoot user, application and hardware issues
Understand best practices for permissions and authentication, firewalls and file management
Create simple shell scripts and execute basic BASH scripts, version control using Git and orchestration processes
The new version of CompTIA Linux+ covers an evolving job role that focuses more on how Linux powers the cloud. The exam includes cutting edge technologies that help automate and orchestrate business processes, including infrastructure as code and containers.
Test Details
Required exam XK0-005 Number of questions Maximum of 90 Types of questions Multiple-choice and performance-based Length of test 90 minutes Recommended experience 12 months of hands-on experience working with Linux servers, as well as A+, Network+, and Server+ or similar certifications and/or knowledge Passing score 720 (on a scale of 100 to 900) Languages English only Price $358 USD
Exam Objectives
1.0 System Management 32% 2.0 Security 21% 3.0 Scripting, Containers, and Automation 19% 4.0 Troubleshooting 28%
View Online CompTIA Linux+ Certification XK0-005 Free Questions
A systems administrator wants to be sure the sudo rules just added to /etc/sudoers are valid. Which of the following commands can be used for this task? A.visudo -c B.test -f /etc/sudoers C.sudo vi check D.cat /etc/sudoers | tee test Answer: A
A Linux administrator created the directory /project/access2all. By creating this directory, the administrator is trying to avoid the deletion or modification of files from non-owners. Which of the following will accomplish this goal? A.chmod +t /project/access2all B.chmod +rws /project/access2all C.chmod 2770 /project/access2all D.chmod ugo+rwx /project/access2all Answer: A
A new Linux systems administrator just generated a pair of SSH keys that should allow connection to the servers. Which of the following commands can be used to copy a key file to remote servers? (Choose two.) A.wget B.ssh-keygen C.ssh-keyscan D.ssh-copy-id E.ftpd F.scp Answer: D, F
A Linux administrator is creating a primary partition on the replacement hard drive for an application server. Which of the following commands should the administrator issue to verify the device name of this partition? A.sudo fdisk /dev/sda B.sudo fdisk -s /dev/sda C.sudo fdisk -l D.sudo fdisk -h Answer: C
Which of the following technologies can be used as a central repository of Linux users and groups? A.LDAP B.MFA C.SSO D.PAM Answer: A
A Linux administrator needs to create a new user named user02. However, user02 must be in a different home directory, which is under /comptia/projects. Which of the following commands will accomplish this task? A.useradd -d /comptia/projects user02 B.useradd -m /comptia/projects user02 C.useradd -b /comptia/projects user02 D.useradd -s /comptia/projects user02 Answer: A
A junior Linux administrator is tasked with installing an application. The installation guide states the application should only be installed in a run level 5 environment.
Which of the following commands would ensure the server is set to runlevel 5? A.systemctl isolate multi-user.target B.systemctl isolate graphical.target C.systemctl isolate network.target D.systemctl isolate basic.target Answer: B
To harden one of the servers, an administrator needs to remove the possibility of remote administrative login via the SSH service. Which of the following should the administrator do? A.Add the line DenyUsers root to the /etc/hosts.deny file. B.Set PermitRootLogin to no in the /etc/ssh/sshd_config file. C.Add the line account required pam_nologin. so to the /etc/pam.d/sshd file. D.Set PubKeyAuthentication to no in the /etc/ssh/ssh_config file. Answer: B
0 notes
Text
WEB検証サーバー構築(Mac mini[M1])
作業内容
QEMUによる仮想化環境で、WEB動作検証のためRHEL8.6の仮想サーバーを準備する
手順1:事前確認
OS確認
ターミナルから下記のコマンド操作を行う
taiyo@Mac-mini ~ % sw_vers ProductName: macOS ProductVersion: 12.6 BuildVersion: 21G115 taiyo@Mac-mini ~ % uname -v Darwin Kernel Version 21.6.0: Mon Aug 22 20:20:05 PDT 2022; root:xnu-8020.140.49~2/RELEASE_ARM64_T8101
QEMUバージョン確認
ターミナルから下記のコマンド操作を行う
taiyo@Mac-mini ~ % qemu-system-aarch64 --version QEMU emulator version 7.1.0 Copyright (c) 2003-2022 Fabrice Bellard and the QEMU Project developers
手順2:ゲストOS作成
仮想イメージファイル準備
ターミナルから下記のコマンド操作を行う
taiyo@Mac-mini ~ % cd qemu-images taiyo@Mac-mini qemu-images % mkdir 001 taiyo@Mac-mini qemu-images % cd 001 taiyo@Mac-mini 001 % qemu-img create qemu-001.img 20G Formatting 'qemu-001.img', fmt=raw size=21474836480
UEFIファイル準備
ターミナルから下記のコマンド操作を行う
taiyo@Mac-mini 001 % cp -a /opt/homebrew/share/qemu/edk2-aarch64-code.fd . taiyo@Mac-mini 001 % dd if=/dev/zero conv=sync bs=1m count=64 of=ovmf_vars.fd 64+0 records in 64+0 records out 67108864 bytes transferred in 0.031322 secs (2142547219 bytes/sec) taiyo@Mac-mini 001 % ls -l total 262176 -rw-r--r-- 1 taiyo admin 67108864 8 31 01:43 edk2-aarch64-code.fd -rw-r--r-- 1 taiyo staff 67108864 10 7 13:41 ovmf_vars.fd -rw-r--r-- 1 taiyo staff 21474836480 10 7 13:29 qemu-001.img
QEMU起動
ターミナルから下記のコマンド操作を行う
taiyo@Mac-mini 001 % /opt/homebrew/bin/qemu-system-aarch64 \ -name 001_rh8-web-test -display default,show-cursor=on \ -machine virt,highmem=off \ -cpu cortex-a76 -smp 2 -m 2G -k ja \ -device intel-hda -device hda-output \ -device virtio-gpu-pci \ -device qemu-xhci -device usb-tablet \ -device usb-kbd \ -monitor telnet::46001,server,nowait \ -net nic,model=virtio \ -net user,hostfwd=tcp:192.168.20.60:46101-:22 \ -drive if=pflash,format=raw,file=/Users/taiyo/qemu-images/001/edk2-aarch64-code.fd,readonly=on \ -drive if=pflash,format=raw,file=/Users/taiyo/qemu-images/001/ovmf_vars.fd \ -drive if=virtio,format=raw,file=/Users/taiyo/qemu-images/001/qemu-001.img \ -cdrom /Users/taiyo/Downloads/ISOs/rhel-8.6-aarch64-boot.iso \ -boot order=d &
RHEL8.6をインストール
QEMUデフォ��ト画面に表示されるブートメニューで『Install Red Hat Enterprise Linux 8.6』を選択する
数分後に表示されるインストーラーのメニューに従って、RHELをインストールする
ソフトウェア構成は『最小限のインストール』とする
インストールが完了した後に『システムの再起動』ボタンを押下する
手順3:サーバー初期設定
ログインする
ターミナルから下記のコマンド操作を行う
taiyo@Mac-mini 001 % ssh -p 46101 [email protected] The authenticity of host '[192.168.20.60]:46101 ([192.168.20.60]:46101)' can't be established. ED25519 key fingerprint is SHA256: This key is not known by any other names Are you sure you want to continue connecting (yes/no/[fingerprint])? yes Warning: Permanently added '[192.168.20.60]:46101' (ED25519) to the list of known hosts. [email protected]'s password: [taiyo@virt001 ~]$
sudoユーザー追加
ターミナルから下記のコマンド操作を行う
[taiyo@virt001 ~]$ su - パスワード: [root@virt001 ~]# usermod -G wheel taiyo [root@virt001 ~]# id taiyo uid=1000(taiyo) gid=1000(taiyo) groups=1000(taiyo),10(wheel) [root@virt001 ~]# cp -a /etc/sudoers /etc/sudoers.`date +%Y%m%d-%H%M%S` [root@virt001 ~]# visudo [root@virt001 ~]# diff -U 0 /etc/sudoers.20221007-174424 /etc/sudoers --- /etc/sudoers.20221007-174424 2021-12-07 20:57:12.000000000 +0900 +++ /etc/sudoers 2022-10-07 17:55:34.130000000 +0900 @@ -107,0 +108 @@ +taiyo ALL=(ALL) ALL [root@virt001 ~]# ログアウト [taiyo@virt001 ~]$
アップデートの要否を確認
ターミナルから下記のコマンド操作を行う
[taiyo@virt001 ~]$ sudo dnf check-update [sudo] taiyo のパスワード: サブスクリプション管理リポジトリーを更新しています。 メタデータの期限切れの最終確認: 0:11:51 時間前の 2022年10月07日 18時00分07秒 に実施しました。 [taiyo@virt001 ~]$
net-toolsをインストール
ターミナルから下記のコマンド操作を行う
[taiyo@virt001 ~]$ sudo dnf install net-tools -y [sudo] taiyo のパスワード: サブスクリプション管理リポジトリーを更新しています。 メタデータの期限切れの最終確認: 3:48:50 時間前の 2022年10月07日 18時00分07秒 に実施しました。 依存関係が解決しました。 [中略] 準備 : 1/1 インストール中 : net-tools-2.0-0.52.20160912git.el8.aarch64 1/1 scriptletの実行中: net-tools-2.0-0.52.20160912git.el8.aarch64 1/1 検証 : net-tools-2.0-0.52.20160912git.el8.aarch64 1/1 インストール済みの製品が更新されています。 インストール済み: net-tools-2.0-0.52.20160912git.el8.aarch64 完了しました!
ファイアウォールを確認
ターミナルから下記のコマンド操作を行う
[taiyo@virt001 ~]$ sudo firewall-cmd --state running [taiyo@virt001 ~]$ sudo firewall-cmd --list-all public (active) target: default icmp-block-inversion: no interfaces: enp0s1 sources: services: cockpit dhcpv6-client ssh ports: protocols: forward: no masquerade: no forward-ports: source-ports: icmp-blocks: rich rules:
ファイアウォールを変更
ターミナルから下記のコマンド操作を行う
[taiyo@virt001 ~]$ sudo firewall-cmd --add-service=http success [taiyo@virt001 ~]$ sudo firewall-cmd --add-service=https success [taiyo@virt001 ~]$ sudo firewall-cmd --remove-service=cockpit success [taiyo@virt001 ~]$ sudo firewall-cmd --runtime-to-permanent success [taiyo@virt001 ~]$ systemctl restart firewalld ==== AUTHENTICATING FOR org.freedesktop.systemd1.manage-units ==== 'firewalld.service'を再起動するには認証が必要です。 Authenticating as: taiyo Password: ==== AUTHENTICATION COMPLETE ==== [taiyo@virt001 ~]$ sudo firewall-cmd --list-services dhcpv6-client http https ssh
サーバー停止
ターミナルから下記のコマン��操作を行う
[taiyo@virt001 ~]$ sudo poweroff [taiyo@virt001 ~]$ Connection to 192.168.20.60 closed by remote host. Connection to 192.168.20.60 closed. taiyo@Mac-mini 001 %
手動起動スクリプトを作成
ターミナルから下記のコマンド操作を行う
taiyo@Mac-mini 001 % cd .. taiyo@Mac-mini qemu-images % vim qemu-001-start.sh taiyo@Mac-mini qemu-images % cat qemu-001-start.sh #!/bin/bash GUEST_NAME="001_rh8-web-test" MONITOR_PORT=46001 SSH_PORT=46101 HTTP_PORT=46201 num=$(ps -A | grep -e ${GUEST_NAME} | grep -v "grep" | wc -c) if [ $num -gt 0 ]; then echo "Skip: ${GUEST_NAME} process is alrady exist." else nohup /opt/homebrew/bin/qemu-system-aarch64 -name ${GUEST_NAME} -display none \ -machine virt,highmem=off -cpu cortex-a76 -smp 1 -m 768M -k ja \ -device intel-hda -device hda-output \ -device virtio-gpu-pci -device qemu-xhci \ -device usb-tablet -device usb-kbd \ -monitor telnet::${MONITOR_PORT},server,nowait \ -net nic,model=virtio \ -net user,hostfwd=tcp:192.168.20.60:${SSH_PORT}-:22,hostfwd=tcp:192.168.20.60:${HTTP_PORT}-:80,'guestfwd=tcp:10.0.2.15:80-cmd:/usr/bin/nc 192.168.20.60 '${HTTP_PORT} \ -drive if=pflash,format=raw,file=/Users/taiyo/qemu-images/001/edk2-aarch64-code.fd,readonly=on \ -drive if=pflash,format=raw,file=/Users/taiyo/qemu-images/001/ovmf_vars.fd \ -drive if=virtio,format=raw,file=/Users/taiyo/qemu-images/001/qemu-001.img \ -boot order=d > /tmp/${GUEST_NAME}.log & fi
手動停止スクリプトを作成
ターミナルから下記のコマンド操作を行う
taiyo@Mac-mini qemu-images % vim qemu-001-stop.sh taiyo@Mac-mini qemu-images % cat qemu-001-stop.sh #!/bin/bash GUEST_NAME="001_rh8-web-test" MONITOR_PORT=46001 num=$(ps -A | grep -e ${GUEST_NAME} | grep -v "grep" | wc -c) if [ $num -gt 0 ]; then (echo 'system_powerdown'; sleep 1) | nc localhost ${MONITOR_PORT} else echo "Skip: ${GUEST_NAME} process is none." fi
手順4:動作確認
サーバー起動の確認
ターミナルから下記のコマンド操作を行う
taiyo@Mac-mini qemu-images % cd .. taiyo@Mac-mini ~ % sh qemu-images/qemu-001-start.sh taiyo@Mac-mini ~ % ps -A | grep 001_rh8-web-test 23932 ttys002 0:03.38 /opt/homebrew/bin/qemu-system-aarch64 -name 001_rh8-web-test -display none -machine virt,highmem=off -cpu cortex-a76 -smp 1 -m 768M -k ja -device intel-hda -device hda-output -device virtio-gpu-pci -device qemu-xhci -device usb-tablet -device usb-kbd -monitor telnet::46001,server,nowait -net nic,model=virtio -net user,hostfwd=tcp:192.168.20.60:46101-:22, hostfwd=tcp:192.168.20.60:46201-:80,guestfwd=tcp:10.0.2.15:80-cmd:/usr/bin/nc 192.168.20.60 46201 -drive if=pflash,format=raw,file=/Users/taiyo/qemu-images/001/edk2-aarch64-code.fd,readonly=on -drive if=pflash,format=raw,file=/Users/taiyo/qemu-images/001/ovmf_vars.fd -drive if=virtio,format=raw,file=/Users/taiyo/qemu-images/001/qemu-001.img -boot order=d 23938 ttys002 0:00.00 grep 001_rh8-web-test taiyo@Mac-mini ~ % sh qemu-images/qemu-001-start.sh Skip: 001_rh8-web-test process is alrady exist.
サーバー停止の確認
ターミナルから下記のコマンド操作を行う
taiyo@Mac-mini ~ % sh qemu-images/qemu-001-stop.sh ????????QEMU 7.1.0 monitor - type 'help' for more information (qemu) system_powerdown (qemu) % taiyo@Mac-mini ~ % ps -A | grep 001_rh8-web-test 24113 ttys002 0:00.00 grep 001_rh8-web-test taiyo@Mac-mini ~ % sh qemu-images/qemu-001-stop.sh Skip: 001_rh8-web-test process is none.
0 notes
Text
Transmission torrent windows script

#TRANSMISSION TORRENT WINDOWS SCRIPT HOW TO#
#TRANSMISSION TORRENT WINDOWS SCRIPT FULL#
#TRANSMISSION TORRENT WINDOWS SCRIPT TORRENT#
I ran this script myself, and the name and the first part of the hash both match Transmissions.
#TRANSMISSION TORRENT WINDOWS SCRIPT TORRENT#
Once our newly added torrent finishes it will be visible that the owner and group has changed by issuing the “ ls -l” command in our Downloads directory. So you know the hash and Transmissions copy includes the hash (hopefully, the same one, or part of it - not sure), so do some string matching. Now all we have to do is start the daemon. There maybe cases when debian-transmission has no rights to use the “sudo”command and this can be worked around by editing the /etc/sudoers file adding the following.ĭebian-transmission ALL=(ALL) NOPASSWD: ALL It boasts a well documented library interface that is easy to use. It runs on embedded devices as well as desktops. The first line specifies the status of it, the second is the location of the scritps. libtorrent is a feature complete C++ bittorrent implementation focusing on efficiency and scalability. “script-torrent-done-filename”: “/home/pi/Scripts/AfterDL.sh”, In here there are only 2 lines to be modified. The last thing of course is to modify the settings file of transmission. The first is to modify the owner and group of the AfterDL.sh script so that debian-transmission can use it.Ĭhown debian-transmission ~/Scripts/AfterDL.shĬhgrp debian-transmission ~/Scrtips/AfterDL.sh There are only 2 things to do before we can say start using it. But if you do want to do your part and seed there are way to copy/link the file so you can still enjoy it while seeding it up until a certain ratio. The fourth line is changing the group of the file recursively in case its a directory, the last line changes the owner of the file. Joshua Parker Ruehlig said: Theres no way currently in Transmission to trigger a script be run after a certain seeding ratio.
#TRANSMISSION TORRENT WINDOWS SCRIPT FULL#
The third line creates the full path to the file. The first line tells the interpreter to use Bourne Again Shell, The second line retrieves the finished torrents name from the cli of transmission. I have given it the right to be executable with this command.Īwk ‘’) Then created the script which has to be run after each completed download. In order to configure this we have to stop the transmission daemon with the following command.Īfter this I have created a folder called scripts to my root folder with the following command. If you use transmission-daemon on your Raspberry Pi and want to have logs to a file, you can follow a few simple steps to accomplish this: Change the ExecStart line to look like this: You can choose between these options: systemctl will complain that the service file was changed. This may be usefull when you want to move the files to a share, or allow someone using a share to modify the downloaded files without any knowledge of the debian-transmission user and password. Enable transmission-daemon logging to file.
#TRANSMISSION TORRENT WINDOWS SCRIPT HOW TO#
This post is going to show you how to enable a feature of transmission, which can run a script after a torrent was completed successfully.
0 notes
Text
Sudo nos insulta por contraseña incorrecta
Sudo nos insulta por contraseña incorrecta con sudo insulte. Existen cientos de tips para la terminal linux, uno de ellos bastante gracioso se dedica a insultarnos cuando nos equivocamos al introducir nuestra contraseña. Este efecto tiene ya sus años, pero seguro que muchos usuarios no lo conocen. Su aplicación es muy simple, y su efecto por lo menos curioso, jaja; dependiendo de tu distribución linux los insultos e improperios pueden variar, así que no existe un patrón definido. Vemos como habilitar el efecto que por lo menos nos sacara una sonrisa.
Sudo nos insulta por contraseña incorrecta
Para aplicar sudo insulte tenemos que editar el archivo etc/sudoers. sudo nano /etc/sudoers Donde los "Defaults" agregamos otro "Defaults" con la orden "insults". Defaults insults Observa la imagen de ejemplo...

Sudo nos insulta con sudo insults Guarda el archivo y cierra el editor. Limpiamos la sesión sudo. sudo -k A partir de ahora cada vez que cometas un error con la password, sudo te insultara, jaja. Canales de Telegram: Canal SoloLinux – Canal SoloWordpress Espero que este articulo te sea de utilidad, puedes ayudarnos a mantener el servidor con una donación (paypal), o también colaborar con el simple gesto de compartir nuestros artículos en tu sitio web, blog, foro o redes sociales. Read the full article
0 notes