#worbla armor
Explore tagged Tumblr posts
Text

Photo of my Witch King cosplay, it's still my pride and joy! I spent so long working on this costume, and I love it so much.
Photo by Bryant Cox Photography Cosplayer @apteux
#cosplay#lotr#lord of the rings#lord of the rings cosplay#witch king#the witch king#witch king of angmar#witch king cosplay#self-made#sewing#craft foam#worbla#diy armor#foam armor
18 notes
·
View notes
Text


The gauntlets for my Guild Wars 2 cosplay are done, other than sanding and painting! I still intend to finish this costume lol, it's just taking me extra time because life. All pieces are made of worbla over foam or cardboard, or by itself. The gloves are made from the same fabric (hand-dyed by me) as the rest of the costume. Everything is fully articulated to move with my hand and arm. The only armor piece I have left is the upper arm. Then it's just wiring, sanding, painting, and styling the wig! Woo! I'm pretty excited for this cosplay. Not only is it the most complex and difficult costume I've built, but it has also been with me through some tough times. At some point, I'll have to put all the pieces on and share some pictures :-)
#cosplay#cosplay wip#cosplay progress#guild wars 2#gw2#arenanet#costume making#armor#armor making#worbla#thermoplastics#gauntlets#bracers#fantasy#crafting#wip#diy#costume#norn#royal guard#guild wars character#gaming#video games#my cosplay
93 notes
·
View notes
Text
I leave for Momocon in 2 days and I’m not done with this cosplay (pt. 1- gauntlets)
Time is running out but I finished making all the fabrication stuff. Now I just have to get it onto the cosplay.
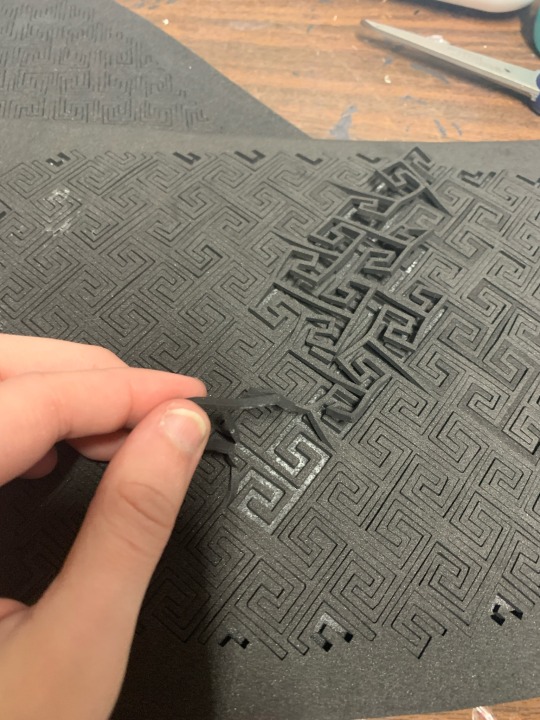
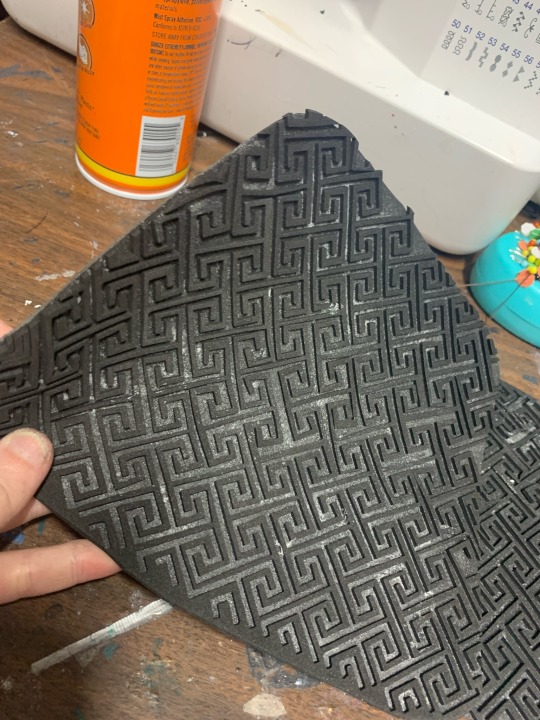
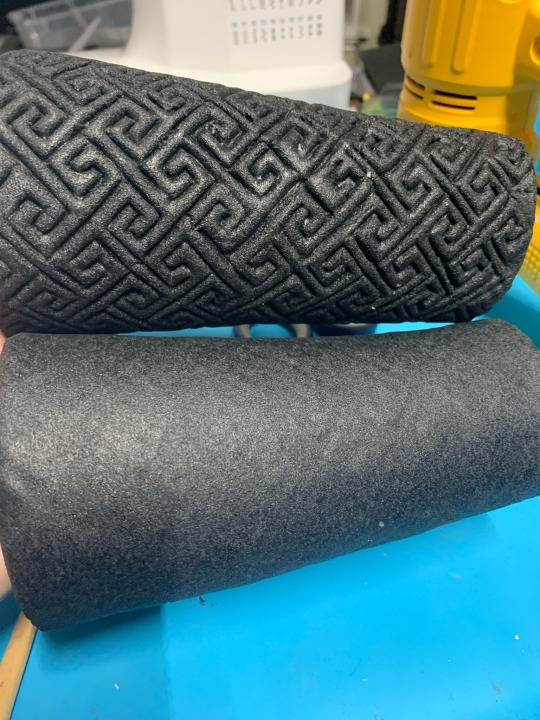
Gauntlet base is laser cut foam glued onto 1mm foam and wrapped in black Worbla
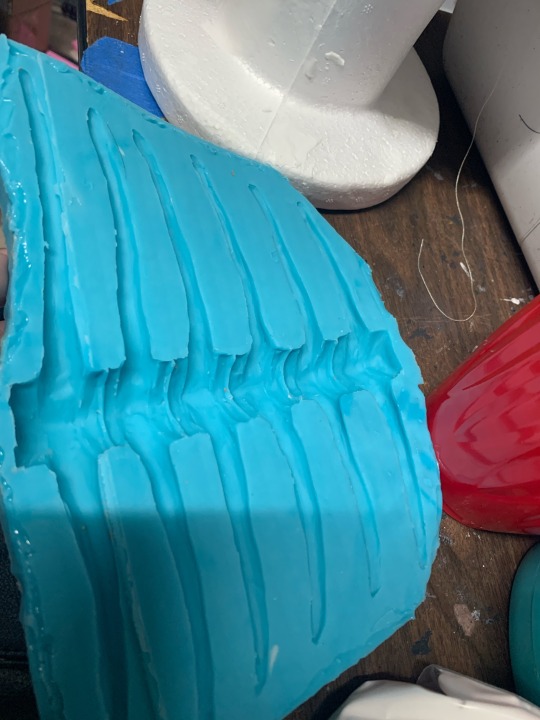
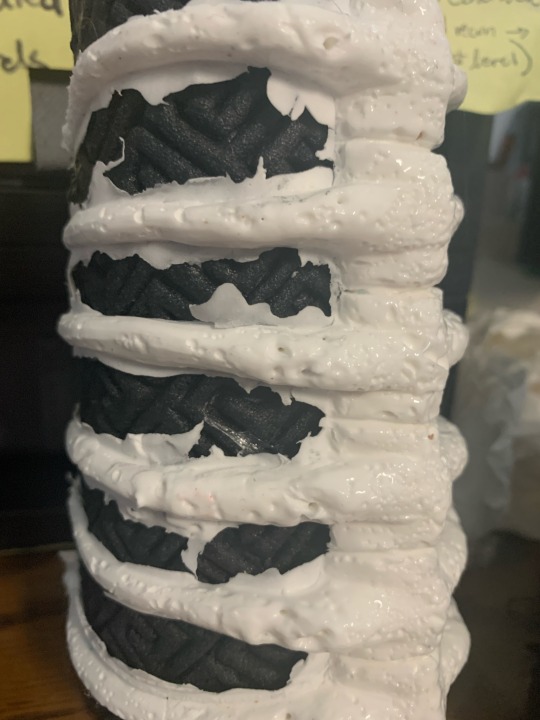
I sculpted a spine and casted it in foam clay. Played aorund with moisture manipulation to get this nifty texture on the foam clay. I glued them into the gauntlets with a bit of hot glue so that they could dry in a curved shape.
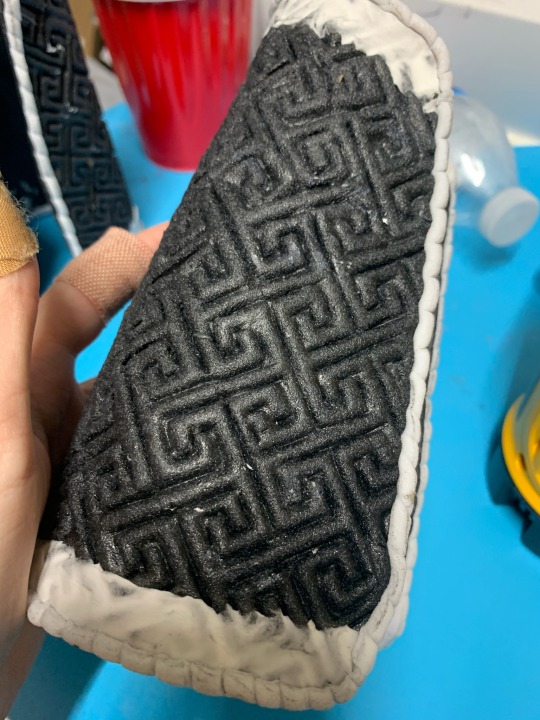
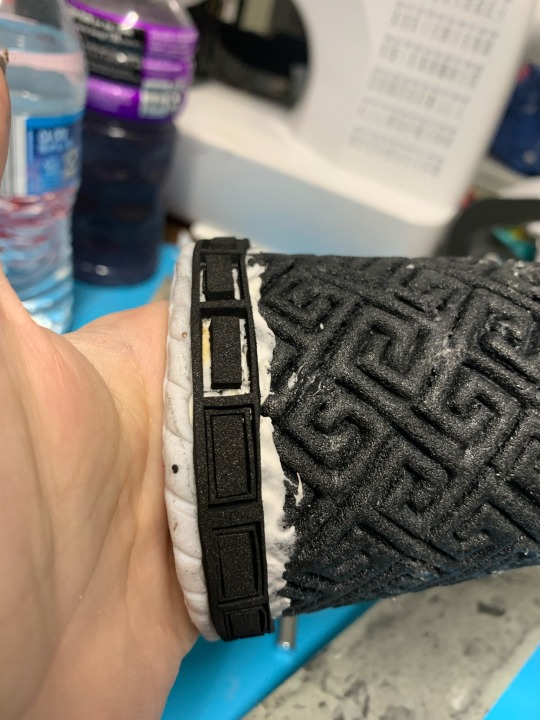
Filled the edges with foam clay to give me a flat surface for the trim. This was also laser cut. I glued the whole thing down with contact cement and weeded out the unwanted parts. Also used Worbla’s Pearly Art scraps to make a twisted rope like trim
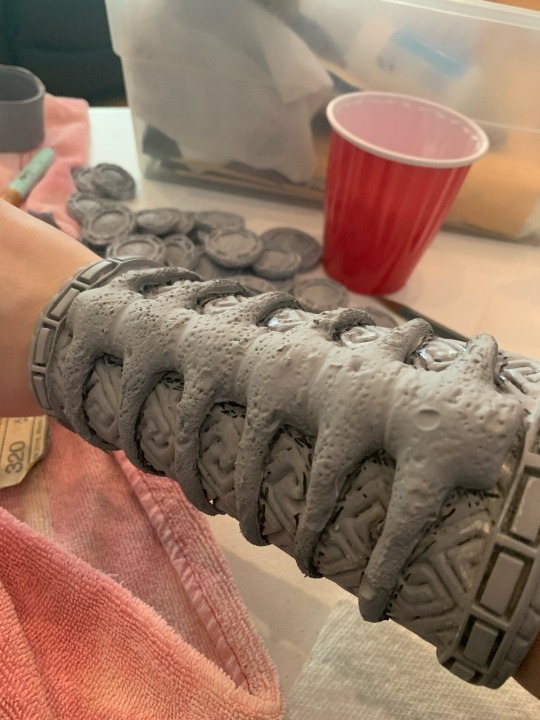
I primed the base gauntlets and the spines separately using sand able filler primer. I glued down the spines with contact cement.
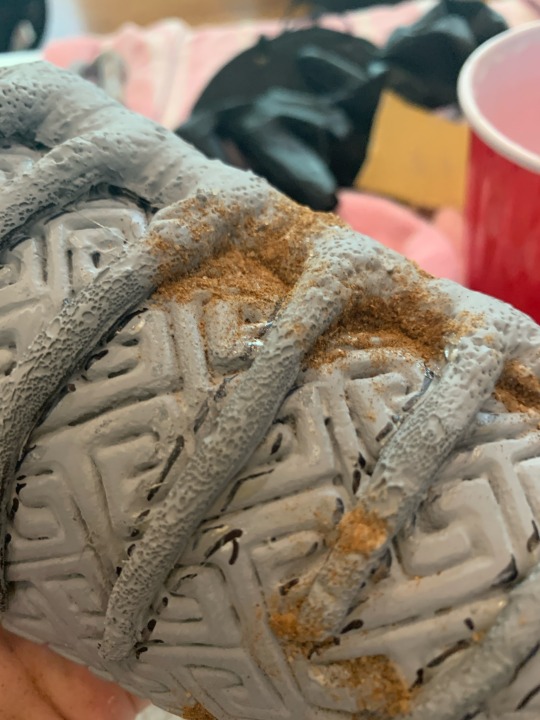
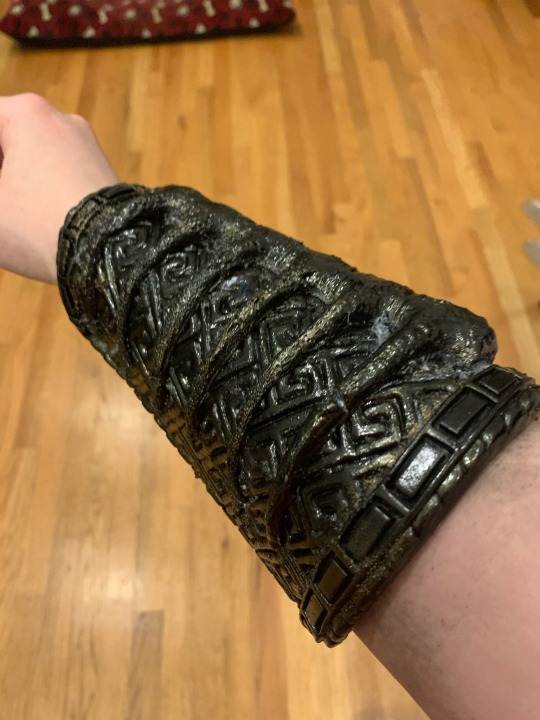
I used mod Podge to add some cinnamon for grit and a ‘definitely has nice stuff but lives near the ocean and the salt water corroded everything’ texture.
Paint is a combination of a lovely satin black base, automotive metallic black spray paint, bronze acrylic highlights, and a high gloss varnish.
5 notes
·
View notes
Text
New Commission! Espeon Knight, based on Evee Knights artwork by sunsetdragon Soft ombre crepe fabric in ombre sunset colors, stretch knit stop and leggings. The armor is a combination of black worbla and foam! Wig not a part of the commission, I just threw it on the mannequin 💀
For a commission of your own: AmazonMandy.com Find me on: facebook.com/CommissionsByAmazonMandy Socials: Instagram, twitter, tiktok: AmazonMandy
#cosplay#amazonmandy#cosplaycommission#sewing#seamstress#cosplay commission#commission#cosplaycommissioner#espeon#umbreon#pokemon#foam armor#foamarmor#worbla#video#cosplayvideo
6 notes
·
View notes
Text
With JoAnne Fabrics going out of business I feel it is my duty as a cosplayer, historical costumer, and general sewing gremlin to help teach y'all how not to be reliant on evil overpriced mediocre big box stores for fabric and cosplay supply, cause if I catch y'all going into Homophobia Lobby to get cosplay fabrics imma have to start throwing hands. And frankly you guys all deserve better.
- Find a neighborhood full of brown people. Probably a slightly poorer neighborhod. I know, I know, but they will have small independent fabric stores. Selection in each may vary. Hispanic and Caribbean areas will give you prints that EAT. Muslim areas will give you fabrics with amazing drapery. Indian and Southeast Asian areas will give you beading that would make the House of Worth wet with envy. (Try to avoid oldwhitelady quilting stores unless you are a knitter or are specifically trying to cosplay Kirsten Larson.) (Also ask while you're there for lunch/dinner spot recommendations. Your fabric store guy usually has a buddy with a joint nextdoor with the best *insert relevant ethnic food here* you'll ever put in your mouth.)
- DEVELOP A RELATIONSHIP WITH THE OWNER OF SAID STORE. This I cannot stress enough. Abdul, my fabric guy, can and will get me whatever I want cause he knows me, knows I bring in other young people, and knows I will be back every month for more. Indie fabric stores tend to have older clients. They are anxious to see faces under 60. Just chat with whoever is in there about the kind of stuff you want and need and they will help you. This also frequently leads to discounts. I have not paid listed price for fabric in years and just walked out of Abdul's with 7~ yards of gorgeous teal satin for 10 bucks. Not a yard. Total.
- Do not be afraid of mess. The best shit comes from stores that look like a hurricane went through them. Don't try to understand the organization. (One day, 4 years into your relationship with the store, suddenly the fabric gods will reveal the knowledge to you.) Again, talk to whoever is in there about your project. They'll help.
- Give up on one stop shopping. Get your crafting supplies elsewhere. Like a small independent hardware store. There's usually an old guy in there that reminds you of an uncle who will also help you.
-Worbla and whatever other Cosplay Specific Material you're using is a fatphobic material straight from Satan's hot taint, you do not need it, and any old hardware/tractor supply dad will help you find better, more durable armor/weapon/detailing material. Don't snub your nose at paper mache and plaster of paris. Venetian Mask makers have been using it for years. Balsa wood is also your friend. Hardware store Uncles will teach you to work with both.
- Elderly people are your bffs. If you see an old person TALK TO THEM. They know how to do all kinds of shit. I know there's a hesitation around old people because of the political climate and a fear that they may be homo/trans/whatever-phobic, but hey....minds are changed by making friends. My elderly Muslim fabric supplier is an Our Flag Means Death fan because of me gushing about the teal I needed for Stede Bonnet. He wishes me happy pride now. He put bolt of rainbow in the window in June and kept it up all summer. And he'd never had a thought about queers before me.
- Don't feel limited to Craft and Fabric stores. Hardware stores are cool. They stock outdoor fabrics and umbrella and furniture covers that are very durable....my first cosplay was made out of patio furniture covers. Also upholstery stores and upholsterers have velvets and damasks and faux leather and real leather and all sorts of rich textures. Most of them will part with a few yards pretty cheap. Second hand sheets and bedspreads and curtains also make some really cool garments. A significant amount of my ren fair garb started as household goods.
- If you are forced to order fabric online, please for the love of all that is holy DO NOT BUY FROM MOOD or any other famous store. You're paying for their branding and their place on certain reality shows I will not mention. Indie is always cheaper for the quality and usually not abusing their workers.
- If the fabric/hobby/hardware/upholstery/etc store you develop a relationship with is inconveniently far from you, see if said owner is willing to take your order via phone and send it to you. You'd be surprised how accommodating people in the crafting and sewing world can be.
It all really comes down to having to form a community. I know finding multiple small stores is a lot less convenient than Joannes. But forming a relationship with a local supplier will, in the long run, yield you much better results AND put money and good back into a community near you.
(And if you're in the NYC area DM me and I'll put you in contact with Abdul. He's the absolute best and I'd do anything to help him and his business grow!!!)
18K notes
·
View notes
Text

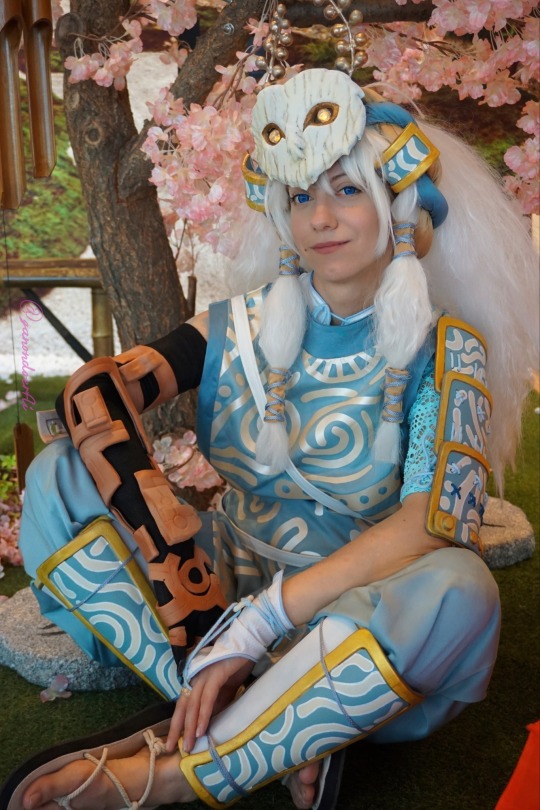
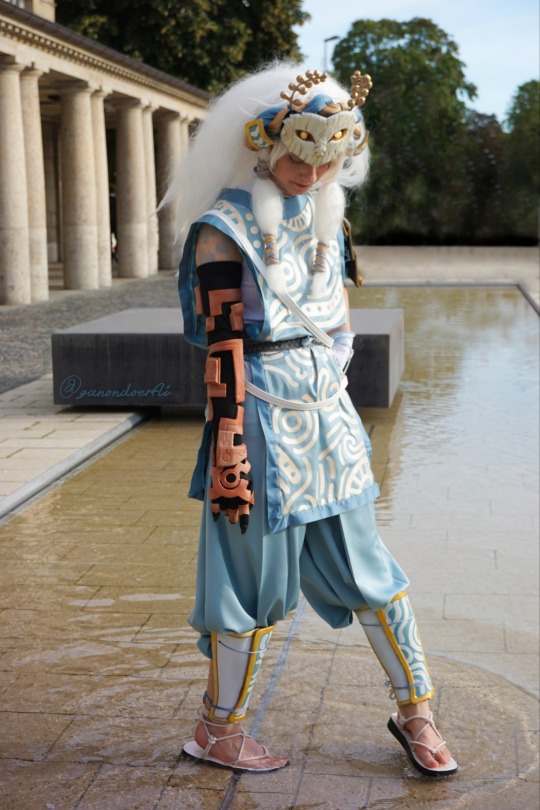
I'm so excited to share my most recent cosplay from Connichi 2023!
Cosplay made and worn by me (@ganondoerfli)
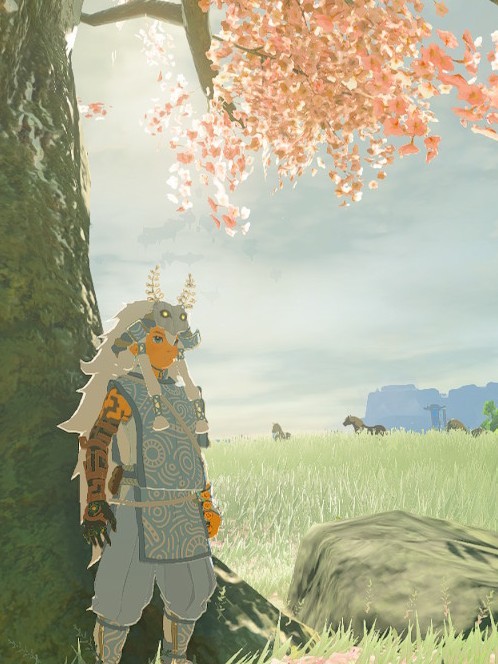
Character: Link from The Legend of Zelda - Tears of the Kingdom
Armor Set: Mystic Set
Photos taken by my BFF: @ithilcelevon
Date of photos: 2023-09-12
Reference picture:
Keep reading for more details on the making of the cosplay props:



🌸The Satori mask🌸:
I made this mask using worbla on a foam base. The LEDs I used inside the eyes were taken from LED tea candles. They give the light a cool flickering effect.
🌸The right arm🌸:
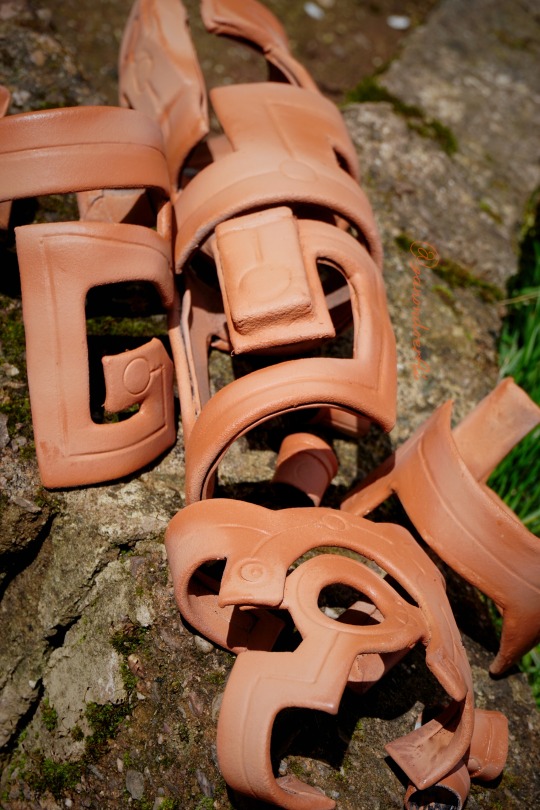
For Rauru's right arm I wore the runes on top of a scaly glove.
-> First I sewed the glove from a very textured jersey fabric.
-> Then I added some artificial nails on top, which I modified to look like claws.
-> In order to construct the pattern for the runes, I actually had to create a makeshift cast of my arm first. For this, I wrapped my whole arm in newspaper and crepe tape. After cutting the cast open and removing it from my arm, I filled it with more newspaper to make it sturdy enough to work with.
-> This paper cast of my arm was perfect for constructing the pattern, since it could be rotated in any direction (as opposed to my real arm🙃)
-> Using the finished pattern, I made the runes from foam rubber and worbla and shaped them with heat. I painted them using terra-cotta spray paint.
🌸The clothing🌸:
I used satin fabric for a nice and flowing look on the clothes.
In order to recreate the shimmering pattern on the robe, I used heat transfer vinyl.
🌸The armor🌸:
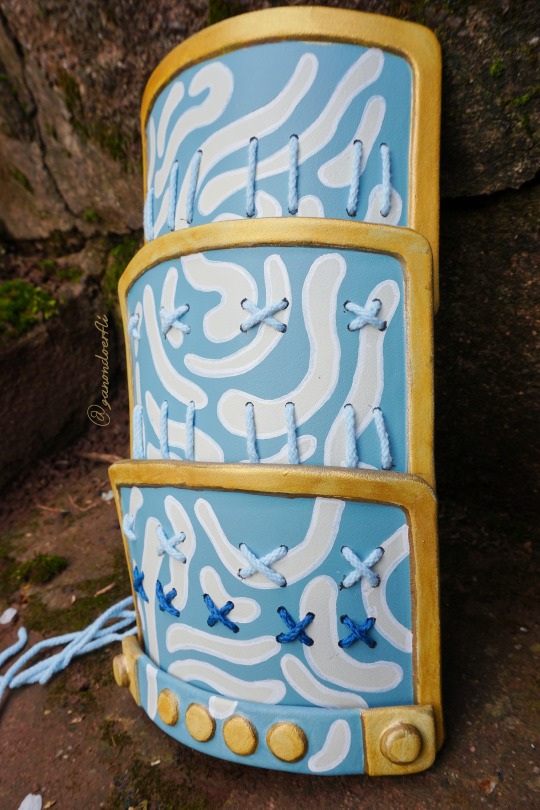
All armor pieces are made from foam and worbla. I've been using this technique for many years, it really works great! The armor pieces were then painted with lacquer and gold acrylic paint.
Making this cosplay was a lot of fun!
Tears of the Kingdom offers so many beautiful designs and outfits.
I can't wait to make more from this game! <3
#the legend of zelda#tears of the kingdom#totk#cosplay#tloz totk#loz#Link#zelda cosplay#zelda#my stuff
549 notes
·
View notes
Text


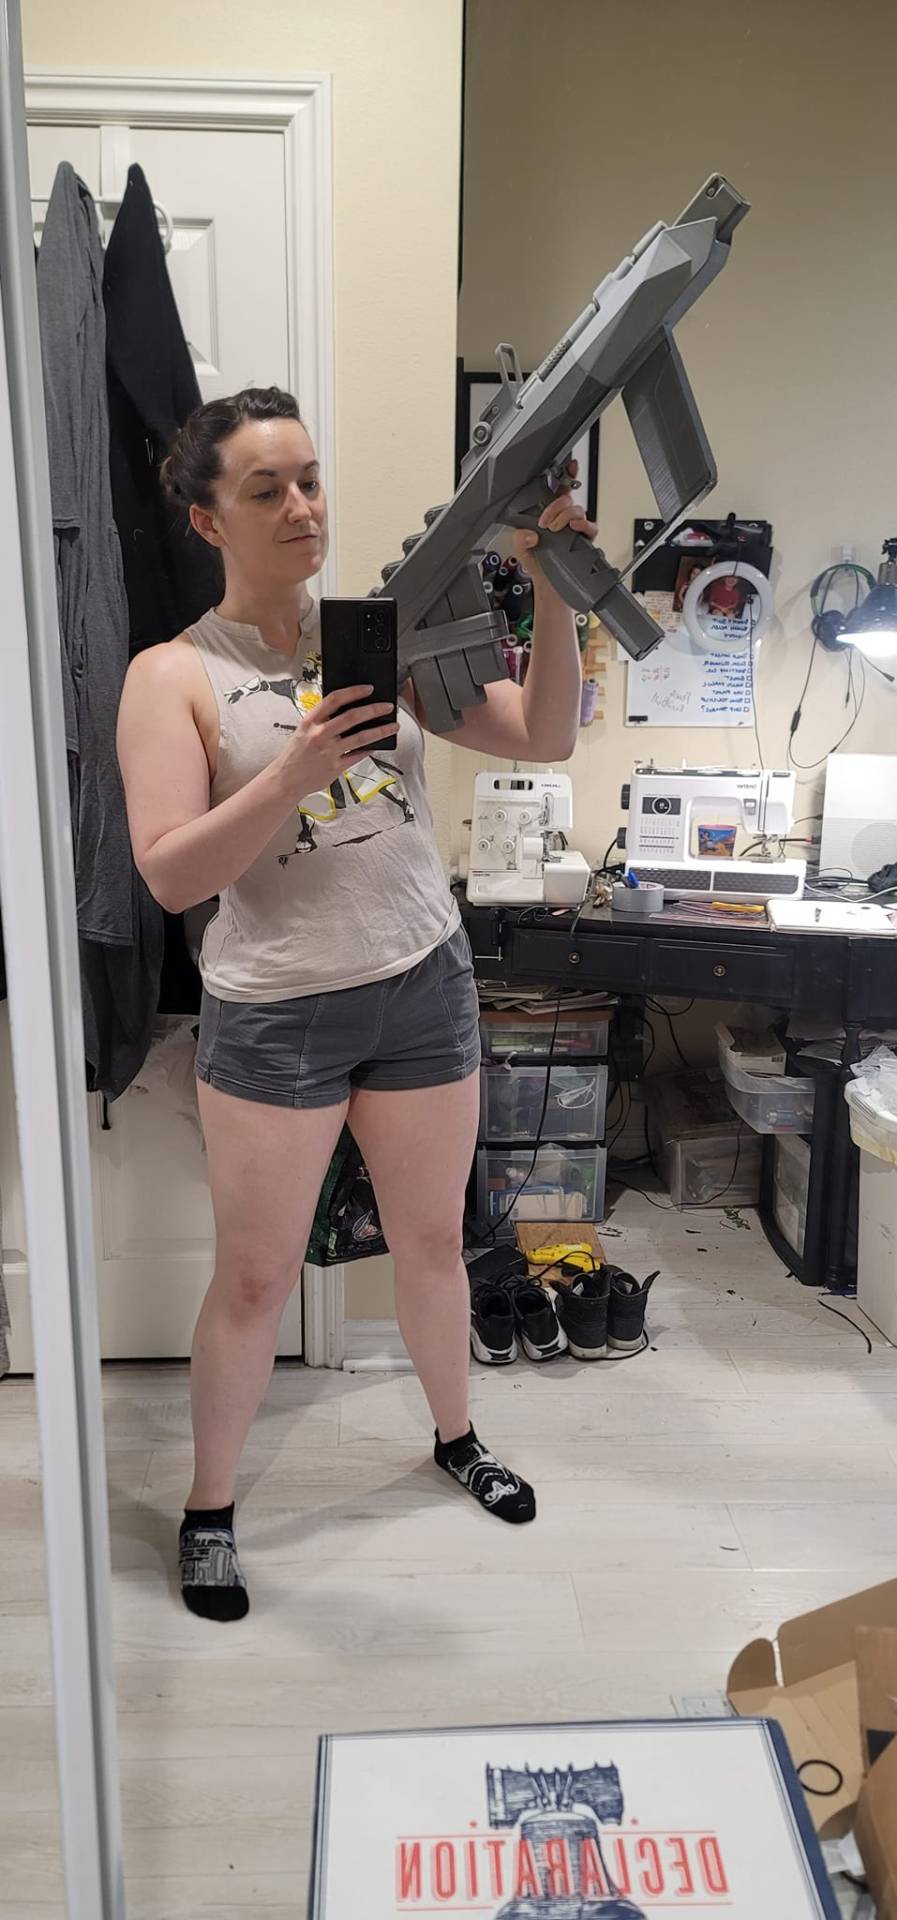
It's happening.
I'm in full con crunch mode, but I decided I needed to finally join the Destiny shoot this year at DragonCon, so I've been crafting as fast as my fingers and work schedule allow the last few days to get this done!
Tonight I have a TON of painting to do and a little bit more sewing before I pack all this up and fly to Atlanta EARLY Wednesday morning!
She's a warlock bb!
P.S. amazing 3D print of Risk Runner thanks to Designed by 3D!
But you don't get to say anything about my armor skills because this was my first time working with foam & worbla. I'll get better, but this was "get it done" mode.
285 notes
·
View notes
Text
let's hear it for the 2.5 weeks late and low quality cosplay pics 🔥🔥🔥
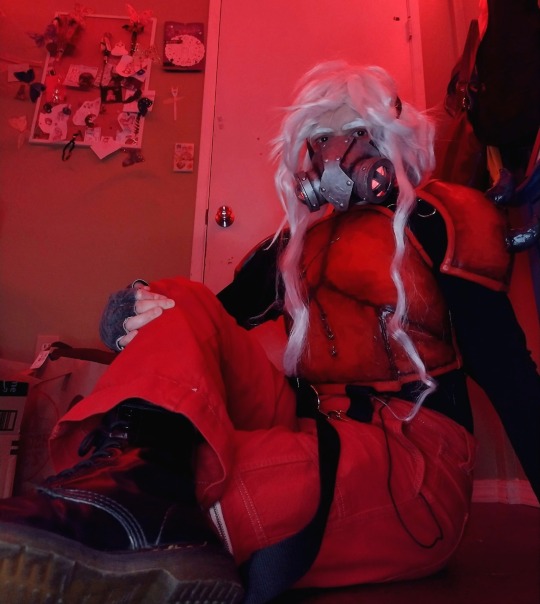
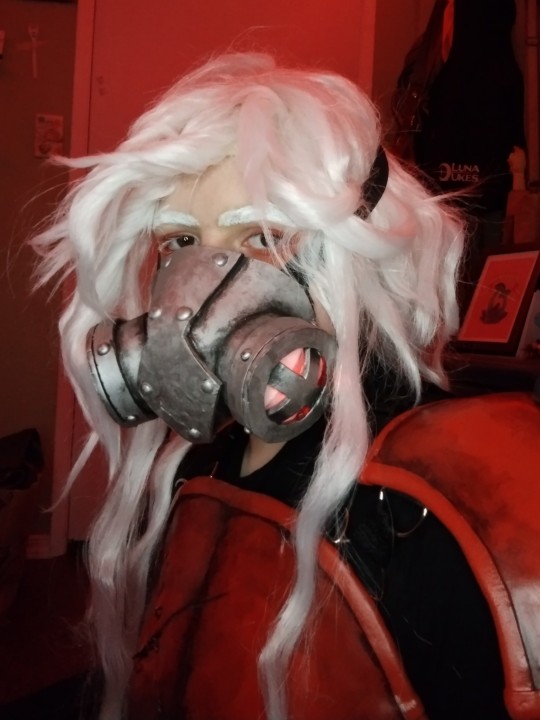
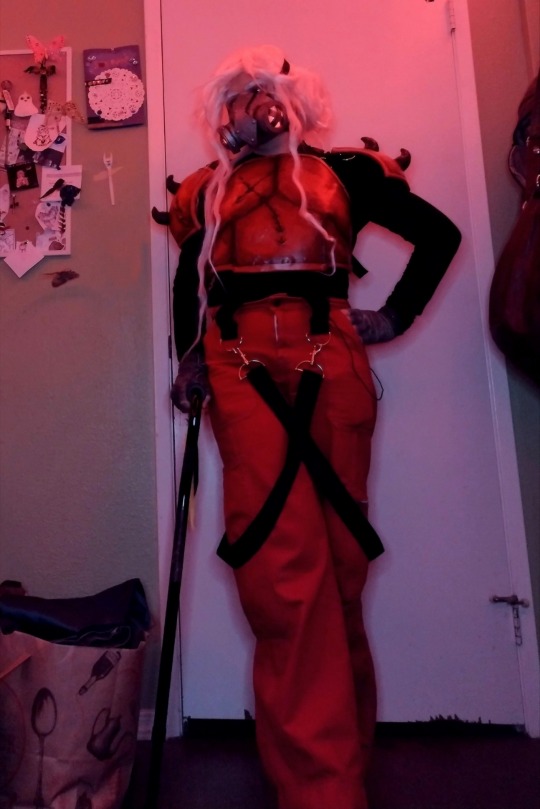

ID in alt text, materials/methods explained under the readmore! i DIY'd almost everything here.
wig used to be even and straight - cut and styled myself
gas mask is EVA foam, hot glue, LED tea lights, & cut up surgical mask material in front of the lights (and another mask inside. cosplay covid safe!!). Painted with acrylic and rub 'n buff
armor is worbla thermoplastic and EVA foam, D rings and webbing for straps, spray paint and acrylic - i made this about 2 years ago lmao
jeans used to be white. i had 2 failed dying attempts which included dropping my phone in the dye bath and almost burning myself a few times before i got them this color the 3rd try. also D rings and webbing straps.
not fully included in the pics but inside the mask is a mic that i hooked up to a soundcard & speaker to use as a voice changer (and amp- it's hard to project your voice through multiple layers of mask and painted foam !)
i super recommend including cargo pants in your cosplays. in or on my pants i was able to carry phone, wallet, extra mask, sound card, speaker, advil, con program, 32 oz water bottle, and an entire quesadilla
#ex#evil xisuma#evil x#hermitcraft cosplay#hermitcraft#🌙#cosplay#i kind of. hate every picture i take of myself. posting anyways though#i dont hate how i look im the sexiest beast on the planet. just dont like pics. oh well#🌕
139 notes
·
View notes
Text


Just figured I'd get a nice post going of my World of Warcraft hunter tier 4 cosplay, Demon Stalker armor with Ranger General's Guard Thas'dorah.
technically this is the PvP/Season 1 recolor but WHATEVER
Costume entirely made by hand with various foams and Worbla. LEDs and smoke also wired by me. :)
These pictures are by https://www.courtexstudios.com/


These pictures are by https://www.juliusphotography.com/
9 notes
·
View notes
Note
How did you make your wonder woman cosplay?
Which one? In general, I like to use leather, suede, spandex, or upholstery fabrics for the fabric parts, and EVA foam coated in plastidip to seal, then with metallic paint over it for the armor. Some of my accessories are real metal, and others are either hard plastic, resin, plaster of Paris, worbla or different types of foam. I don't have any step by step tutorials, but for the most part it's a lot of staring at comics or fanart, making a sketch then a pattern using my measurements as a guideline and either making a 1 to 1 copy or making my own version that's loosely inspired by a few of her looks that I really loved, with my own twist on it. There's no wrong way to cosplay as long as you're having fun. <3 Here are a few of my Wonder Woman costumes, I hope one of these is the one you meant!


#Wonder Woman#diana of themyscira#Nubia#Wonder Woman of Earth 23#some of these are different characters from alternate universes but they are all Wonder Woman#cosplay#my cosplay
18 notes
·
View notes
Text
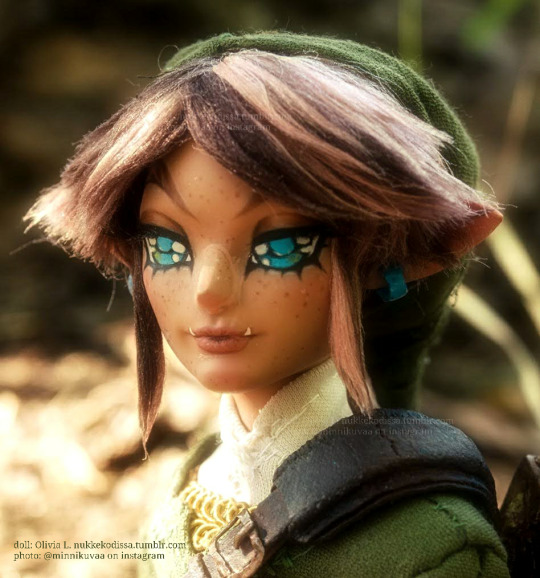
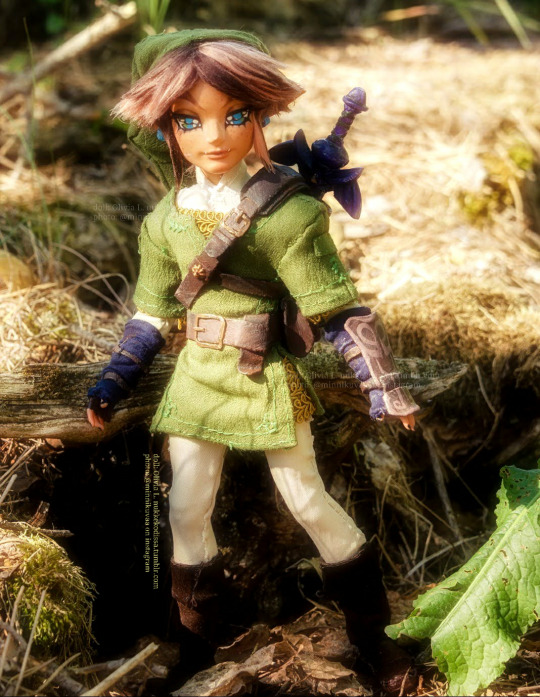

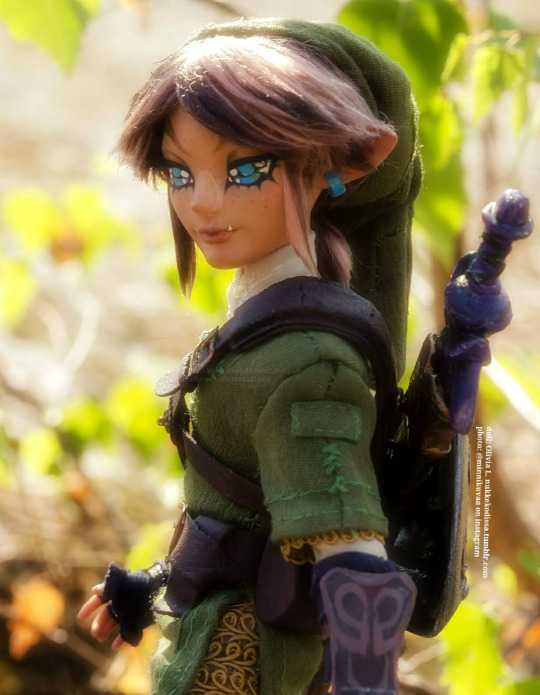
Twilight Princess Link!! I actually finished this doll last summer?? I think?? I'm so lazy with posting.... but here he is finally!! Pictures are taken again by my lovely friend @ minnikuvaa on instagram<3333
I used Ever After High Hunter doll for the base and sculpted etc on top of it!!! His clothes were sooo fun to make :3 The sword, armor and shield are made from worbla and milliput!!!
#tloz#twilight princess#zelda#loz#the legend of zelda#doll custom#doll maker#dollmaker#ooak#link#tp#tp link#tloz tp#the legend of zelda twilight princess#ever after high custom#also sorry the pictures arent the best quality idk what happened to them im too lazy to search for the higher quality pics in my files....
53 notes
·
View notes
Text
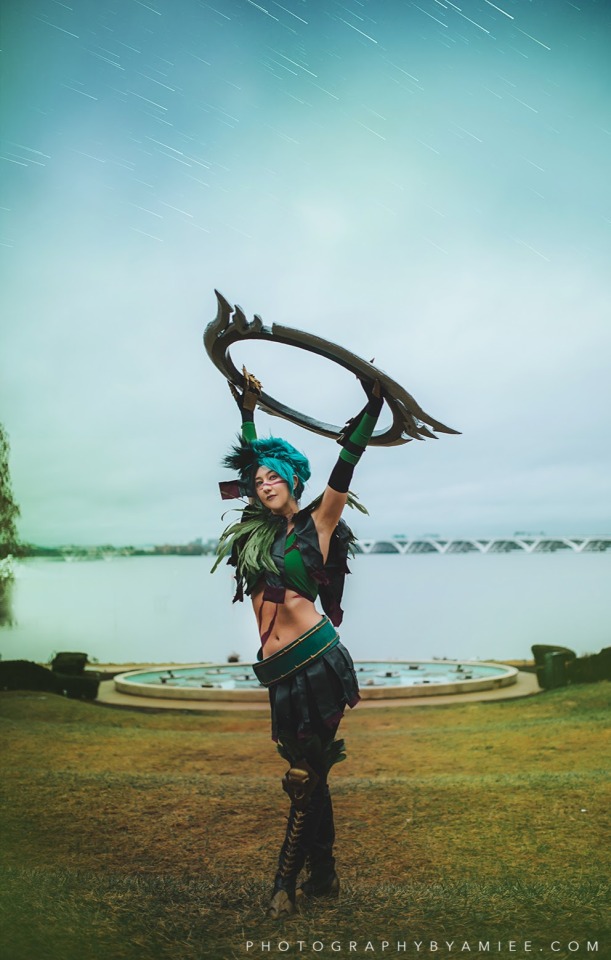
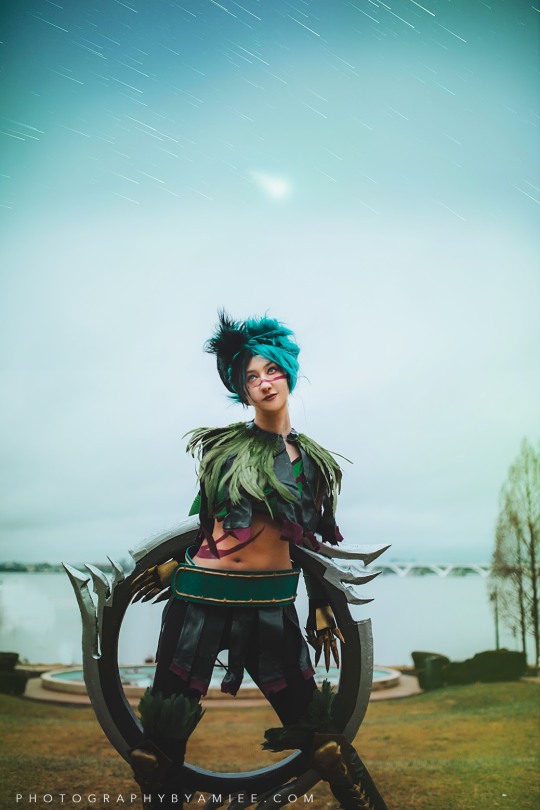
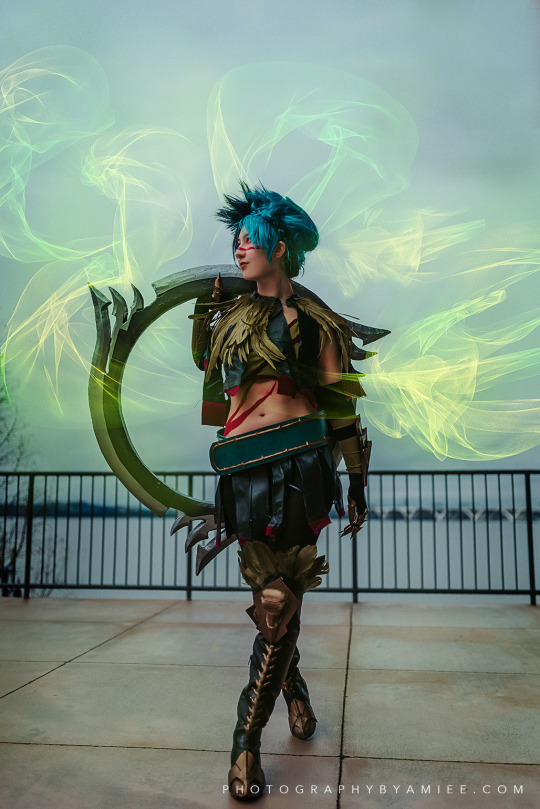


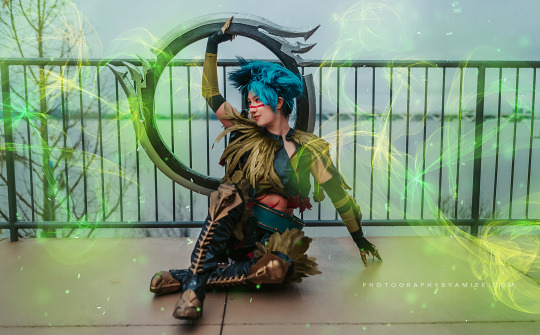
I don't play a lot of fighting games (because I'm REALLY BAD) but the Soul Calibur series was always one of my favorites, and Tira was my favorite character of the lot BY FAR. Something about her just really spoke to me, and getting to cosplay her was such a dream. This cosplay is an absolute mess, it was my first ever really big build with armor, using foam and worbla and I'd love to remake it one day.
📸 Amie Photos
#my cosplay#tira#soul Calibur#soul Calibur Vi#tira soul calibur#soulcal vi#soul cal vi tira#soul calibur 6#cosplay#soul calibur 6 tira#video game cosplay
19 notes
·
View notes
Text
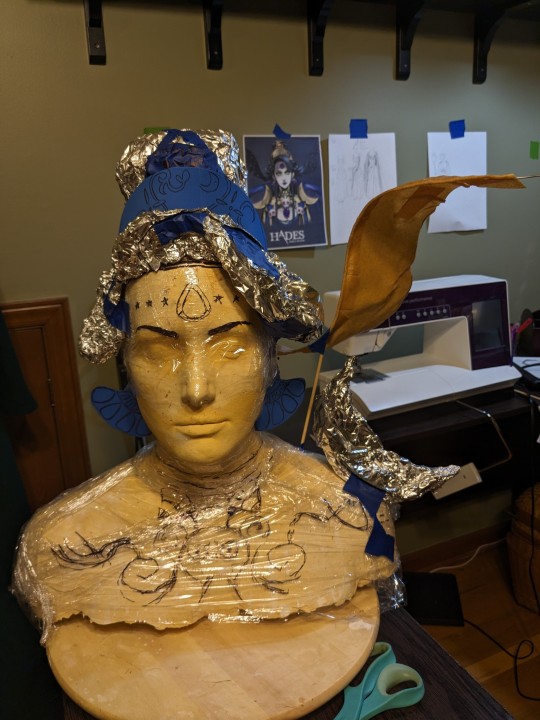
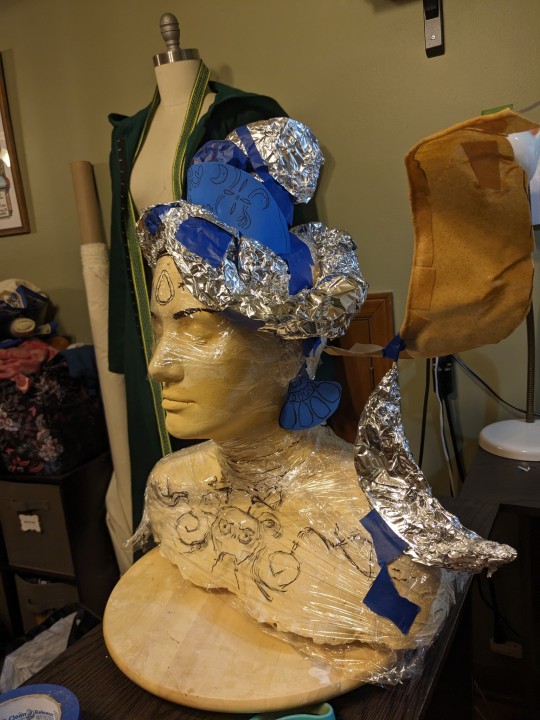
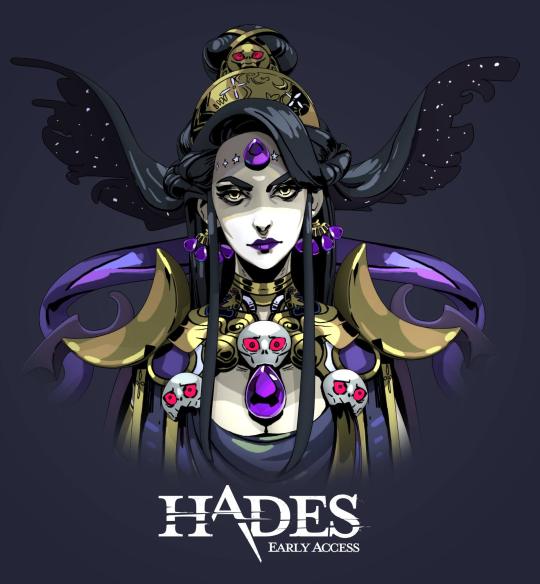
Nyx has been on my cosplay list since 2020 and I have been gleefully swatching and buying supplies since then, but dreading actually starting the project. :( Her giant armor and wig are such a cool design, but are otherwise a really big logistical problem. How do I travel with a wig like this, how far will I be able to turn my head, how long will I be able to have this on my body before I hate it? I don't even really feel comfortable talking about it in more than hypotheticals because I'm genuinely not sure if it's gonna get done.
I spent a couple hours tonight roughing out the general shape of her wig and headgear. I'm really really grateful that my friends helped me do a head cast a few years ago, because trying this stuff on my own body would be too much to bother with. I was hoping I could use some old worbla scraps to help rough out her head wings, but in working with it again I'm remembering why I don't really like it that much. I'll probably replace it with more aluminum foil to get the general shape nailed down before I start breaking the wig down into modular pieces.
23 notes
·
View notes
Text

It's best girl's birthday! I haven't worn my version 2.0 of BlackRose since this 2020 shoot, LOL but I am so very proud of my remake. When I first made her in 2015, it was my first armor project and of course I picked an intense one 😂 But so worth it for one of my favorite characters I've adored since I was like, 14! I made it look better throughout the years, but ultimately decided to remake most of it during the pandemic since I had a lot of unexpected free time. Foam > Worbla forrealsies. I trashed my 2015 armor and boots immediately after I finished the new one (same wig, sword, and stockings though). Also, a fun fact: A very expensive Victoria's Secret strapless bra that I hadn't worn since 2009 was used as a base for the top of my remake version 😎 I knew I held onto it for a good reason!
2015 pic📸: swoz 2020 pic📸: my partner Raph, edited by me
#cosplay#cosplayer#cosplayers#cosplay photoshoot#game cosplay#video game cosplay#retro#retro game cosplay#dot hack#dothack cosplay#dothack#.hack#.hack cosplay#blackrose#blackrose cosplay#.hack//imoq#.hack//infection#.hack//mutation#.hack//outbreak#.hack//quarantine#ドットハック#ps2#ps2 cosplay#playstation 2#playstation cosplay#retro cosplay#retro game#retro gaming#cool cosplay
13 notes
·
View notes
Note
I love your answers.
I think the outfit he has in the cutscene after Dubai is basically Nathan Drake's outfit anyway.
I feel Diana has a bit of a wild streak. If it was out of necessity and time was of the essence, she'd grab something like elven ears or cat ears headband and argue that it was cosplay and then get the job done. Without pressure, why not go all out?
Olivia definitely made her own cosplay with her own sewing machine, worbla armor and wigs+ make up. Maybe some world of warcraft elaborate thing.
Lucas would walk in and the guards fistbump him, complimenting his Call of Duty costume. Spoilers: he wasn't wearing one. Inside he asks Olivia who this Colin Duty guy is and she gives him the biggest ughyouareembarrassingme
Uhh I like that! Without pressure, they'd probably all try harder - especially Diana, I agree. Trying something new; I can imagine she'd like it! In general, she certainly enjoys leaving her desk and going on missions with the fam
and omg I love your answer about Lucas in my head he's best bro with what feels like every doorman. The guy knows how to get into clubs/bars/whatever. A little chat, two or three cigarettes and he's got unlimited access to wherever he wants. He is charismatic and knows what makes people tick, especially those who live ‘underground’ and to this day, i'm still sad as hell that we've never seen lucas in a tactical outfit. i love him in his black clothes, but this one time…
2 notes
·
View notes
Text


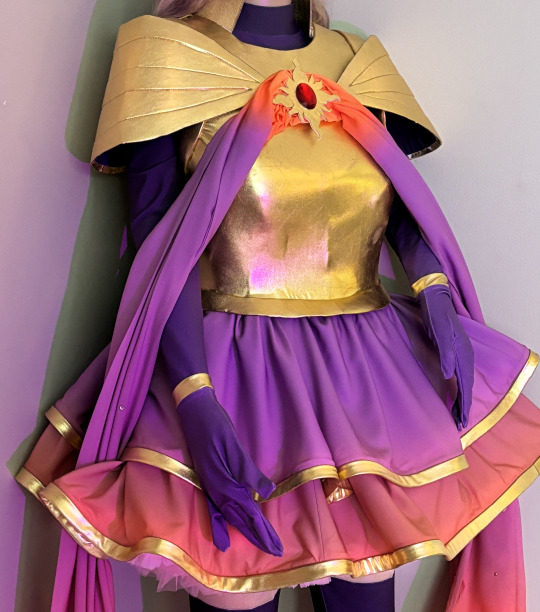

New Commission! Espeon Knight, based on Evee Knights by @sunsetdragon Soft ombre crepe fabric in ombre sunset colors, stretch knit stop and leggings. The armor is a combination of black worbla and foam! Wig not a part of the commission, I just threw it on the mannequin 💀
#cosplay#amazonmandy#cosplaycommission#seamstress#sewing#cosplay commission#cosplaycommissioner#commission#Espeon#evee#pokemon
7 notes
·
View notes