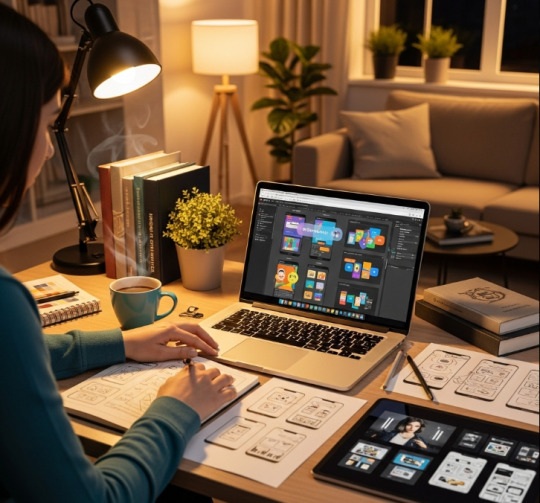
#web design tips for beginners
Explore tagged Tumblr posts
Visit Tumblr Blog
Explore Tumblr blogs with no restrictions, modern design and the best experience.
Last Seen Tumblr Blogs


Fun Fact
In 2020, 27% of US Tumblr users had an annual household income of over $100,000.
Text
Web design tips for beginners
Essential Web Design Tips for Beginners Why this Web design tips for beginners? Web design is key in today’s fast-changing digital world. It’s vital for anyone wanting to make a mark online. Whether it’s a personal site, a small business blog, or a professional portfolio, knowing the basics is crucial. Start with simple projects like blogs or personal sites. Use templates to learn HTML, CSS, and…
0 notes
Text
youtube
Complete Web Design Course for Beginners | Free Full Course
Welcome to the Complete Web Design Course for Beginners! In this free full course, you'll learn every step of the professional web design process and build a comprehensive project alongside me. We'll start with strategy and structure, move into the design phase, and even develop the website without writing a single line of code using Framer…
Throughout this course, you'll thoroughly understand web design techniques such as wireframing and color theory, and you'll become proficient with tools like Figma and Framer. This isn't just theory—it's practical application. By the time you finish, you'll be ready to design and publish simple websites for paying clients.
What You'll Learn:
Strategy: Client needs, identify competitors, and develop solutions
Structure: Create sitemaps, content documents, and wireframes.
Design: Research, moodboards, generate assets, and design in Figma.
Development: Build responsive websites with animations in Framer.
This course is perfect for beginners who want to dive into web design and develop their skills step-by-step. Whether you're looking to start a new career or just want to design your own website, this course has everything you need.
#youtube#free education#web development#education#web design resources#web designers#web developers#web design#Complete Web Design Course for Beginners#educate yourself#educate yourselves#web design tips#figma#ux wireframe#wireframing
4 notes
·
View notes
Text
🎨 Wanna Design Like a Pro? Start with Figma — It’s Free, It’s Fun, It’s 2025.
If you’ve ever looked at a clean app or beautiful website and thought, "How do they even make this?" — you’re not alone. And the answer? Figma.
This free guide walks you through everything you need to start designing with Figma in 2025 — no expensive courses, no gatekeeping. Just a clear, beginner-friendly path to master UI/UX (and maybe even start freelancing 👀).
💡 Dive in: 🔗 How to Master UI/UX Design with Figma in 2025 (Free Step-by-Step Tutorial)
Mockups. Wireframes. Prototypes. This is your creative era. 💻🧠
#UI UX design#Figma tutorial#Learn design free#UX 2025#Design tools for beginners#Web design tips#Product design learning#Free Figma course#Creative tech tools#Digital design skills
0 notes
Text
WordPress.com vs WordPress.org: What’s the Difference and Which One Should You Choose?

If you’re thinking about launching a website or starting a blog, chances are you’ve come across WordPress. But there’s a common point of confusion: WordPress.com vs WordPress.org. At first glance, they sound like the same thing — but they’re actually quite different platforms with distinct features, pros, and cons.
In this blog post, we’ll break down the differences between the two, help you understand which one suits your needs, and guide you toward the best choice for your website goals.
What is WordPress.org?
WordPress.org is the self-hosted version of WordPress. It’s the open-source software that anyone can download for free and install on their own web hosting server. With WordPress.org, you have full control over your website.
Key Features:
Complete Customization: Install any theme or plugin, modify the code, and design your site exactly the way you want.
Ownership: You fully own your website and all its content.
Monetization Freedom: Use any ad network, sell products, offer memberships, or add affiliate links with no restrictions.
Advanced Functionality: Great for eCommerce (using plugins like WooCommerce), custom development, SEO tools, and more.
Pros:
Total control and flexibility
Thousands of free and premium plugins/themes
Full access to your site's backend and data
Ideal for business, large blogs, and complex websites
Cons:
Requires web hosting (usually $5–$15/month)
You handle security, backups, and updates (though plugins can automate much of this)
Slightly steeper learning curve for beginners
What is WordPress.com?
WordPress.com is a hosted platform created by Automattic (the company behind WordPress). It offers a simplified, all-in-one solution for building a website without worrying about hosting, maintenance, or technical tasks.
Key Features:
No Hosting Needed: Hosting is included. No need to buy a separate plan or domain (though custom domains are available on paid plans).
Easy to Start: Perfect for beginners who want a fast and simple setup.
Maintenance-Free: WordPress.com handles updates, security, and backups.
Pros:
Free basic plan available
No setup or maintenance required
User-friendly dashboard
Great for hobby blogs, personal websites, or simple portfolios
Cons:
Limited customization (especially on the free plan)
Cannot upload custom themes or plugins unless on Business or higher plan
Limited monetization options on lower-tier plans
WordPress.com branding unless you upgrade
WordPress.com vs WordPress.org: Quick Comparison Table
Feature
WordPress.com
WordPress.org
Hosting
Included
You provide (self-hosted)
Cost
Free with paid upgrades
Free software, hosting cost
Custom Themes & Plugins
Limited (paid plans only)
Unlimited
Monetization Freedom
Limited
Full control
eCommerce
Only on paid plans
Full eCommerce support
Maintenance
Handled for you
You manage it
Suitable For
Beginners, personal blogs
Businesses, pros, devs
Which One Should You Choose?
Choose WordPress.com if:
You want a hassle-free experience and don’t want to manage hosting or security.
You’re a beginner with no technical background.
You just need a simple blog or portfolio site.
You’re okay with limited flexibility or willing to pay for premium features.
Choose WordPress.org if:
You want full control and the ability to customize everything.
You’re building a business website, store, or scalable project.
You need to monetize your content freely.
You're comfortable (or willing to learn) about managing your own hosting.

Final Thoughts
Both WordPress.com and WordPress.org offer powerful tools for creating websites, but the right choice depends on your goals. If you’re starting out or want something easy and low-maintenance, WordPress.com is a solid option. If you're aiming for maximum control, customization, and scalability, WordPress.org is the way to go.
Still unsure? Start with WordPress.com to get your feet wet — and when you’re ready for more freedom, you can always migrate to WordPress.org.
Need help deciding or building your site? Contact WJM Digital Design for professional guidance, custom WordPress development, and support tailored to your goals. [email protected]
#WordPress Comparison#WordPress.com vs WordPress.org#Self-Hosted WordPress#Best WordPress Platform#WordPress for Beginners#WordPress Hosting Guide#Website Builder Comparison#WordPress.org Explained#WordPress.com Features#Choosing a Website Platform#Blogging Platforms 2025#WordPress Website Tips#WordPress Guide for Beginners#WordPress.com Pros and Cons#WordPress.org Benefits#Web Design Basics#How to Start a Website#WordPress Setup Help#WJM Digital Design#Website Design Advice
0 notes
Text
Free Secure Web Hosting for Students or Individuals for Learning Purposes
दोस्त आज मैं आपको बहोत ही खास जानकारी देना चाहता हूँ जो शायद अभी तक आपको इसके बारे में पता नहीं होगा और इसीलिए आप इस आर्टिकल में आये है, अगर आपके पास होस्टिंग और डोमेन खरीदने के पैसे नहीं हैं, तो घबराने की जरूरत नहीं है। आज के इस आर्टिकल में मैं आपको बताऊंगा कि कैसे आप Free Resources का इस्तेमाल करके ब्लॉगिंग, वेबसाइट डिजाइनिंग, और वेब डेवेलपमेंट जैसी Skills को बिना पैसे खर्च किए सीख सकते…
#best free hosting#best free hosting providers#blogging for beginners#blogging tips in Hindi#educational hosting#free domain#free domain for students#free hosting for students#free hosting resources#free web hosting#free web hosting and domain#free web hosting css#free web hosting for students#free web hosting html#free web hosting javascipt#free web hosting with cpanel#free website hosting for education#free wordpress hosting#google free website hosting#how to start blogging without money#learn web development#lifetime free web hosting#website designing free#wordpress free hosting
1 note
·
View note
Text
#Graphic Design Tips for Beginners#Best Graphic Design Tools in 2024#How to Create a Logo for Your Business#Top Graphic Design Trends This Year#Web Graphics#Product Design#Marketing Design#Business Branding#Social Media Design
0 notes
Text
50 of the Best WordPress Tips and Tricks for Beginners – Part 1
Improving your WordPress website is essential for optimising performance, enhancing user experience, and boosting search engine rankings.
Whether you’re a beginner or an experienced developer, there are always steps you can take to enhance your site’s speed, security, and functionality.
This list of 100 tips provides practical, actionable advice to help you improve various aspects of your WordPress site, from choosing the right plugins and optimising images to implementing security measures and improving SEO.
By following these tips, you can ensure your website runs smoothly, loads quickly, and delivers an excellent experience for your visitors.

Choose a reliable hosting provider
Choosing a reliable hosting provider is one of the most important decisions when building a WordPress website. Your hosting provider impacts your site’s speed, security, and uptime. A good host ensures fast load times, which enhances user experience and SEO rankings.
Reliable hosting also includes features like automatic backups, SSL certificates, and solid customer support, reducing the risk of data loss or security breaches. Shared, VPS, and managed WordPress hosting options are available depending on your needs. Opt for a provider known for excellent performance, strong security measures, and scalability to handle increased traffic as your website grows.
Here are the top 5 hosting providers for WordPress, including SiteGround, along with reasons why they stand out:
1. SiteGround
Performance and Speed: Known for its fast performance, SiteGround uses SSD storage, free CDN, and caching tools like SuperCacher to ensure excellent site speed.
Free SSL and Daily Backups: SiteGround offers free SSL certificates and daily backups, providing security and peace of mind.
Expert WordPress Support: Their 24/7 support is highly regarded, with specialists trained to handle WordPress-specific issues.
Easy Staging and Managed Updates: SiteGround offers one-click staging for website testing and automatic WordPress updates for hassle-free management.
2. Kinsta
Premium Performance with Google Cloud: Kinsta is powered by Google Cloud Platform, offering top-tier speed, scalability, and security.
Automatic Scaling: Kinsta automatically scales your resources during traffic spikes, ensuring your site remains fast and stable.
Built-In Security Features: They provide free SSL, daily backups, and a firewall, with proactive monitoring for threats.
Developer-Friendly Tools: Kinsta includes features like one-click staging, SSH access, and Git support, making it ideal for developers.
3. WP Engine
Enterprise-Level Security: WP Engine offers advanced security features such as a firewall, daily malware scans, and automatic security updates.
Fast Load Times: Their EverCache technology ensures rapid page loading, and their platform is built for high performance.
Excellent Developer Tools: WP Engine offers staging environments, SSH access, and Git integration, making it a favorite among developers.
Global CDN: With a built-in CDN, WP Engine delivers fast loading times across the globe, further optimising user experience.
4. Bluehost
WordPress.org Recommended: Bluehost is officially recommended by WordPress.org, making it a reliable option for WordPress hosting.
Affordable Pricing: Bluehost offers budget-friendly plans with features like free SSL, a free domain for the first year, and unmetered bandwidth.
User-Friendly Interface: It has a beginner-friendly control panel with one-click WordPress installation and easy site management.
24/7 Customer Support: Bluehost provides 24/7 customer support through phone, chat, and email.
5. Flywheel
Managed WordPress Hosting: Flywheel provides fully managed WordPress hosting, including automatic updates, caching, and daily backups.
Easy Collaboration: Flywheel offers tools for agencies and designers, including client billing transfers and easy collaboration features.
Fast Performance: Flywheel uses Google Cloud Platform and includes built-in caching for fast loading speeds.
Staging Environments: Flywheel allows for easy creation of staging environments to test changes without affecting your live site.
These hosting providers offer top-tier performance, security, and customer support, making them ideal choices for WordPress websites at different levels of need and expertise.
Use a lightweight WordPress theme
Using a lightweight WordPress theme is crucial for improving your website’s speed, performance, and overall user experience. Lightweight themes are optimised to load quickly, using minimal resources, which reduces the time it takes for your pages to display.
This helps lower bounce rates and improves search engine rankings. These themes also typically have clean code, fewer built-in features, and simpler designs, allowing you to add only the essential plugins or customisations as needed.
By choosing a lightweight theme, you enhance your site’s responsiveness and mobile compatibility, making it faster and more efficient for all users.
Here are five lightweight WordPress themes:
Hello Elementor Designed by the creators of Elementor, this theme is extremely lightweight and minimal, offering a blank canvas perfect for building custom designs using the Elementor page builder. It loads incredibly fast, as it contains no extra features or styling that could slow down your site.
Astra Astra is known for its speed and flexibility. It offers numerous customisation options, is fully responsive, and integrates seamlessly with popular page builders like Elementor and Beaver Builder. It’s lightweight yet feature-rich for performance optimisation.
GeneratePress GeneratePress is a fast, lightweight, and modular theme that allows you to enable only the features you need. It has clean code, is optimised for speed, and is fully compatible with all popular page builders, making it a great choice for performance-focused websites.
Neve Neve is designed to be lightweight and fast-loading, perfect for mobile-first designs. It’s flexible, easy to customise, and integrates well with page builders like Elementor and Gutenberg. Neve also offers extensive header and footer customisation.
OceanWP OceanWP is a highly customisable and lightweight theme. It’s built for performance with fast load times and offers deep integration with popular page builders. OceanWP is suitable for any type of website and comes with many extensions for added functionality.
Optimise images before uploading
Optimising images before uploading is essential for improving your WordPress website’s performance. Large image files can significantly slow down page load times, negatively affecting user experience and SEO rankings. By compressing images and reducing their file size without sacrificing quality, you can ensure faster loading speeds. Tools like Photoshop, TinyPNG, or online services can help optimise images before uploading them to your WordPress site. Additionally, saving images in the correct format (JPEG for photos, PNG for graphics with transparency) and adjusting dimensions to the appropriate display size can further enhance your site’s efficiency, leading to a better overall performance.
Did you know? – The SiteGround Optimizer plugin includes a powerful image optimisation feature that compresses images without losing quality, helping to reduce file sizes and improve site speed. It also offers lazy loading, which delays image loading until they’re visible, further enhancing performance and boosting your WordPress website’s efficiency and user experience.
Here are five popular plugins for WordPress image optimisation:
Smush
Key Features: Smush automatically compresses and optimises images without reducing quality. It offers bulk image compression, lazy loading, and resizing options.
Why It’s Popular: Easy to use with great performance, Smush is beginner-friendly and integrates seamlessly with WordPress.
Imagify
Key Features: Imagify provides multiple levels of compression (Normal, Aggressive, and Ultra), allowing you to optimise images based on your needs. It also supports WebP format.
Why It’s Popular: Known for its excellent compression quality, Imagify optimises images without visible loss in quality, ideal for performance-focused websites.
ShortPixel
Key Features: ShortPixel optimises images, PDFs, and WebP formats, offering both lossy and lossless compression options. It also provides automatic resizing and WebP conversion.
Why It’s Popular: A highly efficient plugin that handles bulk image optimisation with a strong focus on speed and quality.
EWWW Image Optimizer
Key Features: EWWW Image Optimizer provides automatic image compression, bulk optimisation, and the ability to convert images to WebP. It also includes lazy loading features.
Why It’s Popular: It offers unlimited file size optimisation and works well on shared hosting environments, making it a favourite among many WordPress users.
Optimole
Key Features: Optimole offers real-time image optimisation with automatic resizing based on device and browser. It also integrates with a CDN for faster image delivery.
Why It’s Popular: Optimole delivers optimised images through its CDN, reducing server load and improving site speed, ideal for mobile-first designs.
These plugins provide various levels of image optimisation, helping you improve your website’s speed, performance, and user experience by reducing image file sizes without sacrificing quality.
Read More: https://dcpweb.co.uk/blog/50-of-the-best-wordpress-tips-and-tricks-for-beginners-part-1
#50 of the Best WordPress Tips and Tricks for Beginners#Best WordPress Tips and Tricks for Beginners#WordPress Tips and Tricks for Beginners#WordPress Tips and Tricks#WordPress Tips#dcp web designers#wordpress#webdesigners#webdevelopment#wordpresswebdesign#web design#web development
0 notes
Video
youtube
Boost Your #business Visibility with #seo Magic #startupbusiness
#youtube#seo#seo services#best business to start#web design#website builder#seo for beginners#content seo#on-page seo#collaboration#entreprenuer#business#business stamina#restaurant owner#restaurant business tips#success#business growth strategies#business growth stages
0 notes
Text
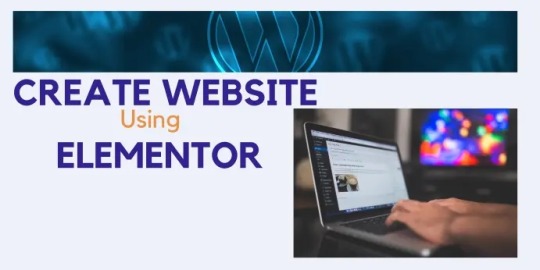
Create a Stunning Website on WordPress Using Elementor
In the digital age, establishing an appealing and functional website is essential for individuals and businesses alike. WordPress, in conjunction with Elementor and Elementor Pro, offers a user-friendly platform to create stunning websites without the need for extensive coding knowledge. This step-by-step guide will walk you through the process of creating a captivating website using WordPress…
View On WordPress
#Blogging for Beginners#Blogging Tips#Blogs#Content Marketing#Digital Marketing#E-commerce#Elementor#Elementor Pro#Keyword Research#Online Business#Responsive Design#Search Engine Optimization#SEO Optimization#talkstreetblog#User Experience (UX)#Web Development#Website Building#Website Design#Website Hosting#Wordpress#WordPress Plugins#WordPress Themes
0 notes
Text
[Megapost] Online Resources For Fiber Arts
Hi y'all! Local crazy lady librarian n' crafter here! I am one of those people who loves collecting resources and to that end I created my Weird Wonderful Web spreadsheet many moons back (which is an ever updating project btw) which is a spreadsheet of useful, interesting, wacky, old school, unique, or just plain delightful gems on the internet. For the purposes of this post I decided to pull out all of the fiber arts related resources (+ I added some new stuff just for this post that will make it on the sheet eventually)
Today, I am here to share with you collection of useful resources online for embroidery, cross stitch, sewing, knitting, and crochet. If you have any useful sites that you know of that I didn't share here I'd love to know! Reblog or comment and share!
Without further ado:
Sewing
@fatmasc’s google drive of sewing resources –– lots of sewing resources in one gDrive folder
Dagraeve’s Jedi Robe Pattern –– sew a simple jedi robe for a costume!
Vincent Briggs’ tutorials on making fabric covered buttons (18th century style!) –– what it says on the tin. These are very thorough video tutorials on this topic from a dude is extremely knowledgeable about sewing 18th century men’s clothing. Check out his whole YT channel for more 18th sewing content and his blog @ vincentbriggs.tumblr.com for more excellent content!
@wastelesscrafts basic circle skirt tutorial –– learn how to design and sew a basic circle skirt
Google WeWearCulture Project –– browse a huge collection of images and information about fashion around the world and throughout history.
Embroidery/Needlepoint/Cross Stitch
Sarah’s Hand Embroidery Tutorials –– a complete visual dictionary of embroidery stitches with tutorial videos for each stitch. Super thorough and informative!
Lord Libidian’s Cross Stitch Blog –– lots and lots of useful resources for cross stitch and embroidery, including the extremely handy downloadable DMC thread color chart spreadsheet for helping you organize your thread hoard. Lots of reviews of products and free patterns as well.
ThreadColors –– DMC thread colors to html hex codes. Excellent resource for selecting matching colors from your reference image to color block your next project. Note that some of the color names on this site are older names that DMC no longer uses, but the number codes and the colors themselves remain unchanged.
Faimyxstitch’s embroidery blog posts –– embroiderer Kseniia Guseva, who is well known for her stunning embroideries of scenes of various cities around the world has a variety of freely available posts with information about getting started with embroidery, including a very thorough post on the supplies you might need. She also sells patterns on her etsy and teaches a class (paid).
Free Patterns on the Official DMC site –– DMC has a lot of free to download patterns for cross stitch and embroidery.
DMC thread conversion charts –– convert DMC colors to other brands and vice versa using these handy charts.
reddit’s embroidery community r/embroidery –– lots of great, talented people, many of whom very kindly offer tips when asked!
Needle n’ Thread embroidery tutorials –– lots of posts and videos for beginners!
Knitting/Crochet
Ravelry –– if you’re not new to crochet or knitting you probably have already heard of Ravelry, but I figured I’d stick it here because if you’re brand spanking new you might not have heard of it. You need to create an account but you can download free patterns or purchase patterns on Ravelry. The other main thing you can do with your Ravelry account is to use it to keep track of your projects in your “journal” where you can put notes, a list of the yarns used, the hooks/needles you used, etc. and continue to update the project as you go along. Because I am a person who starts a project and completely forgets about it for like 2 months, I love my Ravelry journal because I put down the yarn I used, the hook I used and the stitch counts for the last row that I crocheted. Nifty!
Left handed Knitting from LeftyKnits –– short, sweet videos on knitting for lefties posted 16 years ago. All are less than 2 minutes long and cover a single micro topic!
Rowbot’s Knitting Videos –– similarly old knitting videos that are short, sweet and to the point from 10+ years ago.
thecrochetside crocheting videos –– short, sweet and to the point crochet videos from 15+ years ago. Right handed mostly.
Internet Archive’s Collection of Knitting Magazines –– collection of knitting magazines that can be viewed online via IA from a variety of time periods. Some magazines also contain crochet and a few crochet magazines are buried in the mix. Magazines contain patterns and project ideas.
Bella Dia’s “vintage” style vertical stripe crochet blanket pattern –– photo tutorial for crocheting a vertical striped multi-color blanket.
General:
findoldvideo.com –– for those who weren’t on YouTube 12+ years ago, you might not know this but there were a TON of super useful fiber arts tutorial videos that were short, sweet and to the point that were all over YouTube, but since the YT search algorithm heavily weights new content you’d never be able to find them now …. unless you use this site! findoldvideo allows you to search YouTube videos from a particular year and sort your results chronologically. A good example search would be “crochet” year: 2008 Boom! Now you have tutorial videos that are less than 2 minutes long and have no promos, random extra talking, title cards, or other fancy shit because they were posted 17 years ago before YouTube was awash in “content”. You’re welcome.
Degraeve Color Palette Generator –– generate a color palette from any image on the web and get hex codes. Good for graphic design, but could also be useful for coming up with “inspired by” color palettes for your projects.
Kleki –– digital painting in your browser for free. Includes a wide range of brushes and the ability to use layers. If you need to do some drawings for your project, Kleki is a good free alternative if you don’t have paid software on your computer or tablet.
Library of Congress Digital Collections –– Free to use reference images of a wide range of items, including images of historical fashions!
ManualsLib –– did you just buy a second hand sewing machine, digital embroidery machine, or knitting machine that doesn’t have a manual? You might be able to download a free copy here on the internet’s most comprehensive catalog of product manuals.
Stitch Fiddle –– A site/tool for designing patterns for knitting, crochet, cross stitch, needle punch and more.
The Smithsonian Image Archive –– Free to use images of a massive amount of things! If you like designing embroidery or cross stitch images of botanicals, insects, animals, etc. you can find high quality images of these here and download them for free and use them for anything.
Encyclopedia of Needlework by Thérèse de Dillmont (1890) –– Dillmont’s Encyclopedia of Needlework contains tutorials for sewing, embroidery, cross stitch, lace making, knitting, macrame and more. Originally published in 1890, it was an extremely popular work on the topic and is still being reprinted today. The link takes you to a free online copy on Project Gutenberg. It unfortunately doesn’t seem to have included the Table of Contents so you’ll need to pop a ctrl + f (cmd + if you’re on mac) and search your desired terminology. If you get it in print it is HUGE!
The Dictionary of Needlework by Sophia Frances Ann Caulfeild (1885) –– Read another popular book stitching, with the delightful subtitle: “an encyclopaedia of artistic, plain, and fancy needlework. Dealing fully with the details of all the stitches employed, the method of working, the materials used, the meaning of technical terms, and, where necessary, tracing the origin and history of the various works described. Illustrated with upwards of 800 wood engravings, and coloured plates. Plain sewing, textiles, dressmaking, appliances, and terms”
Volunteering Opportunities:
Project Linus –– Project Linus seeks to “Provide love, a sense of security, warmth and comfort to children who are seriously ill, traumatized, or otherwise in need through the gifts of new handmade blankets and afghans, lovingly created by volunteer blanketeers.” Knit, crochet, or quilt blankets that will be donated to NICU babies, Peds Oncology kids, and more. My grandma quilted for Linus for many years. I think that this post is a great encapsulation of the impact of Linus and similar orgs that donate blankets to kids in need.
Loose Ends Project –– “Loose Ends is an everyone-is-welcome movement that aims to ease grief, create community, and inspire generosity by matching volunteer handwork finishers with textile projects people have left undone due to death or disability.”
#fiber arts#crochet#knitting#embroidery#sewing#resources#masterlist#megapost#reference#mine#help#please please tell me what resources YOU know about! I'd love to hear about them!!!
49 notes
·
View notes
Text

Hello! In this post I will share some tips I have to help you on your custom content making journey. These are more general rather than creating a specific item, but I may make another part in the future!
Things covered: learning curve of blender, free resources, learning your computer, using references

1️⃣ There’s no need to pay for anything
The only money I have spent on anything related to TS4/custom content is for some of the expansion packs. Every resource I have used I have only had to pay with time. Blender, Sims 4 Studio, and Sims 4 Tray Importer are all free! And for Photoshop, a good free alternative I use is Photopea, which is just a web version. Another good alternative is GIMP, which is an application.
There are applications like Substance Painter and Marvelous Designer, but I would only recommend those if you have a genuine interest in 3D modeling outside of TS4.
And in terms of finding tutorials, scouring the internet will always lead to some result. A good tumblr page is @thefoxburyinstitute, which has many sections based on your level of experience. Adding “reddit” to the end of a search helps too!
2️⃣ You can export anything from Sims 4 Studio as a reference (mod or EA object)
For an EA item, In S4S, go to Tools -> Browse Game Content -> then select the category you need a ref. If it’s a mod, click on My Projects and find the package you want.

From here, you can export the mesh, images, or any textures you need without having to create a new package for it! Best used when you have already created your own package and just need one aspect of the object.
If you want to append in Blender, go to File -> Append (works with any .blend file exported from S4S), then find the location of whatever you exported. Go to the Object folder, find anything labeled s4studio_mesh_number, then append. I just append all of them, then delete ones I don’t need.

Also, in the Scene tab, make sure the cut box is blank for the reference you imported! S4S will confuse this with your mesh if not, as the cut number determines which mesh will replace the EA one.
3️⃣ File management is important!
The more you create, the more random things you’ll download on your computer. You need to be aware of where you’re downloading things from, duplicate files, how much storage it’s taking up, etc. I recommend the Sims 4 Mod Manager by GameTime. Back up your files often and learn how your computer works because every device is different! Below is how I organize my CC (could use some improvement), but use whatever keeps you organized.

4️⃣ Learn Blender outside of Sims 4 CC
There have been so many times when I’m so frustrated about Blender that I have to take a step back and focus on a different hobby. The first time that happened years ago, I decided to learn how to make simple models in Blender, and not only did I enjoy it, but I also learned so much that can be applied to CC! Below are some tutorials that I watched.
Blender 3D Beginner Tutorial by 3DGreenhorn
A simple room tutorial.
3D Isometric Bedroom by artbytran
Another simple room tutorial, but with more cute details.
Creating Stylized Low Poly Characters by lacruzo
How to make a low-poly character and texture paint on it (I used this tutorial to texture paint on a hair clip!)
Intro to Creative Web Development by Andrew Woan
Okay I know the 5 hours is daunting, but only (lol) the first 2 hours are Blender. This video goes more into the technological aspect and making models optimized for video games/web (ahem TS4). After the 2-hour mark, it's all coding, which is not needed for CC making.
5️⃣ It takes time/consistency
As a person who only makes CC once every other month or so, it’s mostly muscle memory and consistent practice that makes someone feel confident in their CC making abilities. Remember how as a kid typing was the slowest thing ever, and today you’re (hopefully) better? It’s cause you kept practicing over a long period of time.
The first time I opened Blender to make poses was in 2021, and 4 years later, there’s so much that I have learned from others, and 10x more that I don’t know due to the endless possibilities of what can be created. But hey, I’m confident enough that I made this post of tips, right? Take small steps, the end goal is to make something you or others enjoy.
Thanks for reading this if you’ve come this far, and here are two pages I recommend reading to help you on your CC journey! :D
Internet safety regarding TS4 by crazy-hazy-sims (pls read this) Custom Content Creation by simlaughlove
15 notes
·
View notes
Text
Advanced Mahou Outfit Guide 💫
Hi guys! I hope you all are excited for more posts to come– AP exams are over, and soon school will be out for the year! To those who have upcoming school exams, or are in the final stretch of school, good luck! We believe in you :)
Also, another reminder to join Mahou Planet! We have a couple of Summer events we’re planning, gamenights, challenges, etc! It’d be lovely to have you join our endeavors ^^
Now that that’s over, are you guys ready for today’s guide?

👗 INTRODUCTION TO MAHOU FASHION
If you’re no stranger to the world of magical heroes, you’ll know that they have different outfits whenever they transform. Strikingly different outfits compared to how most of us dress on the norm. Advanced magical heroes will likely know what they’re searching for in terms of outfits, however, beginner magical heroes may not know where to start– that’s what this guide is for! In this guide, I’ll be discussing a couple of tips and tricks to create your magical hero outfit!
👠 HOW DO I GET STARTED?
To get started, I recommend following some of the advice that I shared on my concept basics post– especially with making lists. I recommend making bulleted lists of what you want/don’t want, specifically in outfits. For example, writing down “I want to wear a skirt” and “I don’t want heels” already narrows down a LOT of possibilities you have for an outfit!
Another recommendation is to decide a couple of concept themes before you create an outfit, so you can correlate your concept with your outfit. Knowing the basics can help you more than you think– know your desired motifs, colors, etc.
One more important tip, think about what you are comfortable wearing and what you’d like to embody as a magical hero. You can experiment with this by playing dress-up in your bedroom, fitting rooms, etc! Experiment with what you feel comfortable wearing in real life, so you’ll get an idea of what you’d like to wear while doing magic. If you can’t do this, then think about what you would like to wear as a magical hero. Maybe you want to try a new style, or (my personal motivation) defy societal norms/the “dress code” you were raised with. Basically, go out there and experiment!

💄 BRAINSTORMING IDEAS
Now that you have these new ideas layed out, it’s time to brainstorm! Go out in the real world or on the wonderful world wide web and search for some outfit ideas! Here are some helpful sources for finding outfits:
Pinterest is a STAPLE for inspiration. Some keywords I recommend are “magical girl”, “magical girl oc”, “magical girl oc design”, “(your aesthetic)core outfit”, “runway outfit” and “stage outfit”!
Research some magical hero animes/games for outfit ideas! Some I recommend looking at are Madoka Magica (more specifically Magia Record since there’s like 1000 magical girls there), Precure, Girls x Heroine, Cocoppa Play, and Pripara!
tumblr (this platform teehee) is also a nice place to search for inspiration! You can use the same keywords above, just with tumblr hashtags!
Play around with dress-up apps like Gacha Life 2, Dolldivine, Everskies, Picrew, and ROBLOX (I know a couple of avatar editor games, if you want me to drop them, just ask!)
Go window shopping (or shopping if you have the money) and look at magical hero-esque outfits! You can go thrifting, to the mall, online shopping, or look at other people’s everyday outfits!

🎨 DESIGNING THE OUTFIT: SECTION 1
Now that you have inspiration and plenty of ideas to go off of, it’s time to DESIGN! You can design your outfit with any method, from creating collages off of images, to using dress-up games, drawing your design, commissioning an artist, there’s endless possibilities!
The only method I recommend you don’t use is AI art. AI art not only takes credit away from actual artists, but AI art is environmentally harmful and the algorithm searches every image on the internet, including medical records and illegal and problematic images. Mahou Planet has a rule against using AI art: “There will be no AI art usage in this server. This rule is non-negotiable. Accidentally sending AI art without knowing is understandable and can be corrected by deleting the message, however, do not promote the usage of/use AI art.” I will not be willing to argue with anyone about the morality of AI art– know it is not supported by us. There are many better alternatives that can get you a better design, and most importantly- it’s a design that you (for the most part) create yourself!
There are lots of different factors to consider for your outfit design, such as whether you have teammates, uniforms, shared outfit motifs, outfit rules, etc. We’ll go over those in this section!
TEAMMATES
If you have teammates, it may be a good idea to correlate your outfits together to show that you’re a team.
For example, the magical girls in each Precure season have shared outfit motifs to show their team harmony. I think the Precure season that does this well is GoPri. The Cures in Go Princess Precure each have a tiara with a charm representing their outfits motif, princess-like dresses, a back bow, and a golden gem on their outfits. You can easily look at them and tell that they are a team.
Another example of this is of Winx (specifically S1)! The simplicity of their designs, the glittery fabric, the small wings, and the boots are all correlated, even though the girls themselves all stand out with unique takes on these rules.

Something to take from these magical girls is that they each have something to tell that they’re a team. If you are a team and want you guys to have shared outfit motifs, make sure that someone can look at a picture of your team and can tell that you guys work together.
A simpler solution to this is uniforms! Uniforms are basically a simpler way to coordinate your teammate outfits. One of the most famous examples of this is Sailor Moon: their outfits, besides some accessories, are the same. The only difference is the color scheme. This is easy for those who don’t want to design unique outfits, or want outfits to stand out in terms of color.
Here’s a more simplified list of the pros and cons of having uniforms VS unique outfits:
Uniforms
Easy to design
Takes little to no thought
Colors easy to pick out
Can be either simple or complex
Colors may be hard to remember for each member
Limited freedom of expression
Unique Outfits
Harder to design, but a more satisfied finish
Outfit and colors may be hard to remember for each member
Usually complex but some can be simple
Freedom of expression, or much freedom if there are still rules
Harder to coordinate
As you can see, I have a little bit more pros under uniforms. However, do what you want with your designs! I personally always go for unique outfits– some of the unique outfits I’ve seen in the magical hero community look STUNNING!
If you want to have unique outfits or uniforms, a good thing to implement is outfit rules. Rules are basically what you can and can’t do in a design. When I’m designing teammates, I have rules listed under DO, DO NOT, and IT DEPENDS categories.
DO is of stuff you can change, add, modify, etc. For example: you can have a unique hairstyle.
DO NOT is stuff you cannot change, no exceptions! Example: you must keep a bow on your chest.
IT DEPENDS is stuff you can modify, but may be limited. Example: You can change the shape of a skirt, but it must keep white ruffles and be in the color of your theme color.
These rules can vary based on your kind of magical hero and what you want for your team. Remember: you are the designer! Design to your heart's content and what you think looks good for you and your team! 💫
SOLO
If you’re going solo, this section may be a bit more helpful than what I said in the teammates section. Solo outfits usually apply to just yourself, so you have so much more freedom in designing your outfit. When making an outfit, don’t just focus on what looks good. Remember to design an outfit that makes you comfortable, and you only!
If you want to have teammates in the future, or if you need more guidance on creating outfits, then it’s recommended to create outfit rules, just in case. Or if you’d like 100% freedom on outfit designs, do what you want! It’s your outfit!
THEME COLOR
Choosing a theme color is easier said than done. I see most magical heroes choose their favorite colors as their theme colors, and I have also seen magical heroes put more thought in their theme colors. Do what you want! Even if you don’t want a theme color or want multiple, you are still a valid magical hero!
For color palettes for an outfit, you can go on Pinterest for colors, or go to coolors.co to generate color palettes! A cool thing about coolors is that you can save color palettes for your magical form!
MOTIFS
Motifs are also important to decide on your outfit! To decide outfit motifs, repeating elements in your outfit, think about the theme your magical hero wants to display, or a moral lesson you’d like for whoever you’re fighting/the general public to learn. If you’re a magical hero of love, you can opt for adding heart shapes and motifs to your outfit. If you’re a magical hero of wishes, add some shooting stars on your outfit! It goes on and on for any motifs, it’s all up to you to determine how you use them.
🎨 DESIGNING THE OUTFIT: SECTION 2
For this section, I’ll go over the more detailed aspects of your design, from top to bottom! I’ll give advice on designing outfits, as well as some practical tips for your magical design.
HAIR
Probably the most famous– magical heroes are notorious for their crazy hair. Most magical heroes you see have long hair, either down or in some updo, and in the color of their theme color or an accent color. Some magical girls have their hair be a variation of their natural hair. You can have any kind of hair you’d like as a magical hero! Here are some of my tips:
Make sure your hair won’t hinder your fighting abilities- it won’t get caught in your outfit, you won’t trip on it, etc. Also, make sure your villains can’t grab your hair to pull you/catch you off guard! This is a common fighting technique and I’ve seen this absolutely destroy people in school fights. If crazy freshman can do it, your villains likely will as well.
Don’t worry about your hair being “easily recognizable” if you’re keeping your natural hair. You can always script in that no one recognizes you or use magic to ensure no one associates you with your secret identity.
As for personal recommendations, I recommend having your hair out of your face. I have bangs in real life and in my magical girl form; sometimes they’re a pain, especially on hot days. It’d kind of hinder your ability to see in your magical form. A good counter to this would be scripting the thickness or thinness of your bangs if you plan on having any, or to script that you see better once you transform (this is good for people with glasses!)
Also recommend to script that you don’t sweat when you transform. Sweat + hair = pain.
Choose a hairstyle you can fight in and feel comfortable with– if you’re not sure where to start, think about hairstyles you would like to try or hairstyles that flatter you. Even hairstyles you wear in real life would be a good start!
Don’t worry about damaging your hair with the color you choose, I’d like to imagine magic changes your hair color, and is completely damage-free! (Really wish this were the case in real life 😭)
HEADGEAR
I know a couple of magical heroes who plan on having hats or SOMETHING on their head in their magical hero form. If you’re interested in having headgear in your magical hero form, here are some precautions and tips:
I don’t want to say it’s a hindrance to have a hat (because I literally wear an ushanka in my magical hero form 💀), but try to find some way it’ll stay on your head while fighting. Unless you don’t anticipate doing crazy backflips, I’d recommend scripting that your headgear won’t fall off even in the craziest situations– or even better, it can only be taken off by your hands only.
Also script that your hat (or better: your entire mh outfit) is the exact size for you, and grows as you grow in civilian form!
Try to find some practicality in it! I see magical heroes go for goggles to replace their civilian form glasses. Some magical heroes wear hats to keep the sun out of their eyes. I had an old concept where my magic came from a top hat (if you know, you know). Hats don’t just have to be fashionable, but I wouldn’t blame you if you wanted something cool just to finish off your outfit.
If you’re looking for hat designs, a good game I recommend for inspiration is Genshin Impact! The creativity the characters have for their headgear is amazing, and I can imagine some magical hero designs based off of just hats alone. Pinterest is also a good place to look!
TOPS
Tops! This is one of my favorite parts of designing! Designing tops is always really fun. Here’s some advice:
I recommend looking up necklines or just pretty tops in general for inspiration!
Also recommend to have a built-in bra with your top, wearing one separately would be a hassle in my opinion.
One of my biggest pet peeves with strapless tops is it falling down every 5 seconds, so if you have a strapless top, make sure you script that it won’t fall while you’re fighting.
This is the same for sleeves in general! Script they won’t fall down.
If you have anything tied in your magical form, like ribbons, script that they won’t come out or loose.
Make sure you choose something you’re comfortable with! Script that you’re comfortable in your top, no matter what kind of top you’re going to wear in your magical form.
PSA for magical heroes who want gloves: script that you can use your phone while wearing them. I hate wearing gloves and then having to take them off just to use my phone :(
If you aren’t planning on wearing gloves, script that you don’t leave fingerprint traces on surfaces you touch, just for security reasons!
I’d hate to continue the “YOU DON’T NEED PAINTED NAILS IF YOU’RE WEARING GLOVES DUHHH!!!!” debate, do what you want with your nails! Pinterest has gorgeous nail designs! If you are wearing gloves, I’d recommend making the color of your nails change the natural color of your nails. Long nails would probably be more of a liability than shorter ones, or you could script your nails are immune to breaking, getting damaged, falling off, etc.
A smart idea would be incorporating your outfit into some kind of use with your magic. For example, if your main weapon is guns, then I’d recommend keeping ammunition on your body, on a sling or a belt. This takes a bit more thought to be put into it, but it’s so worth it and makes a great design in the end!
BOTTOMS
Bottoms are also fun to design! In my opinion, these are the most versatile. There are different directions you can take for bottoms, SO many different directions! Here’s my advice and suggestions:
Go for what makes you the most comfortable! You are 100% a valid magical hero if you go for pants or shorts over a skirt and vice versa! It’s your outfit! If someone has a problem with how you present your magical self, they can kiss your- 💥💥/JOKE /ok but fr ignore people who have problems with your outfit they’re just insecure (/srs)
If you are planning on wearing a skirt, please script safety shorts or opt for a skort instead! I don’t think I should explain why flashing people while you’re fighting is not only embarrassing but dangerous since there are terrible and disgusting weirdos out there.
If you’re wearing socks, script that they won’t slide down (another pet peeve of mine)
If you want to wear heels, or if your shoes are high heeled, PLEASE script that you know how to fight in heels and won’t fall or trip! Been there done that, it’s not fun. Also scripting that your feet won’t get blisters is a good precaution too!
Also, if you’re wearing a back bow/something on the back/a cape, or anything you’re scared will catch up into something while moving, script that you’re not going to get stuck or nothing will catch your clothes while you’re moving.
MAKEUP
I feel like makeup is a less commonly talked about thing when it comes to magical hero design. I think makeup is also important to consider when you’re transformed! Here are some considerations:
Make sure your makeup is sweat-proof, sensory friendly, and won’t wipe off or get ruined while fighting. Emphasis on sensory friendly, I avoid makeup in civilian form because foundation is absolutely PAINFUL.
Search for makeup styles you like, or go off of makeup you wear or would like to wear in real life! You can go for natural makeup, glamorous makeup, stage makeup, etc.
Royale High on ROBLOX is a good game to look for makeup styles! The makeup in faces (to my knowledge) is free to use! Everskies is also a good game to experiment with makeup!
Tear proof makeup works as well, just in case you end up crying in your magical hero form.

🎤 GENERAL TIPS
Keep in mind the environment you’ll be fighting in may change depending on where you go. You may fight in the rain, in snow, on the beach, etc. It’d be a nice idea to accommodate your outfit for such conditions, or to script that your outfit is weather-proof.
Speaking of accommodations, if you’re disabled, it’s always a great idea to script accommodations for your outfit! You can script that your outfit is sensory friendly, isn’t itchy, and (my favorite) there are no tags on your magical outfit.
I also like to script that my magical outfit is able to regulate heat/coolness! This can work for any outfit, even if you can’t find the logic behind it. It’s magic! That’s all the logic you need!
Make sure you’re able to find some way you can fight in your outfit. Even if you don’t plan on fighting, it’s a good precaution!
Kind of TMI, but if you get periods, script that your outfit is bleed-proof. This is also good if you end up getting hurt in your outfit. Also scripting that your outfit’s immune to tearing or getting injured is a great idea!
A fun way to experiment with how your magical hero outfit may look is to take a full body picture of yourself and then draw over it with your magical hero clothes. You can also dress in aspects of your magical hero outfit in real life with items you have at home (ex. wearing a top similar to the top in your magical hero form) to get a feel of what you’ll be wearing.
If you need design help, I suggest joining Mahou Planet! There are great magical hero designs there and talented designers willing to help you! Searching for inspiration, meshing different pictures of outfits together, and asking friends for help are also valid methods!
💫 CONCLUSION
In conclusion, there are about a gajillion different ways to create a magical outfit. There’s not one right or wrong way to design, or a “bad” or “good” design: what matters is that you’re comfortable in it and that it’s an outfit you love! Outfit changes are 100% valid, and I’d even recommend scripting variations of your outfit for weather/personal reasons!
At the end of the day, designing should be a fun process. I hope you guys learned a thing or two from this post, and have fun designing your magical hero outfit! Remember to join Mahou Planet to have a chance to choose the next article I write!
See you guys next post!
(idols: yeojin - loossemble, jinsoul, choerry, kim lip - artms, mina - twice, ella - pixy, gowon, hyeju - loossemble, gwsn ot7, stayc ot6)
#magical girl#manifestation#irl magical girl#magic#subliminals#mahou shoujo#mahoucore#manifesting#loa#magical girls
53 notes
·
View notes
Text
How to Master Color Theory in Graphic Design – Easy Tips for Students

Introduction
Color is perhaps the most influential graphic design element. It can evoke moods, express emotions, and enhance visual appeal. Whether you're a beginner or an aspiring designer, learning color theory is crucial to achieving professional and stunning designs. In this blog, we simplify color theory and provide easy tips to help students learn it effectively.
Knowing the Fundamentals of Color Theory
Before diving into advanced techniques, it is essential to understand the basics of color theory.
1. The Color Wheel
The color wheel is a diagram that shows colors arranged according to their relationships. It includes:
Primary Colors: Blue, yellow, and red – these cannot be created by mixing other colors.
Secondary Colors: Green, orange, and purple – formed by combining two primary colors.
Tertiary Colors: Created by mixing a primary color with a secondary color (e.g., red-orange or blue-green).
2. Color Harmony
Harmonious color combinations are essential in graphic design. Common color schemes include:
Complementary Colors: Opposite on the color wheel (e.g., blue and orange) and create strong contrast.
Analogous Colors: Placed side by side (e.g., blue, blue-green, and green), producing a calming effect.
Triadic Colors: Three colors evenly spaced on the wheel (e.g., red, yellow, and blue), offering a rich and balanced look.
Monochromatic Colors: Different shades and tints of a single color, creating a clean and simple appearance.
Easy Tips to Master Color Theory in Graphic Design
Now that you understand the basics, here are practical tips for effectively applying color in your designs.
1. Learn About the Psychology of Colors
Colors influence emotions and perceptions. Here are some examples:
Red: Urgency, energy, and passion – commonly used for sales pages and call-to-action buttons.
Blue: Calmness, professionalism, and trust – frequently used in corporate branding.
Green: Health, growth, and nature – ideal for eco-friendly and wellness-related designs.
Yellow: Warmth, happiness, and optimism – great for grabbing attention.
Purple: Mystery, luxury, and creativity – often used in beauty and fashion branding.
Select colors based on the industry and the message the brand wants to convey.
2. Utilize Contrast for Readability
Proper contrast ensures that text and design elements stand out. To enhance readability:
Use black text on a white background for maximum contrast.
White text on dark backgrounds (like navy or black) creates a sleek, professional look.
Avoid using analogous colors for text and background, as they can be hard to read.
3. Apply the 60-30-10 Rule
A well-balanced color scheme follows the 60-30-10 rule:
60% – Dominant color (background or major elements)
30% – Secondary color (complements the main color)
10% – Accent color (highlights key areas)
This technique is widely used in branding, web design, and UI/UX design.
4. Experiment with Different Color Schemes
If you’re unsure about color combinations, use online tools like:
Adobe Color
Coolors
Canva’s Color Palette Generator
These tools help generate visually appealing color schemes with ease.
5. Test Colors on Different Backgrounds
Colors appear differently depending on the background. Always test your design against both light and dark backgrounds to ensure consistency and readability.
6. Stay Updated with Design Trends
Color trends evolve over time. Stay current by exploring design platforms like:
Behance
Dribbble
Observing professional designers can help you stay inspired and refine your skills.
Why Learning Color Theory is Important for Graphic Designers
Mastering color theory is crucial for creating professional designs, whether you’re working on logos, websites, posters, or branding materials. If you’re serious about becoming a skilled graphic designer, consider enrolling in a structured course to enhance your skills.
If you’re looking for graphic designing classes in Yamuna Vihar or graphic designing training in Uttam Nagar, choose an institute that covers advanced design concepts, including:
Color Theory
Typography
Composition
Many reputed graphic designing training institutes in Yamuna Vihar and graphic designing coaching centers in Uttam Nagar offer hands-on learning with expert guidance.
For those interested in multimedia courses in Yamuna Vihar or multimedia training in Uttam Nagar, learning to apply color across multiple media, such as digital design, video editing, and animation, is essential. Mastering color theory allows you to create visually striking designs that capture the audience’s attention.
Final Thoughts
Color theory is a vital aspect of graphic design that every student must learn to create effective and visually appealing designs. By understanding color psychology, contrast, and harmony, you can elevate your design skills. Keep experimenting, practice regularly, and stay updated with design trends to enhance your expertise.
If you are searching for a graphic design course in Delhi or the best graphic design institute near you, opt for a course that provides hands-on experience and industry-specific knowledge. With proper training and guidance, you can build a successful career in graphic design. Visit us:
Suggested Links:
CorelDraw
After Effects
Canva Using AI Tools
#graphic designing#graphic design tips#graphic design tutorials#graphic art#graphic designers#graphic design#graphic designing tips#graphic designing institute#graphic designing course#Graphic designing course in yamuna vihar#Graphic designing course in uttam nagar
6 notes
·
View notes
Text
Tips for New Web Developers: Building a Strong Foundation
Tips for New Web Developers: Building a Strong Foundation
As a beginner in web development, it's important to focus on the fundamentals before diving into complex projects. Here are a few key tips to help you build a strong foundation:
Learn HTML & CSS: These are the building blocks of web development. Mastering them will allow you to create basic, functional websites.
Understand JavaScript: This language brings your websites to life by enabling interactivity. Start small and work your way up to more advanced concepts.
Responsive Design: Ensure your website looks great on all devices by learning responsive web design principles. Mobile-first design is crucial today.
Version Control (Git): Use Git for tracking changes to your code and collaborating with others. GitHub is a great platform to showcase your projects.
Focus on Clean Code: Write clean, readable code that is easy to maintain. It’ll help you and your future collaborators down the line.
Remember, the journey may be challenging, but with consistency and practice, you’ll become proficient and confident in web development. Keep coding! 🚀
#design#etsy#html#technology#website#web design#web developers#web development#html css#html5#htmltemplate#htmlcoding#frontenddevelopment#code
5 notes
·
View notes
Text
Planning to sell physical or digital products online and want to create a website for it in the FASTEST way?
If you're starting your e-commerce journey and feeling overwhelmed by all the platform options—don't worry, you're not alone. Two names dominate the conversation: Shopify and WordPress (with WooCommerce).
But which one is truly better for newbies, beginners, and dropshippers looking to launch fast and sell efficiently?
Let’s break it down and get straight to the point—especially if you're here to build a business, not fiddle with tech headaches.
Shopify: Built for E-Commerce from the Ground Up
Shopify is a dedicated e-commerce platform. That means everything from product setup to payments, themes, and shipping is purpose-built for one thing: selling online.
Why Shopify is Great for Beginners
Zero Coding Required: Just drag, drop, and start selling. Perfect for people who want results, not tutorials.
3-Day Free Trial: You can start today and be up and running in hours.
Sign up for Shopify’s FREE trial with this link -
https://shopify.pxf.io/QjzmOa
Fast Setup: No plugins, no server setup, no manual installation. Just sign up and start building.
Designed for Dropshipping: Integrates easily with apps like DSers, Zendrop, CJdropshipping, and more.
Mobile-Optimized: Your store will look great on any device—without touching a line of code.
24/7 Support: Real-time help from actual people when you get stuck.
Sign up for a Shopify FREE TRIAL Here at https://shopify.pxf.io/QjzmOa
WordPress (WooCommerce): Powerful, But Not Beginner-Friendly
WordPress is an amazing platform... if you're building a blog or you’re already experienced with web development. But for e-commerce newbies, it can feel like you're building a house from scratch.
Why WordPress Might Be a Struggle for Beginners
Complex Setup: You'll need to buy hosting, install WordPress, then install WooCommerce, then configure it all manually.
Plugin Overload: Want a feature? You’ll likely need to install a plugin. And another. And another. Then update them constantly.
Security Risks: If you don’t stay on top of updates and patches, your site could be vulnerable.
Slow Support: There’s no dedicated support team—just forums or your hosting provider.
Not Built for E-commerce First: WordPress is a blogging tool at heart.
WooCommerce makes it work for selling, but it’s not seamless.
So Which One Should You Choose?
If you're:
A beginner with no coding experience,
A dropshipper who wants fast supplier integration,
Or just someone who wants to get your first product online this week, not next month...
Go with Shopify.
It’s clean, easy to use, beginner-friendly, and built to sell. You won’t waste time on tech issues—you’ll spend time building a brand.
Pro Tip: You can start with a 3-day free trial and see how easy it is. No risk, no commitment.
Sign up for a Shopify FREE TRIAL Here - https://shopify.pxf.io/QjzmOa
Manual Setup
Shopify was made for people just like you—dreamers and doers ready to launch something real.
Don’t get stuck in tech setup and plugin chaos.
2 notes
·
View notes
Note
Hi! Gonna start off and say that I love the work you're doing with the Welcome Home neocities website! It's perfectly stylized for the project/puppet show and I can see the work you're putting into it.
I'd love to learn how to make my own neocities website (for fun? For a personal project??), so I was wondering if you could provide some tips and/or pointers for a first-timer.
Thank you!
HAHA well first of all i'm flattered that someone would think i'm skilled enough to be giving pointers in the first place. i still consider myself a novice when it comes to web design (for example, if you're wondering why every page on welcome to welcome home has its own CSS, it's because CSS is Way harder for me to wrap my head around than HTML) so i can't give any Super advanced tips, but i can at least write about what's helped me so far:
GUIDES. neocities has its own tutorial and list of HTML/CSS resources, but user-made guides are your best friend when it comes to figuring out where to go from there. a.n. lucas and pauli kohberger both have really good guides for beginners, but for the more advanced stuff, i found myself referencing the resources on solaria's webspace and sadgrl.online the most. w3schools is also very helpful when it comes to answering more specific questions like "how do i use two different fonts on the same page?" (and probably more.) if all else fails, then usually just googling "how to (x) in HTML" or "how to (x) in CSS" will yield at least one useful result. for making your website more accessible, there's the accessible net directory and this masterpost by foxpunk on tumblr.
it sounds obvious, but it helps to have a solid idea of what kind of site you want to build before you actually dive in, and then snoop around on neocities to get an idea of how other users approach the same topic. for example, i got the idea to start a welcome home wiki on neocities after being reminded of the 8:11 wiki on the same site, and then i spent a couple days just looking up stuff like "wiki" or "fansite" on neocities and then clicking on any page that caught my attention to study it.
layouts! there's no shame in using a premade one, and you can even learn more about HTML/CSS in real time just by messing around with the base code before implementing any intentional changes. sadgrl.online's layout builder is a VERY popular choice, since you can already do a lot with the basic options it offers and it's easy to further customize once you have it set up on your page; it's what i used to make welcome to welcome home. sadgrl.online's webmaster links also feature a bunch of other options under the "layouts" tag, and if none of those work for you, then you can even find something just by looking up template/templates/layout/layouts/HTML/CSS on neocities itself.
side note: if you're reading this and you want to make a wiki then you can also use this wikitable code. it came out after i had already established the Look of welcome to welcome home, so i probably won't implement it any time soon, but i TOTALLY WOULD HAVE if it was around when i first set the site up.
you can scale images up or down using percentage, with 100% being the image's default size. i don't know how helpful or acceptable that is, but i use it a lot.
don't feel pressured to get everything done at once, even if you expect people to be visiting your site frequently. usually if you just slap on an "under construction" gif or even just write "hey this site is still under construction" then people will understand. i don't think i've ever seen anyone get super huffy about slow updates on neocities, anyway.
EDIT: OH. GRAPHICS. i mention all of these on welcome to welcome home's front page but i Also wanted to note them here: betty's graphics and websets by lynn both have HUGE collections of background tiles and other graphics that work especially well if you're going for that old web charm. i also like to use this mirror of patterncooler for backgrounds bc of the customization options. you can also make your own background tile and then use a seamless tile maker like this if all else fails.
EDIT 2: ALSO. obviously. do not be like me and use discord or any other chat client as a filehost, no matter how promising it looks, because one day you WILL get a very nasty surprise when the request signature on those urls expire and the images are no longer accessible on other sites. there are a myriad of other filehosts out there, but personally i recommend file garden (and also donating to file garden if you can, even if only for a couple months. i know i said that just yesterday, but if it gets more folks to subscribe then i'm gonna keep saying it.)
#imaginatorofthings#ask#welcome to welcome home#web design#? yeah i'll slap that tag on there why not#neocities
20 notes
·
View notes