#wanted to try to get back to lineless art
Explore tagged Tumblr posts
Text
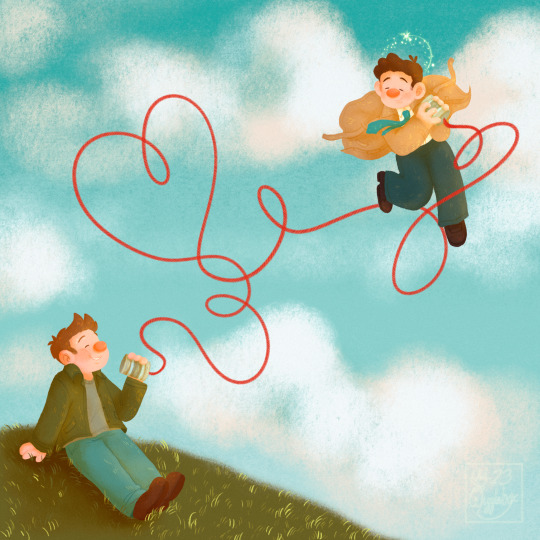
Prayer [x]
#spnfanart#destiel#destiel fanart#dean winchester#castiel#wiggleart#based off this older doodle from eight years ago#I like the original but I wanted the string to make a heart lol#just a lil thing!#trying to get back into shapes and lineless art
288 notes
·
View notes
Text

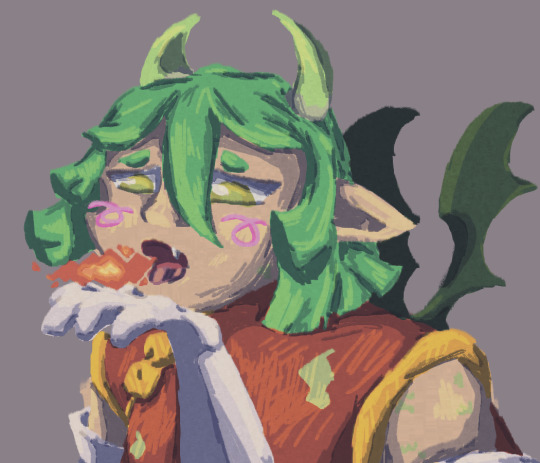
fire breathing dragon girl
#luh's drawings#art#puyo puyo tetris#draco centauros#puyo puyo#LOOK LOOK I DONT DRAW HUMANOIDS OFTEN IM A FURRY ARTIST!! much less anime art... the arm looks a little wonky but its fine#drew lined but i like the lineless look as well#the hair was much more fun to draw than i expected#the pose is what irks me a little in this i KNOW i need to work on that lol. yeah yeah. i should fix it in the drawing but i dont wanna :PP#i want to draw her more. maybe as more of a dragon than a girl..... hmmmm :3#i did doodle of her yesterday that i liked ill post it later me thinks :3#im trying very hard to get better at colouring. its hard lol GIVE ME BACK MY STUPID WAX CRAYONS WITH A LIMITED COLOUR SELECTION AAAHRRRHHGG
12 notes
·
View notes
Text
i got a few asks about my process :0 so yea i took some screenshots mid-process of my recent cliff-skk thing just for that
m gonna preface everything by saying that i did have a ref for the environment!! i avoid color dropping from the image and tracing cuz i do want to hone some digital skills. also saying i'm doing an "environment study" when i'm really just drawing skk makes me feel better abt myself
when i don't have a reference, i tend to do some thumbnail sketches in my sketchbook. here's some random stuff of past work, where i rawdogged everything:
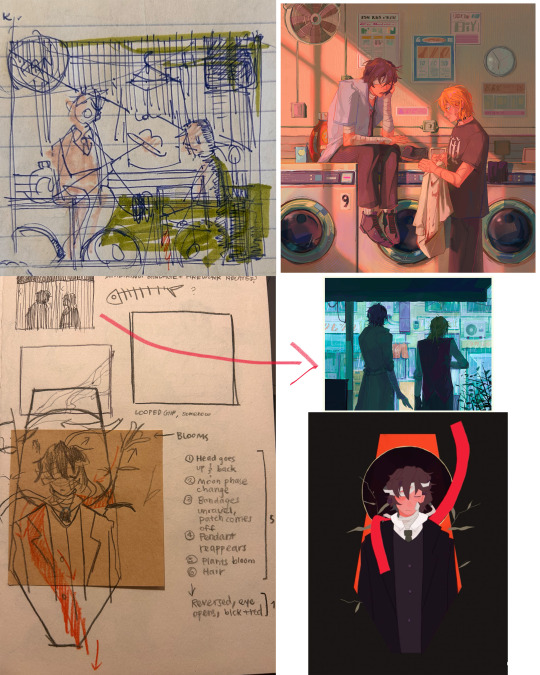
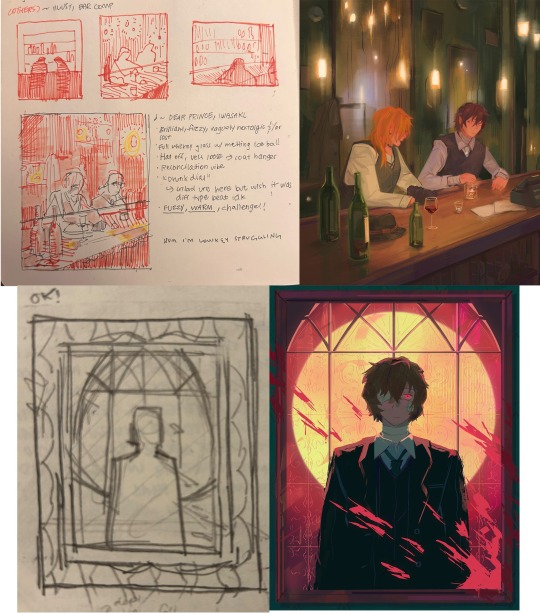
but whatever, back to the cliff-skk. i'll also post a timelapse of it for easy ref, but detailed stuff is under the cut :)
first i did some rough sketches on an orangeish background (underpainting etiquette, i find it helps things feel brighter and keep a stable tone when choosing colors to lay on top), and I quickly lined skk :)


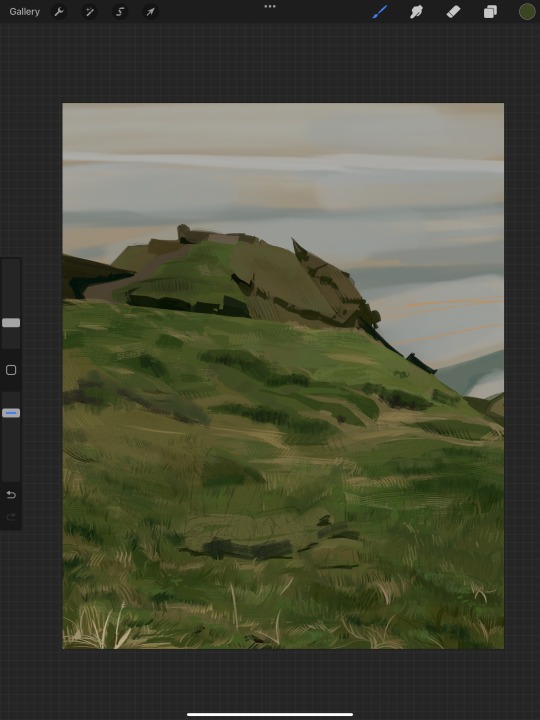
then I laid down some flats for the background, again really eyeballing the reference for hues. afterwards i thought it was a bit bright, and i wanted a more sepia/nostalgia feel to it, so i hue adjusted everything to something more uniform


then i lay down flats for skk + the ocean, which i both had to color adjust a lot (you might see that in the timelapse), and then i jump straight into rendering the background. when i render, i always prefer to do it over something lineless, so i turn the sketch layer off. i rarely do lineart for backgrounds.
i also used to render the characters first, but i've found that it's just not a great approach—especially for art where characters and background are interacting, knowing the hues and shades of the environment is crucial to effective rendering on the character that doesn't make them look out of place.
when i'm rendering, i really try to keep in mind tenants of contrast, perspective, form, and light/shadow. ex, stuff "closer" to us has more detail; the hill in the back is minimalist (in comparison); the shadows lean cool-green while the light leans gray-yellow. rake brushes really carried me here idk... my fav brushstyle forever


eventually i reach a point where i'm satisfied (or bored) with the background. for the last stages i usually have the subjects hidden so i can really perfect the details—but then for super duper final details, like the little leaf specks and grass strands, i unhid skk so the poppy details could work around skk. then i get to rendering the characters :)
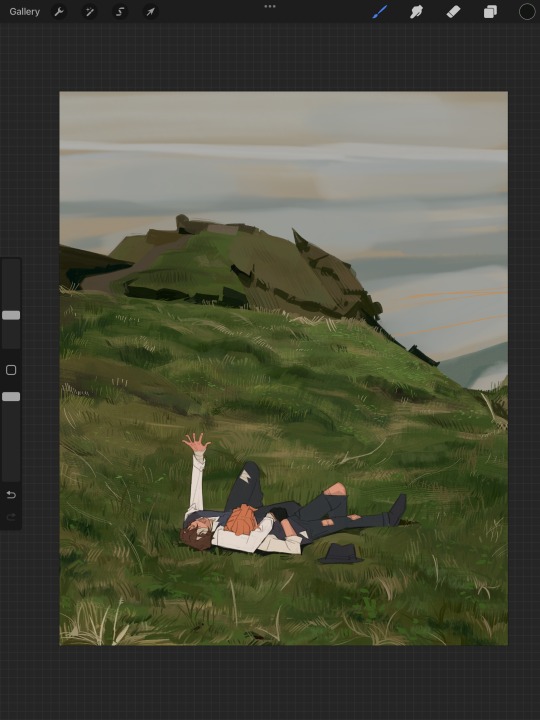
i forgot to take ss of all the stages when i rendered skk, but here's something from... about the middle of the process? i tend to render characters with the lineart hidden as well, sometimes bringing it back just to clarify things, but ultimately i prefer to define things by form than by line. that's just me tho idk, idt it makes or breaks anything, just a preference
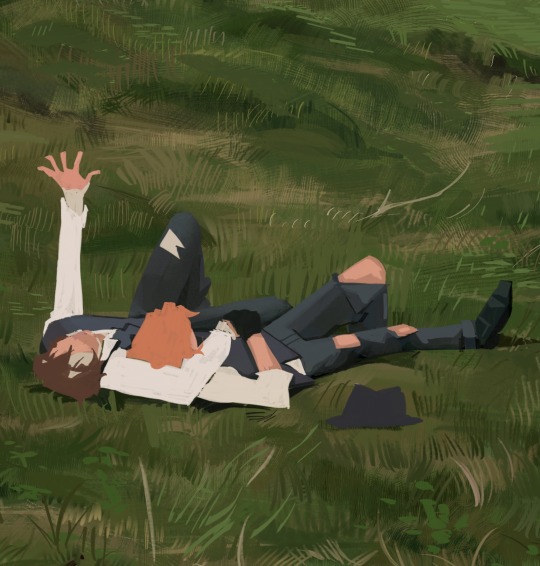
again rlly just thinking about cool/warm, reflective tones (the greenish shadow on chuuya's left inner leg, sky-gray blue on dazai's vest), really just slotting the subject into the environment. after i finish rendering the characters, i usually return to the background and add some stuff—in this one i defined the waves a bit and put some grass around skk
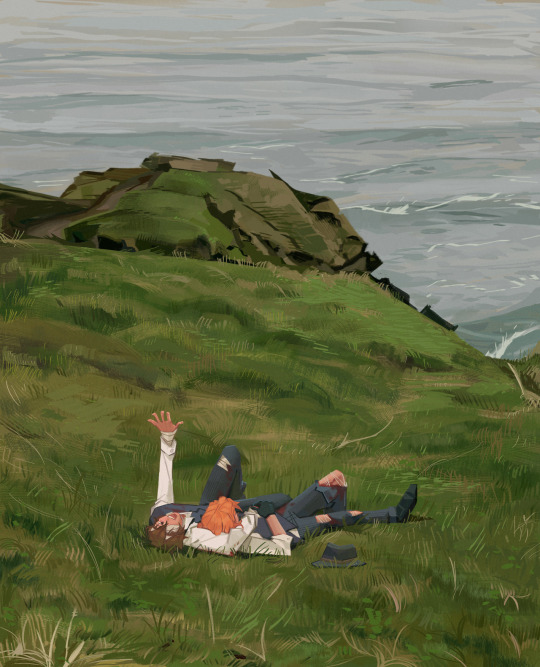
and yeah then we're done idk LOL. sometimes i run the file through camera raw (photoshop) to do some color adjustments—i find that my iPad displays colors super differently, usually making things a lot lighter than they are (u can see how dark the timelapse is...), so i find myself lightening my work a lot. i also sharpen and add noise as needed :)
i think my process has changed a lotttt even in this past year. it's kinda crazy!! it's always fun to do these and just reflect a bit on how i work. mostly just mindless insanity until it kinda works.
thanks for sending in an ask. and if u read all that, thanks to u too lolol
189 notes
·
View notes
Text
my gift exchange piece for @dailysiffrin! The request was essentially “I like isafrin fluff, I also like my kemono siffrin” SO
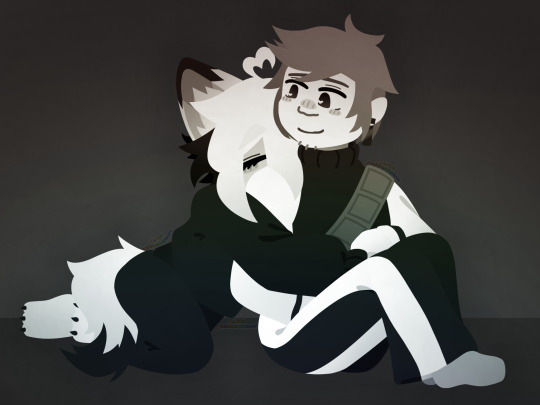
PROGRESS PICS AND YAPPAGE UNDER CUT
Ok so. I haven’t drawn in my lineless style since 2022 AND IM SO GLAD I BROUGHT IT BACK LINEART IS ASS.
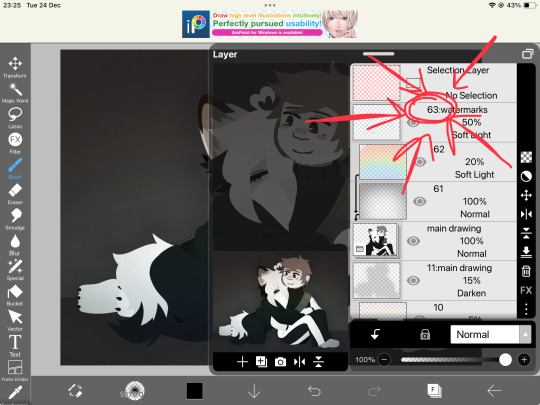
although this pic should clue us in as to why I stopped doing it (asides from my general switch to traditional art)
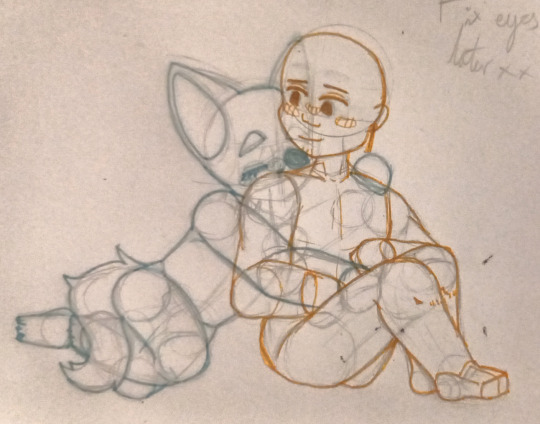
I started this in a little paper notepad, with a pencil sketch of the very basic anatomy and some colored pen over top to distinguish things:
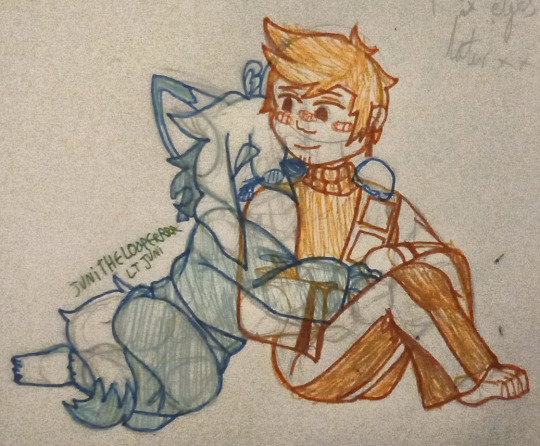
I wanted to procrastinate, so I decided to use this as a warm up or proof of concept, so I knew what I was doing (first time drawing ibabo):
And then, lastly, the digital sketch!
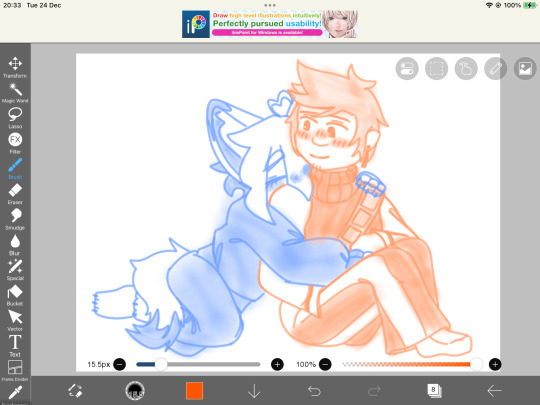
I learnt and re-learnt a lot of new and less new things doing this, I’m so glad I stuck through it!!
Also, here’s some doodles from the 16th when I was first trying to get a hang of kemono siffrin because hands go wrrp


181 notes
·
View notes
Text

[Click for better quality]
Ok yay I'm back from my vacation yipeeeeeee. I started this drawing of Keiki before I left and I was half considering just giving up on it.... until I did a short study of facial planes and then got motivated to work on this again! I'm glad I didn't give up on it though, as I'm actually really happy with this one!
Artist's Notes;
So as I mentioned in my last post about Touhou 17, I wanted to finish this by the game's five year anniversary but with how progress was going I didn't want to rush this so I decided to take a long break from it. Mainly because of the face. For a while now I was kind of feeling like I was stagnating with my drawings, not really in the clothing but in the bodies. There was something about the way I was rendering them that I just wasn't happy with, and after talking with someone else about this issue, I realized that the reason I felt this way was because the faces were too flat and didn't match the rest of the drawing and that I needed to find a way to make the rendering of the face feel consistent with everything else. So after doing a short study of the plains of the face (I used this 3D head model from art station as a reference for my short study, please go give this person some love as they are a lifesaver) I went back into this drawing and applied what I learned here. It was only after that that I finally became motivated to finish the piece, and while it started off as just a simple character sketch like Saki and Yachie's were, the moment I added in Keiki's little fire dragon I knew I had gotten in too deep and now here we are with a full on background. OK it's not super crazy or anything, but it gets the job done and it's better than there just being an empty void behind her. It's rare moments like this when I use brushes other than the Clip Studio Default Charcoal Brush and use the Clip Studio Default Paint Brushes as well (god bless the oil paint and dry gouache clip studio brushes, they were amazing). I don't know why but painting fire has always been really fun for me, there's something oddly satisfying about it y'know? I do think that another reason for this problem was because I was drawing faces like I would in my more sketchy style that didn't mesh well with my lineless style, so I'm glad I've started remedying that.
After adding in the fire dragon I had an idea to kinda make it feel like splash art in the way the composition works... probably because I have been playing Reverse 1999 again and it has taken over my brain. I do feel like Keiki's tools get a little lost in the composition, and I didn't fully render the metal parts of them mainly because I didn't feel like they needed it, but that's just something for me to improve on later down the line.
If you guys are wondering where I went for my vacation, I went to New York and got to go to the MET and the Museum of Natural History. In both places I found Kofun period stuff and I was so happy to see it you have no idea. I remember one of the Haniwa I saw had some neat face paint under the eyes that I tried to replicate with the makeup under Keiki's eyes in my drawing, though I think I'll gave to figure out how to draw makeup on characters because this reads more like blush to me than anything. While drawing this I also looked up some references of Kofun period jewelry and really liked the stuff I found, which also meant that now she has proper Kofun earrings instead of earrings shaped like Kofun tombs. I put some of the things I referenced with a closeup of Keiki's face as well down below. I made her outfit more reminiscent of the outfit I gave her at the beginning of the year with the buttons and all, though I do want to try and draw her in some more period accurate clothing like the Haniwa I took a picture of at the Museum of Natural History. I wish I could find a way to make her handercheif look better though as I wish I made it a little bit bigger, though I think I'm saying this because I've looked at this drawing for too long lmao. Once again something to work on for when I next draw her. Also want to get better at rendering hair, as some details (like the little strands in front of her ears) kinda got unreadable due to the similarities in colour lol.

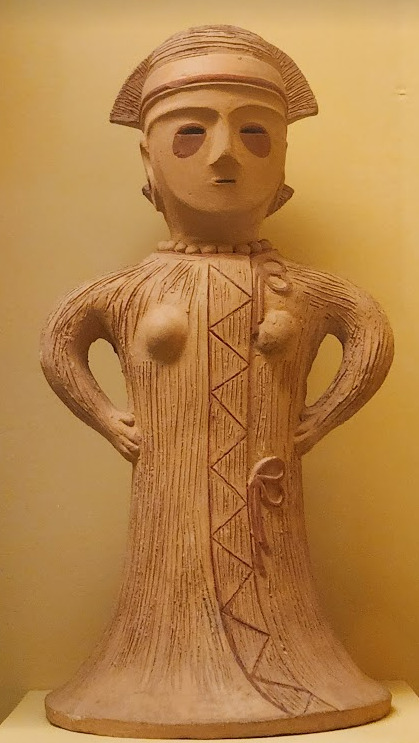


Now you may have also noticed the little cracks I added onto Keiki's face, and that's because I have fallen in love with the idea of Keiki's body being made from ceramic and that she crafted her body herself. While they aren't very visible I also tried to add some doll joints to her body, which is an idea I played around with in the past but never went to far with. I also want to get better at rendering cracks in ceramic, porcelain, etc, as I'm not sure how those read in the drawing. I also have a headcanon where the cracks in Keiki's face show up because of heightened emotions, and while Keiki is aware of this and does her best to make sure her face doesn't break off.... she will still end up with at least a few cracks during any given day, and she can often forget to repair her own body quite frequently so Mayumi has to remind her quite a lot. Mayumi even taught herself some basic sculpting techniques to help repair parts of her body that are so badly damaged to the point where Keiki can't repair them herself, i.e. if both her arms broke off, Mayumi would put them back together for her so Keiki can at least have something to repair herself with rather than nothing. I also like to imagine that if Keiki created her own body, if you took a look at Keiki from the beginning of her life she would look completely different compared to now.
BTW If you guys are wondering what a very very angry Keiki looks like....ok in order for this to make sense have any of you read volume 11 of Land of The Lustrous? Am I bringing back some memories for those of you that have? Ok good, glad we all got that mental image brewing in our minds, I'll probably draw a version of Keiki that is somewhat inspired by that one day as it's an idea I've had for a little while now. And to those who haven't gotten to that volume yet and are confused.... don't worry about it, just keep reading :)
#touhou project#art#fanart#touhou fanart#touhou 17#keiki haniyasushin#wily beast and weakest creature#touhou#東方project#own art
212 notes
·
View notes
Text
26 asks! Thank you! :}}} 🪲

Oh absolutely I do. That's why I always ask before drawing anyone's OCs, or using/modifying their original meme templates, or anything of the sort. Friends and strangers alike.
And same goes for AU ideas. In the past I've seen a really cool idea for an AU and tracked down the OP and asked if I could incorporate their idea into my AU as well. I do my very best to do this for other artists because its what I wish people would do for me.👍👍

I have a master post for all my Octonauts artwork here. 👍

@ripchaos69
I'm really proud of/pleased with how this fairy piece came out! :DD
I also really like how this pixelated cat came out! :)
I was very pleased with how WALL-E cam out in this piece!
I also think this is one of the best drawings of Optimus I've ever done! :))

Even if I knew the answer, that's probably not something I should share online anyways is it?

@mothpendragon
I remember not liking him at all the first time I watched the show. But now watching it a second time years later, I think he's really not that bad. :0 In fact I don't know why I disliked him so much back then.
There are some parts about his character that annoy me. But most of that either is good character writing or isn't his fault. I don't like how immature he tends to be, but of course he's immature. He's still basically just a kid who hasn't experienced much of this war.
And when things get rough, he really straightens out and tries his best to be serious and obedient. Which is very nice to see.
Another thing that I don't like is how the phase shifter was kind'a overused. It became his signature weapon that he used to bail him out of everything. Smokescreen has demonstrated that he's actually pretty clever and slick, it would have been fun to see him trick or outsmart the cons more often instead of just using the phase shifter to save his aft every time. But again, this is not Smokescreens fault at all. Its the writers fault for making his use it so much.
And lastly, something that really made me like Smokescreen was the whole thing that happened with Optimus nearly dying. Smokescreen freaking out at the prospect of becoming a Prime felt really real. Instead of being honored and having and having an inflated ego like I thought he might for some reason- he was terrified.
And him panicking and using the forge to repair Optimus last second felt very real. I could really understand how Smokescreen must have felt, wanting to follow Optimus's orders and restore their home, but also being unable to bare the responsibility of being a Prime. Eventually dragging Optimus back to the land of the living and throwing away any hope of restoring the Omega lock.
If I was better at analyzing characters, I would have loved to draw a comic about what happens right after Optimus was repaired.
My first thought is Smokescreen feeling guilty and ashamed of having used the forge against Optimus's wishes. Would Smokescreen crumble? Fall to his knees, crying and apologizing? "I'm so sorry Optimus- I just couldn't do it-- I couldn't do it, I cant be a Prime- I couldn't-- w-we couldn't lose you.." Is that in character? Honestly I have no idea. 😔

I've thought about doing that for my lineless style, but I haven't gotten around to it.. 😓

If someone goes out of their way to comment on your post/in your ask box saying you're cringe for liking transformers, block the all the way to the sun and back.
What a jerk. I wouldn't be friends with anyone who goes around insulting/trying to upset people for no reason like that. Block them and don't accept/respond any phony apology they might throw your way. They knew they were being rude when they sent that message and deserve to be blocked.

Dude I would take that so fast. No one in my family would ever have to work or have debt ever again 😭

I figure if I ever feel like drawing/posting Octonauts art again, I would just put it behind a paywall on my Ko-fi. Which ngl I've thought about doing a lot recently with the new movie that came out.
But also- I would have no way of filtering out people for that private blog because how am I supposed to know who will and wont steal my artwork just by looking at their account? And when it did get stolen, I would have no way of knowing which follower did it-

I believe I've mentioned it before, but I didn't want to watch Rescue bots because its attached to Transformers: Prime <:/
Its supposed to be connected to Prime, but its rather baby-ified. The tone is much more light hearted, the plot of Rescue bots completely rewrites/contradicts the plot of Prime, Optimus comes back to life for no reason. Stuff like that.
Atm I'm only interested in Prime 😔

@kitkat1003
OUGUHHH SO REALLLLL 😭😭😭😭

REALLL I've only ever found ship fics😔😔😔 I'd love to see an aftermath fic with no romance involved.


@virtualworldfp5
That's a really cool idea! :D Great artwork too! :))


@badlyblurry
Man, if I had a nickel for every time Jeffery Combs played a character with some sort of scientist background and that had some form of contact with a green chemical compound that holds harmful properties to one body in a way, I'd have 3 nickels. Which isn't a lot but its weird that it happened 3 times. XD

@anonymous-red-shades
I'd definitely want to be something that can fly :00 But I don't think I'd wanna fly super fast because i wanna enjoy the scenery.. hmmm.. maybe a helicopter or a classic pontoon plane? :000
As for abilities... uhhhhhhh the only special abilities I know that transformers can have is the warping thing that Skywarp does. I don't know of any other powers <:0 Maybe an ability to change into more than one alt mode..? So I could be a submarine and go underwater? Or maybe the ability to breathe underwater or something? :00

(Referencing this post)
They're so unhinged I swear 😔

@chickenmilk120 (Referencing this post)
NOT YOU TOO-

@cherrycreamfairy
I couldn't find any websites that didn't make my anti virus tweak out <XD So the only villain I like from memory is Captain Gantu from Lilo and Stitch.

I still like it yeah :0 but I'm not really engaging in any Mandalorian media atm-

@minnesotamedic186
Okay the killing part aside a Plymouth Fury is an excellent choice of car ngl. Especially a fiery red 💅💅💅

@axolotlcookie0
The fact that it looks like Thomas's face has been bagged makes it even funnier XDDD

@wolfie-777
XD I actually think of that a lot yeah. I always tell myself "oooo I should draw that later" but I never do XD💀

@beryl-shade
Bibi would probably use it as intended. Sharpening and cleaning his claws💅💅
Meanwhile Cici would use it as a weapon to beat up Jangles and Gerald with XDD

What was his real name supposed to be in that continuity then? XD

@milk-powrit
References. Looooots and looooot of references.
Typically I use references of realistic skeletons. But if there's a part of the body that I just cant seem to draw right, then I look up drawings of skeletons to see how other artists drew that part. 👍

@beryl-shade
Oh no doubt they'll have an episode that takes place around the lake and the fair grounds(?) The theme park next to the main tent-
The fact that Caine mentioned their existence at all implies that an episode is going to take place there. At least for me-
#my response#transformers prime#tfp smokescreen#ngl I kind'a wanna draw that smokescreen thing now but I'm not at all confident that I'd keep him in character 😔#Or optimus for that matter-
54 notes
·
View notes
Note
I just found out about the ask me anything after writing my pervious comment
But i was wondering if there were any tips on how to adopt your drawing style because im thinking about animating UR&Y (undertale red and yellow) pls get back to me when you can
I it took a while to find you and i mainly dont want to butcher all of your hard work with a trash animation (sorry if that came off as a threat i was trying to be genuine and was reading this over and noticed that could have veen seen as one) any ways get back to me when you can.
Tbh don’t feel pressured to have to 100% incorporate my style imho :’DD
Feel free to just reference my art as is (visually) & be sure to tag me if you make any work related to it :00
If you’d like a general tip for lineless, i usually separate a lot of my elements into layers (so like one layer for each component etcc)
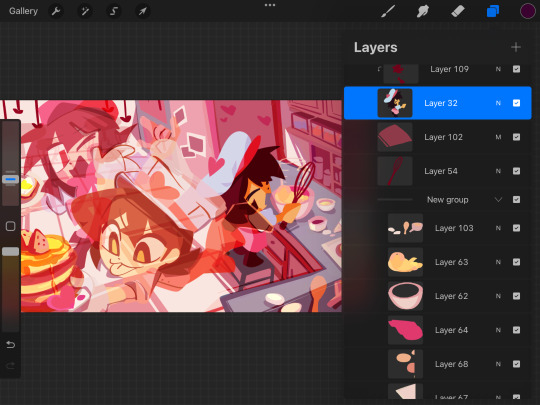
(The one here has the character already merged but everything else follows the same rule too! Merging just helps save storage space ehe)
62 notes
·
View notes
Note
Hi i hope youre doing well! If its not too much trouble i wanted to request a witch version gor Mabayu Aki from magiarecord! Idk if you did Madoka spinoff chars or not but since you did Hitomi i thought utd ask anyway!
With Mabayu its very sad beacuse i love her alot but they did her so dirty never showcasing her Witch form or Doppel so i wanted to see what you could come up with!
Thats all really i just hope youre doing alright and that you countinue to bless us with your amazing art!
Hi! Thanks so much for your kind words. They really do mean a lot to me.
I’m doing alright, much better now that I’ve had a few days to just rest up. I said I would be working on new things in the ask box on the 13th but I was itching to do something and got restless.
I don’t understand myself sometimes, I get burnt out and frustrated so I take a break but then after only a couple of days I 180 and am already itching to get back to work.
Anywho after making hunlock, I realized I don’t actually have the witch be hand drawn by me that much anymore so instead of a bunch of photos stitched together so I tried my hand at it again!
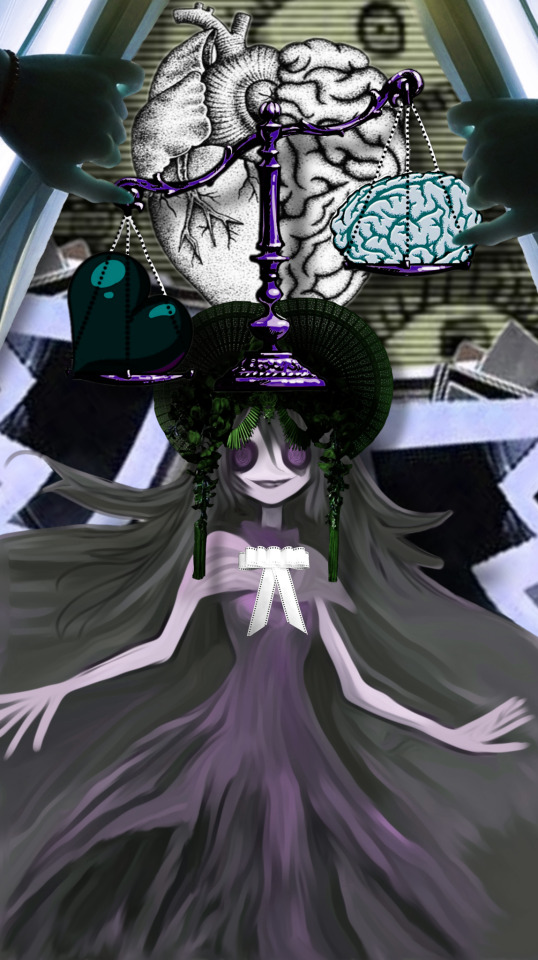
I wanted to try out lineless art for the first time. I actually really like how this turned out. The ibis smudge tool is my savior when it comes to making things look shaded (in all honesty, I’m not very good at it)
I’ll definitely use this style for future projects. Like more witches. Or if I’m feeling ambitious in the future, maybe even a scratch game.
Mnemosyne : the memory witch
#pmmm witches#puella magi madoka magica#pmmm#mahou shoujo madoka magica#madoka magica#mabayu aki#magia record
50 notes
·
View notes
Text
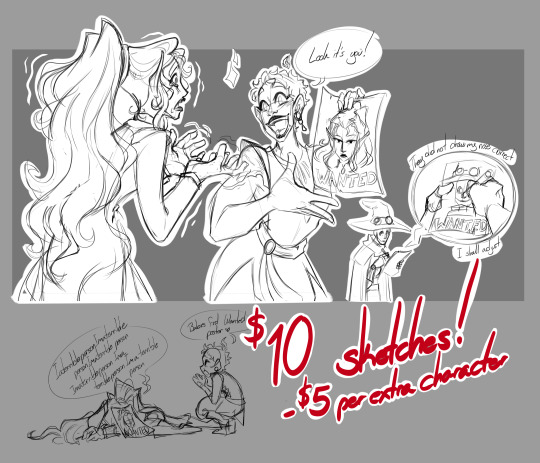
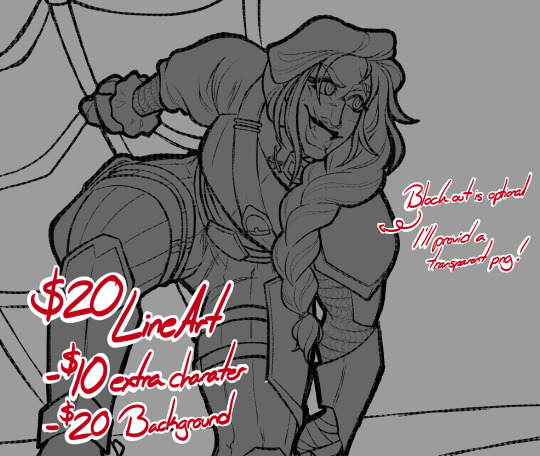
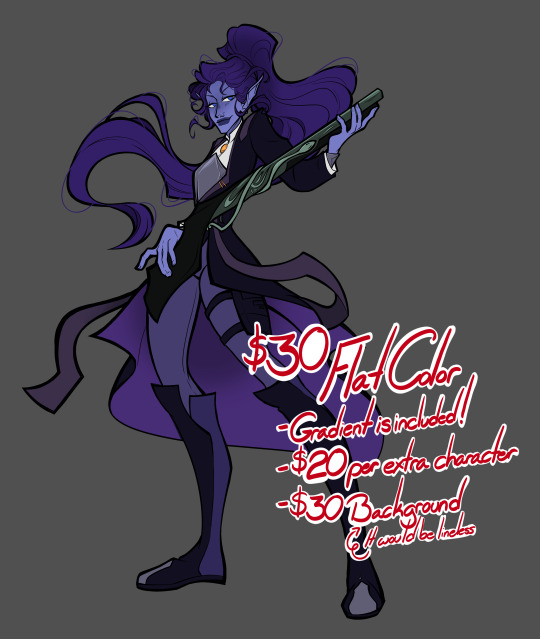
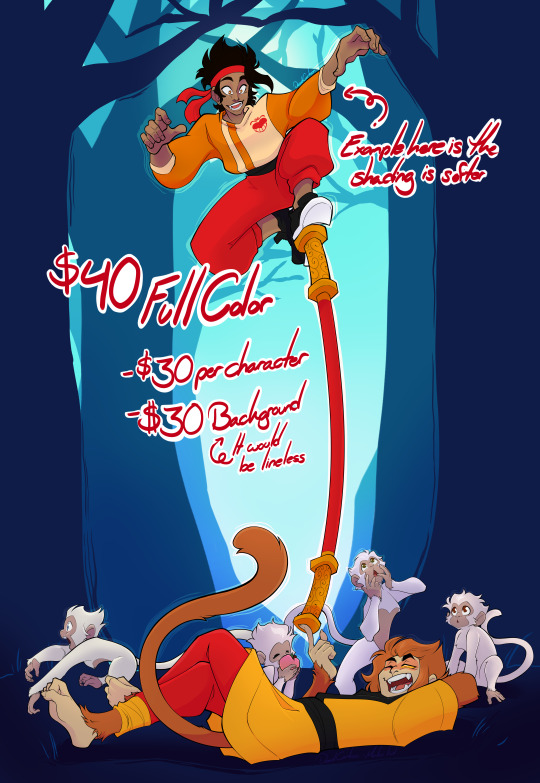
Sorry it's a lot later but behold!
I'm a freelance artist at this time that is trying to do more art related work, I cant live off this so I still have my full time job, however I love to draw and want to properly get my footing back (Ive done commissions in the past however they were usually part time).
There is no limitation on this so I'll try reblogging this periodically to make myself alive (I say this having a history of one and done.) With that being said I'm also doing projects on the side so as much as I wanna be speeding, the goal is quality so if you do consider commissioning me, please have patients with me ^^"
Now for some Commission info!
Disclaimer! I use Paypal only
Backgrounds are generally not my specialty, I try to put as much effort in them but I will warn it is not my strong suit. However I find lineless to the most appealing as it helps my line work stand out for the characters. That being said, Sketches get a freebe on backgrounds only because they'll usually end up the most simplified and apart of the characters. Meanwhile Line art would be the only time I'd put the time to line backgrounds since there's no color (No brainier but saying it aloud helps meh brain).
Extra characters are always a tricky thing for me I don't like charging the exact price (trying to make it a deal), but I also have to consider my time in these. So with that, it is set to be little off so it's not like you're buying another commission entirely.
What I Will and Won't do!
Will do: >Animals >Robots >Fanart (Doesn't have to be be strictly what I'm into. I'm excited to create what you would like) >Original characters >Horror/Gore (It will be mild but I'm not scared of blood) >Lgbtq+
Wont do: (Generally if it makes me uncomfortable It's a no. I have the right to decline) >Nsfw >Fetish art >Political art >Inappropriate depictions of underage characters
Also one last disclaimer no use of AI art both to take my work or obviously use. (Not sure if I need to say this but saying this out to the universe now)
If you have any questions feel free to DM me ^^
I also have a Patreon if you'd like to support me for just $2 a month for behind the scene works.
84 notes
·
View notes
Text
Kirby And The Forgotten 3rd Anniversary - Part 1
"Eco of my reborn soul"
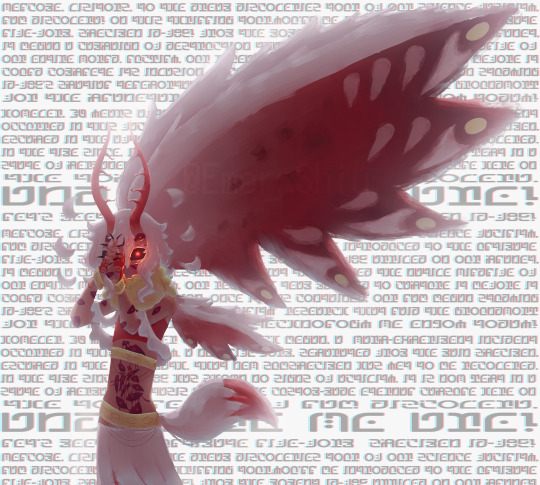
I know it isnt the 25 yet but still, happy 3rd anniversary to the game that rewired my brain chemistry and rots my mind away (seriously i cant stop thinking about it) as much as i love it, the game makes me sad, it makes me sad i'll never get to experience it again like the first time, that ill never be able to play it completly blind (i already knew lots before i got the game) no matter how many times i replay it it will never be the same, it keeps aging and i do the same alongside it, knowing that ill never be able to go back to what once was, just thinking about the game makes me so happy, so happy it doesnt let me sleep, so happy i have to run around my room and jump, but it also makes me sad, so sad a lump forms in my throat, so sad it makes me so nervous of everything. im absurdly attached to this game and the characters.
And strangely, all of this reminds me of fecto, believe it or not. while i dislike the tought of fecto elfilis and forgo being the same character, i do like, chaos elfilis and forgo being one, its just forgo, sure morpho's soul is in there, and the other beast pack souls, but, that IS fecto forgo want to admit it or not. it should probably look like mix between morpho and forgo, yet it looks almost the same as elfilis, no matter what it went trough, no matter how much time goes by, they still cling to its former glory as fecto elfilis, an angel, a divine being, even tough its long gone.
being set on an abandoned planet with visible signs of aging doesnt help this certain bittersweet feling the game causes in me.
I tend to play forgotten land at least once a month, usually i only collect some coins and then do lab discovera again, lately i had been forgetting that, and today when i played it it felt, so different, i was on the verge of tears half of the time, especially hearing the music for some reason, remembering all the light-hearted memories i have in that little cartridge, how id take pictures of every cutscene frame, how i made two very stupid errors and only survived on a sliver of health the chaos elfilis and never did the ultimate cup z again because i did not want my deaths to extend beyond my already failed treasure roads. Aahh, sorry this game is so very dear to me and i talk lots about it, most of my content is about it, i think daily about it. and i cant help but share this love with everyone. and sorry for the incoherence i dont actually know to express my feelins well so everything ends up being redundant.
I should probably talk about the drawing now, the whole time thing i just talked about? i think no better drawing of mine to accompany that this one, sure, there isnt any symbolism or whatever of that in there, but its the external thing, i started this the 2nd of may of 2024 around 21:27:39. yet i only recently finished it on the 22 of this month, thats 2 months away from a year! tough i have to be honest in a majority of those months i wasnt making any progress. tough if you follow me and seen some posts of mine, you can see wips of it, back when i was coloring, and when i said id post this when i returned, also yeah im returning fully today even tough technically its tomorrow, the actual anniversary. ejem- continuing, so, this is to me one of my most iconic drawings i have made, not for being popular or anything, but by the history i have with it, funny that i consider my drawing for katfl's 2nd anniversary my most iconic, tough i mostly mean the sai2 version i never finished. and also this was my first try doing lineless art, even tough it could be better i kinda think i did good, and ive started liking doing lineless, so expect it to be a bit more common in my drawings from now on. oh and also what holded me back the most from completion was the background god the background for some reason i tough itd be a good idea to fill it with something (i think its obvious what i wrote there but ill refrain from saying) and have it be written in forgotten land's lenguage.... done by hand, mostly due to me not having the font back then and more recently when i was finishing, i liked the idea of it being handwritten more, and i still do prefer it, but because this idea popped into my mind, but basically, i wanted it to look like its trying its hardest to be organized, clean, perfect. yet it looks off as it slowly degrades and progressively becomes shakier. an organized chaos, sorry i dont know how to explain, but uhhh

that took me 2 days to write, and it barely reaches 4 lines, sure, i could have done it faster if i concentrated and stuff, but hands do start to hurt after hours of redoing and redoing the letters because you cant just get them right. So i ended up using the font
Also, it was made during my trying to redesign my chaos elfilis era so bad thing, i still have to redesign my gijinka and set on one so thats gonna be fun! ...its even more fun how the drawing has a gijinka that is practically only gonna be seen on this one and i still have to change it yippie...
The part 1 you say? (if you noticed) well well well...as much as said i think this drawings as iconic to me, and how much i spent on it and everything, i find it quite underwhelming, and also i did not want to post a year old drawing for the anniversary, so i did another one, but i wanted to return with this one as promised, but i also wanted a more recent drawing for katfl and being the ever work obsessed katlf addicted i am, basically, uh, im gonna be celebrating katfl's anniversary whole week, maybe even more days than that the lenghts i go for this game man...id even get my memory wiped just to experience it again. i wanna bake a cake in its honor, i want to learn to sew and make plushies to those left forgotten in the game. i want to do those figures. i want to eat the game. dare i say it will be the cause of my death? /ref
You shouln't keep Chaos Elfilis waiting soon tough,
Let's go play with them!
edittt: forgot to mention this silly thing but while drawing and writing for the entire time i was listening to the dream discoveries tour and eternal echo of the thrilling tour-our-our on loop for a completly and truly sane and inmersive experience and i did not want to make it shut up at all
#cw blood#technically#cw eyes#lots of eyes#cw eye contact#cw eye horror#cw eye imagery#btw i use it/they for forgo#this game is making me insane /srs#i love it way too much#especially that melting rat#星のカービィ#星ほしのカービィ ディスカバリー#kirby#kirby and the forgotten land#kirby series#kirby of the stars#hoshi no kaabii#hoshi no kirby#kirby fanart#カービィ#gijinka#chaos elfilis#chaos elfilis gijinka#kirby and the forgotten land third anniversary#katfl third anniversary
19 notes
·
View notes
Note
Hello! Do you have any videos of your coloring process? I know you posted a video of your Hades and Persephone cover art, but I can't find it 😭 I'm struggling with a lineless LO redrew right now, and you're the LO guy in my mind, so I figured it'd be best to ask you. Thanks for the LO brushes, they're hella useful.
So I'm not 100% certain where that speedpaint is either, BUT here's one for an older illustration mixing Rekindled with Neon Genesis Evangelion if you want !
youtube
Aside from that, I'm not doing much for video stuff as of right now, BUT I do stream roughly once a week over on my Twitch! And that's honestly one of the best ways to watch my process because you get to actually see it happen in real-time in the software rather than sped up as a recording outside of it :>
I also have some older Twitch VOD's backed up to my Patreon which only costs $5 to unlock, I'll be backing up a bunch more this week.
I do plan to actually try and put together some like, actual in-depth videos going into the process, but unfortunately what I wanna do has to wait a couple months because my current living situation just wouldn't be ideal for proper video recording (thankfully that's changing soon though, hopefully by April at the latest). In the meantime, I hope the VOD's and upcoming Twitch streams at least help you out a little, and if you ever pop into the stream while it's live, feel free to say hello and ask questions about what I'm doing! I'm always happy to talk shop ;3
40 notes
·
View notes
Text
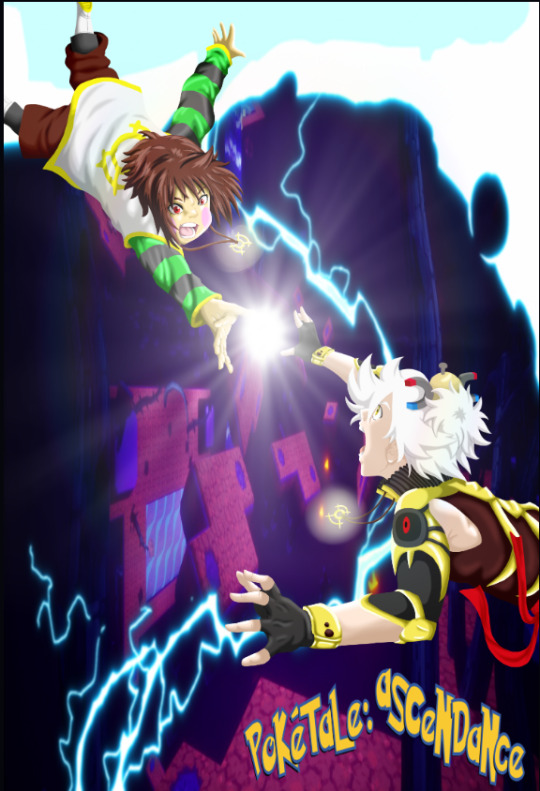
Started this ages ago, like March or April I think? Wanted to try the lineless artstyle cuz at the time I was getting bored with my old art style, and I wanted to do a screenshot redraw of the Boruto poster thing with Naruto.
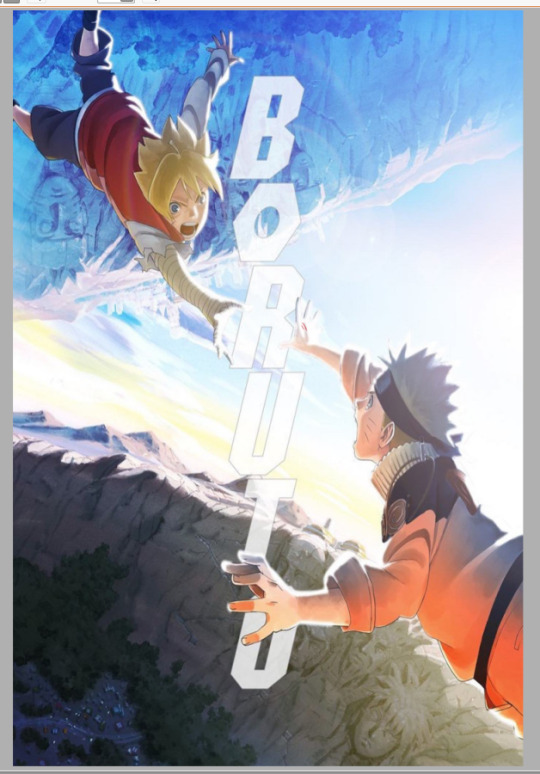
There was supposed to be a lot more to the drawing, but I got fed up with it cuz it was taking WAY too damn long to finish so yeah-
I included the sketch too if you wanted to see what else was supposed to be on this. Might come back to this again eventually but for now I'ma just upload as is tbh.
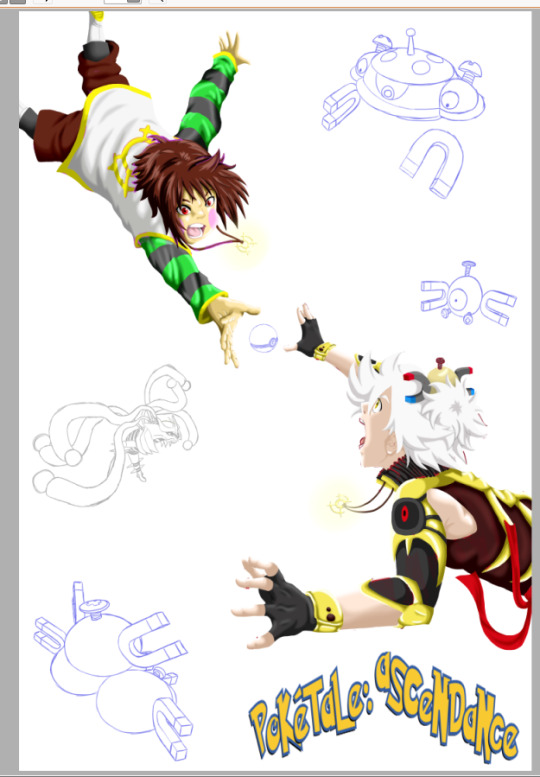
VERY heavily referenced from the one poster as an FYI.
#screenshot redraw#poster#poketale ascendance#chara#chara dreemurr#zero giratina and the sky warrior#zero#pokemon#pokemon au#undertale#undertale au#chara centric au#heavily referenced#lineless#lineless style#practice#lineless art style#got fed up on this#it took too long to finish lol#done for now#might continue eventually#poketale#fanart#redesign#character redesign
9 notes
·
View notes
Note
How do you color in your art?? I can never make mine look right, i’m still relatively new to procreate and I just wish I could instantly know how to use it because AGEGGS
I don't use Procreate and I'm not sure what you're personally having problems with, so I'll just go through my process using some of my old drawings and try to give some general advice that might help
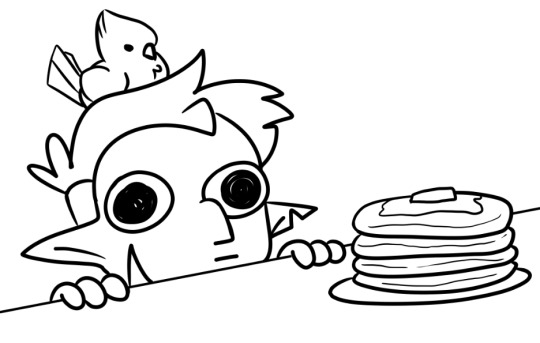
So I have the line work of "Hunter wants pancakes" here. I usually copy images from screenshots of the show and paste them onto the canvas so that I can eyedrop the colors, but I probably had it on a different canvas there.
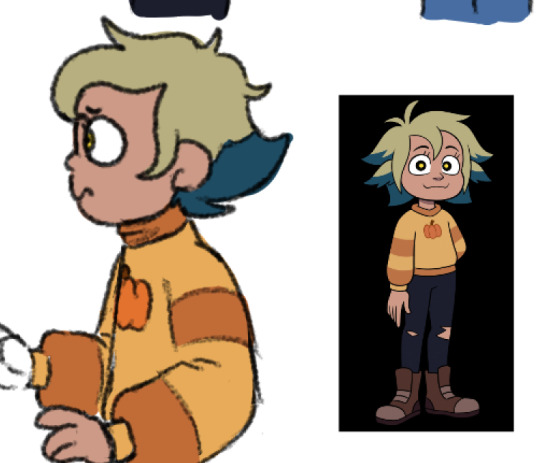
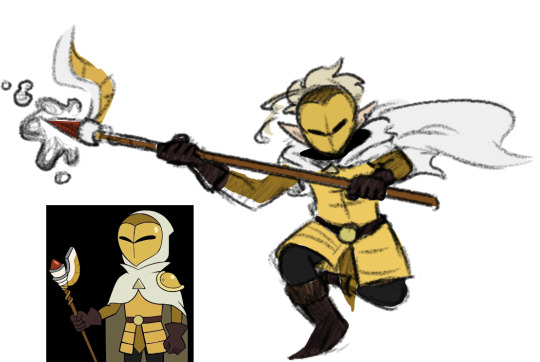
Sometimes I'll change the colors a little bit for clothes to make them a bit brighter or less saturated (depends on what I think looks better), but really for fan art of characters that already have a color scheme, I just copy the colors.
But your line work is going to be your topmost layer the majority of the time. All the coloring stuff should be underneath the line work so that if you do color into the lines, the linework isn't impeded
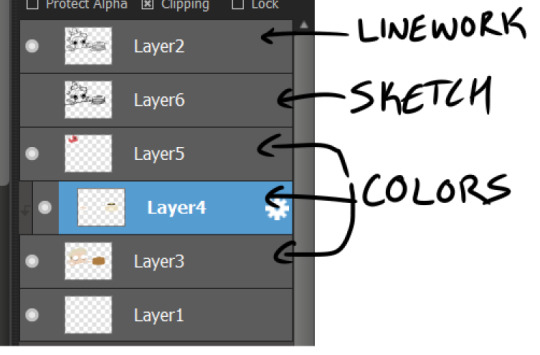
I typically put all my colors on the same layer, but feel free to use layers in whatever way is more convenient for you. (When I'm doing lineless, I'll typically make a new layer for each color so that I can shade them individually later on. Idk if that's at all smart or convenient but it's just a thought)
As for the actual act of coloring, I pick a large, textureless brush. You could use whatever you want depending on what kind of look you're going for, but for my finished pieces I usually like the coloring job to look cartoonishly clean. Like you can see that the second brush changes opacity as it reaches the end of the stroke (or with lighter pressure, since I use a pen), which I don't want, since I prefer the colors to be uniform in shade and texture. So I use the first one instead. Also less texture helps keep the color in the lines from my experience.
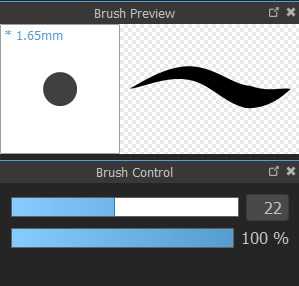
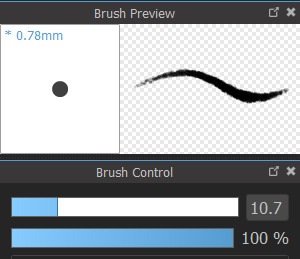
I don't use the paint bucket tool very often because it typically won't fill in all the white space, especially when your work is more detailed (which would lead you to have to go back and go over all of the edges again with a brush anyway), so I color most everything manually now. But for "Hunter wants pancakes" I think I did use a paint bucket and then probably went back to fill in some of the gaps since there are clean white gaps where the line work would be.
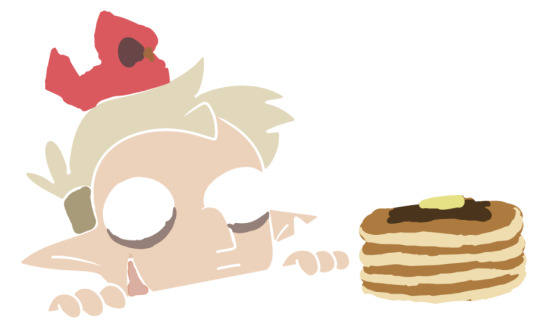
That is to say you should color with your line work visible (I don't know who wouldn't but I'm trying to cover all the bases here). You made yourself a coloring page, now you get to enjoy it. Without the lines it can look pretty silly and very messy, but it doesn't really matter if it's going to be covered up by your line work anyway.
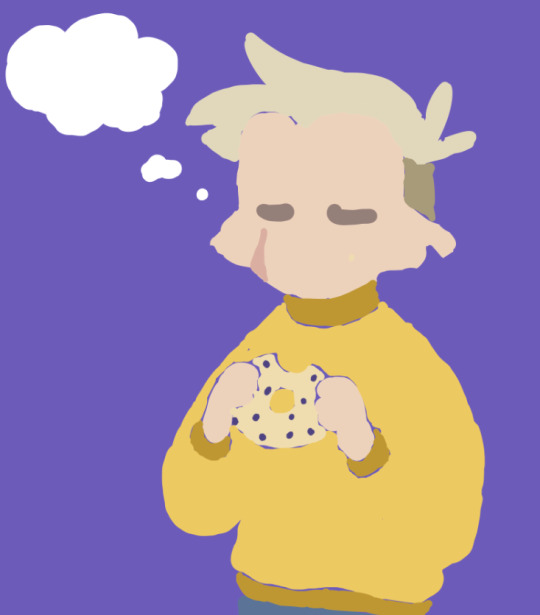
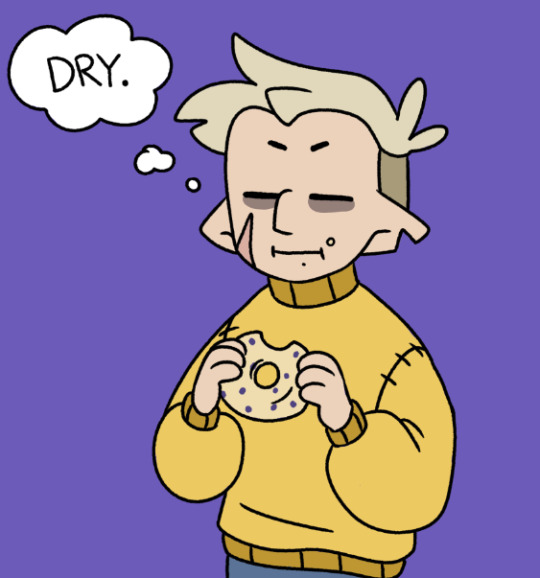
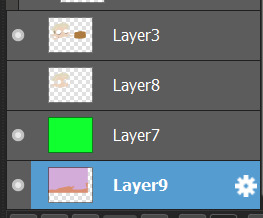
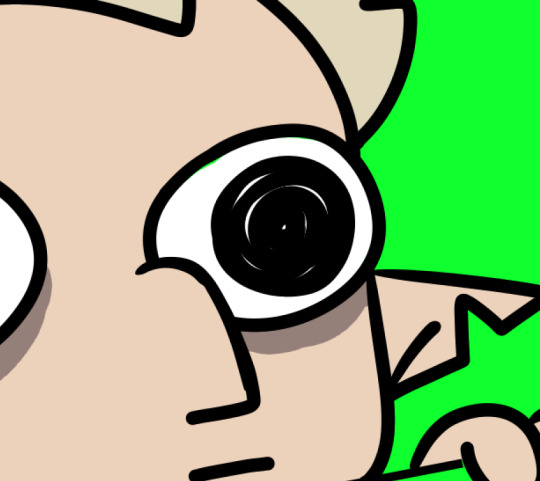
Sometimes when you're coloring with lighter shades on a light background, it's hard to tell if you're missing a spot. I like to use a really REALLY saturated color like neon green or red to see any gaps in the color. Put the layer of neon green under the color layer and it will become very obvious where you missed haha. Sometimes I'll look at the neon color for too long and will need to change it to refresh my eyes
This colored sketch isn't very clean but it shows that you can also make a clipping or masking layer (if you don't know what that is the Internet could honestly probably explain it better than I could), color over the whole thing with a different color, and lower the opacity to give it a cool-looking tint
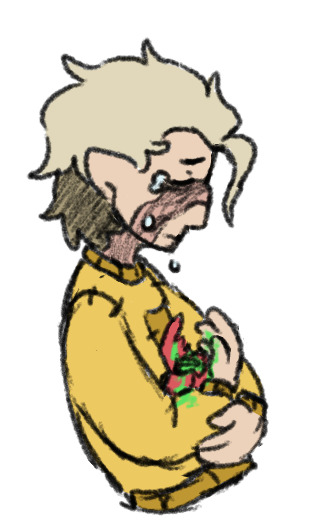
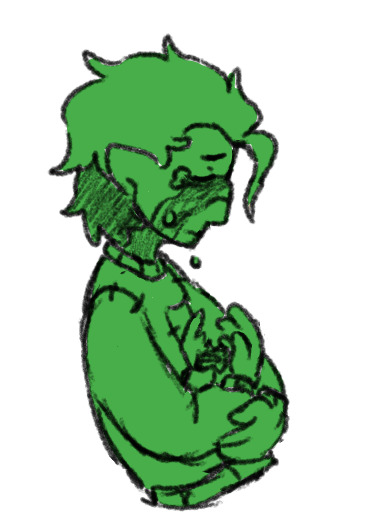
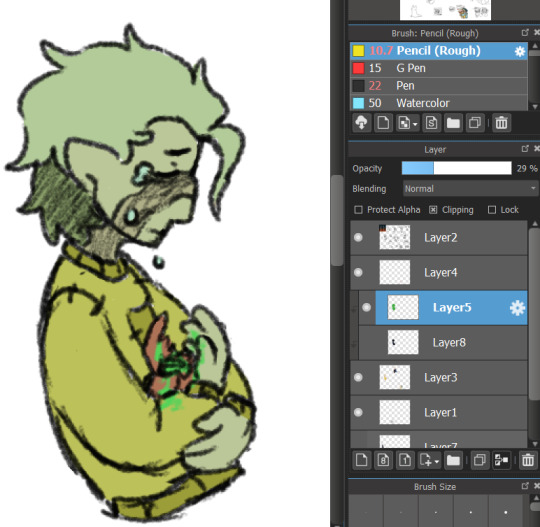
I don't know what your specific issue was but hopefully I was able to clear at least something up for you
19 notes
·
View notes
Text
Revamp: Monthly Subs and Reward Art!
Hi everyone! After a long hiatus on this due to inconsistent health, I'm back and feeling better than ever, and I'd like to re-institute my monthly subscription service for art rewards. These will be active on my Ko-fi starting on August 1st! Read on to hear about the changes from my old system and details of what you'll get for subscribing, but if you don't care about any of that and just want to see the rewards page, here it is:
Please share this and consider tossing a couple bucks a month my way to help me support myself and my dog! Details below the cut!
So last time I was offering art rewards, it gradually became unsustainable for a number of reasons, chief among them the fact that I was basically offering severely discounted full commissions of all styles, and it was exhausting to fulfill in addition to regular commission work. I just couldn't keep up and got overwhelmed. So to help prevent that this time around, here are the changes I'm implementing:
I'll have a single reward type: single character busts! These are easy to crank out in an hour or less, so I can keep up with demand better. I'll reserve the right to decide between lined/lineless flats and papercrafts as I see fit to keep them interesting and fun for me, but if it's your birthday month or your yearly sub anniversary, you can choose the style and get a little something extra! For examples of what a bust looks like, please check out my recent ArtFight submissions :)
I'm going to do my level best to institute a hard 3-week turnaround rate for all regular commissions, and save the final week of each month for giving these rewards full priority along with onboarding new batches of clients for the following month's commissions.
I'm moving my subscription service over to Ko-fi, where anyone can give between $2-9 a month as a very generous tip and get access to my Discord server, or give $10+ for monthly bust rewards, early access to adoptables, and more! You can choose to give more than $10, but no other rewards exist for higher tier subs, it's up to whatever you feel is appropriate! Ko-fi has both Stripe and PayPal integration, which should be easier on the subscriber end, and it allows me to use PostyBirb to post across multiple sites at once, which makes it much easier to post early-access WIPs and finished work than it was on my old subscription service. It also automatically handles Discord onboarding and role assignment, yay!
I'm on the hunt for a simple Discord bot that can post a single repeating message on the first of every month with a link to a Google form for everyone to submit their requests, so that I don't have to ask for them manually. (If anyone knows of such a bot or is capable of making one, please get in touch!)
Previously I offered a whole suite of other rewards in addition to the monthly art -- things like subscriber-only request streams, early claims on adoptables, and even physical merch, which were not sustainable for me. Going forward, early adoptable claims for a discount will still be available as a reward, and I may occasionally do request streams, but on a less formally-scheduled basis and only as I have the free time to do so. I am not able to offer physical prints/stickers at this time; I might revisit the option in the future, but I need to know more before I try it again! I'll also be continuing to offer a subscriber discount on all commissions that will stack with other sales and discounts, along with the ability to skip the waitlist and jump directly into the work queue.
So to recap, if you subscribe to me, here's everything you get:
For $2-$9 USD: Discord server access with a special role, and my thanks for your generous support!
For $10+ USD: Discord server access with a special role, 24 hour early adoptable access with the ability to claim for a discounted price, a bust of a single character each month, first looks at finished artwork and WIPs/timelapses, commission discounts, and potentially more down the line.
My Discord is open to anyone, and all members can freely chat, post art, attend/host art streams, and answer polls regarding prompts for adoptable designs and more. You just get some nice bonuses for subscribing! While these subscription tiers are available, one-time tips and donations of any amount are still an option for commission clients or anyone else who just wants to show some love.
I hope this all makes sense and sounds enticing; I really love seeing people's OCs and getting to bring them to life and put my own little touch on them, and I'm very excited to start giving something back to all of you out there whose support means so very much to me, and without whom I could never do what I do. Thank you so much for checking out the Ko-fi! As a reminder, reward eligibility begins on August 1st! The tiers are active on Ko-fi now, but if you subscribe before August you won't be rewarded for the month of July, so keep that in mind.
#commissions#commission me#art commissions#commissions open#open commissions#ko fi rewards#ko fi support#artist on kofi
49 notes
·
View notes
Note
Would you be open to talking about your process and art style a little bit? It's so impressive how you use shapes in your art in this expressive and non-naturalistic way ~arceespinkgun
Of course!
I started drawing Transformers in early 2023 but only started posting at the end of said year, aaand this is going to sound a little embarrassing and VERY self-defeating, but... my art sucked. A lot. No use saying otherwise. I had a really hard time adapting my style to drawing mecha (or at least robot-shaped people), and the fact that I had a really rough transition to using a drawing tablet didn't help (I used to draw using the trackpad, my finger, or just traditionally).
Most of the art I'll use here will be old, since that represents my capabilities at the time better than my old Transformers art does. It's also an honor for y'all because I purged all my art from my socials way back in 2022, ahahaha.
I'm self-taught, so most of my explanation is vibes-based. If a professional artist were to read this, they'd hurl in agony.
First off. My thought process behind how I draw things... I really like drawing things flat.
That's it, basically. When I draw, I try my best to show the least possible volume, and even when I show volume, I still think of it as a flat shape (it's psychological). This applies when I think about faces (the flattened facial features thing I talked about a few months ago). I think about shapes as 2D planes stacked on top of each other rather than shapes existing in a 3D space. You see this when I draw Hook's nose when he's facing forward; I keep the dorsal hump. Or when I draw side views (I LOVE drawing side views), this was actually inspired by Mickey Mouse's ears and how they're always facing forward, so he can always have his iconic marketable silhouette. I thought it was genius at the time.
Some of my main inspirations are UPA animated shows (put Clone High here too), Bruce Timm's character designs for Freakazoid and BTAS, phase one Gorillaz art (that's Jamie Hewlett), Rebecca Sugar's work on SU, and Vernon Grant's magazine covers. I also have been getting into medieval art, so let's see how that'll turn out
Things I try to avoid like a plague are thick line art and organic shapes. If I'm going to draw a square, it needs to be a polygonal shape, not just a suggestion of a square shape (this sounds confusing, ik).
Here's some art from March 2021 and how I'd approach it today. I had a somewhat distinguishable art style, but it still needed polishing and a clear vision of what I wanted to do. I kept it a very unpolished sketch so you can see a little bit of my thought process when I draw (and because I'm lazyyyyy). Notice how I try to do singular lines and defined shapes anywhere I can. Also, a stronger line of action and silhouette—silhouettes were/are a very weak spot of mine.
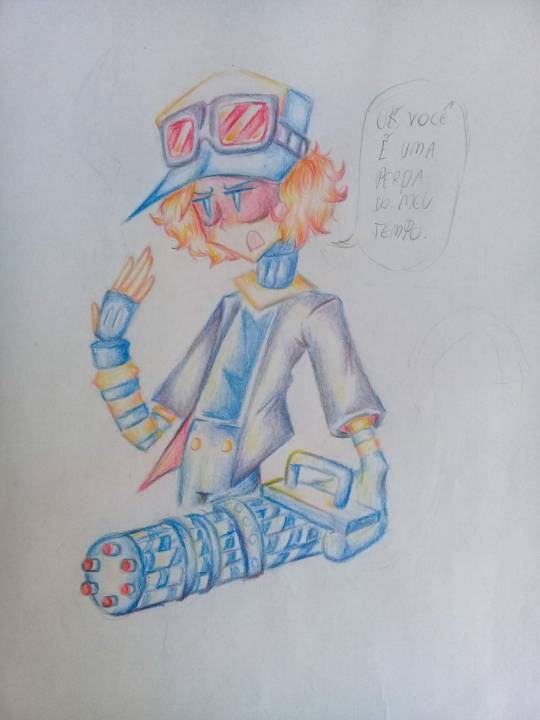
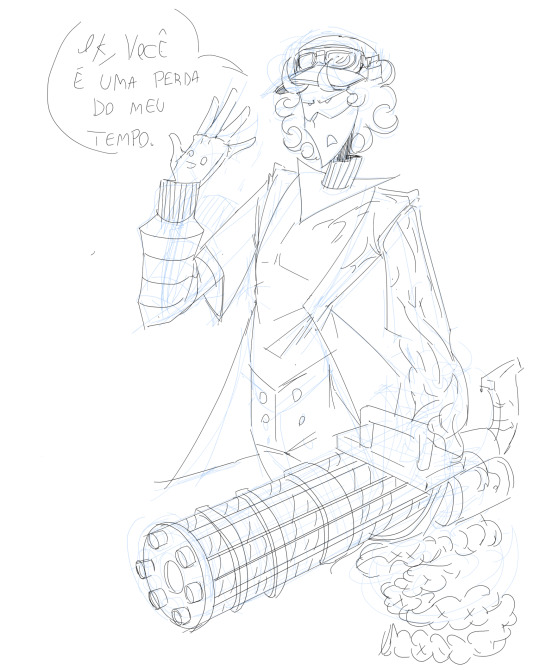
Around 2022, I had already hit a very nice spot with my art.
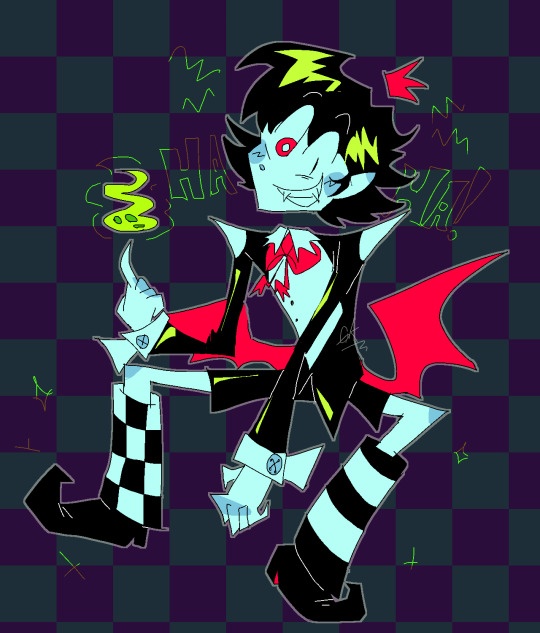

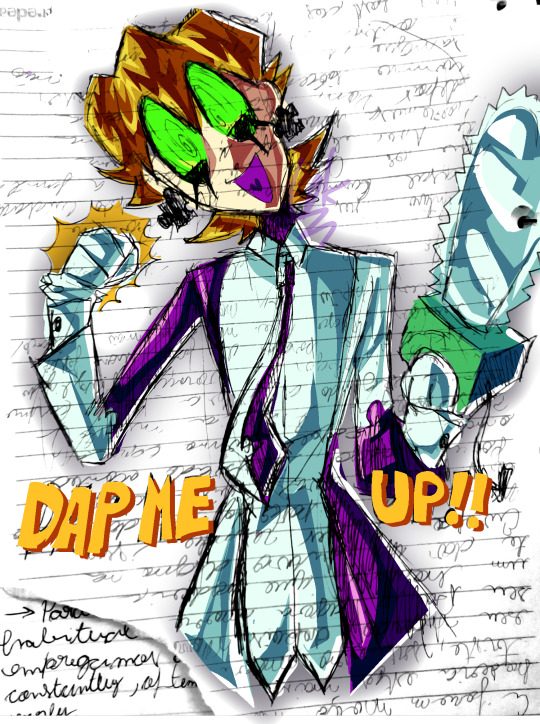
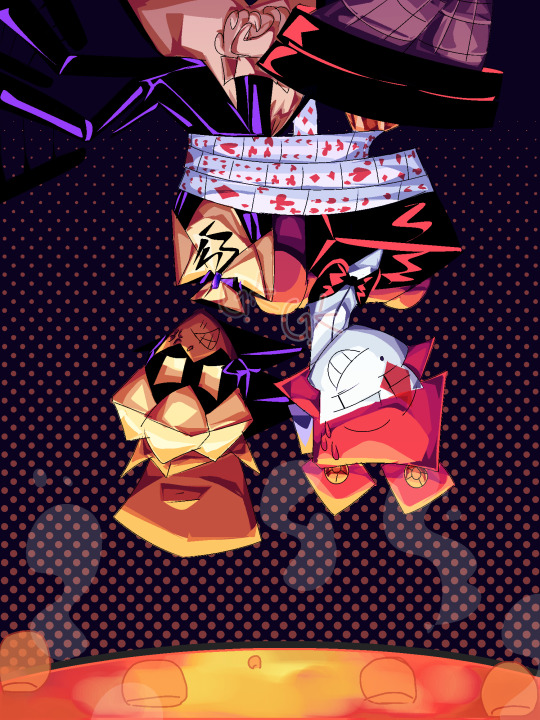
Ignore just how stiff my poses were and the awful proportions (eugh), but see how I push the shapes and the obnoxiously thin line art. I did change my rendering to be gradient-based instead of this vector shading approximation. I like both, though.
It's not JUST about having an angular style; it's about the flow and consistency of the strokes. I really like this little doodle from 2023, made almost entirely out of curves, BUT they are DEFINED curves. That's the thing.
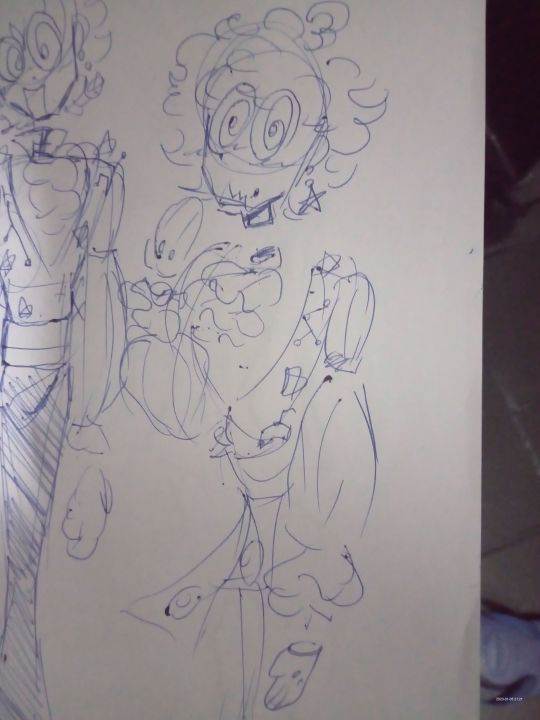
My current process consists of: rough drawing (gesture) -> sketch -> clean sketch -> line art -> flats. When I'm feeling fancy, I render it using gradients.
Some things I really improved in 2024-2025 were the same-face syndrome, drawing detail, HANDS, and 3D shapes + perspective. Still haven't gotten over my hangups with drawing lineless art... IT LOOKS BAD WHEN I DO ITT.
#talkingtalkingtalking#drawing transformers literally degraded my art for a time#but practice makes decent#Sometimes I get angsty about my art looking too much like vivziep0p's stuff...🙁#thanks for the ask!#if you have questions about anything specific I'd be happy to answer#it's not a science#some things - I'll admit - come naturally to me#i haaaaate thick lineart on my style#my early tf art was sometimes drawn with thick or sketchy lineart because I had difficulty working with my tablet and... robots... hard#that's why I'm so derisive towards it#going down memory lane for these made me miss my OC's#just a bit#ask: answered
7 notes
·
View notes
Text
talking about my art journey as of late, or more specifically how relying on 3d models actually worked out in my favor
so back in 2023, i started relying on 3d models for poses and proportions. i hated how my art looked and i was frustrated with trying to put something together, taking forever on it, and having it just turn out like ass in the end. the 3d models removed a ton of guesswork from the process and helped me focus on the things i was good at while gently training skills i was less capable of. i'd already been using 3d models sporadically before then, but it was around when i started drawing nate and ken together that i switched to using them all the time.
it's hard to find comparisons around the right timeframe... but here's a nate drawing (with a friend's oc) i did just before i made the switch, when art was so frustrating for me that i wasn't fully lining or rendering anymore, and then the first nateken i ever did, which was when i started using the models in earnest.
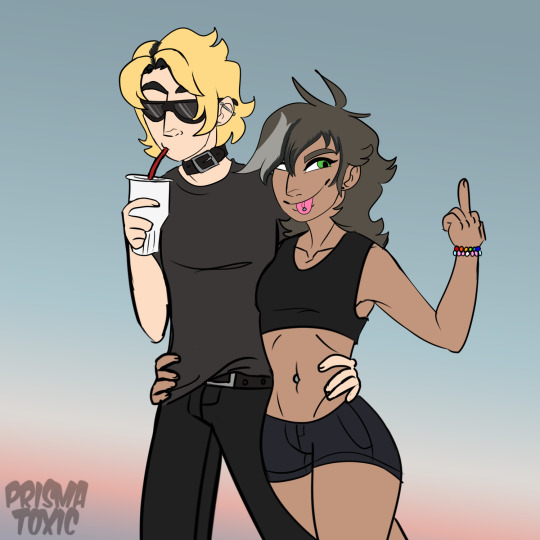
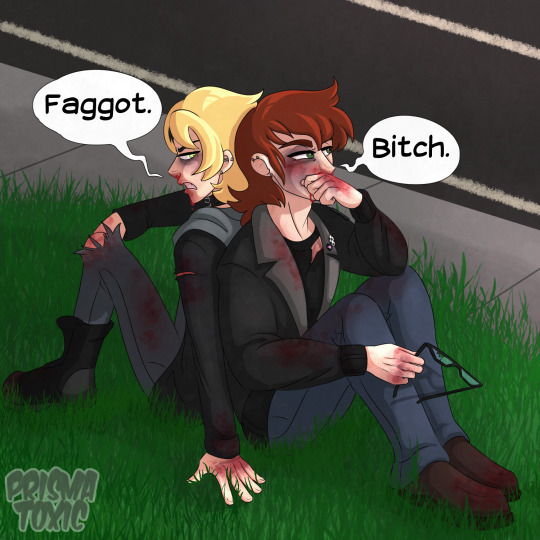
it gave me my confidence back. i drew nateken CONSTANTLY, and they overtook my present fandom interest (mgs) before too long.
i did lose some things, though... fluidity, namely. and i've spent a lot of time trying to make my art feel dynamic, make it flow even with the models underneath, but even when other people can't tell, i can. it's been bothering me for a long time. my art is better now, yes, but cursory attempts to not use 3d models were all the more devastating for it. i was scared. i'd grown too reliant.
i tried a handful of times to sketch simple things without models and every time i hated it so bad that i didn't finish it. the past year, time and time again, i've found the prospect of drawing freehand far too daunting to attempt.
some jokey sketches of animal characters came out recently-ish that read fine, and that was good, but... i knew the humans and humanoids i draw all the time were still beyond me.
this anniversary drawing for me and devot back in the summer made me think... maybe... just maybe... i might actually have some skill in conveying what i want in simple shapes while freehanding. not what i'd like to do in full, but i love these little doodles. it was a start. (the main part was in fact based on models.)
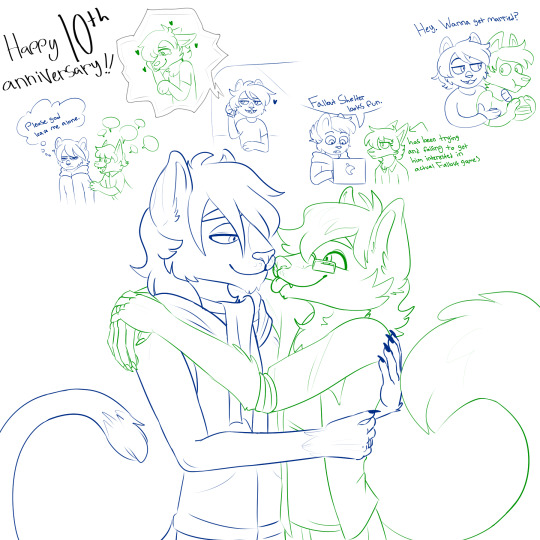
more recently, this joke comic i did based on something max said gave me a similar feeling. like yeah it's a sketchy mess, but it does the job. it's silly. you know what you're looking at.

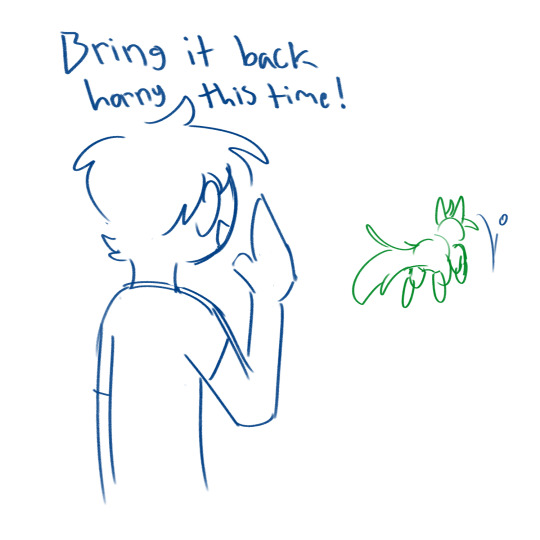
a few weeks ago, i had a silly malix idea that i didn't want to bust out the models for. so i made a loose freehand sketch. and... it seemed okay. so i refined it. and honestly? i really like how it came out.
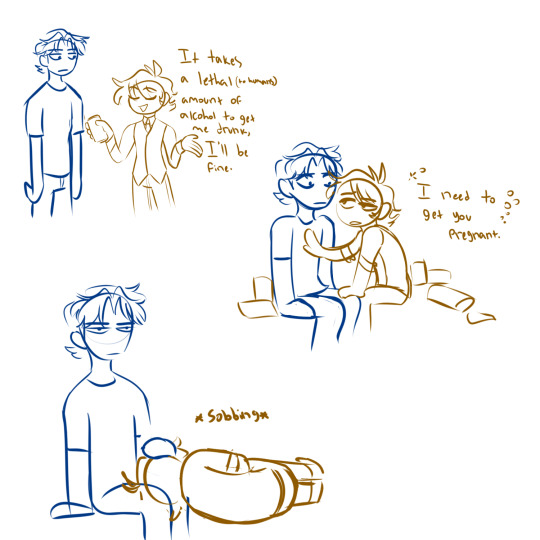
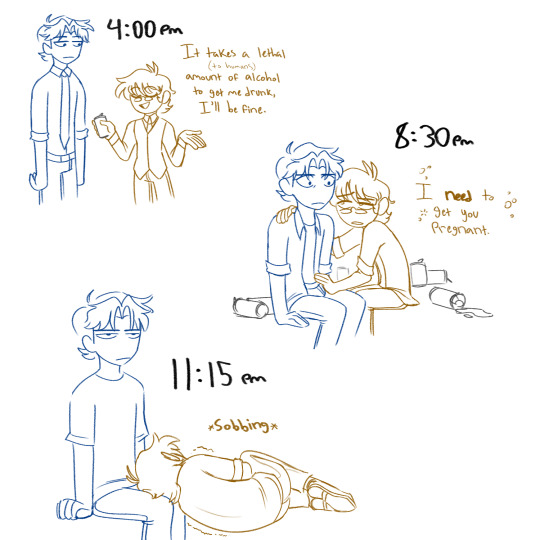
it has that fluid charm i always wanted my doodles to have. i started to wonder... has this year+ of using the models actually helped me improve my sense of anatomy and proportions? did i actually get something out of this?
the answer might be yes. here's all the things i freehanded recently:
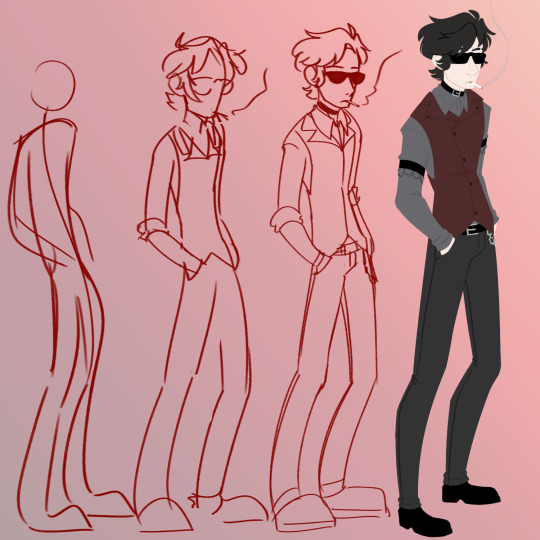
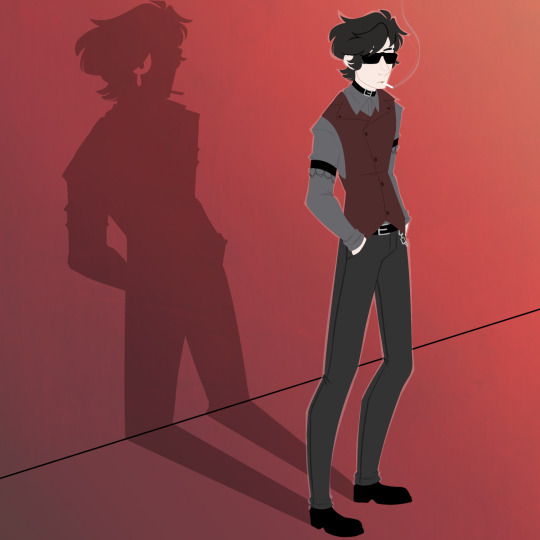
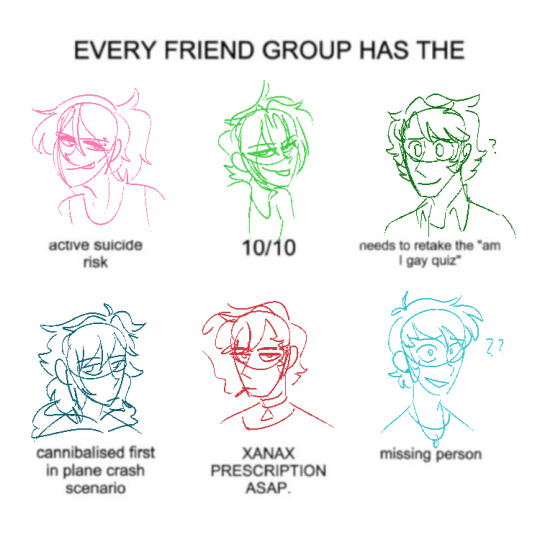
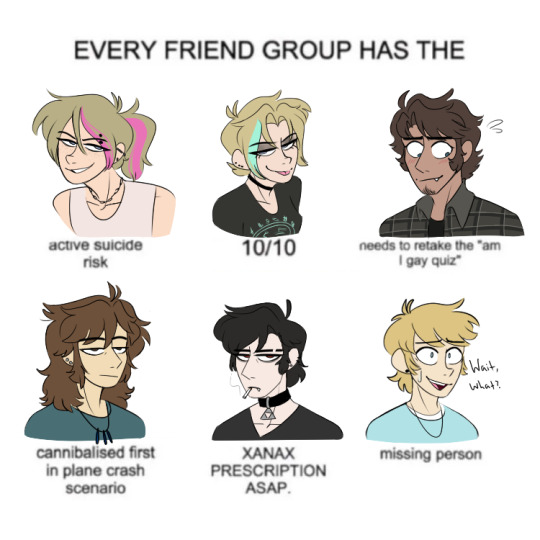
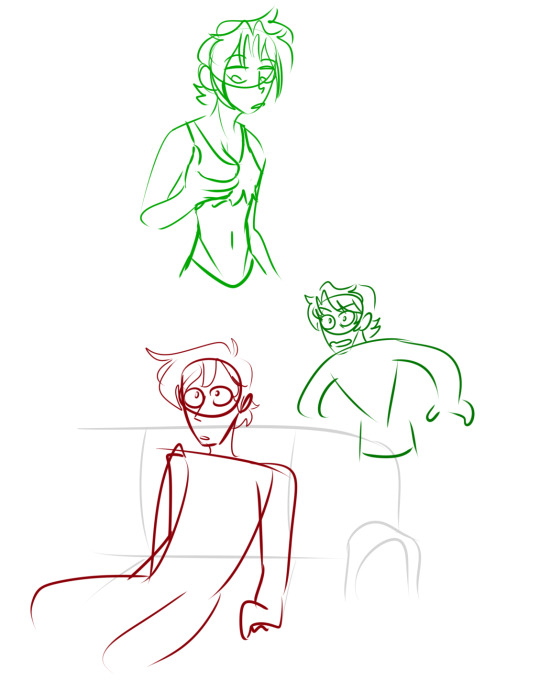
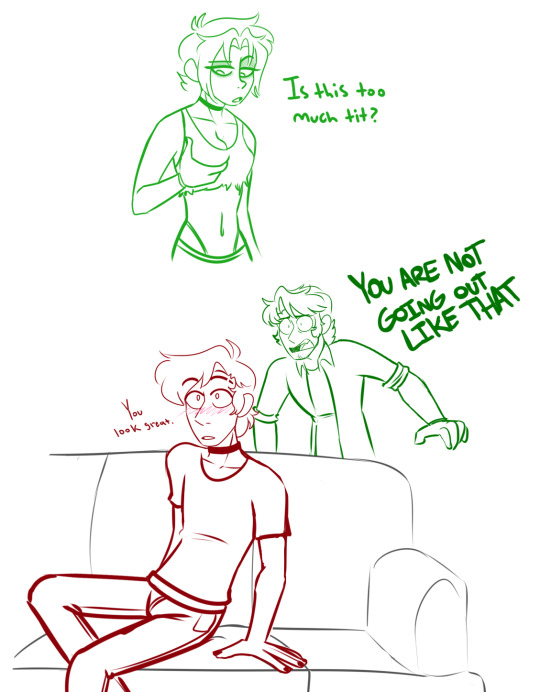
aside from the lineless one, these were all just quick silly things, and ultimately i still intend to use the 3d models for "serious" work or things i just want to make sure have a certain refined quality to them.
idk, i'm just... excited? happy? i thought my skill to just sketch something and refine it all by myself had surely atrophied. i thought my reliance on 3d models had ruined my art potential. turns out it's just been training wheels and i'm actually doing kind of okay taking them off sometimes.
i'll keep making silly simple things this way for a while. the lineless damien one was me having a bad night and needing a major distraction, and it served its purpose alright. i'm just happy i was able to actually finish it. i don't even hate it!
i guess this is me saying, yeah, it's fine to use tools and shortcuts. i know the fear of "cheating" but here i am, having done this for ages, and i'm doing better for it. i will say i think a lot of my ability to learn has been my willingness to compensate for what the 3d models can't do (like joints and muscles) and tweak things once those layers are hidden, but i've still been relying heavily on these shortcuts. it's just nice to realize it wasn't all a waste, in a skill sense.
7 notes
·
View notes