#this tutorial is probably not very helpful
Explore tagged Tumblr posts
Visit Tumblr Blog
Explore Tumblr blogs with no restrictions, modern design and the best experience.
Last Seen Tumblr Blogs


Fun Fact
Tumblr has 16.74 million mobile monthly users in the US.
Text
ꜱᴛᴀʀᴍᴀɴ ᯓ★ part 1
ᴄʟᴀʀᴋ ᴋᴇɴᴛ x ʀᴇᴀᴅᴇʀ / 4.5ᴋ
.✦── ᴡʜᴀᴛ’ꜱ ᴛʜᴇ ᴡᴏʀꜱᴛ ᴛʜᴀᴛ ᴄᴏᴜʟᴅ ʜᴀᴘᴘᴇɴ ɪꜰ ʏᴏᴜ ᴀꜱᴋ ʏᴏᴜʀ ɴᴇᴡʟʏ ꜱɪɴɢʟᴇ ᴀɴᴅ ᴀᴛᴛʀᴀᴄᴛɪᴠᴇ ᴄᴏ-ᴡᴏʀᴋᴇʀ ᴛᴏ ᴘʀᴏᴏꜰʀᴇᴀᴅ ʏᴏᴜʀ ᴀʀᴛɪᴄʟᴇ? ── .✦
𝙩𝙖𝙜𝙨/ 𝙨𝙡𝙤𝙬𝙗𝙪𝙧𝙣, 𝙧𝙚𝙖𝙙𝙚𝙧 𝙝𝙖𝙨 𝙣𝙤 𝙥𝙝𝙮𝙨𝙞𝙘𝙖𝙡 𝙙𝙚𝙨𝙘𝙧𝙞𝙥𝙩𝙞𝙤𝙣, 𝙡𝙞𝙜𝙝𝙩 𝙖𝙣𝙜𝙨𝙩, 𝙬𝙤𝙧𝙠 𝙥𝙡𝙖𝙘𝙚 𝙘𝙧𝙪𝙨𝙝, 𝙥𝙖𝙨𝙩 𝙘𝙡𝙤𝙞𝙨, 𝙨𝙢𝙪𝙩 𝙞𝙣 𝙥𝙖𝙧𝙩 𝙞𝙞, 𝙛𝙡𝙪𝙛𝙛, 𝙩𝙝𝙚𝙮 𝙖𝙧𝙚 𝙗𝙤𝙩𝙝 𝙨𝙤𝙧𝙩 𝙤𝙛 𝙡𝙤𝙨𝙚𝙧-𝙞𝙨𝙝, 𝗮𝘄𝗸𝘄𝗮𝗿𝗱 𝗳𝗶𝗿𝘀𝘁 𝗱𝗮𝘁𝗲𝘀, 𝗿𝗼𝗺-𝗰𝗼𝗺 𝘃𝗶𝗯𝗲𝘀??, 𝗰𝗹𝗮𝗿𝗸 𝗸𝗲𝗻𝘁 𝗶𝘀 𝗻𝗼𝘁 𝗰𝗼𝗺𝗽𝗹𝗲𝘁𝗲𝗹𝘆 𝗼𝘃𝗲𝗿 𝗹𝗼𝗶𝘀, 𝗱𝗲𝘀𝗽𝗲𝗿𝗮𝘁𝗲! 𝗿𝗲𝗮𝗱𝗲𝗿
✦✧✦✧✦✧✦✧✦✧✦✧✦✧✦✧✦✧✦✧✦✧✦✧✦✧✦✧✦✧
You really shouldn’t be so smug about Lois and Clark’s breakup, especially considering how brief their relationship was. You shouldn’t… but here you are, thinking of ways to start a conversation with your freshly single and undeniably fit co-worker.
Yes, he was a bit clumsy and awkward, traits you’d normally label as weaponised incompetence and steer well clear of. But with a face like his? You’d let him get away with far worse.
Clark Kent, in his usual blissful oblivion, probably wouldn’t even notice. Still, you spritzed on your most expensive perfume the one you reserve for dates where you’re almost certain you’ll end up in someone’s bed. You followed a “no makeup makeup” tutorial you found on TikTok, hoping to hide your very obvious desperation behind something that looked effortless. And you wore a skirt just a touch shorter than usual, short enough to be noticed, but not short enough to land you in HR’s inbox.
✦✧✦✧✦✧✦✧✦✧✦✧✦✧✦✧✦✧✦✧✦✧✦✧✦✧✦✧✦✧✦✧
You were a good journalist—damn good, actually and an even better writer. So, asking Clark for help on your article about the rise of anti-intellectualism was, admittedly, not the most convincing lie. But it was just believable enough for Clark, who would never even consider a colleague lying to him. One of his very few flaws, really. The man was far too trusting for his own good.
“I’m very happy to help,” Clark said, offering a shy smile. “But what exactly do you need my help with?” He looked genuinely confused probably because you hadn’t actually explained why you needed him, specifically.
He was sitting across from you, slouched slightly in the chair, all long limbs and broad shoulders trying to fold themselves into something smaller. God, he was so big, and yet always tried to make himself less. His fingers fidgeted with a pen he’d grabbed mid-sentence, a nervous habit you hadn’t noticed before but immediately stored in your mental archive of things that made you fall deeper in love with Clark Kent.
“I just needed someone to read over it—get a second opinion,” you replied, cringing inwardly at the transparent lie, hoping to God he wouldn’t catch on that you were really just looking for an excuse to talk to him.
“Oh, um, of course sure. Give it to me, I’ll look over it on my lunch break,” he said, like it was the most obvious thing in the world. Never mind that his lunch break was unpaid, or that he could probably spend it doing something far more useful than proofreading an article that had already been edited to death.
Goddamn this man. He couldn’t be serious.
You should’ve felt bad. You did feel bad. You were a terrible, selfish person interrupting this man’s one pocket of peace in the day.All for your own ridiculous crush. Especially since the article had already been proofread seven times and was, objectively, ready to go. Not that you’d ever hand over anything short of perfection to your potential future lover. Your ego wouldn’t allow it. Then again, apparently your ego also wasn’t too big to stop you from lying straight to his sweet, trusting face.
“Oh, Clark, you really don’t need to do this,” you said, guilt creeping into your voice. “You should take your break. Read it whenever you’ve got time—it’s honestly no rush. I’ve got two other pieces ready to go before this one anyway.”
You smiled, guilty and sheepish. He smiled back, clueless as ever.
✦✧✦✧✦✧✦✧✦✧✦✧✦✧✦✧✦✧✦✧✦✧✦✧✦✧✦✧✦✧✦✧
You usually didn’t bother going out for lunch. A Red Bull and a cigarette were enough to suppress your appetite most days…maybe a granola bar if you were really starving. But you also had a nasty habit of stress eating in stressful situations, and today? Your guilt was practically biting at your insides.
You thought of Lois. Would she have done something like this? Probably not. But then again, she and Clark didn’t exactly work out, so maybe her judgement wasn’t the gold standard you should be following.
So, in a moment of weakness you found yourself at that bagel place everyone in the office had been talking about for months. The one creating abhorrent shit like ‘Labubu Dubai Chocolate Banana Bagel’. Consumerism it seemed, truly had no boundaries.
As you stood in front of the aggressively whimsical menu board, squinting at names that felt more like jokes than food descriptions, you spotted him.
Clark.
Of course.
Luck finally was on your side.
You felt like a teenager again, catching sight of your crush walking the school corridors. It was ridiculous, honestly. You were so down bad. ‘Get it together,’ you told yourself, playing with your hair in an attempt to casually fix it without looking like you were trying.
Then his eyes met yours.
Oh no.
He definitely saw you. He probably thought you were stalking him. Ridiculous. You hadn’t even known he came here. How could you? You two barely even spoke outside of awkward work conversations.
And yet here he was, standing just metres away. And here you were, silently begging the universe not to make this any more embarrassing than it already was.
As you saw him walking towards you,far too quickly for comfort, thanks to his ridiculous height and those long legs you scrambled to think of anything to say. Anything that didn’t make you sound intellectually inept. Just… anything.
“Hey Clark, what are you doing here?”
What are you doing here? Seriously? Your ability to make yourself cringe was becoming truly impressive.
“Oh, um, you know… people at the office have been talking about this place, and it sounded cool, so I came to try one of their bagels. And I don’t have your impressively long article to proofread, so I thought,why not now?” he said with a chuckle, oddly relaxed for once. Not a trace of his usual awkwardness. In fact, he was making you look like the socially inept one.
“Yeah?” you replied, eyes drifting to the dimple in his cheek. God, he really did look like some kind of Greek god. It made you want him to have his way with you right there in the middle of the bagel shop.
No. You couldn’t be thinking like some primal, lust driven creature. Pull it together.
Because it wasn’t just lust, not really. You noticed the small things. Like how he walked slowly and carefully around pigeons so he wouldn’t scare them. How he always watered Jimmy’s plants when Jimmy forgot, every damn time. How he never once came back from his lunch break without bringing you coffee, knowing full well you never went out to eat. And he always got your ridiculously long order right: Big iced brown sugar shaken espresso with almond milk, sugar-free vanilla syrup, and light ice.
You didn’t even notice yourself zoning out.
“Hey, are you okay?” Clark asked, concern softening his features.
“Yes sorry, I, um I was lost in my thoughts. Work thoughts. You know me, a true workaholic,” you said, trying to play it off with a smile.
“Don’t worry,” he replied, grinning. “I really don’t know what to order…are these words even real or just made up.”
He laughed. The kind of sound you wanted to hear for the rest of your life.
“So,” he continued with a playful smirk, “what’s the usual order our top journalist’s getting?”
What has gotten into Clark? This sudden confidence was completely unexpected, but you weren’t about to complain. Someone had to keep the conversation going.
“Do you really take me for someone who’s a regular at a place that sells ‘Labubu Dubai Chocolate Whatever’ bagels?” you asked, raising your eyebrows and returning his smirk. Thank God, your wit was finally catching up after that tragic characterisation of you.
“I’m getting a regular bagel. Extra cream cheese. Everything seasoning.”
“Oh, you’re no fun,” Clark pouted.
You stepped up to the cashier and began to order.
“The same,” Clark said casually from behind you.
“Oh? Didn’t you want to have some fun?” you shot back, the petty tone in your voice unmistakable though it somehow came out sounding flirtier than you intended.
Clark just rolled his eyes with a smile he clearly didn’t want you to see. Then, just as you were about to tap your card, he swiped his first in a flash so fast your eyes barely registered it.
You blinked. “You’re paying? So this is basically a date now?”
The words slipped out before your filter could catch them, your insecurity briefly overpowered by your increasingly desperate desire to end up in his bed. You really were going all in.
Clark went red almost immediately, his ridiculously perfect face flushing with something between panic and delight.
“Um” he started, but you were already beginning to regret being so bold.
Then he gathered himself. “Would you… want it to be a date?”
Oh.
Oh, this was good. He wasn’t backing away, he was just shy. Your heart thudded in your chest.
“What if I said yes?” you asked, your voice smaller now, as your fingers moved anxiously to pick at your cuticles.
You were being a mess. But if not for Clark Kent, then for whom? Who else could ever deserve this kind of desperation?
He gently took your hand in his, stilling your fingers before they could turn your nerves into a bloody mess.
“I’d say you deserve a proper date,” he said softly. “Maybe tomorrow night?”
✦✧✦✧✦✧✦✧✦✧✦✧✦✧✦✧✦✧✦✧✦✧✦✧✦✧✦✧✦✧✦✧
You were losing your mind, standing in your apartment, trying on your fourth outfit of the evening.
Everything looked so much better in your head. Nothing was working. You didn’t even know what exactly you were going for. Cute, someone he could actually picture dating? Or maybe sexy, something to ensure the night ended successfully? Or should you go with cool girl—whatever that even meant. You immediately cringed, remembering the “cool girl” monologue from Gone Girl. Yeah, maybe not that.
You wondered if Clark was freaking out about what to wear right now too. Probably not. That man practically lived in his polite, boring grey suit.
After trying on three outfits and hating them all, you ended up going with the first one you’d tried on. A very short navy-and-brown checkered pencil skirt, black tights with grey leg warmers, your vintage brown knee-high boots, a simple navy blue shirt, and your oversized brown leather jacket. Makeup slightly heavier than your usual office face. Brown Stella McCartney bag slung over your shoulder.
You actually looked… pretty good.
Clark, ever the gentleman, was picking you up. He’d been waiting outside for at least fifteen minutes now without sending a single passive aggressive text or a “ready yet?” . Of course not. That wasn’t his style.
Still, you rushed down to avoid keeping him waiting any longer.
And when you finally spotted him outside, standing next to his car you were pleasantly shocked.
No grey suit in sight.
Instead, he wore navy trousers and a white button-up perfectly fitted. Not tight enough to seem like he was trying too hard, but just cling enough to make it impossible to ignore his frame. You’d seen Clark in dozens of shirts. Somehow, this one managed to be… devastating.
“I’m sorry for taking so long,” you said with an awkward, downturned smile, completely unaware of how cute he found it.
He didn’t answer immediately. He was just looking at you.
“You look absolutely stunning… wow,” he finally said, his voice genuinely breathless.
That made you smile wider than you meant to. “You don’t look too bad yourself, Kent,” you replied, and that was enough to make him blush.
He opened the car door for you.
Of course he did.
His car was spotless,clean and polished, like everything else about him. One of your favourite David Bowie songs played softly through the speakers, low enough that you could still talk easily. God, was this man considerate.
“So,” you said, shifting slightly to get comfortable without slouching, “where exactly are we going?”
“That’s a surprise,” he replied, a playful glint in his eye.
And all you could do was sit there and quietly stare at the way his arms looked flexed as he gripped the wheel.
Even just driving, this man looked absurdly sexy.
✦✧✦✧✦✧✦✧✦✧✦✧✦✧✦✧✦✧✦✧✦✧✦✧✦✧✦✧✦✧✦✧
Clark was trying his best to hide how nervous he was.
You probably expected a nice restaurant. Candlelight, maybe. Something fancy. It wasn’t too late, he could still reroute, pick a place uptown, order wine, pretend he wasn’t completely out of his depth.
He wasn’t cheap. Sure, working at the Daily Planet didn’t exactly make him rich, but he earned enough to take someone like you out for a nice dinner.
But he kept thinking about Smallville. About how much he used to love picnics. Simple, peaceful, heartfelt. Maybe you would too. He’d even called his momma earlier that afternoon to ask for her recipes. Her famous iced tea, the crispy fried chicken he loved and her key lime pie that tastes like heaven.
This mattered to him. He wanted it to feel personal.
He could also hear the way your heart rate had started ticking up the moment you sat in his car. Getting faster, minute by minute. And as much as he tried not to focus on it, he couldn’t help but feel a little relieved.
You were just as nervous as he was.
Though he didn’t quite understand why. To him, you were way out of his league. You were sharp, witty, intimidating in the best way and gorgeous. He’d always wondered why someone like you didn’t already have a boyfriend. Surely he couldn’t be the only man on Earth with both eyes and a brain.
And yet here you were.
You’d always been kind to him, even when others overlooked him. He remembered how you used to cover for him when he disappeared mid-shift off saving the world, though you had no idea. You never asked questions, just quietly helped him.
You making the first move? That had been a blessing. Because he wasn’t sure he’d have had the courage, not after everything that happened with Lois.
“I should probably tell you,” you said without making any eye contact, “that I’m not very fond of surprises. For next time.”
Next time.
Clark latched onto the words instantly. You hated surprises he’d definitely remember that. But more importantly, you were already thinking about a next time. That was… very good.
He turned to tell you he’d taken note, but before he could even open his mouth, your voice came through, stern and sharp.
“Eyes on the road, Kent.”
Then, almost under your breath, you added, “I expected better from you.”
Clark laughed, caught completely off guard. His eyes flicked straight back to the street as he grinned to himself.
“I read your article, by the way,” he said after a moment, letting the warmth return to his voice. “Let me tell you—you don’t need my help, sweetheart. Next time, I’m coming to you for proofreading.”
Your whole face lit up at that, an automatic, touched “Aww, thank you, ” escaping your lips followed by an unconscious scrunch of your nose that very nearly killed him.
You were truly the sweetest thing he’d ever seen.
Eventually, he pulled the car into a quiet area on the outskirts of Metropolis one he hoped would stay relatively unknown, tucked away. The park was lush and green, filled with wild, blooming flowers and shaded by trees tall enough to drown out the skyline. There was even a tucked-away path that led to a smaller clearing, with a marble fountain at its centre where birds often gathered to chirp and bathe.
It looked like something out of a postcard. He really, really hoped you’d like it.
Clark got out of the car, circled around, and opened the door for you. Then, without a word, he reached into the back seat and lifted out the picnic basket one he’d spent his entire Saturday preparing.
The moment your eyes landed on the scene, your expression softened completely. That look alone made all the effort worth it.
“I hope you’re not allergic to pollen—” he began.
“I love it,” you cut in, already smiling. “It’s Perfect! Really.”
Clark continued setting up the picnic, carefully laying out the checkered blanket, arranging the containers of food. But then a flicker of memory passed through his mind—picnic dates with Lois. He blinked it away.
No. He wasn’t going to be that guy. The kind of man who used one woman to forget another. That wasn’t him. He wasn’t built like that.
Maybe he should’ve waited a little longer before asking you out. Given things more time. He didn’t want to mess this up—not just because you were a kind woman who deserved honesty, but also because you worked together. If this ended badly, he’d be sitting between two women he’d disappointed. That thought alone made his stomach twist.
But more than anything… Clark Kent really liked you. And he wanted this to go right.
You both sat down on the blanket, and he noticed you shifting awkwardly, subtly adjusting your posture in a way that made him realise—ah. You were wearing a skirt. Maybe he should’ve told you this was a picnic. He filed that away under things to do better next time.
“Did you make all this yourself?” you asked, clearly impressed.
Clark smiled, though he didn’t think it was anything too grand. “Yeah, all my mum’s recipes too—especially the fried chicken. I mean, it’s nowhere near as good as hers, but I gave it my best shot.”
You nodded, but the look on your face was… complicated. There was something just a little too bright about your smile. A little too practiced. And then came the tiniest piece of chicken he’d ever seen pinched between your fingers, followed by an even smaller bite.
“It’s so good,” you said quickly. “I love it.”
Clark tilted his head slightly. Your pulse had just spiked, he didn’t need his powers to know that was a lie. Your face said it all anyway. You were a terrible liar.
He bit back a smile.
Rather than call you out on it, he let it slide and shifted the conversation instead.
“So,” he began, “what does our top journalist get up to when she’s not making me proofread her articles during my break?”
He followed it up with a dramatic little sigh and a mock “poor me,” which made you roll your eyes.
“Don’t be so dramatic! You offered and I also declined”
✦✧✦✧✦✧✦✧✦✧✦✧✦✧✦✧✦✧✦✧✦✧✦✧✦✧✦✧✦✧✦✧
You couldn’t believe yourself. Really—this was where you drew the line? Years of strong, principled living thrown out the window… for a man with kind eyes and annoyingly perfect smile. You were genuinely about to risk gastrointestinal ruin just to spare Clark Kent’s feelings.
He had probably spent hours on that chicken. He didn’t know—how would he? You never ate at work, and the topic of your ten-year vegetarianism had simply never come up.
The logical part of your brain was telling you: Just thank him and tell him the truth, tell him you don’t eat meat. But then there was the other part of you, the part with no backbone and with overactive people pleasing tendencies —that won. And now you’d eaten something your body would probably reject later tonight.
Lying was starting to become a concerning habit.
Clark, unaware of the moral and gastrointestinal crisis unfolding beside him, turned to you with an easy smile. “So, tell me about yourself,” he said.
This… might’ve been the right moment to mention the whole vegetarian thing. But no. You feared it would only make you look even more unhinged. Like a liar and a lunatic.
You were an interesting person or at least you liked to think so. But whenever someone asked you that question, your brain seemed to go blank.
“Um… I like to read,” you started, trying not to wince at your own underwhelming answer.
“Classics and comics, mostly classics,” you added quickly, searching for something that sounded less dead behind the eyes. “I used to figure skate when I was younger like, seriously. Competitions and everything. Don’t really have time for it anymore except maybe around Christmas.”
You paused, then remembered the one thing that actually mattered to you. “And I volunteer at a homeless shelter most weekends. Saturdays, sometimes Sundays too. Work eats most of my time, but that’s kind of my constant.”
Clark turned to you with real interest. “You work at a homeless shelter? I had no idea.”
“Yeah,” you said, feeling a bit shy now under his gaze. “I’ve been doing it for a few years. It feels good to feel useful, contribute to something good, however little it may seem.You know,journalism’s great, but there’s a certain kind of helplessness that comes with constantly hearing about the worst of humanity.”
“So what about you ?” you quickly asked. “I don’t think you’re nearly as ordinary as people like to think.”
He gave you a soft smile, shaking his head. “You might be wrong there. I’m honestly not all that interesting. I write, even in my free time. Go to the occasional baseball game.Do some gardening. Watch a lot of sci-fi.”
You tilted your head, unconvinced. “Oh, come on. Don’t sell yourself short. You don’t have to be Superman to be interesting.”
Clark then laughed, an actual, proper laugh. Not a chuckle or a shy smile, but a deep laugh that made your stomach flutter . You’d never heard that sound from him before, and now that you had, you already wanted to hear it again. His voice was deep and rich, but never intimidating. More like the vocal equivalent of a warm blanket.
He looked at you, then said softly, “Can I tell you something?”
You blinked, suddenly feeling a little caught off guard. “Yeah, of course.”
“I had no idea you, um… had any interest in me,” he admitted, eyes a little wide.
You looked at him then, really looked. The strong line of his jaw, his warm, impossibly blue eyes, the slight wave in his hair, the curve of his mouth. His broad chest under that crisp white shirt, the sleeves just rolled up enough to make your stomach feel weird. His hands, large and gentle. Everything about him made your thoughts dangerously hazy.
It was still genuinely baffling to you—how could someone like Clark Kent, with that face and that heart, ever doubt that he was wanted?
“Why wouldn’t I be interested, Clark?” you said, your voice quiet but steady, eyes meeting his and holding.
His expression shifted, and you swore you saw his entire chest rise and fall just a bit more heavily.
He wasn’t ordinary. Not even close.
“I don’t know…” he then whispered, eyes drifting downward, a flicker of sadness clouding blue eyes behind his glasses.
And just like that, things turned cold. You hadn’t expected things to take such a turn, so quickly, everything had been going so well. Predictable, maybe, but good. Comfortable. Sweet. Now it felt as though you’d hit a nerve you hadn’t even known was there.
Lois. Was it about Lois?
Was that it? Had your compliment unknowingly pulled at an old scar reminded him of why that ended? Of who she was, and who you weren’t?
The silence made your guilt begin to rise up in your chest.
“I lied,”
Clark’s brow furrowed. “What? Lied about what?”
You exhaled, eyes stinging. The words came out, too fast to stop. “I only said I needed help with your proofreading because I wanted to talk to you. I didn’t know how else to start a conversation and it was stupid and dishonest and I’m sorry. I—I really like you, and I panicked. And then tonight—I ate chicken even though I’ve been vegetarian for ten years just to not hurt your feelings, and now I’m just spiralling and embarrassing myself and honestly you’re probably thinking I’m some unstable, unhinged, lying lunatic and—fuck, if I were you, I’d walk out right now—”
You felt a tear slide down your cheek.
But Clark reached over and gently stopped your rambling, his hand warm and steady as he wiped the tear away.
“Hey,” he said softly, coaxing your gaze back to his. “Shhh. Don’t cry. I would never walk out on a date. And… believe me, I’ve had worse.”
He was trying to make light of the moment, maybe hoping to draw out a laugh from you, but all you could do was stare at him, heart still racing.
“I won’t lie,” he continued, brushing another tear off your cheek, “I don’t love being lied to. But… I’m also incredibly flattered. You’re sweet and smart and you could’ve walked up to me and talked about the weather, and I’d have stood there listening for as long as you wanted. Probably would’ve followed you around the office after.”
That did make you feel a bit better.
Maybe it was the way his fingers lingered on your skin, feather-light and comforting. Maybe it was his voice, calm and kind, grounding you. Or maybe it was just the overwhelming emotions, but before you could think twice, you leaned forward and kissed him.
It was soft at first. Hesitant. Unsure.
Clark didn’t move. For a second, he was still surprised, maybe. Uncertain. You pulled back, the regret rising again, your breath catching.
But then his hands were on your waist, pulling you toward him, and suddenly you were in his lap. His lips found yours in a kiss that was messy and searching.His hand cradled the back of your head like he was scared you might vanish. It wasn’t perfect, your mouths didn’t move in harmony just yet, not like people who’d kissed a hundred times. But it was intimate. Raw. Charged.
Another tear slid down your cheek, and this time Clark pressed a kiss there, slow and gentle.
“Don’t cry, sweetheart,” he whispered against your skin. “It’s okay. I’m not mad. I promise.”
After what felt like just a few seconds gone as quickly as it had come you pulled away, breathless, cheeks flushed. You slid back onto the blanket beside him, fixing your skirt and brushing down your tights with shaky hands. Your fingers instinctively reached up to wipe beneath your eyes, just in case you had any mascara under your eyes.
Clark, still slightly dazed, blinked a few times as if trying to ground himself.
“You ate the chicken… after being vegetarian for ten years?”
Watched Superman a few days ago and realised that Clark Kent is the only man ever! .𖥔 ݁ ˖💌
#superman 2025#clark kent#clark kent x reader#clark kent fanfiction#superman x you#superman x reader#clark kent x you#dccomics#dcu#david corenswet#david corenswet x reader#x reader fanfiction
73 notes
·
View notes
Note
hi i love all ur fics, especially ur shinsou ones! do u think u could write for shinsou using this prompt:
"i’m obsessed with a food blogger who writes about cheap ways to be gourmet in your 20s and i flirt with them over comments but they never post pictures of their face and ALSO there’s a really cute grocery bagger at the store down the street who teases me and always asks to join me for dinner and i definitely want to say yes"

SOMETIMES
You really like flirting with the cute cashier at your clocks grocery store. You also really like flirting with the funny faceless YouTuber in his comment section
(thank u sm for this ask i loved it)
—————————————————————————-
GOCHUJANG MAC & CHEESE PIZZA MindJack · 459k subscribers 7 hours ago · 15:39 · 679k views Description Burnt the shit out of my mouth eating this but it was worth it… [SHOW MORE]
perfect first date meal icl y/neats 6 hours ago Reply [Thumbs Up] 1.9k [Thumbs Down]
⤷Are u asking me out rn… MindJack 5 hours ago Reply [Thumbs Up] 1.9k [Thumbs Down]
⤷are you saying yes rn…. y/neats 5 hours ago Reply [Thumbs Up] 1.9k [Thumbs Down]
—--
Despite what the contents of your fridge might suggest, you are actually quite a terrible cook.
You don’t want to be. If it was your choice you’d be the next chef on Hell’s Kitchen, yelling alongside Gordon Ramsey. But, unfortunately, you completely lack the skillset to even think about auditioning. You burn things, you overmix them, you undercook them. No matter how closely you follow a recipe you somehow manage to mess things up. It doesn’t help that most of the ingredients you buy are substitutes for the expensive things you really should be using. But it’s not your fault. You’re just a college student trying to get by, your low paying part time job nowhere near enough to fund your hobby. Even with the detailed tutorials made by your favourite YouTuber, you still struggle.
In all honesty, he's probably the reason you’re so into cooking. You’d found his account on a whim, when he only had about a hundred subscribers, and you’d instantly fallen in love with his content, the recipes that looked like they came straight out of a Michelin stars restaurant.
His channel is different from most of the cooking content you see. He doesn’t talk, other than the very rare occasions you catch a glimpse of the soft lilt of his voice. He uses captions that shouldn’t be as funny as they are, and lots of different angles of his cooking. It’s a testament to how good of a cook he is that he’s amassed as many subscribers as he has with only his words.
He doesn’t show his face, but you just know he’s attractive. The smooth planes of his hands that he’s not shy to pan the camera too, the flowery apron he always has on tied over what you think is a pretty muscular chest.
It only makes the fact he actually knows you even better. Well. Knows might be an overstatement. Your relationship is solely an online one, with you commenting under all of his posts and him replying every time. It helps that you’re one of his oldest fans, and so you think he’s memorised your handle by now. You even sometimes get a mention, your name sweet against his tongue as he teases you about your horrible cooking that you’ve warned him about.
Mina likes to remind you that he’s faceless, and so there is a chance you could be flirting with a seventy year old man, but you doubt any seventy year old looks like that. And if he really is a senior that does, then you think you’re okay with it.
It’s all just for fun, anyway. You guys don’t really talk outside of a comment section, both of you are too scared to cross over the line from a fan and a creator to actual friends.
Today's recipe looked incredible. That’s why you find yourself milling about the grocery store near your college accommodation. It’s a nice place, only a ten minute walk, and it has pretty much everything you could need. The only issue is, you have to look presentable, considering the fact that everyone who works there are students from UA, including your favourite cashier, Shinsou Hitoshi.
He’s cute. He’s really cute. Soft purple hair, these dimples that crease his face every time he smiles. He always looks tired, mainly because he usually works night shifts, but you think it makes him all the more attractive. Shinsou also seems very familiar for reasons you can’t quite place, but you’re always shopping in the middle of the night, so your brain is never working hard enough to figure it out.
A chill settles over your skin as you walk through the vegetable aisle. Your UA hoodie is baggy and overworn, and you pull the material over your hands. You don’t even know why you’re in the vegetable aisle. You don’t even need any. You consult your phone as you wander around, dropping things aimlessly in your basket.
When you’re ready to pay, you walk right past the self-checkout to Shinsou. He’s sitting behind the till, and when you get close enough you can see him playing block blast on his phone. You peer over just in time to see him lose. He tuts softly and you shake your head.
Shinsou glances up and the smile that graces his lips is almost instant at the sight of you.
“I was wondering when you’d show up.” He nods in greeting, shutting off his phone and placing it to the side.
You hoist your basket up. “It hit one am so I thought I’d get up and get my shopping done.”
He snorts a laugh. “You know, you could be normal and do your shopping during the day.”
“Yeah, but then I wouldn’t get to see your insomniac ass.” You tease.
Shinsou rolls his eyes but you see the tips of his ears turn red. He peers at the ingredients in your basket suspiciously. The flour, gochujang and macaroni.
“What the hell are you making?”
“Don’t look at my delicious ingredients like that,” You pout. “It’s this recipe I saw online.”
Shinsou looks wary and you scowl. “What’s that face for?”
“This face is for worry.” He grabs a plastic bag from under the counter, free of charge for you. “You should probably warn the building manager.” He muses.
You cross your arms, but it's hard to look angry with the smile that's fighting to fill your face. “And why is that?”
“Make sure the building is up to code. Fire safety is no joke, Y/N.” He fixes you with a look, and you splutter.
“I’m not going to set the building on fire!”
“Only time will tell.”
Shinsou is well aware of your horrible cooking, courtesy of the countless pictures you’ve shown him of all your failures. He thinks they’re very funny. Shinsou always has advice ticjingnto fall off his tongue, because according to him, he's an excellent cook. You’ll believe it when you see it.
You take your bag out of his hands. “You just watch. Today is the day I will persevere and cook the greatest meal you will ever see in your life.” You say determinedly.
“Tonight.” he corrects you.
“Shut up.”
Shinsou watches with hooded eyes as you clumsily shove your bank card back into your wallet, his chin resting on his hand. The dark green polo he wears, embossed with the store’s logo, fits loosely against his chest. He has nice hands, you think. And nice biceps.
“I could just cook for you.” He suggests, and you ignore the soft lilt in his voice, no matter how enticing it is. “And I can assure you it won’t taste like shit.”
“My food doesn't taste like shit.”
He raises an eyebrow.
“It doesn’t taste like shit all the time.”
You want to accept his offer. You really really do. But the last guy you’d spoken to had left your crying in your room for a week, and you refuse to let any more college boys trample all over your heart. You’re sure Shinsou wouldn’t do any trampling, but it’s better to be safe than sorry. But god, if he doesn’t make your resolve weak. He seems to enjoy the little back and forth you two have, though, so you hope the two of you can keep flirting and acting like you both don’t want something more.
“You’ll see, Shinsou. It’s going to be great. I’ll bring you a plate.” You promise.
“Please don’t.”
He’s right to be scared, seeing as you in fact do burn your pizza.
-
STRAWBERRY CHEESECAKE COOKIES MindJack · 459k subscribers 4 hours ago · 19:32 · 403k views Description Heaven in a cookie if you can ignore the obscene price of strawberries… [SHOW MORE]
sweet just like you y/neats 3 hours ago Reply [Thumbs Up] 426 [Thumbs Down]
⤷Cringe MindJack 3 hours ago Reply [Thumbs Up] 993 [Thumbs Down]
⤷ur supposed to flirt back.. y/neats 2 hours ago Reply [Thumbs Up] 327 [Thumbs Down]
⤷Not on main baby MindJack 1 hours ago Reply [Thumbs Up] 376 [Thumbs Down]
–
“You’re just over-mixing, I think. And your oven is too hot.” Shinsou’s nose wrinkles a little as he breaks one of your cookies in half.
Cookies might be an overstatement, because they’re somehow rock hard on the outside and gooey on the inside. They’re still slightly warm, seeing as you’d baked them only a few hours ago, and Shinsou is doing a pretty good job in being polite about it all. You’re currently leaning against the register as he lays them out in front of him.
It’s late, again, and there’s only a few other people milling about the store. You didn’t actually need any groceries today. You’re supposed to be finishing the essay that’s getting dangerously close to its due date, but you were bored, and made up some excuse to yourself that an energy drink would help you work better. You’d bought the cookies on a whim to see if all his culinary bragging had any bite to it.
And it did. At least you think it did. He gives you some pretty helpful advice.
“But how do I know when to stop mixing?” You ask.
“Well, the butter and sugar is hard to over mix. Once you add your dry ingredients, the second the flour streaks are gone and everything is combined, you stop.” Shinsou explains it in a way that doesn’t make you feel stupid.
You nod slowly. “I see.”
You push the container toward him. “Try one, please.”
Shinsou fixes you with a look. “No.”
“What? You have to, I brought them all this way!”
He shakes his head, pushing the container back towards you. “Don’t try to poison me while I’m working.”
Your brows furrow. You don’t actually care if he eats them or not. You just think it’ll be funny, considering the fact you tried them yourself so you know they taste like crap. You shake the container in a way you hope is enticing.
“Come on, please? For me?” You try to make your voice sound as syrupy sweet as you can.
He looks at you for another beat, before sighing heavily.
“Fine. Only because you’re begging so nicely.”
“I- Shut up.” You mumble, looking down to ignore the teasing smirk on his face.
Shinsou grabs the one that looks the least deformed. He eyes it warily, his tongue darting out to lick his lip.
He shuts his eyes. “Deliver us from evil-“
“Just try it!”
He does. A very small, tentative bite. But It's a bite nonetheless, so you can’t complain. There’s a beat and you watch his jaw work as he chews. You allow yourself to hope for a second that maybe they’re not that bad, but then he winces, pretty features creasing.
“Y/N.”
“Shinsou.”
He shakes his head. He reaches under the counter for some water. He swallows, and you watch his Adam Apple bob as he leans his head back.
Shinsou groans, shuddering. “You need to never bake again.”
“It’s not- I’m trying, at least.” You pout.
The container clicks as he shuts it swiftly. You crack open the Redbull you’d just brought. The sound echoes through the nearly empty store. The drink is cold and refreshing, and the can cools your palms.
“Trying how? Where are you even finding these recipes?” He laughs.
You grab your phone out of your pocket. “This guy I follow on YouTube.”
“I think you should follow someone else.”
You shove his shoulder. “No. I love him, he’s so cool. I’m always flirting with him in his comments, you know.” You smile mischievously, showing him the YouTube page.
Shinsou has a very weird reaction to that. His eyes widen just slightly, his mouth parting to speak words that don’t make their way out. You squint at him.
“Are you alright there?” You half joking and half asking, because he doesn’t really look alright.
His eyes search for something in your face. “Are you fucking with me?”
Your brows furrow, your phone going a little limp in your hand. “What?”
Shinsou seems to shake himself out of whatever shock he was in, because he slips your phone out of your hand and starts scrolling through his page.
“Nothing.”
“You’re so weird.” You say, but you drop it, leaning in a little closer so you can watch with him.
He nods approvingly as you point out your favourite recipes. “Wow. Amazing. These videos look incredible.”
You roll your eyes. “Yeah, yeah, whatever.”
“I’m being serious!” He exclaims, and you snatch your phone out of his hand.
“No, you’re being sarcastic. Or mocking. Or both, actually.” You sigh dreamily. “That’s my boyfriend you’re making fun of.”
“Your what?” Shinsou splutters.
“You heard me. It’s only a matter of time before we make it official.” You wiggle your left hand at him and point dramatically at your ring finger.
“You’re delusional.”
“He literally wants me. Look.”
You pull up the most recent of your interaction, and Shinsou’s jaw drops a little.
“That’s you?”
“Yes!” You grin. “Isn’t it romantic?”
Shinsou just nods wordlessly. He rubs at his eyes, shaking his head slightly. “Do you know who he is? Is- Isn’t he like, faceless?”
You pat his arm. “Oh, Shinsou. I don’t even need to see him to know he’s fine. Look at his biceps. And his arms. And those beautiful hands. What I’d let those hands do to me.”
You pull up a random video and hold it up to him. Shinsou, again, reacts differently than what you expect. He doesn’t say much, just nods along to your words. You think he’s blushing.
“And he cooks? And really well, at that? I’d let him wine and dine and f-“
“Okay!” He cuts you off. “Let’s calm down.”
You laugh. “Is all this talk too much for you?”
“Yes.”
You glance at the time and curse. “Shit, I should probably get going. I have an essay to write.” You mumble.
You grab the snacks you’d brought and give Shinsou a wave. “Think about me if you get bored.”
“Definitely won’t.”
—-
SCALLION FLATBREAD WITH CHILLI OIL MindJack · 460k subscribers 10 hours ago · 13:02 · 679k views Description If you don’t like spicy food then grow up because this… [SHOW MORE]
that shot at the end is insta worthy 🙏love that flowery apron y/neats 8 hours ago Reply [Thumbs Up] 1.0k [Thumbs Down]
⤷Shall I post MindJack 5 hours ago Reply [Thumbs Up] 1.9k [Thumbs Down]
⤷yes mindjack insta page when?? post cooking thirst traps plz y/neats 5 hours ago Reply [Thumbs Up] 489 [Thumbs Down]
—-
You were joking about the Instagram page.
Well, only slightly joking. Mindjack solely resided on YouTube and TikTok, the latter only being clips from his videos condensed for engagement purposes. You thought Instagram would be a nice place to get a little more content from him if anything else.
Your conversation with Shinsou was another stark reminder that you actually didn’t know what MindJack looked like. Obviously, it’s not like your flirting was going to go anywhere. But, on the one in a million chance it did, you’d like to know who it was you were thinking incredibly inappropriate thoughts about.
So, when you glance at your phone during your lecture after it buzzes on the table, your heart nearly falls out of your ass when you see what it is.
MindJack has requested to follow you. 56s
You think it’s a fake account at first. You have the same username on all your socials, so it’s no surprise that if someone was sad enough to pretend to be him, they’d find your account. Your comments on his videos are not exactly private.
You open up the request, glancing up at the lecturer you’ve been trying to focus on. She’s looking away and you’re sitting in the far back, so you don’t feel rude to pick up your phone with more purpose.
The page is blank. He has the same caption as his other socials, the same profile picture. If you’re being honest it looks pretty legit. And what’s the worst that’s going to happen if you accept? It’s not like you’re going to get hacked. Probably. So you approve the request and shut your phone off, not thinking much of it.
And then your phone buzzes again.
You shoot an apologetic look to the person next to you, who’s getting increasingly annoyed at your phone. You look at it once more.
MindJack
1.2k followers . 0 posts
You follow each other on Instagram
MindJack: Hey
This is getting weird now. Maybe weird is not the right word to describe it. Exciting might be better.
Y/Neats: hiiii
A few minutes pass without the reply, and the read receipt stares back at you mockingly. You pout, disappointed in falling for someone’s stupid prank.
MindJack: I have no idea what to say right now
Y/Neats: wait so is this actually MindJack
Y/Neats: or am I being punk’d
MindJack: Punked?
Y/Neats: YOU NEVER WATCHED PUNK’D??
Y/Neats: it’s like a hidden camera prank show that I might be staring in.. seeing as ur ass could be a fake
MindJack: No my ass is real
MindJack: Workijf on getting that verification
So it is him. The nerves you had that he wasn’t disappear almost instantly, and the excitement increases. Your chest fills with a weirdly sappy feeling that he’d actually taken the time to find you socials, request it and message it. Maybe all those YouTube comments weren’t just for fun. It’ll be a nice story to tell your kids, at least.
You spend the rest of your lecture texting. The conversation is stilted at first, only slightly, but you get past the awkwardness quite easily. He’s fun to talk to. You find yourself trying to stifle laughter at some of the stuff he says, and when you have to pack up and leave you immediately miss him.
And, surprisingly enough, when you make your usual nightly trip to the grocery store, MindJack seems to be on Shinsou’s mind too. Because when you rock up to the counter with only a pack of m&ms, he frowns.
“You not cooking tonight?”
“Nope.” You sigh. “I’m not in a mood to nearly burn my kitchen down again.” The card machine beeps at you to pay, and you dig around your pockets to look for your wallet.
Shinsou tilts his head a little. “But Mindjack posted a new video.”
Your eyes dart up to his the second the name leaves his mouth. It seems you can’t avoid the guy.
“Yeah, but the recipe is too difficult for me.” You shake your head. “And I have none of the right equipment.”
Shinsou nods slowly. You’re still eyeing him a little, because he looks lost in thought, and you're sure you haven’t said anything for him to look that confused. Just before you’re about to ask if he’s okay, he speaks up.
“Come over to mine tonight and we can make it together.”
This request feels a little different. Not like his usual jokey flirting the two of you do, but it feels real.
“Are you being serious?”
“I always am. But tonight more than most.”
You realise, while he’s speaking, that he’s nervous. He looks fine, but you can see his hands wringing beneath the counter where he thinks you can’t see. You smile a little shyly.
You want to. You really want to. You think texting MindJack has made the little burning feeling in your chest for some romantic attention worse. It makes the fear that you’ve been harbouring over dating dissipate, and the hopeful way Shinsou is looking at you certainly makes your decision easier.
So, against your better judgment, you nod.
“Alright.”
Shinsou looks just as surprised as you feel at your acceptance, but he recovers quickly, flashing you a bright smile that makes your cheeks flush.
“Perfect. I get off in ten, if you can hang around.”
You glance at your phone and laugh a little. “So you’re taking me out on a date at five in the morning?”
Shinsou raises his eyebrows. “A date, huh?”
You blush. You shake your head quickly. “Well- Hang out, I mean. Not a date. This-“
“Oh, it is a date.” He reassures you, his smile easy. “It’s just cute seeing you all flustered.”
“You- I’m going to wait by the front.” You say, ignoring his teasing laugh as you do.
He doesn’t take too long. Shinsou looks nice outside of work. He’s wearing one of the campus hoodies and a pair of jeans that fit him nicely. He’s got two cans of Monster in his hand and he passes you one. You grab it, the condensation cooling your hands.
“Hey, this is my favourite flavour.” You crack it open and it fizzes over your fingers.
“I know.”
“I can’t decide if that’s charming or creepy.”
Shinsou hums, holding out his arm for you to take. “I prefer charming.”
You think your arm fits perfectly between his. The sunrise creeps behind the buildings, the deep orange light warming your side. You’re used to catching the sunrise. Most of your shopping trips tend to be in the early hours of the morning, and, much like the cute guy on your arm, you’re quite the insomniac.
Conversation blurs easily with Shinsou. You talk about your course and he talks about his, and you find there’s a lot more to him than your conversations at the till. He plays bass, and he has been trying to figure out how to sneak a pet cat in without his nosy next-door neighbour telling on him.
The walk doesn’t take long, and Shinsou makes you close your eyes so he can quickly tidy up. You think you look a bit stupid standing in his doorway with your hands over your eyes, but he’d insisted.
You sigh. “Shinsou, I don’t care what your place looks like.”
“Well, I do.” He sounds a little out of breath from all the running around. “I have to impress you.”
A minute passes, and then you feel two warm hands circle your wrists. Shinsou pulls your hands off your face and you're greeted by a very handsome face.
“Hi.” He says.
You bite back a smile. “Hey. Can I look at your place now?”
“If you must.”
It’s the same setup as your place, and it’s what you assume all the student accommodations look like. The very tiny seating area, the slightly bigger kitchen and the room that’s tucked away. Shinsou place is decorated quite nicely. There's lots of vinyls hanging up around his wall, plants tucked into every corner of the room. There’s a few pictures hung on the wall and also a hole.
Shinsou sees you looking at it and laughs a little awkwardly. “Yeah, my friend is a very destructive drunk.”
“You know you’re not going to get the deposit back cause of that.” You chide and he rolls his eyes.
“I’ll make him pay. Bakugo has a shit ton of money saved, he’s so anal about that stuff.” Shinsou says.
Your kitchen is definitely your favourite part. It seems Shinsou has spent most of his time decorating this place, with the expensive cooking equipment and the fridge that’s stacked with all the pricy ingredients you never have the guts to buy.
It looks oddly familiar.
You don’t know why. Something about the counters, or the decor. You can’t quite place it. You figure it’s probably just the fact it looks the same like all the other student accommodations. It’s also nearing half five in the morning, and you think you need more rest before you can figure anything out.
“Alright! I’m ready to bake. Or cook. Or whatever we’re doing.” You cheer.
“Baking today. Scallion flatbread, according to MindJack.” Shinsou reads off his phone.
“Do you have all the ingredients?”
“Yes.”
You furrow your brows. “You haven’t even checked.”
Shinsou leads you to stand behind his counter. “I just know. I have a cooking sixth-sense.”
You drum your fingers on it. “I’m excited! This might be the first time I ever cook something that doesn’t turn out like shit.”
Shinsou snorts. He’s busied himself with pulling out ingredients and bowls. “I hope your bad cooking juju doesn’t rub off on me.”
“What- I don’t have bad cooking juju!”
Shinsou winces a little. “Yeah. Of course you don’t.”
Shinsou finishes grabbing everything he needs. He quickly tugs off his hoodie and you act like you’re not trying to catch a glimpse of his bare skin when his shirt rides up.
He rubs his hands together. “Okay, so. Grab me flour. We need three hundred grams.” Shinsou points to the bowl, and you salute.
“Yes, sir.”
“Oh, you can definitely keep calling me that.”
You elbow his side lightly. Shinsou searches in a drawer for a scale, but honestly there’s really no need because you quickly dump what you think looks like three hundred grams into the bowl.
“Okay, so- Y/N, what are you doing?” Shinsou speaks around a laugh, grabbing the flour out of your hand.
“What? It’s three hundred grams.”
He looks at you like you’ve grown another head. “Are you being serious?”
You frown, grabbing the bowl protectively. “Did I do something wrong?”
Shinsou laughs boldly now. “This is why your baking is horrible. You need to measure.”
You roll your eyes as he tugs the bowl out of your hands. He pours the flour back into the bag as gracefully as he can so he can measure them again. You draw little hearts in the mess he makes on the table.
“I don’t have a scale, though. Only my eyes.” You pout.
He scoffs. “You’re not real.”
“I am!”
Shinsou decides to measure the remaining ingredients. He slides the bowl over to you once everything is inside. You’d pushed the sleeves of his t-shirt up for him and the strong muscles of his forearms are dusted with flour.
“Now mix. Carefully.” He instructs. “I need to clean the counter.”
“Okay.”
You do mix. The dough feels sticky in your hands, and you mush it between your fingers. You make a face and you hear Shinsou snicker behind you.
“Stop laughing at me.” You stick your tongue out at him and he flicks water in your face.
It’s fun cooking and actually being good at it. Shinsou shows you how to roll out the fough, how to crinkle it in the pan. You let him do that, a little too nervous to get your hands so close to the hot metal. Your eyes sting from the heat of the chilli oil and your hands are silky because of the oil you spilt, but it might be the most fun you’ve had all week.
He presents the flatbreads on a pretty marble plate.
“Wow! I can’t believe we made these.” You marvel.
“Yep.” Shinsou breathes. “Looks almost exactly like MindJack’s, doesn’t it?”
“Yeah. I hope it tastes the same too.” You add.
Your fingers burn a little, since the food is so fresh. The bread crunches as you bite into it and you make a noise that sounds strangely similar to a moan.
“Oh my god.” You speak around a mouthful. “That’s so good.”
Shinsou only hums in reply. His fingers tap the table a little impatiently. You’re too busy munching on the flatbreads to notice. You’ve never made anything even remotely as good at this, which you think makes it tastes all that nicer.
“These are so nice! I love-“
“You still haven’t realised?” He cuts you off quickly.
You look up at him. He’s watching you intensely, biting at his lip nervously.
“Are you okay?” You ask, brushing your fingers on a tissue.
He nods. Then shakes his head.
“I’m okay. I just. I thought you’d have noticed by now. I thought I was being kind of obvious.” He explains.
You’re confused. The sunrise is creeping in fully through Shinsou’s open windows, the chirping of the birds and the start of the morning rush cutting through the calmness of his kitchen. It’s too early for all this problem-solving. “What the hell are you on about?”
Shinsou stammers. He tries to explain, you think, but his mouth clicks shut. Instead, he quickly walks over to the closet by the front door. You lean over the counter and watch him pull something out that he hides behind his back.
“Close your eyes.”
“Shinsou, not again.”
“Humour me. Please?”
You can’t say no to those bright eyes. You reluctantly close them again. You hear a bit of a commotion and you almost open your eyes. You fumble around the table for the flatbreads.
“Okay. You can look.”
You do. And you’re greeted by Shinsou, wearing a pretty flowery apron that looks like it belongs in your grandma's kitchen.
You stifle a laugh. “You look stupid. Is this what the big reveal was for? You-“
And then it clicks.
Because you recognise that apron. It’s the same flowery apron you’ve unfortunately thirsted over multiple times. And it’s like everything just sort of clicks. The familiarity of Shinsou’s kitchen and his voice. The weird way he reacted when you brought up MindJack. Everything sort of falls into place, and you’re not sure whether to feel excited or completely and utterly mortified.
“Oh my god.” Your breathe.
Shinsou laughs a little. “Yeah.”
“Oh my god.” You groan, covering your face with your palms. “There’s no way.”
“Have you finally connected the dots?” He teases, walking back over to you.
“Oh my god. Please don’t look at me.” You wave your hands at him but he doesn’t flinch, leaning his elbows on the counter beside you.
“Why? You’re my biggest fan, after all. I’ve been dying to meet you.” He drawls and you peek at him through your fingers.
“So I’m guessing you know I’m y/neats.”
Shinsou snorts. “You did tell me yourself. And very cute username, by the way.”
He runs a hand through his hair. You rub at your eyes as if it’ll help erase you almost telling Shinsou he could wine and dine and fuck you.
“When did you even realise it was me?” You mumble.
“Two days ago. When you showed me my own YouTube page.” He reminds you and you wince.
Your brain feels like it’s running six hundred miles a minute. Shinsou and MindJack being the same person does sort of make sense. They both have the same humour, the affinity for cooking. That uncanny ability to make you feel like your fifteen with a crush again. The chances feel one in a million, and while you should still feel embarrassed, you’re starting to get a little excited.
“You’re like, famous, you know.”
Shinsou smiles. “I know.”
You take another bit of the flatbread. It’s so good. It’s now dawning on you that you’re eating food made by it’s original creator, which makes it taste a hundred times better.
The room has been silent for a beat too long and Shinsou watches you carefully. “Have I weirded you out?”
“No! No, not at all, I’m just. I’m shocked. And embarrassed. I’ve been- I’ve been thirsting over you to your face.” You rush out, eyes darting away from the careful look on his face.
Shinsou holds up his hands. “Hey, don’t stop on my account.”
You huff a laugh. Shinsou still looks worried, though. He sighs, running a hand through his hair.
“The second I realised, I knew I had to tell you. I felt- I don’t know, I thought it’d be weird if I knew and you didn’t.”
“I thought you’d figure it out while we were cooking.” He gestures towards his kitchen. “It’s the same setup as my videos, you know.”
You yawn. “Shinsou, it’s six in the morning and I haven’t slept a wink. You think I have the energy to figure out this mystery?”
He snorts. “Apologies, apologies. I thought the baking was a nice touch.”
You smile. “Yeah, a little.”
“Well. Now that you know, and we’ve gotten all the awkward introductions out the way.” Shinsou looks at you again with those bright purple eyes, his hand reaches down to grab yours. “Will you finally say yes to my request for dinner?”
“Hm. If you let me help you cook, then sure.”
—————————————————————————-
anon I love u lemme lips u.. this is such a good prompt it was so fun to write!!!! And guys plz formatting all that text nearly killed me.
I hope u all enjoyed!!
#b3ach bunn7#oneshot#fluff#mha shinso hitoshi#bnha shinso hitoshi#hitoshi shinso x reader#mha shinsou#shinsou x reader#bnha shinsou hitoshi#bnha shinsou#shinsou hitoshi#hitoshi shinsou#shinsou hitoshi x reader#shinsou x you#shinsou x y/n#shinsou fluff
42 notes
·
View notes
Note
Random idea I just had
There would be a very secret hieroglyph in the Temple of the Red Sun, or maybe some other temple,
Basically it's a figure with vague details. With However many swords there are that we have to collect, and with the more swords we collect there's a very faint glow of the sword's color when that sword is in our possession
Basically the details would vaguely look like our character, but in the game it would just look like your average Roblox noob / base
I like to think we are part of a much bigger picture, probably as the main hero of sorts, and Shedletsky would most likely know the entire time, but he never tells us
The Sword guardians seem to be depicted as some sort of obstacles that will soon move to our side as some sort of help
And the people we repeatedly run into (tutorial Terry and kyoko) are some sort of guides to the right path that we must take
If you have any more ideas please add them to this-
🤔
uhhh idk man lol but
#block tales#block tales headcanons#block tales roblox#player block tales#shedletsky block tales#askladyinwhiteandfam
28 notes
·
View notes
Text

slowly I'm recovering the beauty of discovery
(creature by half•alive)
(textless + timelapse below cut)

#yellowart#subnautica#i feel like the timelapse is kinda long but also this did take a long time to make#anyways. let me yap about the meanings of all the panels <3#'i am creation' -> the ocean being the source of life and where shit evolved from also a good way to sort of 'set the scene' for subnautica#'both haunted' -> GHOST leviathan; in the BONE fields#'and holy' -> this one was a bit trickier. debated about using the emperor but i knew i wanted to use her elsewhere#also debated hoverfish because its cute and well liked so i thought that would be funny for 'and holy'#also something something jesus walking on water also makes it fitting. in the end though i decided on a peeper with the enzyme trail#and i *tried* to make it loop over its head like a halo but idk how well that imagery came through. still mentioned it in the alt text tho.#'made in glory' -> was REALLY torn about this one. on the one hand i wanted to have like a picture of the code because something something#divine machine and it being made out of code making it inherently holy or something; but i wasnt sure if that would be too#'immersion breaking' since most of the stuff in this is like in game stuff i wasnt sure if acknowledging that it was a game would be#too much. my other idea was to draw a couple of creature eggs like a stalker egg and a spadefish egg or something; but in the end i just#went with the one that i personally thought was cooler so if you think it does feel out of place uhhhh sorry i guess lmao.#also yes that is code from the game. idk shit about programming i just think code shit is cool so i poked though a modding tutorial til i#found what it is they use to look at that shit and started poking around. its pretty cool tbh. anyways the specific part i chose for the#drawing was something under the peepers; i think its the bit that tells the enzyme peepers to do the enzyme stuff like the trail obviously#but also some other stuff. not 100% sure though like i said idk shit about this sort of thing but everything in there seems pretty well#labeled its kinda impressive. and very helpful for navigating even if you dont know shit lol.#anyways. 'even the depths of the night cannot blind me' -> blood kelp trench is i think one of the darkest biomes in the game#possibly THE darkest so i thought it would be fitting. probably my least favorite panel though i dont think i did a very good job#representing the area or representing the bloodvines :/#'when you guide me' -> sea emperor but more specifically her messages to the player telling you to 'come here'#'creature only' -> not sure how well i can articulate this but basically the idea of humans beig animals with animal needs to eat and drink#and the idea of being a part of the ecosystem. modern life tends to make us forget that sort of thing but id imagine for ryley being on the#planet would violently remind him of this with things trying to eat him while he has to try to eat things as well. being part of the food#web. 'creature only' because he is only a creature not non-essential systems maintenance chief; but a creature living in an environment and#trying to survive. or something like that. does that make any fucking sense to anyone besides me? whatever.#anyways yapping over 👍
20 notes
·
View notes
Text
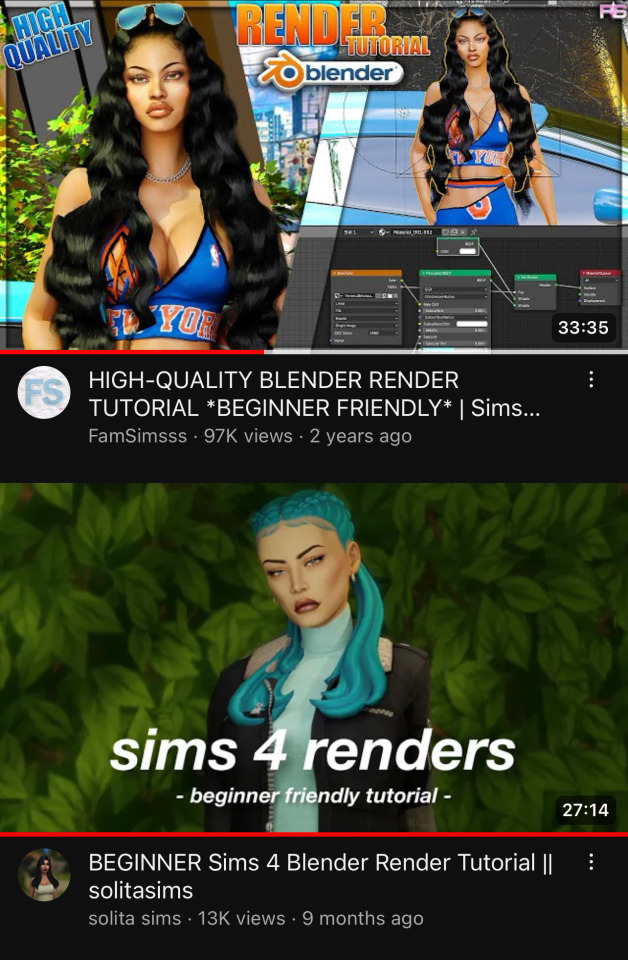
these are the two tutorials i followed when i first started out with sims renders! they’re super easy to follow along with (and as you can see, i go back to the first one all the time for help) !!! links: 1 / 2
#ts4#ts4 resources#ts4 tutorial#idk how to tag this#these are probably the first videos you’ll see if you search ‘sims render’ but i wanted to share anyway#they’re very helpful
85 notes
·
View notes
Text
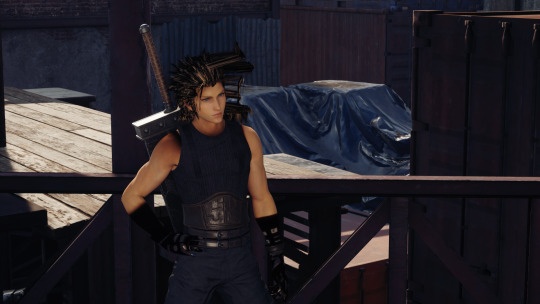
I tried to mod something and the good news is, it didn't crash the game. 🥳 The bad news is, not what I was looking for lmao.
Like, don't get me wrong. I've seen way worse (the stuff of nightmares) on a modding channel I've been teaching myself this stuff lately, so. It's not like I completely fucked this thing up or anything like that.
It's just... I still gotta ask though.
What went wrong here?
#personal#my mods#(sort of kjdkd)#i was just lamenting this stuff on a fandom discord channel. saying i'm at my wits' end here and about to quit this shit#i tried following a tutorial on a modding channel and i got the whole thing working for the most part#he's sized correctly. animations seem to work. nothing is stretching apart from hair. the textures are all fucked up now but yeah#but because what i'm trying to do here is a little different than what that tutorial does#(they still keep pointing to that very same tutorial though)#it seems that either i did something wrong. maybe i skipped some important part?#(because one answer claimed if it's a model extracted from the same game it doesn't need to be rigged or weight-painted)#but then that video tutorial also says you need to separate some parts so that nothing's stretching etc.#which is obviously a thing that's happening above. that hair is in fact stretching. A LOT#i'm guessing because cloud and zack have different hair. so they must have different hair physics or something#but then. i also learned on that channel that zack doesn't have his own animations. because he's neither playable/non-playable#because he only appears in this one cutscene towards the end of the game. he has his own model and textures though#so i don't know whether that means he doesn't have his own physics either or...?#meaning i probably need to use another model's hair physics as well and somehow transfer them on zack's hair too or smth like that maybe#i don't know. i'm so confused#like i've put so much effort into this. so many retries already. i'm getting sick of the shaders input part actually lmao#and i'm so close but i'm stuck!#i tried asking for help on a modding channel but because my question didn't get answered in a couple of hours i chickened out and deleted i#and now i'm like i need help. i just don't know what i did wrong 🙈 i need strength and courage
10 notes
·
View notes
Text
Crazy to me still that the dragon tears are just something you can not do
#like. my first playthrough. i did start the quest but i couldnt find the tear location (wasnt really looking very hard probably)#so i just. left. i didnt come back ever because i straight up didnt think the tears were important#the only reason i saw them before i completed the game was because i was putting off fighting ganondorf. wanted something else to do.#like imagine. you get the master sword from the random dragon (dont know shit about it). maybe this is before the fight or during.#then this dragon just sticks around and helps you. and then?? that guy from the tutorial and the sages memories shows up.#and then this random woman youve never seen before. and then fucking zelda is there somehow???????#crazy.#mb's two am rambling#totk
2 notes
·
View notes
Note
im hshntdgj im so sorry for asking smth again i really aaaa hope its not a bother bbbut in spirit of october i just wanted to know if you got any tips for drawing gore and stuff? antway thnx heres a little guy w a hat in compensation for being annoying: <]:D
HI okay um. im terrible at explaining things but!!my process for drawing blood before i talk about the guts and stuff!
ik this looks kinda fucking terrible BUT ITS OK
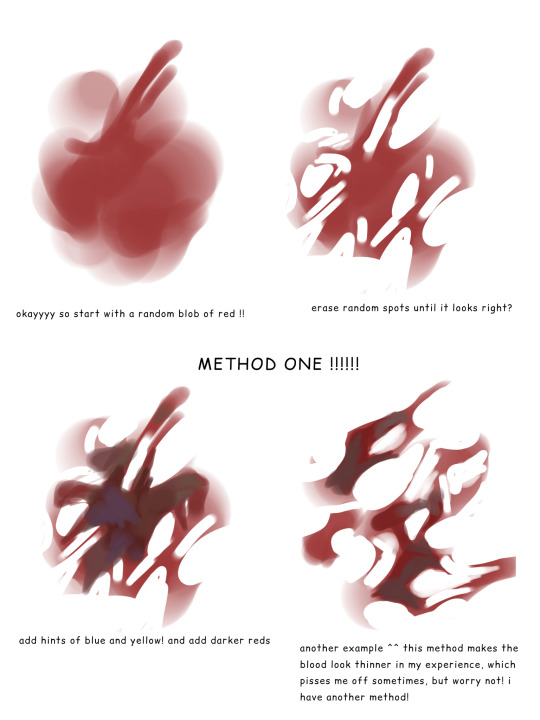
^^this is the more boring method. i feel like there isnt as much depth to the blood, but that's cuz i only use this for blood splatters! but since i got less time during goretober, ive been using this lol
NEXT METHOD! sorry this might be a long post
here's an example. i have no damn clue how i did this, so dont ask
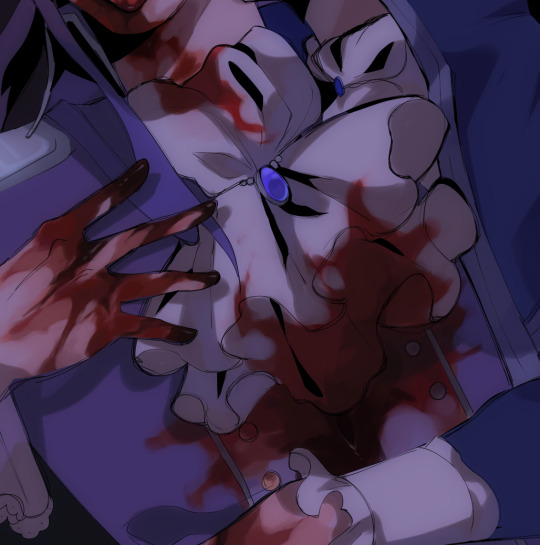
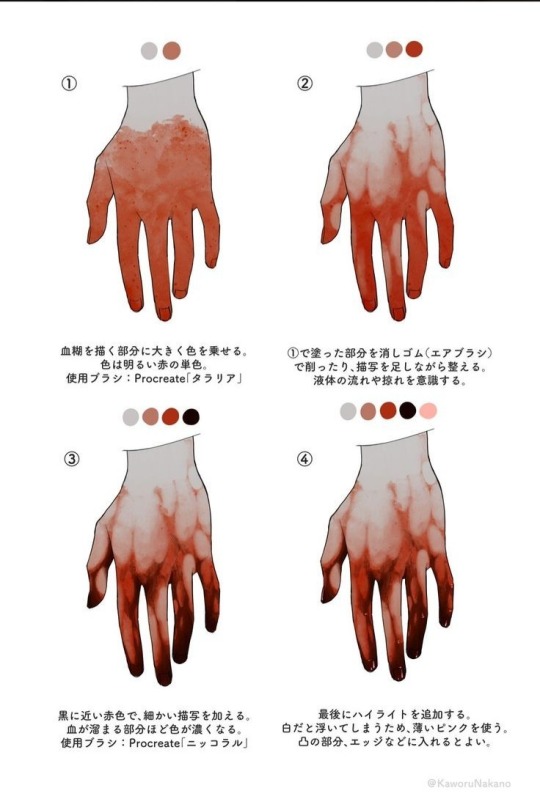
i really cant explain this better, so ill show u an explanation by kaworunakano on twitter
i add more hints of blue and yellow, but this sums up the way i draw blood. regarding the whole guts thing ....uh
...i dont really know anything about anatomy or whatever. my number one tip is just remember that they fold .like

they fold !!!
highlights really enhance the way i draw guts and stuff, which is why i like using blue! for contrast and all that jazz. im very new to drawing gore, but ive heard lots of people say that u should visualize them as sausages or something
#SORRY I DONT KNOW IF U QANTED A TUTORIAL OR JUST TIPS BUT I GOT CARRIED AWAY#again im very new to this so idk if this was helpful like. at all#pinterest would probably help more lol#.asks#.txt
23 notes
·
View notes
Text
blue prince is gonna make me set up a conspiracy theory corkboard with red string wall
#going into this game knowing it's a deep puzzle game where every little detail could matter : i gotta write Everything down#2 hours later : maybe i'm overthinking this maybe not everything is super relevant i'll just see#2 more hours later : i gotta write everything down and make a spreadsheet and draw a map and hire benoit blanc#christ how compelling this fucking thing is. i don't even know what specifically makes it scratch my brain so well but#ourgh#i don't want to say anything that could be a spoiler because it really is a game you must go in with 0 knowledge of it#but god... realizing that One element that's in basically every room had a common pattern#and having to solve a fucking riddle every time to find what the pattern is leading to#AND STILL NOT KNOWING WTF I'M MEANT TO DO WITH THE ANSWERS I GET OUT OF THEM GKFJFJDJD#i'm gonna gnaw my skin off#so anyway. it's a puzzle escape room-ish roguelike#you're in a mansion where YOU get to pick which room is behind every door you open#so it's your job to create the layout of the mansion and make sure you avoid being stuck with dead ends everywhere#you've got a limited amount of energy to explore. the rooms you can pick from when you reach a door are random.#you're gonna need to find keys you're gonna need to find coins you're gonna need to find gems#there's special rooms that have specific roles there's nothingburger hallways there's little minigames#there's items you can find that help you like a shovel or a hammer you can break chests open with#but anyway when you're out of energy or when you've nowhere left to go your run ends and everything in the mansion is reset#(except for very specific things you unlock which i won't detail)#so you basically start over Except with all the knowledge that you've gathered on your previous attempts#so maybe you found a password for something and then in the new run you find the thing the password unlocks#your main goal is to reach a very specific room at the other end of the mansion AND EVEN THEN#i haven't reached it myself but i imagine even if you manage to get there there's probably Something you need to do/have done#to really succeed like there is A LOT GOING ON#you're dropped in there no tutorial except little notes you find around the mansion no NPCs just you and your map#it's fucking brilliant if you're into puzzle games and mysteries and don't mind “slow” gameplay try it ouuuuut#it's still a bit RNG based what with being a roguelike but that's the thing innit#you keep going because you hope you'll eventually find all the right things in the right place for you to put together
0 notes
Text
⭐ So you want to learn pixel art? ⭐
🔹 Part 1 of ??? - The Basics!
Edit: Now available in Google Doc format if you don't have a Tumblr account 🥰
Hello, my name is Tofu and I'm a professional pixel artist. I have been supporting myself with freelance pixel art since 2020, when I was let go from my job during the pandemic.


My progress, from 2017 to 2024. IMO the only thing that really matters is time and effort, not some kind of natural talent for art.
This guide will not be comprehensive, as nobody should be expected to read allat. Instead I will lean heavily on my own experience, and share what worked for me, so take everything with a grain of salt. This is a guide, not a tutorial. Cheers!
🔹 Do I need money?
NO!!! Pixel art is one of the most accessible mediums out there.
I still use a mouse because I prefer it to a tablet! You won't be at any disadvantage here if you can't afford the best hardware or software.
Because our canvases are typically very small, you don't need a good PC to run a good brush engine or anything like that.
✨Did you know? One of the most skilled and beloved pixel artists uses MS PAINT! Wow!!
🔹 What software should I use?
Here are some of the most popular programs I see my friends and peers using. Stars show how much I recommend the software for beginners! ⭐
💰 Paid options:
⭐⭐⭐ Aseprite (for PC) - $19.99
This is what I and many other pixel artists use. You may find when applying to jobs that they require some knowledge of Aseprite. Since it has become so popular, companies like that you can swap raw files between artists.
Aseprite is amazingly customizable, with custom skins, scripts and extensions on Itch.io, both free and paid.
If you have ever used any art software before, it has most of the same features and should feel fairly familiar to use. It features a robust animation suite and a tilemap feature, which have saved me thousands of hours of labour in my work. The software is also being updated all the time, and the developers listen to the users. I really recommend Aseprite!
⭐ Photoshop (for PC) - Monthly $$
A decent option for those who already are used to the PS interface. Requires some setup to get it ready for pixel-perfect art, but there are plenty of tutorials for doing so.
Animation is also much more tedious on PS which you may want to consider before investing time!
⭐⭐ ProMotion NG (for PC) - $19.00
An advanced and powerful software which has many features Aseprite does not, including Colour Cycling and animated tiles.
⭐⭐⭐ Pixquare (for iOS) - $7.99 - $19.99 (30% off with code 'tofu'!!)
Probably the best app available for iPad users, in active development, with new features added all the time.

Look! My buddy Jon recommends it highly, and uses it often.
One cool thing about Pixquare is that it takes Aseprite raw files! Many of my friends use it to work on the same project, both in their office and on the go.
⭐ Procreate (for iOS) - $12.99
If you have access to Procreate already, it's a decent option to get used to doing pixel art. It does however require some setup. Artist Pixebo is famously using Procreate, and they have tutorials of their own if you want to learn.
⭐⭐ ReSprite iOS and Android. (free trial, but:) $19.99 premium or $$ monthly
ReSprite is VERY similar in terms of UI to Aseprite, so I can recommend it. They just launched their Android release!
🆓 Free options:
⭐⭐⭐ Libresprite (for PC)
Libresprite is an alternative to Aseprite. It is very, very similar, to the point where documentation for Aseprite will be helpful to Libresprite users.
⭐⭐ Pixilart (for PC and mobile)
A free in-browser app, and also a mobile app! It is tied to the website Pixilart, where artists upload and share their work. A good option for those also looking to get involved in a community.
⭐⭐ Dotpict (for mobile)
Dotpict is similar to Pixilart, with a mobile app tied to a website, but it's a Japanese service. Did you know that in Japanese, pixel art is called 'Dot Art'? Dotpict can be a great way to connect with a different community of pixel artists! They also have prompts and challenges often.
🔹 So I got my software, now what?
◽Nice! Now it's time for the basics of pixel art.
❗ WAIT ❗ Before this section, I want to add a little disclaimer. All of these rules/guidelines can be broken at will, and some 'no-nos' can look amazing when done intentionally.
The pixel-art fundamentals can be exceedingly helpful to new artists, who may feel lost or overwhelmed by choice. But if you feel they restrict you too harshly, don't force yourself! At the end of the day it's your art, and you shouldn't try to contort yourself into what people think a pixel artist 'should be'. What matters is your own artistic expression. 💕👍
◽Phew! With that out of the way...
🔸"The Rules"
There are few hard 'rules' of pixel art, mostly about scaling and exporting. Some of these things will frequently trip up newbies if they aren't aware, and are easy to overlook.
🔹Scaling method
There are a couple ways of scaling your art. The default in most art programs, and the entire internet, is Bi-linear scaling, which usually works out fine for most purposes. But as pixel artists, we need a different method.


Both are scaled up x10. See the difference?
On the left is scaled using Bilinear, and on the right is using Nearest-Neighbor. We love seeing those pixels stay crisp and clean, so we use nearest-neighbor.
(Most pixel-art programs have nearest-neighbor enabled by default! So this may not apply to you, but it's important to know.)
🔹Mixels
Mixels are when there are different (mixed) pixel sizes in the same image.

Here I have scaled up my art- the left is 200%, and the right is 150%. Yuck!
As we can see, the "pixel" sizes end up different. We generally try to scale our work by multiples of 100 - 200%, 300% etc. rather than 150%. At larger scales however, the minute differences in pixel sizes are hardly noticeable!
Mixels are also sometimes seen when an artist scales up their work, then continues drawing on it with a 1 pixel brush.

Many would say that this is not great looking! This type of pixels can be indicative of a beginner artist. But there are plenty of creative pixel artists out there who mixels intentionally, making something modern and cool.
🔹Saving Your Files
We usually save our still images as .PNGs as they don’t create any JPEG artifacts or loss of quality. It's a little hard to see here, but there are some artifacts, and it looks a little blurry. It also makes the art very hard to work with if we are importing a JPEG.

For animations .GIF is good, but be careful of the 256 colour limit. Try to avoid using too many blending mode layers or gradients when working with animations. If you aren’t careful, your animation could flash afterwards, as the .GIF tries to reduce colours wherever it can. It doesn’t look great!

Here's an old piece from 2021 where I experienced .GIF lossiness, because I used gradients and transparency, resulting in way too many colours.
🔹Pixel Art Fundamentals - Techniques and Jargon
❗❗Confused about Jaggies? Anti-Aliasing? Banding? Dithering? THIS THREAD is for you❗❗ << it's a link, click it!!
As far as I'm concerned, this is THE tutorial of all time for understanding pixel art. These are techniques created and named by the community of people who actually put the list together, some of the best pixel artists alive currently. Please read it!!
🔸How To Learn
Okay, so you have your software, and you're all ready to start. But maybe you need some more guidance? Try these tutorials and resources! It can be helpful to work along with a tutorial until you build your confidence up.
⭐⭐ Pixel Logic (A Digital Book) - $10 A very comprehensive visual guide book by a very skilled and established artist in the industry. I own a copy myself.
⭐⭐⭐ StudioMiniBoss - free A collection of visual tutorials, by the artist that worked on Celeste! When starting out, if I got stuck, I would go and scour his tutorials and see how he did it.
⭐ Lospec Tutorials - free A very large collection of various tutorials from all over the internet. There is a lot to sift through here if you have the time.
⭐⭐⭐ Cyangmou's Tutorials - free (tipping optional) Cyangmou is one of the most respected and accomplished modern pixel artists, and he has amassed a HUGE collection of free and incredibly well-educated visual tutorials. He also hosts an educational stream every week on Twitch called 'pixelart for beginners'.
⭐⭐⭐ Youtube Tutorials - free There are hundreds, if not thousands of tutorials on YouTube, but it can be tricky to find the good ones. My personal recommendations are MortMort, Brandon, and AdamCYounis- these guys really know what they're talking about!
🔸 How to choose a canvas size
When looking at pixel art turorials, we may see people suggest things like 16x16, 32x32 and 64x64. These are standard sizes for pixel art games with tiles. However, if you're just making a drawing, you don't necessarily need to use a standard canvas size like that.
What I like to think about when choosing a canvas size for my illustrations is 'what features do I think it is important to represent?' And make my canvas as small as possible, while still leaving room for my most important elements.
Imagine I have characters in a scene like this:

I made my canvas as small as possible (232 x 314), but just big enough to represent the features and have them be recognizable (it's Good Omens fanart 😤)!! If I had made it any bigger, I would be working on it for ever, due to how much more foliage I would have to render.
If you want to do an illustration and you're not sure, just start at somewhere around 100x100 - 200x200 and go from there.
It's perfectly okay to crop your canvas, or scale it up, or crunch your art down at any point if you think you need a different size. I do it all the time! It only takes a bit of cleanup to get you back to where you were.
🔸Where To Post
Outside of just regular socials, Twitter, Tumblr, Deviantart, Instagram etc, there are a few places that lean more towards pixel art that you might not have heard of.
⭐ Lospec Lospec is a low-res focused art website. Some pieces get given a 'monthly masterpiece' award. Not incredibly active, but I believe there are more features being added often.
⭐⭐ Pixilart Pixilart is a very popular pixel art community, with an app tied to it. The community tends to lean on the young side, so this is a low-pressure place to post with an relaxed vibe.
⭐⭐ Pixeljoint Pixeljoint is one of the big, old-school pixel art websites. You can only upload your art unscaled (1x) because there is a built-in zoom viewer. It has a bit of a reputation for being elitist (back in the 00s it was), but in my experience it's not like that any more. This is a fine place for a pixel artist to post if they are really interested in learning, and the history. The Hall of Fame has some of the most famous / impressive pixel art pieces that paved the way for the work we are doing today.
⭐⭐⭐ Cafe Dot Cafe Dot is my art server so I'm a little biased here. 🍵 It was created during the recent social media turbulence. We wanted a place to post art with no algorithms, and no NFT or AI chuds. We have a heavy no-self-promotion rule, and are more interested in community than skill or exclusivity. The other thing is that we have some kind of verification system- you must apply to be a Creator before you can post in the Art feed, or use voice. This helps combat the people who just want to self-promo and dip, or cause trouble, as well as weed out AI/NFT people. Until then, you are still welcome to post in any of the threads or channels. There is a lot to do in Cafe Dot. I host events weekly, so check the threads!
⭐⭐/r/pixelart The pixel art subreddit is pretty active! I've also heard some of my friends found work through posting here, so it's worth a try if you're looking. However, it is still Reddit- so if you're sensitive to rude people, or criticism you didn't ask for, you may want to avoid this one. Lol
🔸 Where To Find Work
You need money? I got you! As someone who mostly gets scouted on social media, I can share a few tips with you:
Put your email / portfolio in your bio Recruiters don't have all that much time to find artists, make it as easy as possible for someone to find your important information!
Clean up your profile If your profile feed is all full of memes, most people will just tab out rather than sift through. Doesn't apply as much to Tumblr if you have an art tag people can look at.
Post regularly, and repost Activity beats everything in the social media game. It's like rolling the dice, and the more you post the more chances you have. You have to have no shame, it's all business baby
Outside of just posting regularly and hoping people reach out to you, it can be hard to know where to look. Here are a few places you can sign up to and post around on.
/r/INAT INAT (I Need A Team) is a subreddit for finding a team to work with. You can post your portfolio here, or browse for people who need artists.
/r/GameDevClassifieds Same as above, but specifically for game-related projects.
Remote Game Jobs / Work With Indies Like Indeed but for game jobs. Browse them often, or get email notifications.
VGen VGen is a website specifically for commissions. You need a code from another verified artist before you can upgrade your account and sell, so ask around on social media or ask your friends. Once your account is upgraded, you can make a 'menu' of services people can purchase, and they send you an offer which you are able to accept, decline, or counter.
The evil websites of doom: Fiverr and Upwork I don't recommend them!! They take a big cut of your profit, and the sites are teeming with NFT and AI people hoping to make a quick buck. The site is also extremely oversaturated and competitive, resulting in a race to the bottom (the cheapest, the fastest, doing the most for the least). Imagine the kind of clients who go to these websites, looking for the cheapest option. But if you're really desperate...
🔸 Community
I do really recommend getting involved in a community. Finding like-minded friends can help you stay motivated to keep drawing. One day, those friends you met when you were just starting out may become your peers in the industry. Making friends is a game changer!
Discord servers Nowadays, the forums of old are mostly abandoned, and people split off into many different servers. Cafe Dot, Pixel Art Discord (PAD), and if you can stomach scrolling past all the AI slop, you can browse Discord servers here.
Twitch Streams Twitch has kind of a bad reputation for being home to some of the more edgy gamers online, but the pixel art community is extremely welcoming and inclusive. Some of the people I met on Twitch are my friends to this day, and we've even worked together on different projects! Browse pixel art streams here, or follow some I recommend: NickWoz, JDZombi, CupOhJoe, GrayLure, LumpyTouch, FrankiePixelShow, MortMort, Sodor, NateyCakes, NyuraKim, ShinySeabass, I could go on for ever really... There are a lot of good eggs on Pixel Art Twitch.
🔸 Other Helpful Websites
Palettes Lospec has a huge collection of user-made palettes, for any artist who has trouble choosing their colours, or just wants to try something fun. Rejected Palettes is full of palettes that didn't quite make it onto Lospec, ran by people who believe there are no bad colours.
The Spriters Resource TSR is an incredible website where users can upload spritesheets and tilesets from games. You can browse for your favourite childhood game, and see how they made it! This website has helped me so much in understanding how game assets come together in a scene.
VGMaps Similar to the above, except there are entire maps laid out how they would be played. This is incredible if you have to do level design, or for mocking up a scene for fun.
Game UI Database Not pixel-art specific, but UI is a very challenging part of graphics, so this site can be a game-changer for finding good references!
Retronator A digital newspaper for pixel-art lovers! New game releases, tutorials, and artworks!
Itch.io A website where people can upload, games, assets, tools... An amazing hub for game devs and game fans alike. A few of my favourite tools: Tiled, PICO-8, Pixel Composer, Juice FX, Magic Pencil for Aseprite
🔸 The End?
This is just part 1 for now, so please drop me a follow to see any more guides I release in the future. I plan on doing some writeups on how I choose colours, how to practise, and more!
I'm not an expert by any means, but everything I did to get to where I am is outlined in this guide. Pixel art is my passion, my job and my hobby! I want pixel art to be recognized everywhere as an art-form, a medium of its own outside of game-art or computer graphics!

This guide took me a long time, and took a lot of research and experience. Consider following me or supporting me if you are feeling generous.
And good luck to all the fledgling pixel artists, I hope you'll continue and have fun. I hope my guide helped you, and don't hesitate to send me an ask if you have any questions! 💕
My other tutorials (so far): How to draw Simple Grass for a game Hue Shifting
28K notes
·
View notes
Text
Low space & low budget weaving
Want to weave but don't have space for a loom? Have a few sticks and yarns but no DIY skills? Come, be tempted anyway. Weaving is a whole family of crafts, some of which don't require a loom at all.
Small-ish looms like box looms (as basic as yarn wrapped around a cardboard grocery tray), inkle looms, and rigid heddle looms exist, but I'm assuming every possible space for a box in your life is already filled. In this post we're going even smaller and cheaper. As far as possible, everything either is flat enough to stow behind/under furniture or rolls up safely into a bundle of just sticks and yarn.
Many of these crafts have some crossover - the same setup can be used for multiple styles of weaving. Most of them can be improvised at home depending on what you have on hand, or if you need to buy something there is not a huge gulf between homemade vs professional equipment. Alas I am not skilled in any of these and my descriptions will not be wholly accurate; corrections and additions welcome! If you need help, I'd only be able to tell you to seek out books and tutorials yourself, ask other weavers, and just try stuff out.
All photos included with permission. My thanks to the people allowing me to use their projects! I saw so many gorgeous and skillful projects when assembling this and I wish I could have included them all.
Fingerweaving
Projects by @kitteniestkitten (here) and @wefty-weaver (here)
Culture - I am aware of this as a Native American technique, I don't know its history with any more specific nation.
Fabric - "Warp faced" cloth of any width, insofar as warp and weft have meaning for this craft as the weaving is on a diagonal. Often used for sashes or blankets.
Method - There is no loom! A couple sticks hold the yarns to begin with, but then it is all freehand. Starting at one corner, you use your fingers to weave a strand through the other strands, and... that's it. Very simple beginnings work up to very complex patterns that no loom is capable of. The whole project can be rolled up when not active.
Backstrap loom
Projects by @calendae-creations (here) and @weavingforlooms (here)
Culture - I am most aware of this from the Andes but I think it is much more widespread than that.
Fabric - Warp faced or balanced fabric of any width up to your own reach, suitable for blankets and clothes and many other things.
Method - You are the loom! Several horizontal rods hold and manipulate the warp threads but your body provides the tension, with the other end hooked to some furniture or around your own feet. When not in use, you can roll up all the equipment into a small bundle of yarn and rods. You can also use a backstrap loom setup for other methods like tablet weaving.
Warp weighted loom
Projects by @shadowcreepling (here) and @doctormead (here)
Culture - used by ancient Greeks among many many others.
Fabric - any kind of fabric at any size. Shadowcreepling is using a warp weighted loom for a tablet-woven band, Doctormead is probably using heddle rods to make a wider piece of cloth.
Method - the warp threads are held by a bar at the top and tensioned with weights on one end that hang down towards the floor, then the weft is woven into them with any method such as tablets, heddle rods, or by hand (if you have a lot of patience) and beaten into firm fabric at the top or bottom of the loom. Warp weighted looms can be very big, but they are simple and can also be very small and taken apart when not actively weaving.
Tablet weaving / card weaving
Projects by @damage-ko (here) and @foxease (here, hardware from CellesKit on Etsy)
Culture - found as far apart as textiles (geographically and temporally) from Byzantine Egypt and the Vikings
Fabric - a warp faced fabric with patterns made by twining warp threads around each other, usually used for strong narrow bands like collars, belts, and shoelaces.
Method - the cards hold open the shed so you can pass the weft through, then rotate the cards to advance the pattern. Many people make their own with cardboard or playing cards, or you can buy some. The rest of the weaving setup can be improvised with a backstrap (or just a shower curtain hook clipped to your trousers), a cardboard box loom, or warp weights.
Rigid heddle band weaving
Projects by @pisaracraft (here) and @crookedtines (here)
Culture - small rigid heddles like the first project have been found in Roman archaeological sites across Europe. The larger rigid heddle in the second project is being used for "baltic pickup" style designs on the band.
Fabric - can be warp faced or a balanced weave, size limited by the size of your heddle.
Method - you provide tension with any setup you please such as an inkle loom, backstrap, or warp weights. The heddle creates sheds so that you can pass weft yarn through the warp easily. Infinitely many "pick-up patterns" let you weave patterns and even words into the cloth.
Pin loom / potholder loom
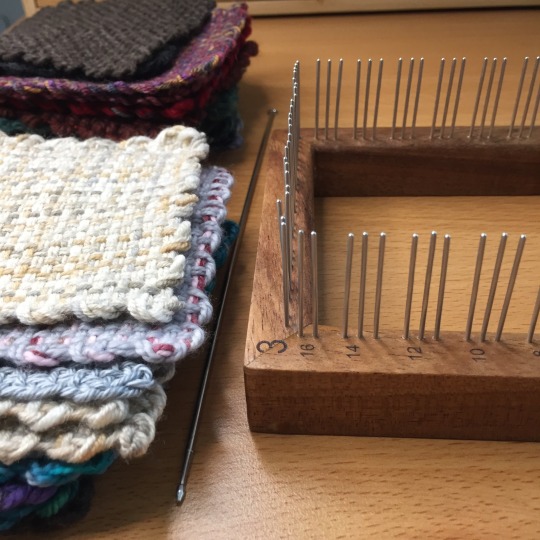
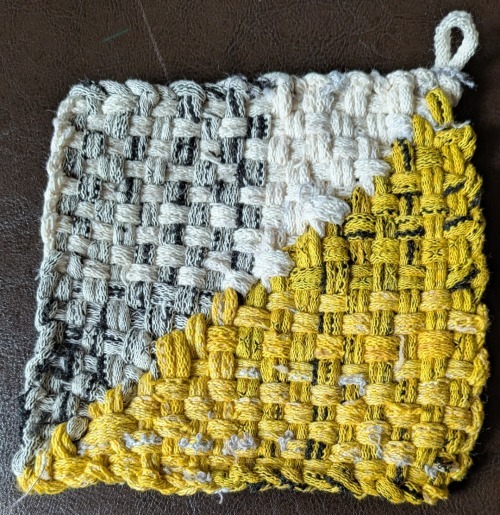
Projects by @pardalote (here) and @weavingmyheartout (here)
Fabric - a small square (or rectangle or triangle) of balanced weaving, which can be used alone or patched together into larger fabrics. Pin looms are finer and suitable for many knitting/crochet yarns, potholer looms are chunkier and designed for big elastics, but the method is similar.
Method - wind yarn lengthways around one set of pins and then pull yarn widthways through these strands with a hook. Or, work at 45 degrees in continuous strand weaving! Lots of room to experiment with colour and texture. You can improvise a pin loom by cutting notches in a square of sturdy cardboard.
Needle weaving / stick weaving / peg loom

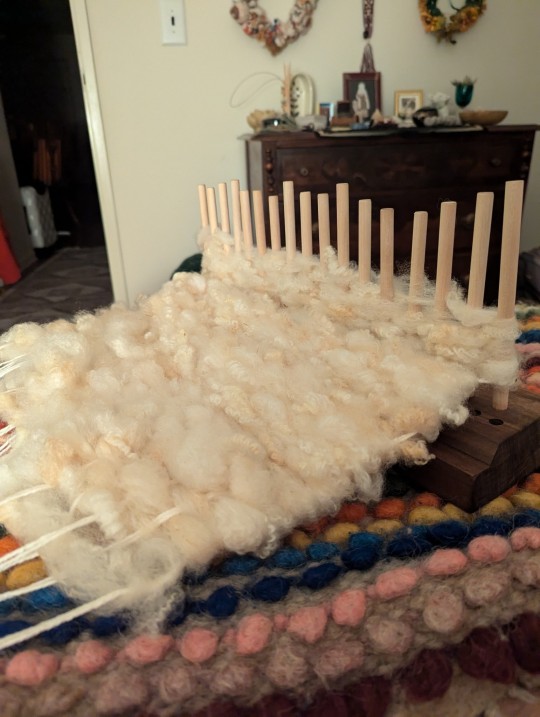
Projects by @thaylepo (here) and @pastelispunx (here)
Fabric - weft-faced fabric and rugs of any size.
Method - thread long thin warp threads through the pegs, then wind a thick weft (eg heavier yarn, sheep fleece, or long scraps of fabric) around the pegs. Push the weft down along the pegs as they fill up, so that it slides off onto the warp. The pegs can be secured in a base to make a peg loom for large projects, or just handled freely. I believe these evolved as separate crafts and the nuances are different, but the overall method is similar.
Frame loom / tapestry loom
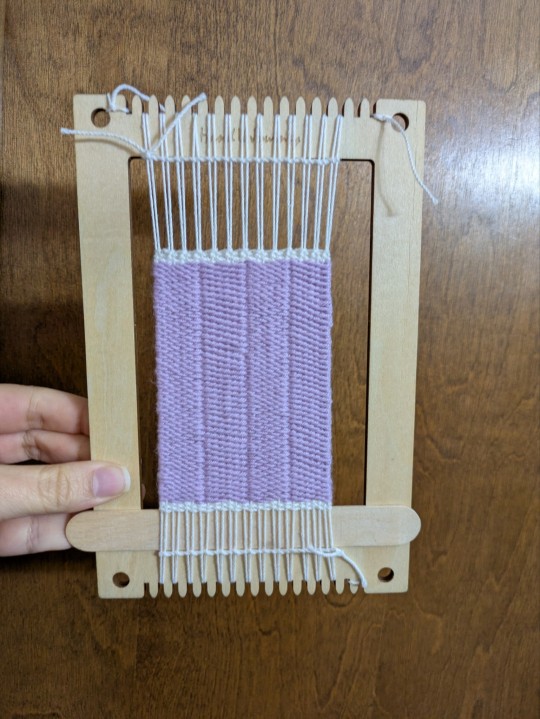
Projects by @squeakygeeky (here) and @battlestar-gasmacktica (here)
Fabric - weft-faced or balanced fabric ideal for wall hangings and upholstery, size limited to the frame being used.
Method - (usually) thinner warp threads are wound round a frame, such as heavy cardboard with notches cut in the end, a picture frame, or a small and flat purpose-made loom. Thicker weft threads are woven in by hand using needles or just small lengths of yarn. Some people make lifelike images, others make more ordinary fabrics or geometric patterns.
Bobbin lace
Projects by @crochetpiece (here) and @noxx-notions (here)
Culture - began in renaissance Italy and spread throughout Europe, often as a cottage industry.
Fabric - balanced fabric usually made of very thin threads in freeform shapes. It's not usually considered "weaving" but the basic cloth stitch is definitely a woven fabric!
Method - each thread is wound onto a bobbin (e.g. a clothespeg) and then bobbins are crossed over each other to weave threads together. The lace is pinned to a cushion to hold everything in place while the design grows.
#long post#weaving#beginner weaving#weaving resources#(deep breath)#fingerweaving#backstrap loom#tablet weaving#card weaving#warp weighted loom#backstrap weaving#peg loom#pin loom#frame loom#tapestry loom#cardboard loom#bobbin lace#potholder loom#rigid heddle#band weaving#stick weaving#needle weaving
4K notes
·
View notes
Text
This would’ve been so helpful two days ago
I was just about to post this and I immediately saw this first thing on my dash :/
As promised, here's my Rodimus Prime breakdown/ref sheet!
#i kid i kid#I’ll probably use this reference later#I love this mech so much#I used Keferon’s tutorial on drawing robots instead#very helpful too#I will eventually master Roddy’s anatomy#maybe#I’m trying my best#transformers#rodimus prime#tf mtmte#mtmte#rodimus#lost light#grad cap#btw#my fellow grads are so sick of my robot hyper fixation lol
2K notes
·
View notes
Text
sports car
pairing: lando norris x piastri!reader
summary: the one where lando gets outed for having a crush on his teammate's little sister.
a/n: bro it's been stuck in my head for a solid week now

liked by vogue and others
yourinstagram my vogue beauty secrets tutorial is out 🪽 all products used are linked below! thank you so much for this opportunity, was insane to me when i was informed of it and still very much is!
view all comments
user1 not fair. why is everyone on insta a freaking model
user2 where's the gold necklace from? thanks queen love you <3
yourinstagram it's from brandname brandname 😉 y/n piastri repping our gear? this calls for a c...o...l...l...a........
user3 drop the skincare routine too
user4 y/n are you ever going to a grand prix?
user5 she was at oscar's f1 debut user4 yeah but never again user4 she shouldn't be too busy as a part-time influencer like
vogue we're so glad you agreed 🤍
yourinstagram kisses!
user6 my gf (real)
user7 wait. wait. why is a vogue beauty secrets video title the way i find out y/n is a formula 1 driver's sister?
user8 well tbf she doesn't usually use her full name, probably not to seem like she's mooching off his success yk user9 no girl you're good i realized that a month ago when someone posted an edit of her and tagged it with her full name
── ⟢ ・⸝⸝

liked by mclaren and others
yourinstagram best brother 🧡 yay points
tagged: oscarpiastri
view all comments
user1 she took the comments about her not showing up to his races personally
user2 wait. y/n is his sister?? user3 oscar you thought you ate
user4 forget f1 drivers i want THIS GIRL
user5 hope you had fun !! thank you for taking a photo with me and my friends liked by yourinstagram
yourinstagram i did and i hope you did too 🫶 no worries, you both were v polite and absolutely stunning user6 she's so sweet aww
oscarpiastri I think this is your first post without any selfies. Congrats.
yourinstagram are we not partially the same people yourinstagram i thought you were smart? oscarpiastri I don't think that's how it works.
── ⟢ ・⸝⸝
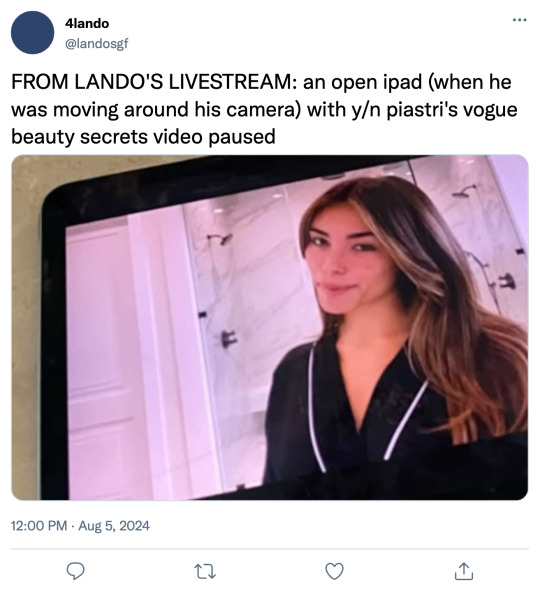
── ⟢ ・⸝⸝
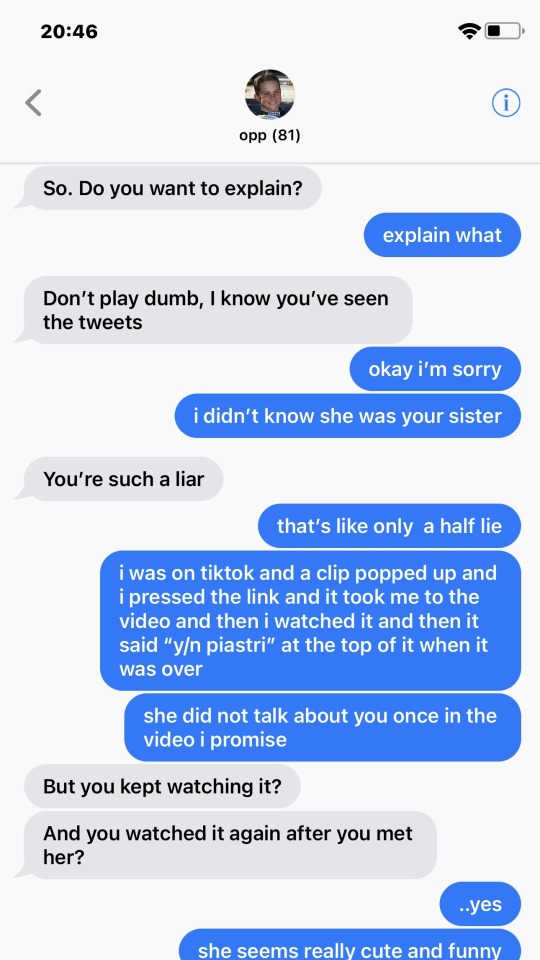
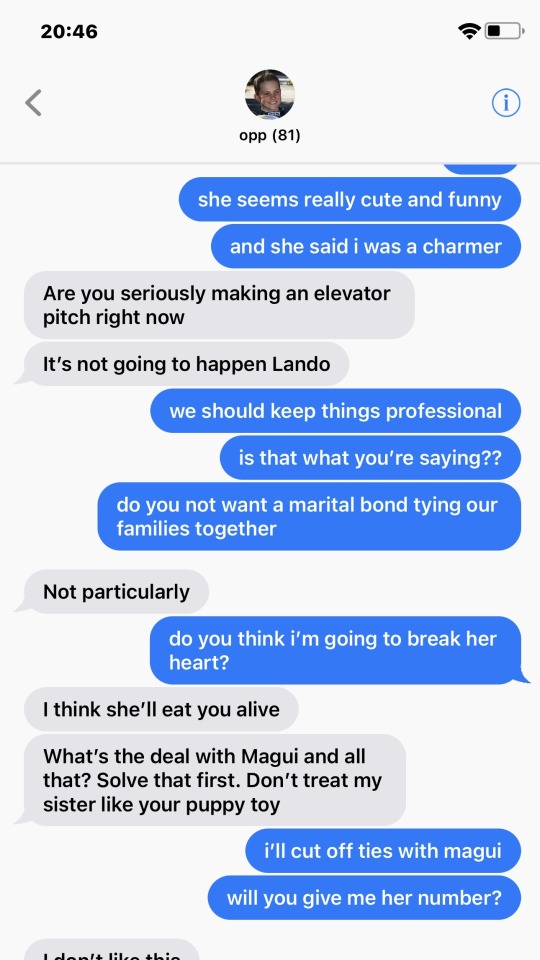
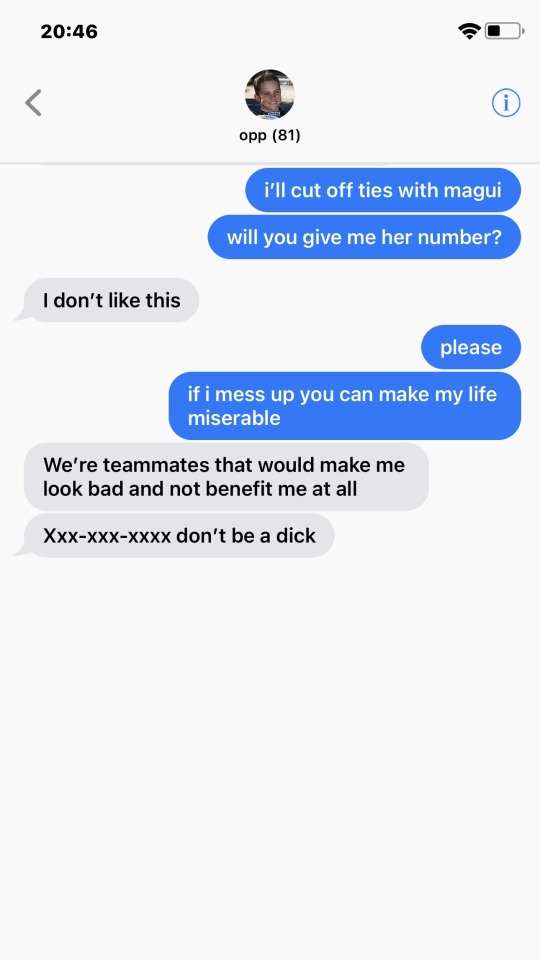
── ⟢ ・⸝⸝

liked by yourinstagram and others
lando on the move
view all comments
user1 i was not familiar with your game
user2 lando whoreizz more like? dang.
user3 I AM GOING FERAL NO ONE CAN HOLD ME BACK
user4 wait guys y/n piastri liked this 😭
user5 i pray the next time i accidentally make an idiot of myself on live stream my crush will notice me too user6 lmaooo help
user7 who are you posing for? y/n?
oscarpiastri Attention whore yourinstagram the girls are fighting!! user8 this cannot be real. polite piastri just called his teammate an attention whore user9 y/n u are so real for that
── ⟢ ・⸝⸝

liked by badgalriri, lando and others
fentybeauty Y/N Piastri is the new face of Fenty Beauty. @/yourinstagram
tagged: yourinstagram
user1 i just want to be a nepo baby.
user2 well y/n isn't really a nepo baby user3 nepo sister? user4 most of her image is built around her as js herself i think it's only recently (after her appearance at a gp) that people realized she was oscar piastri's sister cause they don't look alike and she usually only goes by y/n
user5 STUNNERRR
user6 am allowing myself to be influenced
user7 be so fr right now what is lando doing in the likes
── ⟢ ・⸝⸝

liked by oscarpiastri and others
lando austin, tx
tagged: oscarpiastri, maxfewtrell
view all comments
user1 oscar? in a cowboy hat? oh i folded my ovaries exploded i swore i was wearing clothes
lando i think you've got a fan, mate @/oscarpiastri oscarpiastri That's very kind of you
user2 the only time america serves
user3 is when a fucking brit comes over user4 live laugh love lando
user5 good luck at COTAS!! papaya army will be cheering for you *liked by lando
user6 soooo lando have you shot your shot yet?
user7 pardon? user6 i mean has he officially tried to hit on y/n yet user7 no way. she's too nonchalant to date him. piastri siblings do be the coolest crushes fr
mclaren see you, sheriff
lando this town ain't big enough for us two
user8 love to see oscar hanging out w landos friend group
── ⟢ ・⸝⸝

liked by oscarpiastri and others
yourinstagram you taste like the 4th of july
view all comments
user1 Y/NNN ARE YOU GOING TO COTAS??
user2 she must be i don't think she's ever been to the us before user3 queen y/n in mclaren paddock i'm calling it
user4 hold up am i reaching but lando posted burger joint milkshakes and she posted a burger joint and
user5 i really hate to break your bubble but there's literally no evidence to suggest they were at the SAME burger joints user6 its america its all fast food.
user7 so stunningg
oscarpiastri So you ignore your debts and post instagrams
yourinstagram what debt 😭 i paid for your concert tickets no?? oscarpiastri I paid for my concert tickets yourinstagram well we paid for each other's concert tickets yourinstagram you're jokign right do you hate me that much oscarpiastri I just wanted you to respond to me yourinstagram okay 😔 sorry brotha
── ⟢ ・⸝⸝

liked by mclaren and others
yourinstagram came to support the fam
tagged: mclaren, oscarpiastri, lando
mclaren we are so glad you did 🧡
yourinstagram the teddy is so cute i'll sleep with it every night! tysm for the wonderful welcome user1 aww
oscarpiastri I'm emotional now. Get me a tissue, please. I can't believe my sister cares about me.
yourinstagram the combination of perfect punctuation and capitalization really hit the mark. user2 he's so silly user3 oscar bfr you're glad she's finally started coming to ur races often
lando am i the fam
yourinstagram gosh i hope we're not related that would make it weird user4 well you guys are pretty close to alabama liked by yourinstagram user4 HELP??
── ⟢ ・⸝⸝

liked by mclaren and others
lando soon.
view all comments
user1 ? soon ? as in ? coming soon ?
user2 bro if he looked at me like that
user3 oscar can you explain your boyfriend's cryptic captions
yourinstagram soon.
user4 HELLO? user5 did she just acknowledge his existence user6 tf you mean soon girl lando soon. yourinstagram soon. lando soon. user7 they need help oscarpiastri You see what I have to put up with every day of my life?
── ⟢ ・⸝⸝

liked by tatemcrae and others
yourinstagram i think you know what this is
view all comments
user1 y/n and tate?
user2 the crossover we never knew we needed
user3 WAITTT YK HOW TATE HAS HER NEW MV AND SHE'S TEASING A MCLAREN DRIVER WHAT IF OSCAR OR LANDO'S DATING HER??
user4 i like the way your mind works user5 that's so awkward for her lol if it's oscar "cool you're shagging my brother" user6 or maybe it's lando probably? because he posted soon on his instagram user7 but doesn't lando have a crush on y/n? or is it not confirmed user8 girl idk
user9 baddieeees
── ⟢ ・⸝⸝
liked by tatemcrae and others
yourinstagram SPORTS CAR.
everybody say THANK YOU TATIANA ♡ seriously, what did i deserve to get to know her? she has put out a killer album, danced her ass off in stilettos, and did so during a non-stop tour. now she's starting another one. respect, a whole cartload of it.
but a little recap: obviously, tate wanted a driver in her music video about a SPORTS CAR. lando's team was up for it. tate (being respectful, she literally had no reason to do this whatsoever except for that fact that she's an amazing person and so very considerate) asked me to film it with lando instead. for "chemistry' and blah but again, THANK YOU TATIANA we say in unison.
hope you enjoy the music video and the song!
tagged: lando, tatemcrae
view all comments
tatemcrae there was no need to write a whole paragraph but i appreciate your recognition ♥️ considering an acting career anytime? love you loads
yourinstagram while the answer is yes, unfortunately i don't think anyone else will be considering it for me 🤪 tatemcrae also you fine asf yourinstagram u too bae rahhh user1 i love them sm
user2 that's so nice of her
user3 like i'm sure y/n would've been fine with her but giving up an MV for an actor's gf is crazy user4 i mean...it paid off. the chemistry is INSANE user5 need a man to hold me how lando holds y/n
user6 oscar jack piastri, how are you holding up?
oscarpiastri Have been avoiding the video. Have not been entirely successful. user7 LMAO poor boy lando sorry mate oscarpiastri You're not sorry in the slightest yourinstagram just close your eyes
lando thank you tatiana for orchestrating a music video for me and my girlfriend you're the goat
tatemcrae i think you're just glad you got to hard launch her this way, but you're welcome user8 y/n never called him her boyfriend BUT GUYS THiS iS CONFIRMATION THEY ARE DATING lando yes i'm her boyfriend she's my girlfriend. in case the making out and monkey business did not make that clear! user9 "monkey business" i cant anymore with him ✋
lando @/yourinstagram mommy? sorry-mommy? sorry-
yourinstagram shameless, i tell you. shameless. do it again.
── ⟢ ・⸝⸝
a/n: WE CAN UH-UH IN IT
#lando norris x reader#formula one x reader#formula one#f1 x reader#f1#f1 smau#lando norris#oscar piastri#mclaren#oikarma ᯓᡣ𐭩
2K notes
·
View notes
Text
How to Make Your Own Binder that Fits Well and Looks Good
A while back I was in need of some new binders and thought hey, I bet I can make one way cheaper than buying it from somewhere (especially cus some of the ones I’ve bought in the past didn’t really fit right). Except when I started looking for a binder patterns online, I was very surprised that I really… couldn’t find many that looked very nice lol. Most of them had really wrinkled necklines, or didn't bind well, or just overall looked weird. A lot of the patterns also required a serger, which I don't have.
So I just said fuck it and made my own pattern! And it ended up being relatively easy! And the binders fit REALLY WELL and are comfortable to wear, even for long periods. The neckline doesn't show under shirts with loose collars, and the bottom hem doesn't gap or stick out. Here's me wearing one:
(plus I was able to make myself 5 of them for a total of like ~$50.)
So I figured I could throw together a guide to help out anyone else who wanted to make their own binder but was dissatisfied with the patterns available!
Disclaimer: This tutorial is going to assume a baseline level of sewing experience, and also will require access to a sewing machine. It is not a complicated pattern, but it will most likely require some tweaking and adjustments after you make the first one. Don’t be afraid to make alterations to make it fit better!
This tutorial is for a gc2b-style half-tank binder. It could be altered to be a full-tank binder, but all instructions will be for the half-tank design.
Materials needed:
Stretchy fabric, probably listed as 'athletic fabric' (I use this kind from Joann’s. Most athletic stretch fabrics should work, look for around 80% nylon/20% spandex blends)
Stiff fabric (I use this shirting cotton because I like how lightweight it is. If you want something a little stiffer with more structure, you can use a cotton or cotton/poly blend twill like this. gc2b binders use twill for theirs.)
Lightweight fusible interfacing (I use this kind) (get FUSIBLE not sew-in)
Fusible webbing like Pellon Wonder-Web (this is technically optional but it WILL make your life easier when you’re sewing - just make sure to get the kind with the paper backing!!!)
“But kiwisoap thats 4 whole kinds of materials, surely I don’t need that many!” Ok sure, you can probably get by without the fusible web and interfacing, but consider: they are both dirt cheap (im talking like $1-2/yard), they will make it much easier to sew the final product, and will give you an overall better-looking result. This tutorial is written with the assumption that you’ll use them.
"How much fabric will I need?" Measure the circumference of your chest below your armpits. Add 6 inches just to be safe. This is the yardage of stretch fabric you’ll need, and should give you enough material to make at least 3 binders without much excess left over. You will need around half as much stiff fabric.
Other supplies:
Big Paper (for drawing the pattern)
Flexible measuring tape
Sewing machine
Iron
Pins
Step 1: Measuring
You will need 4 main measurements for this pattern.

A) Measure the circumference of your chest just below your armpits, then divide the number in half. This will be the widest part of the pattern.
B) Measure from the top of your shoulder down to where you want the binder to end. For most folks, this will usually be around the natural waist (narrowest part of the torso), about 3-6 inches above the belly button. This will be the overall height of the pattern.
C) Measure the distance from below your armpit to where you want the binder to end. This will determine where the arm hole starts.
D) Measure the circumference of your waist where you want the binder to end, then divide the number in half.
So for example, after dividing A and D in half, my measurements are 17", 15", 7", and 14.5".
Next:
Subtract one inch from measurement A - This will help provide some compression. You might need to take it in even further depending on how it fits, but one inch is a safe starting point. I take mine in around 1.5 inches.
Subtract half an inch from measurement D. This will help prevent the bottom edge of the binder from gapping. Again, you may need to take it in more or less, depending on your own body.
Add 1.5 inches to measurement B and one inch to measurement C. This is to account for the hems and armhole placement.
This makes my final measurements
A = 16"
B = 16.5"
C = 8"
D = 13.5"
From here on out, we are only going to be working with the measurements that we have added/subtracted to, NOT the ones we initially took.
Step 2: Drawing the Pattern
You will need a piece of paper large enough to accommodate the entire pattern. This may involve taping multiple pieces together, or using a piece of newsprint, etc.
I recommend folding the paper in half to ensure that you get a symmetrical pattern. However, this means you will need to divide measurements A and D in half again, or else you’ll end up with a pattern that’s twice as wide as it should be!
Also note: the pattern is drawn with the seam allowance built in! You don’t need to add any seam allowance.
To draw the pattern:

Begin with your folded paper. Measure and mark B and C on the paper, and draw a line extending across the paper. These will be your guidelines.
Measure and mark A and D along the middle and bottom guidelines, respectively. Remember, the paper is folded, so you only use half of the measurement for A and D.
Draw a loose curve connecting the endpoints of A and D. If needed, you can also just draw a straight line between the two.
Mark the opening for the neck hole. Depending on your size, it will measure around 6-8 inches across at the top (remember to divide this in half for the folded paper) and about 5-6.5 inches deep. (mine is 6.5" across and 5.5" deep) Draw a curve to connect the two points. This part will take some tweaking and adjusting to get it to look right lol.
Measure the width of the strap - this should be somewhere between 2.5 - 4 inches wide. They will end up about 1/2” to 3/4” narrower once you sew them. Draw the line at a slight angle, as shown.
Connect the endpoint of the strap to the endpoint of line A with a curve like in the diagram.
This will be the pattern for the front piece.
To make the back piece, trace the front pattern, but make a very shallow curve for the neckline instead of a steep one, as shown:
The last piece is the stiff front panel. This is what provides the flattening effect of the binder. To make the pattern, trace the front pattern again. Trim 3/8” in on the sleeves and neckline, and 3/4” to 1” along the bottom. This gives a flatter hem. Then trim the straps shorter by a few inches. This helps the binder lay flatter along the shoulders.
When you're done, you should have 3 pattern pieces that look approximately like this (stiff panel shown overlaid on the stretch fabric to show how it fits together).
NOTE: If you want more compression or just want to make it a bit sturdier, you can add a second panel of stretch fabric to the back piece. Just use the bottom half of the back pattern (from the widest part down to the bottom hem) to cut out another piece of stretch fabric. Attach it to the back piece with a strip of fusible webbing and a zig-zag stitch along the top.
Step 3: Putting It All Together
Once you’ve made the patterns and cut out the pieces of fabric, you should have something that looks like this:
The next step is adding interfacing and fusible webbing. Use your pattern to cut out 3/8" strips to fit on the top of the straps for both pieces, and to the neckline, sleeves, and bottom hem of the back piece, as shown:
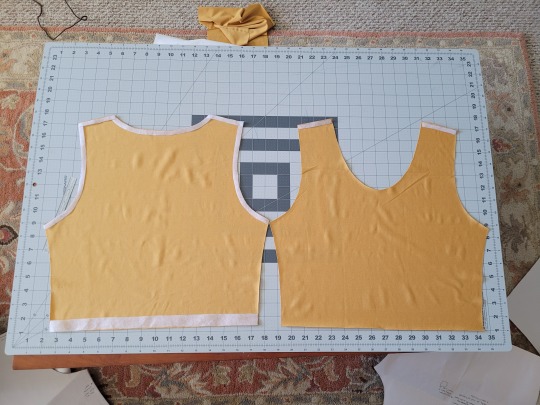
If you want to add it to the bottom hem of the front piece, it will help keep that hem flat when sewing it down later, but it's not essential.
If you choose to also use fusible webbing (WHICH I RECOMMEND), you will apply it to the stiff front panel similarly to how the interfacing was applied, ~3/8” strips along the neckline, sleeves, and top of the straps. Cut out two strips for the neckline and sleeves, because we'll use those later too.
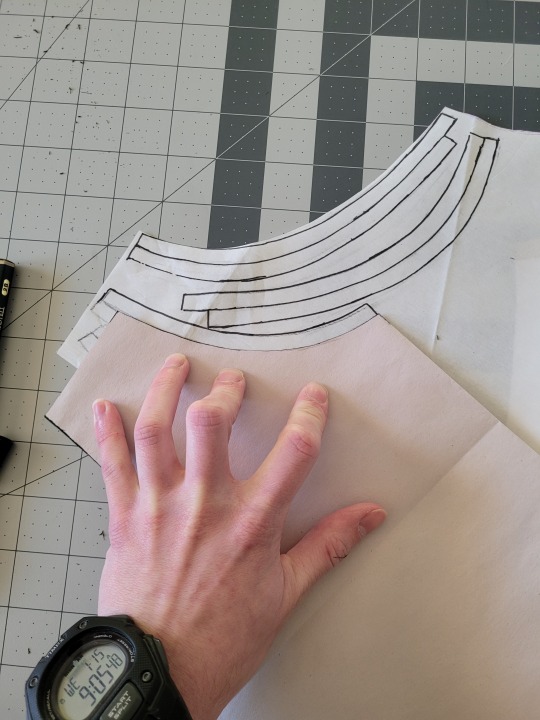
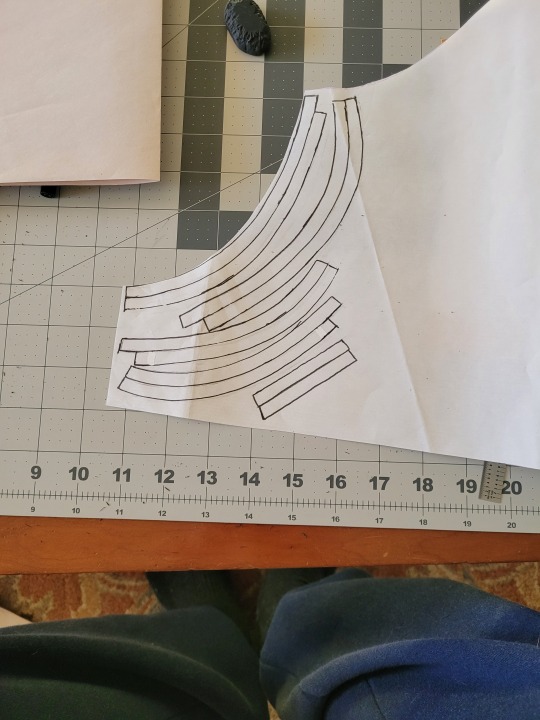
Iron the strips onto the front panel as shown:

Once it's on, just peel off the paper, position it webbing-side down on the stretch fabric, and iron it to fuse the two pieces together so everything stays in place while you sew. THIS MAKES IT WAY EASIER TO SEW.
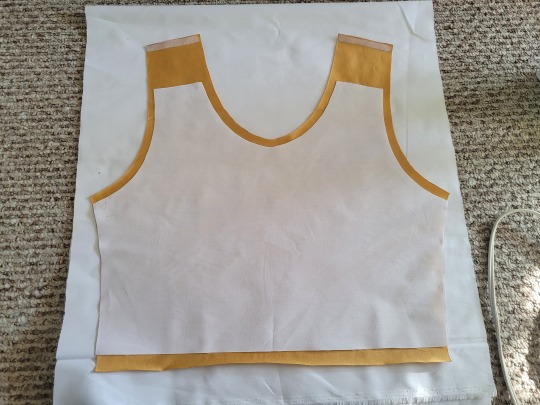
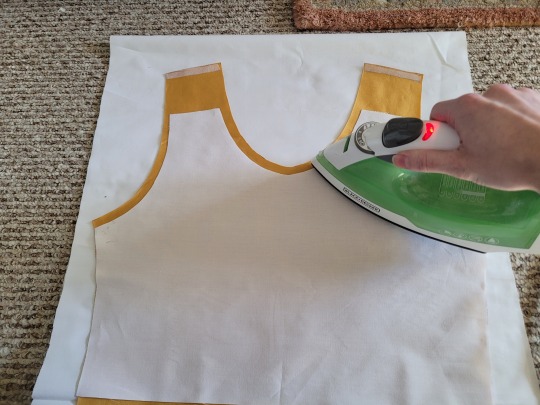
After the stiff front panel is fused to the stretch fabric, you’ll sew the straps of the front and back pieces together, then join the pieces along the sides. Pin the hell out of it to keep everything in place -this type of material is VERY prone to puckering.
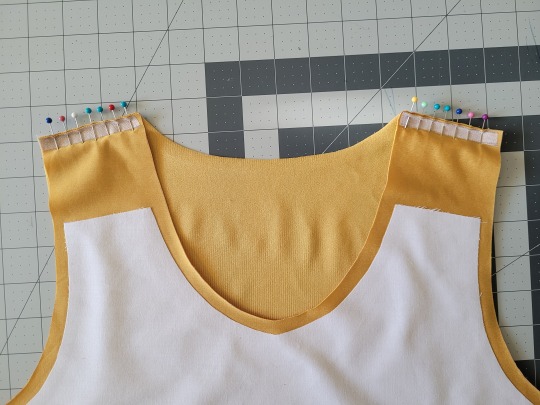
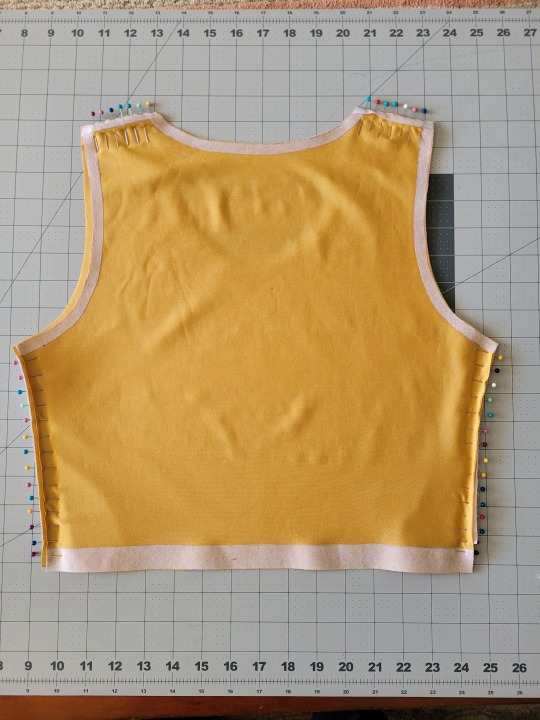
When sewing, USE A ZIGZAG STITCH. A straight stitch will NOT WORK for stretch fabric. I adjust mine to 1.3mm long and 3.5mm wide which has worked well. If your machine doesn’t let you adjust stitch length or width, well. That sucks, I don’t really have any advice.
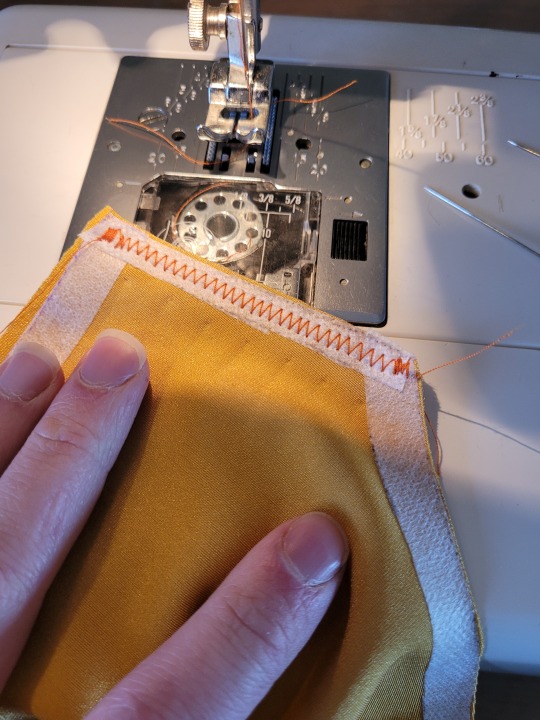
After you sew the front and back pieces together, you can add more fusible webbing to the front panel to help hold the hem down flat and prevent it from puckering while you sew it. Just add the strip, peel the paper off, then fold the hem over and iron it down. This part isn’t really necessary, but it does make the hems look nicer. If nothing else, I would recommend adding it to the neckline.
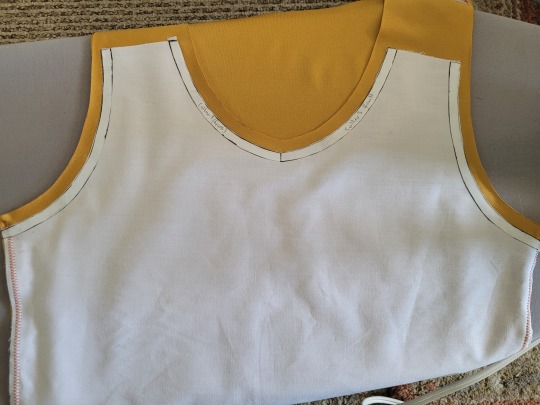
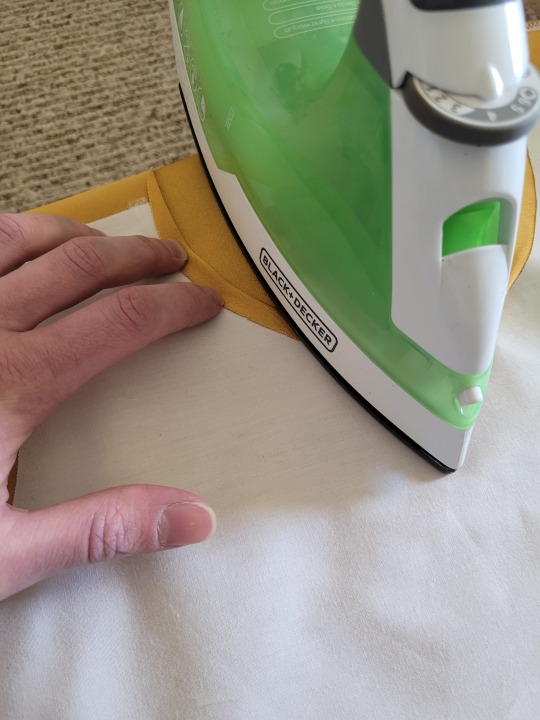
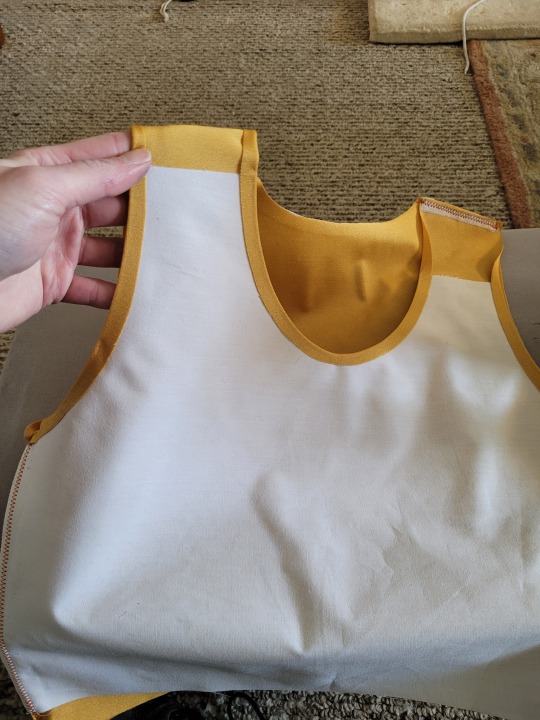
After that, you just fold & pin all the hems and sew them up with a zigzag stitch, then go over the raw edge at the top of the stiff panel (where we cut the straps shorter).
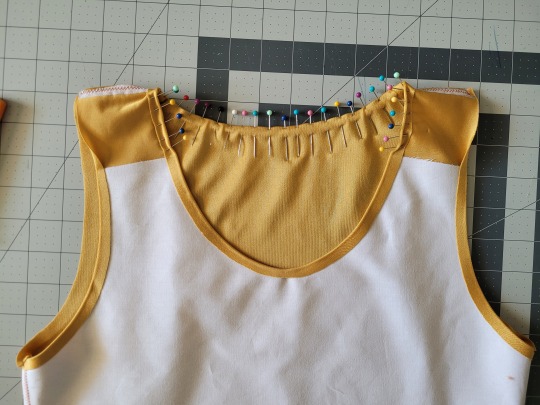
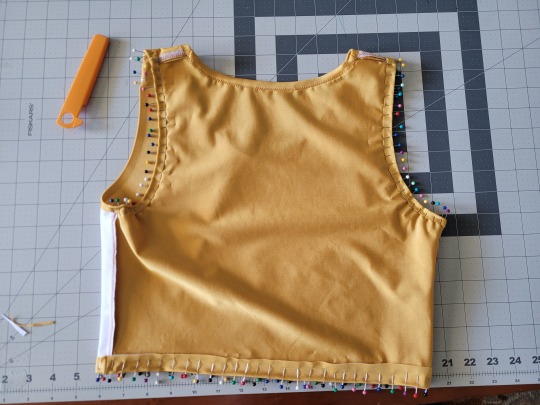
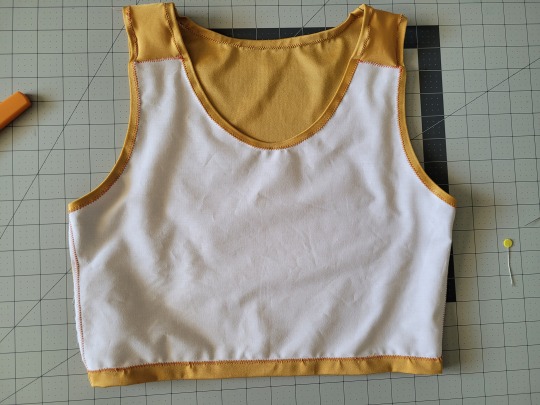
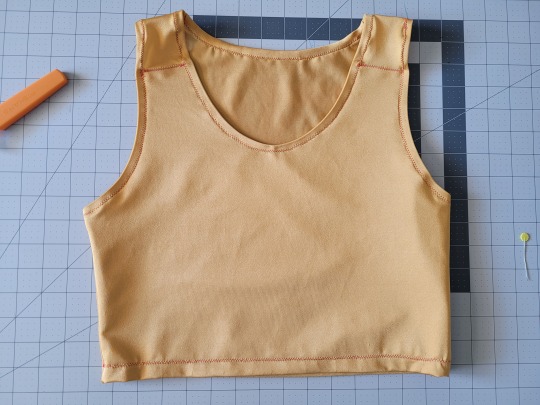
And that’s it! You’re done! And now you can make your own binders whenever you want!
And hey! If you used this tutorial and wanna throw me a dollar or two on ko-fi, I wouldn't complain.
2K notes
·
View notes
Text

BATBOYS HCS ON YOUR PERIOD ── .✦
a/n: so basically this is a request by a anon (here) and anyways I’m gonna try to be very active from now on actually and like try to post 3 times a day too and answer requests too!
Tags: ( batboys x reader)

DICK GRAYSON ── .✦
The overthinker final boss: Dick keeps a stash of everything you might need pads, tampons, heating pads, chocolate, and tea. He probably Googled “best snacks for periods” and stocked up on all of them.
Mr. Optimism: He tries to cheer you up with jokes or funny stories from his day. If you’re too grumpy, he’ll settle for giving you a massage instead.
Walks it Off with You: If cramps aren’t too bad, he’ll suggest going on a short walk to “get the blood flowing” (pun not intended he swears).
Endless Compliments: “You’re glowing. No, I’m serious. Period or not, you’re stunning.”
JASON TODD ── .✦
Silent Supporter: Jason isn’t the type to fuss over you, but he’ll quietly do everything to make you comfortable like bringing you your favorite snacks, handing you the remote, or lighting a candle in the room.
Cramps Battle Plan: “Heating pad or Tylenol? Pick your weapon.” He’s very no-nonsense about getting rid of your pain.
Comfort Food King: He’ll whip up your favorite comfort meal, and if he doesn’t know how to cook it, he’ll spend hours watching YouTube tutorials to get it right.
Protective Mode Activated: If anyone so much as annoys you while you’re on your period, Jason’s ready to pick a fight. “You’re messing with her today? Leave her the fuck alone.”
TIM DRAKE ── .✦
The Researcher: Tim has read every article about periods and cramp relief. He’s got tips you’ve never even heard of, like drinking tart cherry juice or lying in a specific position to ease the pain.
Sleep Enforcer: “You need rest. I’ll handle everything.” He’ll make sure you get enough sleep, even if it means carrying his laptop into the bedroom to work quietly by your side.
Subtle Humor: When you’re cranky, Tim knows how to make you laugh without crossing the line. “I guess Batman didn’t prepare me for this kind of monthly chaos.”
Midnight Run Specialist: If you casually mention craving something like fries or ice cream, he’s already putting on his shoes to go get it.
DAMIAN WAYNE ── .✦
Efficient and Direct: Damian doesn’t dance around the topic. “What do you need? Tell me, and I’ll get it.” He’ll ensure you have everything from snacks to painkillers.
A Little Awkward at First: If it’s his first time dealing with your period, he might be slightly flustered but determined to be helpful. Expect a lot of practical solutions.
Healthy Solutions Advocate: He’ll try to make you herbal teas or suggest yoga stretches that can relieve cramps. “This pose is known to improve blood flow. Try it.”
Protective Little Bean: If anyone upsets you while you’re on your period, Damian will glare at them like they’ve personally offended his family. “Apologize to her. Now.”
BRUCE WAYNE ── .✦
Regular guy: Bruce has handled every kind of crisis imaginable and he does have daughters/ female colleagues and close friends so he isn’t truly like clueless, so this is no different to him. He’ll make sure you’re stocked up on everything and keep the Batkids in check so they don’t annoy you.
Comfort King: He’s surprisingly good at creating a calming environment dim lighting, soothing music, and plenty of blankets. (But please never ask him to decorate for the love of god😭 h/j)
Subtle Affection: Bruce isn’t overly emotional, but he’ll quietly make sure you’re okay, checking in on you with a simple, “Do you need anything?”

#jason todd#jason todd x reader#batboys#dc#dick grayson x reader#dick grayson#jason todd headcanon#jason todd imagine#dick grayson imagine#dick grayson headcanon#red hood#red hood x reader#red hood imagine#red hood headcanon#tim drake x reader#tim drake#tim drake imagine#tim drake headcanon#red robin headcanon#red robin x reader#red robin#red robin imagine#damian wayne#damian wayne x reader#dcu#bruce wayne x reader#bruce wayne#bruce wayne headcanon#batman x reader#damian al ghul x reader
1K notes
·
View notes
Note
hello, could you make a tutorial explaining how you make your gifs? thank youuu x
Hey Nonnie,
I found you a tutorial which is very similar to my own procress on how to make gifs. You can find it here. I think their explanations would be better than mine, and not all over the place. They have also a bunch of tips that can be useful. Hope this is helpful, have a nice day! ❤️
#i wanted to make my own tutorial#but then i realized it would be a mess 😔#and probably not very helpful#so i looked for a tutorial that would be similar to my own procress#hopefully this one will be helpful to you#if you have any question don't hesitate tho#anon#answered
1 note
·
View note