#tapestry crochet techniques
Explore tagged Tumblr posts
Text
crochet pixel stitch
so there may be some of you who remember the pixel tapestry crochet controversy around a certain pillow, but i have come across a stitch that seems to work well for this.
this reddit post has an example and link to a tutorial on the stitch, and i will say, this isn't where i initially found the stitch, i found it a few months ago on pinterest and modified it much like the one in the reddit post, but i still want to try and find a way to make tapestry crochet that does follow the pixels precisely.
now, this stitch is a great little learning spot for how to get the stitches to line up vertically- the issue with single crochet is that the stitches don't align. the stitch above does align vertically, however, it is hard to work, especially in the mirrored/reversed version (working back to front). but what it does show is that it's necessary to work into two stitches to align those stitches vertically. also from experience i can say that this stitch doesn't work if it's not mirrored, so it's likely that other stitches would have to be mirrored as well.
knowing this, we can go about modifying stitches in a couple different ways, and i'm currently trying it out on a small scale with some 8x8 (technically 10x10) designs.

top left: single crochet/traditional tapestry; top right: pixel stitch linked above; bottom: sc dec worked into the previous and next stitch, and also mirrored like the linked stitch
now i think there's a tension issue with my pixel stitch dino since i've worked this stitch before and it's been less gappy but i'm also using a different yarn. i think that the sc dec version is promising, and i really like the texture it creates. i will say that overall i think sc might look the nicest/most uniform, but it has all those same issues mentioned previously.
anyways that's my little ramble, here's the dino if you want to try some stuff or make him for yourself. the biggest takeaways are:
1. sc creates pixel sized stitches so we need a sc height stitch
2. whatever stitch is used has to be worked into the previous and next stitch in order to align properly
and 3. the stitch will likely have to be mirrored (i.e. worked through the back) in order to create that nice pixelated look.

#crochet#lc's crochet lab#tapestry crochet#tapestry crochet techniques#anyways im telling y'all exactly why this works because im hoping some of y'all want to mess around with it and see what you can discover#maybe we'll figure something out#there is a paid pattern i've come across as well for this pixel art but like#i wanna figure it ouuuuuutttttttt and i don't wanna payyyyyyy#anyways best of luck to anyone who tries this!
3 notes
·
View notes
Text
waiting for my femme to come back in from cleaning out the bong so i can infodump to her about niche crochet pattern discourse i saw today
#mal posts#please someone tell me you’ve heard abt thr semi recent stardew valley chicken crochet pillowcase pattern that was actually just cross#stitch bc i saw the pillow & pattern a while ago and literally almost bought the pattern to crochet for my femme bc we play stardew together#and i thought it was so cool i was absotuely duped thinking it was some cool technique i don’t know (listen i don’t do a lot of color work#or tapestry crochet leave me alone)#and i am Very glad i did not use limited funds to buy an apparently not fully complete plain pillow single crochet pattern with some cross#stitch guides lmao#butch4femme#sapphic#butch lesbian#weed cw
9 notes
·
View notes
Text
Tapestries ….. save me tapestry projects
#if I felt good at crochet I would make some crochet tapestries too but I’m just gonna try my hand at some knitted ones .#gonna be trying a knitting technique I’ve never ever done before so that should be fun#and a challenge . and make me feel something for once. slash hj#rjb.net
2 notes
·
View notes
Text
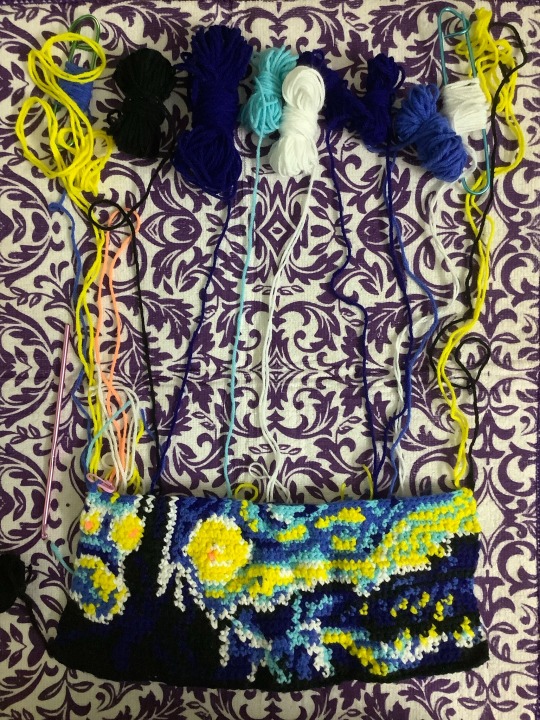
guess what that is~
#crochetblr#graphgan#tapestry crochet#vincent van gogh#it’s building up real slow and steady#13 more rows to go#ignore the wobbliness pls#also the back is a sight to see🤡#i dint carry anything forward just plain old floating yarn technique#this had so many dynamic color switches i dint no what technique to use#or what techniques are out there tbh#and the yarns may be slightly varying in sizes😬#so i had to double strand some of em#but blame the place where i live for that#as far as i no the lack of availability of good quality or even any quality supplies isn’t stopping people from picking up hobbies#they just choose to get it online#but then how are new people supposed to be encouraged to pick up new things#if they have to make sure to commit seriously cause you cant get just 1 hook online#you get a set#seriously so shitty#anyways#this has been quite an endeavour in my graphgan journey#I’M SOO WAITING FOR IT TO BE COMPLETE#then i can fondle it around and straighten it out#make it a lil less wobbly#but that’s fine cause i looovee it#and it’s for meee#aa mine#crocheting#crochet
2 notes
·
View notes
Text


look at this lil guy ❤️
#i'll make the ones i give my friend squares tho with added details#but this gave me an idea of the dimensions#also using the tapestry crochet technique... it stretches a lot less#but i didn't include the white in the top and bottom edges and that's where it actually stretches horizontally#rest of it is secure horizontally#but the while thing stretches vertically#so I'd rather make it woder than longer
10 notes
·
View notes
Text
Bear Claws was designed to celebrate the 10th birthday of the stacked stitch technique and the Fox Paws pattern. This engaging striped colorwork project features a large scale flame stitch motif. The pattern is relatively simple, using only a few rows of shaping in combination with color to create a distinct claw motif.
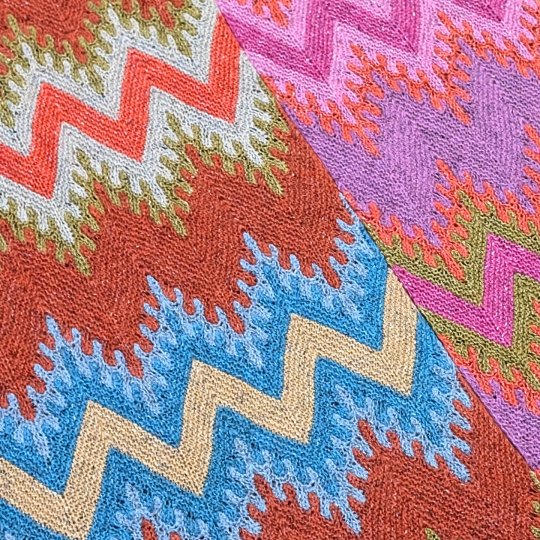
The wavy colorwork in Bear Claws is created using stacked increases and decreases. There are no loops on the wrong side and the wrap is very stretchy and drapey. The fabric is light and airy, not dense like stranded colorwork and mosaic knitting. If you're new to stacked stitches, check out my playlist on YouTube. You'll have an easier time with these stitches if you've tried increases, decreases and slipped stitches.
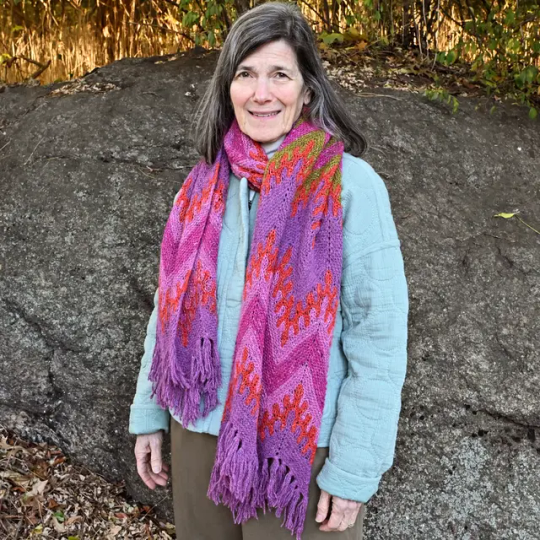
This pattern can be recolored in many ways, the coloring page available to anyone who wants to download it. You can use any number of colors you like, as long as they have good contrast. I recommend picking a Main Color that is not too bright or flashy in comparison to the others.
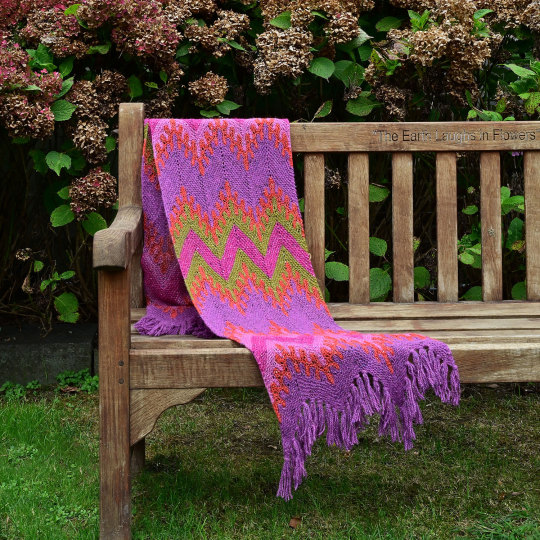
Written instructions are included in the pattern alongside a visual guide called a “stitch map.” It's not the same as a traditional chart and is meant to be used with the written pattern. The rapidly fluctuating stitch count of the stacked stitches doesn’t fit nicely into a square grid. Instead, the map uses symbols and lines that bend and flow as the rows do, as they would in a crochet chart. The primary use of the stitch map is to show how each row relates to the last and to help you find mistakes and get back on track.
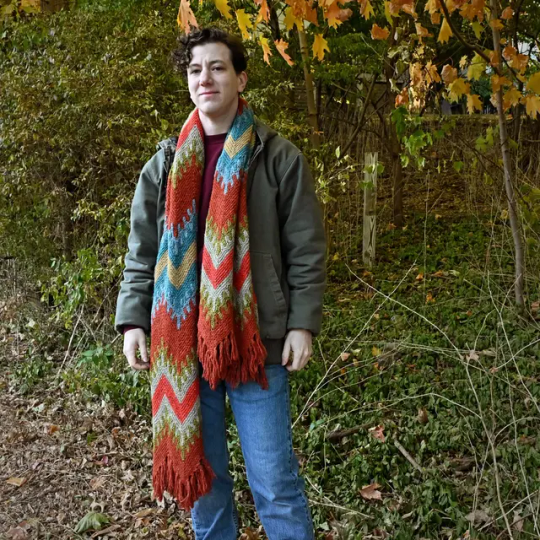
Finished Size: 14 (23.75)˝ x 82 (82)˝ / [36 (60) x 208 (208) cm] rectangular scarf including fringe.
Yarn: Rowan Felted Tweed DK; 191 yards (175 meters) per 50 gram skein, 50% Merino Wool, 25% Alpaca, 25% Viscose.
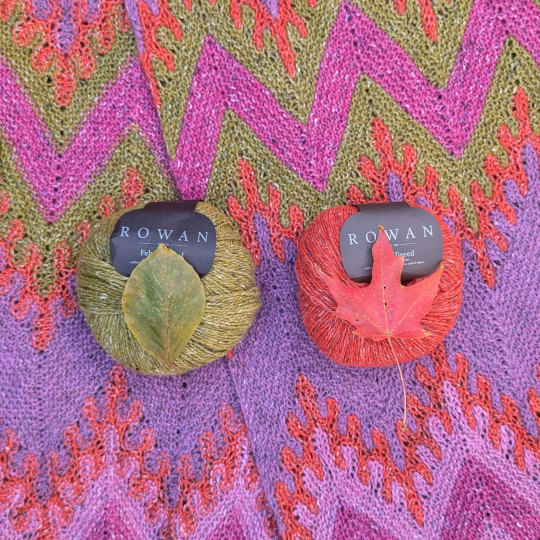
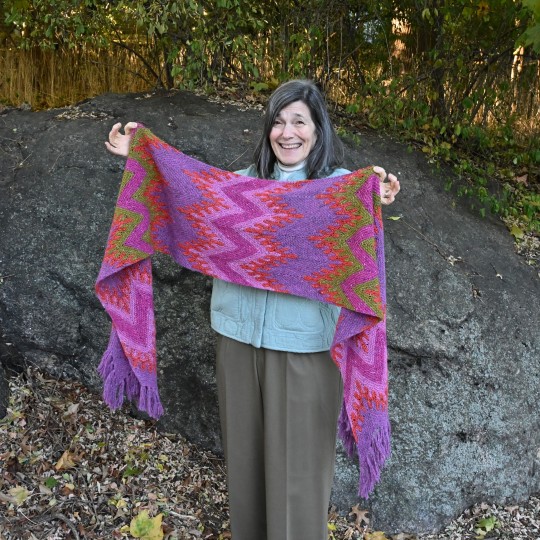
Pink Scarf - 5 colors and 3 repeats wide
Main Color: Peony, 3 balls
Outer Color: Zinnia, 2 balls
Inner Color 1: Pink Bliss, 1 ball
Inner Color 2: French Mustard, 1 ball
Stripe Color: Barbara, 1 ball
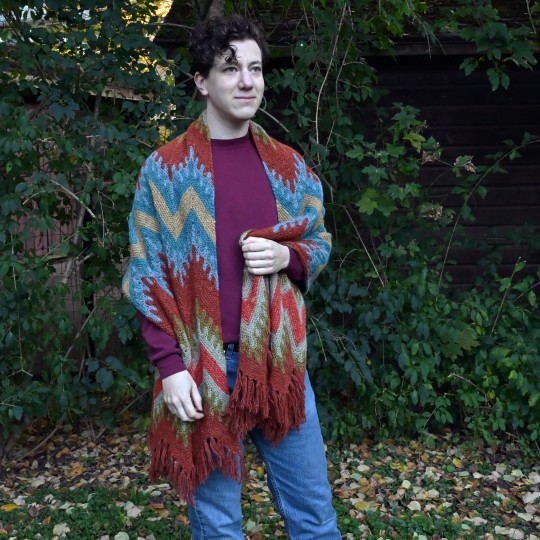
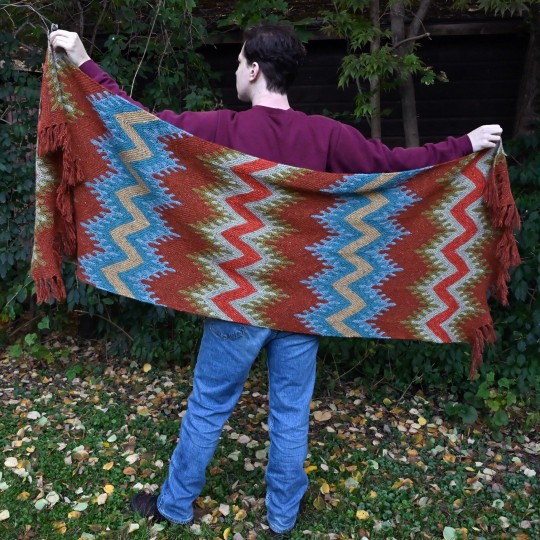
Brown Wrap - 7 colors and 5 repeats wide
Main Color: Ginger, 4 balls
Outer Color 1: French Mustard, 2 balls
Inner Color 1: Stone, 2 balls
Stripe Color 1: Zinnia, 1 ball
Outer Color 2: Duck Egg, 1 ball
Inner Color 2: Watery, 1 ball
Stripe Color 2: Canary, 1 ball
Needles: Size 6 (4mm) 32˝circular needles, or size needed to obtain gauge.
Gauge: 16 sts x 36 rows = 4 x 4” (10 x 10 cm) square in garter stitch.
Other Materials: Tapestry needle, stitch markers, pins, blocking wires, blocking surface.
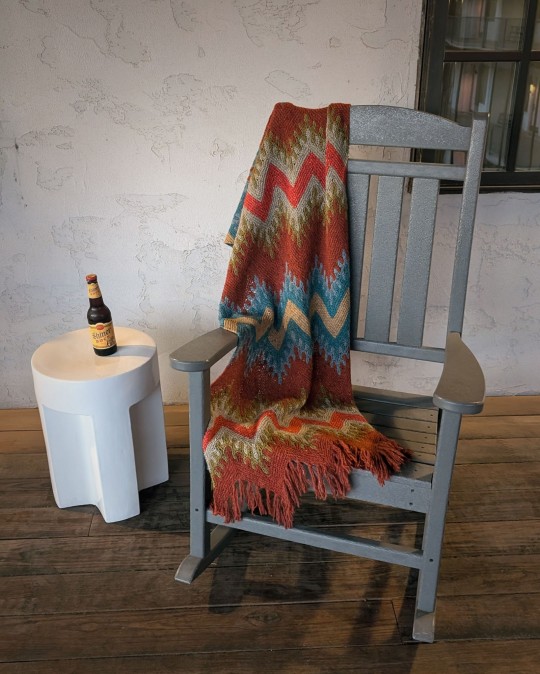
Get the pattern on my website and on Ravelry.
From now until the end of October, take 20% off all patterns, pins, books and stickers when you use the code "FoxyBday" on Ravelry or on my website.
Video Resources:
Bear Claws Playlist
Weave in tails as you knit
General Stacked Stitch Resource Videos
Yarn for this project was provided by Rowan
340 notes
·
View notes
Text

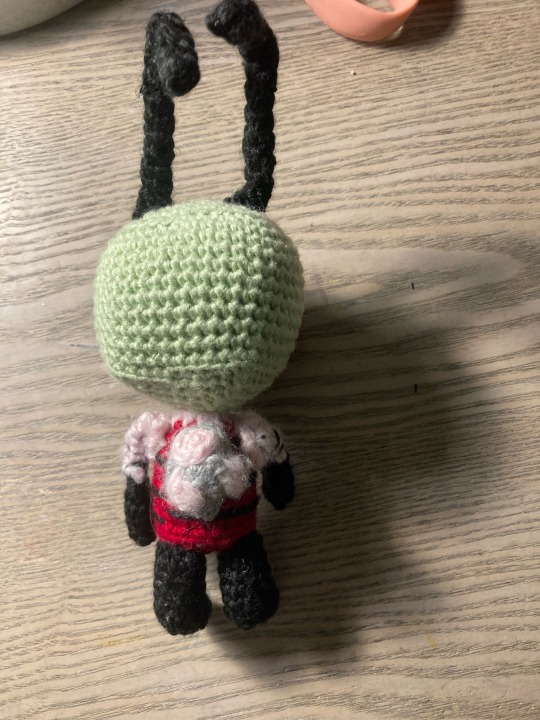
Invader zim crochet pattern
IMPORTANT INFO (PLEASE READ BEFORE YOU GO ON TO THE PATTERN):
THIS PATTERN IS WRITTEN IN U.S. TERMINOLOGY
PLEASE DO NOT SELL MY PATTERN ON ETSY, RAVELRY, OR ANY STORE OF THE LIKE, BUT YOU CAN REPOST IT AS LONG AS YOU LINK IT TO MY BLOG (millys-craft-corner) OR TIKTOK/YOUTUBE (fiestywyvern) FEEL FREE TO SELL ANY FINISHED PRODUCTS. Be sure to link me if you post your Zims as I’d love to see them.
Zim stands at about 5 inches tall or 12.7 cm, not including antennae
Techniques used
Sc
Inc
Dec
Triple dec
Triple inc
Magic ring
Chain
Basic embroidery and sew techniques
Not so well known techniques used
Triple inc- an increase with 3 stitches in one stitch instead of 2
Triple dec- a decrease going across 3 stitches instead of 2
Materials
3.5 mm crochet hook
size 3 or light worsted or light yarn weight in these colors light green, black, deep ruby red, light grey, and light pink
aluminum wire in size 14 or pipe cleaners
black embroidery thread
a medium sized sewing needle
tapestry needle
pliers if you’re using wire
hot glue
light pink felt
stuffing
Head and torso (make 1)- start with green
R1: 4sc in mr (4)
R2: triple inc around (12)
R3: 1 sc, (triple inc, 2sc)x3, triple inc, 1sc (20)
R4: 2sc, (triple inc, 4sc)x3, triple inc, 2sc (24)
R5: 3sc, (triple inc, 6sc)x3, triple inc, 3sc (36)
R6: 4sc, (triple inc, 8sc)x3, triple inc, 4sc (44)
R7: blo
R7-16: sc around (10 rounds) (44)
R17: blo- 4sc, (triple dec, 8 sc)x3, triple dec, 4sc (36)
R18: 3sc, (triple dec, 6sc)x3, triple dec, 3sc (28)
R19: 2sc, (triple dec, 4sc)x3, triple dec, 2sc (20)
R20: sc, (triple dec, 2sc)x3, triple dec, sc (12)
R21: dec around (charge to light pink at the end) (6)
R22: inc around (charge to red at the end) (12)
R23: sc around (12)
R24: inc, sc around (18)
R25-30: sc around (6 rounds) (18)
R31: blo- dec, sc around (12)
R32: dec around (6)
F/o, leave a long tail and 3 embroider stripes, using black yarn, so they cut the torso into thirds
Use the tail to close up piece
Shoulder pads (make 2)- light pink
R1: ch 5 and sc down from the 2nd chain from the hook, ch 1 and turn (4)
R2: 2 dec, ch 1 and turn (2)
R3: dec
F/o and leave a long tail for sewing
Arms (make 2)- start with black
R1: 3sc in mr (3)
R2: sc around (3)
R3: inc around (6)
R4: sc around (6)
R5: dec around (3)
R6: sc around (change to pink at the end) (3)
R7-10: sc around (4 rounds) (3)
F/o leave a long tail for sewing and embroider stripes using sewing needle and black thread
Legs (make 2)- black
R1: 4sc in mr (4)
R2: inc around (8)
R3-7: sc around (5 rounds) (8)
F/o and leave a long tail for sewing
Feet (make 2)- black
R1: 3sc in mr (3)
R2: sc, inc, sc (4)
R3: sc, inc, 2sc inc (6)
R4: 2sc, inc, 2sc, inc (8)
F/o leave a long tail for sewing
Pak (make 1)- light grey
R1: 4sc in mr (4)
R2: inc, sc (6)
R3: 2inc, sc, inc, 2sc (9)
R4: 2sc, 4inc, 2sc, slst (13)
R5-6: sc around (2 rounds) (13)
F/o leave a long tail for sewing
Big pak spot (make 1)- light pink
R1: 4sc in mr (4) Sl st into 1st stitch
f/o and leave a long tail for sewing
Small pak spot (make 2)- light pink
R1: 3sc in mr (3) sl st into 1st stitch
F/o and leave a long tail for sewing
Eyes (make 2)- red
R1: 6sc in mr (6)
R2: inc around (12)
R3: 4sc, 2inc, 4sc, 2inc (16)
R4-5: sc around (2 rounds) (16)
Antennae (make 2)- black
R1: 3 sc in mr (3)
R2-19: sc around (18 rounds) (3)
Assembly
Sew arms to shoulder pads
Sew bottom of feet to the sides of the legs so they create an “L” shape
Sew pak spots to the pak
Sew pak to body
Sew arms to body
Sew legs to body
Sew eyes to the lower left and lower right sides of the head
Cut out eyeshine out of light pink felt and hot glue it or sew it to the eyes
Cut 2 pieces of 5 inches of pipe cleaner/wire and fold in an inch on both sides so it’s 3 inches long. Insert them into each the antennae and sew antennae towards the back of the head. Fold back 1/4 of the antenna so it creates a right angle.
Congrats you just finished your irken invader, now go take over the earth!


262 notes
·
View notes
Text
CABIN 6 HEADCANNONS
This is my first post so feedback is appreciated <33
Since athena is also the goddess of weaving, most cabin 6 kids are good at it, plus most arts and crafts
They definitely have two baskets in one corner of their cabin, one filled with various types of yarn and the other with every type of knitting, weaving, crocheting needles known to mankind
They also weave tapestries to decorate their bunks and walls
They also have a tapestry called the Great Tapestry or smt which has like all major Greek mythology moments plus the camps history (like all the places it has visited or smt)
They host a Weave-off every summer and the whole camp can participate
The winner gets a small blessing form Athena
I can imagine the older campers helping the younger campers learn new stitches and techniques
Also...WOVEN BATTLE PLANS FOR CAPTURE THE FLAG
You can see I'm quite passionate about this lol
They definitely have a library that's open for all campers to visit snd study at
It's open for all hours and some campers help people from different cabins study and tutor them
Their cabin also has the most extensive collection of stationary, like from all over the world
If you can name it, they have it
They also are really good at designing new and better weapons so they have a close alliance with the hepheastus cabin
They team up with cabin 9 and spend HOURS creating the perfect bow/crossbow/sword
____________________________________
My masterlist
#writing#pjo x reader#athena cabin#cabin 6#pjo hoo toa#pjo fandom#pjo show#annabeth chase#malcom#headcanon#first post
36 notes
·
View notes
Text
Enoch (Over the Garden Wall) Crochet Pattern

Disclaimer:
This pattern has a lot of sewing. You've been warned! I couldn't find a way to minimize the sewing and still have the same color changes and composition I wanted.
Materials
Two different greens (Green 1 and Green 2) and orange yarn (I used a Medium sized yarn) Appropriately sized Crochet Hook (I used a 3.5mm hook) Black, soft brown and off-white felt to make the face details (If you can't find off-white felt, like me, buy white felt and paint it off-white with acrylic paint) Stitch Markers Tapestry Needle Fiberfill Scissors Sewing Pins
Techniques
Magic Ring (mr) Chain (ch) Single Crochet (sc) Increase (inc) Decrease (dec) Skip a stitch (skip)
Head


----- Using ORANGE Round 1: 8sc into a magic ring [8] ----- The next two rounds are worked on the stitches from Round 1 Round 1.5: FLO 8sc [8] ----- Attach a stitch marker to the first stitch of Round 1.5 for later Round 2: BLO 8inc [16] Round 3: (sc, inc) * 8 [24] Round 4: (sc, inc, sc) * 8 [32] Round 5: (3sc, inc) * 8 [40] Round 6: (2sc, inc, 2sc) * 8 [48] Round 7: (5sc, inc) * 8 [56] Round 8 - 16: 56sc [56] Round 17: (5sc, dec) * 8 [48] Round 18: (2sc,dec, 2sc) * 8 [40] Round 19: (3sc, dec) *8 [32] Round 20: (sc, dec, sc) * 8 [24] ----- Stuff ----- The next two rounds are worked on the stitches from Round 20 Round 20.5: FLO (sc, dec) * 8 [16] ----- Attach a stitch marker to the first stitch of Round 20.5 for later Round 21: BLO (2sc, skip) * 8 [16] Round 22: 8dec [8] ----- Stuff
Fasten off and leave an extra long tail. It should be able to wrap around your head 10 times.
Pass the yarn under a stitch from round 20.5. Wrap the yarn over and around the pumpkin and divide it in two. Pass the yarn under another stitch from round 20.5. Pull the yarn tight and secure it with a knot. Repeat this two more times until your pumpkin is divided in 6 parts.
Pass the yarn through the pumpkin from bottom to top to work on his top embellishment.
Starting from the stitch marker on the head's round 1.5
Round 1: 8inc [16] Round 2: (2sc, inc) * 5, sc [21] Fasten off and weave in the tail.
Body
----- Starting with GREEN 1 from the stitch marker on the head's round 20.5
Round 1: (sc, inc) * 8 [24] Round 2: (sc, inc, sc) * 8 [32] Round 3-24: 32 sc [32] Round 25: 32 sc [32] Round 26: (sc, dec, sc) * 8 [24] Round 27: (sc, dec) * 8 [16] Round 28: 8dec [8] Fasten off and weave in the tail.
Arms (x2)
----- You can crochet around a wire to give the arms more structure ----- Using GREEN 1 22ch (Skip the chain if you're using a wire) Skipping the first chain from the hook and 21 sl st Leave a long tail for sewing
GREEN 1 Stripes (x9)
----- Using GREEN 1 27ch Skipping the first chain from the hook and 26 sl st Leave a long tail for sewing
GREEN 2 Stripes (x11)
----- Using GREEN 2 27ch Skipping the first chain from the hook and 26 sl st Leave a long tail for sewing
Assembly
Using sewing pins, attach all the stripes and the arms and stripes alternating greens. Once you're happy with the placement, sew everything.

Using felt, cut the following shapes: 2 soft brown circles 2 black circles (smaller than the brown ones) 1 skinny black heart that will serve as a nose 1 soft brown oval 1 off-white oval (smaller than the brown one) ----- To make the teeth, I just cut the smile and then vertical lines. When it was time to glue it on the brown oval, I separated them a bit for that teeth effect. Glue everything and you're done!
26 notes
·
View notes
Text
My official commissions post
So I’ve been unemployed for over a year now. I got laid off from my PR writing job because “the intern and ai can do the same job cheaper” apparently. Anyways, I’m starting to save up for top surgery sometime next year (my consultation is in 2 weeks!!) and the money I get watching my nephews 3 days a week is not enough for that. So, come and sample my wares
1. Tapestry Blankets

I posted this a few days ago and some people seemed interested in the style. I have multiple patterns for the center tapestry picture as well as the boarder patterns. This one took me about 30 hours, so that’s what I’m going to base my price on.
PRICE: $300+materials+shipping
2. Tapestry

There are two different styles of crochet that I can use for these: Tunisian crochet and regular single crochet. The snoopy is tunesian crochet. Ignore how curly he is lol. My partner didn’t want to wait for him to be blocked.
If you have a grid pattern that you’d like, you can get that. Or I have a variety that I can search through. These ones are gonna be priced based on size and which technique.
PRICE:
Small (up to 12 inches width and length)
Tunisian: $45 Regular: $30
Large (13 inches to 24 inches tall width and length)
Tunisian: $100 Regular: $65
3. Stuffed D&D dice

I only have a few that I can picture, but I can make a full set of d and d dice or individual d20s. Colors can be customized as you like, and if you want to help me bust my stash and use the yarn I already have, we can discuss a price reduction.
PRICE:
Full set: $100 d20: $45
I have a few more options that I’ll add when I can get some good pics. And some premade things if anyone is interested. My dms are open if anyone wants to discuss. I also might reopen writing comissions but I’m not sure and would have to update rates because I have degrees now lol. Not sure. Anyways, thanks for sitting through my post! My Venmo is https://venmo.com/u/Jenny-Robinson-61 if you wanna help pad out the top surgery fund. I’d also be willing to make things not listed above. If there’s something you want that’s not up there, message me and we can work something out. Thanks again!
#for some reason the original post got flagged as mature so I’m reposting this#throws this into the abyss#crochet#comissions open#comission#bbc merlin#dungeons and dragons#dungeons and daddies#critical role#the adventure zone#crafting#fiber art#snoopy#peanuts
14 notes
·
View notes
Text
I’ve talked about this on Twitter but I don’t think I’ve posted about it here.
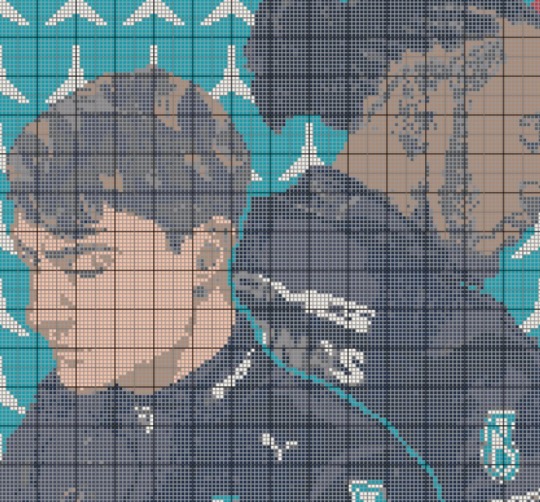
I like to crochet and I decided to do something very ambitious, which is turn a one of @souriadraws’ Lewis and George prints into a crocheted tapestry. The original image is from her personal works portfolio, and I got Souria’s blessing to do this project.
I used a site called Stitchfiddle to turn the print into a diagram I could work into a 5’x5’ square using mini corner-to-corner stitches. I had to simplify it into >10 colors (so I wouldn’t die) and edit the background, but here’s a rough preview of the graph I’m using. It’s not the whole thing because I am not reposting the diagram for others’ use (and there’s a surprise baked into it):
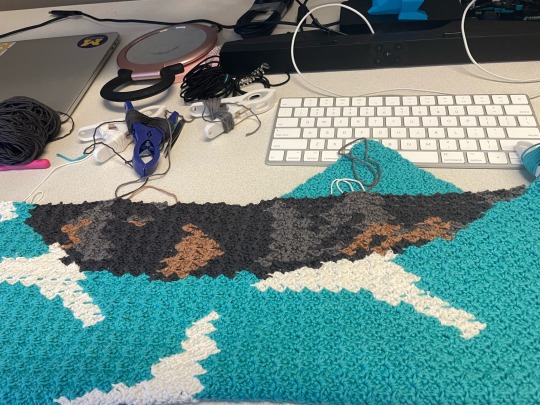
And here’s some pictures of my progress so far. This is worked in a diagonal instead of side-to-side like most crochet is, so I’m currently right about at George’s forehead.


My ultimate hope is that I finish in time for the Canadian GP and I can find a way to give it to the team as a gift, but we’ll see. If that doesn’t work out, I guess I will keep it, but it’s been a really fun challenge so far and I’ve had to learn/practice a few new-to-me crochet techniques to manage all of the color changes and minimize the amount of loose ends to weave in.
I will update my progress on this, if you want to see it. It’s been a lot of fun.
167 notes
·
View notes
Text
Fiber Crafts
A resource for writers
Spinning: The process of winding fiber into thread or yarn. Can be done with a drop spindle or a spinning wheel. Can also be done on industrial machinery such as a spinning mule.
Plying: Taking two or more strands of spun thread and twisting them together to make a stronger yarn. Can be done on a spindle, spinning wheel, or machine.
Weaving: The process of forming cloth by interlacing two sets of threads, the warps (longitudinal) and the wefts (latitudinal), on a loom.
Bead Weaving: A type of weaving in which beads are woven into the fabric. This can be done with or without a loom.
Tapestry: A type of weaving in which only the weft threads can be seen from the front of the work, with all warp threads hidden on the back. Tapestries weave an image into the front of the work.
Nålbinding: A historic precursor to knitting, still practiced by the Nanti people of Peru. Nålbinding creates fabric by creating interlocking loops of yarn with a single-eyed needle. Nålbinding differs from knitting and crochet in that, in nålbinding, the entire length of the working yarn must be passed through each loop made.
Knitting: The process of forming cloth by interlocking loops of yarn. Knitting is most commonly done with two or more needles held in the hands, but can also be done with knitting looms or machines. The two most common methods of hand knitting are the English and Continental styles.
Crochet: The process of forming cloth by interlocking loops of yarn. This is most commonly done with a crochet hook, but can be done with the fingers. Crochet can also be done on looms. Whereas many stitches are active at any given time in knitting, in crochet, each stitch is finished before another is made.
Macramé: The process of creating textiles by making knots in cords. The main knots used in macramé are square knots and half-hitches.
Chinese Knotting: The process of knotting cord into decorations and charms.
Felting: The process of creating cloth by matting fibers together. In wet felting, fibers are exposed to water and then pressed and agitated to join the fibers together. In needle felting, fibers are joined by repeatedly being stabbed with specialized needles.
Rope Making: The process of braiding or twisting fibers together to create rope.
Sennit: The process of creating cord by braiding dried fibers.
Sewing: Using a needle and thread to join pieces of fabric. Sewing is done either by hand or machine. Sewing can be used to create garments and other items or to tailor preexisting items. Sewing can be either constructive (creating objects) or decorative (adorning objects).
Darning: A method of mending holes and worn areas in fabric. Darning can be either hand sewn or done with a machine, and weaves threads to fill in holes within fabric.
Embroidery: A form of sewing in which various stitches are added onto a preexisting fabric or item. Originally used for mending clothing, embroidery stitches are now also used decoratively. Embroidery can be done only with thread, but may also incorporate beads, sequins, and other decorative notions, such as beetle wings.
Cross-stitch: A type of embroidery in which the thread is sewn in X-shaped stitches across fabric.
Needlepoint: A type of embroidery in which yarn is stitched through an open weave canvas.
Tatting: The process of lace-making by looping and knotting thread. Tatting can be done with a shuttle, with a needle, or with a combination of tatting and crocheting techniques called cro-tatting.
Appliqué: The process of attaching one piece of fabric on top of a larger piece. Originally done to mend fabric, appliqué is now commonly used as decoration.
Patchwork: The process of sewing small pieces of fabric together to create a larger piece. This is often done to form a pattern or image.
Quilting: The process of stitching three or more layers of fabric together. Quilting is typically used to make blankets. Fabric layers can either be quilted by hand, usually with the aid of a quilting hoop, tied, or quilted using a domestic sewing machine or a longarm machine.
Banner Making: The process of creating a flag or banner. Banner making incorporates many other forms of needlework, such as patchwork, sewing, and embroidery.
Needlework: The umbrella term for textile handicrafts.
184 notes
·
View notes
Note
your stitches line up so nicely, I was looking at your projects to try and see what technique you use, do you do something similar to a modified single crochet but while going into both loops instead of just the back one?
hi there!! i am just using single crochet, but keeping in mind that stitches lean one way or the other depending on if you are working into the “right” side or the “wrong” side. i use stitchfiddle to plan out my design before i start crocheting so i literally just go through every single stitch to make sure that the color changes will be continuous lol. also, when you change colors, make sure to change on the last yarn over of the single stitch of the previous color—i’ll link a youtube video of this here: (https://youtu.be/0YOqY0l9rCg?si=LUjpkuh7bp1_kfng) this video does show weaving the other color in the tapestry, but i like to carry it on the “wrong” side.
let me know if this helps :)
youtube
36 notes
·
View notes
Text

Oh haha, oops.
It hadn't occurred to me because I don't really care for mosaic crochet (the hastily-made example at right), but it would actually be trivially easy for someone who knows the technique to convert my patterns (for interlocking filet, pictured left) on the fly.


(Slightly out-of-date PDF and video for the clover pattern above here)
Double crochets on back and chain spaces both become back-loop single crochets and that's … most of it? Work from charts, not notation, which omits chains and assumes you will be turning the work. You're on your own for starting, finishing, and edges, but I'm sure mosaic crocheters have preferred ways of handling these.
I'm not entirely sure what to do with this insight! I don't plan on switching to fully hybrid patterns, like Ashlee Brotzell, whose work clued me in to the possibility, but I may tweak the format of things to make working across techniques more straightforward.
As for *why* you might want to do this: you can easily make tubes with mosaic, which is great for clothing and other finished objects, and working in 3 or more colours (with the addition of tapestry or intarsia) is easier in mosaic than in interlocking. Other than that, I don't know. Maybe weaving in ends meets some kind of emotional or psychological need for some people. Who am I to judge?
7 notes
·
View notes
Note
Can I ask where you learned to crochet letters? I’ve always wanted to!
Hi! For crochet, basically you use a tapestry (or intarsia) crochet technique, where you work off a grid pattern and do one stitch for each square in the grid.
This looks like a good tutorial for getting the technique:
youtube
Once you have that down, you can follow any chart like the one they work off in the video. You can either find ones that other people have made (any knitting, cross stitch, friendship bracelet, perler bead etc pattern that is in a grid can also work), or make your own. This is the one i used for the piece I just posted (that was knitting but it’s the same idea):

You can make your own on graph paper or a website like stitchfiddle. You can use things like these to guide you on how to do each letter:


78 notes
·
View notes
Text
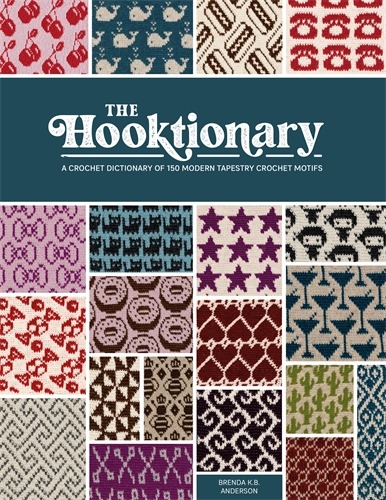


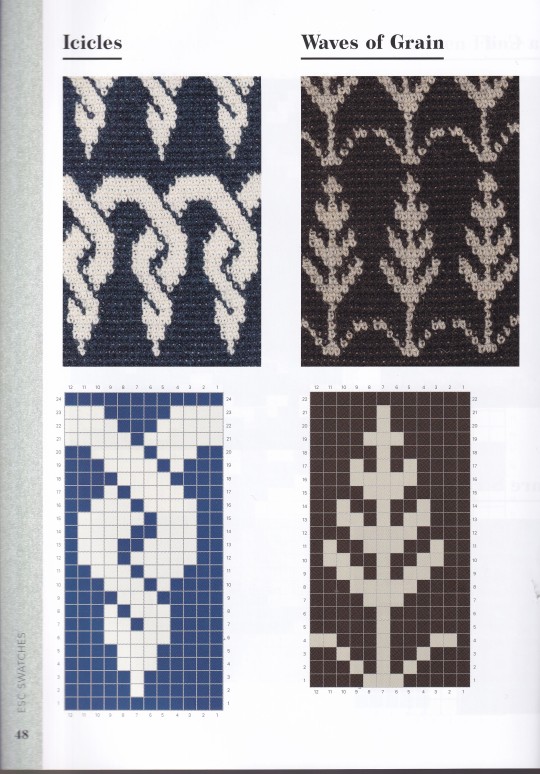
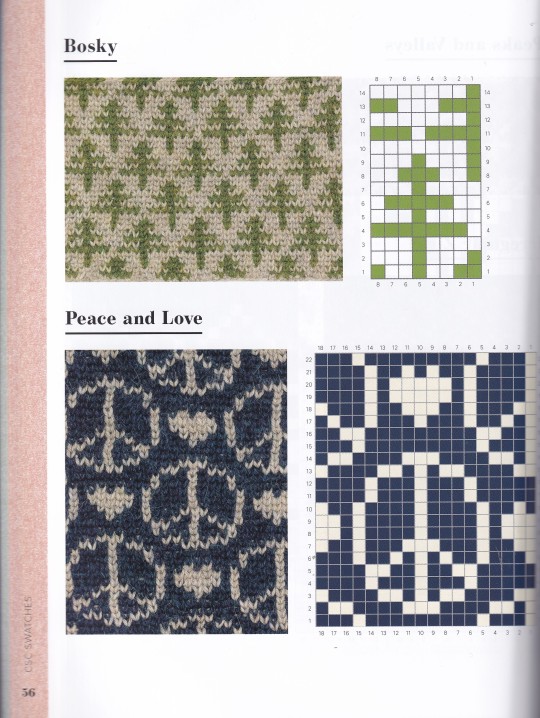
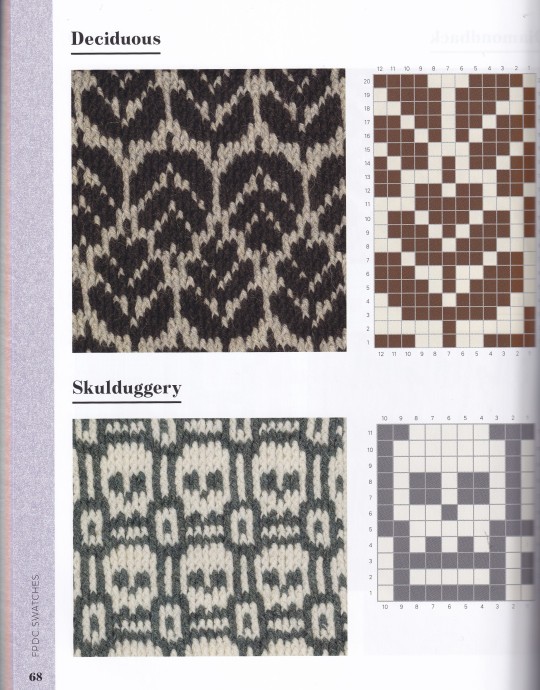
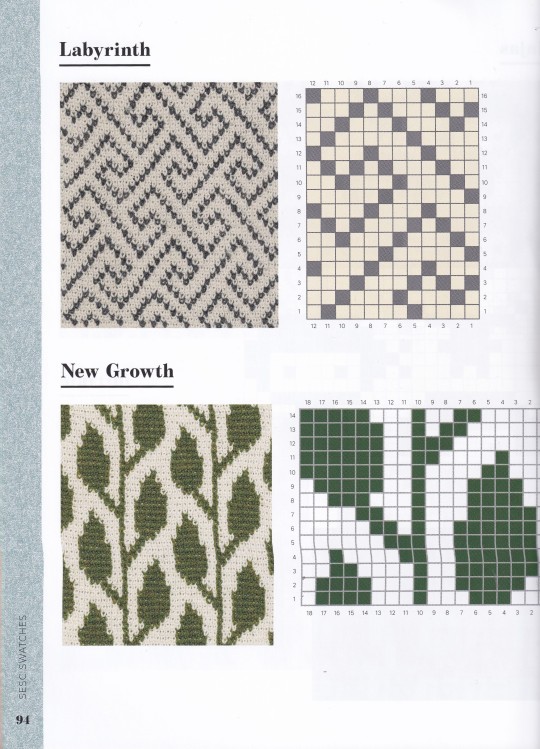


The Hooktionary
Text and Designs Brenda Anderson
David & Charles, Exeter 2023, 144 pages, 21,8x28, paperback, ISBN 9781446309575
euro 25,00
email if you want to buy [email protected]
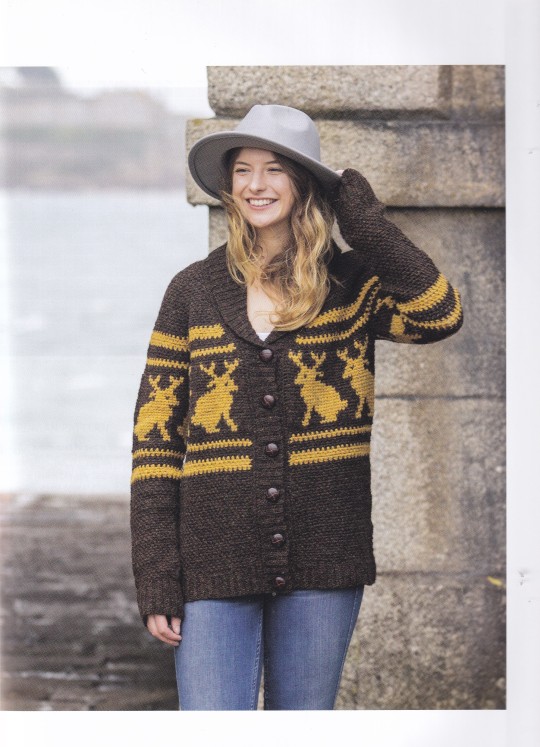
Create bold, modern and fun tapestry crochet designs with this unique crochet stitch dictionary! One of the most important tools in any crocheter's toolbox is a stitch dictionary - an essential reference packed with possibilities. The Hooktionary is the first and only crochet stitch dictionary to feature tapestry crochet motifs. And it has personality to boot! From unicorns and bumblebees to bold, graphic designs, the 150 motifs this book includes are perfect for the modern maker. Plus, five 'choose your own adventure' projects allow you to mix and match motifs into one-of-a-kind designs that reflect your own tastes. Inspired by Andrea Rangel's Alterknit Stitch Dictionary, Brenda K.B. Anderson has created a crochet counterpart so that crocheters can join in the fun too. Unlike other tapestry crochet pattern collections, which focus on single crochet stitches - creating slanted color patterns which do not create clean lines - Anderson has used her experience of which kinds of crochet stitches pair well with tapestry crochet to create beautiful, clear patterns, and wearable fabrics. Swatches are made in one of five different crochet stitch patterns: single crochet through the back loop, center (or split) single crochet, extended single crochet, center (or split) extended single crochet, and front post double crochet, with information about how the crochet stitch anatomy affects both the drape and feel of the fabric and also the look of the charted image, so that you can imagine how a chart would look in another stitch pattern. All the designs are crocheted in the round, so that you can keep the front of the work facing you, and then steeked - a technique that has not been covered in any other crochet book! There is also comprehensive advice on choosing stitches and fixing mistakes.
28/01/24
#Hooktionary#stitch dictionary#crochet stitch#uncinetto#punti uncinetto#fashion books#fashionbooksmilano
17 notes
·
View notes