#takumi: empty vessel
Explore tagged Tumblr posts
Visit Tumblr Blog
Explore Tumblr blogs with no restrictions, modern design and the best experience.
Last Seen Tumblr Blogs


Fun Fact
Tumblr was attacked by a cross-site scripting worm deployed by the Internet troll group GNAA on Dec 3, 2012.
Text
Request Poll - Takumi


Please do not criticize any art you may not like or compare one art to another in terms of quality, it's unkind and downplays the amount of work that the feh artists put into them. Please treat the feh artists how you would as any other artist - with kindness and with love.
Artists in order: Hino Shinnosuke, hou, Tobi, Hino Shinnosuke, Tobi, Niji Hayashi
#request polls#all polls#feh alt battle#fire emblem#fire emblem heroes#fe heroes#feh#takumi#takumi fire emblem#fe takumi
18 notes
·
View notes
Text

Takumi, Empty Vessel
#minecraft#minecraftart#minecraftbuilds#minecraftbuild#minecraftartist#minecraftarts#fireemblemheroes#fire emblem
0 notes
Text
I think there's a *lot* to be said about Ghost Trick's treatment of women in general, some of it complimentary but much more in critique. None of them really end up with plausible agency or interiority:
Lynne: memetic forever-damsel in distress; killed over and over again in-game, kidnapped and held against her will, given no choice or say in what she'd want in the ending, held back by years in becoming a detective
Kamila: an innovative mind held back for five years in the ending (what sense does it make that she's making her mother's five-years-ago birthday present now?), gets kidnapped, gets killed multiple times, becomes Yomiel's inadvertent vessel
Memry: sent home with a stomachache after her bug gambit failed in-game, still having to make nice and play mind games with her male superiors in the ending
Emma: caught in a chandelier in-game for the crime of sticking to her principles, and doesn't even get to finish her novel; focused on asking her husband for ideas in the ending
Amelie: we're told she is a feisty and sassy little prodigy but we're shown a sick and petulant child; she is shown adoringly doting on her father in the ending while her mother is treated like a gossipy kook whose job doesn't matter
Beauty: blown up(?), constantly being hit on
Lovey-Dove: a silent pet, in the game where pets love their owners so much that they develop consciousness, awareness, and a voice
FianSissel: haunts the narrative but we never even see her
Alma: haunts the narrative and we DO see her but she has so little interiority that she gets one line that isn't even about herself
Each of these women had the chance for an incredibly compelling and interesting motivation and place in the story, and yet they are treated merely as tools of the narrative over and over again. They are pitted against each other, asked to put aside their own ambitions and drives for the sake of something they don't even get to remember, and generally treated as though their needs don't ultimately make a difference.
The game makes distinct points about manipulation, about people using each other, about ambition and about self-sabotage... But overwhelmingly it treats masculine struggles with these things as real and fate-changing whereas women's experiences as manipulator and manipulated, as ambitious or intelligent and driven, are silly little feminine foibles that will inevitably be forgotten or subsumed when they fall into line with the overriding narrative agenda of masculine control of the plot.
This is an ongoing issue with both AA's and GT's treatments of feminine agency and interiority; there is a terrible double standard in what gender role and presentation (especially if one presents as feminine in any sense) means to people in these stories. I'm not speaking to specific characters-- yes, you can point to female characters in Shu Takumi works who have reasonable amounts of agency and interiority-- but to the overwhelming expectation of female subservience to masculine choices in both AA and GT.
So, going back to Lynne and Kamila: yes, it doesn't make sense, and yes these are disappointing choices in-game. I would love it if GT loved its female characters as much as I do; since it doesn't, I feel called upon more to be thoughtful and aware of the flaws in their writing while simultaneously applauding what I love about them!
It makes me so happy to see posts like this, therefore; I can l and do love the male characters in GT while wanting to see SO much more meta and exploration of the distaff side. I'm really glad you put these thoughts out there so it doesn't feel like such a pointedly-empty void in the fandom understanding of these characters' role and place in GT's plot.
tbh i don't like the idea of lynne forgetting the events of the game. it's disappointing for her to forget everything she accomplished, and her relationships with the rest of the cast are way less compelling if she doesn't remember defying the law for jowd and acting as kamila's guardian for five years and empathizing with yomiel on the yonoa and going from agreeing to use sissel to calling him friend (or partner).
also it doesn't rlly make sense for her to adopt missile if she doesn't remember if in the original timeline she only got a pet at all for kamila's sake.
57 notes
·
View notes
Text
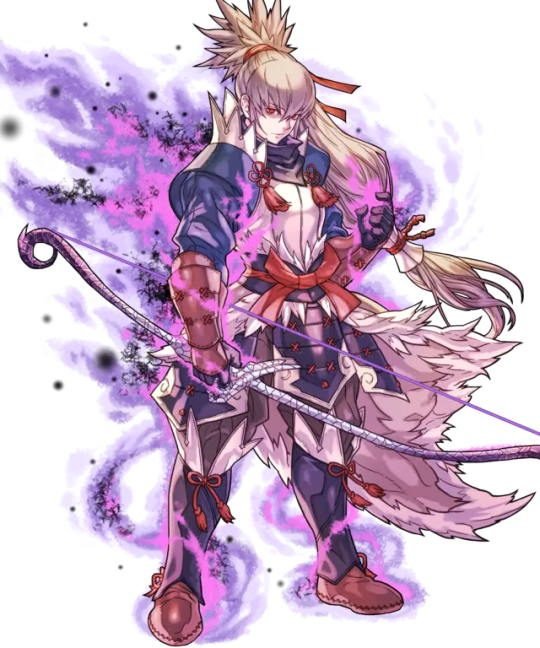
Fallen Takumi: Empty Vessel (Unit Review)
Available at 3-4★ (Grand Hero Battle Reward)

Lvl 40 Stats (Flaw/Neutral/Asset)
Note: As a Grand Hero Battle reward, Takumi does not have access to boons/assets and banes/flaws.
HP: 33/37/40
Atk: 27/31/34
Spd: 31/34/37
Def: 22/25/29
Res: 21/24/28
Neutral BST: 151
Max Dragonflowers: 10
Skills
Weapon: Skadi (400 SP)
Mt: 14. Rng: 2. Effective against flying foes. Grants Spd+3. At the start of turn 3, foes within 3 columns centered of unit take 10 damage and bonuses become penalties for duration of their next actions.
Colorless Bow. Cannot be inherited. Cannot be refined.
Assist: None
Special: Vengeance (200 SP)
Boosts damage dealt to foe by 30% of damage dealt to unit.
Can be inherited. Cannot use: Staff.
A: Fury 3 (200 SP)
Grants Atk/Spd/Def/Res +3. After combat unit takes 6 damage (unit cannot hit 0 HP this way).
Can be inherited. Cannot use: Staff.
B: None
C: Spd Smoke 3 (240 SP)
After combat inflicts Spd-7 on foes within 2 spaces of target for the duration of their next actions.
Can be inherited. Cannot use: Staff.
Analysis
Back once more under the same mindset as his fallen peers comes Fallen Takumi (F!Takumi for short). While his stat spread and base kit may not as unique or as powerful compared to his modern day competition F!Takumi still possesses a unique niche that few units have been able to replicate.
F!Takumi was infamous when he was first introduced for not only his difficult GHB but for his stat line. Carrying the same stat line as Clarisse, another GHB archer with only +4 extra Res, he failed to stand out in the ever expansive sea of readily available archers. His skills, Fury 3 and Spd Smoke, certainly helped push his offenses but offered little else. The most notable thing about F!Takumi is his unique PRF weapon Skadi. The first weapon to impose a turn condition in its effect, Skadi will on the 3rd turn of combat deal 10 damage to all foes within 3 columns of F!Takumi (with F!Takumi in center) and also panic them for the duration of their next actions. This potent weapon can effectively allow F!Takumi control the battlefield with the help of proper positioning making him a massive enemy threat or a tool to help teammates net kills they otherwise would have missed. His Skadi’s effect is tricky to activate at times, as combat may fail to even reach the 3rd turn and predicting how the AI will move will take trial and error. In modes such as Aether Raids or Arena Assault however his aid will prove far more beneficial
On his first merge, Takumi will gain +2 HP/Spd and +1 Atk.
Reasons to Invest in Takumi
You like Takumi and intend to use him in a core team, whether it be for Arena, Aether Raids, or an Infantry
You’re interested in building Takumi due to his menacing player phase and bow’s unique effect in combat
You have obtained all or most previous copies made available and do not mind the grail cost
Reasons NOT to Invest in Takumi
You don’t intend on using him as a core on any team or in any PVE game modes such as Rival Domains or Grand Conquest
You don’t play Aether Raids and have no interest in obtaining grails
You consider Takumi’s playstyle and base kit uninteresting and would rather fodder his skills off to other heroes you use
You already have an invested bow unit that you already use on your core Arena & or Aether Raids team
Similar Units
Note: As a Grand Hero Battle Reward Takumi does not have access to boons/assets or banes/flaws and therefore is not directly comparable to any summonable units.
Clarisse: Sniper in the Dark (37/31/34/25/20)
Takumi: Fallen Vessel (+0/+0/+0/+0/+4)
Note: Takumi has access to uninheritable skills and is thus not directly comparable.
Takumi: Wild Card (40/32/33/25/18)
Takumi: Fallen Vessel (+0/-1/+1/+0/+6)
Note: Both Takumis have access to uninheritable skills and are thus not directly comparable.
Builds

Containing one of the better A skills in the game in his base kit proves beneficial for Takumi as it helps him better run budget offensive sets.
The set on the left focuses on ploying his enemies of their offensive skills while slowly seating himself in vantage range. The central focus here should be debuffing all enemies within 2 spaces of Takumi’s original target which will not only boost his survivability but, once he’s retaliated against, help set him up in Vantage range. Once the third turn hits and his opponents are chipped and panicked Takumi can better set himself up to wipe his ranged foes on by one. Luna is taken for its additional chip damage but can be substituted for Moonbow if desired.
The set on the right in contrast focuses on doing as much damage as possible. Here we use Fury/Desperation for its great synergy and to make use of his 40 Spd thanks to Fury’s stat boost and Skadi’s +3 Spd. After combat with double Savage Blow in effect we’ll be chipping enemies within 2 spaces of our target for 14 HP slowly but surely prepping them to be wiped out.
Takumi’s seal options include but aren’t limited to: Attack+3, Spd+3, Atk/Spd 2, Atk Smoke, Chill skills, Bond skills, Savage Blow and Brazen skills.
Player Phase:

Takumi, with his offensive stats in mind, does fairly well as a player phase archer.
The build on the left showcases a Slaying Bow+ set, utilizing LnD3 and Desperation to boost his offenses and optimizee his chances of sweeping his opponents. With the help of Slaying Bow+, Luna’s cooldown shortens turning it into a 2 turn special. This will not only increase his chances of activating Luna in combat but may also be used in infantry pulse setups to help him have Luna up and ready on Turn 1.
The build on the right takes a different approach turning him into a support unit. The idea with this build will be to ploy enemies in different stats to help his teammates take out said foes swiftly. The central point here will be the combination of Swift Sparrow and the Darting Blow seal. With both active, Takumi gains +10 Spd when initiating turning the 34 Spd depicted into a faster 44 Spd. At this Spd he can safely run Windsweep denying all physical melee units the chance to counterattack, being ployed after combat for -5 Atk/Spd. All foes within 2 spaces of the targeted foe will also suffer -7 Def because of Def Smoke. A defense refine may be taken if Takumi finds himself needing to take a hit from a ranged unit but can be swapped for a Spd or Atk refine as needed.
High Investment:

Takumi has a range of different roles he can fulfill on his team. The following setups are intended for those who plan on heavily investing in Fallen Takumi.
The first setup is a support build for Arena. C Duel Infantry will act as if Takumi’s BST is 170 netting higher ranking opponents in Arena as well as granting HP+5. This indirectly subjects Takumi into a support role as his stats will fail to grab him many (if any) kills in higher tiers. As such we’ll be buffing our ally’s Def and Res to help with their survivability. Hama Ya+ will grant allies within 2 spaces +2 Def/Res in combat. We further stack these defensive buffs with Drive Def and Distant Guard granting an additional +7 Def and +4 res making a grand total of +9/+6 Def/Res. Def/Res Ruse on the other hand is taken to not only ploy foes within any cardinal direction of Takumi for -3 Def/Res but to also deny their special charges. Takumi may be the one rallying or being rallied in this scenario, just as long as he is facing his opponent down.
The build on the right makes use of Null C Disrupt’s unique interaction with Firesweep weapons. Firesweep weapons are negated by Null C Disrupt as are Wrathful Dazzling staff refines (Wrazzle Dazzle for short). However in the hands of a Firesweep user this interaction changes slightly. Firesweep Bow+ for Takumi will work on Player Phase, granting him multiple hits leaving foes unable to counterattack. On enemy phase however Null C Disrupt will ignore Firesweep Bow+’s effect that denies a unit a counterattack if they’re attacked. To summarize this effect, on player phase the enemy cannot counterattack. On enemy phase, Takumi can counterattack. Distant Def 4 is taken to better help his defensive stats allowing him to tank better and nulifying any buffs their opponent has. Odd Spd Wave is taken to bolster his Spd stat and Chill Spd is taken to create a gap in a foe’s Spd. Against the fastest opponent, Takumi can effectively create a Spd gap of 13 allowing him to double more opponents safely.
#feh#fire emblem heroes#fe heroes#unit review#takumi: empty vessel#f!takumi#fallen takumi#mod asama#colorless bow/infantry
8 notes
·
View notes
Photo

Betrayal... Be... Trayal... I AM BETRAYAL!
10 notes
·
View notes
Text
Me playing heroes, sees this:

What normal people think:
Oh. He's evil and possessed and shit. And he wants to kill stuff. Cool I guess.
What my weird ass thought:

#shitpost#this is a shitpost#fire emblem#fire emblem fates#fire emblem heroes#lotr#lord of the rings#lord of the rings return of the king#lotr movies#lotr shitpost#fire emblem shitpost#gollum#smeagol#fe takumi#takumi#empty vessel takumi#i am betrayal#fe:if#fe fates#feh#what is wrong with me#sigh#u cannot stop me
115 notes
·
View notes
Photo


Team E.V.I.L did great this week! Really happy Takumi was a bonus unit this week too
#rate my build#f!grima#grima#robin#takumi#empty vessel#fell reincarnation#fell vessel#imprisoned soul#celica#feh#fe heroes#fire emblem heroes
103 notes
·
View notes
Text
I have a team of four Takumi’s and I find them hilarious

There’s always that on bitch in the group who’s always down to murder
Takumi 1: Yes
Takumi 2: On it
Takumi 3: Lets go
Takumi 4: DIE
Takumi 3 looks generally unfased about the fact that the dark version of himself is standing in front of him and is on fire

Takumi 4 is so fucking extra compared to the other three
Takumi 1,2 and 3,: Pure bois, they protecc they attacc but most importantly they protecc
Takumi 4: Will kill you outside a McDonalds if you look at him the wrong way, won’t hesitate bitch
381 notes
·
View notes
Photo


Archer Fallen Takumi in FE Heroes
#FEH#FE#FE Heroes#FE if#FE Fates#fire emblem#fire emblem heroes#fire emblem if#fire emblem fates#Takumi#fallen Takumi#Empty Vessel#max level#spoilers?#conquest#poor guy#Fallen
26 notes
·
View notes
Photo

unpopular opinion I have: takumi is a bad
114 notes
·
View notes
Video
youtube
Who knew the trick to this was to get one of the Takumis to run to the other side of the map before turn 3
7 notes
·
View notes
Text
oh yeah i just wanna say that empty vessel takumi is still my son and i would actually die for him
even if he is balls hard to get on hard and lunatic difficulty
40 notes
·
View notes
Photo

now that i got the third she looks like a babysitter
#'DIE' 'DIE' 'DIE' 'okay~'#i'm sorry it's just too funny to me#faye#takumi#bow experience 3#fe heroes#fire emblem#empty vessel takumi#an update of sorts to my other post lol#mp
18 notes
·
View notes
Video
youtube
i couldn’t figure out a way to do this with the free to play units i had for Lunatic, let alone Infernal
so i thought a more fun thing to do would be a team of Conquest units to fit the theme of the map
some of these units are more invested than others, but Xander and F!Corrin are free to play, so hopefully you can use/modify this strategy during the next 11 days whilst the GHB is still up and hopefully net yourself a free 4* Takumi!
i’ll keep throwing myself at this over the next few days in intermittent bursts, to see if i can beat it on Infernal or even just Lunatic with f2p units, but this is what i’ve got for now
enjoy~
15 notes
·
View notes
Text
Takumi
Damn baby.. I just can't beat your Infernal.. I'm suffering, but I suppose I'll just be happy with my one 4* and 3* version of you. Fuck those healers...
14 notes
·
View notes
Photo

A Foolish Samurai Warrior Wielding a Shapeshifting Master of Darkness Wielding a Magic Sword
To commemorate the introduction of Edge™ to Fire Emblem Heroes. Grabbed the 3* Fallen Takumi from the battle and by the end of the first day I’d sent home upwards of 50 4* units to get him to the 5* Lv 40 beast he is now. RNGesus still hasn’t granted me Grima, though.
EDIT: Grima came home with 1 HOUR LEFT ON THE BANNER I’M
#petalbirdie#fire emblem heroes#fe heroes#takumi#empty vessel takumi#fallen takumi#grima#fallen robin#fell incarnation robin#fallen heroes
15 notes
·
View notes