#switch plates and outlet covers
Explore tagged Tumblr posts
Visit Tumblr Blog
Explore Tumblr blogs with no restrictions, modern design and the best experience.
Last Seen Tumblr Blogs


Fun Fact
Kazakhstan’s Minister of Communications and Informatics has blocked the Tumblr site because it contained 60 sites of terrorism, extremism, and pornography in 2015.
Text

Introducing KROMO+ switch plates and outlet covers from Maven switch range by RR Switches, a product of premium quality made for your safety and to elevate your room space.
#electric switches#switch plates#rr switches#kromo switches rr#switch plates and outlet covers#rr kabel#switches manufacturers
0 notes
Photo
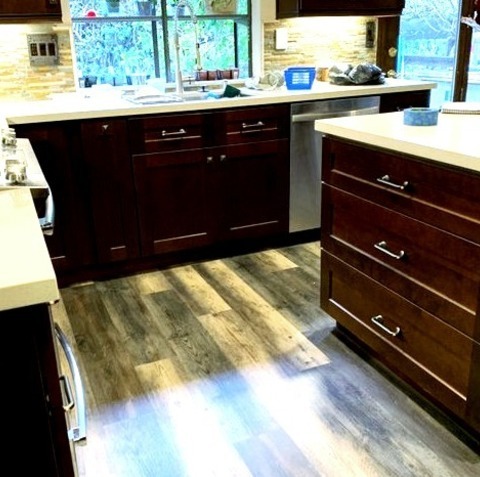
Kitchen San Francisco An illustration of a mid-sized traditional u-shaped kitchen with a beige floor and medium-toned wood cabinets, an undermount sink, dark wood cabinets, quartzite countertops, a multicolored backsplash, stone tile backsplash, stainless steel appliances, and an island.
#door knobs and door handles#stainless steel appliances#under cabinet lighting#kitchen cabinets#switch plates & outlet covers#kitchen remodel#kitchen islands
0 notes
Text
Okay so I've already established Robin!Bruce Wayne and Batman!Alfred, but how about Superman!Jor El and Superboy!Kal El? I love the concept of switched out aus
Specifically, Jor and Kal escape Krypton together, and both get taken in by the Kents. They live together on the farm, with the cover being Jor is Martha Kents' cousin from somewhere in Eurasia, and he and Kal moved to Smallville to escape conflict. Jor starts using the more human name Jordan, and Kal picks Clark. They still prefer their Kryptonian names tho. Jor picks up a job as a reporter in Metropolis, using his super powers to be REALLY good at reporting on what's happening, and Kal does his best to be a normal school boy. They become Superman and Superboy because while American is a great country, they can see the injustice happening to people who don't have powers to protect themselves.
-
Jor sighed as he once again flipped through the most recent report he received on a corrupt landlord who was caught scamming his tenants. It was incredibly unfair how society allowed people to suffer until the suffering was noticed by too many people. He only looked up when a hand pushed the lid of his laptop shut, placing a plate with a slice of freshly baked pie on top of it. Martha's kind smile greeted him.
"Eat, boy. You're gunna become skin and bone if you don't." She smiled as she ruffled Jors hair, treating him like the son she never had. Jor and Kal had been a blessing to her and Jonathan, a son and grandson to love. Jor scoffed as he began to eat, the cherry pie as delicious as ever.
"Did Kal run through here recently? I've been meaning to ask him about school." Jor spoke through a mouthful of pie, waving his fork a bit as he watched Martha clean the dishes she had used while baking. She shook her head, but offered what she knew.
"Jonathan took him down to the lake for some boys bonding. Said they would be fishing all day, might even bring home dinner."
As if on cue, the front door slammed open, a small, soaking wet boy flying in carrying a large trout, an equally soaked man following after carrying two fishing poles. Kal happily flew between the rafters, waving the fish he had caught back and forth.
"Father, look! I caught it!" Kal cheered as he finally landed in front of Jor, Jonathan chuckling lighting.
"He insisted on diving in after it. Tipped the damn boat."
When Jonathan took the fish from Kal to prepare for dinner, Kal sidled up next to Jor, trying to reach for the slice of pie his father was eating.
"Kal El, do not steal your father's slice. I'll get you your own." Martha scolded, slapping away Kals hand, the young super powered boy smiling as he followed after his adoptive grandmother. He happily accepted the slice, floating a few feet into the air and crossing his legs as he ate. While Jor tended to keep his Kryptonian powers under wraps, Kal was happy to be able to use his abilities at home. It was a struggle to hide his strength, especially with how his inability to fully control it yet and getting to throw around hay bales was a great outlet.
#dc comics#dc comics fandom#dc universe#dcu#dc fanfic#dc comic#superman#dc superman#dc characters#dc#dc superfam#superfam#superman comics#supeman au#superman head canon#superman fandom#dc clark kent#clark kent#kal el kent#kal el#jor el#dc comics au#dc cartoons#dc comcis#dc au#jor el superman#jor el superman au#kal el superboy#kal el superboy au#superboy
68 notes
·
View notes
Note
mafia front pls 🙏🙏
WIP Wednesday (4/9) | Mafia Front Restaurant AU (Part 306)
When he's hungry enough to eat, Neil allows Jean to peck his cheek before going to heat up the food Kevin had saved for him. At Jean's request he pops a bag of popcorn and brings it to them in a couple bowls before getting his own plate. The spot in the middle is still empty so he sits there with his legs up on the table and his plate on his lap.
He's a bit shocked to discover Kevin is actually a good cook. When he says it aloud he gets a real, authentic Kevin Day smile for the compliment. And a kiss placed on his forehead that he can still feel ten minutes later.
Once the clock chimes ten, the TV is switched off and the three of them start to get ready for bed. Neil brushes his teeth and does his business quickly then vacates the bathroom so the others can have it, like always. He's stepping into his bedroom when he hears Kevin say, "Neil, are you coming?"
The question hangs in the air for a long moment, but finally Neil snatches the pillow off his bed and follows the sound of Kevin's voice. Kevin is already sprawled in the middle of Jean's bed and Jean is sat on the edge of it, making sure their cell phones are plugged into the outlet by his nightstand. They both look delighted to see him even though it's only been forty-five seconds.
"I don't think I wanna be held tonight,” he says.
"Then you can hold Kevin."
“Yeah. Hold me.” Kevin pats the bed behind him and Neil moves to oblige. Climbing into bed with them when the light is on and everyone's fully awake is more vulnerable than it had been the night before when it was almost a secret. But he drops his pillow and slips under the covers, scooting close enough to Kevin to put an arm around him. It means having a mouthful of Kevin's hair, but he thinks it's worth the sacrifice. After checking that they're both tucked in, Jean yanks the string on the lamp and tells them goodnight. And that's that.
#finally we're gonna be getting back to andrew next week!#lol this kevjeaneil situation has been going on for a few hours in fic but one thousand weeks in real life time TwT#aftg#kevjeaneil#Mafia Restaurant AU#WIP Wednesday#🕊️#answered#anon
10 notes
·
View notes
Text

when I was fucking up that bathroom wall I figured I'd check for wallpaper behind this switch plate and also figure out why one screw did not go anywhere whenever I turned it. there wasn't any wallpaper but there was an unbelievable amount of fucking paint both behind and on top of the plate. the hole for one screw was covered with too much paint for the screw to push through so I cleaned that and the plate.
above is cleaned pic. kinda pissed at how bad the outlet is secured to the electrical box (the little mounting things are bent to fuck. how does that even happen. you can see how it doesn't sit flat in the pit) but that's a project for a day when I can shut off the breaker.

the light switch plate looked like shit in comparison afterward so I cut it off the wall and scraped it clean. for some reason that one is metal. now the two plates look super stupid together. I figure I'll replace both after patching the drywall and repainting.
nothing in this house is cohesive. it's like everything was pulled out of someone's junk drawer. when I took that medicine cabinet down, the screws I removed didn't even match each other.
28 notes
·
View notes
Text
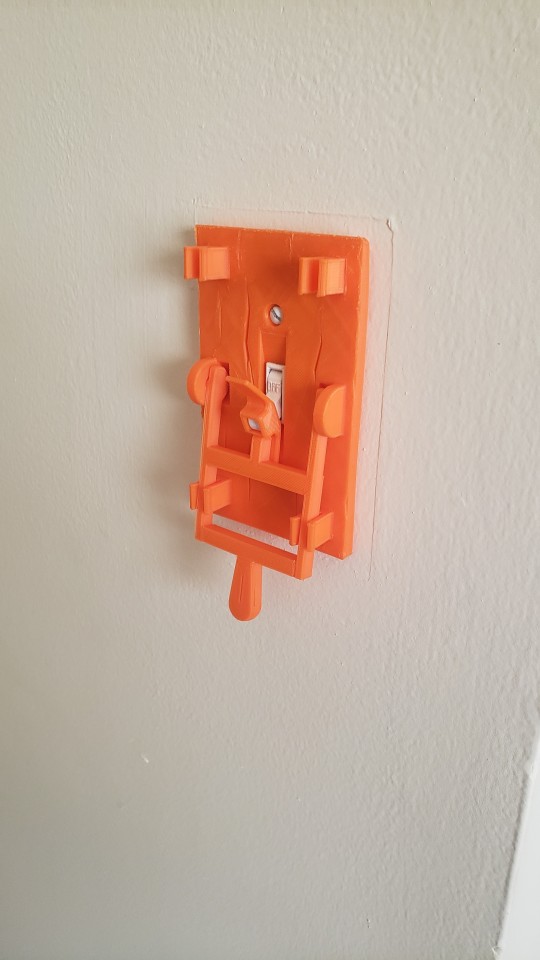
A note for those who are printing this - when you are printing replacements for light switch covers you should be aware that the plastics that are used for electrical fixtures are in a set of plastics that are "self-extinguishing". This means that they don't propagate fire. Please ensure that if you're replacing a switch place or outlet plate that it's a self extinguishing plastic.
Today on "I'm an Adult and Get to Decide What That Means": Mad scientist light switches

105K notes
·
View notes
Text
Discover the Craftsmanship of South India kitchen equipment manufacturer Loved by Hotels and Restaurants
Chefs, hoteliers, and caterers across the region trust the reputation and reliability of South India kitchen equipment manufacturer for delivering equipment that truly meets the real needs of a commercial kitchen. From small bakeries to star hotels, quality and performance matter the most — and that’s what this brand consistently delivers.
Clients who run fast-paced kitchens know that a single equipment failure can slow down the entire service. That’s why they invest in well-engineered products from South India kitchen equipment manufacturer who prioritize durability, hygiene, and safety standards. The company's stainless steel products are tailored to fit both modern and traditional South Indian cooking needs.
Every product—whether it’s a dosa plate, burner, sink table, or tandoor—is crafted to make bulk cooking seamless. No wonder more entrepreneurs are placing their trust in this South India kitchen equipment manufacturer for their hotel, mess, or food chain expansion.
Scale Up with Smart Kitchen setup services in Tamil Nadu That Fit Any Budget or Space
Opening a new food outlet or redesigning an old kitchen? Then the smartest choice is to go with expert Kitchen setup services in Tamil Nadu that understand workflow, movement, and safety. Dhanyass provides personalized kitchen layouts and installs every unit with precision and care.
From restaurants in Madurai to canteens in Coimbatore, their Kitchen setup services in Tamil Nadu cover design consultation, manufacturing, and full implementation. Whether you need a gas line plan, chimney setup, or storage rack alignment, their experienced team handles it all professionally.
Many restaurant owners appreciate how these Kitchen setup services in Tamil Nadu save time, avoid future repair costs, and ensure staff can operate without accidents. The demand is especially high among cloud kitchen startups and café chains.
Every Restaurant's Need: Affordable commercial kitchen tools for Daily Cooking Efficiency
Startups and small eateries don't want to spend lakhs on kitchen gear, but they still want reliability. That’s where Affordable commercial kitchen tools from Dhanyass come into the picture. These tools are priced competitively without compromising strength and hygiene.
You’ll find work tables, idli steamers, vegetable cutting machines, chapati warmers, and more in their wide range of Affordable commercial kitchen tools. The best part? They’re all made from rust-resistant stainless steel, easy to clean, and built for tough daily use.
Kitchen owners love the return on investment. Even after years of heavy use, these Affordable commercial kitchen tools remain solid and dependable. Many small businesses who started with basic sets later return to buy larger setups as they grow.
Built to Last: Premium Heavy-duty kitchen equipment in India for High-Volume Food Service
Not all kitchen equipment is made the same. When it comes to volume cooking and constant usage, chefs need Heavy-duty kitchen equipment in India that doesn’t give up under pressure. Dhanyass delivers exactly that with heavy gauge materials and industrial-standard finishing.
Large hotels, wedding caterers, and industrial canteens across India are switching to these Heavy-duty kitchen equipment in India for their unmatched durability and top-level functionality. Each item—from bulk cookers to storage bins—is tested for long operational life.
Clients report that this Heavy-duty kitchen equipment in India reduces downtime, minimizes repair costs, and improves the speed of food delivery. In kitchens where every second counts, having equipment you can trust makes all the difference.
Visit the Most Trusted Local kitchen equipment showroom Madurai for Real-Time Demos and Expert Support
One of the biggest advantages of working with Dhanyass is their walk-in Local kitchen equipment showroom Madurai. Customers can explore, test, and discuss their needs in person with product specialists who truly understand the culinary world.
You don’t have to guess from online pictures. At the Local kitchen equipment showroom Madurai, you can see the strength of the steel, feel the burner control, and compare equipment models side by side. From restaurant owners to first-time hoteliers, everyone is welcome.
With plenty of stock ready for delivery, this Local kitchen equipment showroom Madurai stands out as a one-stop shop for Tamil Nadu’s food entrepreneurs.
Need expert advice or a custom kitchen plan?
📞 +91 92455 56074 📞 +91 90251 56074 📞 +91 98946 35445 📞 +91 99948 25445 📞 +91 73581 56074 🌐 Visit: dhanyasscommercialkitchenequipmentsmanufacturer.in

0 notes
Text
Common Repairs Before Listing Your Home

When you decide to sell your home, first impressions are everything. A well-maintained, move-in-ready property can stand out in a crowded market and attract more serious buyers. One of the most important steps before putting your property on the market is taking care of common repairs.
Let’s break down the most essential repairs to make before listing your home—and why they matter. Whether you're selling a family house or a luxury apartment, like those offered by the Bayshore Road Condo Developer, these tips can increase your home’s appeal and value.
1. Fix Leaky Faucets and Plumbing Issues
Buyers are quick to notice plumbing problems. Dripping faucets, running toilets, and low water pressure might seem minor to you, but to potential buyers, they signal neglect.
What to do:
Repair or replace leaky faucets.
Fix running or noisy toilets.
Check under sinks for signs of leaks or mold.
Ensure proper drainage in tubs and sinks.
These fixes are usually inexpensive and easy for a handyman to complete, but they make a big difference during showings.
2. Patch and Paint Walls
Walls take a beating over the years—nail holes, dents, scratches, and faded or outdated paint can give your home a tired look. A fresh coat of paint can make a space feel clean and new.
Best practices:
Stick to neutral colors like white, beige, or soft gray.
Patch up all holes, cracks, or dents before painting.
Repaint baseboards, trims, and doors if they look worn out.
Fresh paint is one of the cheapest upgrades with the highest return on investment.
3. Repair or Replace Flooring
Floors can be a major selling point or a major turn-off. Stained carpet, chipped tiles, or scratched wood floors are red flags for buyers.
Options to consider:
Steam-clean carpets or replace them if they’re worn out.
Refinish hardwood floors to remove scratches and restore shine.
Replace broken tiles or cracked grout in bathrooms and kitchens.
Use modern vinyl plank flooring for a quick, stylish upgrade.
Remember, buyers love clean, cohesive flooring that flows from room to room.
4. Service or Replace HVAC Systems
A faulty heating or air conditioning system can be a deal-breaker. Buyers want peace of mind that the home’s major systems are in good working order.
Checklist:
Have a licensed technician service your HVAC system.
Replace air filters and check ducts for leaks or blockages.
Consider replacing an old unit if it’s near the end of its lifespan.
If the HVAC system is newer and well-maintained, it’s a strong selling point you can highlight in your listing.
5. Fix Doors and Windows
Doors that don’t close properly or windows that won’t open are small details that signal poor maintenance. Buyers will test doors and windows during a walkthrough.
What to check:
Make sure all interior and exterior doors open and close smoothly.
Replace any broken locks, handles, or hinges.
Repair cracked window panes and ensure all windows lock securely.
Replace worn-out weatherstripping to improve energy efficiency.
These are small fixes that can prevent bigger questions about the home's overall condition.
6. Address Electrical Problems
Old light switches, dead outlets, or flickering lights may seem harmless, but to buyers, they could indicate wiring issues.
Steps to take:
Replace broken or outdated light fixtures and ceiling fans.
Upgrade switch plates and outlet covers for a cleaner look.
Hire an electrician to fix any code violations or unsafe wiring.
Buyers want a home that feels safe and up to date—especially when it comes to electricity.
7. Improve Curb Appeal
Before a buyer even steps inside, they’re judging your home from the street. Curb appeal plays a huge role in getting people through the door.
Ideas for curb appeal:
Mow the lawn and trim hedges.
Plant fresh flowers or greenery.
Power wash the driveway and walkways.
Paint or replace the front door if it’s worn or faded.
A neat, inviting exterior makes your home stand out and sets a positive tone for the rest of the showing.
8. Kitchen and Bathroom Touch-Ups
These two areas are the most scrutinized by buyers. While full remodels aren’t always necessary, minor upgrades can go a long way.
Quick wins:
Re-caulk sinks, tubs, and backsplashes.
Replace outdated cabinet hardware.
Install new faucets or lighting fixtures.
Deep clean appliances and tile grout.
Even small updates can make kitchens and bathrooms feel modern and well-maintained.
9. Declutter and Depersonalize
While this isn’t a “repair” in the traditional sense, it’s just as important. A cluttered, personalized home makes it hard for buyers to visualize themselves living there.
What to do:
Remove family photos and personal décor.
Clear off counters and surfaces.
Organize closets and storage areas.
Consider renting a storage unit to free up space.
A clean, spacious home photographs better and feels more inviting during tours.
10. Consider a Pre-Listing Inspection
If you want to get ahead of potential issues, consider hiring a home inspector before listing. This allows you to fix problems proactively rather than negotiating after a buyer's inspection.
Benefits:
Increases transparency with buyers.
Reduces the chance of surprises that delay or kill deals.
Gives you more control over repair costs and timing.
A pre-listing inspection can also give your real estate agent confidence when marketing your property.
Conclusion
Taking care of these common repairs before listing your home can lead to a smoother selling process, fewer negotiations, and potentially a higher sale price. Buyers are willing to pay more for homes that are well-maintained, move-in-ready, and visually appealing.
And if you're looking for inspiration in premium property development, check out what the Bayshore Road Condo Developer is doing. Their attention to detail and modern designs highlight exactly what today's buyers are looking for in a home.
Remember: A little work upfront can make all the difference when it's time to sell.
0 notes
Text
Reliable Electrical Installations & Finding the Best Electrician Near Me with Vizi
Whether you’re building a new home, renovating a commercial space, or simply updating outdated wiring, the quality of your electrical installations can have a lasting impact on safety, efficiency, and property value. At Vizi, we specialize in professional-grade installations that stand the test of time.
But we also know what most people search for when the lights go out or sparks start to fly: "electrician near me." That’s why Vizi brings local, trusted electrical expertise right to your doorstep—quickly and reliably.
Why Professional Electrical Installations Matter
Electrical systems are complex and potentially dangerous if not handled correctly. Whether it’s a lighting system, a panel upgrade, or setting up new circuits, the risks of improper installation can include fire hazards, electrocution, and failed inspections.
At Vizi, we make sure every connection, outlet, and breaker box is installed with precision. Our technicians follow all safety codes and use industry-leading tools and materials, ensuring that your systems work perfectly and safely.
What We Offer
Our installation services cover a wide range of needs, including:
Lighting Systems: From ambient and recessed lighting to smart lighting controls, we design systems that enhance aesthetics and functionality.
Electrical Panels: We install modern circuit breaker panels that provide better safety and capacity for today’s energy needs.
EV Charging Stations: Vizi offers certified installation for electric vehicle chargers, whether at home or in commercial garages.
Home Automation: We install smart switches, thermostats, and home security systems that make life more convenient and secure.
Data & Communications: Our structured cabling solutions ensure high-speed internet and seamless communication systems.
The Vizi Advantage: Electricians Near You, When You Need Them
When you’re searching for an electrician near me, you’re not just looking for proximity—you want a local expert who shows up on time, communicates clearly, and gets the job done right.
Vizi prides itself on being a trusted name in your community. Our electricians are strategically located across service areas to respond quickly and efficiently to your calls.
Benefits of Working with a Local Vizi Electrician:
Faster response times
Familiarity with local codes and regulations
Personalized service from a neighbor, not a stranger
Ongoing support and maintenance
Installation Done Right the First Time
A bad electrical job isn’t just frustrating—it can be dangerous. That’s why our Vizi team undergoes regular training, stays up to date with the latest technologies, and follows strict quality assurance procedures.
We don’t believe in shortcuts. Every installation goes through a checklist to make sure it’s done right, right away.
Common Signs You Need New Electrical Installations
Flickering or dim lights
Breakers tripping frequently
Outdated fuse boxes
Limited number of outlets
Hot or discolored switch plates
If any of these issues sound familiar, it’s time to get in touch with a Vizi electrician.
Real Reviews, Real Results
“We needed an urgent panel upgrade. I Googled ‘electrician near me’ and found Vizi. They were at our home in under an hour and finished the job the same day. Incredible service!” – John R.
“Vizi handled the entire electrical installation for our new restaurant. From lighting to fire alarms—flawless work.” – Alicia W.
Get Started with Vizi Today
Finding a qualified electrician near me no longer needs to be a hassle. Vizi combines the best of local availability, modern tools, and experienced electricians for stress-free service. Whether you’re looking for minor upgrades or full-scale electrical installations, we’re ready to deliver.
0 notes
Text
🌲 Elevate your space with natural elegance! Wood wall plates are trending for a reason — they bring warmth, texture, and a touch of rustic charm to any room. Whether you're remodeling or just refreshing a space, these small upgrades make a big impact. ✨
🔗 Read more: [link]
0 notes
Text
Notes from the Edge 25
Posted 10-27-2013 Never say never. Of course I did last week. I said last week would be the last of full time carpenter and I would be back to full time writer. Remember all those little things I said would take ten minutes? And then I did them and they took ten hours? Well, there were dozens more. Moldings, door trim, lock sets, cat choking, switch-outlet-speaker connection cover plates (Those…
0 notes
Text
Tips for Making Outlets & Glass Switch Plates Look Better!

Ever feel like something is missing about the walls, though the paint and decoration are spot-on? The culprit can well be the obsolete outlets and switch plates that are outdated and out of fashion. A miniature piece put up here and there, the allure of these features isn't immediately noticeable when doing your overhaul, while they mean a lot to the atmosphere of the space. Dated or mismatched switch plates and outlets can spoil a modern room. If glamour mixed with cleanliness in design is the aim, attention must be given to detail. Here's how to make reset outlets and best glass switch plateslook good with a little application.
Match Switch Plates with Wall Color
An easy way to spice outlets and switch plates up is to blend their color with the color of the wall. The outcome is a more seamless-looking and much smoother wall. This trick is particularly advisable in the living room and bedroom. Paint the plastic pieces or buy colored covers that are somewhat close to your wall shade. If there is wallpaper, match or make the switch plates blend into the motif. This way, the room remains crisp and coherent-looking.
Legitimate Glass Switch Plates for a Modern Twist
Glass switch plates are trendy accessories in homes. They add sophistication and elegance to any room. They have a clear, shiny counter that gives your interiors an expensive touch. Used extensively today in modern-styled homes and minimalistic spaces alike. Glass does not yellow like plastic over time, so it always looks fresh and clean. Also, it can be kept looking neat and poised by means of regular cleaning. And indeed—sleek and stylish modular glass switch plates would make a fantastic upgrade to any standard-looking interiors.
Go for Modular Plate System Design for a Super Unique Look
In a modular plate system, one can get crafted parts to meet diverse criteria. You have full control over size, shape, and any layout headers at your disposal. This makes the wall look as uniform as possible with fewer types of switch plates visible. Modular switch plates are available in different stylish finishes such as matte, glossy, wooden, or metallic. They fit perfectly into the wall space and make up your custom home decor. Be it for a bedroom or kitchen, both come in useful for functions and aesthetics.

Use Furniture and Decoration to Hide Your Outlets
In most cases, in the awkward spots, there's no need to remove the outlets or switches on any pretext. Just hide them! Place any kind of tall plant, piece of furniture, or a large photo frame before the offending outlets so that they can be ignored. In the more open spaces such as hallways, living area, this trick is just great and effective. It resolves the situation quickly as the extension cord or wire is less likely to be concealed—no messing about at all on changing out the outlets. This is like treating your eyes to a pure, clean, crisp show of indifference.
Conclusion
It is the small details that together form a room, and switch plates are certainly one of them. Glass switch plates or a stylish modular switch plate can bring a colorless wall to life. Whether you hide the narrow outlets or exchange covers for new ones, the change that it brings has a profound effect. Such improvements to the walls with a few tricks, transforming a basic look to absolutely beautiful. So, notice by them your walls by now; make them share one more story of the style of your home.
0 notes
Text
How to Paint Over Dark Walls Without a Hassle
So, you’ve got a room with deep navy, charcoal gray, or maybe even a dramatic black wall that seemed like a good idea at the time. But now, you're craving something lighter, brighter, and less... cave-like. The problem? Painting over dark walls can be a real pain if you don’t do it right. But don’t worry—I'm here to walk you through how to do it without losing your mind (or your weekend).
Let’s get into it.
1. Prep Like a Pro (Even If You're Not One)
First things first: don’t skip the prep. I know, it’s the least fun part, but trust me—this is where the magic starts. Grab some painter’s tape and cover the trim, ceilings, and anything else you don’t want to accidentally “accent.” Lay down drop cloths or old sheets to protect the floor, and remove any outlet covers or light switch plates.
Next, wash the walls. You’d be surprised how much grime lives on your walls. A quick wipe-down with warm water and mild soap will help the new paint stick better.
2. Sand Down the Shine
If your dark walls are glossy, grab a sanding block and give them a light sand. You don’t need to go nuts—just enough to dull the surface a bit so the primer can grip. Glossy paint tends to repel new coats like it’s got commitment issues.
3. Prime Like Your Life Depends on It
This is the big one: primer is your best friend. Don’t even think about skipping it unless you want to end up doing a million coats of paint and crying in the corner.
Use a high-hide, stain-blocking primer, preferably one that’s tinted gray or close to your final wall color. This helps neutralize the darkness underneath and makes your paint job way more efficient. One or two coats should do the trick. Let each coat dry thoroughly before moving on.
4. Choose the Right Paint (It Matters!)
Once the primer’s dry and you’re feeling confident, it’s time for paint. Quality matters here—cheap paint might look okay at first but could peel, chip, or just fail to cover well.
Look for paints labeled as “paint + primer” for extra coverage (even though you already primed—trust me, it helps). And if you’re going from black to white or light beige, be ready for two coats minimum. Sometimes three. It’s okay—Rome wasn’t repainted in a day.
5. Roll With It (Literally)
Use a good-quality roller with a thicker nap (3/8" to 1/2") to cover the textured surface evenly. Start with the edges and corners using a brush, then roll the rest in a “W” or “M” pattern to avoid streaks and lines.
Let the first coat dry fully before deciding if it needs another. Be patient—rushing leads to uneven coverage and frustration.
6. Finish Strong (And Touch Up Later)
Once your final coat is on and dry, remove the painter’s tape carefully, touch up any spots you missed, and step back to admire your work. The room looks totally different, doesn’t it? Fresher, cleaner, brighter—it’s basically magic.
Bonus Tips for a Smooth Job:
Work in daylight if you can. Natural light helps you spot streaks and missed spots better.
Keep a wet edge as you paint to avoid lap marks.
Always paint in the same direction for a uniform look.
Final Thoughts
Painting over dark walls isn’t as intimidating as it sounds—it just takes a little patience, the right materials, and a solid plan. Once you see those dark tones disappear under your fresh new color, you’ll realize it was all worth it. Plus, there’s something super satisfying about transforming a space with just a few coats of paint.
Now grab that roller and show those dark walls who’s boss.
0 notes
Text
For Your Home: Hand-Forged Elegance for Every Room

Is your home missing that special touch that makes it feel truly yours? Discover Old West Iron’s “For the Home” collection, where rustic elegance meets expert craftsmanship. Each piece is carefully hand-forged to combine charm, functionality, and durability. From your living room to your bathroom, these thoughtfully curated items will transform any space into a warm, personalized haven.
Keep reading to explore how Old West Iron can add unique character to every corner of your home. We’ll cover everything from stunning wall accessories to sophisticated lighting that can elevate your interior design.
What is Old West Iron's "For the Home" Collection?
Old West Iron’s “For the Home” collection is a curated selection of hand-forged, handcrafted home accents that bring both utility and aesthetic beauty to any space. This assortment covers everything from eye-catching kitchen hardware and wall accessories to luxurious bathroom fittings and bespoke lighting solutions. Each item reflects the timeless artistry of hand-forging, offering more than just functionality—it’s a piece of art in your home.
Whether you’re a design enthusiast seeking unique pieces for your DIY project or an interior designer searching for standout accents for your client’s space, this collection has something for every style and taste.
Wall Accessories: Small Details, Big Impact
Wall accessories may seem like minor details, but they’re the unsung heroes of interior design. The “For the Home” collection includes a variety of wall accessories that marry aesthetics and practicality, making your home not just a living space but a curated gallery.
What You’ll Find:
Door Stops & Wall Bumpers to safeguard your walls without compromising on style.
Switch Plates & Outlet Covers that add a rustic flair to even the smallest elements in your home.
Hooks for organizing coats, hats, or keys with sophistication.
Shelving with Shelf Brackets to display books, plants, or decor pieces in an artisanal way.
For instance, imagine replacing a boring plastic switch plate with a hand-forged iron design. Suddenly, even light switches become a statement piece.

Window Accessories: Framing the View
Windows already bring natural light and fresh air into your home, but why not enhance their charm? The collection includes exquisite accents that turn your windows into works of art.
Highlights:
Curtain Rods that are both sturdy and stylish.
Curtain Tie Backs designed to showcase your drapes in true elegance.
Shutter Dogs in Mediterranean, French Country, and Early American styles, adding authenticity and charm to your exterior shutters.
Window Grills and Awning Brackets that merge decorative appeal with practicality.
Whether you’re modernizing your living room or remodeling a rustic farmhouse, these accessories tie it all together seamlessly.

Kitchen: Functional Beauty
The kitchen is the heart of the home, and Old West Iron’s kitchen accessories prove that practical doesn’t have to mean boring. These items are designed to enhance your culinary experience while also adding character to your space.
Must-Have Kitchen Items:
Range Hoods detailed with hammered or forged finishes, turning a functional fixture into a stunning focal point.
Pot Racks for convenient and space-saving storage, showcasing your cookware with pride.
Utensils and Trivets hand-forged to not only be useful but also beautiful conversation starters.
Cutting Boards and Trays combining rustic aesthetics with modern functionality.
Think about hosting friends for dinner. Wouldn't a statement pot rack or a custom cutting board make your kitchen the talk of the evening? That’s the magic of functional beauty.

Bathroom: Elevate Your Sanctuary
Bathrooms are more than functional spaces; they’re sanctuaries where you unwind and refresh. The “For the Home” collection offers luxurious bathroom accessories that boost your space’s comfort and style.
Top Picks:
Bathroom Hardware Sets featuring towel bars and hooks with intricate iron designs.
Mirrors framed with hand-forged details that reflect not just your image but your impeccable taste.
Tubs with a vintage charm that turns bathing into an indulgent experience.
Consider swapping out a plain mirror with one framed in hand-forged iron, and see how the room's atmosphere transforms instantly.

Lighting: Mood and Mastery
Lighting can change the entire atmosphere of your home, and the collection’s chandeliers, sconces, and pendant lights bring warmth and personality to every room. Made with the same meticulous forging process, these pieces offer style, durability, and plenty of wow factor.
Lighting Options:
Chandeliers that make bold statements in dining rooms or entryways.
Wall Sconces available in rustic designs like cabin motifs or medieval-inspired torches.
Candle Holders & Candelabras for adding soft, ambient lighting to any room.
Picture a dining room illuminated by a grand iron chandelier or a hallway accented with wrought-iron sconces. These lighting elements not only light up your room but spark conversations.
Infuse Your Home with Character
Old West Iron’s “For the Home” collection is more than just decor. It’s a celebration of hand-forged artistry that blends functionality with character. Whether you're adding small touches to a single room or transforming your entire house, these pieces provide the perfect finishing touches that truly make a house a home.
What are you waiting for? Explore the full range of hand-forged perfection and turn your home into the masterpiece it deserves to be.
Discover Old West Iron’s “For the Home” Collection Now!
0 notes
Text
Common Interior Painting Mistakes and How to Avoid Them
Embarking on an interior painting project can be both exciting and daunting. A fresh coat of paint has the power to transform your space, but achieving that flawless finish requires careful planning and execution. Let's explore some common interior painting service mistakes and how to avoid them, ensuring your project is a resounding success.
1. Skipping Surface Preparation
One of the most prevalent mistakes is neglecting proper surface preparation. Painting over dirty, greasy, or uneven walls can lead to poor adhesion and an uneven finish. Before you dip that brush into paint, take the time to clean the walls thoroughly. Remove dust, grease, and any flaking paint. Sanding glossy surfaces is also crucial to ensure the new paint adheres properly. Remember, a well-prepped surface is the foundation of a long-lasting paint job.
2. Forgoing Primer
Primer plays a pivotal role in achieving a smooth and vibrant finish. It not only helps the paint adhere better but also enhances the paint's true color and provides a uniform appearance. Skipping primer can result in uneven coverage and increased susceptibility to peeling. Especially when transitioning from a dark to a light color (or vice versa), applying a suitable primer is essential for optimal results.
3. Choosing Low-Quality Tools
The allure of inexpensive brushes and rollers can be tempting, but they often lead to unsatisfactory outcomes. Low-quality tools can leave streaks, shed bristles, and result in uneven application. Investing in high-quality brushes and rollers ensures a smoother finish and can make the painting process more efficient and enjoyable.
4. Applying Thick Coats of Paint
In an effort to expedite the project, applying thick coats of paint might seem like a good idea. However, this approach can lead to drips, uneven texture, and longer drying times. Instead, opt for multiple thin coats, allowing each layer to dry completely before applying the next. This technique ensures a more even and professional-looking finish.
5. Ignoring Environmental Factors
The conditions under which you paint can significantly impact the outcome. Painting in high humidity or extreme temperatures can affect drying times and the paint's appearance. Ensure the room is well-ventilated, and try to maintain a moderate temperature. Additionally, adequate lighting is essential to spot any missed areas or imperfections during the application process.
6. Neglecting to Remove Fixtures and Cover Surfaces
Painting around fixtures, outlet covers, and switch plates can lead to messy edges and accidental splatters. Taking the time to remove these items and properly cover floors, furniture, and hardware with drop cloths or plastic sheeting can save you from unnecessary cleanup and ensure crisp, clean lines.
7. Rushing the Drying Process
Patience is key in painting. Rushing to apply subsequent coats before the previous one has fully dried can result in smudges, streaks, and an uneven finish. Always adhere to the manufacturer's recommended drying times, and ensure each layer is completely dry before proceeding.
8. Overworking the Paint
Once the paint is applied, it's important to resist the urge to over-brush or roll it excessively. Overworking the paint can create unwanted texture, visible brush strokes, and an uneven appearance. Apply the paint smoothly and allow it to settle naturally for the best results.
9. Not Testing Paint Colors
Choosing a paint color based solely on a swatch or in-store lighting can lead to disappointment. Colors can appear different under various lighting conditions and in different spaces. It's advisable to test a small section of the wall with the chosen color and observe it at different times of the day to ensure it meets your expectations.
10. Inadequate Cleanup and Maintenance
After completing the painting project, proper cleanup is essential. Cleaning brushes and rollers thoroughly extends their lifespan and ensures they're ready for future use. Additionally, properly sealing paint cans prevents the paint from drying out, allowing for easy touch-ups down the line.
By being mindful of these common pitfalls and taking proactive steps to avoid them, you can achieve a professional-looking interior paint job that revitalizes your space.
If you're in the St. Petersburg, FL area and prefer to leave the painting to professionals, consider reaching out to Esso B Services. As a family-owned and operated business, they specialize in interior and exterior painting, cabinet painting, as well as pressure and soft washing services. Their commitment to quality and attention to detail ensures your home receives the care it deserves. For more information or to request a quote, visit their website at essobservices.com or contact them at (727) 776-4721.
0 notes
Text
Tips for Home Improvement Bakersfield Without Major Renovation
There are times when you want to give your home an upgrade but you don’t want to enter into a major upgrade session. It might be something like a quick adjustments or a simple improvement. You can always upgrade without breaking your pockets or going through a major construction hassle.
These tips are all going to help whether you want to enhance the functionality or improve the aesthetics of your house. These simple changes can make it impactful and add new energy to your space and work in favor of home improvement Bakersfield.
1. Lighting can impact the home improvement you are planning without adding a lot on your budget. It can boost the ambiance of the room. You can simply improve the home space by removing outdated fixtures and replacing them with refreshing and new ones. For instance, you can move to LED bulbs that are energy efficient and can offer better lighting. You can replace your outdated fixtures with new chandelier or pendant lights. You can also add wall scones to enhance the lighting. Install the dimmer switches which can improve the mood according to the space. Accent lighting under the cabinets or behind the TV can also make the space look contemporary. Lastly, you can use table and floor lamps to add warmth to the space.
2. Whether you are planning kitchen remodeling Bakersfield or a complete home upgrade, you can simply refresh the walls with a coat of paint or wallpaper. You can choose a new colour or refresh the existing shade. You can also use the trending paints to transform the space. Choosing light and neutral tones can make your space appear bigger. With bold and bright colours, you can enhance its personality. You can use wallpaper or bold paint to create the accent wall. Peel and stick wallpaper can also improve the essence of the wall. You can also improve the walls with wall decals or murals. These would improve the visuals of the space without the long-term commitment.
3. You must update the hardware and fixtures in the house that are either outdated or old as part of home improvement Bakersfield. It will help improve the house and give it a modern look. Start by looking at the cabinet handles and drawer pulls. You can use modern or vintage designs for the cabinets and improve its appearance. You can also improve the aesthetics of the doorknobs and locks by updating the hardware. Bathroom and kitchen faucets should be next on your list, where you can make a big impact with a high-quality faucet. Lastly, you can improve the look by adding light switch covers and outlet plates.
4. You can revamp the accessories and décor of the house to upgrade the space. For instance, you can replace your existing pillows and blankets with new colours and textures. Similarly, you can rearrange the paintings and photos to give a fresh aesthetic to the space. Indoor plants can also add life and purify the air in the house. Lastly, you can upgrade curtains and blinds to improve the space.
5. Make sure to declutter and organize, as part of kitchen remodeling Bakersfield, to make your home fee refreshed and inviting.
0 notes