#sweetindulgence
Explore tagged Tumblr posts
Text
#SignatureChocolateTower#LuxuryChocolate#GourmetTreats#ChocolateGift#PremiumChocolates#JPatriceChocolate#ElegantGifting#SweetIndulgence
3 notes
·
View notes
Text

Apple Marshmallow
Ingredients:
250 g Apple puree (it should be thick)
40 g Egg whites (approximately 1 egg of selected category)
7-8 g Agar-agar
140 g Water
600 g Sugar
Powdered sugar for dusting
Recipe:
The measurements are given for a planetary mixer; for a hand mixer, reduce all ingredients by half.
Preparation process:
1. In a saucepan, combine water and agar-agar, mix well.
2. Bring to a boil until agar-agar forms a thick liquid "gel."
3. Once the gel is formed, add all the sugar and actively stir, cook until it reaches 110 degrees Celsius. If you don't have a thermometer: the syrup is ready when it reaches the "thread" state (initially, the syrup flows continuously, then the last drop hangs on a spatula or whisk like a "thread").
4. While the syrup is cooking, prepare parchment paper and stencils for scooping the marshmallow.
5. In the mixer bowl, combine the apple puree and egg white, starting from medium to maximum speed - beat.
6. The readiness of the apple puree with egg white before adding the syrup should be white in color and hold firmly on the whisk (beat until peaks form).
7. Without reducing the mixer speed, slowly pour the cooked syrup (heated to 110 degrees Celsius) into the beaten egg whites without hitting the whisk, and continue beating. The mixture will increase in volume by 2 to 2.5 times.
8. Continue beating for 3-4 minutes to cool the mixture and hold it on the whisk.
9. While beating the mixture, prepare a pastry bag with a nozzle.
10. Transfer the marshmallow mixture to the bag.
11. Scoop the marshmallow onto the prepared parchment and stencils.
12. Let it stabilize for at least 4-6 hours, preferably overnight at room temperature.
13. Remove the marshmallow from the parchment, join the two halves, and roll in powdered sugar.
14. The marshmallow is ready! If you have a hand mixer, first beat the apple-egg mixture. Then set aside the beaten mixture and prepare the syrup.
#ChocolateLover#SweetTooth#DessertHeaven#Indulgence#DecadentTreats#SugarRush#YummyInMyTummy#SatisfyYourCravings#TastyTreats#DeliciousDesserts#GuiltFreeIndulgence#DessertObsessed#TreatYourself#DessertTime#SweetIndulgence#DessertPorn#DessertGoals#SugaryDelights#HeavenlyDesserts#DessertLove
2 notes
·
View notes
Text
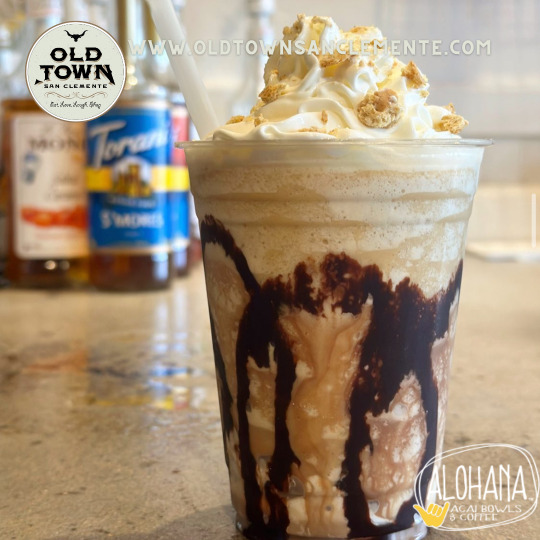
Indulge in pure bliss with our ultimate S'mores Frappe at Alohana Acai Bowls! 🍫☕️✨ A delightful blend of toasted marshmallow and graham crackers that is sure to satisfy your sweet cravings 😋
#smorefrappe#sweetindulgence#frappe#frappuccino#coffee#coffeelovers#acai#acaibowl#acaishop#coffeeshop#orangecountyrestaurants#sanclementecommunity#sanclementelocals#oldtown#oldtownsanclemente#sanclemente
2 notes
·
View notes
Text
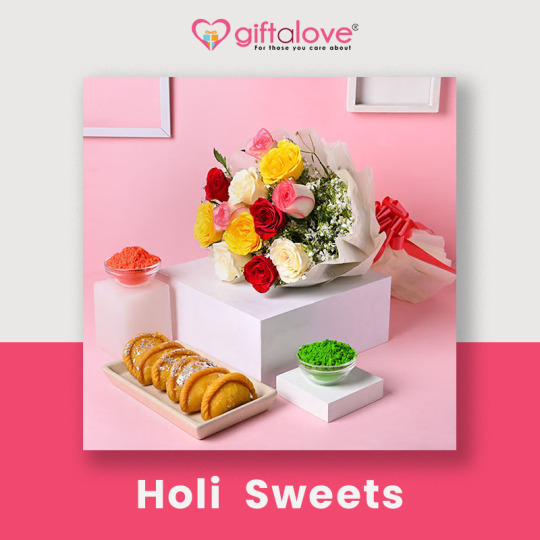


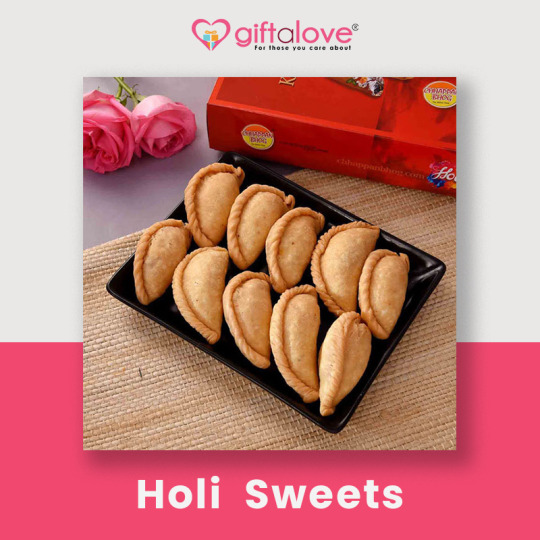
Indulge in the vibrant joy of Holi with our delightful array of sweets! From traditional gujiyas to mouthwatering pedas, our collection has something for everyone. Spread sweetness and laughter this festive season with our delicious treats. Order now from Giftalove.com and make your celebrations truly memorable!
#HoliSweets#ColorfulDelights#SweetIndulgence#FestivalTreats#JoyfulEats#TastyTraditions#SugaryCelebration
2 notes
·
View notes
Text
youtube
Carrot halwa
#CarrotHalwa#GajarKaHalwa#IndianDesserts#TraditionalSweets#FestiveTreat#DessertLovers#HalwaRecipe#IndianSweets#HomemadeDesserts#DessertGoals#EasyDessertRecipe#WinterSpecial#SweetTooth#HalwaLovers#AuthenticIndianFood#DessertIdeas#QuickDesserts#FoodieLove#DesiDesserts#RecipeOfTheDay#Foodstagram#IndianFoodBlogger#VegetarianDessert#SweetIndulgence#FestiveFlavors#Youtube
0 notes
Text

#GulabJamunLovers#DaulatSweetsBakery#FazilkaEats#PunjabSweets#SweetIndulgence#IndianDesserts#TraditionalSweets#GulabJamunMagic#FestiveFlavors#MadeWithLove#TasteOfPunjab#SweetsInFazilka#GoldenBrownDelights#AuthenticIndianTaste#DaulatDelights#bestsweetsshopinfazilka#best sweet shop in fazilka#fazilka sweets#fresh cake in fazilka#gulab jamun fazilka#best tosha in fazilka#mithai in fazilka#best bakery in fazilka#best samosa in fazilka#paneer shop in fazilka#samosa king in fazilka
0 notes
Text
Hubba Bubba Snappy Strawberry Bubble Tape

Indulge in Snackstar's Hubba Bubba Sensations! Chew into a burst of flavor with every bite, pop with excitement, and savor the sweet, tangy goodness that unfolds. Whether you're sharing with friends or enjoying a solo snack break, each piece promises a fun, flavorful experience. Your ultimate snacking adventure is just a chew away—treat yourself today!
#Snackstar#HubbaBubba#FlavorBurst#ChewJoy#SnackingAdventure#PopWithExcitement#SavorTheMoment#GourmetSnacks#TasteTheFun#SweetIndulgence
0 notes
Text
Exquisite Chocolate Boxes Packaging for a Sweet Unboxing Experience

levate your brand with our premium chocolate boxes packaging! Designed to protect and showcase each piece, our packaging adds a touch of elegance to every unboxing. Perfect for gifting, our customizable designs highlight the beauty of your chocolates while keeping them safe and fresh.
0 notes
Text
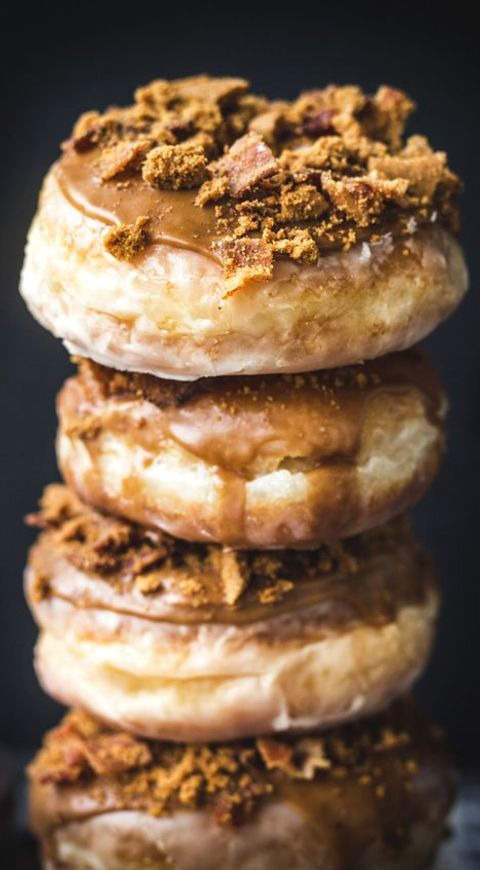
Indulge in the timeless delight of classic homemade donuts. These sweet treats are perfect for breakfast or snacking.
Ingredients: 2 cups all-purpose flour. 1/2 cup granulated sugar. 2 tsp baking powder. 1/2 tsp salt. 2/3 cup milk. 2 large eggs. 2 tbsp unsalted butter, melted. 1 tsp vanilla extract. Vegetable oil for frying. 1 cup powdered sugar for glaze. 2-3 tbsp milk for glaze. 1/2 tsp vanilla extract for glaze.
Instructions: Mix flour, baking powder, granulated sugar, and salt together in a mixing bowl. Mix the milk, eggs, melted butter, and vanilla extract in a separate bowl. Once a dough forms, pour the wet mixture into the dry mixture and stir. Place the dough onto a surface dusted with flour and roll it out to a thickness of 1/2 inch. To cut out donuts, use a donut cutter or a round cookie cutter. Next, cut out the centers with a smaller cutter. Preheat 350F 175C vegetable oil in a deep fryer. Fry the donuts carefully in batches for two to three minutes on each side, or until golden brown. Using a slotted spoon, remove the donuts and set them on a plate covered with paper towels to remove excess oil. To make the glaze, whisk together milk, vanilla extract, and powdered sugar in a separate bowl. Using a wire rack to cool, dip each donut into the glaze, allowing any excess to fall off. After the glaze has set, savor your traditional donuts!
Prep Time: 20 minutes
Cook Time: 20 minutes
Danielle
0 notes
Text

These Marshmallow Filled Cupcakes are a delightful treat for anyone with a sweet tooth. The surprise marshmallow filling adds a gooey and delightful twist to classic chocolate cupcakes. Perfect for birthdays, parties, or whenever you're craving a sweet indulgence.
Ingredients: 1 1/2 cups all-purpose flour. 1/2 cup unsweetened cocoa powder. 1 1/4 cups granulated sugar. 1/2 teaspoon baking soda. 1/4 teaspoon salt. 1/2 cup unsalted butter, softened. 2 large eggs. 1 teaspoon vanilla extract. 1 cup whole milk. 12 marshmallows for filling. 1 batch of your favorite chocolate frosting. Sprinkles for decoration optional.
Instructions: Preheat your oven to 350F 175C and line a muffin tin with cupcake liners. In a medium-sized mixing bowl, whisk together the flour, cocoa powder, granulated sugar, baking soda, and salt. In a separate large mixing bowl, cream the softened butter using an electric mixer until it's smooth and creamy. Add the eggs and vanilla extract to the butter, and continue to beat until well combined. Gradually add the dry ingredient mixture to the wet ingredients, alternating with the whole milk. Start and finish with the dry ingredients, mixing until just combined. Fill each cupcake liner halfway with the cupcake batter. Place a marshmallow in the center of each cupcake batter-filled liner. Cover the marshmallows with additional cupcake batter until each liner is about 2/3 full. Bake in the preheated oven for about 18-20 minutes, or until a toothpick inserted into a cupcake comes out clean. Allow the cupcakes to cool in the tin for a few minutes before transferring them to a wire rack to cool completely. Once the cupcakes are completely cool, prepare your favorite chocolate frosting and frost each cupcake. Decorate with sprinkles if desired. Serve and enjoy your delicious Marshmallow Filled Cupcakes!
Prep Time: 20 minutes
Cook Time: 18 minutes
Bianca MacFarlane
0 notes
Text
The wait is almost over, Bella Vista! Velvet Bites is about to open its doors, where every bite and treat is a delight. Ready to satisfy your cravings?
#velvetbites#grandopening#sweetindulgence#velvetindulgence#bellavistabites#sweetcravings#snackattack#treatyourself#velvetopening#savorthemoment#snackhaven#bellavistatreats#dessertdreams
0 notes
Text

The magic ingredient in these brownies is sweetened condensed milk, which makes them rich and fudgy and also very easy to make. The chocolate makes the brownies sweet, moist, and creamy, making them impossible to resist.
Ingredients: 1 can sweetened condensed milk. 1/2 cup unsweetened cocoa powder. 1/2 cup all-purpose flour. 1/2 cup melted butter. 2 eggs. 1 tsp vanilla extract. 1/4 tsp salt. 1/2 cup chocolate chips optional.
Instructions: Warm the oven up to 175F 350C. Melted butter, eggs, vanilla extract, salt, and sweetened condensed milk should all be mixed together in a bowl. Mix everything together well. You can add chocolate chips if you want to. Put the batter into an 8x8-inch baking dish that has been greased. If you stick a toothpick into the middle and it comes out with moist crumbs instead of wet batter, the cake is done. Let it cool down before you cut it into squares. Serve and have fun!
Prep Time: 10 minutes
Cook Time: 20 minutes
Caitlin
0 notes
Text

Enjoy the richness of this Chocolate Meringue Tart recipe, which has a chocolate crust, fluffy meringue, and creamy ganache.
Ingredients: 1 1/4 cups all-purpose flour. 1/4 cup unsweetened cocoa powder. 1/4 cup granulated sugar. 1/2 teaspoon salt. 1/2 cup unsalted butter, cold and cut into cubes. 1 large egg yolk. 2 tablespoons ice water. 4 large egg whites. 1 cup granulated sugar. 1/4 teaspoon cream of tartar. 1/2 teaspoon vanilla extract. 1 cup semisweet chocolate chips. 1/2 cup heavy cream. 1 tablespoon unsalted butter.
Instructions: Preheat the oven to 375F 190C. In a food processor, combine flour, cocoa powder, sugar, and salt. Pulse to combine. Add cold butter and pulse until mixture resembles coarse crumbs. Add egg yolk and ice water. Pulse until the dough comes together. Press dough into a 9-inch tart pan. Prick the bottom with a fork and freeze for 15 minutes. Line the crust with parchment paper and fill with pie weights or dried beans. Bake for 15 minutes. Remove parchment and weights, then bake for an additional 10 minutes. Let cool. In a clean mixing bowl, beat egg whites until foamy. Add cream of tartar and continue beating until soft peaks form. Gradually add sugar, beating until stiff peaks form. Beat in vanilla extract. Spread meringue over cooled crust, making decorative swirls with the back of a spoon. Bake for 10-12 minutes, or until meringue is lightly browned. In a small saucepan, heat heavy cream until steaming but not boiling. Pour hot cream over chocolate chips and let sit for 5 minutes. Stir until smooth. Add butter and stir until melted and incorporated. Pour chocolate ganache over cooled tart. Let set before slicing.
Prep Time: 30 minutes
Cook Time: 40 minutes
#FluffyMeringue, #SweetIndulgence, #HomemadeTreats
Gerard
#10; Enjoy the richness of this Chocolate Meringue Tart recipe which has a chocolate crust fluffy meringue and creamy ganache.#Ingredients: 1 1/4 cups all-purpose flour. 1/4 cup unsweetened cocoa powder. 1/4 cup granulated sugar. 1/2 teaspoon salt. 1/2 cup unsalted#Instructions: Preheat the oven to 375F (190C). In a food processor combine flour cocoa powder sugar and salt. Pulse to combine. Add cold bu#Prep Time: 30 minutes#Cook Time: 40 minutes#FluffyMeringue#SweetIndulgence#HomemadeTreats
0 notes
Text
Valentine's Day is a special occasion to celebrate your love and romance with your partner. It is also a time to express your feelings and appreciation for them with a thoughtful and memorable gift. But finding the perfect gift for your partner can be challenging, especially if you want to give them something sweet and delicious. You don't want to give them the same old chocolates, candies, or cookies that everyone else gives. You want to give them something that shows how much you know them and care for them.
But how do you find such a sweet and delicious gift for your partner? Well, you don't have to look far. You can find them all at giftalove.com. giftalove.com is a leading online gift portal that offers a wide range of gifts for all occasions and relationships. Whether you want to send Valentine gifts for partner, Valentine hampers, Valentine flowers, Valentine cakes, Valentine cards, or any other gifts, you can find them all at giftalove.com.
#LoveBites#SweetheartTreats#ValentineCakes#CakeLove#SweetIndulgence#HeartsAndCakes#RomanticTreats#DeliciousRomance#CakeCrush#IndulgeInLove#TemptingTreats#CakesOfLove#SweetCelebration#ValentineDesserts#Cakespiration#LoveInLayers#HeartfeltTreats#ShareTheLove#SweetSurprises#CelebrateWithCake
2 notes
·
View notes
Text
Indulge in Every Rich, Velvety Bite at Our Cake Shop in Ladybarn 🍫🍰✨

Looking for the ultimate chocolate experience? Visit our Cake Shop in Ladybarn and dive into the indulgence of our Chocolate Fudge Cake 🍫! With every rich, moist layer melting in your mouth 🤤, and a creamy fudge frosting that’s pure perfection 🍫🍫, it's a dessert that promises to satisfy every chocolate lover's cravings. Treat yourself to the ultimate sweet escape! 🍰❤️
#CakeShopInLadybarn#ChocolateFudgeCake#DessertLovers#SweetIndulgence#CakeHeaven#LadybarnEats#ChocolateLovers#FudgePerfection#TreatYourself#CakeGoals
0 notes
Text
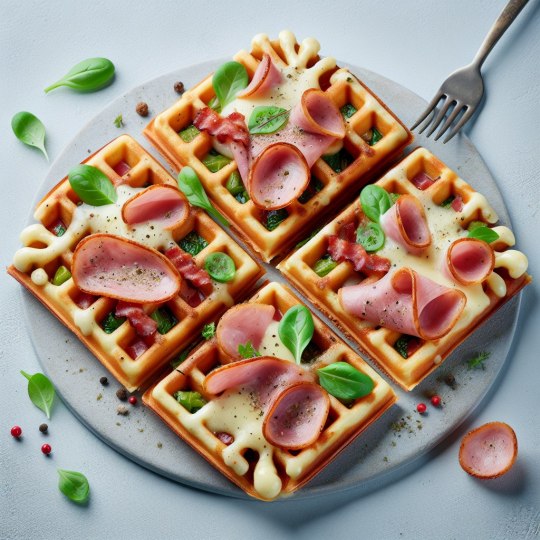
Tender, soft, with a crispy crust — who would refuse such waffles? My kids simply adore them. The recipe is very simple: 5 minutes to mix the dough, that's it. And if you don't have a waffle iron, you can also make small cupcakes from the same batter.
Ingredients:
For 9-10 waffles
For waffles
300 g flour 200 ml milk 150-200 g hard cheese 150 g ham (sausages or sausage) 100 g butter 3 eggs 10 g baking powder Pinch of salt Dill, parsley
Additionally Vegetable oil for greasing the waffle iron
Recipe:
1. Melt the butter in the microwave and mix with milk. Add the eggs, whisk together. Then add sifted flour with baking powder, add salt.
2. Grind the cheese and ham in a meat grinder, or grate the cheese and finely chop the ham into small cubes. Finely chop the herbs.
3. Add the ham, cheese, and herbs to the batter. Mix well.
4. Preheat the waffle iron, grease with oil, place a small amount of batter, close and cook until golden brown (it takes me 4-5 minutes for this). Repeat until the batter is finished.
#ChocolateLover#SweetTooth#DessertHeaven#Indulgence#DecadentTreats#SugarRush#YummyInMyTummy#SatisfyYourCravings#TastyTreats#DeliciousDesserts#GuiltFreeIndulgence#DessertObsessed#TreatYourself#DessertTime#SweetIndulgence#DessertPorn#DessertGoals#SugaryDelights#HeavenlyDesserts#DessertLove#Breakfast#Pasta#Dessert#Vegan#Grill#Cookie#Healthy Eating#Meat#Soup#Pie
0 notes