#so i have to crop the images to make them fit better
Text
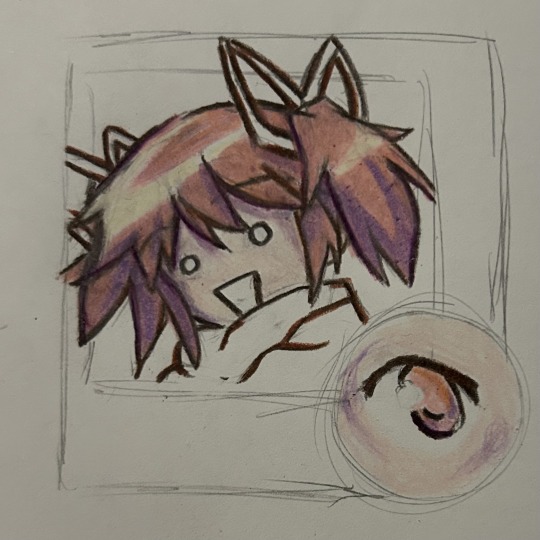
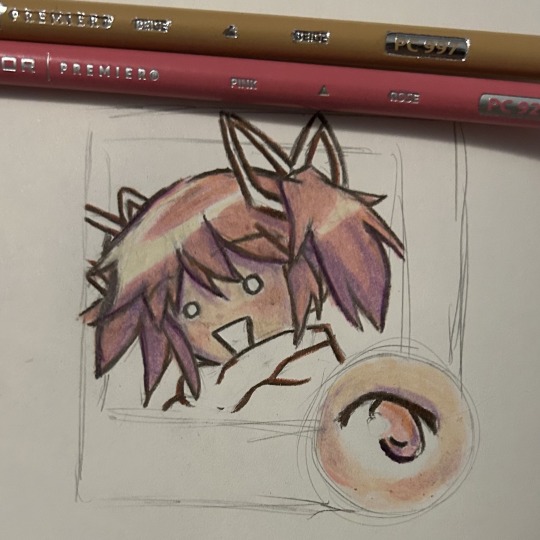
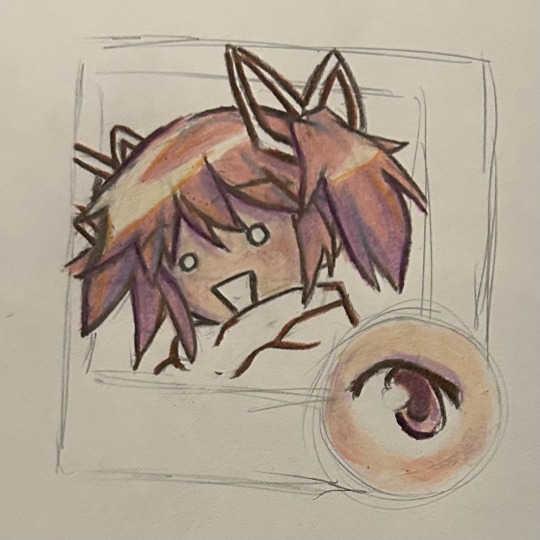
Haven't drawn these goobers in a while
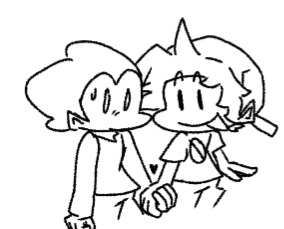
#friday night funkin#pico newgrounds#random thoughts#pico fnf#doodle#gay men#boyfriend fnf#boyfriend#boyfriend x pico#if you ever wonder why my drawings are slightly low res and weirdly shaped#its bc ive gained a habit of drawing super small#so i have to crop the images to make them fit better#not aure if ive explained that before but there ya go
50 notes
·
View notes
Text
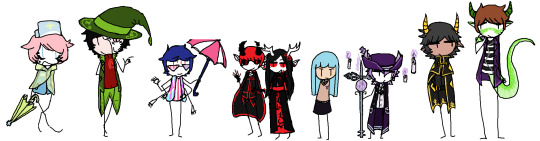
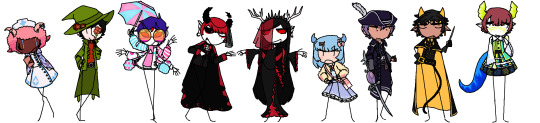
Old vs new
#all of these characters needed redesigns but for various reasons#mostly being that its old art and my design senses and skill has changed since#rain may fall was picked because compared to the other characters in her story they just felt very plain#i also planned on only giving them a brown skintone and i wasnt gonna change their hair or anything#but than while i was microwaving food i randomly thought of them with darker skin and curly pink hair and i thought it was really cute#so i did it lol#salem is a design i was never happy with even when i originally drew him i was not happy with his design#particularly cause he looked very christmas-y#so i changed his palette making the green more yellowish and the red more orangeish and i think that worked out better#delta needed a redesign for the obvious reason of being art from 2019 also i felt they didnt seem vaporwave enough#and the way the umbrella cuts off in the art i did of them looksbadman#alastair and earlene also from 2019 but also i chose them specifically because i... i needed seperate images of them#its awkward to crop that old art for their character pages#bell taurus also just old art from 2019 doesnt even have arms cause i used to not always put arms on stickman drawings#elmo primarily cause i wanted to change his colors and make him look older as well as get rid of his horns and give him a skintone#his story (and salems) had some lore development since i drew him in 2019 so this better fits the lore#belat is another design i was never happy i spent a long time on his old design fiddling with it back and forth and hated it#i decided to make him a catboy and now he looks better#and esteem. my god esteem. i got lazy with their old design and i hated it. they needed the redesign the most#anyways done rambling
4 notes
·
View notes
Text
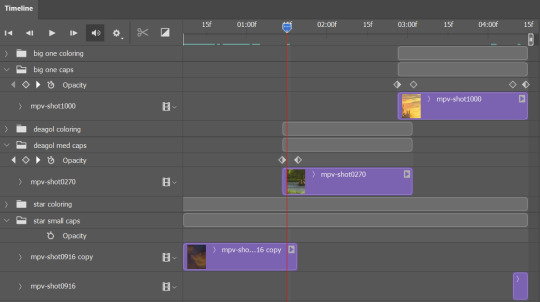
i always get questions when i do a split gifset, and it's a deceptively simple process so i thought i'd try to show how i do it! i don't know if these types of gifsets have a more universally recognized name, but that's what i call them so that's what i'm going with.
i'm going to write this assuming you have a solid familiarity with photoshop and making gifs, but please feel free to send me an ask if anything is unclear. i use video timeline/smart objects so will be showing that (here's a great general tutorial on giffing with timeline). i will also be talking A LOT about gif dimensions, so first let's briefly go over the limits and theory a little bit.
a 1 column gifset can accommodate gifs 540 pixels wide
2 columns = 268 pixels each with a 4 pixel gutter between
3 columns = 177, 178, 177 pixels with 4 pixel gutters
i'm mostly going to talk about 2 column split gifs here (what i will refer to as 2x1 from now on - 2 across and 1 high), but the process is the same for 3 column (3x1) and so on (1x2, 2x2, etc).
so, why would you even want to make a gifset like this? i mean, let’s face it, generally, bigger is better for gifs on tumblr, and there are obvious incentives to 540 width gifs over 268 or 177/8 width, especially since the upload limit went to 10MB. but even 10MB isn’t much when you’re talking about high quality footage. gif making is a constant balance between quality (whatever that means to you: frame dimensions, sharpening, coloring, etc) and file size. split gifs are a cheat to that limitation >:)
i personally believe an untapped frontier of tumblr gifmaking is playing with dimensions and time. that sentence makes me sound like an old-timey sci-fi villain, but you get the idea: gifmaking is an art and there are many fun and interesting ways of exploring the medium. you can do a lot with 268 pixels! longer frame loops to gif longer scenes unbroken, bolder coloring on a wide shot you don’t want to pare down. and, a shorter x axis means the y axis’s bang goes a lot further on a buck. also just if you have a 2 column set but only 5 gifs so you need to make one take up 2 slots. there's a lot of reasons but the most important one is it's fun :) here are some examples of other split gifs i've made: x, x, x
this isn't so much a limitation, more of a shift in how you think about gifs, but it's important to remember that each gif should ideally be doing something still. when making split gifs, it’s easy to pick a wide scene without thinking about how it’ll be split down the middle, and then you’re left with a lot of something on one side and a lot of incongruous nothing on the other - or you're left with a person cut in half awkwardly in the middle. so while a split gif can still be a whole scene, you shouldn’t ignore the break and what it means to the bigger picture. now this is personal preference, but i like to play with the break and make it a part of the gifset. mirrored movement, subjects trapped on either side but still talking to each other, a bird flying from one side to the other. fun with frames! it can be another way of drawing attention to specific images/moments/feelings happening within the same shot.
SIMPLE SPLIT GIFS
to more narrowly define what i’m calling “simple split gifs,” it’s one set of frames split down the middle into two separate gifs that are meant to play concurrently, side by side.
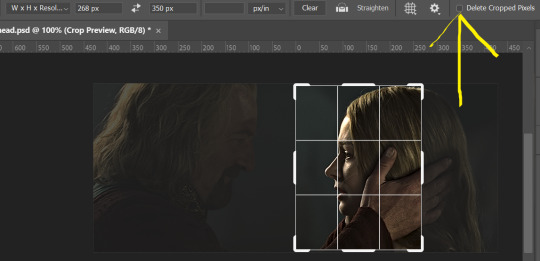
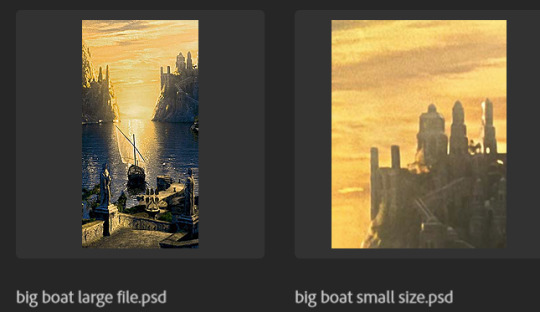
first thing's first, crop your gif and uncheck delete cropped pixels if it is not already (very important). i'm cropping it to the 1x1 size, in this case 268x350. if you need to see how the full size will look, you can try it out with 536 first. but this one is pretty easy, this is the exact center of the frame (the left boundary of this crop is the center line) and both their heads fit within their respective 1x1 crop.
then color as you normally would. if your scene is very different one side to the other, it might be easier for you to color on a wider crop and then either crop again or copy paste your coloring to the smaller crop version. i do that with the 2x6s, but it's usually not that big a deal to color the 2x1s with just the small crop on your canvas at the time. this scene is very symmetrical, both in movement and colors, so i'm good.
now the fun part! once you've got one side how you want it, save/export as you normally would. at this point i also like to make a mental note of how many frames there are.

so i have 49 frames and it's still only ~3MB! this is just an example that i picked from my rotk fancy set, otherwise i probably would have made this gif longer.
then onto the other side, so i ctrl + z my way back to my smart object video timeline. to get to theoden i just drag and drop the smart object 268 pixels over. since this one is in the exact center of the image, it even helpfully guides me (this can get annoying if you are NOT giffing the center of the image fyi, but you can always manually go pixel by pixel too if you need to with your <- -> keyboard buttons. just always remember where you started and count accurately). i can never move around my smart object without hiding the adjustment layers on top of it, so you'll see me do that in this screen recording.
see how it corrected me when i dragged it a few pixels down by accident, and with all those pink guidelines? sometimes photoshop is good 😌
then make sure you still like the coloring, adjust whatever needs to be adjusted, but watch out! don't make any major changes because it still has to match the other side. and export again.

what we perceive as 1 series of frames chopped down the middle is just 2 separate gifs with the same frame rate. when tumblr loads the images, it will run concurrently in the post (even though it never does in the draft post 🙄). and that's it!
COMPLEX SPLIT GIFS
again i'm making up terms, but i call anything with more than 2 components a complex split gifset. i've tweaked some things in the process as i went along, but this is generally how i did the lotr series. these sets are basically just many split gifs with transitions. and here's where endurance becomes a factor :) there's a lot of prep done blind. but if set up well, it will be fairly easy to pull together by the end.
first i decide on my dimensions, using my upper bounds to determine how big i'm going to go. since lotr has very nice large file sizes, i can go pretty big without sacrificing much in quality. i decided on 3 rows of 350 pixel height gifs and it's worked well for me. that means my biggest gif will have a total height of 1050 pixels - fun! you could also do 8 rows, with two 2x2s or just a series of 2x1s that transition to 1x1s. there really is no limit to this except your imagination and source material.
i cap everything i'm going to use before i even open photoshop, then do all of them at once. uncheck delete cropped pixels, then i make my gifs! this is where i spend 90% of the time on this set. every gif should be the size of the smallest 1x1 gif (268x350 for me). i make all 10 into a fully colored, separate psd. (and then i usually go back through all of them a few times to get the colors to match better 😅) for the bigger ones (2x1: 536x350 and 2x6: 536x1050), i just crop them as if they were 1x1 but always thinking about how they will look when big. this gets tricky when i do the big one :) my lazy workaround for that is to basically make it twice: one cropped as it will be and one full size for me to color. then i copy and paste all the coloring layers onto the small one and voila, i know that the coloring in the upper right slice will also look good on the bottom left slice 1050 pixels away because i saw it on the full size version.
coloring is probably the biggest thing i'm thinking about with this kind of set. the whole idea is that these gifs are using the same colors, more or less, throughout each phase. even with the 1x1s, they're still part of a larger color concept, and they should (🤞) work with each other.
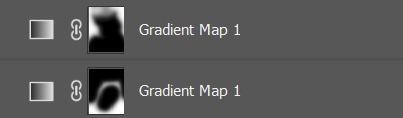
in a pinch, i like to eyedrop a color from one gif and add it as an accent to another. one of my 1x1s had a much more muted color palette originally, but i wanted it to have deeper blues and yellows to complement the 1x1 that would go next to it, so i added some gradients on lower opacity over it, color picked from other gifs i already colored.
i keep my coloring and the smart object in separate folders to help me in the final step of combining everything, and then i trim everything down to my lowest common denominator of frames. you might think you need to keep frames pretty minimal if you're doing 3 phases with transitions like this, but there's more room to work with on a small gif, in terms of file size. i usually do 30-50 frames for each phase, with the assumption that i'll be adding a transition on each side of each gif that will eat up some frames (i usually do 4-6 frame fade transitions). for the rotk set my final frame count was 129 and i never went over 8MB on a gif, so there's plenty of space play around with things :)
and then, combine! whatever order you start with, you are stuck with (unless you're getting even more complicated, but we won't go into that lol). for these sets i go small 1x1 -> medium 2x1 -> big 2x6. i like to think of it in phases from this point on. small is the first phase, then medium, then big. then i put in the fade transitions, chopping up the first phase gif so the last one will fade into it, restarting the whole cycle seamlessly. i'm just doing a quick and dirty fade here, but here's a tutorial if you want more explanation on transitions.
at this point i save this psd as its position, "top left" or whatever (usually it's a psb by this point too 🥲), just in case i need to go back to it. then i export this first gif and move on to the rest.
it's the same concept as a simple split gif: drag and drop the smart object to the new position, but now there are multiple phases to keep track of. folder organization has been key for me to keep everything straight. i move through the gifs in a backwards S, starting with the top left. but you could go any direction, just gotta stick with it and remember your counts. in my case, i'm always thinking of 268 pixels over and, for the 2x6, 350 up/down. it's a tedious process, but it goes quick (apart from waiting for photoshop to load each time you export).
i did this series as a color concept aesthetic kind of thing, so my theory was by using the same-ish colors throughout, that would save me in the end when it came time to export. there's only 256 colors max to work with on a gif, and that's usually what gets me over the 10MB limit. but as i said, i have never even gotten close to the size limit on this series. it's pretty hard to reach the limit on 268 pixels, but not impossible. (i did run into that on the emma set i did, and that was hell. but also not an impossible fix in the end.)
and that's it! if you try any of this and have trouble, i'm happy to help if i can but mostly this is a "click around and see what works for you" kind of process. and feel free to tag me on your split gifsets :) i love seeing them <3
#*lotrsplit#*#split gifs#gif tutorial#photoshop tutorial#usergif#allresources#chaoticresources#completeresources#photoshop tag
234 notes
·
View notes
Note
Hey, I love the comic! I love how the storywriting stays true to the original series but also adds its own fun spin on it! You've actually inspired me to write my own Blue diamond AU, lol.
Anyways I have a question for making comics just in general. How can you make dynamic compositions in such a small space. I honestly love how intricate all of your panels fade into one another!
So, if you're okay with it, I was wondering if you could give me some tips on how that would work?
Anyway, I love the comic and stay awesome!
:D
Your own comic - that's awesome to hear! It's always exciting to start something like that. I wish you the best of luck in your goals!
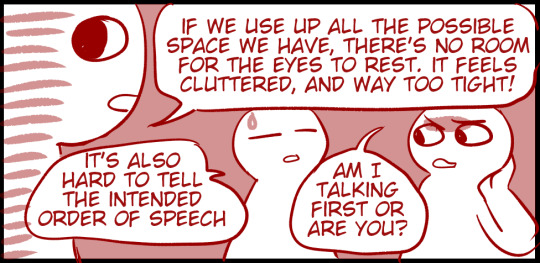
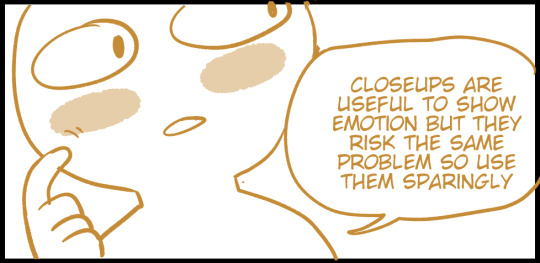
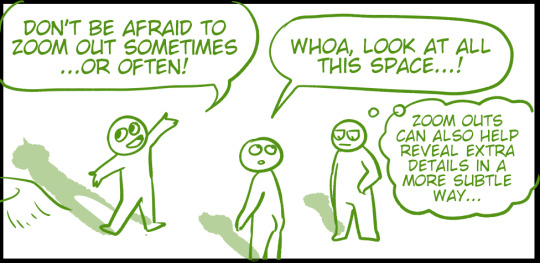
As for the paneling - honestly, the first step is to stop thinking of it as a 'small space'! The truth is, even on a small mobile screen, we can fit a lot of detail. And as long as we know how to use the space wisely, it's not ever going to feel small.
Ironically, cramming MORE into a panel makes it feel smaller.
Drawing less on a panel makes it feel larger. Weird, isn't it?
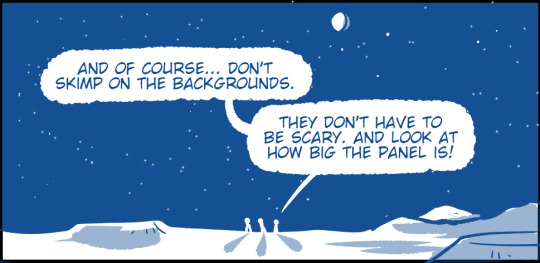
My more general advice is... STUDY MOVIES!
Don't just WATCH movies. But study them. Movies are like comics for dummies because there's only one size and shape of a panel and all the characters do the hard work of acting for you. (It's a joke, don't kill me.)
Anyway, the paneling in movies is versatile and interesting BECAUSE they're putting that single wide panel to the best use. If you already drew some comics, compare them to a movie screenshot and see what's different! Then, ask yourself why a certain angle, or a certain cropping of an image works better.
You'll find that there's some awesome ways to cram fun details into even the smallest corner of a panel. :)
There's also some awesome art resources by more talented comic artists than me out there. I'm sure others will link them in the comments, but for now, here's one I found:
383 notes
·
View notes
Note
Hi, can you please do a fluff featuring Han Jisung x Chubby Fem. Reader? Reader feels insecure about her body so Han makes her feel loved🥰
Of course! I’m on the chubbier side myself so I can definitely relate. I hope you like it🥹💕

You were lounging in your room, boredom settling in as the rain tapped softly against your window. The day had been long, and you found yourself caught in a cycle of self-doubt. You've been feeling insecure for the past few months. It started ever since you went with your boyfriend, Jisung, on his band's world tour. Stays, the group's fandom, were so beautiful, and you began to compare yourself to them. You even started to wonder why Jisung chose you as his girlfriend out of all the pretty girls he could have chosen.
The sound of the doorbell interrupted your thoughts, and you sluggishly got up to answer it. As you opened the door, you saw a small package lying on the welcome mat. Your heart fluttered—this was the delivery you'd been waiting for. You had ordered a bunch of new clothes online, hoping that the clothes would make you feel better about yourself. Maybe, just maybe, this new clothing would be the change you needed.
You carried the package inside, feeling excited as you carefully opened it. Inside were a few new items you had picked out: a crop top, some jeans, and a dress. You decided to try them on, hoping that the new styles might put your insecurities to rest.
First, you slipped into the crop top. It was a sexy black halter top. You smiled, anticipating how sexy you were going to look. However, as you looked in the mirror, your excitement quickly turned to disappointment. The top fit tightly, drawing attention to your stomach. Also, the top was cut way too short. You knew it was a crop top, but this one revealed too much belly. Your stretch marks, which you had been trying to ignore for as long as you could remember, seemed more noticeable than ever. The sight of the unsightly lines on your stomach brought tears to your eyes as you traced them with your fingers. You tugged at the fabric of the top, hoping it would hide the things you felt insecure about, but it only made them more visible. Sighing heavily, you took the top off and tossed it aside.
Next were the jeans. You squeezed into them, but they felt constricting, especially around your thighs. The way they clung to you seemed to accentuate the very areas you were self-conscious about. You stared at your reflection, feeling a pang of frustration as the jeans pulled and creased in all the wrong places. They made your thighs look even bigger than usual. You quickly removed them, adding them to the growing pile of discarded clothes.
Finally, you tried on the dress. It was a beautiful light pink sundress, but it did nothing to make you feel better. It hugged your curves in ways that made you uncomfortable, highlighting the acne on your chest and shoulders as it did so. Tears welled up in your eyes as you looked at yourself in the mirror, feeling overwhelmed and disgusted by the sight. You had hoped these clothes would make you feel better, but they only magnified your insecurities. You felt worse than ever, your self-esteem plummeting.
Feeling defeated, you threw the clothes back into the box and shut it with a snap. You were going to return these clothes as soon as possible. You sat back on your bed, scrolling through social media for a distraction. But as you flicked through Instagram, the flawless images of influencers and models with perfect skin and slim bodies only intensified your insecurity. The comparisons were relentless, and you couldn't shake the thought that Jisung, your boyfriend, might feel the same way. Did he wish he were with someone who looked more like those models? Was he ashamed of you? The idea kept picking at you, deepening your self-doubt. You threw your phone on the ground and buried yourself in your covers, bawling. You weren't sure how long you'd been crying, but it must've been a while as you heard Jisung walking in the front door. He always left the studio late.
"Y/n? I'm home," he called. You stayed silent. You were afraid that if you opened your mouth, he would be able to hear that you had been crying.
Jisung kept calling your name until he reached the bedroom. "Hi, babe," he smiled when he saw you, running over to give you a kiss, which you returned half-heartedly.
Jisung knew something was wrong. He was always able to sense when you were upset. He looked at your face, immediately noticing your wet cheeks. It was obvious to him that you'd been crying. "Hey, what's wrong?" he asked, his voice filled with concern.
You opened your mouth to say something, but you found yourself sobbing uncontrollably. "I'm not enough," you cried. "You deserve someone prettier, someone skinnier. Why did you choose me out of all the girls you could have had?" You placed your hands in your face, sobbing.
Jisung's expression softened with sadness as he reached out to gently cup your face. "Listen to me," he said, his voice tender. "You are more than enough. You're beautiful just the way you are, and I love every part of you." The warmth of Jisung's hands on your face didn't even make you feel better. You shook your head, not believing him.
You tried to turn away, but Jisung held your gaze firmly. He tightened his grip on your face only slightly. His gaze was gentle and loving. "When I look at you," he continued, "I see your beautiful curves, the beautiful print of your stretch marks, and the unique features that make you who you are. I adore your thick thighs because they're part of what makes you uniquely you. They're also so sexy to me, and I love the way they feel in my hands when I squeeze them, and how soft they are when I lay in your lap. I cherish your stomach and the way you carry yourself. Your acne, your stretch marks—they're part of your beauty. They're not flaws; they're what make you special to me." Jisung had started caressing your body as he told you this. You didn't notice, but you started smiling. This was one of the many reasons why you loved Jisung; he always knew how to make you feel better.
He pulled you into a warm embrace, his touch reassuring. "You don't have to change a thing. I love you just as you are, and I wouldn't have it any other way. Your imperfections are part of what makes you beautiful. You'll always be the most beautiful woman in the world to me."
As he held you close, his words began to soothe you. Jisung's words were a gentle reminder that your worth wasn't defined by your appearance or by what you saw online. It was defined by the love and acceptance you shared with him.
In his arms, with his heartfelt words still running through your mind, you started to believe that maybe, just maybe, you were enough.
Jisung looked at you and smirked. "Now, get undressed so I can show you how beautiful you are to me."
#stray kids#stray kids x reader#stray kids x you#han jisung#jisung x reader#fanfic#stray kids fluff#felix x reader#hyunjin x reader#bang chan x reader#jeongin x reader#lee know x reader#seungmin x reader#changbin x reader#stray kids x chubby reader#jisung x chubby female reader
124 notes
·
View notes
Text
Han/Leia Appreciation Week 2024
WE'RE BACK, BABY! "Wait, what's happening, wasn't this in August??" you might wonder. Based on your feedback, we decided to host this and (probably) future editions of Han/Leia Appreciation Week earlier in the year. July seemed like the better choice, given that it's a vacation period in both hemispheres!
This year we're also giving you the prompts over a month in advance, so you have plenty of time to plan and create!
Han/Leia Appreciation Week was an event originally hosted at @han-leia-solo between 2016-2019, but for the past three years, we've taken up the mantle here at @hanleiacelebration 😊
💖 How does Han/Leia Appreciation Week work?
The event will run from July 14th to July 20th, and there will be two different prompts each day that creators can fulfill with: fanfic, fanart, gifsets, graphics, fanvids, headcanons, crafts, playlists, rec lists. You’re encouraged to tag your posts with #hanleiaweek2024 so we can reblog them! After the week is over, we’ll share a masterlist with links to the works.
You can show your appreciation in many ways; however, please keep in mind that it has to be a creation of yours of some sort, e.g. don’t repost other people’s fanart, gifs, or unedited pictures. Rec lists should include a link to the original source both for fanfic and fanart (more on this after the cut).
🎆 The prompts
Sunday 7/14: Tradition / Ceremony
Monday 7/15: Braids & Bloodstripes (hair or clothing) / Home planet
Tuesday 7/16: AU / Canon divergence
Wednesday 7/17: Force / Belief
Thursday 7/18: Favorite scene / Favorite quote
Friday 7/19: Meeting / Escape
Saturday 7/20: Free day!
You can use only one of the daily prompts, combine both, reinterpret them, or skip the day if you can’t think of anything. If you’re not able to post on the same day for a prompt, you’re still encouraged to share it through the week—just don’t post works for a certain prompt before the day corresponding to that prompt.
💠 💠 💠
FAQs and Rules under the cut - please read!
💕 Can I post my work to another site and share the link on Tumblr?
Yes! This is a good option for people who might want to create explicit art that could be taken down on Tumblr, write a long fic or multichapter, or make videos or playlists.
💕 Does it have to be a new creation? Can I finish and post a WIP?
It has to be something that has never been posted anywhere else before, so finishing and sharing a WIP is okay! If it doesn’t fit any of the prompts, you can share it on Free Day.
💕 Is this event open to all ratings?
Yes! Just remember to use a “Read more” cut if you’re posting the whole work on Tumblr, and to add a note at the top if your work is rated Mature or Explicit, as well as if it has any major trigger warnings, so all folks can safely browse through the entries.
💕 Are there any length or quality requirements?
There’s no min. or max. length for fanfic or quality level for art, but please note that AI-generated works won’t be accepted. For gifsets, there’s a minimum of two gifs (that must be made by you!). For playlists, there’s a minimum of five songs. For rec lists of fic or fanart, there’s also a minimum of five recs. Some more questions you might have about rec lists:
- How do I share someone else’s art without posting a picture? You might post a thumbnail that crops a preview of the piece; if the piece has a title, you might use that; you might describe it; or you might say something like “this piece by [artist]”, and link to the source.
- What if I found a fanart on Google? Try to find the original source using reverse search image.
- What if I can’t still find it, can I just say “credit to the artist”? In that case, please just don’t share the piece.
- What if I know the artist but don’t have a link to the original source? Naming the artist and linking back to where you found it is okay, in that case.
💕 Can I write for canon/Legends and include other pairings?
All canons, time periods, headcanons and AUs are welcome, and you’re allowed to include side pairings, except for R*eylo. However, keep in mind that this is a Han/Leia appreciation week - at the risk of sounding repetitive, works should focus on appreciating Han and Leia’s relationship!
💕 What’s the time zone for the event?
Please don’t worry too much about time zones: when we say “day”, we always mean “whenever that day is for you in your part of the world”. IE: if it’s Monday for you, you can post your work for the Monday prompt.
💠 💠 💠
Do you have any other questions? Don’t hesitate to send us an ask or to message one of the mods: @lajulie24 @hanorganaas and @otterandterrier
We can’t wait to see what you all create!
#hanleia#hanleiaweek2024#han x leia#han solo#leia organa#star wars events#swfandomevents#swedit#swcreators#mod post
113 notes
·
View notes
Text
People talk a lot about how Fit didn't want a kid when the Egg event happened, but I'm watching his Egg Event Day stream for the first time and picking up a few interesting things that both confirm and contradict what a lot of people say about Fit's perspective of the Egg event, So here are some notes from his VOD:
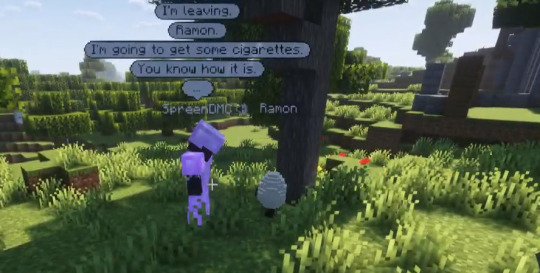
Fit immediately went over to Ramon when he saw him and cooed at his cute little mustache.
Fit repeatedly said to himself "I'm not a dad I'm not a dad I'm not a dad" while the informational videos were playing. HOWEVER--
When Ramon flashes the "Egg" sign repeatedly to them, Fit says he has eggs at his base and tells Ramon to wait with Spreen. Ramon chases after him, and Fit insists that he stays with Spreen, saying: "I will be right back, Ramon. Don't worry, I will return. I promise." ~ 1h 17m
Moments later when he's on his own, Fit says "Spreen better keep that Egg alive. I'm not emotionally attached to the Egg with the mustache, ok? I'm not emotionally attached." (Mirroring the things he often says these days about not having separation anxiety. Which is a lie). ~1h 18m
Fit says even though Ramon has a mustache, he doesn't know if Ramon is a boy, girl, or enby. (This isn't really relevant lore-wise, but I thought that was sweet). ~1h 20m
Foolish and Vegetta introduce Leonarda to Ramon, and Vegetta says "Look look, it's a friend, it's a friend! 😊" and then two seconds later says "Now fight to the death! 😊" ~1h 25m

(The QSMP admins also make a whoopsies here and call Fit "Feet" in chat LMAO)
Despite joking that he's going to build Ramon a dog house near his place, when Spreen asks if they should build a simple house or something nicer for Ramon, Fit says, "Well he is our kid, so he deserves only the best, right? Maybe we should make a big mansion." ~1h 31m
Ramon makes a beeline to Fit's starter house (which the admins poked fun at) and excitedly jumps on the bed
Spreen accidentally hits Ramon (again) and Ramon runs off, and Spreen apologizes while he and Fit chase him down. Fit says "He didn't mean to do that, he loves you very much!" ~1h 36m
Fit gifts Ramon a seashell. ~1h 42m
Fit jokes that there's no doubt he's the father because Ramon looks just like him -- bald as an egg
They put Ramon to bed, but Spreen and Fit introduce Roier, Jaiden, and Bobby to Ramon while he's asleep. ~2h 10m
Spreen says he left food for Ramon in case he gets hungry at night. They get worried about Ramon because he's been sleeping for a long time and check to make sure he's still breathing. ~ 2h 14m
Spreen says they'll be a really good team, and Fit says, "We will be very good parents together, I can feel it." (oof) ~ 2h 15m
Fit and Spreen say goodbye to each other, and Fit says "Being a father is not easy, that's why I've put off fatherhood for so long, I don't know if I'm ready." He says it doesn't seem so bad, but Ramon's sleeping a lot and he's kinda lazy, so he doesn't know how he feels about this child, but "We'll make it work." Right after he says this, he suddenly finds Ramon climbing up the hill towards him, and they go fishing together. ~2h 16m
Fit calls Ramon "Mi huevito." ~2h 19m
"I dunno how I got roped into this fatherhood thing" he says while waiting for Ramon to finish using the bathroom. Then he teaches Ramon how to cook the fish they caught (classic Dad behavior) ~2h 21m
Spreen tells Fit he's going out and to take care of Ramon. Fit teases him and says it's a shared responsibility, and Spreen says he has to go to work. ~2h 26m
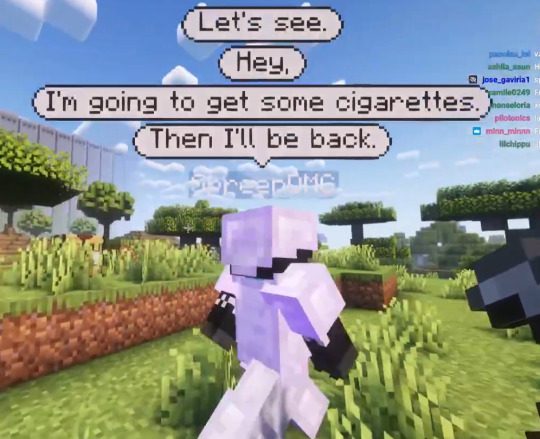
IMAGES THAT AGED VERY VERY BADLY
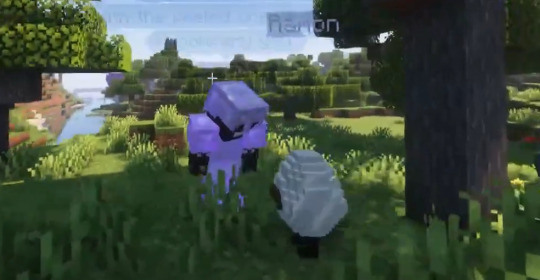
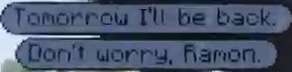
The subtitles don't show it, but Spreen is saying "Don't worry, Ramon. You'll see me tomorrow." Fit says he'll teach Ramon how to grow crops, and Spreen says, "That's right Ramon, I want to hear all about how to grow crops when I get back."
Fit tells Ramon "You are my huevito" and sings him a lullaby. 2h 30m
"Spreen going out for cigarettes my ass! I'm not gonna see him for months now. See - someone's gotta step up and be a parent, and be there, and take the responsibility! That's me. That's me. It's weird though, I mean, I'm not used to this whole "fatherhood" thing, keeping a living thing alive. It's weird." ~ 2h 31m
Fit says he thinks he and Spreen will be a good parenting pair if Spreen comes back. But he's glad the child is doing well right now. ~ 2h 36m
Not related to Fit and Ramon, but these are some other funny moments:
Fit gets kicked for "flying" (he was jumping off a tall tower, but manages to clutch it) ~ 2h 43m
Fit meets JuanaFlippa! ~3h 12m
Slimecicle gives JuanaFlippa a landmine. ~ 3h 21m
#i talk#qsmp talk#sharing these things since it's been almost a year and I'm sure some people have forgotten / never saw this (like me)#it's interesting#Fit#FitMC#Ramon#qsmp info#QSMP analysis
206 notes
·
View notes
Note
i hope this hasn't been asked before. what size do you make your canvas? and do you crop it to fit other socials (like Instagram for example)? i hear that 300 dpi is standard. i never know if it's good to make my canvas big or not.
hi i think this ask is like at least 4 months old but i was scanning my sketchbooks from last year and i abruptly remembered i had gotten this ask because i had made a little chart in my sketchbook trying to figure out how to answer it
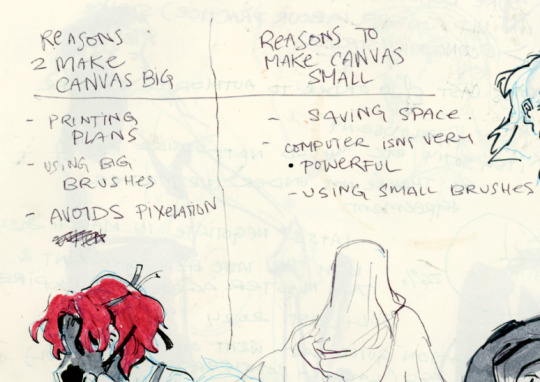
anyways theres pros and cons. and the size of your canvas is really going to depend on personal needs + preference. how good ur computer is, how complicated ur art style, how comfortable drawing feels, how much disk space you have to spare, what youre gonna end up using the art for in the end...300dpi is standard for PRINTING specifically, if you only plan to ever post things online then 72dpi works great and will save you space (fun fact a lot of professional animation files i deal with are 72dpi. and those eventually go on your tv screen). but personally i make everything i draw 300dpi because i am always printing stuff for cons, zines, etc and its nice to have the option even if i dont end up printing.
when I was a teen I used to draw on a rly shitty laptop and i made everything 800x800px 300dpi because big canvases would cause a lot of lag and also the resolution on this laptop was pretty small so 800px was a lot of the screen already. now i have a slightly better laptop with a bigger resolution and i sketch on giant 10000px-40000px canvases with the hard round brush and no shape dynamics or transfer whatsoever to minimize lag. when it comes to making a final illustration when i know ill be using a bunch of layer effects/blending modes/colors/mixing brushes etc etc ill generally crop the canvas down to the 6000px range. most illustrations i try to make sure are comfortably printable on tabloid size paper so thats pretty much anything hovering around or above 3000x5000px w 300dpi (so 11x17in). HOPE THIS HELPS?
EDIT: OH ALSO re: socials. i always ALWAYS size down my art to post on the internet. i think its crazy when other artists dont. because why would i ever let the internet have my hi-res file for free. also in general i think it looks better if you do the resizing yourself because if you don't then many social media sites will compress your file for you! a lot of people will post a hi-res file to twitter and then go "Wow twitter killed the quality of this img!!!" UH YEAH because they have an automatic image compressor. because they need to save space too lol and they dont want your image to take 248263895 years to load. same with instagram and to a lesser extent tumblr. when i post anything on social media i resize it down to 1200px-1600px on the longest side... its a little arbitrary but im kind of basing it on the smallest resolution of widely available screens. mostly because i think it looks stupid when u open up an image file fullsize and u have to scroll to see the whole thing... also iirc instagram only takes images up to 1080px before it resizes them? granted if you upload something smaller than that itll also resize it up which will look worse so I think bumping the numbers just over 1080px is pretty safe.
I should really be bringing the dpi down to 72 too when i post online but often im too lazy to do that. but it will technically help ur image load faster and stuff. and make it less likely for people to yoink it off the web and print it themselves.
147 notes
·
View notes
Note
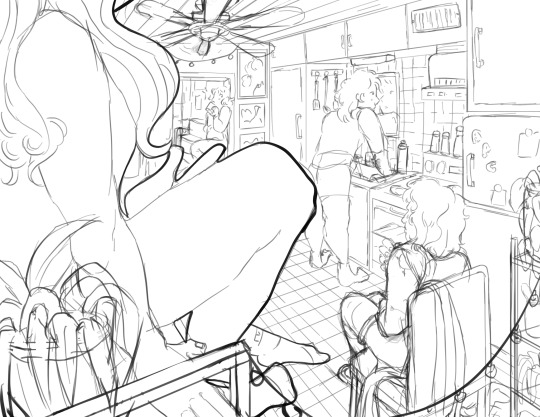
i rlly like ur composition, i wanna know about your process :D
thank uuu !! yeah so like. composing a scene for me generally begins with a vague idea that i want to get down as quickly as possible- and for me that usually starts with finding a setting. I knew that i wanted to draw a) a group of roomates gossiping in a crowded kitchen and i wanted there to be b) one figure in the extreme foreground and c) lots of plants. i do use some tools to figure out perspective, mainly the csp perspective ruler. Usually i start by finding a picture i like similar to the vibe im going for- but instead of referencing anything else- im purely interested in perspective. sorry to anyone who is shocked i dont generate all of my perspective purely by myself- i can draw in perspective fairly well but i struggle to make straight lines and this is easier to make grids with than the line tool lol ^_^ i try to use it kinda more like spellcheck on typos than like something to fully rely on. this is the video i learned this trick from:
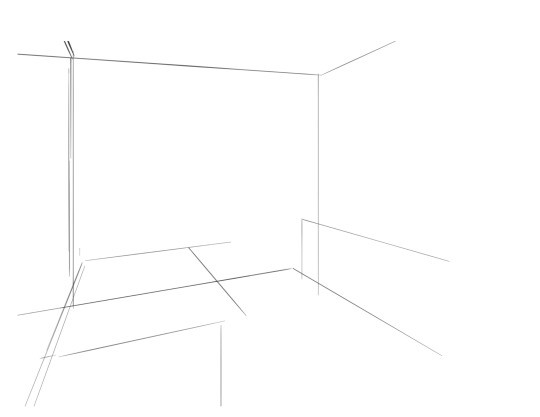
i saw the left photo and realllly loved how the cabinets alligned with the wall- so i used my ruler tool to draw out my inital plotted points from the image- basically the linear movements i was most interested in and then i turned off the image layer and worked with those lines and the ruler tool to move on. eventually i had this:

which was enough for me to put my characters in for the inital round. if you notice- i made a looot of further adjustments as i go on. this sketch is not a final layout, its so my characters have somewhere to be! i cannot draw someone standing on a floor if theres no floor, nor leaning on a table that doesnt exist. i can’t draw my characters without a background, but i also cant finish my background without accounting for how my characters can comfortably exist in it!!

this was the like.. very basic start. i knew the positions of two characters- but i needed to change a lot not only to fit them better but to allow for the other two figures i had planned.
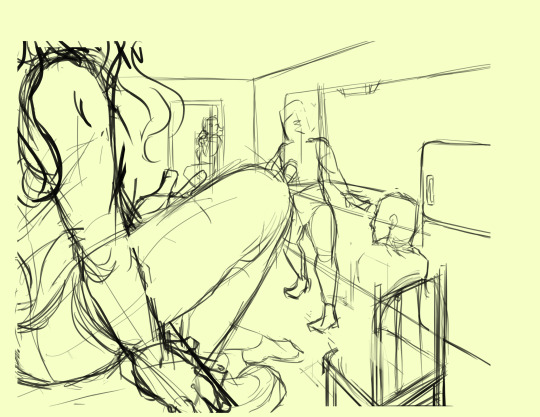
okay.. a little better. i widened the kitchen, closed the fridge door.. added a chair and fit in all the figures.. but this is waaay too dramatic. only two figures are actually interacting- and they are at wildly different energy levels!

this is where things started to make a little more sense characterwiss, so i was ready to refine backgrounds and figures and unite the two.
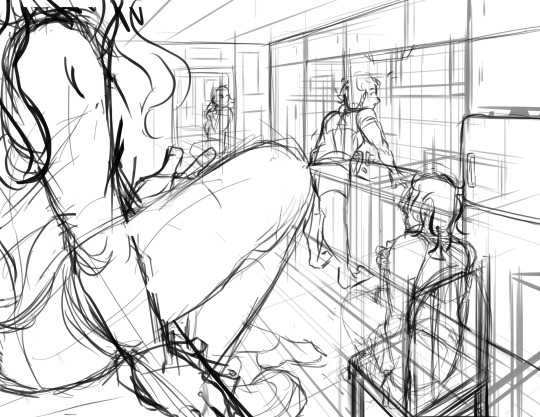
inital base sketch. much better layout.
okay- this is where im getting my footing but things seem.. really really off. You can see me working on my framing here- theres some good linear movement from left to right here- but not vertically. It’s hard to notice the figure in the far back, so i need to redirect the viewers eye to move upwards as well!

this is where i decided to zoom out, add an interesting vertical element to the left of the image and make it clearer whats happening in the foreground. i had to account for some stuff by adjusting the cropping, but i paid attention to that as well.
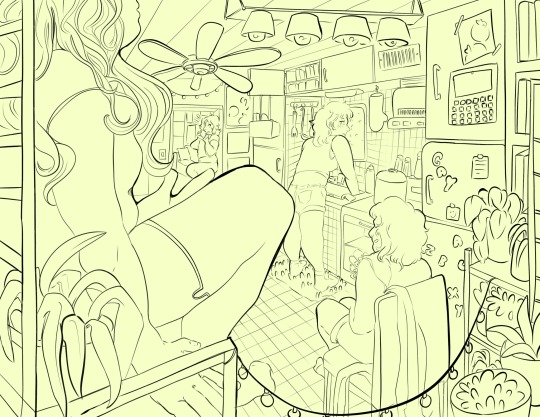
annnd- thats what a clean sketch looks for me! i have all the elements of my scene accounted for, and things are clean enough to read.
the next step for me would be transfer! essentially- I print the image of my sketch out, resizing and taping pages together so my sketch matches the size of the paper i want to paint on, and then i use a lightboard to transfer my sketch with pencil onto my paper. Then i refine the sketch a few times on paper before stretching my watercolor paper (essentially just prepping for painting) and inking with a brush and colored ink before going in with watercolor, gouache and ink, then usually finishing with marker, colored pencil, pastel and ink. it’s a lengthy process but a lot of fun lol. but sketches for me can be like.. 15 layers of different roughs until im happy with just the sketch. there were more images but im on mobile and theres a 10 image limit 😭😭 im a bit masochistic but i believe that if i dont have a good sketch i dont have a good painting!!
101 notes
·
View notes
Text
RealAgeAU Drabble - Costume
I had a a few ideas for drabbles :3 And I settled on this one for now :3
Mostly because I have one mental image in my head that is just too cute to pass up and I wanted to add more cuteness to this AU so here we GO! @spotaus You ready my friend?
First drabble
Prev Drabble
Next Drabble
Als I am really considering making a masterpost for these drabbles and any related asks/answers and drawings people make... Just a thought.
*------------------*
Cross watches as Nightmare looks at the different options of costumes. They are in the bigger city nearby to actually give him some options.
It had been thanks to Crop that they even knew about this happening. Kinda like a halloween get together but it mostly celebrates the start of the colder seasons and the time of rest the land needs.
But with everyone in costume because Halloween happens around the same time.
But it gave them the excuse to take Nightmare out on a tiny trip and let him pick out soemthing he would like to wear. Killer says he is making progress on that front but Cross doubts it as Nightmare still just only wears the stuff they picked out for him or Dust's old things.
Even if Nightmare looks adorable in the for him much too big hoody.
Cross smiles down at Nightmare "And? Any ideas for what you want to be dressed as?"
Nightmare shoots him a look and shrugs "Why get dressed? I am a skeleton... That is spooky enough right?"
Cross feels part of his soul melt but tries to keep it in. Nightmare hadn't fully noticed that his way of speaking is starting to slip more and more into more childlike talking and words. Even if he still tries to speak in his fancy way. It is just too cute.
Cross sees it as them doing a good job at this whole parent thing.
Cross grins "True... But Horror already decided to go as a lumberjack and Killer is going as Jason from friday the 13th." Cross himself hadn't decided yet and Cross knows that Dust is planning on just matching whatever Nightmare wants to get dressed as.
Nightmare frowns and stares at all the options. He points towards a costume and Cross checks it.
It is the cheapest thing there is.
Cross saw this coming but he knows how to deal with that! Cross grins "Oh? A little devil? We can do that. Come. We can look at more costumes for that."
Nightmare looks a lot more unsure as he rubs his arm "This is fine... stuff is expensive."
Cross crouches down and leans on his hand "Hey... it is fine... Dust got a budget together and everything. Let me worry about money okay?"
Nightmare frowns but looks considered at some of the more detailed options instead of the cheap stuff. Much better. Nightmare slowly starts to gravitate towards the vampire stuff and Cross starts to think this may be a success when-
a soft sizzle.
Oh are you kidding him!?
"You seriously gonna let him get that stuff?"
Nightmare blinks and grins brightly at the sound of Error and searches for him before spotting him near the ceiling.
Cross glares and hisses "Error." he glances around nervously.
Error snorts "Calm down. I know how to time stuff. People hardly ever notice I am in universes. Seriously though. yOu are going to let him grab this shi-stuff." Error quickly changes his sentence when Cross glares at him.
Cross crosses his arms "Well we want to have stuff to get dressed in for the party. We are trying to fit in."
Nightmare looks up at Cross and smiles a tiny bit "Error can look with us?"
Cross really wants to say no. Not like Killer. Killer hates the fact that Nightmare has a crush on the other. Cross just doesn't want to deal witht he headache that is Error himself.
Now that Cross knows what he knows he realised that Nightmare always had a crush on Error. No one ever noticed because... well... Nightmare went about those feelings as any six year old did. hanging out, trying to invite the other to play with them. bringing small tokens and things. trying to be included.
Error snorts "Nah. Don't want to be stuck in this store of bad quality." and he nudges one of the costumes offered.
Cross sighs annoyed "So why appear?"
Error looks smug "I saw you were going to let Nightmare grab bad quality stuff. of course i step in."
That is another thing Cross doesn't like. Knowing that Error just, glances in whenever he feels like it. Cross glares and hisses "Stop having a window on us open. One it is weird and two if anyone sees it!"
Error waves it off "I just check for a few seconds when i know it is clear. Calm down." he shoots Ngihtmare a look "Seriously though. You are a god. don't gods deserve like the best things?"
Nightmare shrugs and mutters "Jsut got stuff because they wanted it..."
Cross also finds it rich coming from Error as Error still wears some upgraded hobo-jacket that looks like it is barely holding it together.
Error blinks before huffing "Yeah no. I am getting you a costume of actual quality." he looks areound "vampire?"
Nightmare suddenly looks a lot less comfortable with the attention adn returns to Cross's side to hide partly. Nightmare never likes it when others start offering stuff to him. Cross leans downa dn picks up their small charge.
Cross nudges their skulls together and mutters "It is okay. You had an idea of what you like?"
Nightmare just pushes clsoer "it is dumb. easy stuff is fine."
Cross nudges him again "It isn't dumb. What do you want?"
Nightmare remains quiet for a long time and Cross waits patiently. Just let him feel it out first. Let him decide for himself. Error looks a lot less patient as he just stands there, obviously wnating to tap his foot but refrains from it.
Nightmare eventually mutters "liked... vampire becuase it is a bat..."
Cross blinks and grins "You want to be a tiny bat?"
Ngihtmar eshrugs again and tries to hide further. Clearly done with being verbal.
Cross nods and nzuzles the skull "I am sure we can figure out a tiny bat costume." MAybe they can get a cape? get some wings attached? Cross is srue they can figure it out-
Error nods "A bat. That is easy." he looks thoughtful before nodding and with a sizzle he is gone.
Cross sighs loudly but Ngihtmare giggles and gives a happy mutter "He likes me."
Cross sighs loudly "You are very clearly he favourite. Which isn't a good thing bud, you don't want to be a god's favourite." at least that is the lesson Cross got out of stories.
Nightmare hums as he nuzzles his skull against Cross's "You guys were always my favourites..."
Cross hugs Ngihtmare close as he walks towards the exit of the store "You are so sweet. and you always cared so much about us." Ngihtmare mutters about not being sweet but relaxes with the affection.
Cross gets a ride back from Ellie and returns home to the others. He is only done for a few minutes with retelling everything as they make sure Nightmare eats his snack when they hear more sizzling.
A moment later a small package drops on their dining table.
Nightmare blinks nad opens it only to gasp.
Because that is a bright purple hoody with bat wings sewed in the back and a hood with little bat ears and a grumpy bat face on the hood.
It is adorable and Nightmare looks adorable in it and Cross has to admit it was a perfect pic. a very comfortable and cute costume for the coming outing.
Killer grumbles as he stabs his fork into his own food. He glares at his plate "Gonna have to figure out how to scare a god."
Yeah... Cross is hoenstly a little curious as to how Kilelr plans to do that. For now their babybones is happy in his new hoody and they have a very powerful ally who wants Nightmare happy like them.
*------------------*
Was this whole drabble an excuse to get Nightmare a hoody with little bat wings and bat ears? Yes. Yes it was. And he HAS one now!! :D <3
First drabble
Prev Drabble
Next Drabble
#utmv#realageau#nightmare sans#deaged nightmare#killer sans#cross sans#Error sans#Not too many characters this time#And an actual SHORT drabble! Look at me go! No longer going nuts!#As for where Horror and Dust are? They are still working on their farm#But there is always at least one if not two skeletons with the baby#And yeah... Error jsut kinda checks in on the gang. Just to check in on his favourite person. That used to be his bestie! he is worried!#Ngihtmare is scheming and trying to make a plan to get to hold Error's hand#Killer is trying to get a weapon that can kill a god.#Cross is just worried about this attracting attention.#Not too much today. Just sweetness and cute baby <3
56 notes
·
View notes
Text
I didn't actually mean for this to coincide with Twst's third anniversary, but hey, good timing is good timing. happy anniversary, everybody! 🎉🎉🎉
SO YEAH: a bunch of you guys were asking about prints of my unique magic/signature spell posters, so here are 6.25" x 4.25", 300 PPI versions of the images (the extra .25" is for bleed, so that a 6 x 4" print will still have the white border without it getting weirdly cropped). my color experiments did, uhhh, not go very well, so there's no color-correction, sorry. :') they should print reasonably okay, but it will depend on your settings/printer/paper/etc., so I recommend doing test prints first if you can!
this is current with the Japanese version, so it does contain spoilers through episode 7, and for the Glorious Masquerade event -- I plan on keeping it updated as I do more, so it will continue to be pretty spoilery! no plACEholder though, sorry, I didn't do him at print resolution. :( there are also a couple of alternates, if you decide you like those better: a red background version of Cater (to fit in more with the rest of the hearts boys), and a version of Ortho's with the ??? in ascii instead of binary. edit: and now also the unused version of Vil's!
disclaimer: these are for PERSONAL USE only! please do not sell them/make them available for sale in any way (including uploading to print-on-demand websites). also, please don't repost, reupload, or use them as bases/materials/etc. (though if you want to use them as inspiration for your own art in this style, absolutely feel free! ❤️)
thank you!

#art#twisted wonderland#twisted wonderland spoilers#twisted wonderland episode 6 spoilers#twisted wonderland book 6 spoilers#twisted wonderland episode 7 spoilers#twisted wonderland book 7 spoilers#glorious masquerade#indefinite and ongoing spoilers#unique magic posters#i...do not know how to proof things. sorry!#i don't have a working color printer which doesn't help#i've done prints a couple of times for cons and every time it was an absolute headache and i came out knowing less somehow#me: the k in cmyk stands for kuuga
1K notes
·
View notes
Text


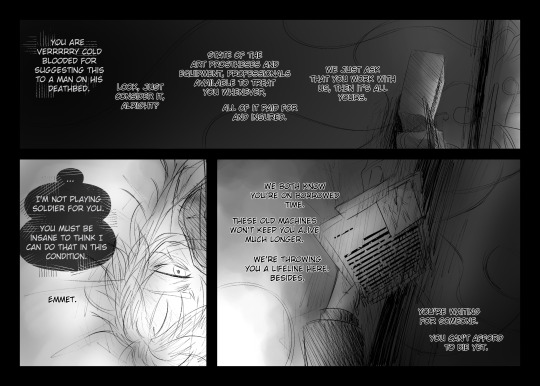
1 - Diantha security detail comic
2 + 3 - Emmet's UDF uniform vs Kalosian Guard uniform
4 - Lore/Background comic
Hooo boy ok so this idea has been simmering on the backburner for a while now. So Legends Z-A had its trailer released a few days back and I figured I'd make something around it. I know logically it's going to be a game set in the past but I found myself wanting to work on something more futuristic/sci-fi which is why we have our little Cyber Emmet here.
There's a lot of different things to mention so I'm just gonna break them down by the images.
1:
Diantha is attending a conference/ceremony where she will be discussing the plans for the urbanization of Kalos with the assistance of neighbouring tech giant and long time trade partner Unova. As a sign of goodwill, the Unovan Defense Force sent several people to either work as security or to help organize and prepare the ceremony. Among the list of people is Emmet, who was recently "working with" the UDF, and who is going to serve as Diantha's bodyguard for the event
Emmet's uniform was made by a mix of Unovan and Kalosian designers. It's meant to mimic the shapes while still keeping aspects of his Unovan uniform (mainly the collar, cuffs, and silver trim). He is carrying a handgun from his UDF uniform, however due to the public nature of the event, he is using his charge pistol instead of his wired pistol. He's also using a different face shield, using a silver one as opposed to his black one, since it better matches the uniform he's wearing for the event
Diantha's fur coat still has the angel wing shape. This isn't lore relevant I just couldn't fit the full thing onto the panel but it's definitely there
2 + 3:
Emmet uses a wired pistol (left side holster) and a charge pistol (right side holster). Both are standard issue firearms used by the UDF, however charge pistols are more common thanks to them being easy to hold and carry. A wired pistol connects to a battery pack of some kind to fire at a greater speed, whereas a charge pistol will generate its own power but take longer to fire and load. Emmet's wired pistol connects to the battery network that powers his body, allowing him to take advantage of his fast reflexes by using his faster weapon
Emmet doesn't get anything to wear for his Unovan uniform! Part of the contract he signed for his cybernetics states that he can't cover the prostheses unless it could lead to a breach in confidentiality (such as going to a foreign region or appearing in public outside of work reasons) since he's meant to effectively advertise the quality and construction of the body built for him. Of course he refuses to go outside completely naked to fight so the UDF got him a cropped version of his coat and shoes so he can have some more cover
The face shield is meant more for form than function. Technically the only purpose they serve is to cover his face when he's out on patrol, though it can also act as a screen to show him information about what he's seeing (kind of like an AR headset). He could technically get the screen function though cornea implants but he's not doing that + he wants the anonymity provided by the shield
Sections of the body can split open or be removed. The front abdominal panel can do both due to the different processing mechanisms inside needing easy access for repair/maintenance. Limbs can be swapped for different prostheses provided they have a compatible socket
The sockets in Emmet's back can be used to power other weapons/devices if he has a compatible cable. Emmet was given a bag of different attachments and cables to hook into his back so he can power a range of things from phones to laser rifles
He has removable skin. Any shot of him with the black body is the body without skin. In situations where he could possibly have skin showing or he is required to wear something that shows more skin, he'll have material rolled over the sections of his body that will be visible so they look more normal
4:
Emmet got run over by a train ♥ long story short is that he went to rescue a passenger who had fallen off the platform and miscalculated how much time he had before the train pulled in. Once he got stabilized in the hospital afterwards, he only has around 30% of his original body intact, along with some sections they were able to somewhat repair but required new hardware being installed in order to return their function. Anything under the waist and a large portion of his arms were crushed beyond repair and as such, he's been connected to different machine to mimic the functions of his organs
The UDF (in a rather scummy play) contacted Emmet for business, asking him to sign a contract that would ensure he would live by letting them test their confidential new tech on him. He is the only ethical candidate they have for testing such prostheses so to get him to agree, they offer to cover the cost of everything relating to his health and work, as well as paying him a salary for the trouble. Since the only other options are "die slowly" or "lose all self sufficiency and go bankrupt living in hospital", he agrees, and so begins his second job as a living experiment and tool for the UDF
I think that's the most I've written for one post yikes. This isn't even everything but I'll cut it here because my hands are not pleased with me typing.
I still have a lot to think about for this concept, mostly what kind of work Emmet will do while overseas in Kalos and whether something dangerous enough will happen to warrant him using his body for what it was made for. That might be funny, only two settings and they're "I love macarons :)" and bloodshed.
Anyways hope you guys enjoyed this dump, feel free to ask on anything (it helps me write too ^^). See you later and have a nice day!
#submas#au#submas au#emmet#subway master emmet#emmet pokemon#kudari#fanart#sketch#drawing#digital art#it just occurred to me that the joltiks would basically cover him like a giant yellow fur coat because he gives off electricity#maybe I should draw that#anyways I am infinitely enraged with how much better he looks from the back!! pretty boy but only when he's not looking at you#SHIT I just realized I forgot to mention the tank#uhh fun fact Emmet spends half of his day inside of a tube ♥ the prostheses can only support him for so long and they can't do his organ fu#They have the capability‚ but it's nowhere near as good as the specialized machines he hooks into at home‚ so he still spends much of his#time asleep or resting in the tube at home. The good thing is that he's a third of his original size so the life support tube doesn't take#up too much space.#Hoough ok I think that's enough writing let me know if you guys want more of this creature‚ I'm heading out for the night#See you and have a nice day!
100 notes
·
View notes
Note
hii i luv your work soo much and also the headers and the stuff you make is rlly good 😻 i was wondering if it’s too difficult to make the headers etc? specially the ones that are more like gifs? and also is it too hard to find the images? bc honestly i haven’t seen a lot of them, just wondering! i get it if you don’t want to share i just genuinely think that the work is rlly rlly good<3 (sorry for such a long ask omgg)
Omg thank you so much hi hi 🥹🥹💞💞💖💖🌸🌸 first of all thank you so much for liking my work and supporting me, I so so appreciate it ✨✨🫂🫂💐💐 And omgggg you’re making me BLUSH thank you thank you thank you for the kind words 😭😭🫂💞💞 I love when people compliment my works it makes me feel like I’m doing something right 😫💐💐 flowers for you for being so great ✨💐💐🌷🌷🌹🌹🌸🌸
To answer your question, the dividers and headers are actually very easy to make. The animated dividers I make aren’t difficult per se, they just involve a few more steps than making a normal divider does. As for my animated headers that I use for my fics or masterlists and what not those are also pretty easy. I’ll try to explain a little more about what I use in depth below. If you would like a detailed walk through explaining how I make them I could do that as well 💕 Prepare yourself, there’s a lot 😭💖

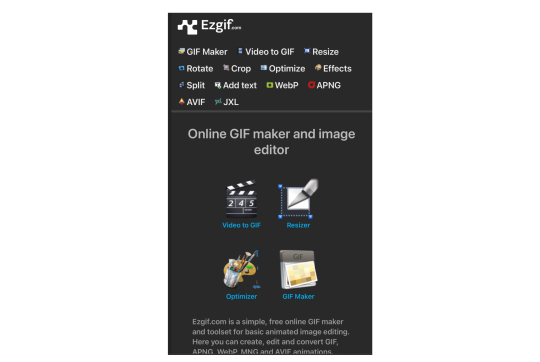
⋆ ˚。⋆୨୧˚ 𝐀𝐏𝐏𝐒 / 𝐖𝐄𝐁𝐒𝐈𝐓𝐄𝐒 𝐈 𝐔𝐒𝐄 — Picsart, Pinterest, PicCollage, Vita, Polarr, GIPHY, Photopea, Etsy, DeviantArt, Phonto, ezgif.com, onlinegiftools.com, Iloveimg.com, various fancy font generators (I don’t use these anymore, I use an app now for fonts, but this is what I used to use the most), various sparkle emoji combos + decorative text ( I use this one a lot + there are a lot of symbol apps on the App Store you can download, I have two apps that I use from time to time )
. ݁₊ ⊹ . ݁ ⟡ ݁ . ⊹ ₊ ݁. . ݁₊ ⊹ . ݁ ⟡ ݁ . ⊹ ₊ ݁. . ݁₊ ⊹ . ݁ ⟡ ݁ . ⊹ ₊ ݁.
⊹ ࣪ ˖ 𝑷𝒊𝒄𝒔𝒂𝒓𝒕 ⊹₊ ⋆ This is a photo editing service / app I use to make regular dividers. They have a lot of aesthetic / cute stickers and pngs like the ones I use in a lot of my dividers. They have a transparent background option I love that makes it easy to make a divider. You can save the stickers you like to a collection and follow artists / users you like as well. I 10/10 recommend this one. They also have a bunch of photo editing software like cropping, retouching, etc. if you’re into that.
.𖥔 ݁ ˖ 𝐂𝐎𝐍𝐒 — You have to buy Picsart Pro to use a lot of the “pro quality” services, and the better quality stickers not made by an individual user (I.e. stickers Picsart itself has created) are not accessible to users not subscribed to Pro. Also, when you crop an image Picsart has a certain limit to how thin it can go, so I use an image cropping website I mentioned above Iloveimg.com. I only use Picsart for divider making purposes though so I don’t have to worry about allat. Not compatible with animation / gifs

. ݁₊ ⊹ . ݁ ⟡ ݁ . ⊹ ₊ ݁. . ݁₊ ⊹ . ݁ ⟡ ݁ . ⊹ ₊ ݁. . ݁₊ ⊹ . ݁ ⟡ ݁ . ⊹ ₊ ݁.
⊹ ࣪ ˖ 𝑬𝒕𝒔𝒚 ⊹₊ ⋆ This is one of my favorite shopping apps in general. If you don’t know about Etsy it’s a small business / individually owned business kind of shopping app. There’s a lot of different stores / sellers that sell a bunch of different things. It’s a good place to buy dividers for very cheap, less than $5 dollars, I’ve also bought pngs / stickers as well. I’ll buy a divider pack from time to time and edit them however I please. I never just buy a divider pack and claim it as my own on Tumblr, I always edit them in some way that fits more to what I want. It’s just a good starting point in my opinion. Of course, you can probably find simple dividers online, only you know what’s best for you. Also, this is just a good place for anything web related in general ( they have sticker packs, dividers, procreate brushes, decorative elements, really anything you want for a relatively small price)
. ݁₊ ⊹ . ݁ ⟡ ݁ . ⊹ ₊ ݁. . ݁₊ ⊹ . ݁ ⟡ ݁ . ⊹ ₊ ݁. . ݁₊ ⊹ . ݁ ⟡ ݁ . ⊹ ₊ ݁.
⊹ ࣪ ˖ 𝑷𝒉𝒐𝒏𝒕𝒐 ⊹₊ ⋆ This is an app for fonts. Unlike the usual fonts you see in fancy font generators (𝔱𝔥𝔦𝔰, 𝓽𝓱𝓲𝓼, 𝚝𝚑𝚒𝚜, 𝐭𝐡𝐢𝐬, 𝒕𝒉𝒊𝒔, etc.) Phonto lets you upload your own fonts to use on pics. Using font websites you can upload whatever fonts you like in just a couple seconds. I personally like to use Dafont.com for my fonts. You can also use dingbat fonts / decorative element fonts. Not compatible with animation / gifs

. ݁₊ ⊹ . ݁ ⟡ ݁ . ⊹ ₊ ݁. . ݁₊ ⊹ . ݁ ⟡ ݁ . ⊹ ₊ ݁. . ݁₊ ⊹ . ݁ ⟡ ݁ . ⊹ ₊ ݁.
⊹ ࣪ ˖ 𝑷𝒊𝒏𝒕𝒆𝒓𝒆𝒔𝒕 ⊹₊ ⋆ Who doesn’t know Pinterest?? Literally my favorite app ever. I use Pinterest for image inspo / my aesthetic images. Here’s my Pinterest if you’re curious. This is besides the point but I used to be a Wattpad girly so I have a lot of boards relating to my past OC’s and wattpad stories (like 2016) 😭💕 You can search up literally anything / any aesthetic and the pictures / gifs that relate to it will pop up. Very easy to use and so much fun to make your own boards and stuff. I spend hours organizing my pins, I need to get back into it tbh 😿
.𖥔 ݁ ˖ 𝐂𝐎𝐍𝐒 — Users upload a lot of fan made art that isn’t always crediting the original artists who made it. I have found some jjk fan art I use for my headers but no source as to who the original creator is. A lot of profiles do give credit tho so that’s good.
. ݁₊ ⊹ . ݁ ⟡ ݁ . ⊹ ₊ ݁. . ݁₊ ⊹ . ݁ ⟡ ݁ . ⊹ ₊ ݁. . ݁₊ ⊹ . ݁ ⟡ ݁ . ⊹ ₊ ݁.
⊹ ࣪ ˖ 𝑷𝒊𝒄𝑪𝒐𝒍𝒍𝒂𝒈𝒆 ⊹₊ ⋆ This is the same service made by the people who created Picsart. I use this for many purposes. I mainly use it to combine my animated gifs with still images and combine animated dividers together with other dividers. To be honest it’s hard to explain what I use it for specifically but it’s just good for combining gifs and still images into one.
.𖥔 ݁ ˖ 𝐂𝐎𝐍𝐒 — I don’t think there is a transparent background option, so I have to use a certain website mentioned above to remove gif backgrounds. You also can’t crop the image and unless you pay for no watermark it gives you one. It saves animated dividers / gifs as videos, so I go to Ezgif to make it into a gif and crop the image to remove the watermark. Again, this one is a little hard to explain.

. ݁₊ ⊹ . ݁ ⟡ ݁ . ⊹ ₊ ݁. . ݁₊ ⊹ . ݁ ⟡ ݁ . ⊹ ₊ ݁. . ݁₊ ⊹ . ݁ ⟡ ݁ . ⊹ ₊ ݁.
⊹ ࣪ ˖ 𝑽𝒊𝒕𝒂 ⊹₊ ⋆ This is a free app I use that’s a rip off of the “real app” I used to have. The “real app” started charging for its services and so I moved to this one. It’s completely the same and FREE. This is where I apply text to my gifs and add the motion to it. Like how my masterlist header is, where it spins and flips, this is the app where I apply those effects. Side note, this is a good starting app for making edit videos like you see on Tiktok. You can turn off the watermark for free.
.𖥔 ݁ ˖ 𝐂𝐎𝐍𝐒 — This app also turns gifs / animations into a video when you go to save it, so again I go to Ezgif to turn it back into a gif.

. ݁₊ ⊹ . ݁ ⟡ ݁ . ⊹ ₊ ݁. . ݁₊ ⊹ . ݁ ⟡ ݁ . ⊹ ₊ ݁. . ݁₊ ⊹ . ݁ ⟡ ݁ . ⊹ ₊ ݁.
⊹ ࣪ ˖ 𝑷𝒐𝒍𝒂𝒓𝒓 ⊹₊ ⋆ This is my favorite filter app for photos. Has very aesthetic filters that I use for my still images and as of recently my Pinterest boards as well. Not compatible with animation / gifs
. ݁₊ ⊹ . ݁ ⟡ ݁ . ⊹ ₊ ݁. . ݁₊ ⊹ . ݁ ⟡ ݁ . ⊹ ₊ ݁. . ݁₊ ⊹ . ݁ ⟡ ݁ . ⊹ ₊ ݁.
⊹ ࣪ ˖ 𝑮𝒊𝒑𝒉𝒚 ⊹₊ ⋆ I use this app solely for its stickers. You can find sparkles, butterflies, hearts, anything you want with a transparent background and turn it into a divider. I use this app mostly for gathering animated stickers to make my animated dividers.
. ݁₊ ⊹ . ݁ ⟡ ݁ . ⊹ ₊ ݁. . ݁₊ ⊹ . ݁ ⟡ ݁ . ⊹ ₊ ݁. . ݁₊ ⊹ . ݁ ⟡ ݁ . ⊹ ₊ ݁.
⊹ ࣪ ˖ 𝑷𝒉𝒐𝒕𝒐𝒑𝒆𝒂 ⊹₊ ⋆ This is my go-to for applying effects / filters to gifs or animations. I use this to add filters to my animated headers. I download PSD’s from DeviantArt and use those filters for my gifs. This is not an app, just a browser I’ve added to my Home Screen. I recommend using on a computer because there’s a lot of stuff on the screen and you’ll want to see it all spread out. I use it on mobile only because I know which buttons I need to press so it’s not a problem.
.𖥔 ݁ ˖ 𝐂���𝐍𝐒 — You have to upload your own filters to be able to add one to a gif. Once you open up the site it can be very overwhelming and confusing with all the buttons and drop downs and yada yada. Photopea is like an animations version of photoshop. I recommend searching for a tutorial, or if requested I can personally make a separate post showing you how to add filters to a gif.

. ݁₊ ⊹ . ݁ ⟡ ݁ . ⊹ ₊ ݁. . ݁₊ ⊹ . ݁ ⟡ ݁ . ⊹ ₊ ݁. . ݁₊ ⊹ . ݁ ⟡ ݁ . ⊹ ₊ ݁.
⊹ ࣪ ˖ 𝑬𝒛𝒈𝒊𝒇 ⊹₊ ⋆ my go-to website for literally anything gif related. Cropping, removing frames, optimizing a gif, making a gif, turning a video into a gif, and many more. I even use the effects tab from time to time to add a border around my gifs (like the one around the Sugar Water Series header) There’s other stuff you can do of course, I recommend checking it out, I’ve been using it for years.
. ݁₊ ⊹ . ݁ ⟡ ݁ . ⊹ ₊ ݁. . ݁₊ ⊹ . ݁ ⟡ ݁ . ⊹ ₊ ݁. . ݁₊ ⊹ . ݁ ⟡ ݁ . ⊹ ₊ ݁.
⊹ ࣪ ˖ 𝒐𝒏𝒍𝒊𝒏𝒆𝒈𝒊𝒇𝒕𝒐𝒐𝒍𝒔 ⊹₊ ⋆ This is a browser I use to remove the background from gifs.
.𖥔 ݁ ˖ 𝐂𝐎𝐍𝐒 — It doesn’t do the best job at removing a gif background unless it’s a solid color. I always do solid black and it removes it pretty well. If your background is white it will have a hard time differentiating the gif from the white background and will clip out parts of the gif and make it choppy. I recommend having a plain black background as that works best for me. Also it just recently had an update where you need to wait 10 seconds before you can download the finished product. It also claims you can only use it a certain amount of times a day but tbh I’ve used it a bunch in one day and never seem to have a limit. So idk. Like I said this update is recent. I guess a lot more people started using it and now they want to charge people.
. ݁₊ ⊹ . ݁ ⟡ ݁ . ⊹ ₊ ݁. . ݁₊ ⊹ . ݁ ⟡ ݁ . ⊹ ₊ ݁. . ݁₊ ⊹ . ݁ ⟡ ݁ . ⊹ ₊ ݁.
⊹ ࣪ ˖ 𝑰𝒍𝒐𝒗𝒆𝒊𝒎𝒈 ⊹₊ ⋆ This is the browser I mentioned in the picsart section where I crop really thin images. Does not have a limit on how thin you can make an image. I’m not positive but I’m pretty sure this is not animation / gif compatible.
. ݁₊ ⊹ . ݁ ⟡ ݁ . ⊹ ₊ ݁. . ݁₊ ⊹ . ݁ ⟡ ݁ . ⊹ ₊ ݁. . ݁₊ ⊹ . ݁ ⟡ ݁ . ⊹ ₊ ݁.
⊹ ࣪ ˖ 𝒇𝒐𝒏𝒕 𝒈𝒆𝒏𝒆𝒓𝒂𝒕𝒐𝒓𝒔 ⊹₊ ⋆ ONE TWO THREE
. ݁₊ ⊹ . ݁ ⟡ ݁ . ⊹ ₊ ݁. . ݁₊ ⊹ . ݁ ⟡ ݁ . ⊹ ₊ ݁. . ݁₊ ⊹ . ݁ ⟡ ݁ . ⊹ ₊ ݁.
⊹ ࣪ ˖ 𝒔𝒚𝒎𝒃𝒐𝒍 𝒅𝒆𝒄𝒐𝒓 ⊹₊ ⋆ ONE TWO THREE FOUR FIVE
. ݁₊ ⊹ . ݁ ⟡ ݁ . ⊹ ₊ ݁. . ݁₊ ⊹ . ݁ ⟡ ݁ . ⊹ ₊ ݁. . ݁₊ ⊹ . ݁ ⟡ ݁ . ⊹ ₊ ݁.
⊹ ࣪ ˖ 𝒉𝒐𝒏𝒐𝒓𝒂𝒃𝒍𝒆 𝒎𝒆𝒏𝒕𝒊𝒐𝒏𝒔 ⊹₊ ⋆ Evernote (a notes organizing app I use to organize my fics + I love it so so much), Amino (can find clubs / communities dedicated to bio decor & symbols), Gif Toaster (the og app I used in the very beginning to apply text to gifs), Canva (good stickers / elements + can find aesthetic / cute stickers with keywords on Pinterest), Videoleap (a video editing software I used to use), Remini (an app that upgrades the quality of an image), Symbol Pad & Symbol (apps I use for individual symbols) Snow (has cute animated effects I used to use sometimes a long time ago), VLLO (the app I used before Vita that charged for some of its services), DeviantArt (where I get all of my PSD’s + they have a lot of stuff you can use, pngs and whatnot, I just don’t really use it for those purposes)

52 notes
·
View notes
Text
Goth DIY: Altered Clothing part 1
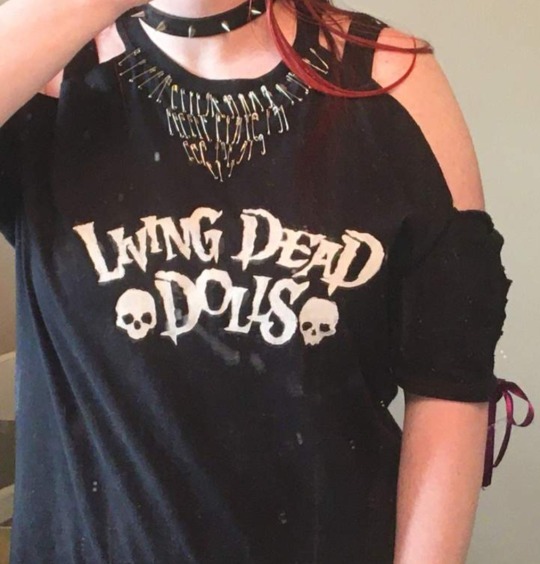
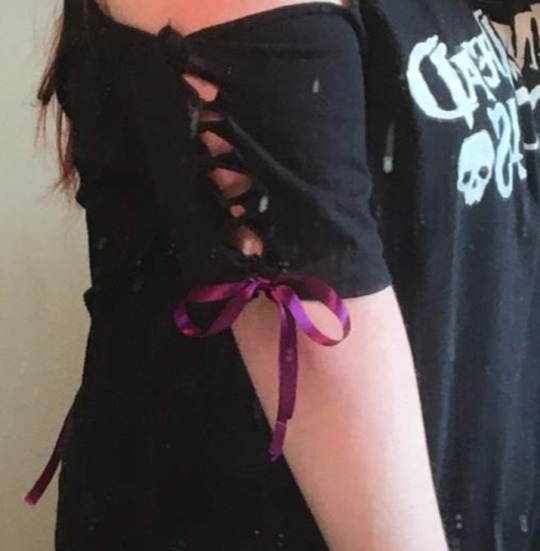
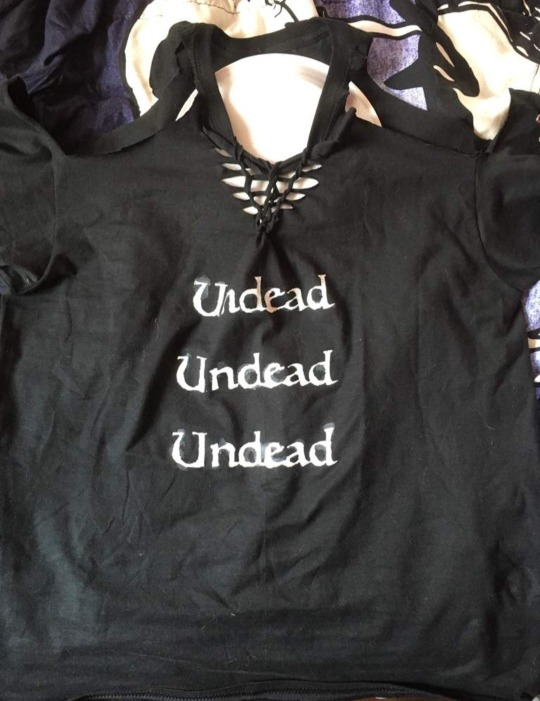
Since some of you crafty goths were interested in seeing the clothing I've altered, I decided to compile it all in one place! I hope I can inspire your creations,give you ideas, and teach you new techniques. This will be a long post, since I've been making alterations to my clothing since high school, which also means some of these projects aren't as polished as others, since they were made when I was newer to DIY and have mistakes I've since learned from, but that's okay! Goth doesn't have to be polished and perfect, and don't let the fear of mistakes stop you from creating!
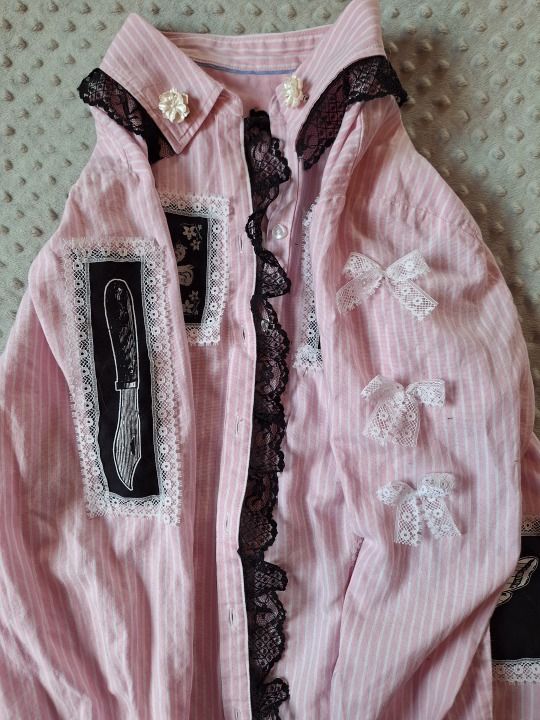
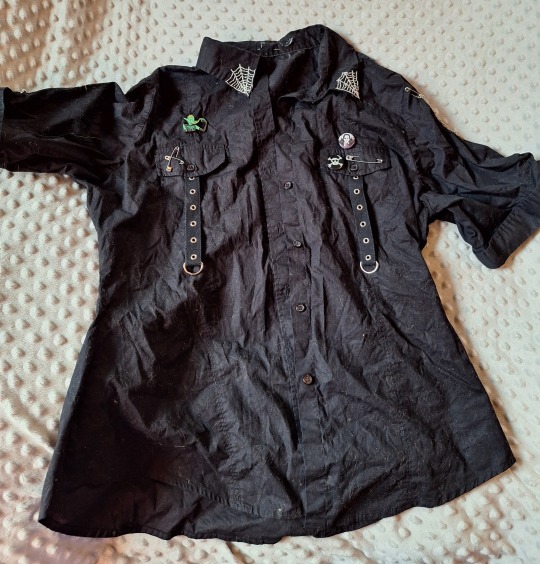
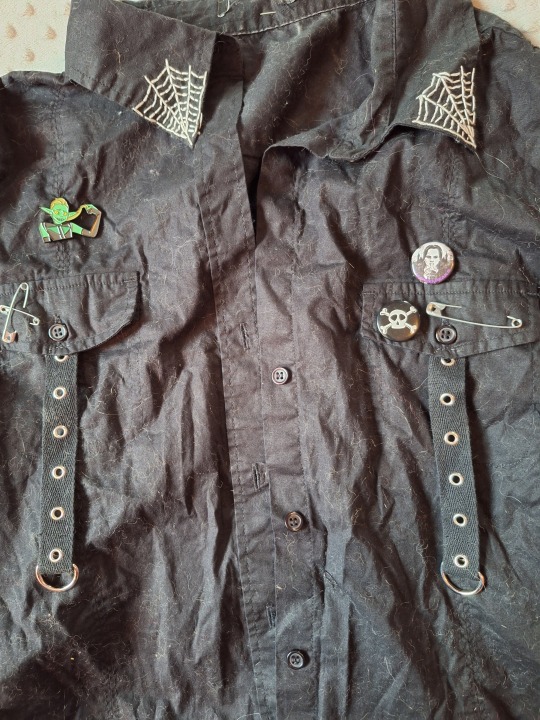
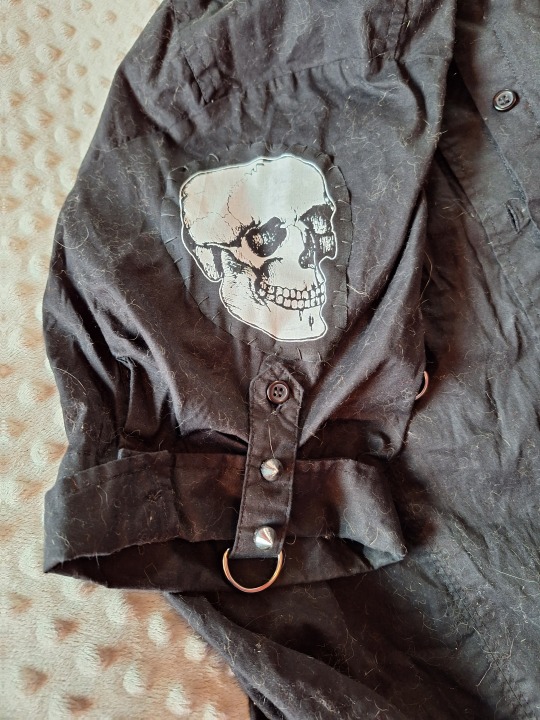
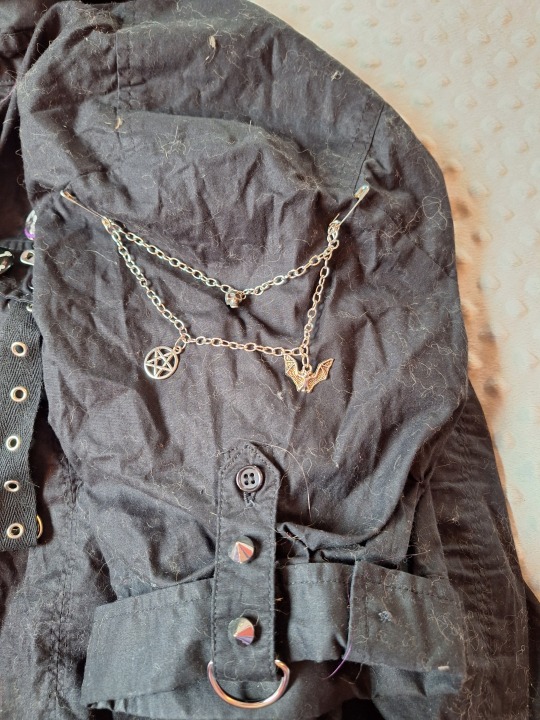
I've already done posts about the shorts and pants I've gothified, so part 1 will focus on t-shirts, camisoles, and button-up shirts. Part 2 will have sweaters, skirts, and dresses. Some alterations are as easy as adding safety pins or lace trim, and others involve more sewing. Lots of these are very beginner-friendly projects and take less than an hour. All of these items were completely plain when I got them--anything metal, lace, embroidered, or painted that you see was added by me. I'll add more about each garment in the image descriptions. As always, feel free to message me if you want better or more thorough instructions or DIY advice. I'm here to be a resource to my fellow crafters! <3
(Also, please pardon the cat hair and my hair on the clothes--I don't take perfect pictures. A couple pics are also old since those shirts are in storage so I could make room for my winter wardrobe, so you'll notice a change in backdrop and a dirty mirror.)
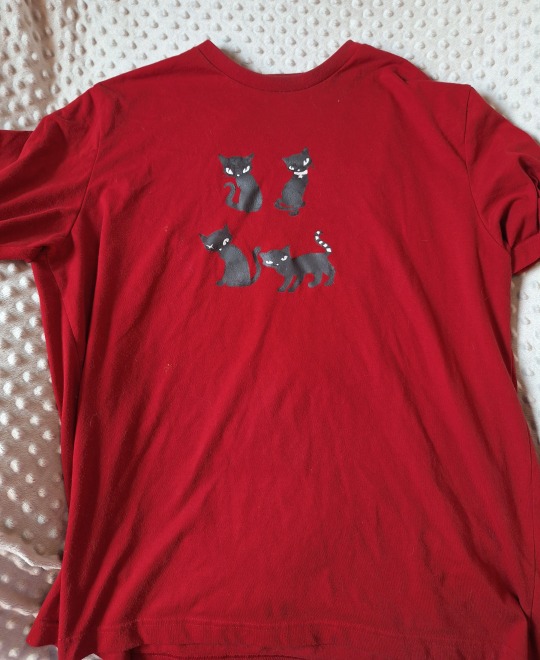
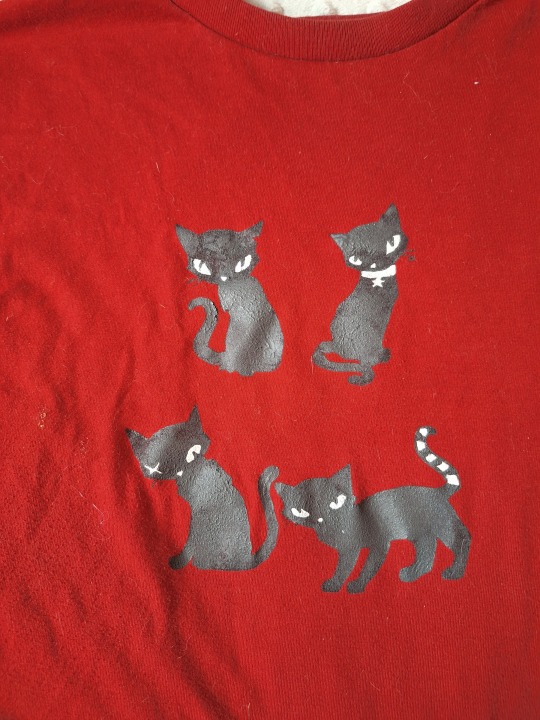
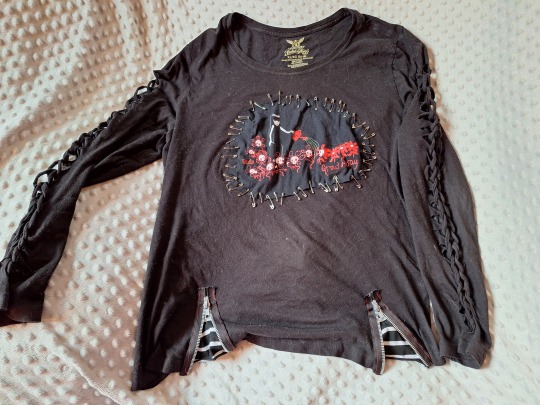
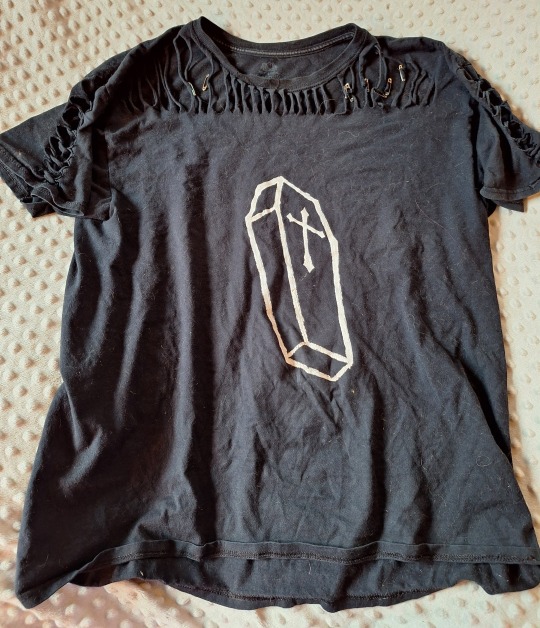
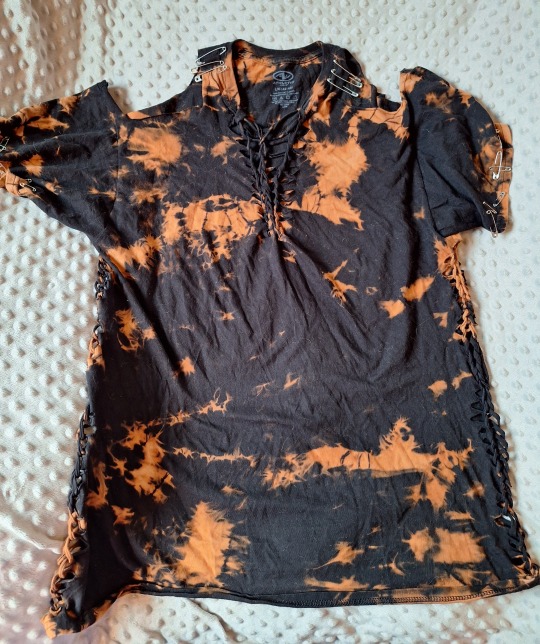
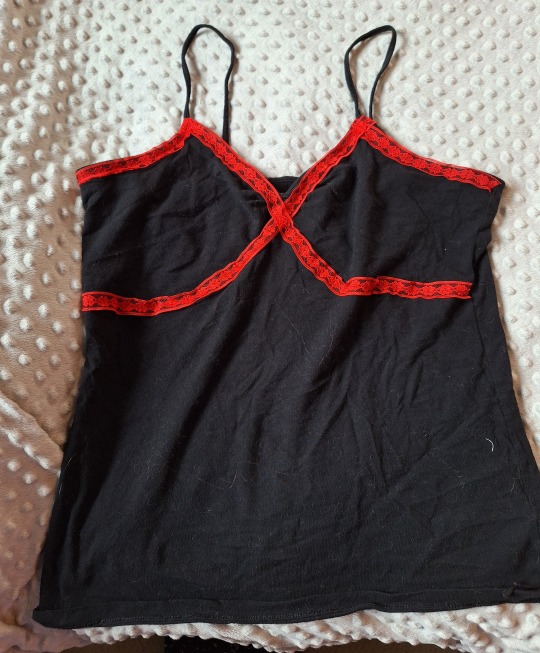
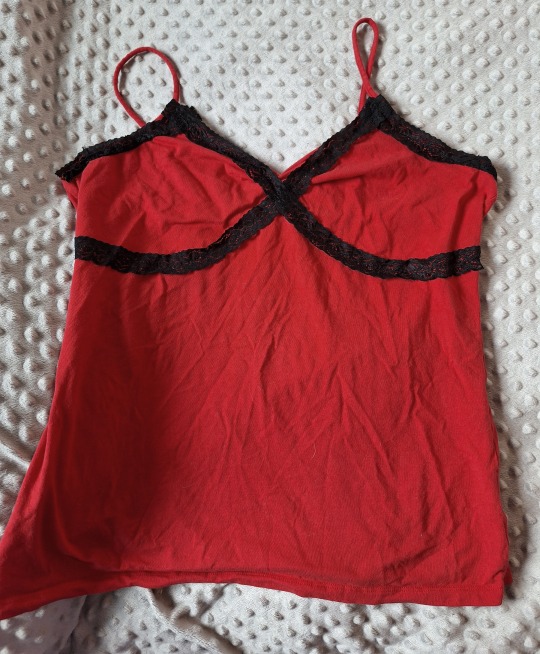
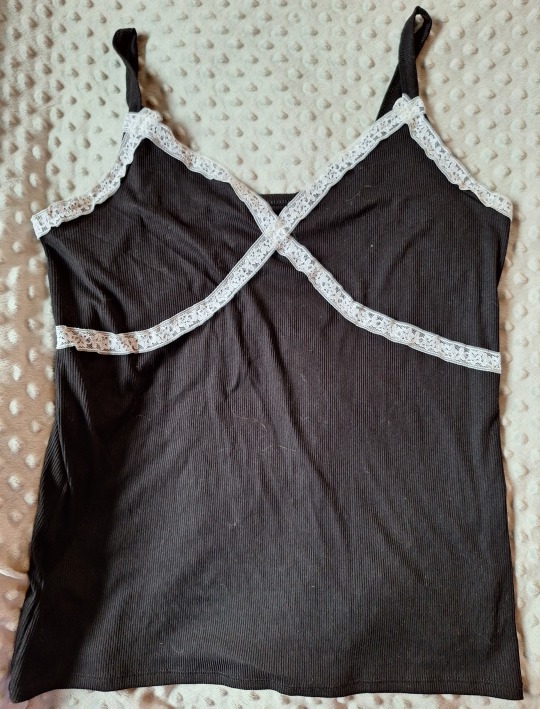
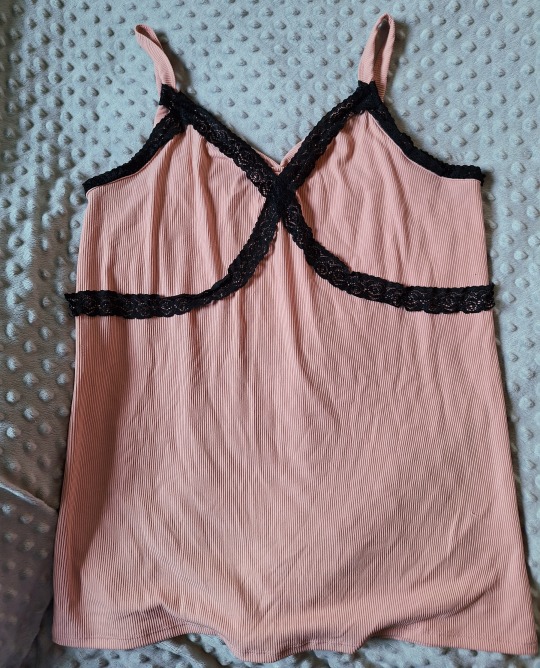
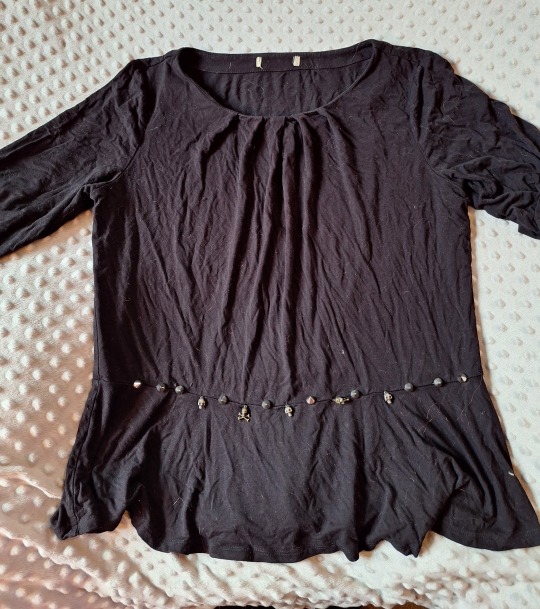
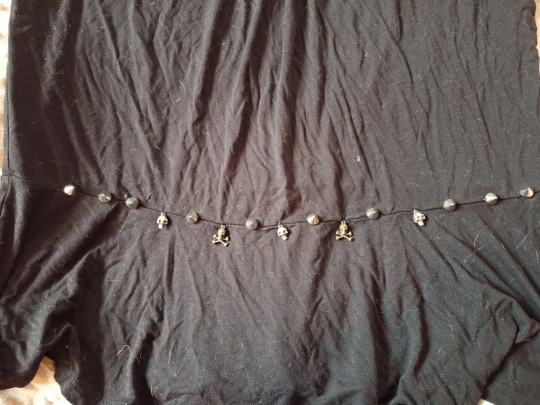
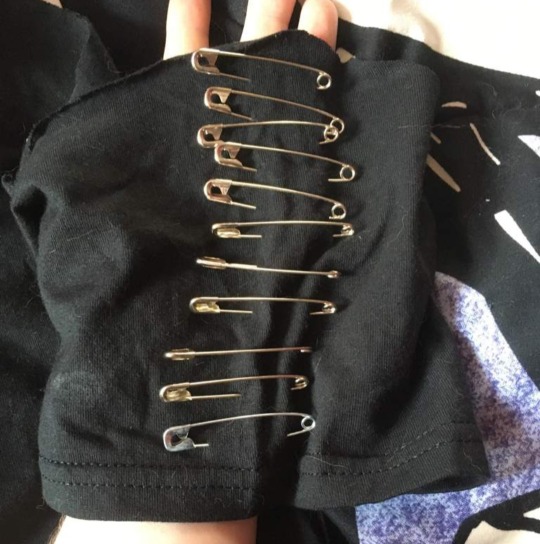
Let's start with t-shirts and camisoles! Use an old shirt, a thrifted shirt, a shirt from Walmart, etc.! I like to get plain unisex t-shirts from Walmart and paint on them using freezer paper stencils, bleach them, shred them, and/or add safety pins to them. The camis also came from Walmart, and I changed the necklines and added lace trim to make them cuter.
To make a sweetheart neckline on a cami, you can cut it, or you can just pinch the middle and sew it into place (I did that for all of them except the black and white one--that one ended up a little lower-cut than I meant it to, so I decided to stick with the pinching method). The lace trim I used on the black camis isn't stretchy, but still works just fine, as long as you pin it into place while you're wearing the shirt and stretch the shirt a bit as you sew to maintain stretch in those areas. Stretchy lace, like I used on the pink and red camis, works a bit better, but is harder to find. I still like pinning the lace while I'm wearing the shirt to get the placement down, but if you wear a bra, make sure you're wearing the one you plan on wearing with the shirt while placing the lace. I found it doesn't sit right with bras that fit a little differently than the one I based the placement on.
The long-sleeved Emily the Strange shirt has a neat detail, albeit a wonky one because my placement is a bit off sometimes. You'll notice two little striped triangles at the bottom. I cut slits in the shirt and added triangles of striped stretchy fabric, then sewed zippers over top of them to hide the seams and add extra detail. I also sewed the zippers on with red thread for contrast.

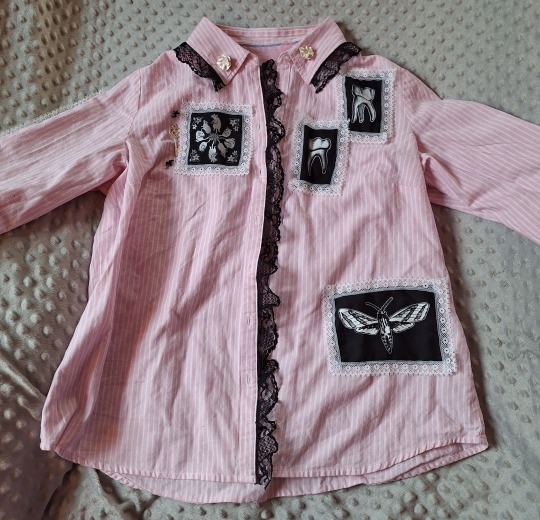
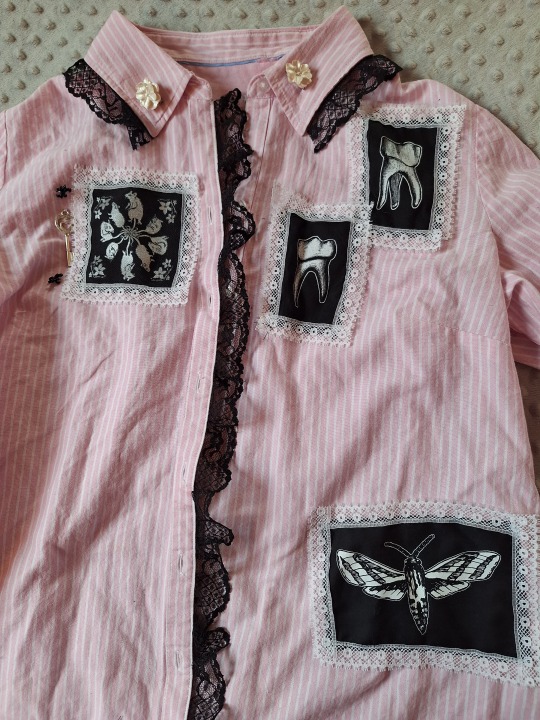
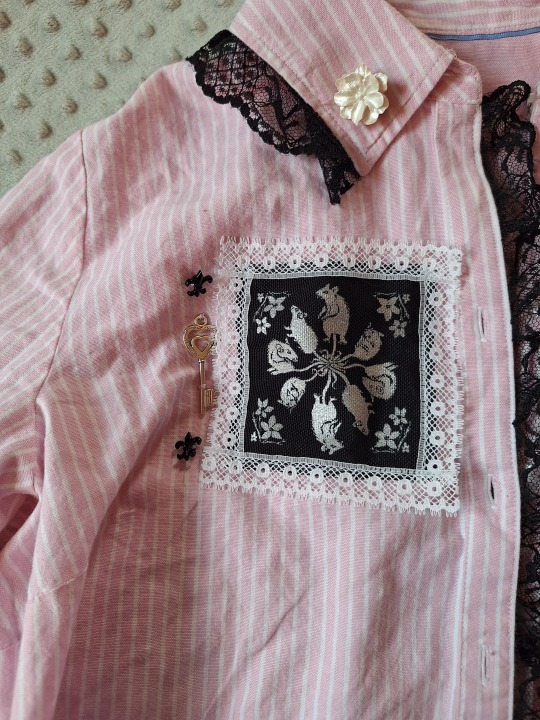
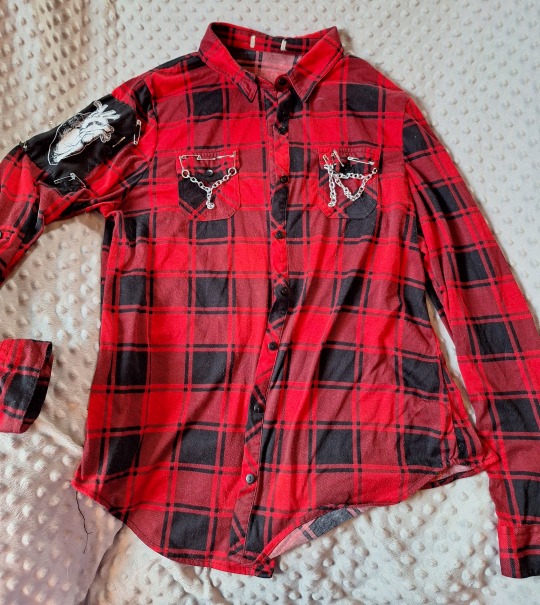
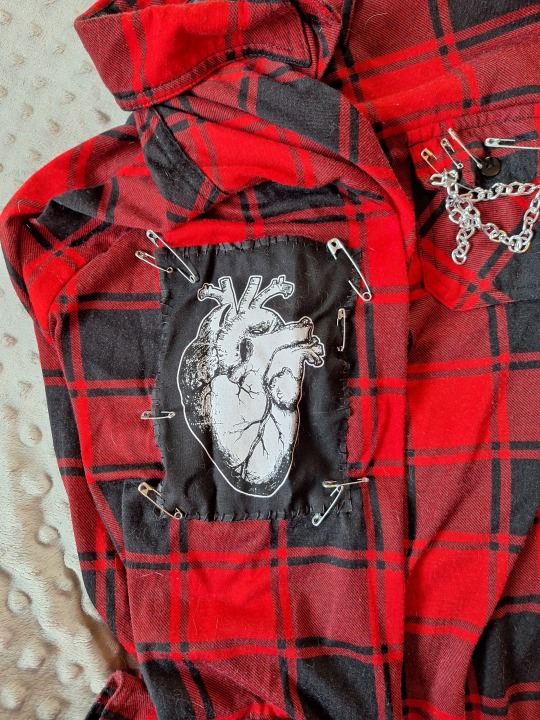
My button-ups are a bit more involved. I treat them like how I treat shorts--patches, lace, embroidery, pins, grommet tape, D-rings, charms, chains, oh my! The pink one is my most recent, and I'm so proud of it. All of the patches came from ToothxNail on Etsy, except the Rat King patch, which came from Katiewhittleart on Etsy. The flowers on the collar were buttons that I glued onto flat-back pins from a craft store (I used E6000 glue). Made super quick collar pins that I can remove when washing the shirt or put on something else when I want.
The orange button-up was by far the simplest. I just added lace trim to the cuffs and cropped it (it had been high-low, but I wanted to wear it tucked into a skirt and the long back was annoying me). I also added collar clips with a chain that I got at a craft fair, but that's more like styling an accessory with it than altering it, since I can just un-clip them.
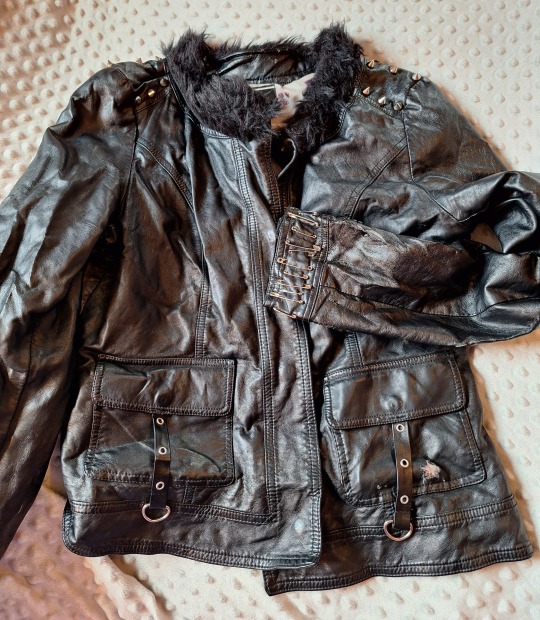
The leather jacket is old and doesn't fit well, so I don't wear it anymore, but I kept it because it was my first leather jacket. Adding the sew-on studs and faux-fur trim on the neck took the longest. You'll also notice that a mouse chewed a hole in the outer shell on the pocket.

Part 2
#diy advice from your local goth#goth diy#goth clothing#goth fashion#goth#gothgoth#goth subculture#diy fashion#diy#diy tutorial#goth tutorial#crafting#sewing#mine
88 notes
·
View notes
Note
So, your Madoka Kaname drawing looks amazing, and as a traditional artist, I was trying to observe to see if I could learn from your drawing.
One thing that stuck out to me was the shading and outlines.
How do you shade so well? How do you know which colors to use, and where to use them? Same question goes for outlines, too.
hihihihiii!! first of all thank u so much, im rlly flattered that u were so impressed 🫶🫶 im honestly really surprised how much attention my drawing got gyuh
anyways!! the picture i referenced was from the crash fever x pmmm crossover, so it’s by no means completely original. here’s the side by side comparison of the (cropped) og image vs in my sketchbook!!
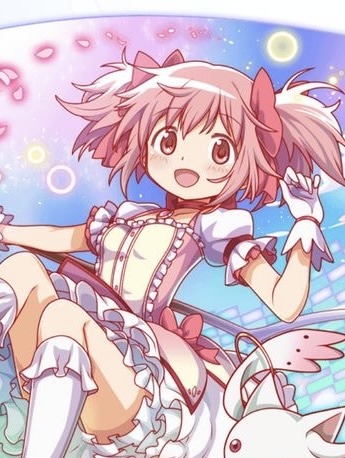
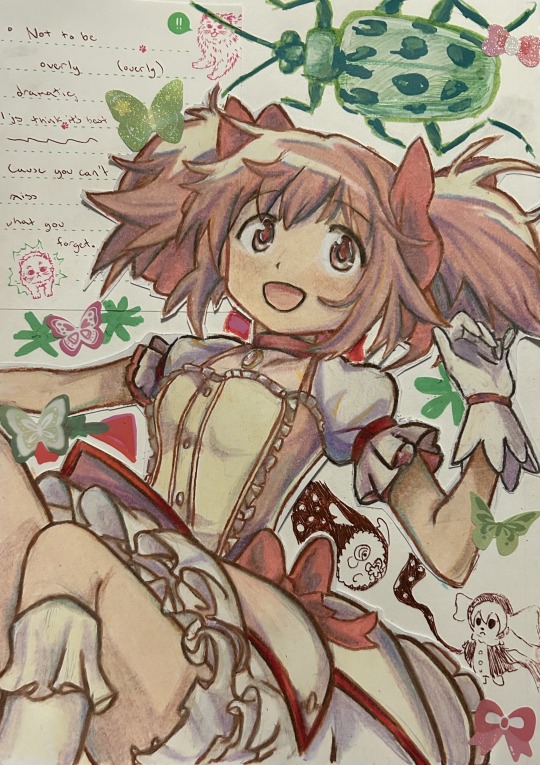
so, most of the actual shading decisions and placements are from the original work. however, i had to change up the colors a bit because of the selection i had. (please note that my version is also darker because of lighting and iphone picture quality 😭😭)
also, for most of my drawings i follow the call of the wind (make guesses) and fufill the prophecies (keep adding more colors until it looks okay)
that being said, below the cut is a full coloring walkthrough if you’re still interested!!
please note that this is much smaller scale and done in less time (took an hour instead of two days 😨) so the quality will be a bit less!!
alright. so let’s say we wanna draw this image, but we tweaked it a bit because drawing BOTH eyes was too much of a hassle.
after you clean your sketch, the best thing to do is open with an outline that’s not QUITE black but close to it.

now, i have a rule. PLEASE PLEASE PLEASE remember this rule: you can use ANY color. for your outline, shading, whatever. it doesn’t have to match the reference.
if you are using this as a genuine tutorial, please know that i change colors every fucking time i draw. i change mediums too. this is only the process i used for my madoka drawing (as best as i can remember)
cuz, like my art teacher said, you have this thing called artistic license, which means you have the right to change whatever the FUCK you want if you think it makes your drawing better. make her purple, give her one ponytail, whatever. as long as you can make it work, have fun!!
anyways. next, go over that outline with other dark colors of different hues. there’s no rhyme or reason, it’s just fun.
after, place your highlights on the hair. i used cream instead of the pastel pink in the original because i like cream better and it adds more hues.

usually, i start with the darkest value instead for shading as it’s more vibrant, but madoka doesn’t have any really standout dark tones. it’s okay though i love her
then, you gotta go in with base colors. simple pink and peach yada yada
listen, quick reminder: YOUR BASE COLORS DON’T MATTER AS LONG AS YOU CAN STILL ADD ONTO THEM!!!
just pick a light base close to the original. don’t agonize over it. apply lightly and gently in circular motions, and you’ll be okay!!
next, we adjust the tone of the hair. i wanted a cooler toned pink, so i added amethyst. i also added a bit to the stray eye.
after, adjust your tone more as needed. again, any color goes. the means justify the ends, and if you end up adding some blue or yellow or whatever then good!! go bonkers with it. i used vermillion.

next, add shading blocks (referenced from the original image!) in a color that’s light enough to blend in more but dark enough to see (amethyst is my favorite for this, and i use it a lot!!) you can also add extra shading in some areas to give it some personality.
after THAT, blend in your shading a bit more with your base colors. by this point you should be pressing down a lot to get the pigment you want. i think for her skin i added beige instead of peach in this step, but that’s also what i did for the above drawing.
the purpose of this is to mute your colors a bit so they fit together more. however, if you want it to pop, you don’t have to add another base color!!
i also went over the outlines with the base color to lighten them and even out the drawing. i do that with almost every step, as needed. follow your heart on that one
also, i gave her a little bit of blush in that step. just because.
ok, so now is the fun part. for the hair and any accessories/clothes/things of the same texture, add random streaks of random colors.
yeah, go ahead, add orange, blue, yellow, whatever. it’s best if it’s of the same value (aka darkness) so it fits in with the base color, but it can be anything!!
you don’t have to do this, but it’s fun.
also, i shaded the eye too offscreen. same process, because pmmm’s style has a very flat texture on characters. thus, it’s okay to use the same shading technique.
now, we can do the same with accessories!! these are simpler and i honestly got too lazy to even reference for the scarf because the hair was the main focus.
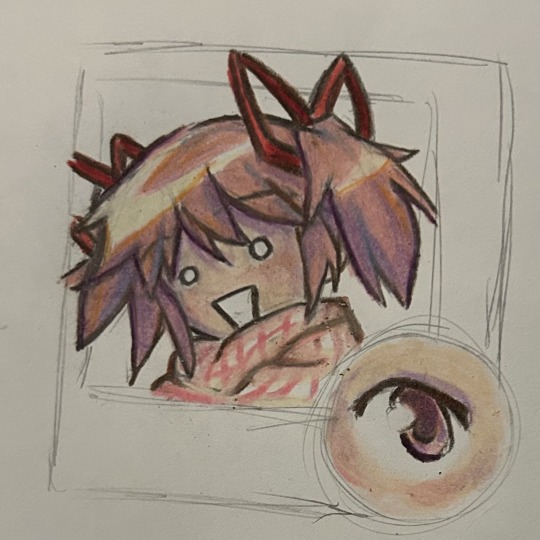
finally, add little details, clean up anything you don’t like, and do whatever you want with it!!
that’s all i do for shading, and i hope it helped a bit. i mainly work with pen and paint markers, but the process is the same aside from tweaking parts.
just remember:
its your art do whatever the fuck you want
LAYER LAYER LAYER fix anything by adding new things
it doesnt have to be perfect yada yada
fun color = fun drawing
it doesnt have to look like the picture because thats boring and you wont learn if you try and carbon copy everything you see
like and subscribe
#also PLEAAASE check out my more original art if you like this drawing#i post my full sketchbook pages where i use a lot nmore mediums and draw original stuff like. bugs!!#pleaseee sorry for self promo but i love attention#drawing tutorial#drawing#my art#sketch#puella magi madoka magica#madoka magica#madoka kaname#madoka magica fanart#prismacolor#idk what do i tag. bro
32 notes
·
View notes
Text

some quick info:
↳ this is specifically for the screencapping method. i use mplayer osx extended to get my caps, but there are a few other programs you can use as well. i’ll specifically be going over mplayer here.
↳ i’m using ps 24.4.1 on a 2020 m1 macbook air
[tysm to @kyubinz for looking this over and adding some things ily]
☆ feel free to send me an ask/message with any questions you have! ☆
「 setup 」
1. finding videos
one big thing to remember is that the overall file size of your video will impact the quality of your gif. the larger, the better. i almost never use anything below 1080p, and try to use 2160p whenever i can. 4k video downloader is the program i use for downloading videos from youtube, it’s free to install and works great! because of how large some files can be, i always store any media on my hard drive. i highly recommend using one if you plan to keep lots of files on hand.
.mkv files are best, but .mp4 works fine as well (.mkv files are usually bigger aka better quality).
2. getting your screencaps
after downloading mplayer, go to the top bar and click file > open. open the video you’ll be screencapping.
you can either drag the little time indicator or using the arrow keys on your keyboard to move to the spot you want to capture. the > key can also be used to move forward frame by frame. to start capping, pause the video and press shift + cmnd (ctrl if you’re on windows) + s to take a screencap. i usually just hold it down until i’ve gotten all the screencaps i need.
by default, screencaps go right to desktop. you can set up a folder for them to go to automatically by going to settings > general and then selecting a spot in the menu under “interface”, but i just let them go to desktop and then sort them into individual folders so they’re easier for me to find while i’m giffing. in general, i try to stay under 80 frames so my gifs fit into tumblr’s 10mb image size limit.
3. importing screencaps into photoshop
to import your caps into ps, go to file > scripts > load files into stack. this window should open:

click browse, and navigate to the folder with your caps in it. select all of the caps you want to import, and then click open.
click ok to create a file with your caps, and then wait until it’s finished loading your caps into the layers tab. once they’re loaded in, this is what your screen should look like:

(if you aren’t seeing the timeline at the bottom of your screen, go up to the top bar and go to window > timeline)
click create frame animation, then go to the hamburger menu at the top right of the timeline and select make frames from layers. once your frames have loaded in, select the same menu again and click reverse frames. play through your gif to make sure everything looks good.
if you were to save your gif at the speed it’s set at now, it would be way too fast. to fix this, you have to set the frame delay. do this by selecting all your frames in the timeline using shift click, and then clicking (on any frame) where it says “0 sec”. select other from the menu that comes up, and you should get this popup:
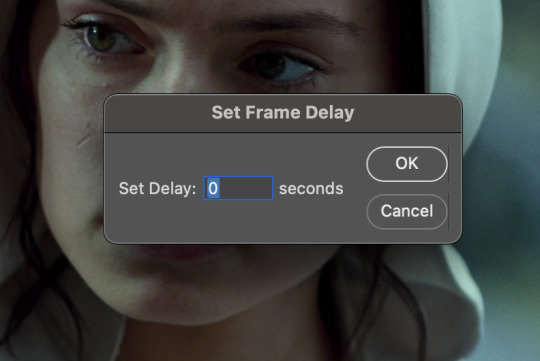
the general rule of thumb for gif frame delay is 0.05 seconds. there are some cases — certain animated movies or video games, for example — where other delays are best, but for the most part, 0.05 is what you want to use (0.05 can slightly slow gifs, and sometimes using 0.04 better matches the clip's original timing. this is really a "train your eyes" thing, and picking the best delay gets easier as you gif for longer). you can set this by typing the number into the text box and then hitting the ok button or enter on your keyboard.
at this point, i’d go ahead and save your file. you can go to file > save in the top bar, or just hit cmd/ctrl + s on your keyboard.
「 making your gif 」
1. sizing
after your frames are ready, the next thing is to size your gif. to crop your gif, press c on your keyboard to open the cropping tool. white borders will show up around your gif.
before doing anything, i would suggest making sure “delete cropped pixels” is unchecked. this will allow you to drag your gif around later if you want to reposition. you can find this option at the top of your screen. drag the borders on either side until you have the area you want selected. mine looks like this:
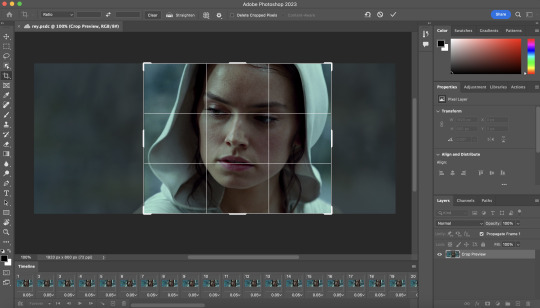
once you’re happy with your selection, hit enter on your keyboard to finalize it.
the tumblr image guidelines require gifs to be 540px across (here’s a post detailing this). to change your gif’s image size, go to image > image size in the top bar. you’ll get this popup:

instead of setting the width right to 540, i’ll be setting it to 544, and then trimming down the edges using canvas size. this makes the quality just a little better, and also prevents any weird borders being made around your gif on the off chance photoshop decides to add them. this isn’t necessary at all, you can absolutely size right to 540, but i just like doing this. if you choose to do this, open canvas size right after you set image size (image > canvas size in the top bar), and trim your width down to 540 and your height down a few pixels as well.
2. sharpening & other filters
sharpening is essential for good-quality gifs. the first step to this is converting our timeline from frame animation to a video timeline. select this little icon in the bottom left of your screen:
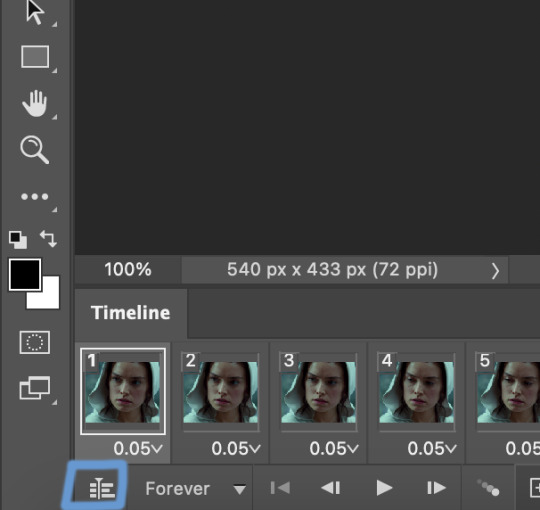
this is what your timeline will look like now:

you can use the little slider with mountains on either side to change the width of your frames in the timeline for easier access when editing. now that we’ve got all this set up, we can sharpen! i use this action pack to sharpen my gifs in addition to a few of my own settings (here is a video on how to install actions into photoshop). go to window > action in the top bar if you aren’t seeing the action tab.
i’ll be using the sharper action from the pack. to use an action, select it from the list and press the little play button at the bottom of the panel to apply it.
in addition to this, i usually also add unsharp mask at 50% amount with a 0.5px radius:


there are a few other filters than can be helpful when giffing:
a. add/reduce noise
noise (aka grain) can be added with “add noise”. go to filter > noise > add noise.
these are the settings i usually use, but the amount depends on the gif (i don't ever go over 3.5 for the most part):
(if you want a grain effect but moving noise doesn't work for the gif, you can also add a grain overlay and then mess with blending mode and layer opacity until it looks how you want)
reduce noise can be used to remove some of the pre-existing grain on a clip. go to filter > noise > reduce noise. here are my settings:

leaving reduce noise on its own at 100% is a bit too much, so double click this icon and change the opacity (i usually do around 45):

b. gaussian blur
if your clip is a bit pixelated, gaussian blur can help with smoothing it out a bit. go to filter > blur > gaussian blur. my settings are 1 pixel radius w ~20% opacity (this changes based on the gif).
3. coloring
time to color! i want you to keep in mind during this section that everyone likes different colorings, and this is just my process! please don’t feel pressured to follow exactly what i’m doing, the best way to find what you like is to just mess around and experiment!
i like to start off with lighting adjustments: brightness/contrast, levels, exposure, and curves.
a. brightness/contrast
i usually start out with this first, just because brightening the gif right away helps me start thinking about how i want to color! here are my settings:
b. levels/curves
levels and curves can either be used interchangeably or together. i usually use levels to adjust lighting and curves to adjust color values, but i’ll go over using both for lighting as well as using curves for adjusting color values.
for both of these adjustments, i use the eyedropper tools to pick out white and black points. for levels, the top eyedropper tool to the left of the graph is used to pick out a black point. i do this first. use the tool to pick a spot on your gif that you want to be the base for black values. for me, that’s the shadow inside rey’s hood. the bottom eyedropper tool picks white point. use the tool to pick a spot on your gif that you want to be the base for white values. i chose the outside of rey’s hood. make sure you’re doing this on a new levels adjustment layer.
now, on to curves. you can either use the same eyedropper method or manipulate the graph directly. using the eyedropper is the same as levels, so i’ll just go over graph manipulation.
shade lightens as you move to the right along the x-axis of the graph — black is the far left, white is the far right, middle is the midtones. generally, i don’t work with midtones.
i’m going to use levels for this gif’s lighting, and curves to adjust color values. here’s how to do that:
curves can be used to adjust the amount of a certain color in different lighting areas of a gif. for example, i can specifically decrease the amount of green in the gif’s whites. to edit these values, select the rgb drop-down menu and adjust them one at a time. here are my final graphs:


c. exposure
this one’s pretty straightforward. the exposure slider adjust general exposure. the offset slider adjusts how dark your dark points are, and gamma correction can be used to lighten/darken scenes as a whole. here’s my settings:

d. color balance
color balance is used to adjust overall tint of a clip. this is in general pretty simple, but i do want to point out that using the shadow and highlights tabs in addition to just the midtones can really help. here’s my settings:

e. channel mixer
channel mixer is one of my favorite tools in ps, especially for coloring scenes that are a pain in the ass without it. to avoid taking up too much space, here’s a great tutorial covering channel mixer. here’s my settings:


[at this point, i’m noticing my gif is still a bit darker than i’d like it, so i’m adding just a bit of brightness/contrast to fix it. there’s also a patch of blue over one of rey’s eyes, so i’ve used a hue/saturation layer to get rid of that bit and masked it to her eye. i’m not going to go over masking here, but there are lots of great tutorials out there!]
f. selective color
selective color can be used to adjust the amount of specific colors within a color. for example, if i were to go into the red tab and take out cyans, the reds would become more red. if i were to add yellows, the reds would become more orange, etc etc. this can be especially good for color manipulation. for this gif, i’d like to make the background more blue, so i’m going to use selective color to do this. here’s my settings:

g. color lookup
color lookup uses 3dlut files to remap gif colors (it’s a preset — think instagram filter or something similar). i don’t always use these, but when i do, i almost never leave them at 100% opacity. color lookup is great for giving gifs a film-type look if you want to do that, it’s got loads of different options. here’s my settings (adjustment layer is set to 20% opacity):

atp i’m pretty much done with coloring! i usually end up doing a few extra little lighting adjustments at the end. for this gif, i added some brightness/contrast at +8. i’ve also noticed that my gif’s looking a bit grainy, so i’ve added some noise to lean into it. this is usually the way i fix it, but you can definitely do reduce noise/gaussian blur as well if you don’t want a grainy look.
here’s my fully colored gif + a process gif (fast images warning):

「 saving gifs 」
1. frame rate
one thing you may have noticed is that my gif is looking a bit choppy. photoshop has a tendency to mess with frame delay after gifs are converted to video timeline. here’s how to fix that.
select all of your layers and convert them to a smart object (right click > convert to smart object). next, click on the hamburger menu in the top right of the timeline and go to convert frames > flatten frames into clips. now we need to change the timeline from video timeline to frame animation. click the little 3 boxes symbol in the bottom left corner of the timeline:

go to the hamburger menu again and select make frames (this is the same one you used earlier), then go through your frames and delete any duplicates. the first frame usually needs to be deleted specifically. once you’ve done that, set the frame delay back to 0.05 the way you did earlier.
2. exporting
once you’re happy with how your gif looks, go to file > export > save for web (legacy).
these are my export settings, but feel free to experiment with the menus where i have selective and diffusion selected, different settings work best for each gif. in general, most gifmakers only use selective/adaptive and diffusion/pattern because they generally work the best for tumblr. before saving, make sure your looping option is set to forever:

gif size for tumblr has a 10mb limit. my gif is under this, so i don’t need to make any changes, but if yours is over, you can either delete some frames from the beginning/end of your gif and/or adjust the height of the gif (width needs to stay 540px so your gif doesn’t get stretched/compressed on tumblr, but height is fair game).
here's my final gif!

happy giffing, and please don’t hesitate to send me any questions you have! ♡
#*mine#gif tutorial#tutorials#allresources#usertheos#userzesty#userzaynab#usershreyu#rogerhealey#userabs#userhekaates#usermaria#userraffa#usermorgan#uservivaldi#tuserheidi
315 notes
·
View notes
Last Seen Blogs


