#sims render tutorial
Explore tagged Tumblr posts
Visit Tumblr Blog
Explore Tumblr blogs with no restrictions, modern design and the best experience.
Last Seen Tumblr Blogs


Fun Fact
Tumblr’s reach among the 26-to-35-year-olds in the US is 11%.
Text

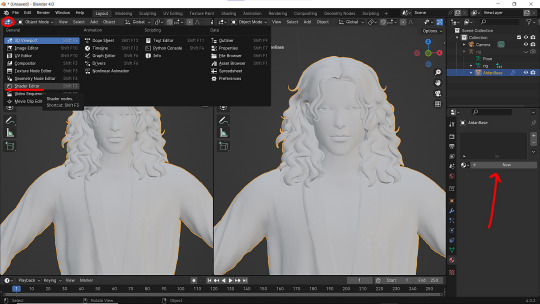
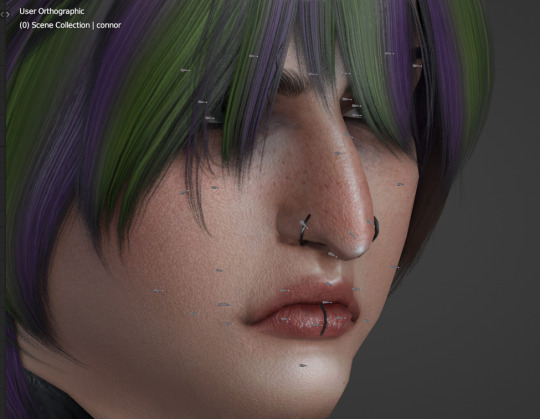
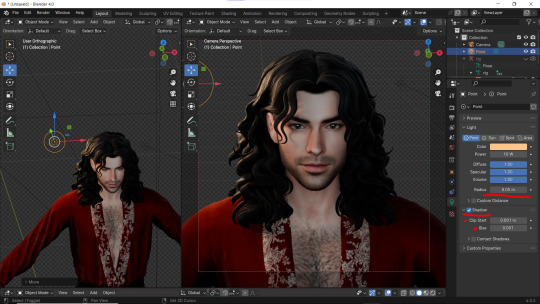
Beginner Blender Tutorial Basic Render: Part One (Importing a Sim and Adjusting Textures)
To learn the basics, we'll begin with a super simple render: one sim, one pose, one background.
But first, the anatomy of blender.
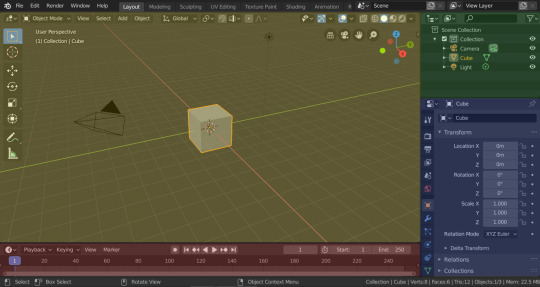
(image & list courtesy of Blender's online manual)
Yellow - 3D viewport (workspace) The 3D Viewport is used to interact with the 3D scene for a variety of purposes, such as modeling, animating, texture painting, etc.
Green - Outliner The Outliner is a list that organizes data in the blend-file, i.e. the scene data, Video Sequencer data, or anything that gets stored in a blend-file.
Blue - Properties The Properties shows and allows editing of many active data, including the active scene and object.
Red - Timeline The Timeline editor, identified by a clock icon, is used for manipulating keyframes and scrubbing the Playhead.
The tools I use most I've highlighted below:
I won't outline their uses just now, but we'll be going over them as we use them.
Different creators like to split their blender window up in different ways, but this is my preferred setup when I'm working:
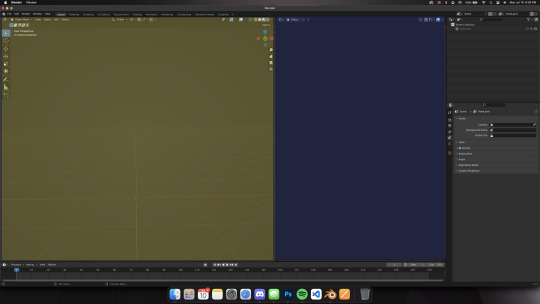
I use the yellow half of the screen as a render preview/3D workspace
I use the blue half for shader editing, posing, etc.
You can set yours up like mine or find what's comfortable for you.
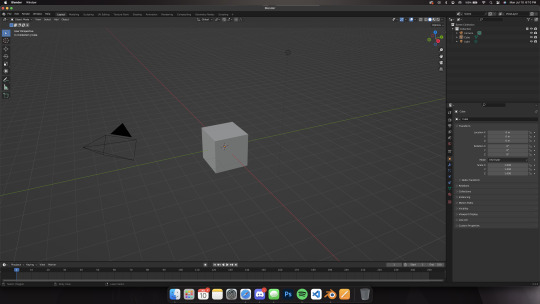
When you first open blender, you'll be greeted by the default cube, lamp, and camera.
Delete them! You can do this two ways:
Click and drag your mouse over all 3 and delete or Select all 3 in the side menu and hit x on your keyboard
Step 1: Importing our Sim
After deleting the default items, we'll import our sim. This tutorial assumes you've already ripped your sim (if you haven't, check here for how to do so!)
Now, let's import.
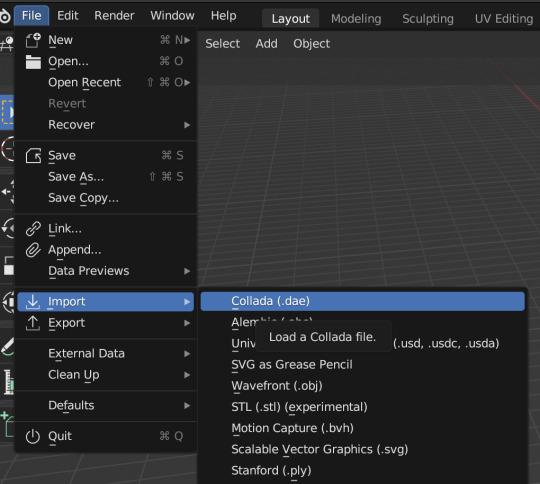
Click file -> import -> collada (dae) Select your DAE and click "import"
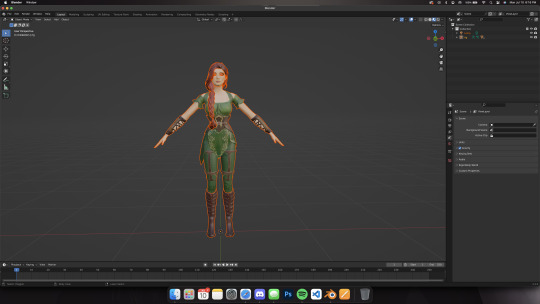
Your sim will look a little... off (thick eyelashes and a weird shine), but that's okay we're going to fix it! Your sim might also look solid white. If that's the case, make sure you're in the right mode. You can adjust modes by clicking on one of the four circles in the top right of the screen.

These are your viewport modes.
Wireframe (far left) - good for mesh editing Solid (middle left) - good for posing Material Preview (middle right) - what we work in most, shows everything with textures (color) Rendered (far right) - this shows your render preview We'll be working mostly in Material Preview
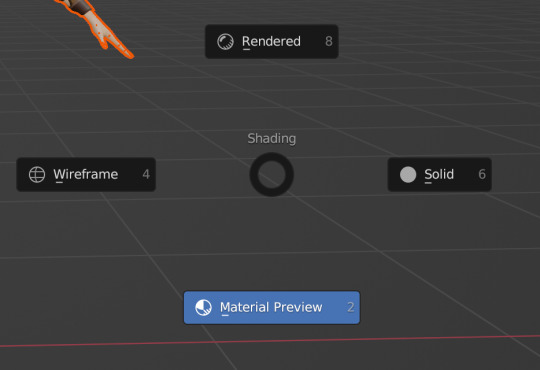
You can also switch between modes by hitting z on your keyboard then selecting which one you want I'll be using mostly keyboard shortcuts but I'll show you how to do both as we go along
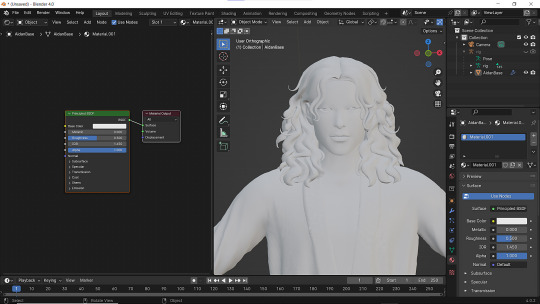
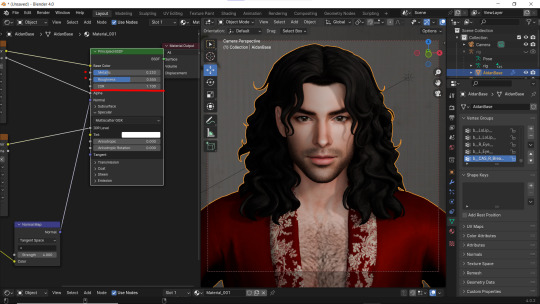
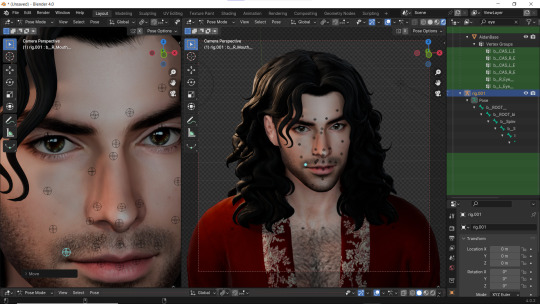
Step 2: Adjusting Our Sim's Textures
Let's fix our sim's textures.
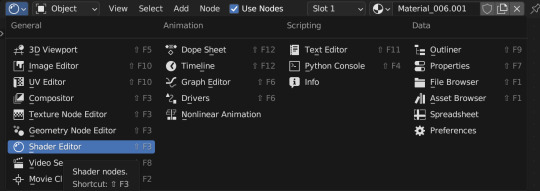
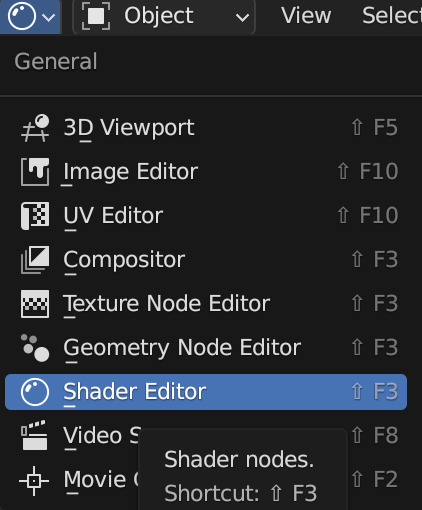
First. set up your workspace. Separate your workspace into two windows (as shown in the picture above with a yellow half and a blue half) and select "shader editor" in your right-side window. Like this:
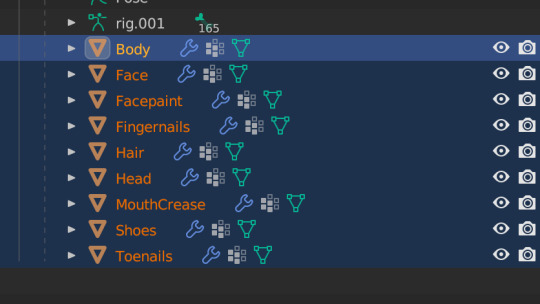
Next, navigate to your Outliner and click the little dropdown beside "rig"

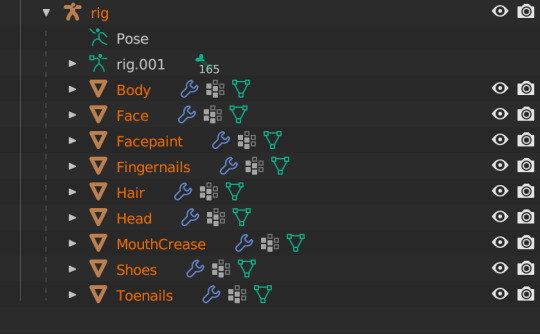
Under "rig" you'll see your sim's body parts listed. We're going to select "Body" When we click "Body", these colored blocks will appear in our shader editor window.

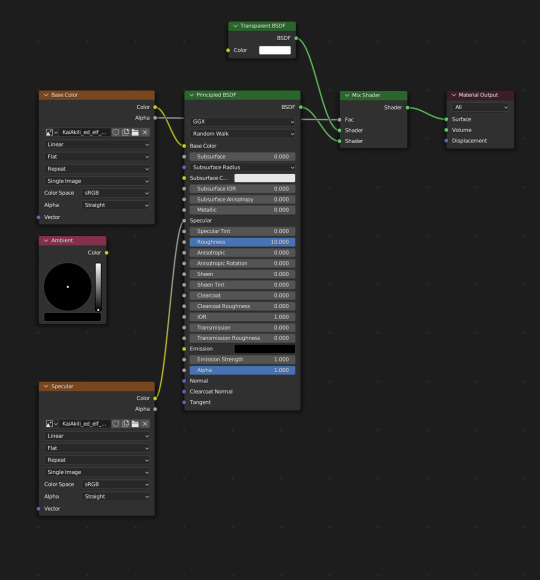
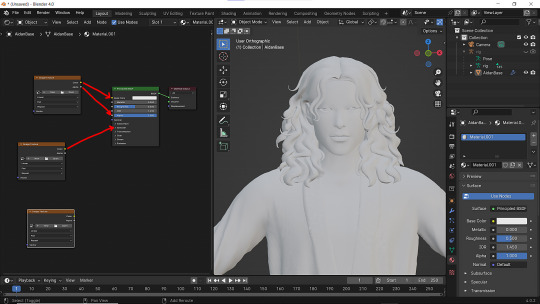
These are called Nodes. We use Nodes to adjust textures for various items in blender (sims, walls, furniture, etc). To add a new Node, you can select "add" in the top bar, or hit Shift+A on your keyboard and add in the node you need.


We're going to add in a Mix Shader and a Transparent Shader (both found under the Shader tab) and adjust our nodes this way:

Snug the Mix Shader between the Principled BSDF and the Material Output. Now we have to connect our Nodes and adjust our Principled BSDF. For the sake of this tutorial, I'll show the basic Node & Shader adjustments, but we'll go into each of them in a later tutorial.
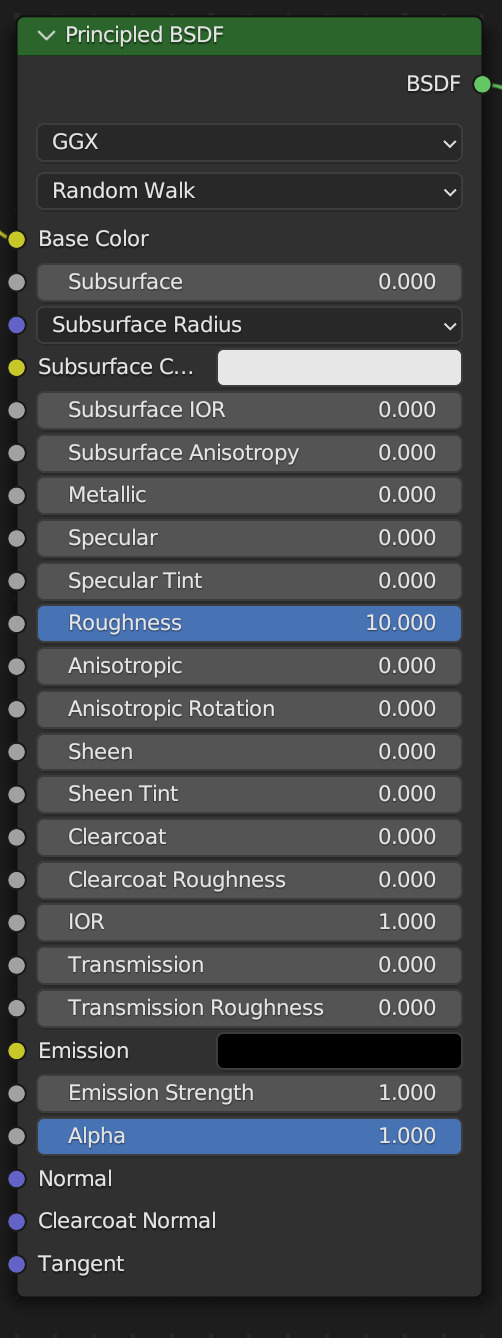
Adjust your Principled BSDF like this, then connect your Node lines exactly like this:
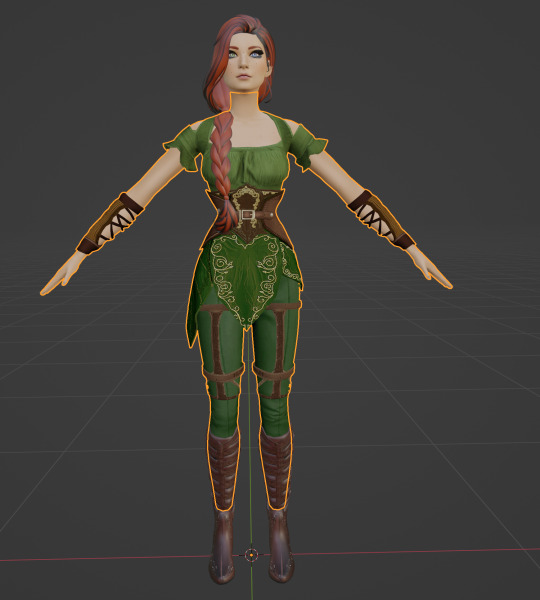
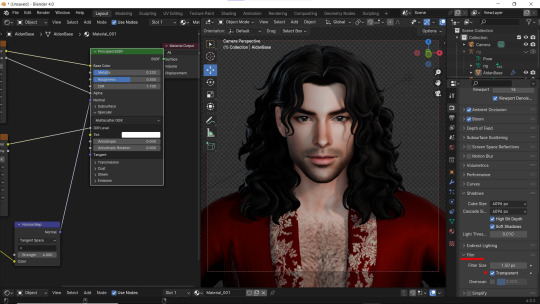
You'll see that our SIm's body looks a bit different from her head, hair and shoes. That's good! Now we need to duplicate that texture to the rest of our sim.
Navigate to your Outliner again, and use Shift+Click to select the rest of the body parts in the list Don't select pose or rig.001 and make sure the Body is selected first EDIT: You'll only see "body" if your sim has a full body outfit on! If they have a shirt and pants, you'll have "Bottom" and "Top" instead! In this case, select "bottom"!
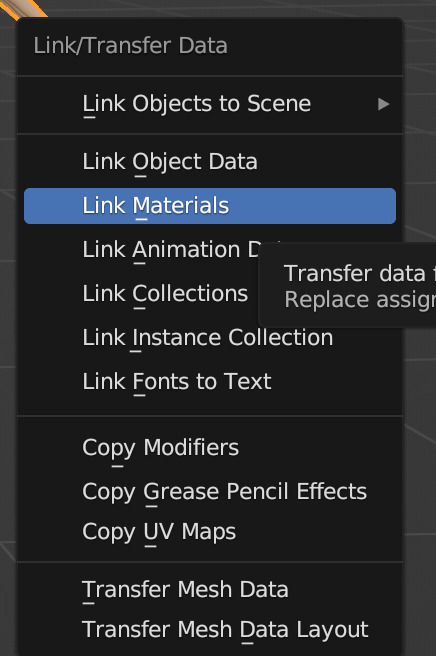
Now, hover your cursor over your sim/the 3D viewport window, and press Ctrl+L on your keyboard. This brings up the Link/Transfer data window. Select "Link Materials"
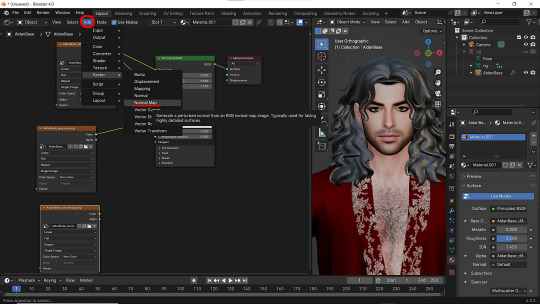
Our sim is looking better, but her eyelashes are still dark, let's fix that now.
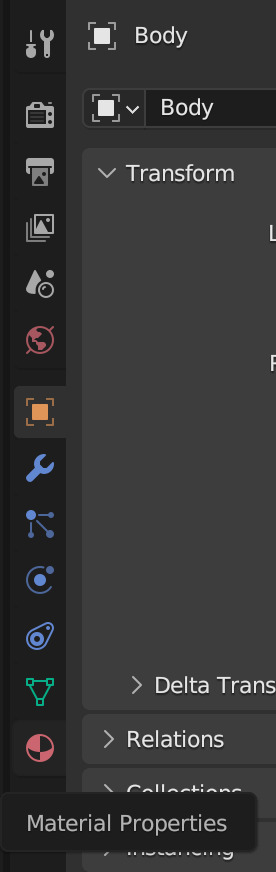
In your Properties area, navigate to Material Properties (the little red ball)
Change your Blend Mode to Alpha Hashed We will always set Blend Mode to Alpha Hashed
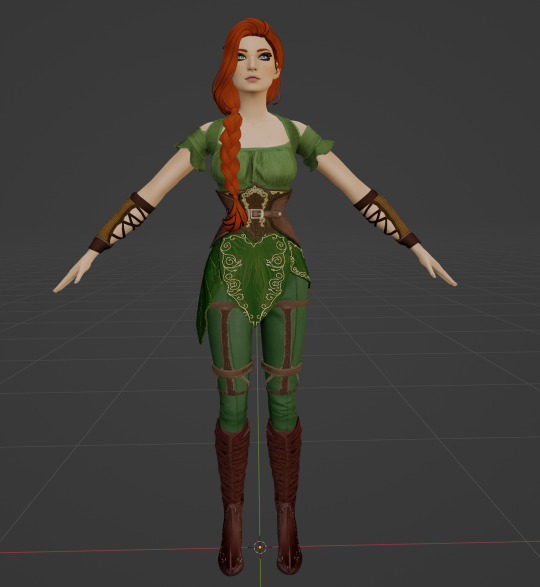
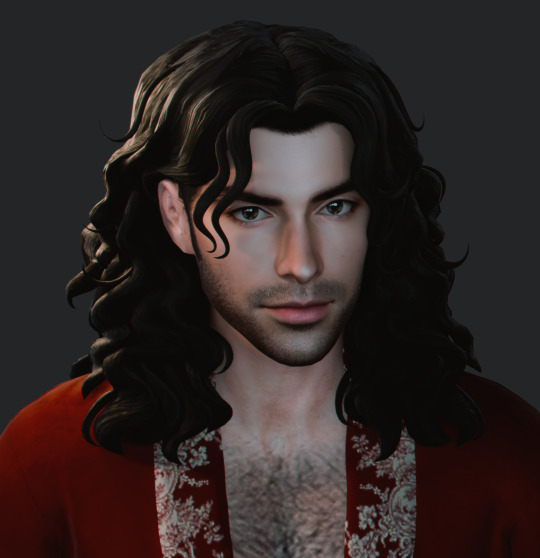
Now our sim looks right!
In Part Two, we'll pose her, set up the scene, and run the render!
#salemsims tutorial#render school tutorial#sims 4 render tutorial#sims 4 blender tutorial#blender#render tutorial#sims render tutorial
147 notes
·
View notes
Text
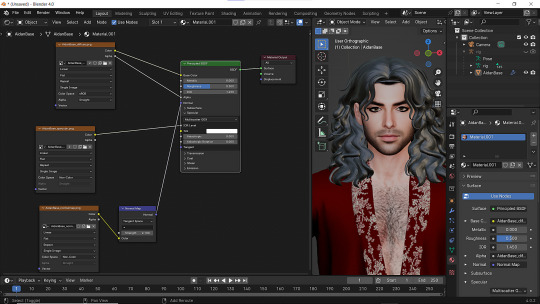
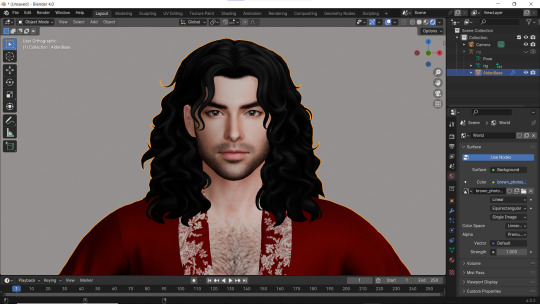
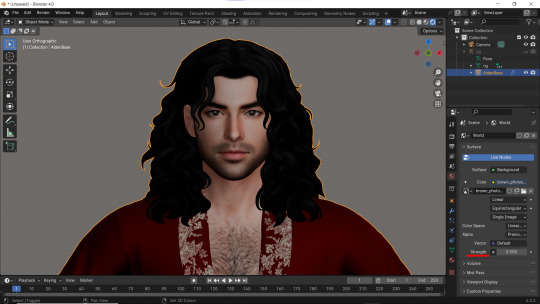
How to apply textures in Blender 4.0 For newbies (´。• ᵕ •。) ♡
So you imported your lovely doll into Blender 4.0, but the textures are messed or missing, here's how to apply base simple textures from the scratch!
I'm using Blender 4.0.2 (Sorry 4.3, but your EEVEE is currently nothing but tears for me) and my lovely Aidan is here to assist me. SO! Seat your bum comfortable and let's begin!
1 - Split your working space by pulling the corner of the screen:
2 - Then click on Material with your mesh selected.
3 - Pick Shader Editor on the left part of the screen and hit New in the Material on the right. You'll get something like this:

4 - On the left choose Add - Texture - Image Texture. We need three of them at very least :D
5 - First Image texture: Connect Color to the Base Color and Alpha to Alpha. Second Image texture connect to Specular IOR Level. Don't forget to upload your textures! Color - is well... color pics. Specular looks like Black/White pics and Normal is purple!
6 - Now add Normal Map. And connect it like on the picture below:
7 - Specular and Normal maps should be NON - COLOR in the Image Texture - Color Space
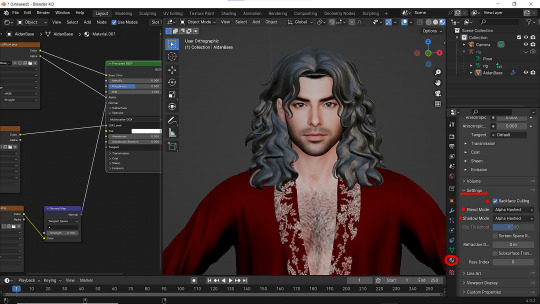
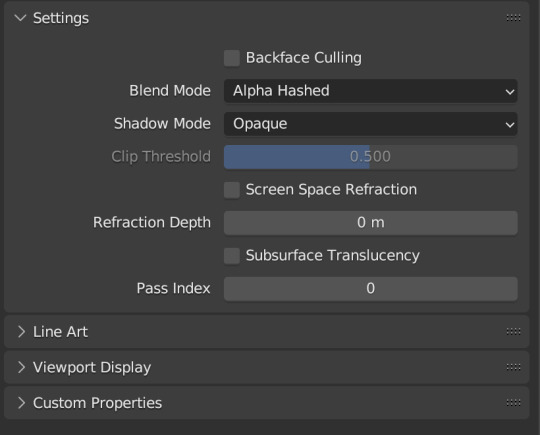
8 - Turn on the alpha. In Material - Settings - Blend Mode/Shadow Mode change on Alpha Hashed + You can check Backface Culling. In some cases it's vital :D
9 - Change the Specular settings in case of weird shining by changing IOR and Roughness parameters.
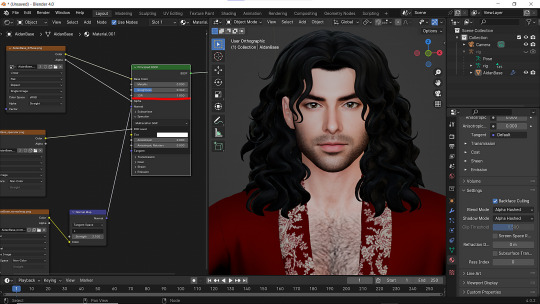
10 - You did it! (ノ◕ヮ◕)ノ:・゚✧
#WistfulTutorialSims4#the sims 4 blender#sims 4 blender render#blender 4.0#blender eevee#sims 4 tutorials#blender tutorial#sims 4 blender render tutorial#blender render
203 notes
·
View notes
Text


#any plastic beach fans?#GUYS GIUYS EFwehseguhwe I FUCJKIN DID IT !#also IF U NEED A REC TO A TUTORIAL I GOT ONE FOR U IT MADE SO MUCH SENSE AFTER THAT#frances... ur real OMFGH AHHHHHHHHHHHHHHHHHHH#watch this look like caca on mobile wHO FUCKING CARES#for a first in wisp history:#ts4 render#sims 4 render#ts4#simblr#sims community#oc: frances
189 notes
·
View notes
Text
one more medicated peaceful moment.
#ts4#the sims 4#simblr#ts4 render#show us your sims#deja senti b sides: edits#jay#from tha lighting tutorial#daddy merrik#god and his voice claim is linked.............i won't him 5ever im ngl#the vitiligo in his brow that i COMPLETELY FORGOT TO GIVE BOWIE HSKLHJHG#we're gonna pretend shes always had it
102 notes
·
View notes
Text
"I'm going to start calling you curious George"
Why?
"That's exactly what I'm talking about."

#he's curious about it bro...#FIRST RENDER EVER#I LOVE YOU PERSON WHO UPLOADED A TUTORIAL TO YT ABOUT HOW TO RENDER SIMS#YEYSYSYEYSSSSS YESSSSS#:333#ALSO THANK ASHER FOR SENDING ME A WRITTEN TUTORIAL 😘😘😘#ts2#the sims 2#strangetown#ts2 premades#the sims 2 premades#simblr#pascal curious#ts2 render#the sims 2 render#render#uymmmm new tag....→#pichulin
96 notes
·
View notes
Text

blender lighting tutorial + tips.
requested by @thecrimsonsimmer + recommended viewing: youtube video one, two, three, and four. this post will be dealing with newer versions of blender (2.8+) and cycles since that's what i'm more familiar with + commonly used for rendering. this is coming from me as an artist with some dabbling in photography and things i've learned in college!
references and setting the mood
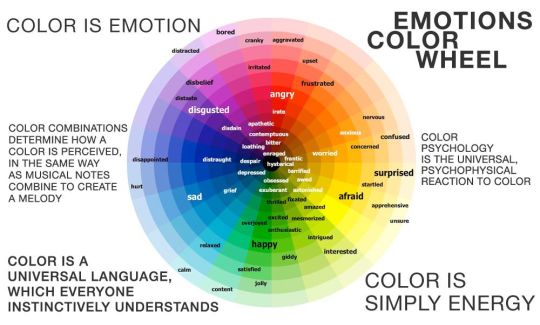
are you basing your render on an existing photo? study the light source and what direction it's coming from: that's what's going to tell you your set up for a similar effect. if you're not basing it on an existing piece, a good start is knowing How you want to set your subject (your sim) up - do you want them to be in the spotlight? are they in a specific environment that has neon lights? are you going for moody or something fresh, bright? definitely look up colors and their meaning (color theory, movie screencaps, etc.) to create a stronger image!
using resources to start the set up
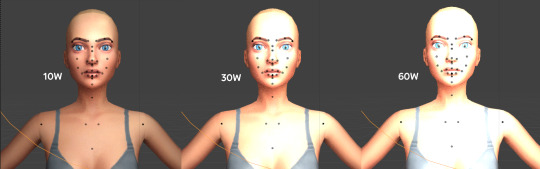
it's always a good thing to mix your tools with different communities, such as the art community! many have lighting tools to figure out how to color their subject, such as this free-to-use head figure that depicts where the lighting source should be placed.

there's also the photography community and teaching people how to set up their lights for certain setups. video three and four linked in the beginning are from photography viewpoints.
spot? area? point? sun?
let's think of the lighting types as objects - a spot is like a plain lightbulb, area is a reflective sheet, spot is a flashlight, and the sun... well is the sun!
a spot is similar to an area light, but triangular/a cone. think of a helicopter search light, it's focused on a small area with the most light concentration. these can be used for lamps with lampshades, car headlights, or a lighthouse.
an area light is great for lighting up technology. a phone screen, tv screen, tablet, anything that's an LED screen emitting from a surface. the light is not as concentrated as a spot and is meant to cover more flatly (hence the rectangular source)
a point is best used for small pops of colors such as candlelight, lamppost, lightning bug tail, etc. a small source that has nothing covering it.
a sun covers the entire area and can be used as the overall mood setter. it can create filter over the entire render by just shifting the color like you would see in a movie. you'll be given a line with a sun light that gives the direction of where the sun is coming from. basically a spot light just on a much larger scale LOL.
power + coloring

this screenshot is mostly what you'll only use to start off with. watts is the unit of measurement and the higher you go, the brighter the light will be. examples with a white colored point light 10W-20W: general portrait lighting 30W-50W: bright source, close flashlight for example 60W+: blinding
coloring is just like the system for in game lights for ts4. shift it to whatever you want it to be (click the white bar, that's the color preview) and mess around with the vibrancy. the darker, more intense color, the less it's going to appear on the sim.

closeness and intensity
similar to what's shown in the head lighting tool shown earlier, the closer the light is, the more that specific area is lit up. go too close and your sim could be completely washed out. it helps to change the size of the light (change with the radius slider) to better imitate what you're wanting. the larger the radius, the more diffused and softer the light source will be. close + small = very clear of the light source shape, can obviously tell where it is in relation to the subject far away + large = soft lighting, more of a hazy lighting of the color you choose.


to quickly adjust the light, press "G" and hold down your middle mouse button to adjust which axis you'd like to edit along. green is the x-axis, blue is the y-axis, and red is the z-axis. you can also press "G" and type the letter of the axis you want to use. drag the mouse to change the placement on that specific axis to however you want. if you want to freely edit the placement, just press "G" to move it out of the axis bounds.
world lighting
take this step as setting your canvas color before you start painting. in order for the values to look their best, change the world color to the same hue of the color you are mostly using. for example, this is set in a red-toned environment:


this is essentially changing the cast shadow onto the sim. the default is gray and will muddy up your undertones if not changed properly. for this instance, if you were to still use the same red point light in a gray world color it'd look like this:

of course, this will be based on if you have an environment image or not that can affect your lighting overall. this post is based on the fact there is no environment image and what not! if you need a visual demonstration on how to mess with the world lighting, check out this short video.

i hope that helped anyone beginning to render or wanting to light up your own scenes! i'm no rendering expert, but here's some of the helpful tricks i've learned and collected over the years<3 if you have any other questions feel free to send an ask!
#ts4 blender tutorial#sims 4 blender tutorial#ts4 render tutorial#sims 4 render tutorial#lighting tutorial#lyko posts#tutorial#long post
231 notes
·
View notes
Text
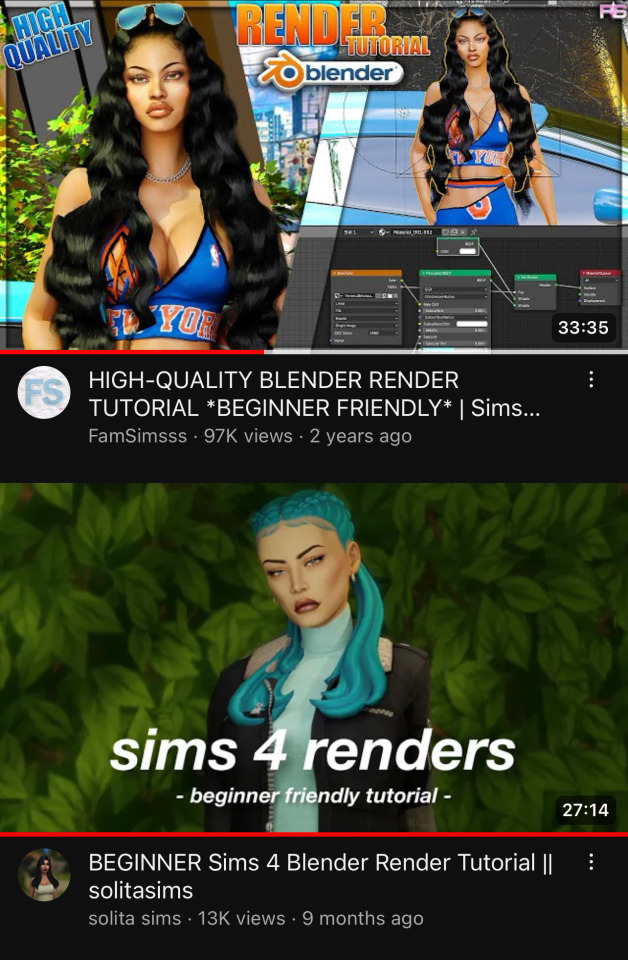
these are the two tutorials i followed when i first started out with sims renders! they’re super easy to follow along with (and as you can see, i go back to the first one all the time for help) !!! links: 1 / 2
#ts4#ts4 resources#ts4 tutorial#idk how to tag this#these are probably the first videos you’ll see if you search ‘sims render’ but i wanted to share anyway#they’re very helpful
77 notes
·
View notes
Text
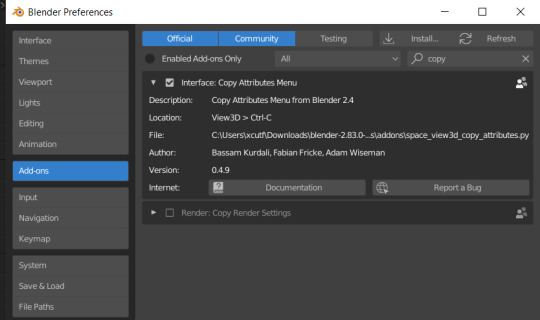
figured out how to do this in a way that's actually helpful for people lmao - here's how you can use the sims 4 studio rig on short/tall sims WITHOUT changing their height or removing your height slider
note that i am not a pose maker! this is for making renders! i have no idea if this would work for making in game poses, this doesn't have anything to do w that lol
haha short
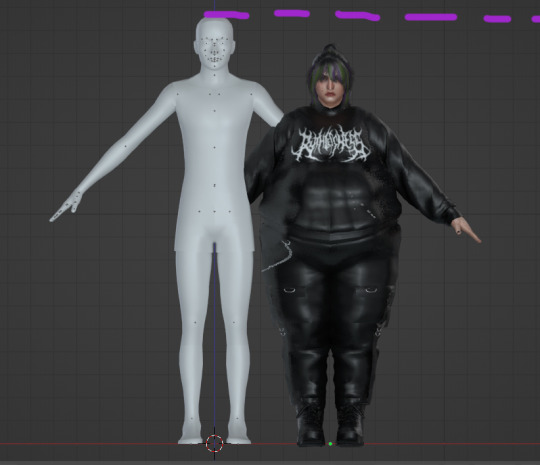
if we do the tried and true method of setting connor's armature modifier to the default sims 4 studio rig, it is WAY off. and not to mention the fact that if you try to make him do anything complicated it gets...well you saw his hands. and it is just as nightmarish for tall sims

the rig that comes w simripper is custom built for your sim's features, height slider or no. but the problem is in its default state it's useless at worst and extremely difficult to use at best. we're going to turn that into the sims 4 studio rig people know and love
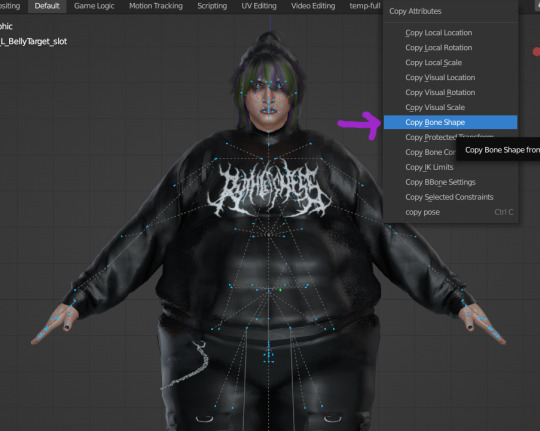
first, go to your preferences and add-ons. find the copy attributes menu, it is already installed on blender, you just have to enable it (i am using blender 2.83 here)
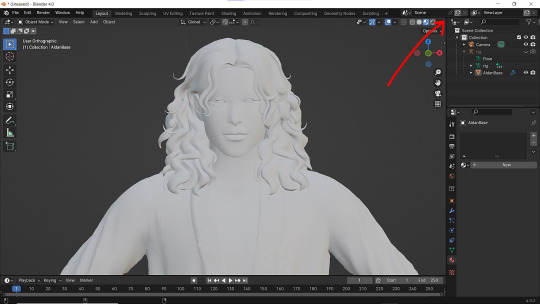
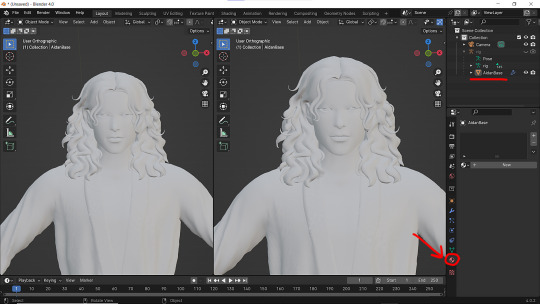
let's make all of the rig visible, as straight out of sim ripper, most of the most important bones are hidden inside the sim. with the rig selected, click the little man icon in your properties menu and under viewport display, check in front.
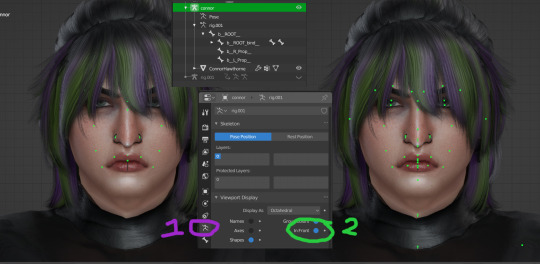
keeping it 100, this is usually what i work with because i think doing poses sucks already, so what do i care if the dots are super tiny? but like i said, that's not that helpful for other people, so let's keep going!
you know that annoying bone shape thing that always hitches a ride whenever you try to append? that's actually the sims 4 studio bone shape, if you look close. we need it!
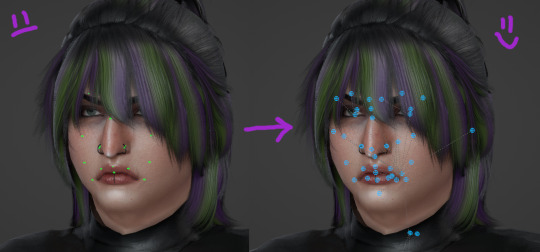
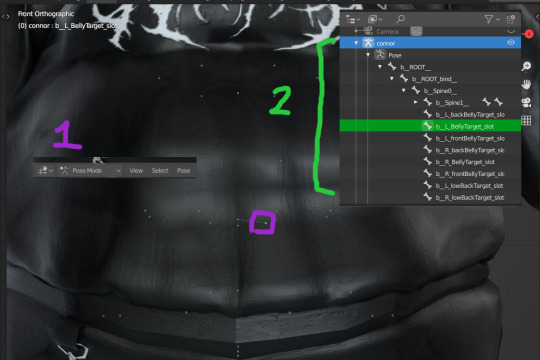
so we've got a pose we want our sim to do (or a blank rig if we're making our own pose). on OUR sim, select the rig and go into pose mode. in the drop down, expand the pose section, then the b_root, then b_root_bind, then b_spine0, THEN b_spine1. lol.
click ONE of the bones in the drop down menu. it doesn't matter which one. it'll highlight in green on your sim.
now click the bone icon in the menu. under viewport display, click custom shape and select the bone_bone_shape. now it looks like the sims 4 rig, but the circles are a little too big (on the face this would be pretty annoying). so under scale, 0.2 will get it to the normal size.
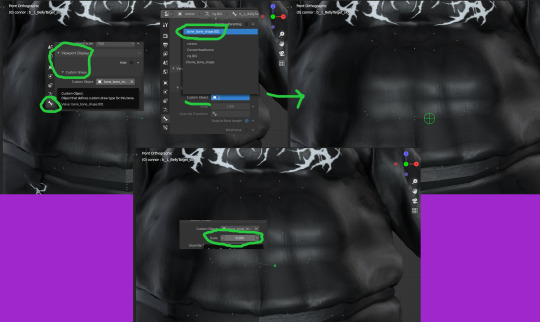
now hit a on your keyboard to select the whole rig. now hit control+c to open your copy attribute menu that we enabled. copy bone shape. we're done! it looks just like the sims 4 studio rig, but suited to our sim!
i recommend disabling the copy attributes add on after this, because obviously with this set up, we're copying and pasting the pose onto this rig from the actual sims 4 studio rig instead of using it. it'll save you a click lol.
when you paste your pose, don't forget to select the rig, hit i and locrot to save the pose!
#i was really excited i figured this out lol#and i love doing tutorials <3#the sims 4#ts4#ts4 render#ts4 tutorial#ts4 resources
163 notes
·
View notes
Text

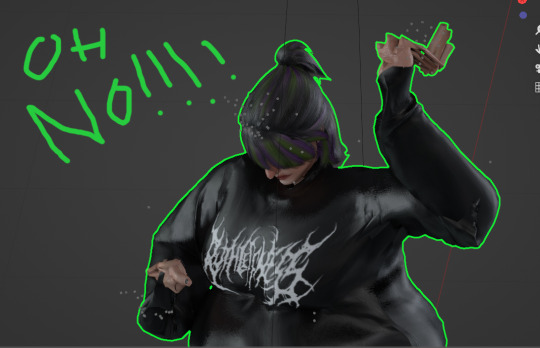
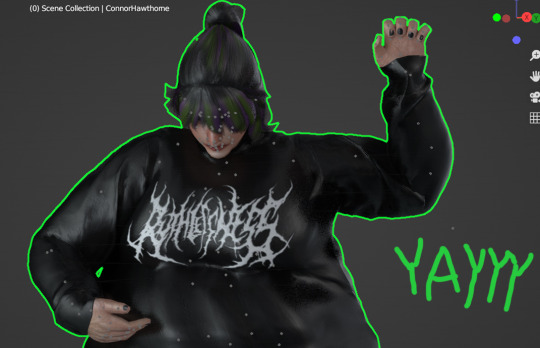
#ts4 render#sims 4 render#ts4 edit#my sims#simblr#sims community#back at it w the renders again#im also rly unsatified w my renders/edits these days😭#idk i wanna change the editing style im so bored of my current but idk whattt style i wanna do#and im struggling to even figure out what direction id like to take my blog in#i want a cohesive theme but i feel like i dont rly have one#its just so random lol#also pls ignore the terrible shadow issue around the lace#idk how to fix that#and i can't find any easy tutorials to follow😭#if anyone knows a fix tell me how. i'd love u forever lol
103 notes
·
View notes
Note
Hello there! I'm Eden :D I LOVE your renders! I've been rendering for well over a year at this point, however I only stuck to the super basic stuff since it took me a year before that to even know how to do it at all. I've wanted to up my game and get to where you are now. I'm SO SORRY if this question was asked already (I haven't gotten too far in your posts yet), but;
How do you personally edit your renders? I understand you use photoshop, but how do you do it exactly? Your renders have that kind of digital art style, like you drew them yourself. Feel free to be as descriptive or brief as you'd like!
Hi Eden!!! Thank you so much! 🥹😍♥️
I've followed you back and glad we're moots! I'd love to see some of your work!
I'm not sure if I've answered this before but I'm happy to answer it again! Also I haven't advertised it in a while (and I really need to try to get up a new tut, maybe soon), but my alt account is a Render School where I post tutorials, with plans to post editing tutorials in the future!
But honestly as far as my editing, I really don't do much.
Actions are my secret weapon, and I have a few favorites/go-tos I'll link! A few are by simmers and a few are just action sets. I'm in a family of photographers, so I have access to a wealth of resources for my editing.
Sonder set by @intramoon
Cold Water set by @intramoon
Retro Prime photoshop actions
Indie camera photoshop actions
But my "secret weapon," as it were, and the set of actions that I think most helps me accomplish that digital art style is a set of actions that are sadly expensive and hard to find now.
My favorite set is by Totally Rad! and I think in recent years it's been folded in to this Pixel Sugar product on their website. I know that's a steep price point but it's possible you can find it around the corners of the Internet for less, or if you can't, you might be able to find "dupes" of the better ones, which imo are:
Technicolor dream world
Super Fun Happy
Bullet Tooth
Grandma's Tap Shoes
As for my method, I know a lot of simmers paint over their renders, and I've done that a few times but find I'm too impatient tbh. My goal is always to have to do only minor touchups over my renders and some color/vibe adjustments before the finished product. My "raw" files are always exactly what blender spits out for me, unaltered in any way except to resize them for Tumblr.
To get that digital art style, I'd recommend rendering with alpha details if you don't already. If your computer can't handle alpha cc in the game, DM me and I can give you some pointers (sneak peek info for a future tut lmao) on how to accomplish it without bogging down your game.
When I go into photoshop I adjust the brightness and contrast, as I tend to personally prefer high contrast pieces that contain dark subject matter but you can still see the details. Then I'll paint/blur/clone/adjust anything that needs it, then I'll "stack" and adjust a handful of actions before applying edge blur and vignette and any other color adjustments (levels, curves, etc).
That's a very oversimplified rundown of what I do, but really overall my editing process is simple. The bulk of my work happens in blender itself. I find that the more time I take to perfect the lighting and shadows and angles in blender, the less frustrating the editing process and the happier I am with the end result. So, that said, be sure you're spending a lot of time in blender getting the light and shadows to be exactly where you need/want them to be before running it.
I know this is a bit long I'm sorry! If any of it is super confusing or you'd like a more in-depth look at any of it please let me know! I do plan to do editing tutorials for my side blog, but the latter half of this year has kind of run over me like a train, and for now I'm just trying to get by day by day. But I'm happy to help if you have more specific questions!
& thank you again!! ♥️
#replies#thank you so much this literally made my day#I was having a bad one too ugh I needed this#mini blender tutorial#tutorial ish#sims 4 blender tutorial#sims 4 render tutorial#sims 4 editing tutorial#I can't tell yall how happy it makes me when yall love my work#legit holding back tears#♥️♥️♥️
33 notes
·
View notes
Text
Adding extra details to your sim!
So any fans of @kikovanitysimmer ‘s renders know that she adds a lot of extra detail to her sim’s skin. Her process has changed since then, but she still hosts her old tutorials on her discord!
We’ve been getting a lot of talk about how hard it can be to follow so I’m providing a text-based step by step tutorial!
Requirements
TheSims4Ripper
Blender 2.9+ (I’ll be using 4.0.0)
Any photo editing software (I’ll be using Ibis Paint) that has these features:
Multiple layers
Adding noise
Changing brightness/contrast and Hue/Saturation/Value
Inverting colours
Sims4studio (optional)
First things first:
You do not need to export a custom skin. Using the _diffuse.png you got from exporting your sim works just fine!
It’s preferable that you export your sim naked. Not a requirement, but makes it a lot easier. Here’s a video tutorial about dressing your sim in blender.
Onto the tutorial!
Displacement Map (Pores and the like)
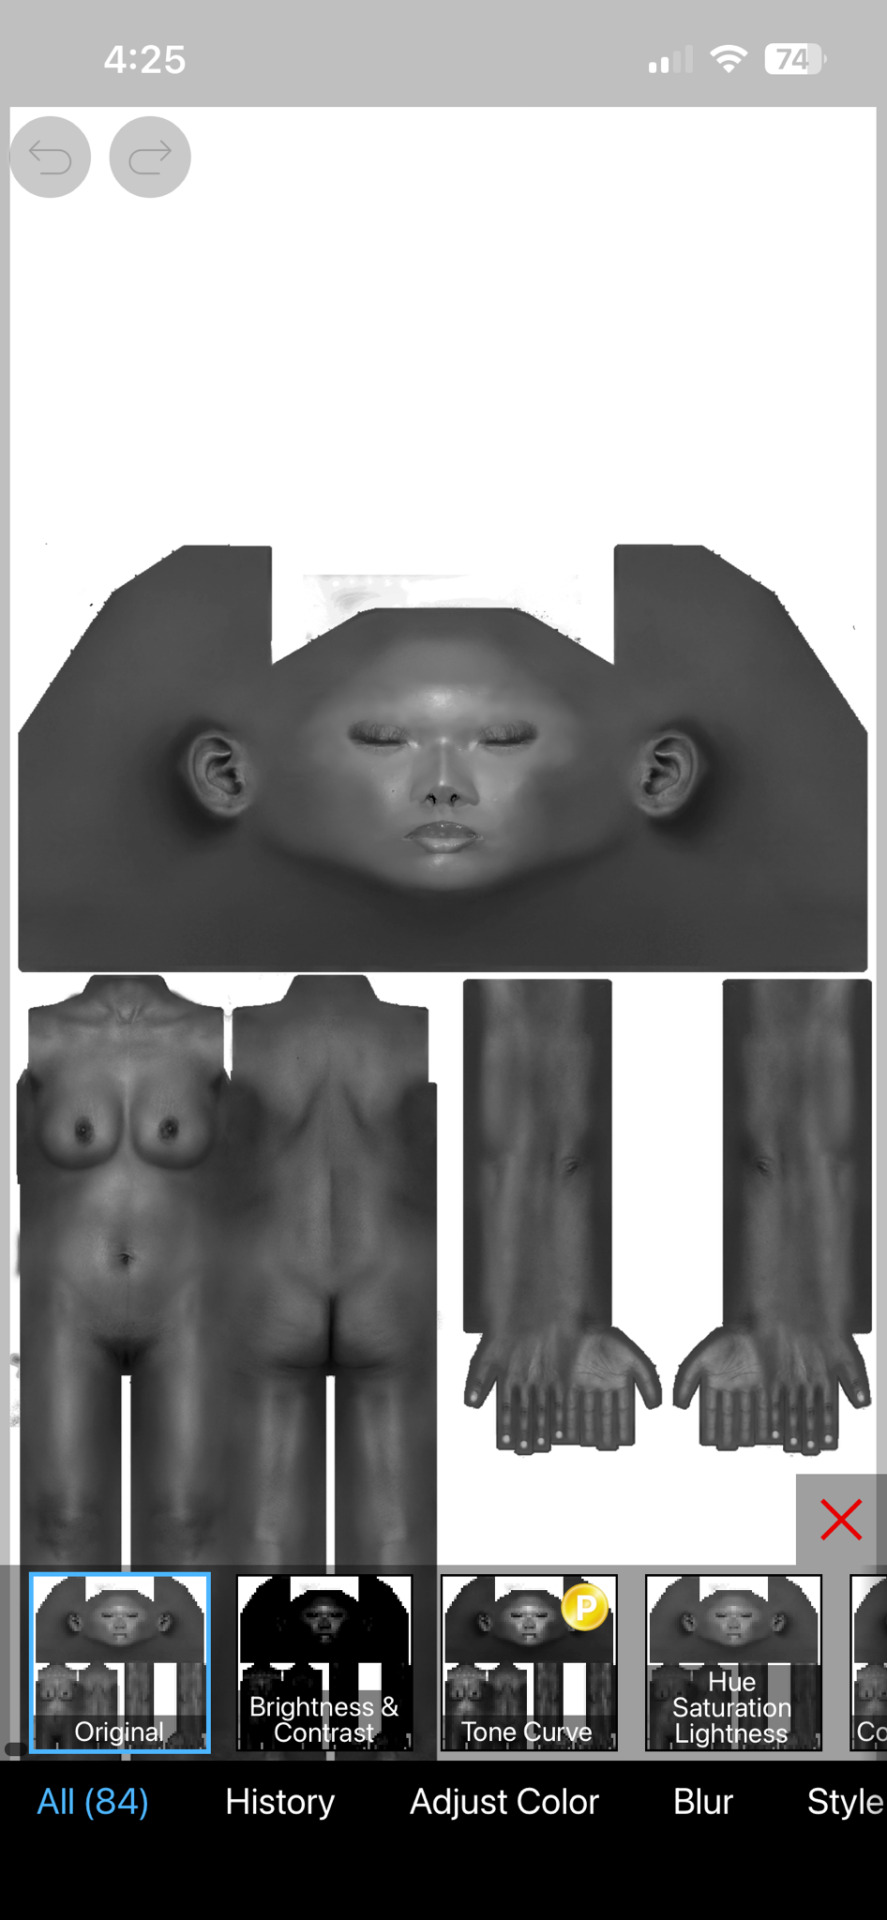
Import your texture. Here, I’m using Kiegross’s Kiera Skin, edited for personal use.

2. Change the texture to black and white
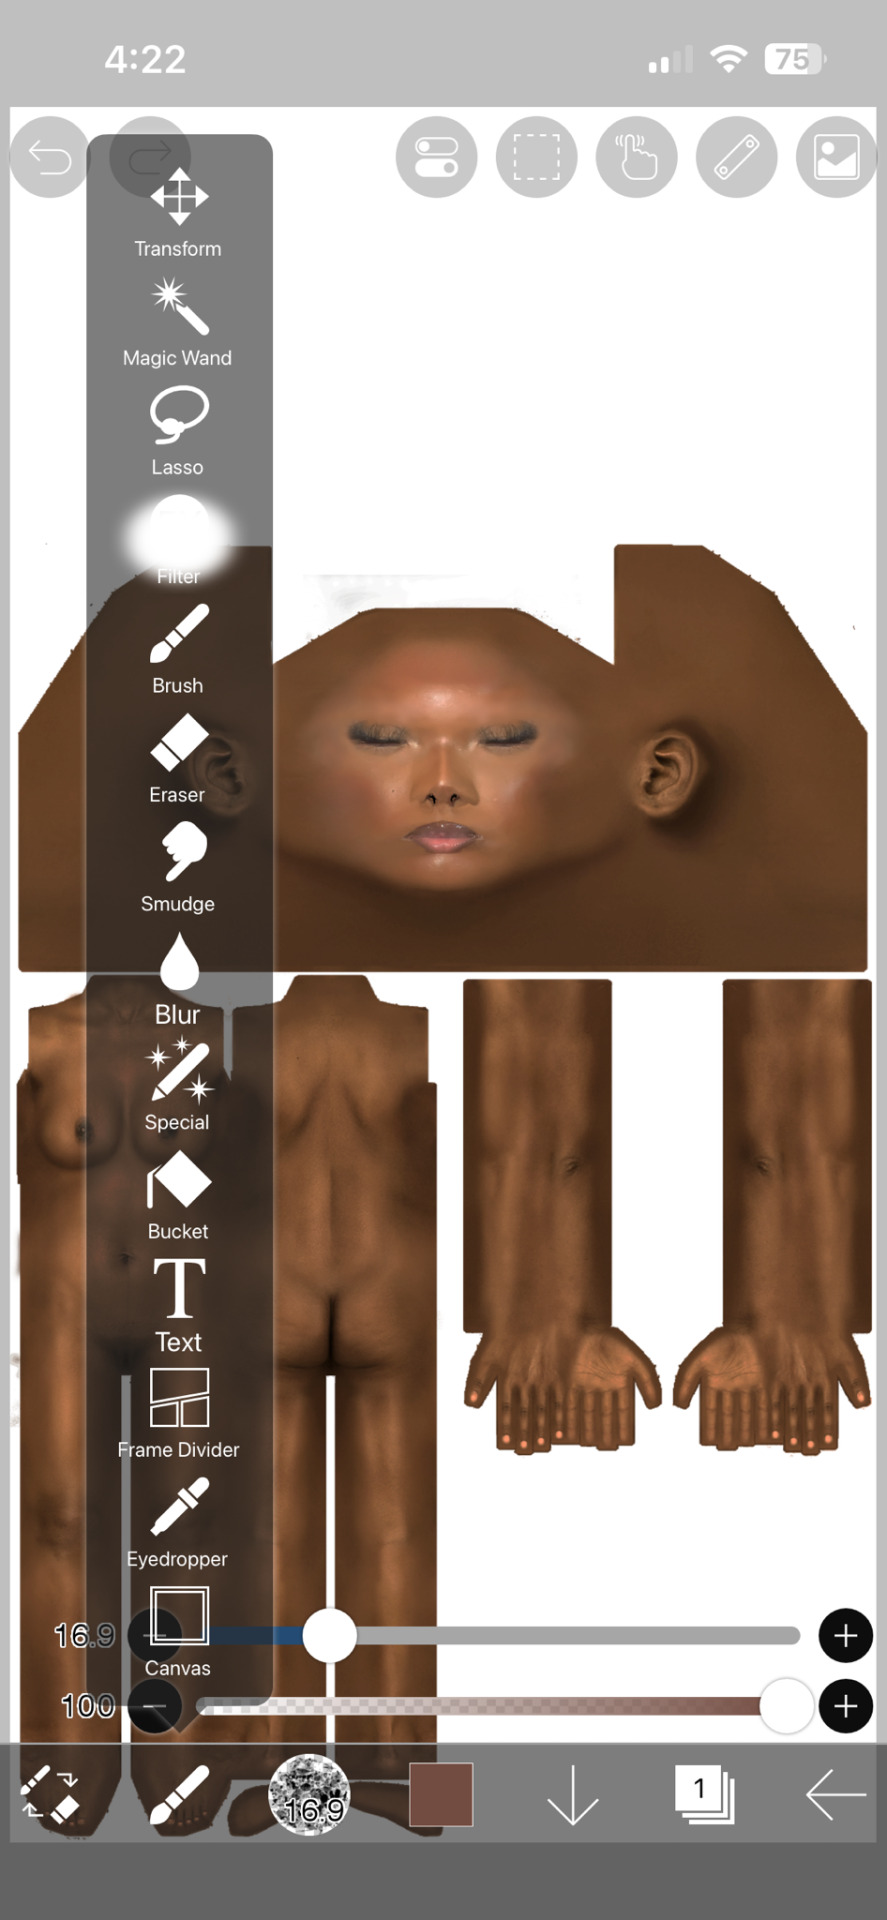


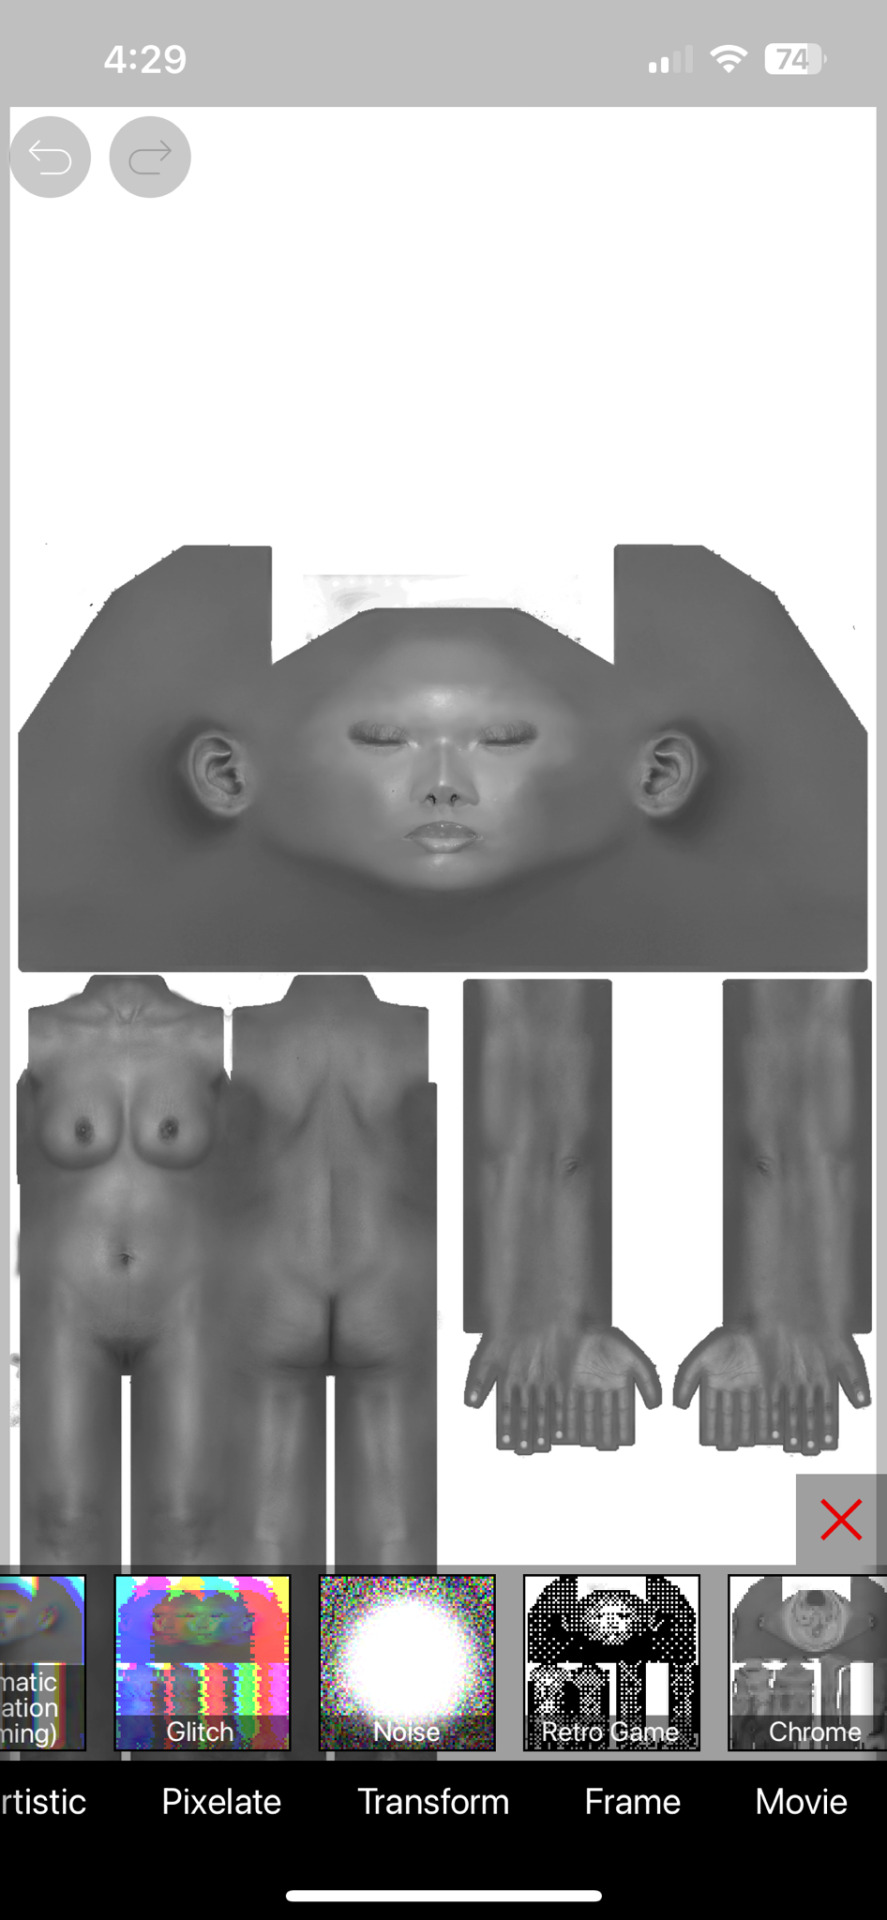
3. Duplicate the layer

4. Edit the Brightness and Contrast to your liking

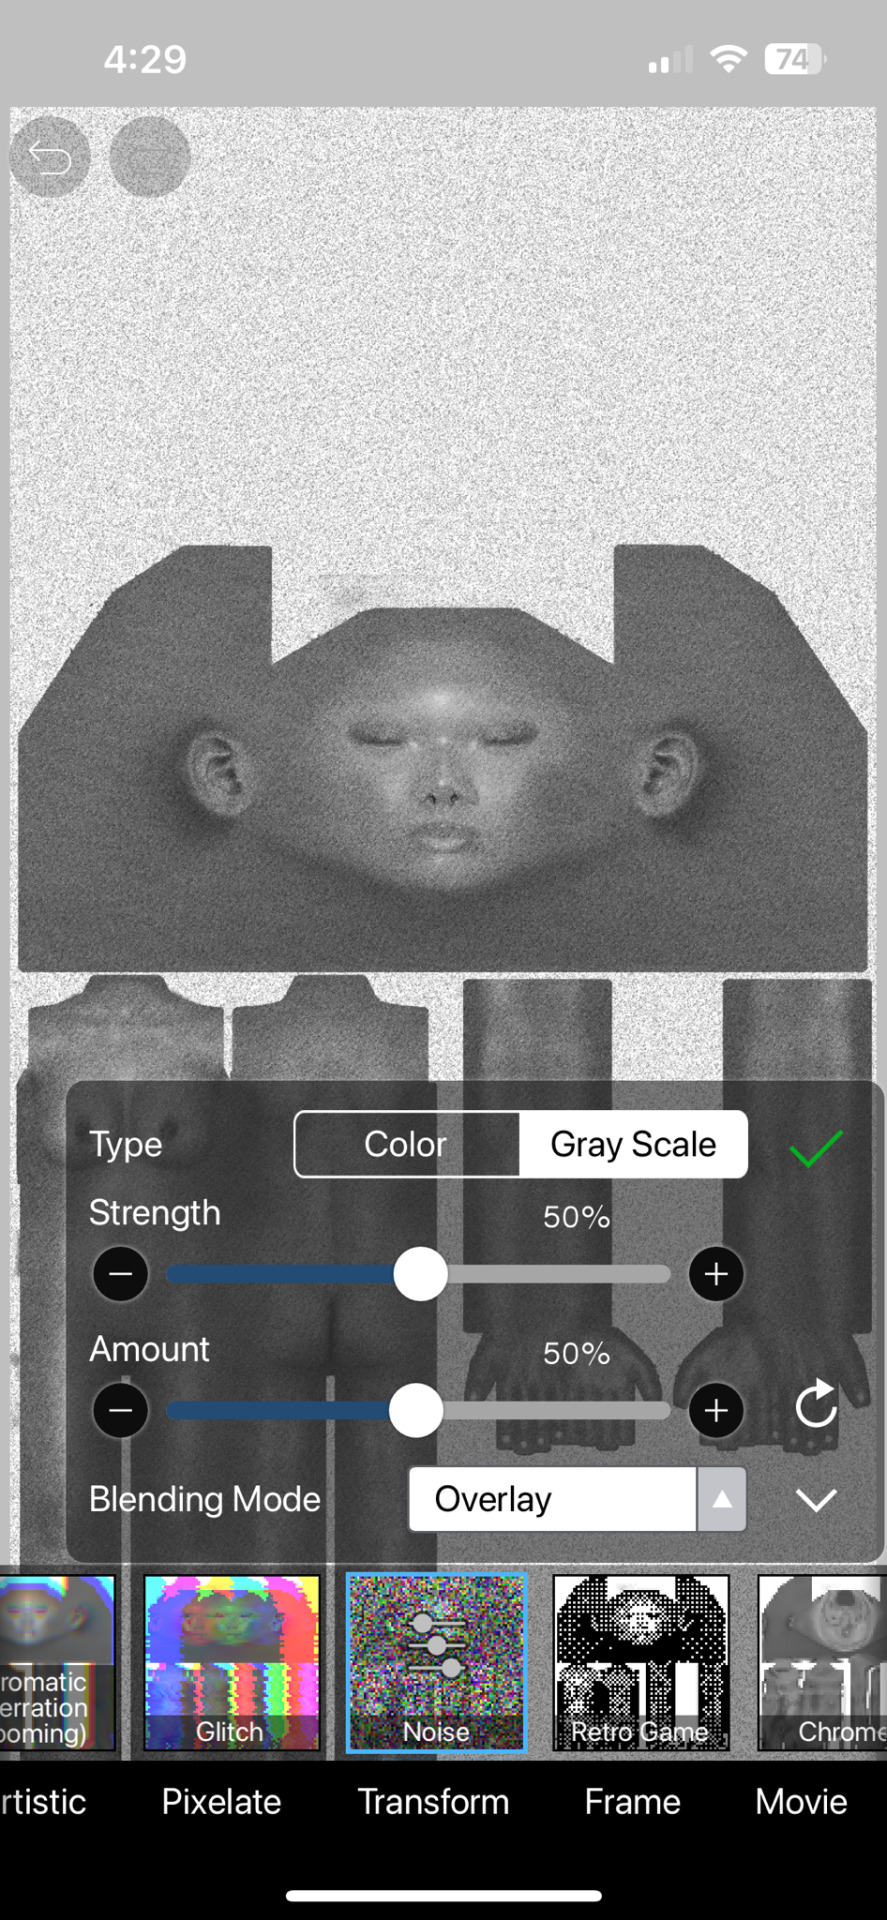
5. Add noise. Pictured here are my personal settings
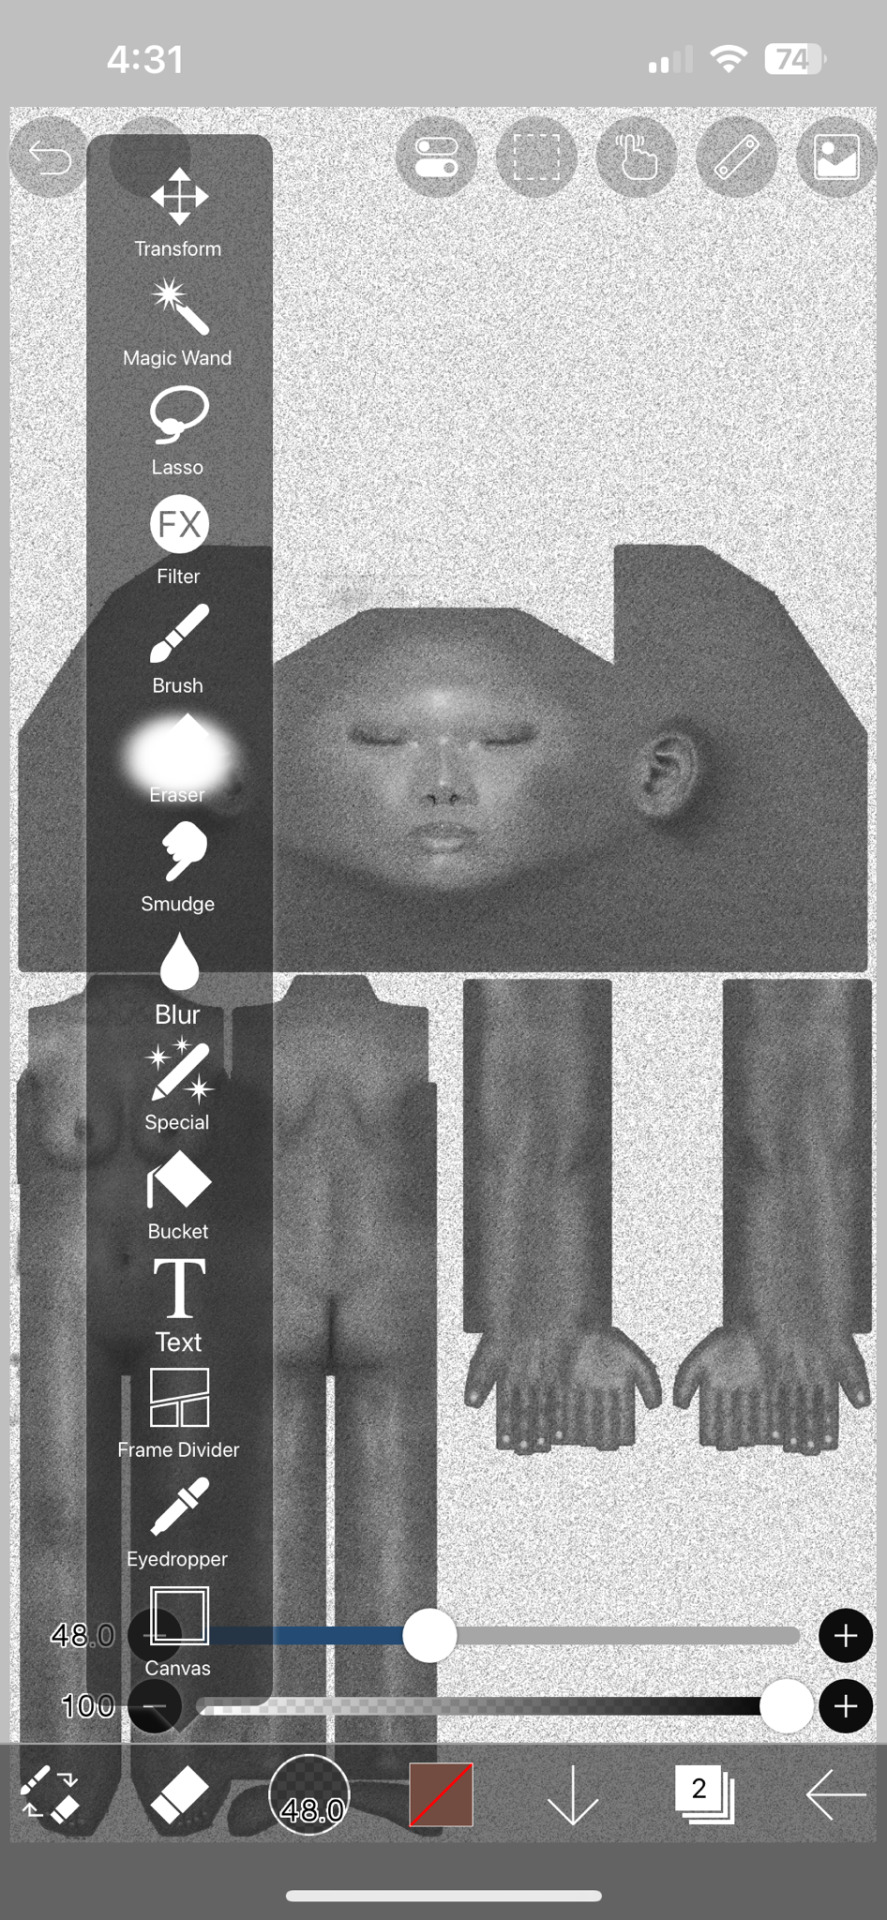
6. Erase parts that realistically would not have a lot of pores, ex. Lips, hands and feet. Kiko suggests putting your eraser hardness or opacity lower as these areas still have texture to them.

7. Save picture as is! You can delete the noisy layer if you wish, but we will need the original black and white layer for everything else.
Specular and Roughness Map (Shine)
Creating a new layer is highly recommended so you can backtrack
Using the original layer, edit the brightness and contrast. Pictured here are my preferred settings


2. Take a black brush and colour in areas you don’t want to shine. Realistically, these are the palms of your hands and the soles of your feet and their respective nails. You may also want to take a white brush to the areas you do want to shine, like lips, chest or thighs.
3. Save as is!
Adding to Blender
First things first: Go into the Shading tab. Link your sim's materials using Ctrl+L to make it easier on yourself!

Add your new Displacement and Roughness Map to your material
2. Add a Displacement Node

3. Plug the Displacement Map's colour into the Height. Change the scale to whatever you like (I chose 0.0005)

4. Add two Color Ramp Nodes to your material
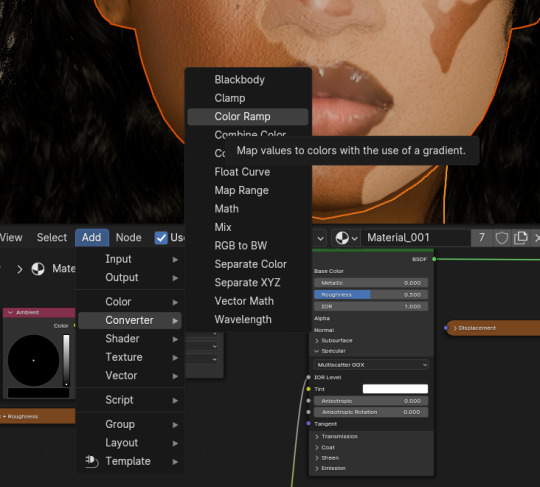

5. Plug the Spec + Roughness Map's colour into each Color Ramps' Fac

6. Plug one Color Ramp into the Roughness and another into the Specular/IQR (you may need to roll out the Specular tab to find it)

7. Drag tabs on the Color Ramp to change the strength of them. For the Roughness Color Ramp, you'll need to swap them around to have the desired effect.
And that's how you get the details! There are other ways to get the details, but for beginner renderers, you can start with this!
24 notes
·
View notes
Text

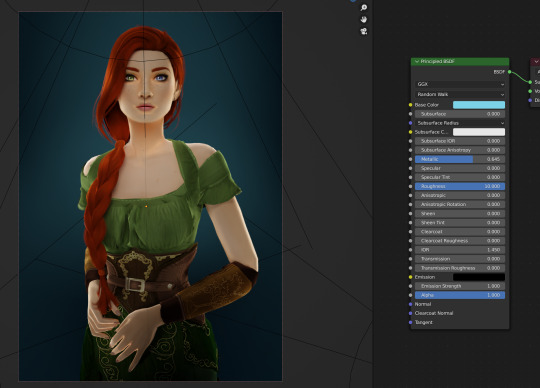
Beginner Blender Tutorial Basic Render: Part Three (Adjusting Render Settings, Adding Lights, and Rendering!)
(Continuing from Part Two)
Step 1: Adjusting Render Settings
I exclusively render in Cycles, and though I'll be doing some Eevee runs for the sake of tutorials, I'm going to share what I know today and show you how to set up a Cycles render the way I do
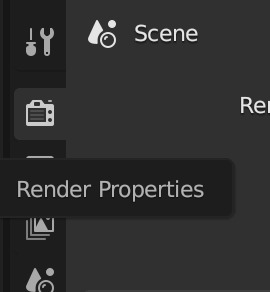
Navigate to Render Properties and select "Cycles" in the Render Engine dropdown

If you have an older system, leave CPU selected If you have a newer or beefier computer, select GPU complete I render on a MacBook Pro, so I'll select GPU
Under Sampling -> Viewport, make sure you click on the Denoise, this will clean up our render preview so we can more easily see what the final result will look like

Under the same Sampling tab, adjust your Max Samples to match mine (32 in the viewport and 128 in the render window, this will speed up your render time)
Click into Output Properties and select "Render Region" and "Crop to Render Region", and change the frame rate to 50fps In the Output tab, change the Color Depth to 16 Nothing will change in our 3D Viewport, but the settings are ready to go
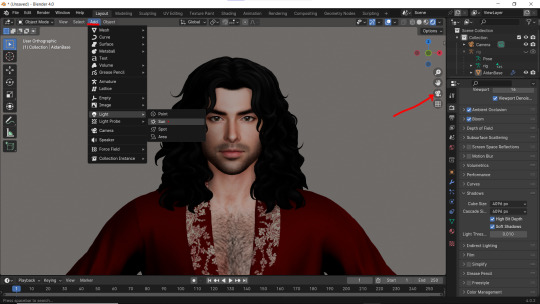
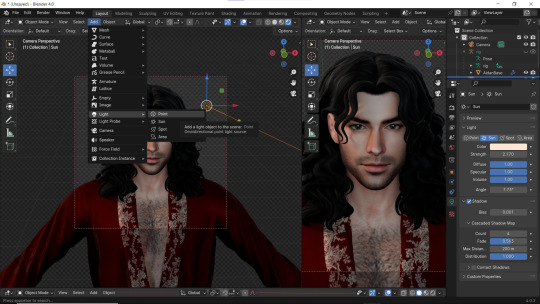
Step 2: Adding Lights
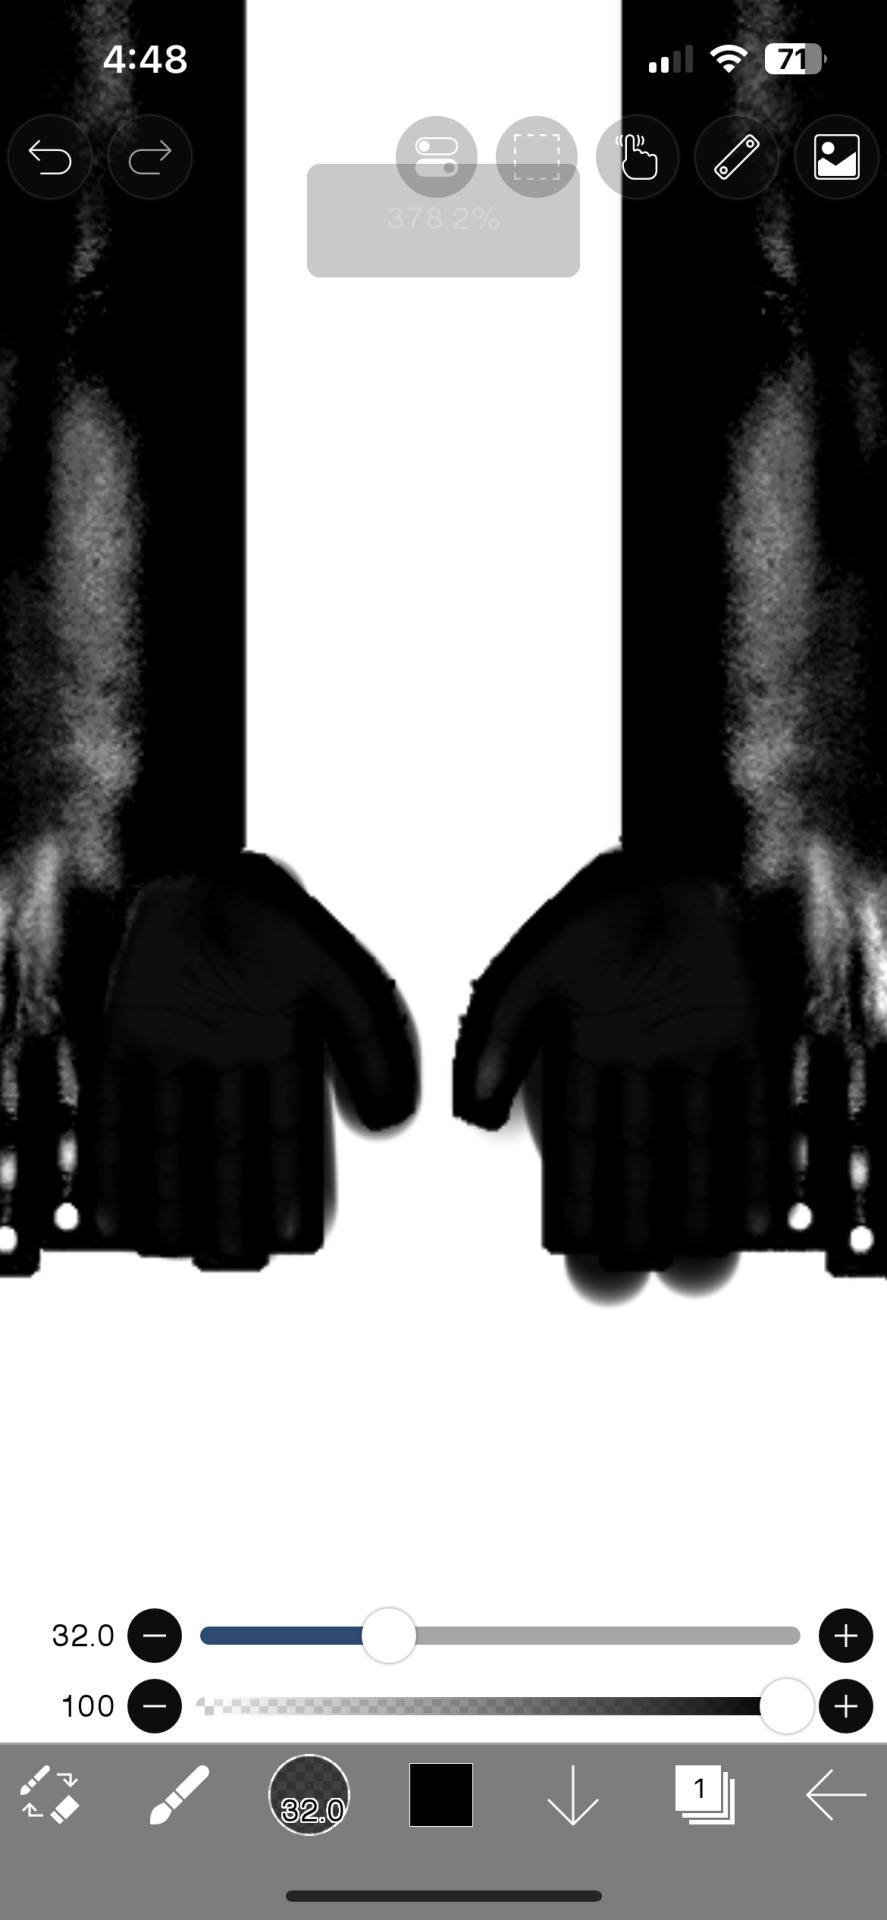
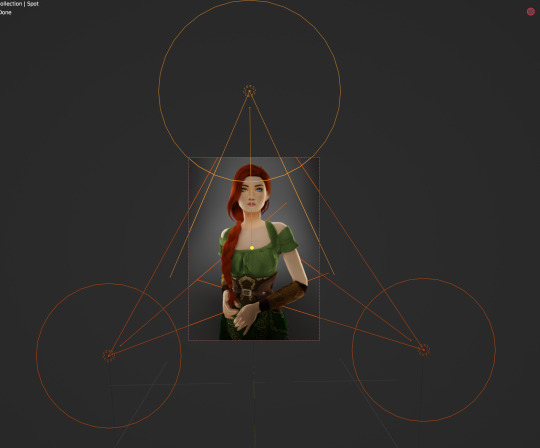
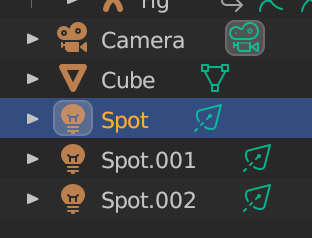
Right now, if we were to change our mode to Rendered, we'd have nothing but a black box. This is because our sim is in a cube with no light source Let's add some lights! For portraits, I like to use a combination of Spot and Point lights You add in lights the same way you add in the camera and the cube, either by clicking "Add" in the top menu or with Shift+A on your keyboard and selecting Light -> Spot or Point I'm going to add a Spotlight first I like to add in lights in Rendered view, but be careful using rendered view as it ups the chances that your Blender will crash

I added in a spotlight but it appears that nothing happened Objects are added into Blender at the Cursor point. I never adjusted mine so it's at the center of the axis, meaning below my sim's feet and outside of the box Using G and X,Y,Z, I'm going to move my spotlight up
Now the light is above her, but I want it shining on her, so I'm going to rotate it forward Rotate objects using the R key and X,Y,Z directions on your keyboard
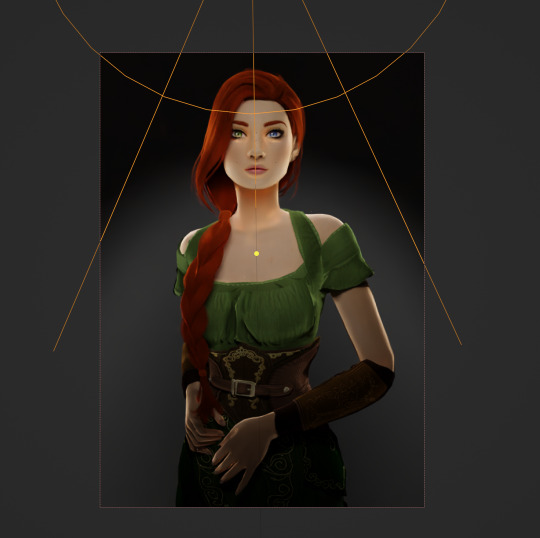
That's not bad, but I want more dynamic light. I'm going to add two more spotlights for 3 point lighting
This is looking better, and you can see where my lights are and how they're oriented Now let's adjust the background Select your cube in the Outliner panel and navigate to Material Properties Click "new" in the bar Then navigate to your Shader Editor window and you'll see a Principled BSDF Node is here
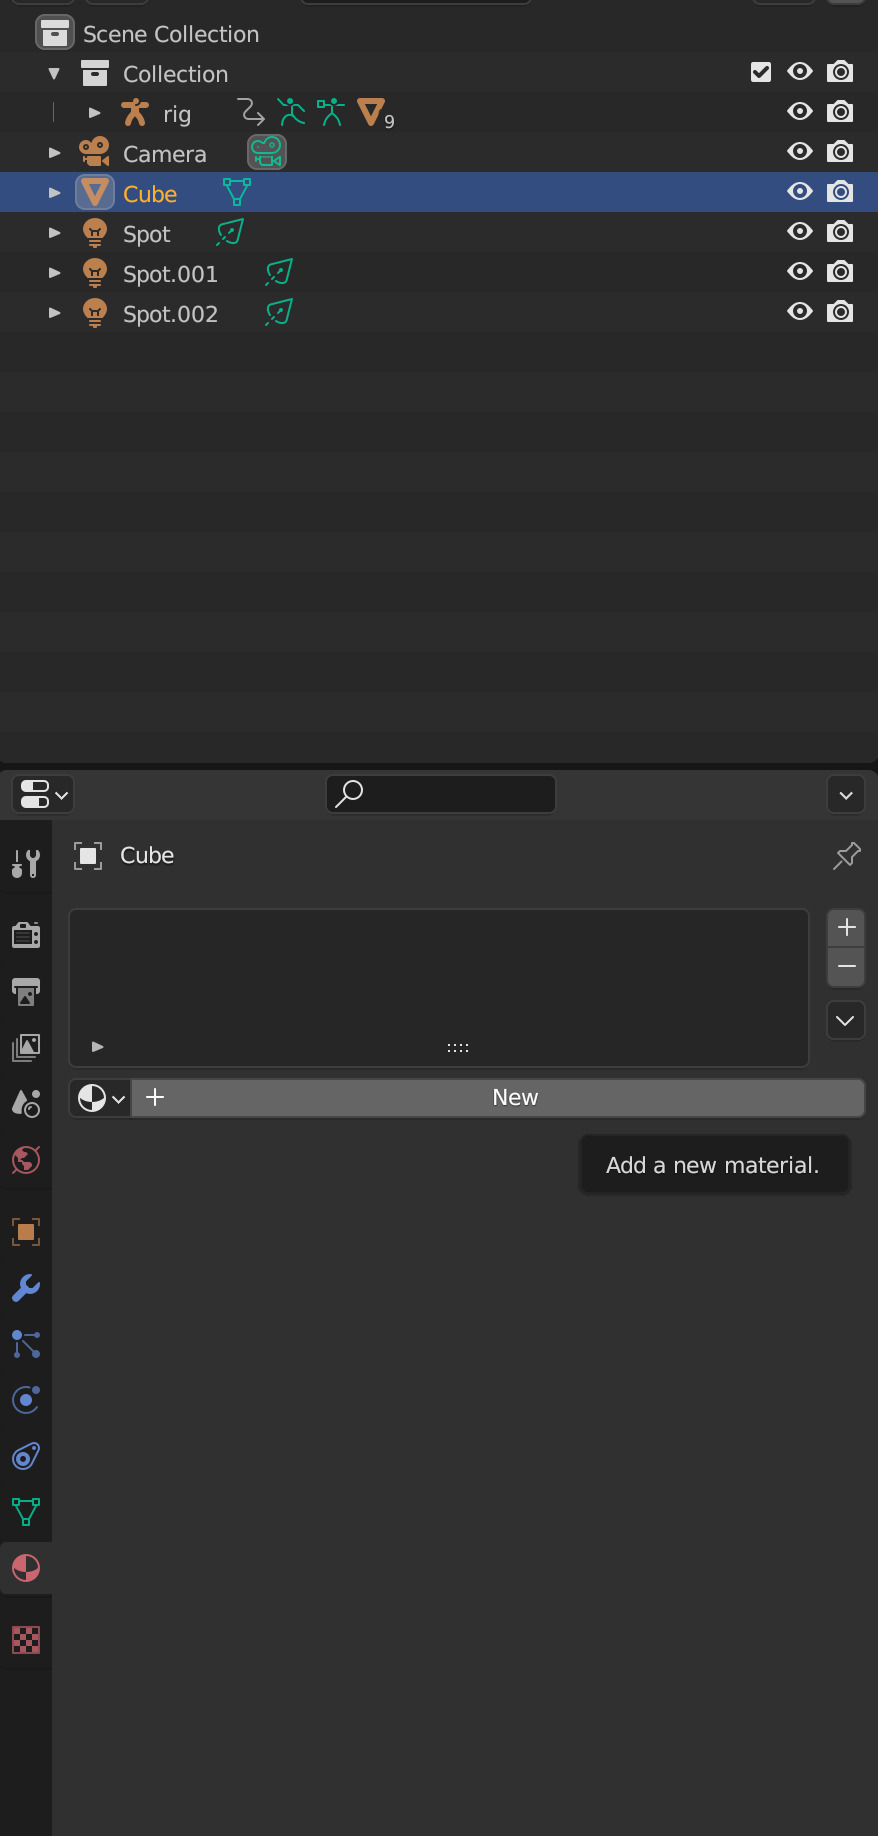
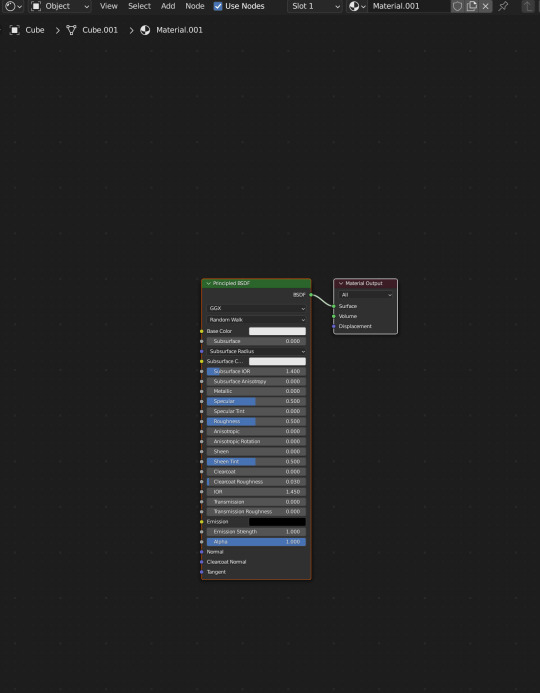
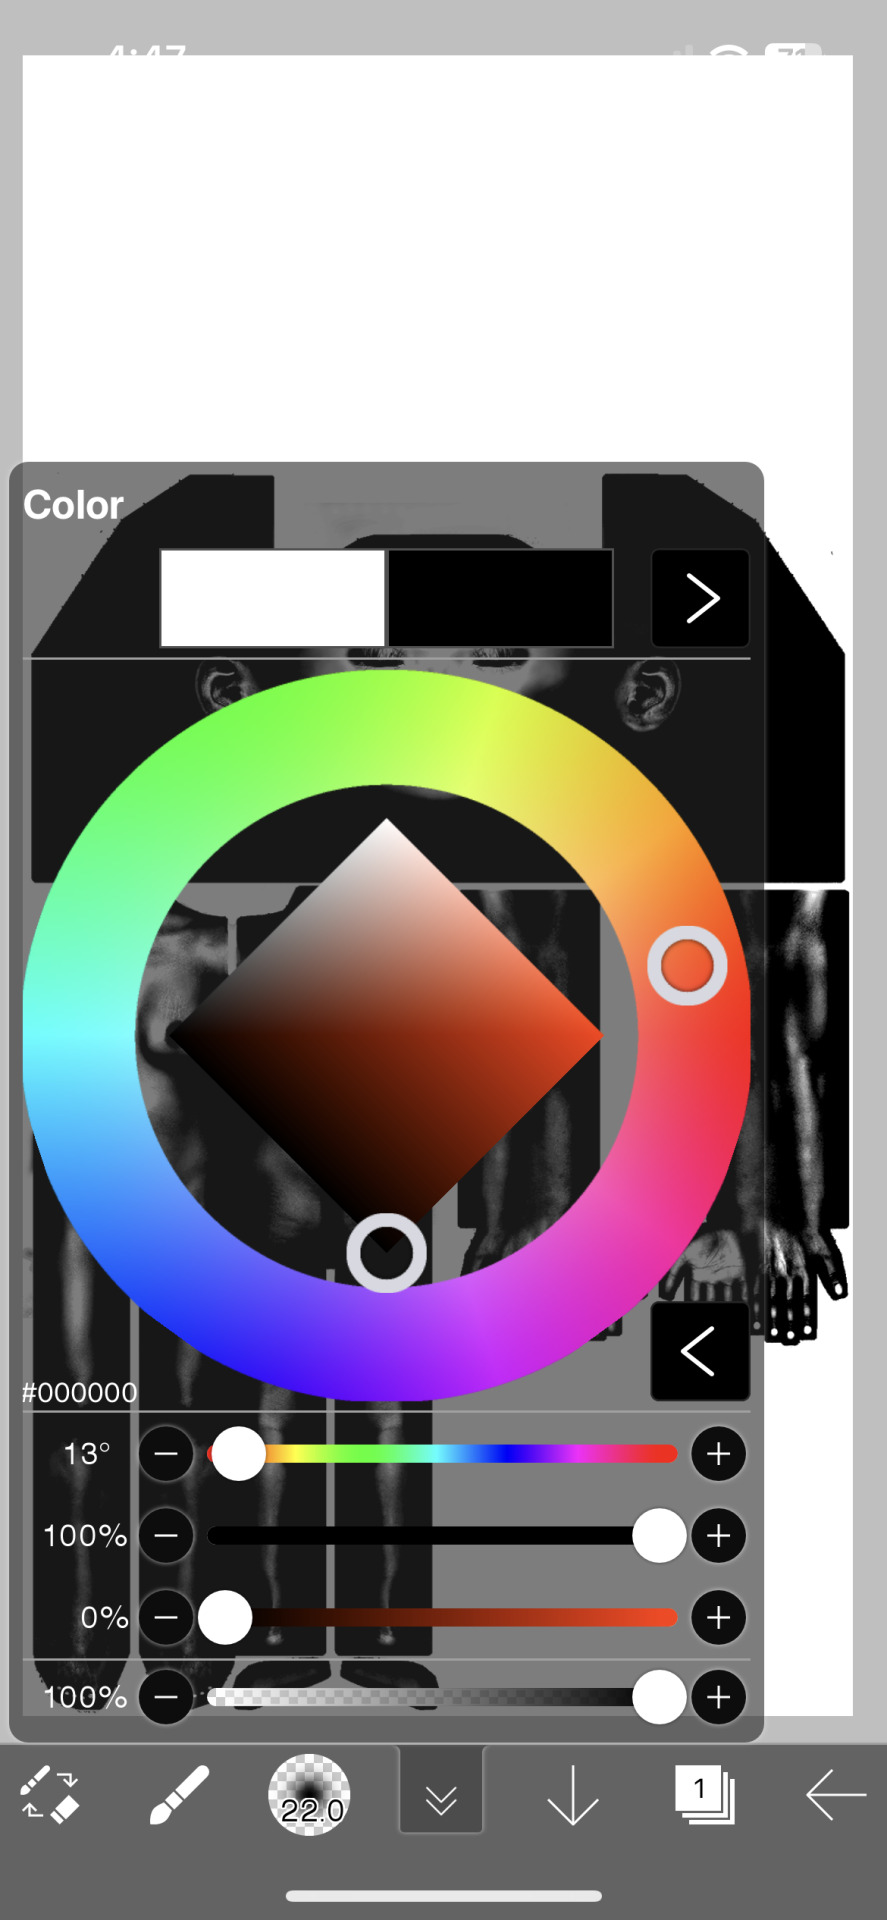
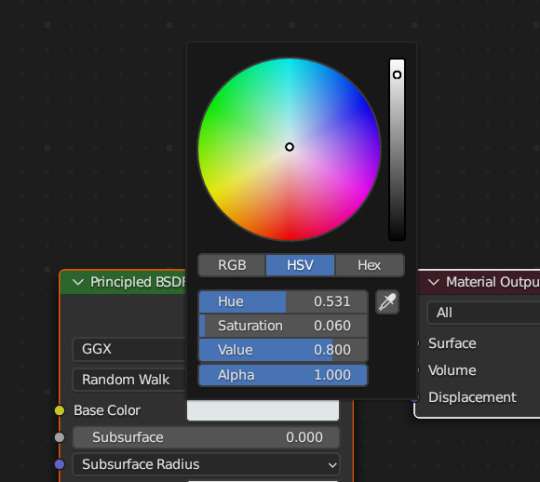
We're not going to do anything too fancy here, just change the color of the cube and some aspects of how it looks Change the color of your box using the color wheel then adjust your nodes to everything is set to zero except roughness
You should have something like this (of course use whatever color compliments your sim best)
I don't want the background to be super flat, so I'm going to adjust the Metallic value on mine Now I have this:
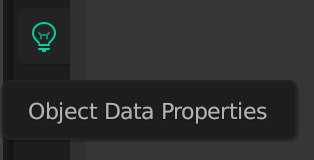
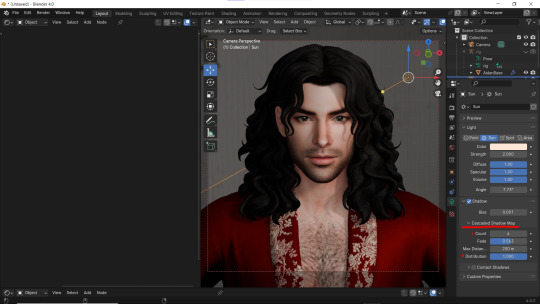
I like the lighting but I think it might be a little too bright Let's adjust it a little In your Outliner panel, select one of the spotlights then go to "Object Data Properties" (the little lightbulb)
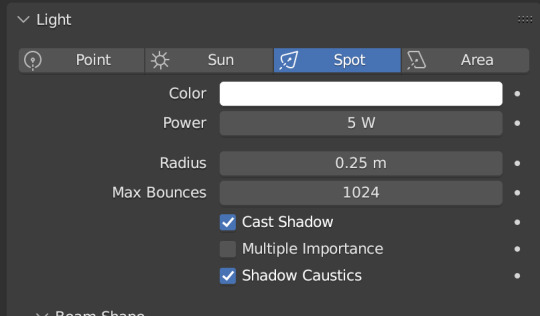
I'm going to adjust the Power to 5 and click off multiple importance and click on shadow caustics, like this:
Do the same for all three spotlights and you should have something like this:
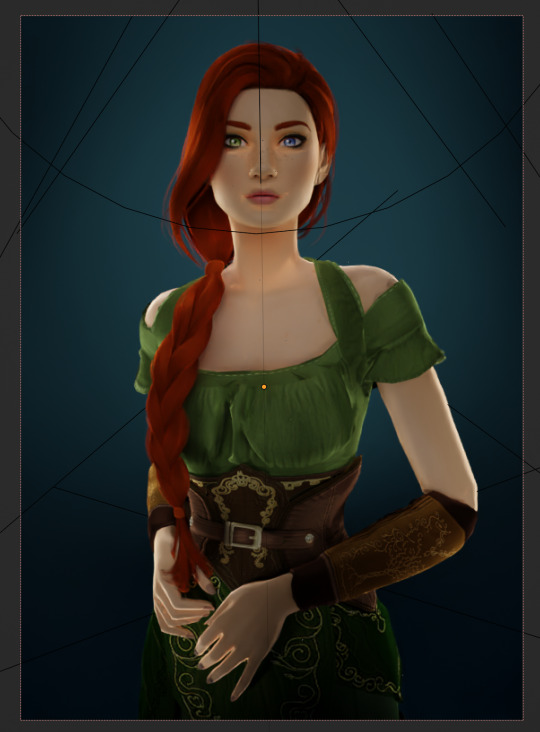
That's better, but let's draw attention to her face with a Point light Add in a point light the same way as a spot (shift+A, light -> point) or Add in the top bar) and move it in front of her face
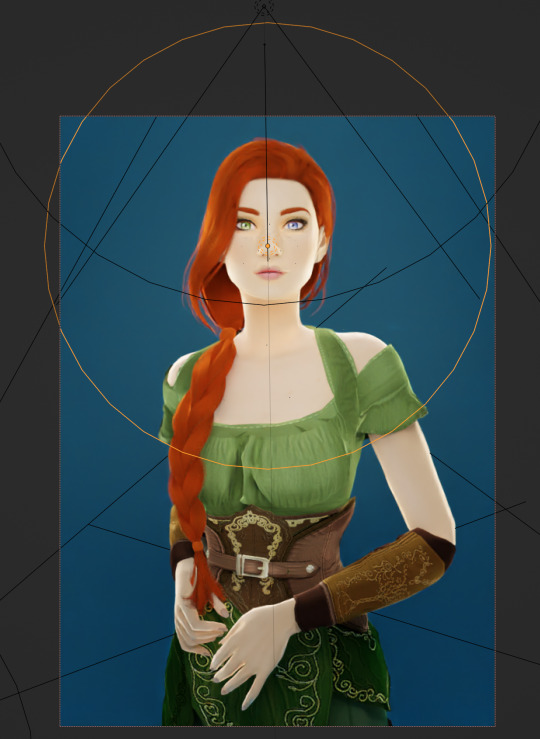
This is obviously way too bright, so let's adjust it like we did for the spotlights I've changed the radius and adjusted the power to 8, as shown here:
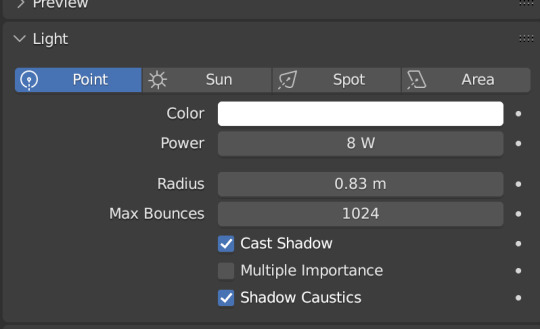
Here's the result:
That's much better! Normally at this point I would probably change her hair and add in jewelry and make minor adjustments to this and that, but for the sake of this super simple beginner render, we're ready to go! Before you run your render, save this file somewhere easy to find. I'll be using the same file for future tutorials!
Step 3: Rendering!
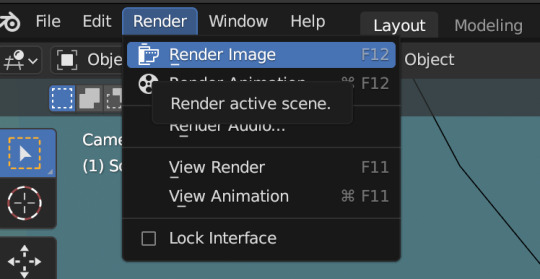
Once you've done all the setup, rendering is actually super easy Make sure you switch your 3D viewport back to Material Preview (rendering while in rendered mode has a tendency to make blender crash) Then go up to the navigation bar and select Render -> Render Image
A new window will pop up, and your render will begin!
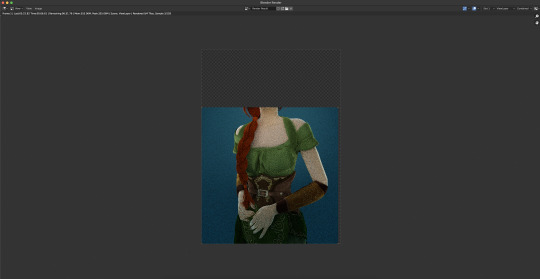
Rendering time will depend on how complex your scene is and how many assets you've added in. Ours is very simple so mine says it'll take about 6 minutes
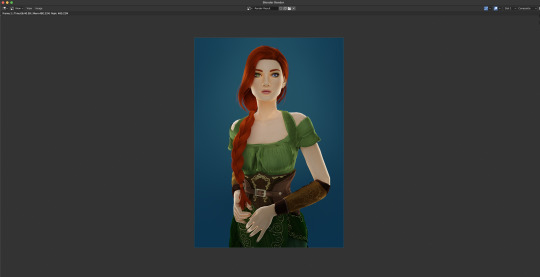
And it's done! Save your render and either post it or edit it in your favorite photo editor!
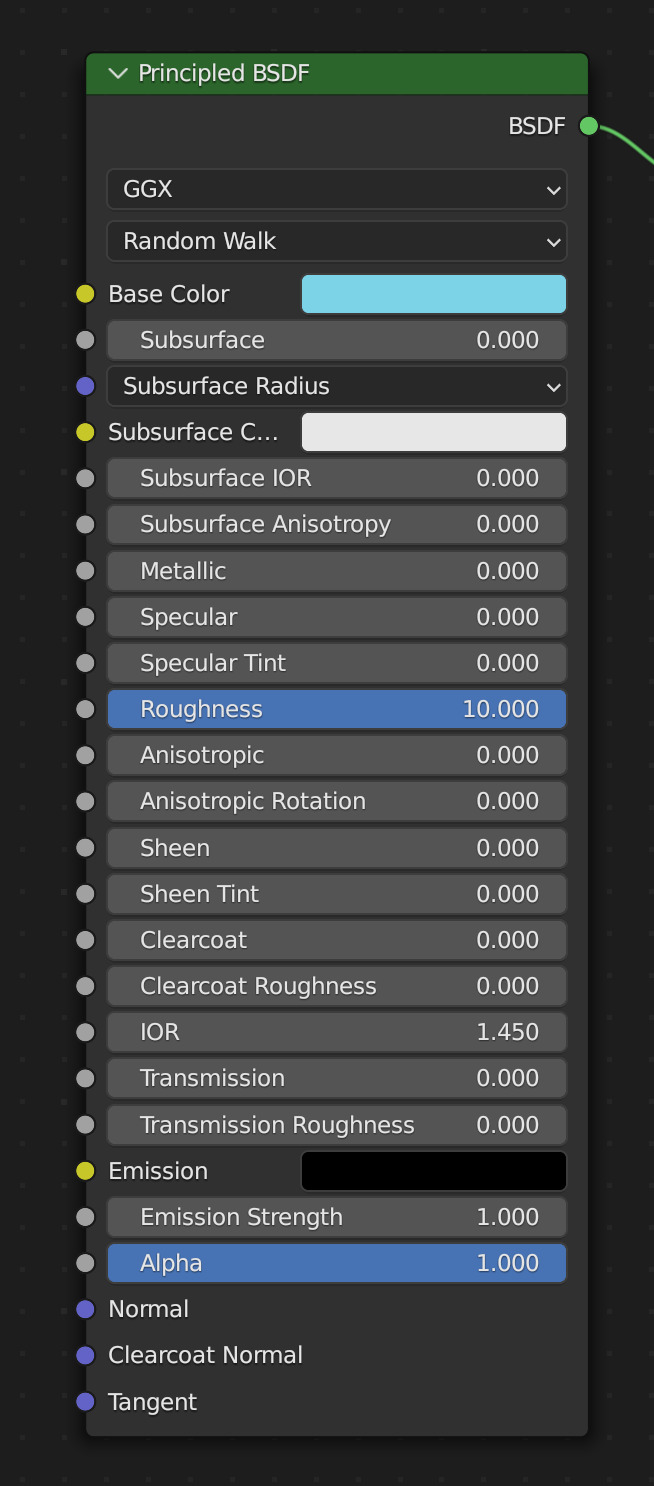
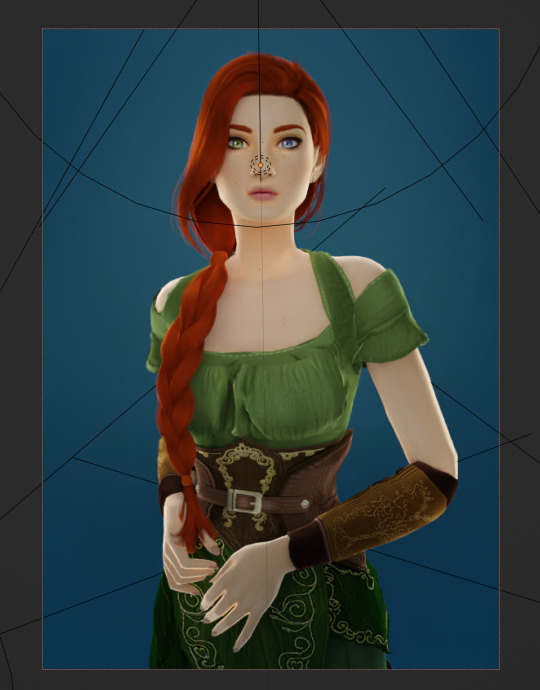
UPDATE 7/17/23
As you can see, my render was looking very glowy. I didn't know why (there was no glare node in the compositing settings or anything that would cause this, or so I thought), until I adjusted the roughness values on my sim.
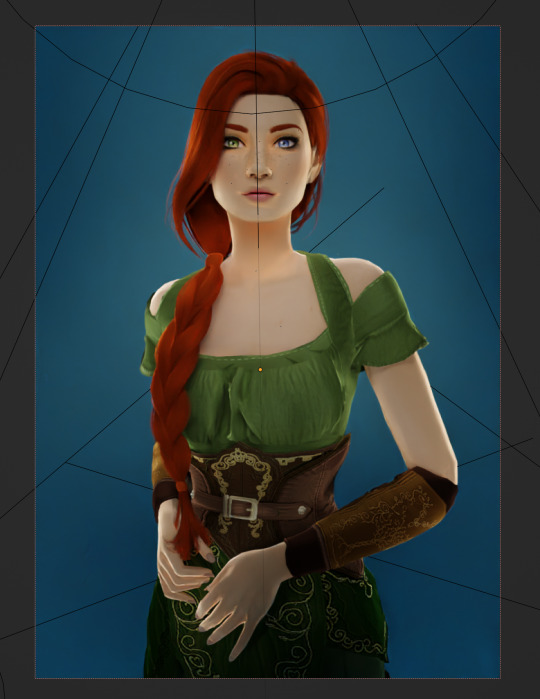
Now it looks like this:
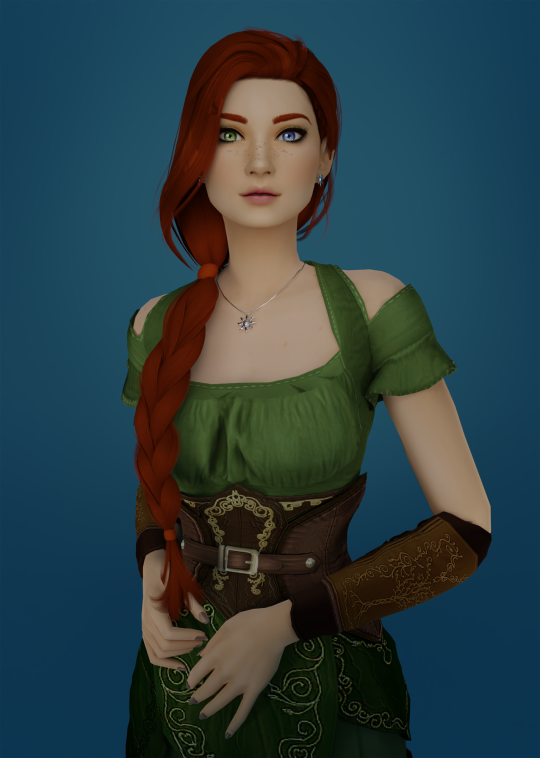
So if yours is looking glowy, adjust the roughness to 0, then back up to 10 and that should fix it!
Homework:
Your Render School homework is to create a simple portrait render using these tutorials and tag me in it! I can't wait to see what yall make!
Please leave any questions in the comments below or send an ask and I'll help as best I can!
Happy Rendering!
#salemsims tutorial#render school tutorial#sims 4 render#tutorial#sims 4 blender tutorial#blender#render tutorial#sims render tutorial
58 notes
·
View notes
Text
How I do my lighting in EEVEE for Blender 4.0 (´。• ᵕ •。) ♡
Are you running your Blender on a toaster? Don't wanna spend much time on rendering in Cycles? Here's some EEVEE tips for you!
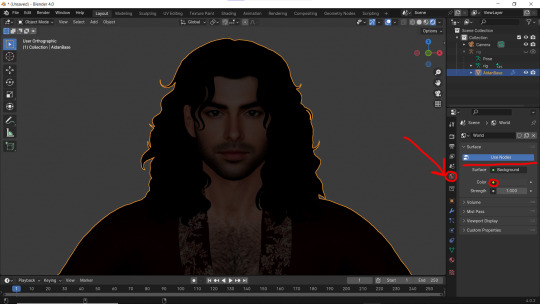
1 - Let's put some HDR lighting on! Go to the Worlds, choose Use Notes and hit that little yellow dot next to the Color.
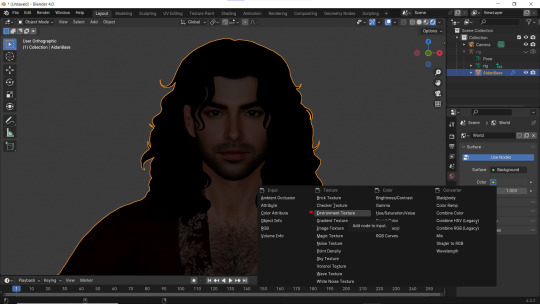
2 - Pick 'Environment Textures'
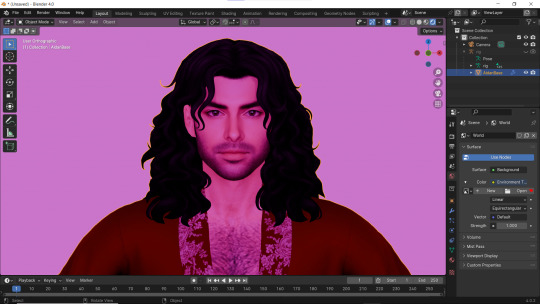
3 - You'll see everything in purple. But worry not! It's just bc you haven't applied any textures yet! Just go on and hit Open.
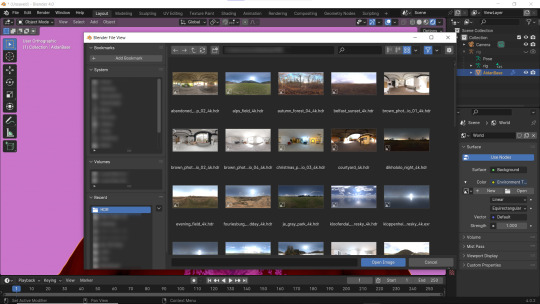
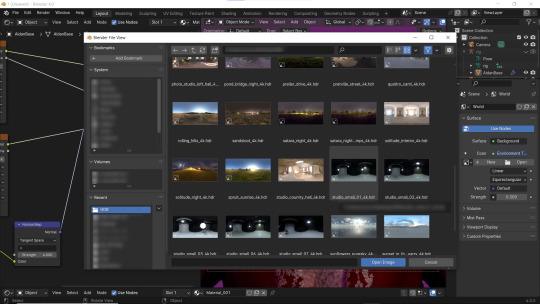
4 - You can find plenty of free, high resolution HDRI textures on Poly Haven. I have almost all of them! Go get some for yourself too and navigate to their location. Pick any you like!
Well... It doesn't look good yet :D
5 - Lower the Strength of the light.

6 - Now. Let's go to the Render Properties and check Ambient Occlusion and Bloom (you can play with it's parameters and see which fits you better). THEN... Go to Shadows and increase the resolution to the max. High Bit Depth and Soft Shadows must be checked too!
7 - Let's Add our very first light (The Sun)! And go to the Camera Mode.

8 - In the Sun Shadow settings: Soften the light by increasing the Angle; Lower Bias to the max.
9 - Change the parameters of Cascade Shadow Map the way it looks better for you.
10 - Also don't forget to fix the specular appearance of your model ;3
Now. I don't hate it. But I don't like it much either... So I played and tried several Environment textures for better result.
11 - Looks way better! Now let's go to the Render Properties once again and remove the background in the Film category (in case you don't want one)
12 - It's time to add another light source!
13 - Settings for the new light are quite similar. I made them softer, lowered Bias, changed color, etc.
14 - Preparing for the shoot. ▓▒░(°◡°)░▒▓
15 - You did it! (ノ◕ヮ◕)ノ:・゚✧
#WistfulTutorialSims4#the sims 4 blender#sims 4 blender render#blender 4.0#blender eevee#sims 4 tutorials#blender tutorial#sims 4 blender render tutorial#blender render#blender eevee lighting#blender environment textures#sims 4 blender#blender render eevee#blender light#blender light eevee#eevee#blender#simblr#the sims 4#my sims
83 notes
·
View notes
Text

Month 1, day 29
Oof, tonight was almost a bust. The first tutorial I tried was a fluid simulation that kept crashing Blender, the second one was a material tutorial for snow covered rocky ground that would not play nice with itself, and this is the third one I tried
It's not supposed to look like this. It's cool! Don't get me wrong! And I'm sure I can find ways to use it in the future. It's just not supposed to look like this lol
#the great artscapade of 2025#art#my art#blender#blender render#blender 3d#cycles render#blenderbitesize#I'm confident I can complete the fluid sim I just have to baby it#and by the time I figured out *how* to baby it I had an hour and fifteen minutes left before I need to start getting ready for bed#and the sim was going to take WAY longer than that to finish#as for the ground material I cannot figure out what went wrong with it#think there was a caching issue with Blender#I can try to troubleshoot it bc the tutorial is for a much older version of Blender anyway#same with this one#older version of Blender = wonky af
5 notes
·
View notes
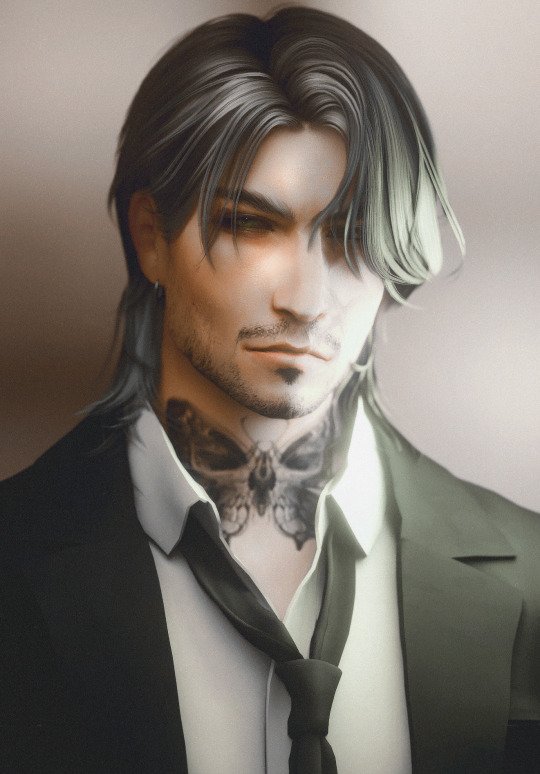
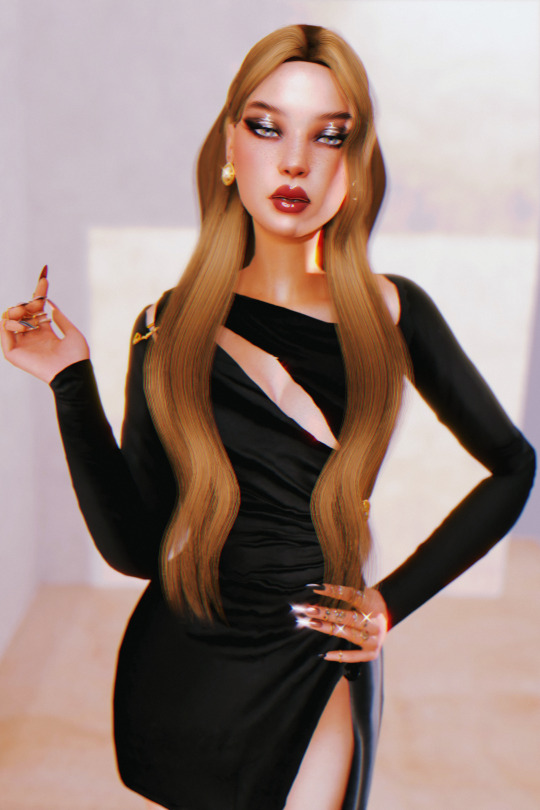
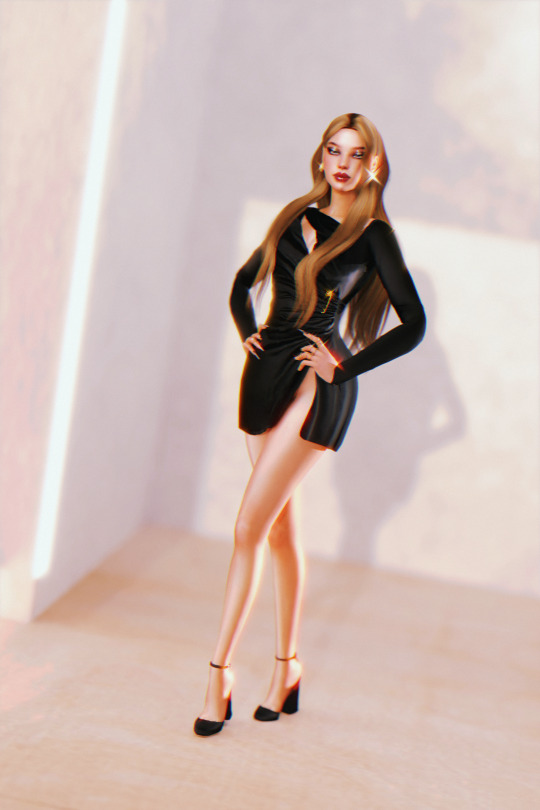
Photo

and maybe I was never meant to be
#ts4#sims 4#sims 4 edit#ts4 edit#ts4 render#sims 4 render#simblr#you cant imagine how long it took because i absolutely refused to look up a tutorial
60 notes
·
View notes
Text
How I Make and Render My Sims
I made some videos on how I make and render my sims! They're very much not tutorials and this is my first time trying to edit videos, so they're a little choppy.
I've posted the videos on both my Patreon and YouTube accounts, you can just pick whichever is easiest to watch on.
YouTube
Patreon

#sims 4 cc#blender sims#the sims 4#blender render#sims 4#blender#sims#the sims#ts4 cc#sims 4 custom content#blender tutorial#blender learning#blender sims 4
20 notes
·
View notes