#sewing-projects
Explore tagged Tumblr posts
Text
I am on my way to being the best auntie ever or the worst sister-in-law that ever lived. Possibly both.
I am making my 2-year-old niece a plushy for her birthday. She is very hands-on baby and wants to help with everything and be involved in the center of attention. A few weeks after her birthday everyone is going dipnetting. She is two and can not help with dip netting or do anything but watch.
So I am making her a toy salmon. And I am making it so she can filet it. It has guts. It has bones. It is all one piece and child friendly, and I am debating using embedded magnets or velcro to hold the filets on.
She has a kitchen set with a little wooden knife at her grandparents house, who have already heard about this and think its a great idea. We are gonna teach this kid to clean and process fish. She already knows where meat comes from and she will want to get in and do what everyone else is doing which she can not do because the fish are only slightly smaller than she is.
So, salmon plushy
33K notes
·
View notes
Text
One of the worst feelings in the world: when you are just desperate, like claw-your-own-skin-off desperate, to create, but the only thing that even vaguely appeals to you to work on is a nebulous half-feeling that might be dreamily related to some half-formed notion of a concept. I must! Make! No thing! Only make!
52K notes
·
View notes
Text


Last day at the festival !
9K notes
·
View notes
Text


Hand embroidered, self drafted, birch tree inspired buttonup shirt.
#will reblog with process#hand embroidery#embroidery#blackwork#blackwork embroidery#sewing#sewblr#self drafted#history bounding#birch trees#fiber arts#crafting#my post#finished project
12K notes
·
View notes
Text

Years ago I bought this insanely bright, thick rainbow fabric at a fabric store that was shutting down and my friend asked ‘what are you planning to make’ and I said I dunno I just can’t pass this up look at it and she made fun of me for being a fabric hoarder but here we are!! 6 years later!!
Anyway now my nakey little dog has a thick ass rainbow jumpsuit and not only has she stopped shivering like a leaf all the time but she’s also very easy to find!!
Plus, I extended the neck part so that I can tuck her ears in (the tips get so cold that they get crusty from lack of blood flow and my vet recommended a snood) and now I have a rainbow worm

Pattern is Luna Jumpsuit from Rosulikka on Etsy.
4K notes
·
View notes
Text
How to Sew a Bias Skirt in 3 Easy Ways as beginner (Free PDF Pattern and Tutorial)
In this post, you will learn how to sew a basic bias skirt with an elastic waistband using a free PDF pattern . Do you love the look of a bias skirt, but don’t know how to make one? A bias skirt is a flattering and versatile garment that can be worn for any occasion. It’s also easy to sew, even if you’re a beginner. In this tutorial, I’ll show you how to sew a bias skirt in 3 easy ways using a…

View On WordPress
0 notes
Text


Good Listener, Part 1
[ 1 - 2 - 3 ]
The third in my comics reflecting on the older brothers’ reminiscing on their youngest growing up.
I absolutely love to hear people talk about the stuff they like, even if it’s usually something I couldn’t care less about otherwise. If someone is excited, I’m excited for them, and it’s fun to have a litany of random knowledge and fun facts from everywhere! There’s so much to learn from listening to people who are passionate :)
I like to think Mikey is the same. He tends to hang out in the background and enjoy the antics around him in the show when he isn’t goofing around himself.
The next part gets a little melancholy, but I swear it’s not actually angsty! Y’all got so scared for Leo last time lmao
#rottmnt#rise of the teenage mutant ninja turtles#rise of the tmnt#rottmnt comic#rise mikey#rise donnie#rottmnt mikey#rottmnt donnie#t*cest dni#I assume the Hamatos have some really old and fancy swords in Splinters do not touch closet#I got into sewing by learning about fiber arts history first#so I’m projecting that on Donnie lol
3K notes
·
View notes
Text
"less is more" "quality before quantity" "a little goes a long way" "understatement is elegant"
Wrong. One hundred moth pendant attack.

2K notes
·
View notes
Text

figure skating set right now please. thanks
#project sekai#pjsk#prsk#emu otori#proseka#tsukasa tenma#nene kusanagi#rui kamishiro#wxs#wonderlands x showtime#GUYS I AM PUTTING OFF WORKING ON MY COSPLAY SOMETHING STUPID. im tireddddd i like sleeepingggff i want to play and drawwwww#after work I literally ate a giant bowl of mac n cheese and climbed into bed. lifestyle choices of a 9 year old#anyways i want figure skaitng set. bad. PJSK HAS A WEIRDLY LOW NUMBER OF ACTUALLY WINTERY SETS... like 3. kind of.#i have some thumbnail sketches but im kind of stumped on composition for them. my idea was a nene focus set#(IF HER NEXT FOCUS ISNT PHANTOM OF THE OPERA THEMED INWILL DIE. BADLY. THEYRE GOING TO AN OPER AHOUSE. PLEADBR)#originally my idea was for nene to be biting a medal i was very sold on it bc i love nenes competitive side#however her outfit is so nice i want it to also be part of the art .. its heavily inspired by that one iconic eunsoo lim dress#from her somewhere in time program iirc. im really undatisfied with emus dress tbh my origimal idea was to give it a phoenix look#but a lot of the firebird/phoenix skating programs have very sleek dresses and i want emus to be fluffy. the balance is hard ..#and since i want her program song to be once upon a dream from sleeping beauty i swerved to make it look a bit like auroras ? but again#it definitely feels like the weakest of everybodys ... maybe i just love her too much and want her to look the best. sorry wxs.#tsukasas outfit is supposed to look like a shooting star. easy. program music moonlight sonata 3rd movement like from dazzling light. easy.#actually i like takahashi daisukes moonlight sonata program its a medley of the 1st and 3rd movement.. i think the calm at the beginning#is best. maybe smth like that.. for his card inhad him doing a haircutter spin but again. the outfits good i want the outfit visible. damn.#ruis the one im very set on even now. girl why are you so phantom of the opera.#it has a lot of beautiful programs to reference but the outfit i didnt really have any solid reference i kind of just balled#my main idea was to make it look a bit like both christine and the phantom.... gender Fluid.#my yapfest... i should be SEWING!!!!!!!!#despite my yapping im not that well versed in figure skating i cant really distinguish jumps i just like it . and medalist#i only do normal skating. bc i played hockey for like 7 years LOLLLL inlove skating though Heart.
2K notes
·
View notes
Text
I take back what I said earlier: I would absolutely sell my craft creations, and by "sell" I mean "trade for something I equally value". Do you like my punk rock giraffe stuffie? You can have one for $81... or a bag full of coreopsis seeds. A knit fringe lumberjack hat? Thats $195... or a jar of local honey. Ill sew new clothes for all of your kid's dolls, usually $300+ in labor and material, but Id rather they draw me a really cool picture that I can hang on my fridge.
#crafts#sewing#knitting#crochet#diy#diy projects#small business#bartering#what matters to me#communities
1K notes
·
View notes
Text


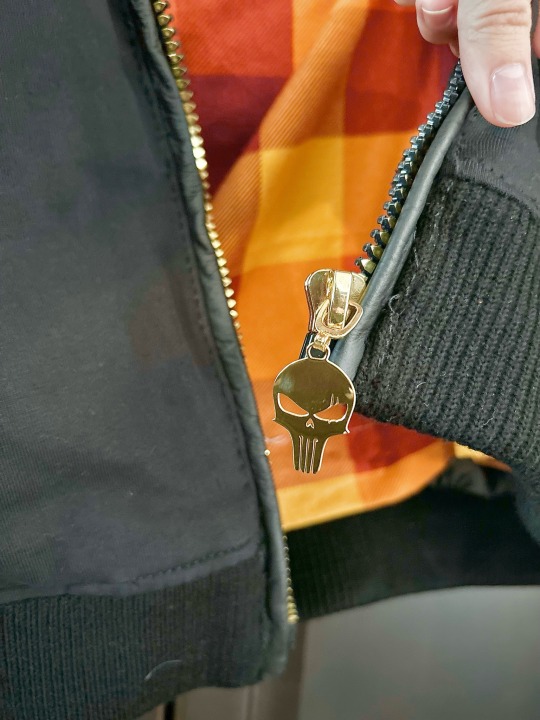


So, I made an Underfell sans jacket…
It basically took me a year to make even though I was actually only making alterations.
This is a motorcycle riding jacket. I added the red reflective stripes, yellow flannel lining, fur to the hood, changed the zipper to gold and the gold grommets, and used a custom zipper pull of Fell Papy’s face.
I had to do a lot of hand stitching because this bad boy broke my sewing machine. Turns out, even with a heavy duty needle, you can’t force a regular machine to stitch through steel wool, leather, and a zipper. Ha.
The design is based off @theskeletongames fell sans design, and this thing is heavy duty. The riding safety pads add that classic bulky figure of sans. Like, ever wonder how he goes from little skeleton to bulky and intimidating one? New head canon, it’s cause he wears a riding jacket. Which is also why it’s so toasty, cause this thing is now my winter coat.
I’m mega ultra excited to wear it around.
Might still go back and add a hidden black vinyl design to the back for extra reflective ability when riding, but I’ve spent waaaaaaaaay too much on this jacket already considering I still need to get the rest of my gear and upgrade from my cute (but speed limited) moped. ^^;
How’d I do?
#undertale#underfell#sans#undertale au#fell sans#jacket#riding gear#sewing project#cosplay#my wallet is crying
1K notes
·
View notes
Text
A video of the filetable salmon plushie being fileted. I managed to film this by holding my phone between my knees, so be proud and grateful for the effort exerted to bring you this magnificent example of how to clean a fish.
3K notes
·
View notes
Text

some fish embroidery i just finished :D
#art by ellis#embroidery#diy#punk diy#diy or die#diy projects#diy patches#diy punk#textiles#art#fish#punk#punk art#sewing
1K notes
·
View notes
Text
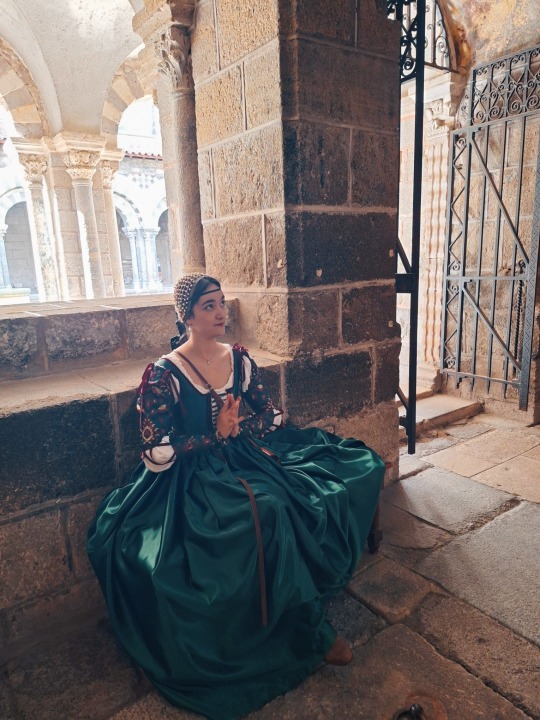
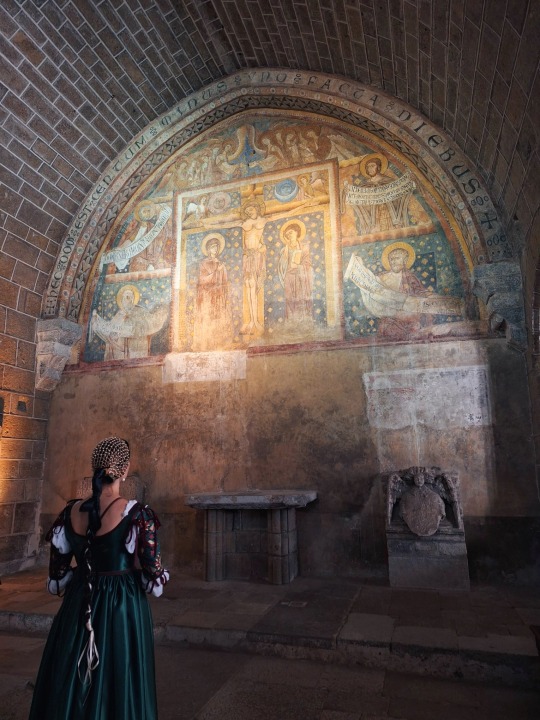
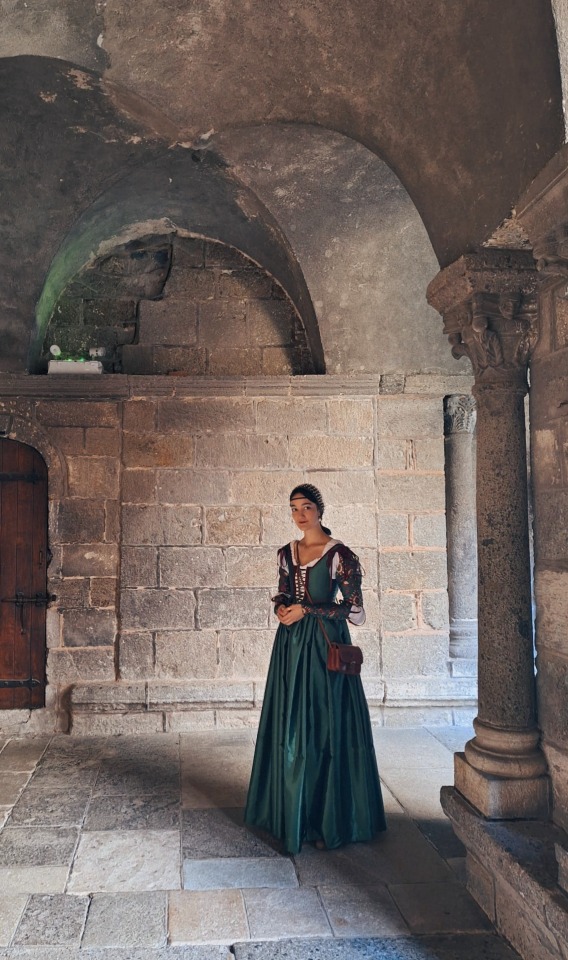
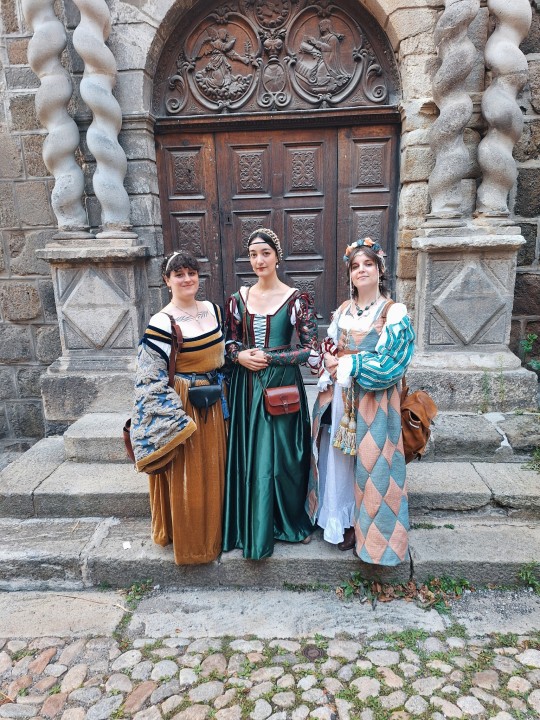

My gamurra and my friends, with @surikane !
4K notes
·
View notes
Text
oh yeah btw i made this
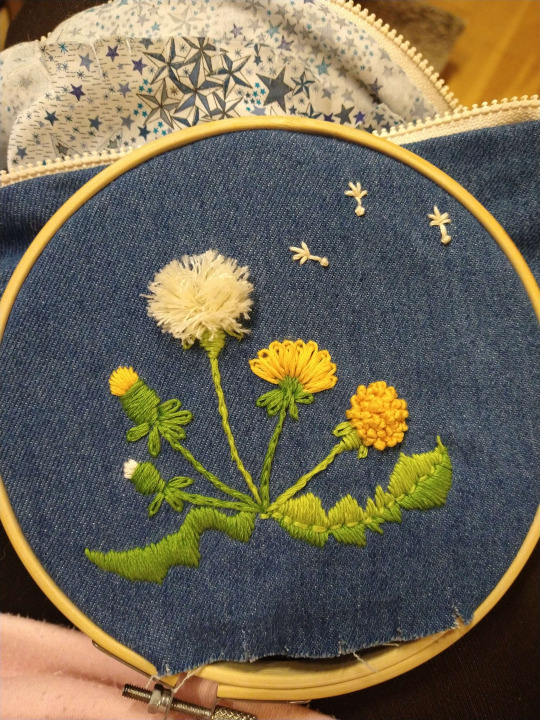
#it's my first time doing hand embroidery#my partner has taken up sewing so i embroidered this on their project#it was fun#now i gotta figure out what i'm gonna do next#embroidery#fiber art#textile art
3K notes
·
View notes
Text
Love it when you thread a needle with dark-colored thread and set it down on a light-colored surface and it just fucking vanishes into the shadow dimension the instant you take your eyes off it
#and yet i continue to do handsewing projects in bed#i will find the needle eventually but i probably won’t like how it happens#sewing
750 notes
·
View notes