#rug tufting
Explore tagged Tumblr posts
Text
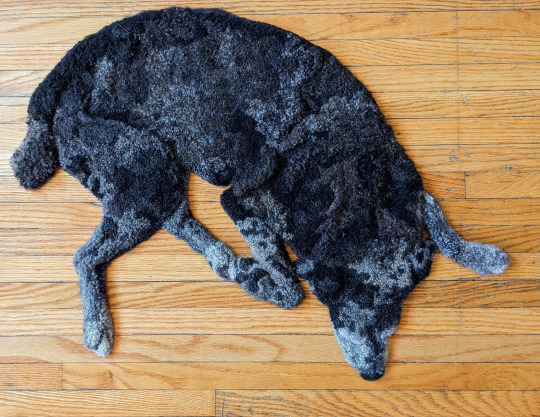
Hooking rugs that look like dogs
Here's how I do it:
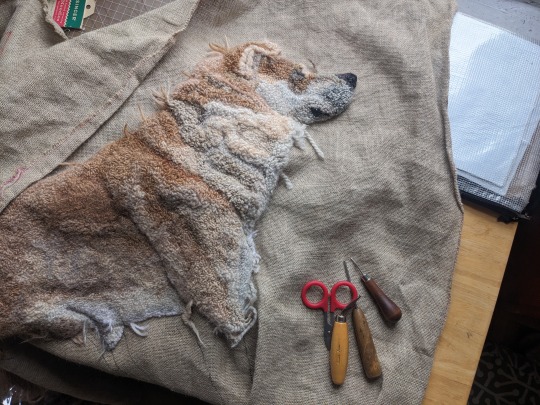
The process I use is called rug hooking (not latch hook or punch needle or tufting, though it is the forerunner of the latter two techniques). Rugs are hooked by pulling loops of fabric strips or yarn through the holes of a base fabric with a coarse open weave, like burlap, or linen, or rug warp. The loops are pulled through the fabric with a squat-handled hook whose business end is shaped like a crochet hook. There are no knots and the loops aren't sewed down in any way. The whole thing stays put just by the tension of all those loops packed together in the weave of the foundation fabric.
This isn't a true detailed tutorial but a walk-through of my particular process. The same information is on my web page, emilyoleary.com .
I hook with yarn, rather than with cut strips of wool fabric, which is what many rug hookers use. I can get a looser, more organic distribution of loops with yarn than I could with wool strips, which are hooked in neat lines.
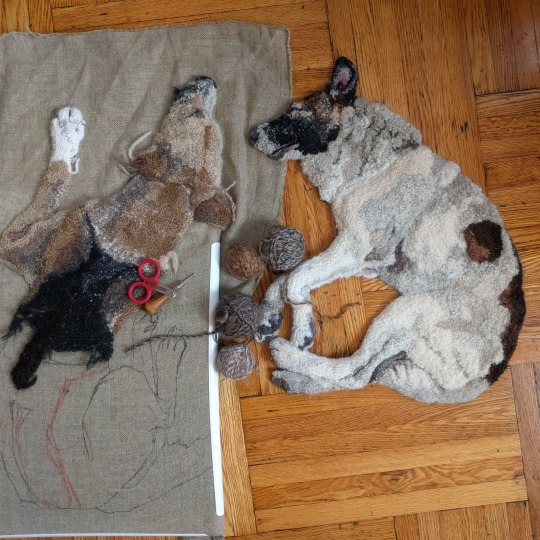
Mostly I use wool yarn. In terms of yarn weight, I can use DK, worsted, or Aran. If I'm using thicker yarn, I leave more holes un-hooked; if I'm using finer yarn, I hook more densely or double up lengths of it. I particularly like using single ply yarns (like Brown Sheep Lamb's Pride or Malabrigo Worsted). I don't keep count, but I think I usually use around two dozen types and colors of yarn per dog.
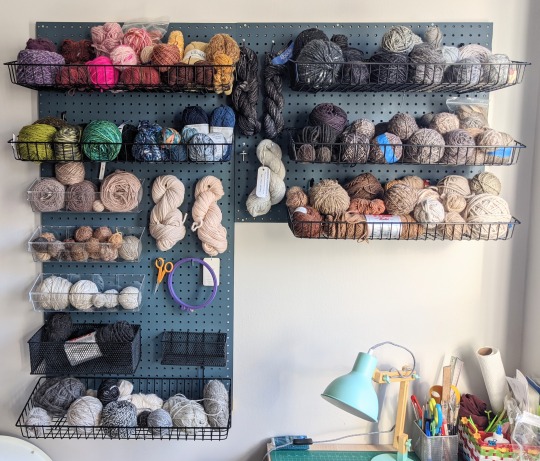
This is my yarn wall in my apartment. Mostly brown and gray yarn!
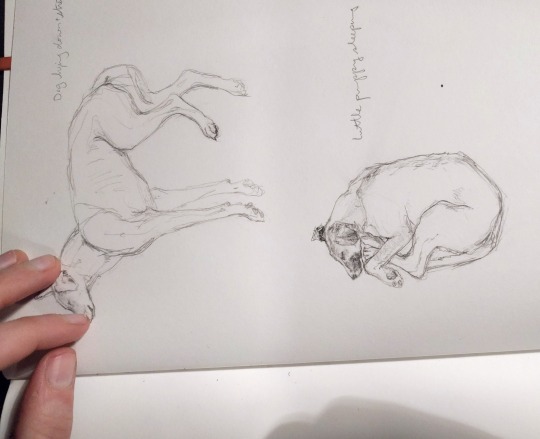
I start from a small drawing in my sketchbook, then I head to FedEx office to use a copy machine, blowing up the drawing repeatedly and experimenting with how big the dog rug should be.
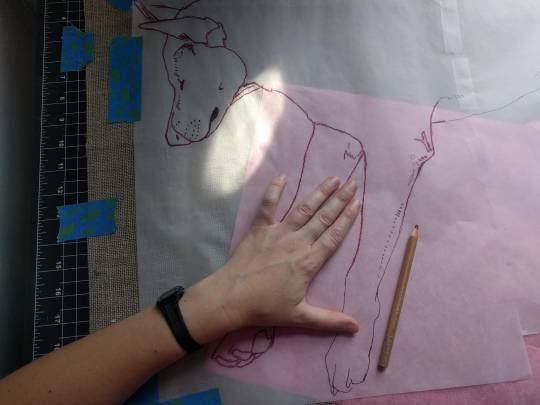
After transferring the image onto my linen, I immediately go over it with Sharpie, because the Saral is really difficult to see and really easy to rub off.
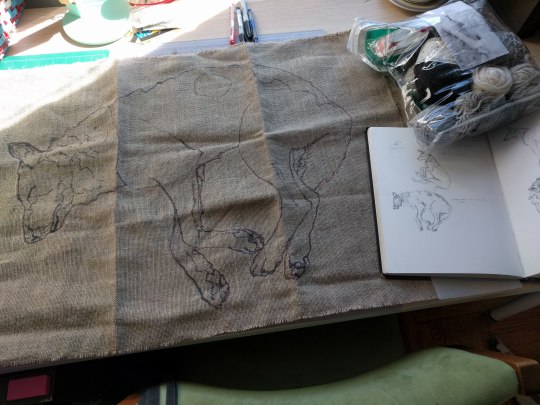
The rug is held taut by a PVC quilting frame that I set on my lap.
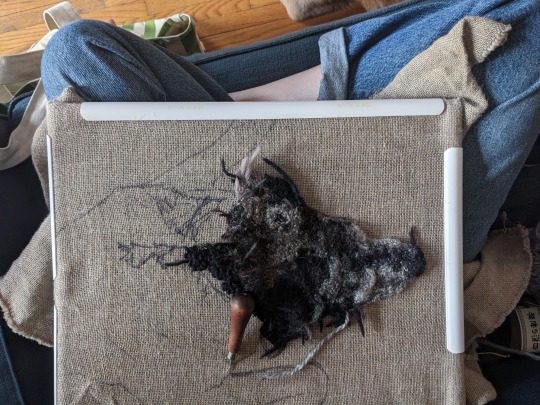
I push my hook down through the fabric with my right hand and my left hand stays below the fabric and guides the yarn while I pull it up and through with the hook. Not every hole in the fabric is hooked. Hooking every hole would make the rug too dense. I do hook pretty densely, though-- If you pick up one of my rugs you’ll see they have a slight curl to them, which is because they’re hooked pretty tight. I'm using all different weights and types of yarn, so it's a challenge to keep the overall tension even.
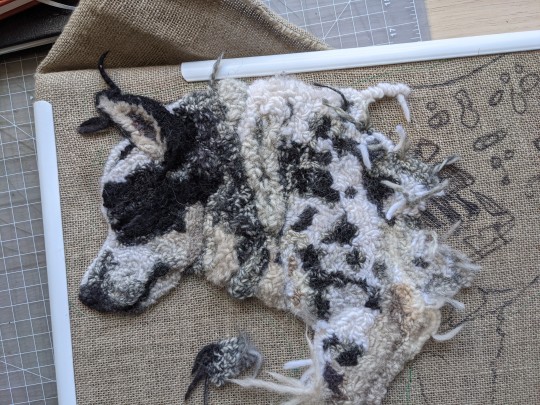
I hook my loops at varying heights to create a very low relief. Sometimes I trim the loops to make them fluffier or wispier or to shape a particular part. I look at a reference photo while I work and pull out and redo sections a lot.
My q-snap frame can accommodate the growing dog rug. I have extenders to make it bigger and I can clamp around my hooking.
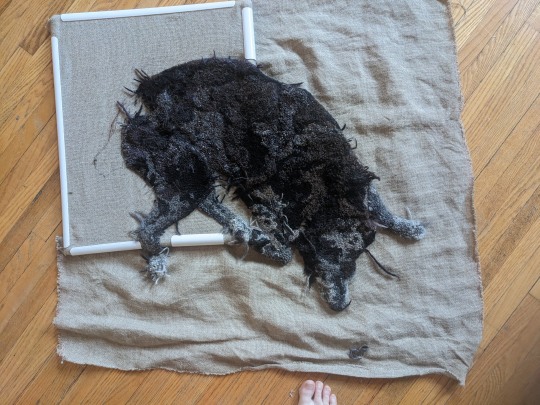
The back of a rug looks like lines of little stitches. The lines are little worm trails snaking around because lines of hooking are not supposed to cross over each other. It's important to start a new length of yarn rather than cross over a stitch you already made! I read this when I first started and took it to heart. It makes it much easier to undo and redo hooking if you have to (and I redo sections A Lot). It also keeps the back from getting too bulky and resulting in uneven wear on the back of a functional rug that gets floor use.
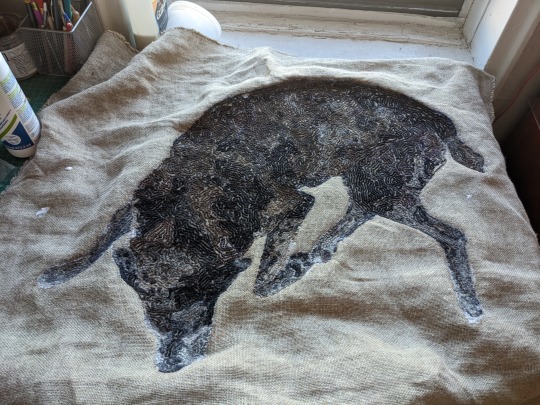
When I’m done hooking everything I turn the rug over and brush watered-down Sobo glue on the edges of the dog, making sure to get one or two of the outermost lines of hooking. I do a couple coats of this thinned out glue. I'm careful not to use so much that it seeps to the front of the rug. When the glue is dry I cut the rug out, but I don't cut so close that the loops don't have any linen to keep them in.
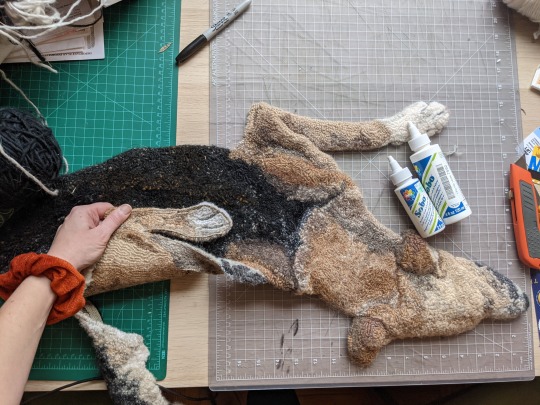
It generally takes me at least several months to finish one dog rug. My hooking frame and yarn bag are very portable (though bulky) so I can hook out and about at coffee shops or the library or a brewery if there's enough space and light.
Hooking in the wild makes me an ambassador for making things in general and rug hooking in particular. I answer people's questions and always emphasize how relatively easy it is to get started hooking. Sometimes I get anxious that other people will hook rugs that look like mine but better, but I think that working in a traditional medium means you should share your knowledge for the good of the craft.
7K notes
·
View notes
Text

Acrylic on tufted rug
Mars Kneale
3K notes
·
View notes
Text

edgar!! ^_^
#been procrastinating putting him up on my etsy but i will i prommy#and the rest of my new shop update will go up same time#just been busy and keep forgetting 🫠#fiber art#fiber crafts#tufting#rug tufting#my art#edgar electric dreams#electric dreams 1984
450 notes
·
View notes
Text


Finished the Trolls world map rug! 34" by 43", made with burlap, acrylic yarn, and felt 🌍🎶 WIP shots under the cut


I had to smoosh the map a little to make it all fit in my tufting frame, but I think it looks good still. Started with details like rivers and country's checkered pattern so I could carve the yarn on the frame and separate the colors more distinctly. At some point between filling the frame and putting felt details on, I retufted the top of classical much shorter and picked out a lot of the star tufting in funk so I could make them more defined in felt. After being stored away for the holidays, I pulled it out the other day and did a little more carving, added a few more felt details, and lint brushed the whole thing. I've never mixed tufting with felt like this, so I'm glad it all worked out!
Tbh I sort of wanted to use this as a set piece for an world tour inspired MV I've been rolling in my head for forever, but I'm just happy this is finally done 😂
#trolls#trolls world tour#dreamworks trolls#dw trolls#rug tufting#tufting#crafts#i did this as a yarn busting project so im pretty sure these were all on hand materials#did not need to be this big but whatever dhkfkg#my stuff
348 notes
·
View notes
Text


Recent batch of pillows off to their new home 🍀
IG
#sorry I have been so absent… back in the studio now!#tufting#haley wood#fiber artist#haleywoodtextiles#tufting gun#fiber art#rug tufting
3K notes
·
View notes
Text

イチゴ マネキネコ
#kidcore#fairy kei#yume kawaii#fiber#kidwave#artists on tumblr#weirdcore#rug tufting#2023#lucky cat#maneki neko#fiber art
2K notes
·
View notes
Text
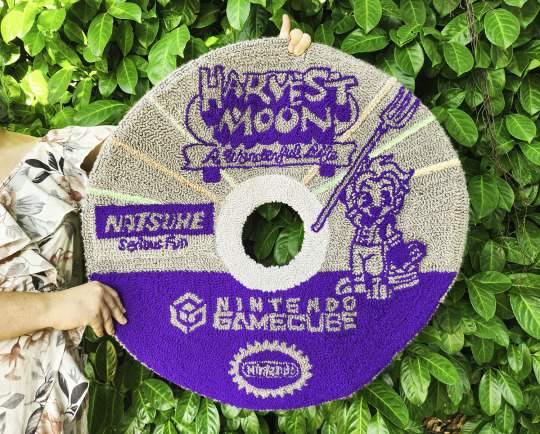
worked on this hand punch needle rug for so long 🥹 but y'all i LOVE how it turned out. this commissioner had a lot of trust in me changing the positioning/size of all the logos, and adding pastel ombre yarn stripes for that good good holographic CD effect! 💿
of course, i wish there were a way to get SUPER precise tiny letters, but with a hand punch needle and a chunky yarn, this was as small as i could get!
#harvest moon#harvest moon its a wonderful life#its a wonderful life#story of seasons#nintendo gamecube#punch needle rug#punch needle rug making#rug making#custom rug#gaming rug#handmade rug#rug tufting#nintendo#video games
1K notes
·
View notes
Text


Got a new toy :3 A rug tufting gun
First rug needed to be MSA of course lol. Im might do another one with a dark grey instead of black yarn
But outside of that im really happy with how it came out
(Kitty for scale lol)
129 notes
·
View notes
Text


I got to do a rug tufting course along with some friends recently, and now my most recent long boy has been immortalized in wool forever and ever and ever
#ragsycon exclusive#ragsymakes#artists on tumblr#wyrm#rug tufting#the studio was called Tuft Stuff. so if you're in Chicago i highly recommend
118 notes
·
View notes
Text
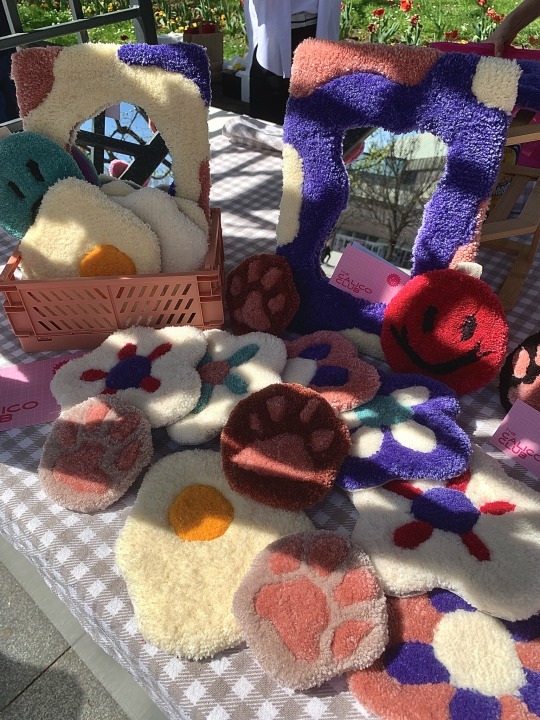
180424 • 2/100 days of productivity
I'm officially graduating next week!!!! I'm kinda nervous, but from then on I can focus on doing what I love doing best = tufting!!! (but also looking for a job bc economic stability).
I talked about opening my shop this month but unfortunately I had so much going on that I wasn't able to give it my full focus. I managed to make some new pieces for the various markets I attended, but now most of these works are in a small concept store in Belgrade!
Anyway, I will be opening commission slots in May for international orders, so if anyone is interested, my inbox is open!! I will be posting more info and making an official post later this week 🌷
#yughost#studyblr#student life#studyspo#coffee#100 days of productivity#100dop#studystudystudy#bookblr#tufted art#tufting#rug tufting#commission#artistsupport#artists on tumblr
229 notes
·
View notes
Text
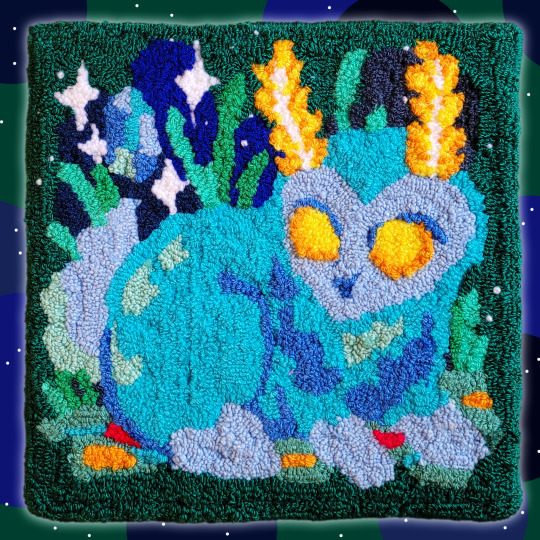


Blupee Tapestry 💎✨
30x30 tufted piece
insta ♡ ko-fi ♡ shop
#the legend of zelda#breath of the wild#botw#loz: botw#loz#legend of zelda#blupee#rupinejo#creature#tufting#tufting gun#rug tufting#tapestry
748 notes
·
View notes
Text
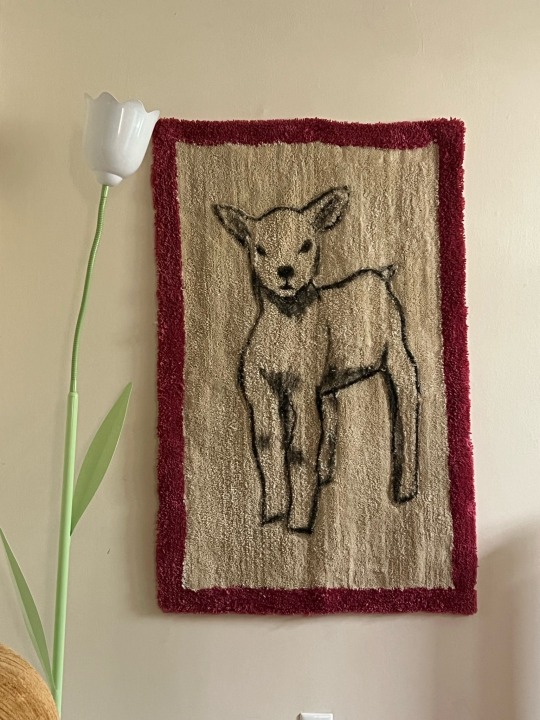
Lamb rug by Mars Kneale
2K notes
·
View notes
Text


before and after doing detail work on edgar rug! ^_^ i think id like to make him a wall hanging , hes not that big!
Would also love to put him up on my etsy when the backing is finished !!
#sooo if anyones interested ... ^_^ keep an eye out!#i will make a post when hes available!#edgar electric dreams#electric dreams 1984#my art#rug tufting#merch
265 notes
·
View notes
Text


http://alicewisbeystudio.etsy.com
Kuromi inspired tamagotchi mirror- hand tufted with chain detail and two charms (wooden and punch needle)
#art#artists on tumblr#artist#my art#artists#abstract#homedecor#rugart#tufted rug#rug tufting#kuromi#tamagotchi#sanrio#mirror#mixed media#commission#cute aesthetic#tufted#textiles#fiber crafts#fibre arts#artists on etsy#etsyseller#etsyhandmade#etsyuk#autistic artist#yarnblr#yarn crafts#homemade#home decor
94 notes
·
View notes
Text
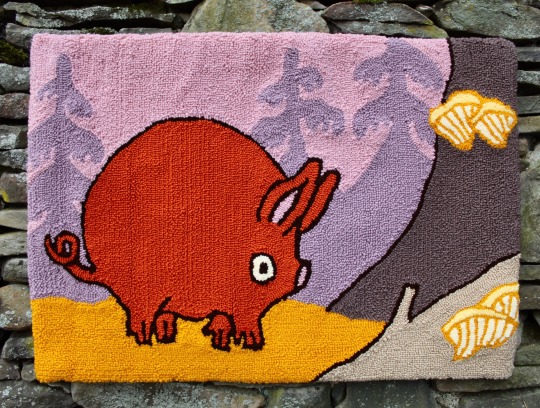
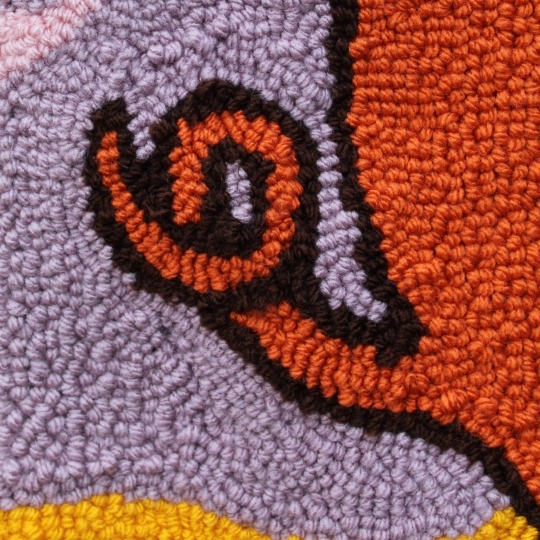
Haley Wood
“Truffling Hog”
1K notes
·
View notes
Text


went rug tufting 👀👀 will get finished thing in mail at some point
61 notes
·
View notes