#remove duplicate photos
Explore tagged Tumblr posts
Visit Tumblr Blog
Explore Tumblr blogs with no restrictions, modern design and the best experience.
Last Seen Tumblr Blogs


Fun Fact
Tumblr has been banned in Indonesia for providing people with access to pornographic content.
Text
Remove Duplicate Photos - Free Up Space and Organize Your Library
Removing duplicate photos is an essential task to free up storage space and keep your digital photo library organized. Duplicate photos often accumulate from backups, transfers, or repeated downloads, leading to clutter and wasted storage. Tools and apps like Duplicate Cleaner, CCleaner, and Google Photos help identify and delete duplicate images efficiently. Regularly clearing duplicates not only optimizes your device’s performance but also makes it easier to manage and enjoy your photo collection.
0 notes
Text
clearing out my phone so im moving the images onto my computer because i have too many for my phone to handle deleting at once. i have 27,000 saved images from tumblr
#its a disease i will save images#assuming most of them are unique too because my phone has a feature to remove duplicate photos
54 notes
·
View notes
Text
Explore top duplicate photo finder tools to efficiently manage your images.
0 notes
Text

some of my purse dogs. feel free to reblog w your own purse dogs.
purse dog qualifications (not serious) (silly concept):
-you are obsessed -you are not romantically attracted to the character* -you have a strong desire to shove them into your purse & carry them around with you -the silly :)
(*this is what drove me to start calling them my purse dogs. if your desire to carry them in a purse outweighs your attraction, your blorbo may still be a purse dog.)
#I took a photo of my bag#duplicated it as a second layer#then removed the majority of that second layer above the open zipper#so that I could put the blorbos on a layer between the two purse layers
0 notes
Text
youtube
Learn how to remove duplicate photos on your iPhone with this simple tutorial. Clear up space and organize your photo library with these easy steps! 1. In the Photos app, tap Albums. 2. Tap the Duplicates album under Utilities. 3. Tap Merge to combine the duplicates. 4. Tap Merge [Number] Items to confirm.
#remove duplicate photos on iphone#delete duplicate photos#delete duplicate photos iphone#how to remove duplicate photos on iphone#how to delete duplicate photos on iphone#remove duplicate photos iphone#duplicate photos#how to delete duplicate videos on iphone#best app to delete duplicate photos#iphone duplicate photos#delete duplicate photos on iphone#delete duplicate screenshots on iphone#remove duplicate photos from iphone#Youtube
0 notes
Text
Reclaim Your Storage: Simple Tips to Remove Duplicate Photos from Your iPhone!
0 notes
Text

oh I desperately need drives for different things jesus christ
#I can’t keep just backing up all my shit over and over again#and having Several duplicates of things#I gotta start sorting things#like art goes here photos here and art ref there#and then I clear out my desktop completely!!!#and then that way the next back up is just New Things y’know???#and rinse and repeat#I know I should go through and sort things Now and remove the duplicates#but I have like a good 5-7 years worth of backups on this drive#and that would literally take me Forever#and there’s stuff I’ve since deleted so like I can’t just delete older backups#because they have things I like to go back and look at every now and then y’know????#it would be easier and faster to save up for a few new hard drives and start the new process idea with them#anyway#starting to think I may have hoarding tendencies.#(I know I do. I’ve known. I’m not just now coming to this realization.)#(it’s the adhd/autism + growing up/being poor)#(hard to throw things out when you know you can’t replace them if needbe)
0 notes
Text
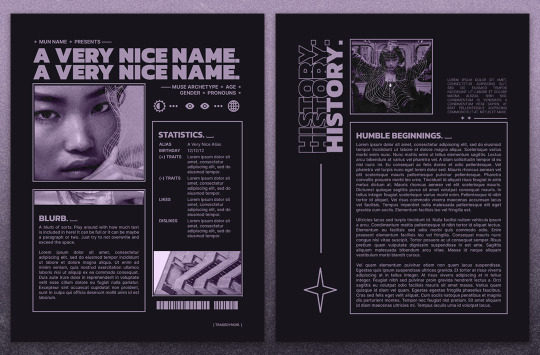


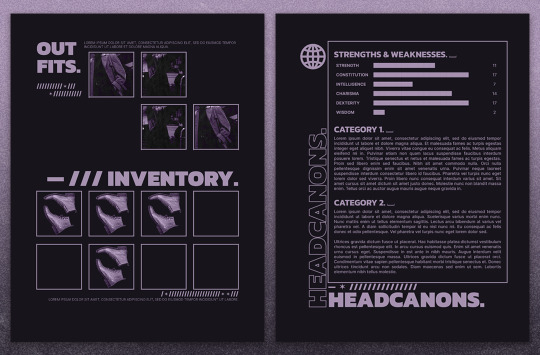
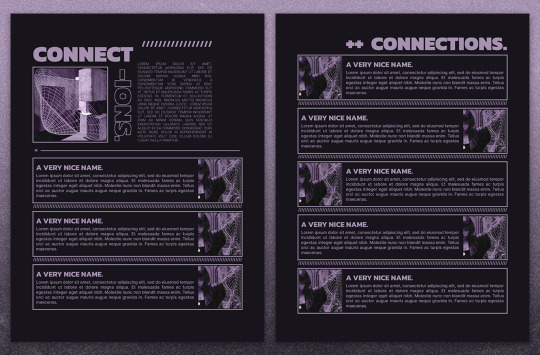
— introducing 013: NEO-NOIRE + [ link ]
a semi-mobile friendly google doc template inspired by brutalist posters, the matrix, and cool fighter types. one of my longest single muse templates yet, this document comes with space for a lot of writing and many images! this template also comes with 9 PSDs, all labelled with their corresponding pages, to easily resize, texture and colour your images to fit the template! this premium template and a full page-by-page preview can be found in the link above or in the source link.
features:
10 unique 8.5" x 11" pages with a lot of space for writing, and plenty of space for pictures
additional miscellaneous pages such as outfits, inventory and even headcanons for you to have fun fleshing out your character
9 PSDs with texture, grain and colour to edit your photo to the right sizes to fit into the template's aesthetic easily!
all pages that can be easily rearranged, copied and duplicated for more!
terms of use:
you may edit to your heart’s desire. Change the colours, replace, add or remove elements and images etc.
you may remix pages with pages from my other templates.
you may not remove the credit from the templates.
you may not copy, sell or redistribute my templates whether wholesale, in part (i.e. taking out certain pages) or remixed (i.e. modified).
you will also receive an additional guide with images on how to use and edit google doc templates! if you have any problems or issues, feel free to leave an ask or join our discord server.
I love 1-bit colour schemes so much and this was extremely fun to build, right down to looking for the right placeholder images to pull off the vibe. I hope you'll like this template as much as I do! you have my eternal gratitude for likes + reblogs (and comments!), it really pushes me to go further and put out more content for the community. ♡
#google doc template#google docs template#muse template#rp template#fave#m#m pr#rp resource#muse doc
1K notes
·
View notes
Text


@roykiller07 There's been some costumes on display on mannequins, which might help staring at the technical details for how Electra fits together? It's easier to see when not on a living actor!
John Napier's basic concept is "toy - trains" - like action figures, the joints are emphasised as the joints are needed to allow the rigid mechanics to move! This is the opposite of his work on the musical "Cats", where almost all the seams, the joints between fabric even, are eliminated or hidden to make the performers as smooth and fluid as possible. For Starlight, we don't have fluid, we have chonky!
The German costumes are duplicates of the Broadway costumes made by Parsons-Meares in 1987, the Parsons-Meares costumes were used as the basis for all productions except the original London production in 1984 - and now the 2024 Wembley production. (Though I believe a few makers who worked on the London show in its later years did also work on the Wembley costumes, but not in a design/supervisory role, so things like construction methods probably didn't get carried across.)
Anyway! The Classic Broadway / Bochum costumes by John Napier rely heavily on a basic bodysuit, often padded and quilted, with belt, vest, elbow, kneepads, gloves, thigh pads, etc, attached.


Here's Espresso's basic suit, knees and thigh patches remain connected - Espresso's performer has to quick change between the engine and the gang costumes. there's a zip the full length of the leg so he can change without removing skates!


The coaches are a bit different of course, being lighter, more shapely.


The coaches have leotard and leggings, with plenty of anchor points to hold the other pieces in place.
As to what it all means? That's quite a different question! The original designs are mostly collages of photos of trains, they're meant to get the idea of the mechanics across rather than being a literal representation in most parts.

Generally it's understood that the bands around ankles etc are springs, the big shock absorbers. Elbows have buffers, the coaches arms and legs have windows - their shoulders are the carriages.


I'm sticking to the Broadway/original Bochum designs here - the original London were very experimental and done on a shoestring budget. They poured money into the Broadway designs - it was the 1980s after all! Later costumes have had less overall concept behind them, they just "Look like Starlight Express". And the Gabriella Slade costumes? I have no clue. but they're shiny.
205 notes
·
View notes
Text
Norwegian suit scandal and probably the most detailed article about everything translated from Polish, enjoy:
«Equipment Controller Christian Kathol Tried to Discredit the Video Exposing the Norwegians Altering Their Suits, Saying That "Nothing Illegal Can Be Seen There." Really?
In this article, we show the reason why Marius Lindvik was disqualified due to his suit after the large hill competition at the World Championships in Trondheim. We also publish a previously unavailable photo and footage that ultimately confirm that the altered suits contained chips—chips that the International Ski Federation (FIS) implemented this season to prevent cheating in ski jumping.
"The sound of sewing machines could be heard from many rooms in this hotel," we were told recently about the Scandic Lerkendal in Trondheim, the place where the Norwegian team stayed during the World Championships. Already at the beginning of winter, during the November competition in Lillehammer, I overheard a conversation at the reception involving a staff member from one of the national teams about renting extra rooms for suit alterations—a story I reported on at the time. Back then, I didn’t suspect that just over four months later, I would be publishing a video from one of those very locations—curtained off and hidden from the world like a crime scene.
At First, the Coaches Lacked the Guts. Then They Showed They Had Them the Size of Watermelons
The first sign that something major might unfold at these World Championships came after the normal hill competition. I reported on Sport.pl about the possibility of a rebellion among the top teams' coaches due to the fact that "some nations can do whatever they want." However, in the end, no rebellion took place. At that time, the Germans and Norwegians were already being pointed out, but the coaches "lacked the guts" to file protests and take the issue further. The situation calmed down. Tensions subsided. Until Friday.
That’s when I first received information about the possible duplication of the chips that FIS introduced to ensure fair competition among athletes. I described how they work in this article. In short, their goal was to reduce the number of suits produced, give officials insight into which suits each team was using by storing them in a central database, and level the playing field—helping smaller teams compete against wealthier ones. Athletes were allowed to use up to ten suits throughout the winter. Nine—two of them new—were available for the World Championships. A tenth could be added for the final period of the World Cup
The chip-tagging—sealing a suit with seven chips in different locations—was carried out by FIS equipment controller Christian Kathol. He had to measure certain parameters before approving and registering the suit in the system. After this, no modifications could be made—no major parts could be replaced, and the chip could not be removed. Any tampering would deactivate the chip, and significant suit alterations would be detectable by FIS controllers.
However, the video we published before the large hill competition in Trondheim casts doubt on the system’s effectiveness. It brought the issue to public attention and put pressure on FIS, along with protests that emerged before and during the competition. Everyone who protested and exerted pressure had the guts—guts the size of watermelons.
This Is How FIS Tried to Sweep the Scandal Under the Rug. Everything Came to Light
Let’s establish the timeline. The teams had known about the problem for a long time. Thomas Thurnbichler stated that "week after week," they showed FIS photos proving that the Norwegians were altering their suits with stiffening material inside. FIS did nothing. The first formal protest was filed even before the competition. Officials held a meeting to discuss the issue and presented evidence—videos I later published, and perhaps even more
The goal was not only to prevent the Norwegians from competing but also their American and Estonian allies. Teams were also convinced that previous competition results at the World Championships should be analyzed, along with potential irregularities in Nordic combined events. However, these actions did not bring the desired outcome. FIS wanted to sweep everything under the rug. A suit inspection was conducted, but it found no irregularities.
At this point, we released the videos. And the teams did not let go. Austria, Slovenia, and Poland protested, demanding the disqualification of all Norwegian athletes before a single jump was even recorded. This led to another inspection after the first round. Again, nothing was found. Meanwhile, Germany formally demanded an explanation from FIS via a written protest.
The disqualifications of Marius Lindvik—who lost his silver medal—and Johann Andre Forfang only came after the competition when their suits were opened. There, as the Norwegians admitted, an "overly inelastic element in the crotch area" was found. It was a string that could be adjusted to pull the suit material downward, widening the stance.
Thomas Thurnbichler claims that this works like a wing, and together with Polish equipment expert Mathias Hafele, he argues that this kind of cheating is not much different from conventional doping.
Christian Kathol Dismissed the Evidence. But There Was a String in the Footage
In his initial statements to television crews gathered at Granasen—after qualifications but before the large hill World Championship event—Christian Kathol insisted that the suits were fine and that the published videos showed nothing suspicious.
Well, according to Sport.pl, the string that caused the entire controversy is indeed visible in the footage. It can be seen in the screenshot below.
This contradicts Kathol’s claims and suggests that the videos reveal more than many initially thought. And what if the videos are just the beginning?
If They Manipulated the String, What About the Chips? We Explain and Publish New Evidence
Before the competition, I only released the videos. Many viewers claimed that they did not prove chip duplication, even though I hinted at it in my post. They argued that the chips were not visible. Well, perhaps they were not perfectly visible, but they were there. Below, you can see them, although an untrained eye might struggle to recognize them.
But don’t worry—the videos are not all we have.
There is also a photograph where the chip on one of the altered suits is clearly visible. Moreover, we have confirmed that it bears the marking used by Christian Kathol for chip-tagging suits: "WM2." The black lettering around the chip indicates that it was the second suit approved for these World Championships.
We are publishing this photo here for the first time.
Thurnbichler Asks: "How Is This Possible?"
I am not the author of the videos or the above photograph, which I recently published on social media and Sport.pl. However, I obtained them and decided to release them. The photo reached me indirectly—not from the person who recorded the videos.
The head of German ski jumping, Horst Huettel, has already confirmed that the evidence shown to him by the Austrian Ski Federation likely came from someone within their organization. The Austrians were staying at the same hotel in Trondheim as the Norwegians. However, I don’t know exactly who recorded it.
For Norwegian media, one of the key questions is: Who secretly filmed the Norwegians? Well, good luck to them in finding out. My priorities lie elsewhere.
Primarily, the issue of the chips and possible duplication needs to be clarified. The protest regarding chip concerns was rejected—true. But that was because the video does not explicitly show chip duplication. Therefore, it cannot be proven
The footage, however, suggests the possible effects of chip duplication—because without tampering, alterations would have been impossible. Chips were placed on new material, and the suits in the footage do not appear to have been inspected by the controller. "How is this possible?" asks Thomas Thurnbichler.
We don’t have an answer yet. But we must find one.
What’s Next for the Norwegians?
Will the only consequences be disqualifications? Some suggest longer bans for Norwegian athletes, officials, or coaches. The coming days may be crucial in determining whether FIS will take further action—and how and when it will announce it.
Ski jumping has never faced such a crisis. The Norwegians cheated everyone, casting doubt on the credibility of the entire sport. What they did is disgraceful. And looking at what might unfold next, it’s possible that the entire future of ski jumping is about to be dragged into the mud.»
The mentioned pictures:


EDIT AS OF SUNDAY 4PM: “The Norwegian federation's sports director Jan-Erik Aalbu admits at a conference in Trondheim that the Norwegians cheated on purpose, but he personally did not know about it. "We manipulated the uniforms on purpose, sewing stronger string into them" @Eurosport_PL “ here, it is all confirmed now
All credits to Jakub Balcerski @ sport.pl, the original article: https://www.sport.pl/skoki/7,65074,31753152,tak-fis-chcial-ukryc-oszustwa-norwegow-tego-zdjecia-jeszcze.html
#ski jumping#trondheim 2025#sooo looks like it’s being going on for quite some time#it’s looking really really really bad for them#this was the sport I’ve loved since I was a literal baby and now they’re ruining it thanks
63 notes
·
View notes
Text
“How do you make your dividers?”
(PT: “How do you make your dividers?”)
this is a question i get a lot! this is my best attempt at a tutorial. this was requested by @oktavia-is-a-fish ; the only reason i’m not answering their ask is because it was sent to my other blog:]
I am using procreate to make my dividers, but i’m sure this tutorial can be modified and applied to plenty of different applications.
⭐️(please tell me if you see any typos in this, thanks)
very long tutorial below the cut! ⬇️
step 1:
(PT: step one)
if you can, turn on snapping on your art program! this helps you make sure everything is aligned and centered. here’s a video on how to do that in procreate:
youtube
step 2:
(PT: step two)
pick an Object. sometimes i use PNGs, sometimes i use free vectors i find online, sometimes i draw it. whatever you want! for the sake of this demonstration, ill be using this rubber duck:
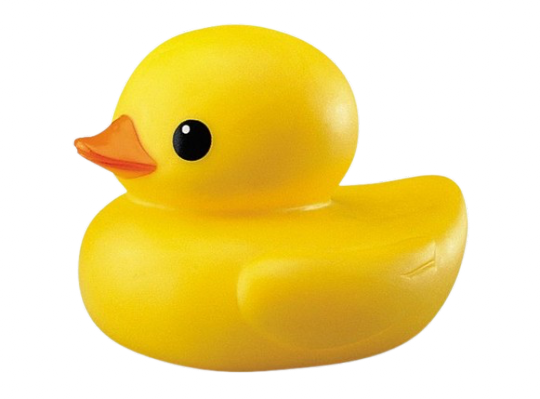
which i turned into a transparent PNG using this website:
step 3:
(PT: step three)
create your canvas!
the dimensions i personally use vary depending on the divider. usually it’s 3000x225 for dividers like this:

3000x330 for dividers like this:

and 3000x440 for dividers like this, with a character on it:

in this tutorial i will be making a simple 3000x225 divider, like the first example!
step 4:
(PT: step four)
make your pattern! drop your little guy into your canvas and push him all the way to the left (or right if you prefer, but i usually start at the left) and make sure it’s centered horizontally

then draw a line as long as you want the objects to be spaced out, and push it right up against (but not overlapping) your object

then you’re going to duplicate both the line and the object, and select one layer of each

and you’re going to move it so that the second object is now aligned with the first and pressed right up against (but not overlapping with) the first line

then merge the two lines with each other and merge the two objects with each other, so you’re back to two layers: one of lines, and one of objects.

then, repeat the duplication and movement process above!

repeat this until you have filled the canvas to your liking!


i like to fit mine to the canvas so it reaches the edges, but you may center it however you’d like!
once you have it centered to your liking, delete the line later. you can now turn off the background and save this image as a PNG.

congrats !! you have just made a divider!!
i only used one object for this tutorial, but you can use as many as you’d like, and modify this process however you see fit!
thank you for reading, happy graphic making! ✨
46 notes
·
View notes
Note
I hope someone steals you art with ai and doesn't credit you for it
It's hard to steal something that I'm giving away, and it's nearly infinitely easier to just right click on the image so you've got a clean copy instead of attempting to duplicate it through prompt generation. Feel free. I'd love to see what you do with it. You're absolutely 100% clear to use any of my art for any purpose as long as you're willing to let people use the results of that creation in the same way. @ms-demeanor-art-blog is where i keep most things so you won't have to scroll forever - I think the moving eyes illustration is probably the coolest thing I've drawn in a while and it would be really cool to see remixed and shared but i'm not gonna lie, it would be very funny if someone used AI to claim credit for my Venom/Eddie pornographic miniature dollhouse.
If you want a clean scan of any of my zines to distribute please let me know - i've made some of them printable but a lot of them were made since I lost access to my scanner so they just got uploaded as photos.
While you're at it, please feel free to "steal" the de-googling pamphlet, the death book, and the college-level guide to writing an essay in my pinned post. Gosh it would be just horrible if somebody widely disseminated those things without my name on them and gave free copies to everyone they knew and took credit for it. And I don't know what I'd do if people started pretending that they'd come up with my gluten-free recipes while baking them for friends.
Please for real though i actually do want as many people as possible to see the death book and i do not give half a shit if i get credit for it, if you want to strip out all of the formatting and find that last "fuck" that i forgot to delete and remove it and just print it out as a word document to give to your grandma and you tell her that you made it for her I do not care please just talk to your loved ones about end of life planning.
#also i'm not particularly interested in licensing my art#but if you want to commission a pornographic miniature dollhouse#i'm down#but that shit will be expensive
385 notes
·
View notes
Text
0 notes
Text

A quick method to deal with blurry action shots that have Hannibal's quintessential dim lighting + green color grading combo.
Here's the example I'll be using:

Don't get me wrong, I love the look of Hannibal, but the average person doesn't scroll tumblr with their screen brightness on max. Plus, night light filters and blue light glasses add even more yellow to an already heavily filtered show. If you want people to see your gif clearly, you have to edit it at least a little. Especially for extreme shots like this lol.
What I use: macOS 15.1.1 Elmedia Player 8.18 dupeGuru 4.3.1 Topaz Photo AI 3.2.0 Photoshop 25.11.0 LuLu 2.6.3 (optional, but it's nice to block outgoing connections from pirated programs)
Step One: Take Screenshots
Open your video file (1080p preferred) in Elmedia Player and navigate to the first frame of your gif. Hit "Playback > Record a Series of Screenshots" and let it run until you have all the frames you want. Unfortunately for mac users, we have a problem where a lot of duplicate screenshots are taken (like every third screenshot is a duplicate... it's so annoying). To save time later, I use dupeGuru to clean out as many duplicates as I can.
Open dupeGuru and add whatever folder you saved your screenshots to.

Scan the folder, then hit "Mark > Mark All" (you can see here that the program only caught one duplicate, which means more work later. it's not a perfect program -_-)

Hit "Actions > Send Marked to Recycle Bin..." to remove the duplicates from the folder

Step Two: Denoise
At this stage the screenshots are so dark that the noise isn't obvious, but it'll be more noticeable after brightening and sharpening. Here's the difference this step makes later:

Upload all your screenshots to Topaz Photo AI and add a Denoise layer. I normally go with the automatic settings.

Hit "Select All," "Apply > Current Settings," then export all your images. This can take a while depending on how many images you have.

Step Three: Create Frame Animation in Photoshop
If you've read any other gif-making tutorials this part should be familiar, so I'm gonna skim over it.
"File > Scripts > Load Files into Stack"
"Browse..." and select your Topaz output files
"Sort by Name" so they load in the correct order
"Ok"
Once all the layers have loaded, hit "Create Frame Animation" in the Timeline window
Under the Timeline window options menu, hit "Make Frames from Layers," then "Reverse Frames"
This is probably when you want to go through frame-by-frame and delete any remaining duplicates. It's very annoying to have to redo this step if you want to go back and edit your crop size later. (Not that I would know... 🤡)
Step Four: Crop + Resize
Crop, then "Image > Image Size" to adjust the width of your gif. You'll most likely want to use one of the common tumblr image dimensions:
Keep in mind that tumblr's gif size limit is 10 MB. But it's honestly best to keep it under 9.5 MB if you want the gif to load smoothly. A 540x540 px gif can have 40-60 frames while a smaller gif can be longer.
Make sure to add +2 px to whichever width you choose (so 542 px, 270 px, etc), since we'll be adjusting the canvas size later to get rid of transparent border anomalies.
Step Five: Color
The more common order of operations is to sharpen before coloring, but for dark scenes like this, it's kinda silly to sharpen when you can barely see what you're doing, so I like to color first.
Select all your frame layers and make a new group, just to keep them separate from your adjustment layers.
I always start by testing out the Auto Color Correction Options in a Curves adjustment layer. To access them, opt + click on the Auto button. This opens a window with four options.
I like to use a combination of "Enhance Per Channel Contrast" and "Find Dark & Light Colors," though either option can be used to adjust color balance. The important part is selecting "Snap Neutral Midtones" and picking a midtone that brings your gif as close as possible to the desired color balance.

If changing the midtone doesn't affect the color balance, brighten the gif first and try again.
For this gif, "Enhance Per Channel Contrast" removed the bulk of the green filter:

It's still pretty dark, so I brightened up the gif with some more Curves layers:

There's still a lot of purple/blue in Dolarhyde's black leather jacket, so I added another Curves layer and used "Find Dark & Light Colors" to improve the blackpoint:

Now we can up the contrast a little:

Nice! Good enough to move onto sharpening!
SIDE NOTE: The reason I use these Color Correction Options is because simply brightening leaves you with purple/blue shadows and sickly green over-exposed highlights that take ages to color correct. You can see the difference here:

(If you've ever wondered why so many Hannibal gifs have blue shadows, this is why.)
Step Six: Sharpen
This is where you'll want to start implementing actions, which are pre-recorded series of adjustments that you can perform with the click of a button. I mainly use three actions (download here, open the Actions window in PS, open the Action options menu, and click "Load Actions...").
The "frame animation to smart object" action converts the gif to a video timeline so we can apply smart filters.
The "legacy sharpening + high pass" action applies my standard sharpening filters. Not every gif will need the high pass filter, so feel free to change its opacity or delete it altogether. You can also tweak the smart sharpen filters by right clicking them and selecting "Edit Smart Filter..."

3. Once you're happy with the sharpness, the "convert to frame timeline" action turns the gif back into a frame animation. I use a 0.05 s frame delay for most gifs (equivalent to 20 fps; 24 fps is standard for tv/movies). I normally use 0.07-0.08 seconds for action shots, so the gif doesn't whip around so fast. Over 0.1 seconds, it starts to look like stop motion, so I try to avoid that.
Step Seven: Final Adjustments
This is where I fine-tune the colors, mostly using Hue/Saturation layers.
If I use a Color Balance layer, I only make very small adjustments and try to counterbalance them in the other tonal ranges (e.i. adjustments to the Highlights spill over to the Midtones, so I make the opposite adjustments to the Midtones to fix it). But most of the time, I'd rather play around with Curves or Hue/Saturation to fix stuff like that.
Hue/Saturation gives you more control by allowing you to select the exact color range you want to affect. For this gif, I used Hue/Saturation to get rid of the purple introduced around the highlights in Will's hair by the high pass filter.
The eyedropper tool allows you to select the exact color you want to include in the range. Then you can move the bars around until all the colors you don't want to affect are excluded.

Once you have your range selected, you can bring the saturation all the way down and set it to whatever lightness you prefer:

I also reduced cyan's saturation so that Will's shirt wouldn't look quite so blue.

[You could do a lot more to make the colors prettier... but there are other tutorials online for that. 😅]
Step Eight: Export
Once you're happy with your final product, go to "File > Export > Save for Web (Legacy)..."
These are my settings:

You can use Diffusion instead of Pattern if you want. Diffusion is probably better for mobile gif compression, but I like the way Pattern looks on desktop, especially for gifs with smooth gradients. It's a personal preference thing.
Hit "Save..." and you're all done!

This isn't gonna win any gif-making awards, but at least you can see what's happening and the colors don't look wonky. And for Hannibal, I call that a win! 🥲👍
46 notes
·
View notes
Text
Eliminate clutter from your digital library with Duplicate Photos Fixer: A simple solution to clean up duplicate and downscaled images effortlessly. Streamline your photo collection for a more organized and efficient experience
0 notes
Note
Not a request but can I know how do you edits gifs like when making stamps or making a moving png to make it for a gif and stuff like that, which program do you use? I looked too hard but never found anything about it
Haiii I'll explain how I make my gifs + moving pngs :3
So the two apps I use are ibis paint and alight motion
Both apps are free and tbh you can use any drawing app + editing app to do this these are just the ones my phone can handle
Websites I use are remove background online and ezgif
So first for moving pngs I get my photo with a transparent background (this is where I use remove background online)
I then open a new file on ibis (I use the square temp) and zoom in to my liking


Then I just move it side to side so we can get that movement for the gif (you can also just zoom out and in for the beating effect)


You should end up with 3 transparents
After that go to the ezgif website and upload them to make a gif


The normal png should be first followed by one to the side, the normal one again, and then one to the other side
You can duplicate the photos to make it slower and faster whatever you want

Here's your big moving png !
If you want it smaller resize it I usually stay from 100 - 200 px


That's how you making moving pngs!!!
20 notes
·
View notes