#quilting project
Explore tagged Tumblr posts
Text

Started this quilt about two years ago… And just recently finished piecing it, then basted and started quilting!
I’m quilting by hand—because I dislike quilting with my sewing machine—using thick pearl thread and bigger stitches. This makes it go a little faster.
I also recently stopped using a quilting frame and it’s made it soooo much easier to knock out a ton of work all at once. I’m hoping this one will be ready in about a month for when it gets really chilly at night so it’ll keep me warm all winter!
#art blog#artists on tumblr#quilting#quilting wip#quilting project#hand quilting#quilt making#quilt#handmade quilt#quiltblr#quilters of tumblr#quiltposting#big stitch quilting#quilting by hand#needlecraft#needlework
30 notes
·
View notes
Text

Finished my second quilt ever - got it delivered to the baby today!
#amateur quilter#learning to quilt#quilting project#quilters of tumblr#baby quilt#quilt#blanket#my quilts#my finished quilts
4 notes
·
View notes
Text

I had a nice pastel jelly roll and found this cute pattern at MSQC. I picked out the light teal for the pinwheel accent and a soft beige for the border and binding and did some simple straight line quilting on my domestic.
I should do this again. It was fun and fast and looks great.
#gay crafting#quilting#patchwork#quilt#finished project#lap blanket#free motion quilting#pastels#rainbow#pinwheel#pinwheels#jelly roll
1K notes
·
View notes
Text


Working on my quilt again. Boots is helping.
#boots!#quilting#hand quilting#my projects#how great would it be to finish this this year lol#postcards from Sweden quilt
325 notes
·
View notes
Text

Finished hand-stitching this quilt made from my dad’s old shirts last night. Sinking into craft was a good way to rest and reorient while reeling from the news. Time to learn all about binding, I guess??
#fiber art#crafting#quilting#fiber arts#quilt#hand stitching#grief#personal work#projects#improv quilting
358 notes
·
View notes
Text

quilt's done! this photo is super washed out and i couldn't figure out how to edit it, sorry about that
287 notes
·
View notes
Text

Quilt!!!
#seems I like cross-posting my creative stuff here#so. yeah!#for any Real Quilters who may stumble across this#the pattern is called ‘I made it up as I went along please don’t look too closely’#patent pending#but yeah machine pieced and hand quilted#the only new materials were the muslin for the backing#and I guess technically the linocut patches#the rest are all scraps from different projects over the years#very excited to do more of this#first person
150 notes
·
View notes
Text

Pro-craft-in-a-ting
#crafts#gifts#decor#sewing#quilting#bedding#briar rose quilts#shopping#quilters of tumblr#holiday#Pro-craft-in-a-ting#avoiding#responsibilities#craft projects#projects#housework#adult life#life
126 notes
·
View notes
Text
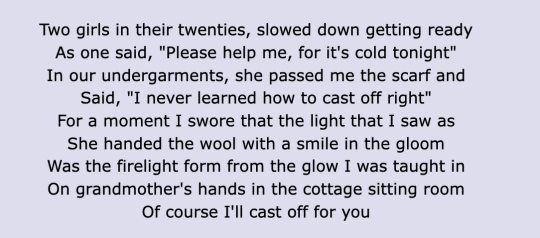
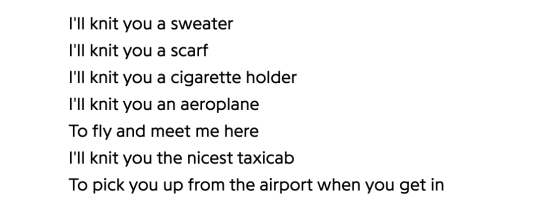
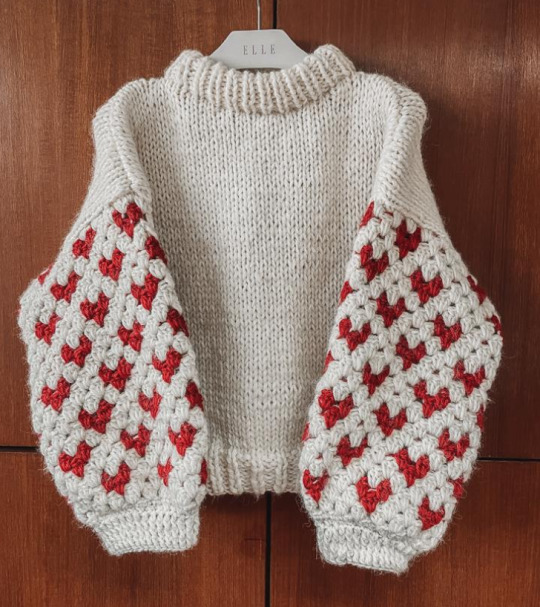


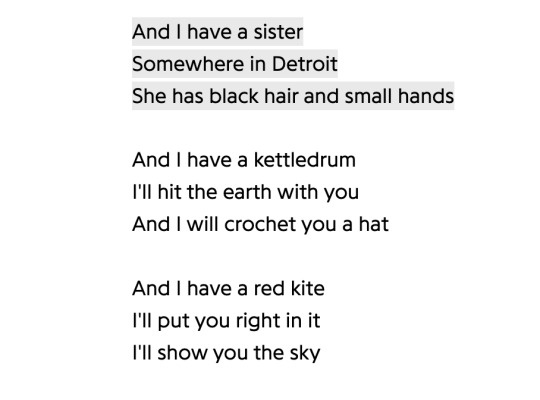

i love you and so i weave you into my art
knitting song; paris paloma // learn how to knit; hawksley workman // knit and crochet heart sweater pattern image by MissMurphy Studio // davy crochet; the backseat lovers // not a lot, just forever; adrienne lenker // sister; sufjan stevens // Loose Ends project website
#paris paloma#hawksley workman#miss murphy studio#adrienne lenker#sufjan stevens#loose ends project#knitting#crochet#sewing#quilting#weaving#fiber arts#love#poetry#mine#web weaving#webweaving#web weave#my web weaving#the backseat lovers
295 notes
·
View notes
Text

The tapir took less than a day so onto Coping Project #2: another quilt for my cat
#awi#my art#quilting#my other sister has also tentatively requested an emotional support tapir lol#so ive already got Coping Project 3 lined up#lmao
155 notes
·
View notes
Text

I recently finished this baby quilt for my newest cousin 💕 I think this is technically my fourth finished quilt?
The pattern is called “Broken Dishes” and from what I can tell is a pretty traditional one. Alternating “light” and “dark” half-square triangles gives a consistent visual effect, although I made one mistake on positioning a quilt block. Hats off to you if you can find it!
The backing is soft yellow flannel. The quilting was done entirely by hand, although I did use a sewing machine to piece the top and do some other finishing. The batting is a thinner cotton but it’s still very cozy due to the flannel.
A lot of fabric was from store remnants, project remnants, or random bits I had lying around. Actually, these triangles were going to be a basic block quilt, but I didn’t want to make that after cutting all the pieces and instead cut the squares into triangles and made this lol.
#hand quilting#quilt#artist#artists on tumblr#woman artist#quilting project#baby quilt#broken dishes quilt#needlecraft#handmade quilt#quiltblr#quilting#quilters of tumblr
30 notes
·
View notes
Text
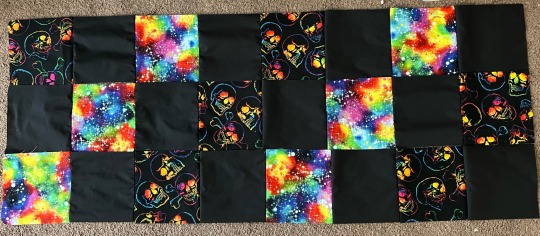
My sister-in-law/bestie is moving away from me so I’m making her a quilt! I started piecing today and I have to say I’m thrilled with how it is coming out. It was supposed to be coffin shapes but due to time I went with an easier pattern.
2 notes
·
View notes
Note
Hi! I just saw your quilted butterflies photo, and I was wondering if you would willing to share how to make them, or link to a tutorial? They're gorgeous and I'd love to try, but i don't know the right search terms to find those, i think.
Oh absolutely! Everyone needs an easy craft to do right now. This will be a photo tutorial, so if you need a video the search terms are "origami butterfly bookmark". The instructions will be pretty similar.
*If you are using a sewing machine a single butterfly should take between 15-30mins, and if hand stitching my guess is ~1hr
Tools: -2 Scrap fabrics or 2x fat quarters, one for the main/outer fabric, one for the inner contrast -I recommend quilting cotton, though any easily ironable, non-stretch fabric will work -ruler and marking tools -scissors OR rotary cutter and mat -Pins (if desired) -Thread in a matching OR contrast colour - depending on preference -Iron and Ironing board - You can use a piece of cotton folded into a thin pad in a pinch as long as it's flat!
Step 1: Cut out two rectangles. You can make the butterflies as big or small as you'd like, as long as it's in keeping with the 2:3 ratio. For me, I like to use 4" x 6" rectangles. Use your marking tools to mark out the rectangle on the back/wrong side of the fabric, then cut them out!
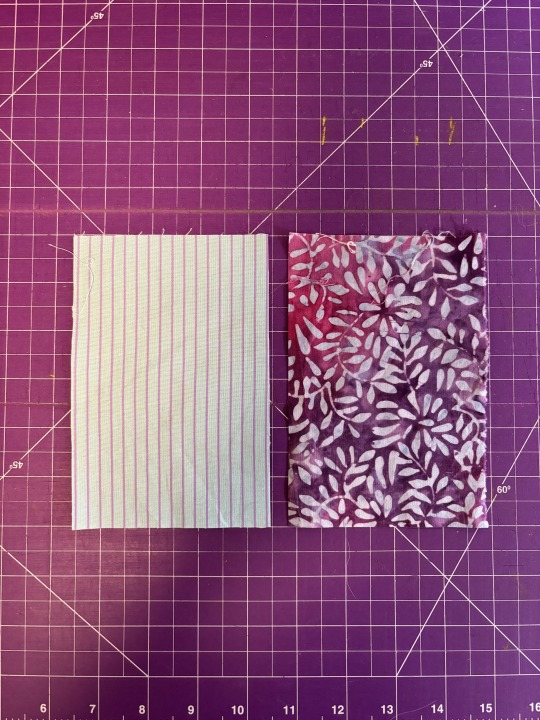
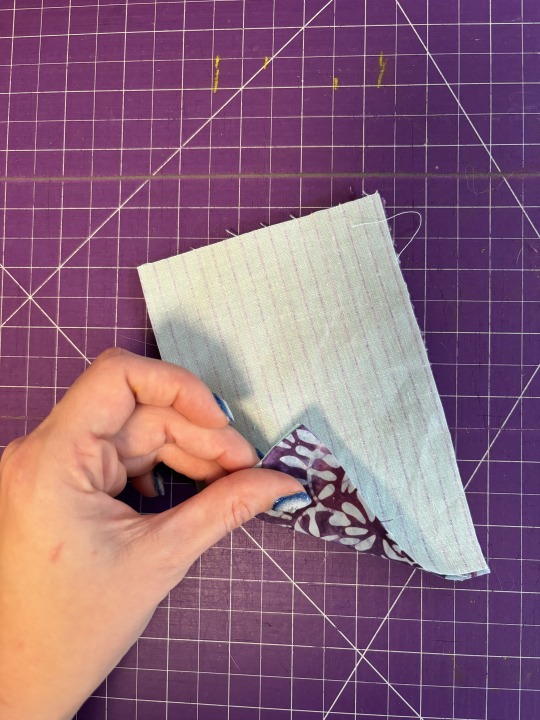
Step 2: Put the rectangles on top of each other, with right/patterned sides facing each other. Make sure all your corners and edges line up. Pin in place if using pins. (in this example one of my fabrics has the pattern on both sides of the fabric)
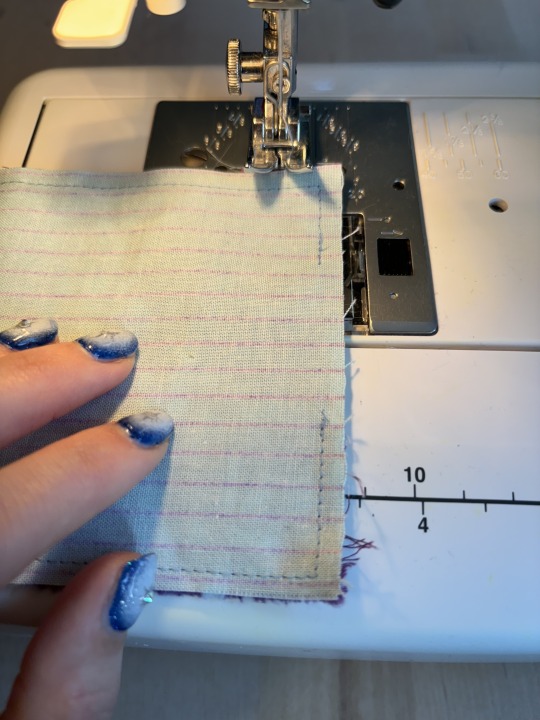
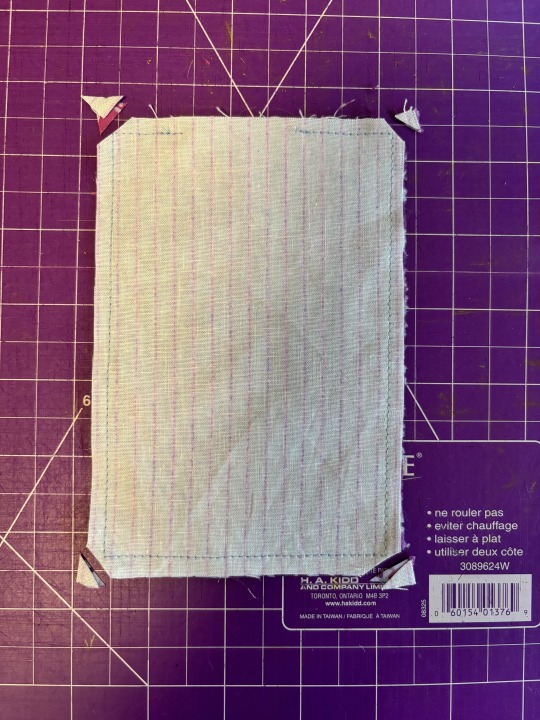
Step 3: Sewing! Mark a 2" gap on one of the short edges. If using hand needle mark out 1/4" distance from the edges. Sew. If using a machine, line up the edge with the 1/4" inch mark and sew. (Image is completed stitching, not placement on machine)
Step 4: Trim the corners without cutting into the stitching line, then flip the fabric inside out through the 2" gap you left. Make sure to stick your finger or something blunt but pokey -like a chopstick- into the corners to make sure they are nice and crisp!
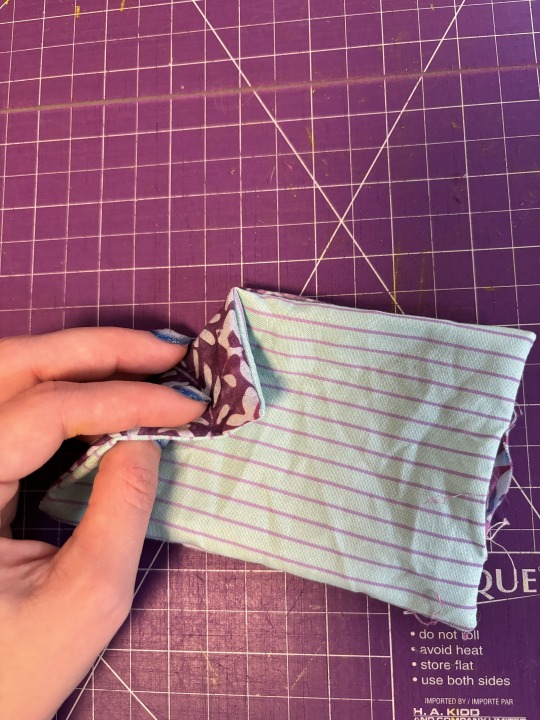
Step 5: Press all your frustrations out by pressing that fabric! Get it nice and flat and crisp! Make sure you've folded in the edges of the 2" gap to match the seam allowance of the already-sewn edges before you press. Then, if hand sewing, slipstitch the gap closed. If using a machine, set your fabric at a 1/8" distance and sew around the edges, effectively closing the gap and giving you a lovely topstitch detail.
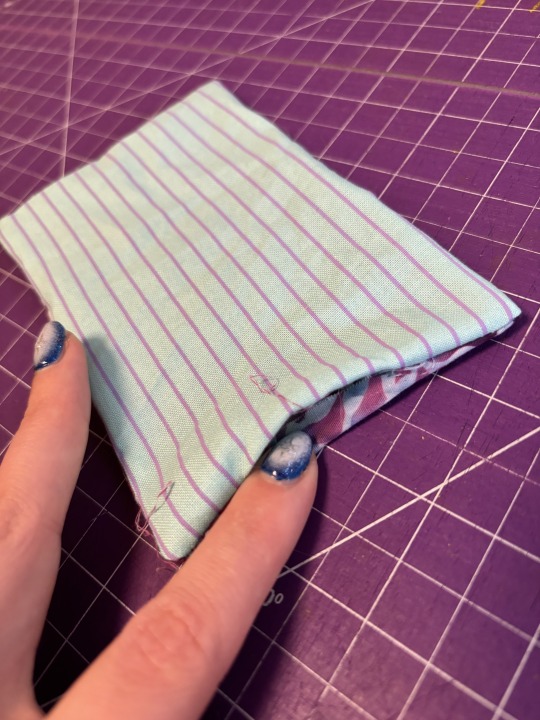
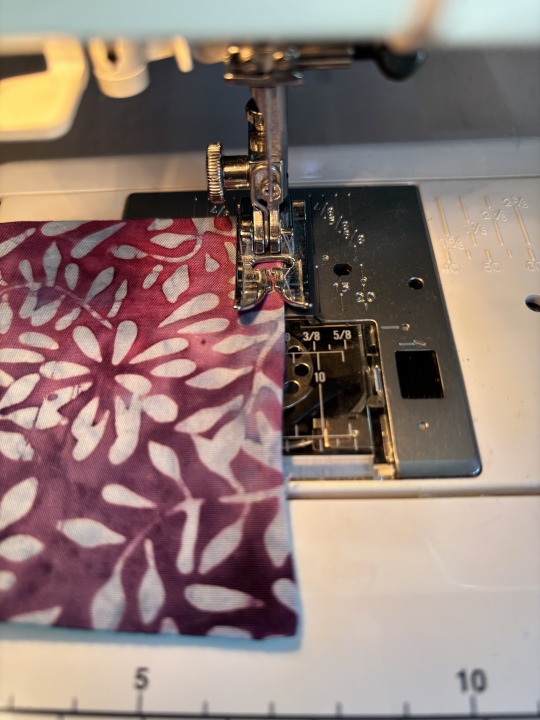
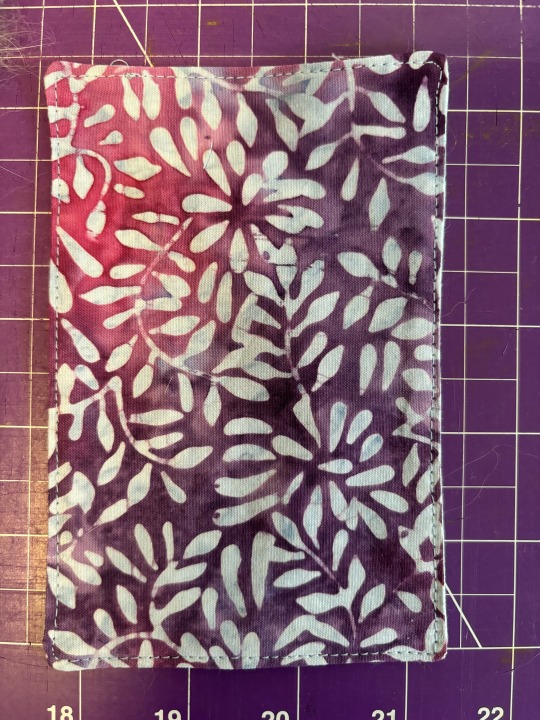
Step 6: Let's start folding! First move we're going to make is folding it in half, bringing the short edges together. Keep in mind, whichever fabric is on the outside will be the main fabric of your butterfly, and what is on the inside will be the contrast! Press hard! Then, make sure the edges you just brought together are facing you for the next step.
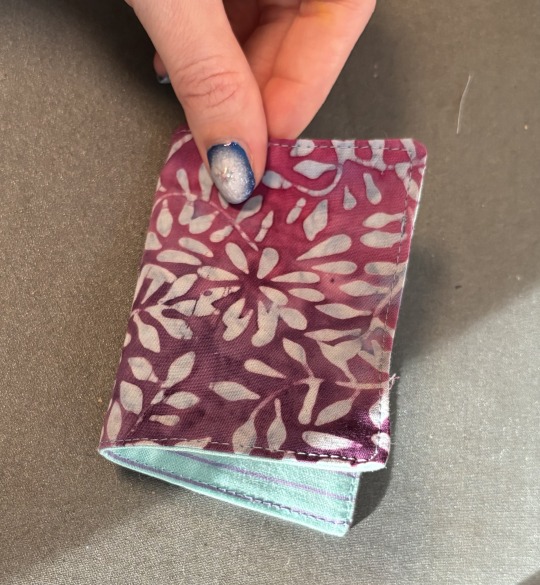
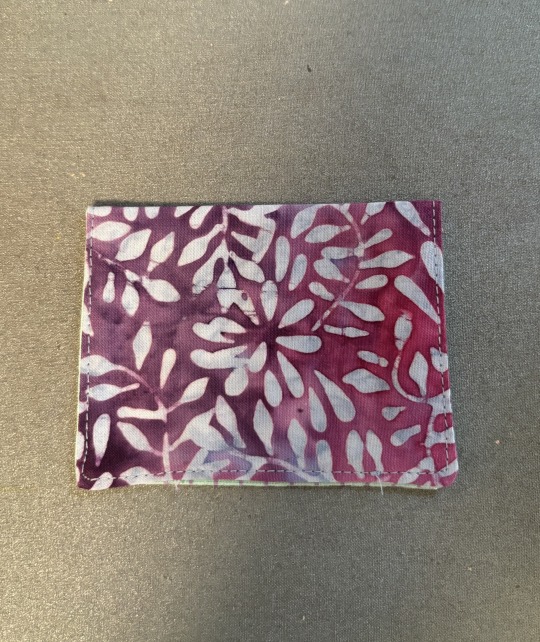
Step 7: Take the top fabric of the right open edge and bring it to the left side of the open edge. It will tent up in the corner, use this and press that tent down until you have what looks like a triangle of the outside fabric on top of two rectangles of the contrast fabric. Press! (I forgot to take pics of the whole process with the first one, don't mind the fabric switch).
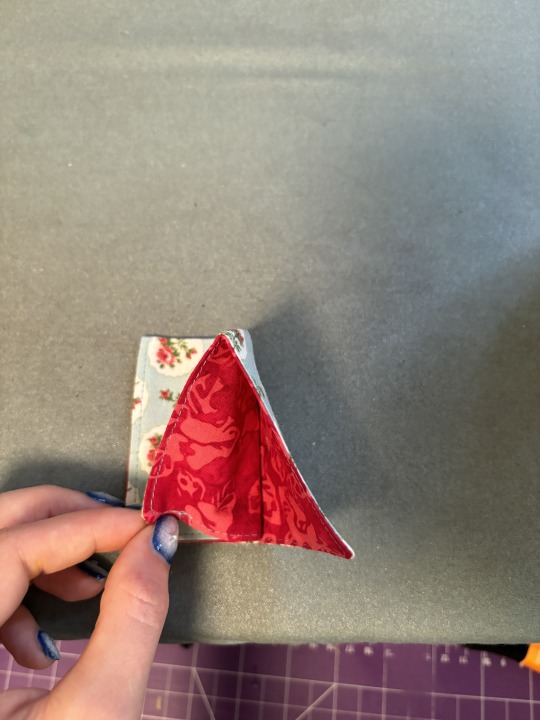
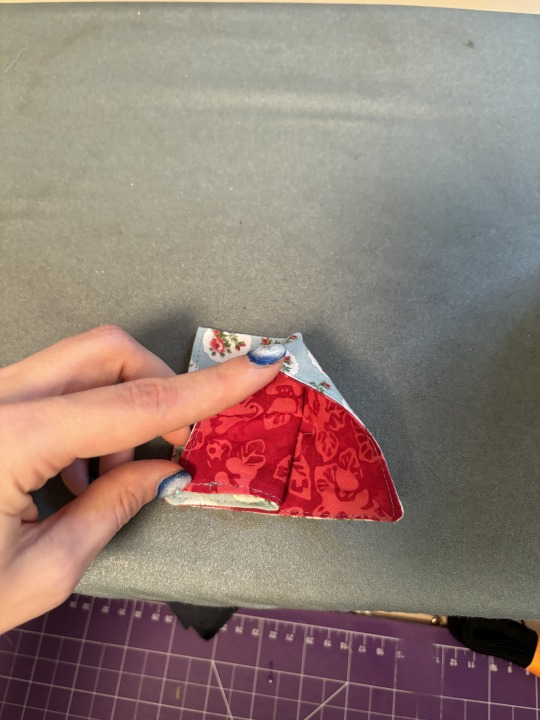
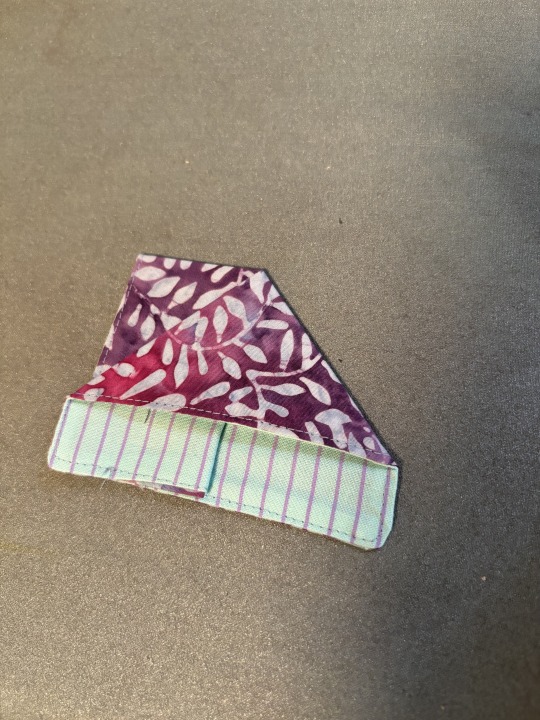
Step 7.5: Flip your butterfly and repeat step 7 on the other side until you have a strange looking triangle like this.
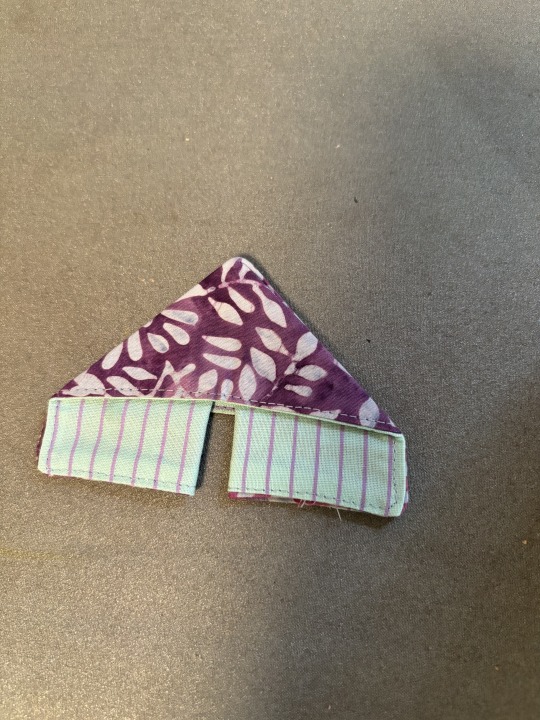
Step 8: Take the inner corners of the contrast fabric and fold it up towards the outer fabric. The bigger this fold, the more contrast fabric you will see in the final butterfly. Press.
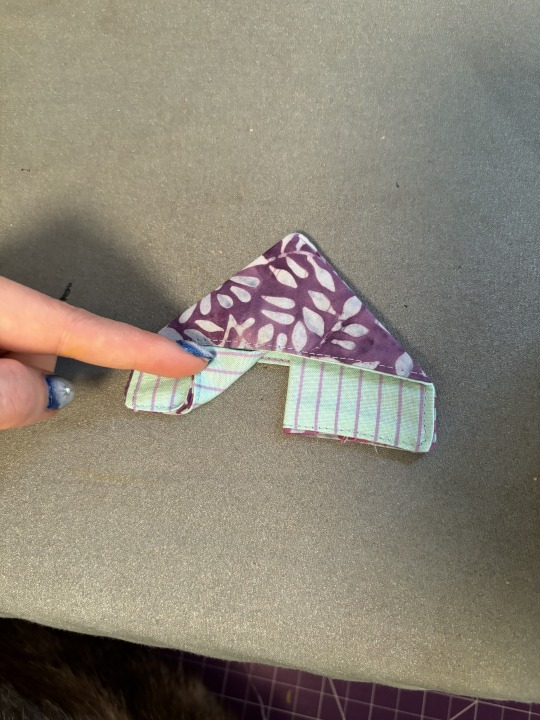
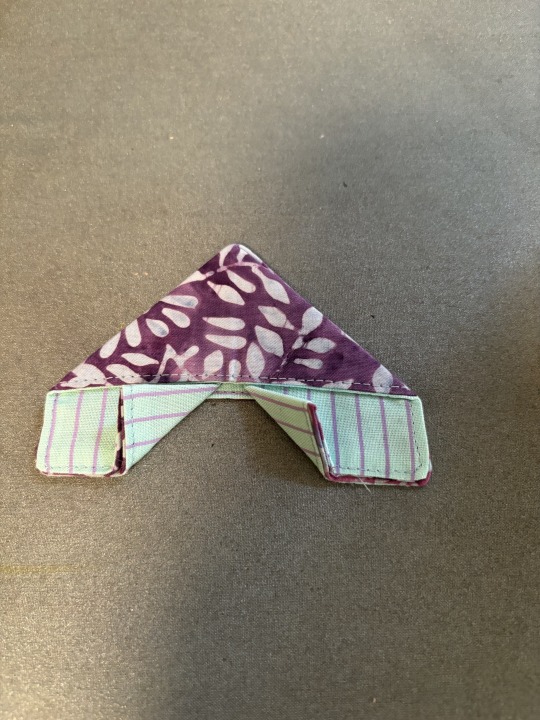
Step 9: Take the tip of one of the corners you just pressed up and bring it back to it's original position. Do not press. Gently press down on the tip of the corner, letting the fabric unfold. The butterfly wing should unfold, with the contrast fabric showing in the centre. Adjust until you have as much contrast showing as you'd like, then press hard. Repeat on the other side.
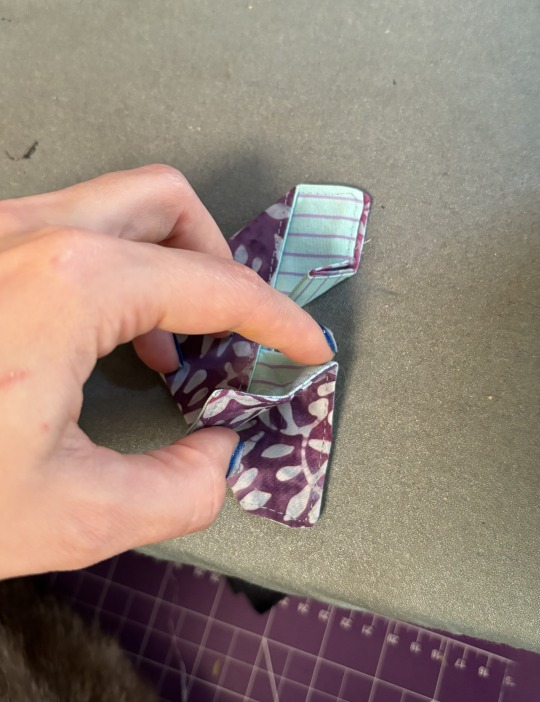
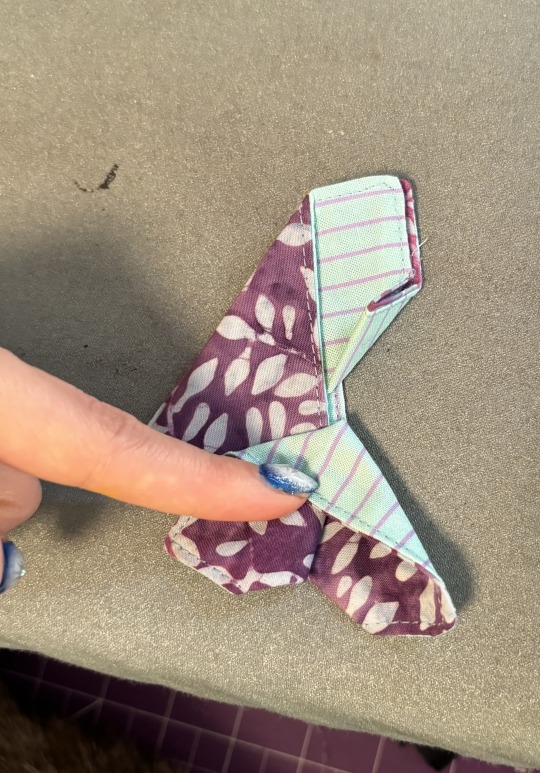
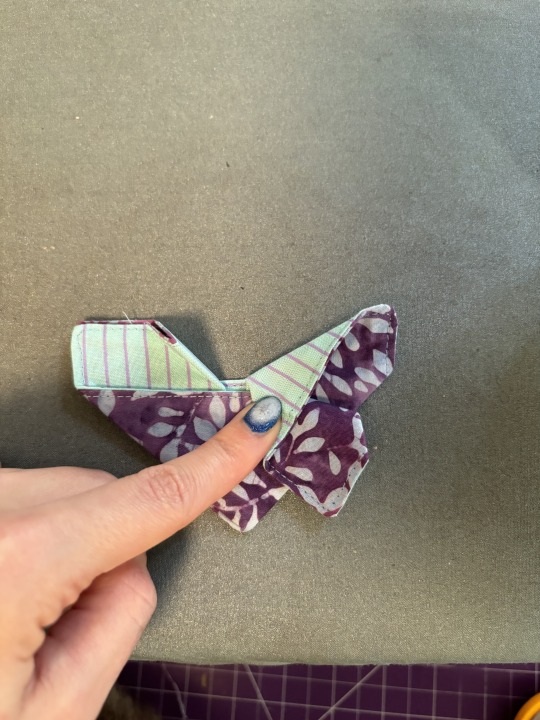
Congratulations!! You now have a butterfly!! You can make a garland, stick them on hairclips, or simply put them on your windowsill to keep you company! If you want to ensure that your butterfly doesn't unfold, you can add a small hand stitch in the centre of the two triangles that make up the "body" of the butterfly right along where the topstitching is.
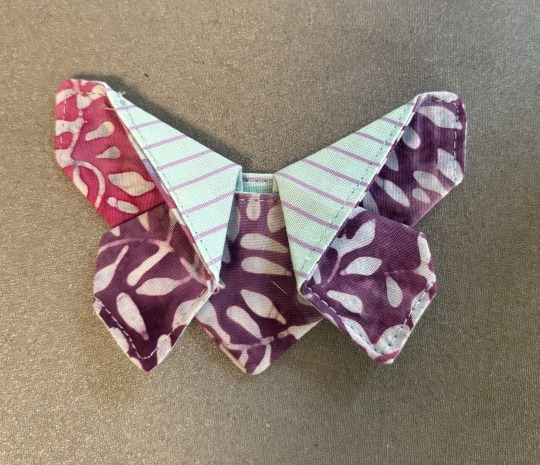
Hopefully this was clear to follow, but if you have any questions, let me know!
204 notes
·
View notes
Text

This was the first heart I did in this pattern. I loved it so much I made two more.
This was made with a layer cake, two different accents, and some border fabric.
It’s laid out on a queen, but it’s terribly short all the way around. A twin or double would be better.
I really love how dramatic the black around the center heart looks.
#gay crafting#quilting#patchwork#quilt#quilttop#finished project#hearts#heart#pink and black#metallic accents#double size
1K notes
·
View notes
Text

I am sitting on the couch working on my quilt under the heated blanket and Boots and Frankie are both asleep on/under the same quilt. It’s like a free sample of quilt. A quilt sneak peek. I think I might take a nap too.
#my projects#quilts#quilting#hand quilting#postcards from Sweden quilt#boots casts the most intense sleep spells#every time I’m next to him I’m like hmm… I should have a nap
221 notes
·
View notes
Text
it snowed several times in the last week and we rarely get snow so I strapped the baby on my back, bundled us up, and got some snowy quilt pics! more pics to come.

96 notes
·
View notes