#next best thing is screencaps...so!
Explore tagged Tumblr posts
Text


Portrait of a Lady on Fire (2019), Céline Sciamma
#*filmdiary#portrait of a lady on fire#im gonna use tumblr as a film diary this year 👍👍#still not posting gifs i just cbf#next best thing is screencaps...so!#anyway 12/10 oh my days the yearning the mutual pining the way the ending ripped a hole in my chest oh my days highly recommend ⭐️⭐️⭐️#portrait of a lady on fire daughter or brokeback mountain son
11 notes
·
View notes
Text
Okay Have some more shots of Poirot from 11.1 Mrs. McGinty's Dead because I Have Got It Bad For That Old Man & I Don't Care Who Knows It
Okay firstly? the LIGHTING in this scene are you KIDDING ME?? SO GOOD

Also He's So SHAPED


He smile :))))


Also I love it when he does that little *leans forward* thing:


& his Profile? okay? like. ???


He's just. Such a Good Looking Old Man
okay thank you for your attention
#mama I love a tiny little old Belgian detective man#He's super sexy & too smart for his own good#& he complains about EVERYTHING. & he's a DIVA. The Perfect Man honestly 10/10 don't change a thing#Yes I know. He's So Annoying^TM. Shhhh. Hush Now. It's part of his Appeal#Bless David Suchet for being the best actor to ever portray him EVER okay thanks#& Listen Agatha Christie? ma'am? I know you may not have liked him very much#You probably just got tired of people being obnoxious and busting down your door like 'SO WHEN IS THE NEXT POIROT BOOK COMING OUT'#but you see. that's why you give him to a man who can do right by him like David Suchet#and let the rest of us who can write millions of pages of fanfic love him for you#11.1 Mrs. McGinty's Dead#watching poirot#agatha christie’s poirot#poirot#David Suchet#back on my screencapping bullshit
12 notes
·
View notes
Text

#degrassiedit#kc guthrie#lisa guthrie#my edit#my edits#my screencaps#degrassi#degrassi the next generation#This storyline was so underrated and so much more could have been done with it#I understand why KC felt it was the best choice to leave and it was such a mature and selfless thing to do but his character still had#*so much potential
4 notes
·
View notes
Text

same weird family, new weird problems aka: udyati in t.he u.mbrella a.cademy. / @theseancekid & @criticalfai1ure
#eye contact /#the umbrella academy.#*mine: edits#//sdfhidfsdsiu this is a s3 still afaik but i couldn't find the s4 one i wanted without stealing someone's screenshot#//so this is the next best thing#//next up: trying to edit ud into a s1 screencap lmao#queue.
6 notes
·
View notes
Text
i confess.
han taesan x reader
inspired by an idea from my pookie bear @myugjh03 <3 yn falls in love w the admin of her school's anonymous confessions account, cute v-day dance, eunchae of lsrfim as yn's bestie! no warnings really, maybe a cuss word or two - also the texting parts yn's texts r bold and italicized n other characters r just italicized!! enjoyy
wc: 5,349
⋆౨ৎ˚⟡˖
staracademy_fess has requested to follow you!
yn ln yawns as the notifications on her phone blurred into her vision. her eyes glanced up towards the time, sighing when she decides it might finally be time to get ready for school.
the girl hums along to the tune blasting off of her tiny pill-shaped speaker, wrapping herself in a robe and beginning to exit the bathroom. she sits at her vanity after putting on her clothes, resuming her usual morning routine. the song playing gets cut off by a familiar sound, "who dare to text me when i'm so busy?!" she quotes the famous meme, cracking herself up as she reaches to pick up her phone. "huh?" she says out loud, questioning the message request that had just popped up on her screen.
staracademy_fess replied to your story: 'realest opinion ever.'
her eyebrows furrowed in confusion. 'that's so random...' she thought. yn knew of the account; an instagram page made by a student at her school where people could send in anonymous tips. it was a recent thing, the account just randomly popped up about three weeks ago, when the school had just reopened after the holidays. it was an interesting blog, and she wasn't going to lie she quite enjoyed scrolling through it's posts every now and then. 'this is so gossip girl' she'd say as she giggles at an anonymous tip dissing her ex-situationship.
but what was so random?
well, for one, she had no clue who ran the account. and for them to be replying to her story like that? seems a bit friendly for a stranger don't you think? still confused, yn decides to take a screenshot of the floating notification. she enters her password and runs straight to the messaging app to text her best-friend.
does this confess account reply to everyone's story or am i special?
the girl hits send before reverting back to the mirror in front of her, checking her reflection as she continues doing her make up.
well ik he follows everyone...but i never heard of him replying off of people's story????? maybe he likes you pookie lol
her friend's response puts her into a deep thinking session. 'he?...you mean this is a guy?' she wonders what she should do next. should she respond to him right away? is he really a him? who is he? was her friend right? does this person like her?
⋆౨ৎ˚⟡˖
"i don't know though...i mean he's really sweet and funny and he matches my energy..i just lowkey wished i knew who he was"
yn ln and the anonymous admin of their school's confess account have been talking for about a week now. it all started when she had finally decided to reply to his random text...
realest opinion ever.
she recalls the message, a response to her instagram story. it was a picture of her laptop - on it, a screencap of kurt cobain in his iconic green cardigan playing the guitar. the caption was, 'if the doctor told me i had an hour and thirty three minutes left to live, trust i will be watching this video on my death bed!'
what do you know about nirvana mtv unplugged 1993 🙄
her cocky and satirical reply was the first thing that ignited their witty relationship. what he said to her following that was something along the lines of, "more than you, i bet".
as they began to have long, daily conversations with each other, yn ln was beginning to find out more and more about him. by the one week mark she had figured out his age, his major, his hobbies, favourite foods, colours, songs, even his childhood dreams. she knew almost everything about him! well, if you take away the fact that she didn't really know anything about him at all...not his name, not his face, nor who he really is.
that didn't stop her though. she liked him. that much she knew. she liked how he typed, she liked his opinions, she liked that he matched energies with her, most of all she liked that he seemed to like her too. and a girl like yn would never let anything come in between her and someone she liked - no, not even an anonymous identity. i mean, it was only about time until he revealed himself, right? she can wait.
"so you're practically e-dating this guy...and you don't even know who he is? aren't you curious at all? what if he's a creep? or worse! what if he's...ugly"
eunchae, the girl's best-friend, squeaks, already thinking of every worst case scenario available. yn rolls her eyes, "first of all, we aren't e-dating! second of all, maybe i can see through his looks? i'm not that shallow!" she accidentally yells out the last part of her sentence, earning weird looks from the other students in the hallway. eunchae giggles, patting her friend on the back as they begin to walk to their classroom.
on the way there, yn continues to ramble on and on about her anonymous lover, starting to make guesses of his identity, "what if he's hot, that would be so incredibly perfect...like imagine if he was one of the boys from myung jaehyun's friend group...they're all hot". her focus was so out of it that she fails to see the boy crouching down near the lockers. her eyes grow wide as she stumbles over him, tripping and falling right on her ass.
"ow...fuck that hurt" she whines, still seated on the floor. laughs escape the mouth of her best-friend, who was busy recording yn's epic fail instead of helping her up. she rolls her eyes before they scan to find the poor boy she tripped on. this poor boy, however, was definitely not who she thought he was.
yn gasps when she comes face to face with none other than han taesan, one of the popular seniors from that friend group she was just yapping about. yeah, myung jaehyun's one, that's right...the one with all the insanely and unnecessarily hot people.
"are you gonna get up or...?" his voice shakes her out of her thoughts, "huh? oh! right...ahem...sorry" she clears her throat, avoiding eye contact as she begins to pick her things up and off of the ground. she doesn't know for sure but the girl swears she could feel him smile at her from behind, her assumptions proven true when she catches him giggle. "what?" yn asks, voice going all snarky all of a sudden. it catches taesan by surprise, "nothing...i just think you're cute, that's all" her eyes get big again, "m...me? cute?" she was sure her face was bright red by now. he laughs again, a lot more cocky this time, a smug look on his face like he knew something she didn't.
"see you around, yn" the boy says, beginning to walk away. 'he knows my name?' she thought, watching as he stops in his tracks and turns to face her again.
"oh! and maybe watch where you're going next time"
he was gone after that, chasing the school bell into his classroom. "what was that about? see you around, yn" eunchae wonders, mocking the guy's tone of voice as she repeated his words. "beats me...weirdo" yn says, resuming her own trek towards her math class. "you can't call him a weirdo if you're the one who tripped on him" her friend's words make her scoff, "well he didn't have to be so cocky about it!"
⋆౨ৎ˚⟡˖
and then what happened?
yn ln flops onto her bed, biting her lip softly as her fingers move to type. she was texting him, you see, she was texting her mystery man. it became a routine for her to do so, coming home after school and telling him all about her day. well, if there was anything significant about her day that is. otherwise, they'd be sending each other silly reels and song recommendations - which, as much as she loved it, did get a bit boring and substance-less after a while.
luckily - or, unluckily? - for her today, she had a fun story to share with him.
and then i totally freaked, and he was being so insanely annoying and cocky about it...like dude you're hot, we know that! doesn't mean you get to be all asshole-y
she sighs in frustration as she remembers the events of a few hours ago, waiting patiently for a text back. it usually didn't take long for one, the anonymous guy was a pretty fast texter. however, for whatever reason this time, it seemed to be taking him years to type. yn is confused, 'what could he be typing?' until alas, the bubble on his end stops moving, a message replacing it.
maybe you should've watched where you were going. i mean you DID trip on him cause you weren't focused
the girl's heart stops for a moment. there was something wrong with his text, yet she couldn't for the life of her tell what it was. it just felt...odd - like the person she had just been chatting with disappeared into thin air. there was a hint of passive-aggressiveness in his tone; maybe she was overthinking it...i mean it wouldn't be the first time he was cold and sarcastic with her. that's just how he is.
you know what's funny? that's exactly what he said lmao...no way...don't tell me the man behind this account is THE han taesan LMAOO
yn didn't think much of it when she typed up that response, she knew there was no way in hell such a popular and handsome guy like taesan would run such a dumb and silly confession account...right?
shit...have to help my dad set up a new TV, ttyl
their conversation ended there. again, she paid no mind to it's sudden end. she knew he'd reach out to her again a little later, possibly to moan and groan about how much of a hard time he had setting up the television.
yn only began to worry when that didn't happen. it had actually been hours since their last conversation and he hadn't squeaked a single word to her - not even a single stupid reel, not even a song recommendation.
where'd he go?
⋆౨ৎ˚⟡˖
"why do you look like that?" eunchae asks, sitting beside her best-friend at the school cafeteria. "like what?" the girl replies with another question. "i don't know...maybe like you just witnessed someone kill off your entire bloodline?" yn rolls her eyes, not uttering another word. "you've been looking gloomy all week...ever since..." eunchae gasps, "is this because of when you tripped over han taesan? cause if it is...girl, i can delete the video if you want me to" this time the girl looks at her friend in disbelief. "oh god, it is because of that, isn't it? girl, you should've just said so and i would-" she doesn't let her friend finish. "you took a video?! and no it isn't because of that...but you took a video?!"
eunchae chuckles as she nods, "i promise i'll delete it...but if it's not cause of that...then what?" yn sighs, "if i tell you, promise not to laugh?" she asks, some kind of a hopeful gaze in her eyes. her friend nods enthusiastically, "when have i ever laughed at your misfortune" - "eunchae. i'm serious" her face is stern, not even a hint of playfulness, and her friend obliged.
"it's the confessions guy..." yn starts, her voice quieting down as she trails off. "you mean your mystery lover boy?" the girl nods, "we haven't texted in four days now..." eunchae's eyes widen in shock, "what? why?!" she seemed just as furious as the girl was. "that's the thing, i don't know! last time we talked i was telling him all about tripping over taesan...he was being unusually cold and dry...then he left to help his dad set up a new TV and then he never texted me since..." her voice was glum, like she was genuinely lost and upset about this whole thing. her friend's gaze softened, "have you tried reaching out to him first?" yn shook her head, "i don't know why...i just can't bring myself to"
eunchae pats the girl on her back, "hey...what if you just give him a few more hours, and if he doesn't text you then just text first, how about that?" yn sighs, "do i have any other choice?" the other girl smiles as she shakes her head, "nope!"
later that day yn ln goes home from school, still feeling like shit. she frowns as she turns her speaker on, a loud ding sound letting her know the bluetooth was connected to her phone. a tune begins to fill the gaps in her room, reality by richard sanderson, one of his favourites.
the girl groans as she throws herself onto the bed, not caring enough to change out of her uniform. she rolls over to lay on her back, staring up at the posters on her ceiling - namely, the giant one in the middle, a poster of the guy who had brought her and the anonymous boy together in the first place. before she even realized, yn had begun to talk to it.
"oh, kurt...whatever should i do?! this is all your fault. if i hadn't put your stupid performance on my story that day then he wouldn't have replied, we wouldn't have talked, i wouldn't have fallen in love with him...i don't even know his fucking name! kurt...how cooked am i? i spend every waking hour thinking about him, guessing his identity, wondering what i did wrong to have him ignore me like this! it's unfair...why does every relationship i get into end this way?"
the last bit of her unscripted monologue brings tears to her eyes. it was true. yn ln had quite the history of horrible relationships. hell, some wouldn't even consider them relationships. the first guy she dated only did it because he was dared to, the next guy decided he was actually into his own sex half-way through their one week long relationship, the last guy she was with - well, she was never really dating him, he was a dick and she was naive enough to like him for his looks and status. all in all, she's never been successful in the love department - she found that no one really got her...until he did.
"why is it that the one guy who actually understood me has to be some fucking anonymous admin...i mean, seriously? and even then...it seems i blew it already, didn't i?" yn whines, starting to get annoyed at the fact that her posters stayed quiet - duh, they're posters! she rolls over again, just far enough to reach her phone. the girl wasn't planning on doing anything on it, but like clockwork her fingers naturally lead her to his chatroom. she stared at it, as if staring would do anything to fix the situation she was in. that is, until it did.
the animation on his side of the chat, indicating that he had begun to type, sent her heart flying. her eyes went wide, mouth dropping opened as if she were going to scream - she didn't though, her parents were home. yn bites her lips, her face so close to the screen she swore she could feel how her eye-sight worsened by the second. and then the animation stopped, a second later it was replaced with a body of text.
are you going to the v-day masquerade dance tomorrow?
that's it? yn didn't know what to think; so she didn't, she let her thumbs do all the thinking for her.
YOU DONT SPEAK TO ME FOR FOUR WHOLE DAYS AND YOU DONT EVEN START WITH A HI? A SORRY????
look, i'm sorry about that i just...i was doing a lot of thinking and stuff
she rolls her eyes, 'what a lame excuse' she thought. still, she couldn't stop herself from smiling softly, she really missed him.
about what??? what could you have possibly been thinking SO much about that you don't talk to me!??!?!
well that's the thing...i was thinking a lot about us.
'huh?' if yn ln wasn't confused all week, she was definitely confused now.
wdym us?
it takes him exactly four minutes and twenty seconds to reply. she knows this because the moment she sent her text, how was your day? by beabadoobee started playing, and it ended the minute his message came in.
will you meet me at the masquerade dance, or no?
for some reason, his words annoy her a bit.
i don't know anything about ur appearance and u expect me to meet u in a dark gym hall where every guy is wearing a suit and a MASK??
well that's the point, love. i trust you'll know it's me in the moment...unless you're not curious about me at all then that's fine i guess we'll just never meet
what a bitch. she's intrigued though.
fine, i'll see you tomorrow then
see you there 💖
yn ln genuinely smiles for the first time in four days, laying down on her back to stare up at her posters again. "well kurt, it seems this love story isn't entirely over yet...you think he'll finally reveal himself to me tomorrow night?" she asks out loud, as if the pieces of paper she talked to could respond. "shit!" she exclaimed all of a sudden, sitting up straight.
"what do i wear?!"
⋆౨ৎ˚⟡˖
"does this look dumb or...?"
yn ln asks for the nth time, twirling around in her thousandth outfit idea for her best-friend to judge through their face-time call. "ew no, i liked the last one better, this one doesnt match your mask- wait try the last dress with that one fluffy bolero you have" eunchae's voice came out a second late due to the connection issues, but yn could understand her just fine. "okay wait let me try that" she says, disappearing from the camera's view and into her closet.
"how's this? cute right?" the girl smiles, spinning around to give her bestie a full 360 view. her dress was a light baby pink and it was short, stopping right above her knees. she wore a pair of tights underneath to prevent getting dress-coded, and a pretty white faux-fur bolero over her shoulders to shield her from the cold. her whole outfit matched perfectly with her silver mask, fine specs of pink and white glitter decorating it's surface. "yes! love it!" eunchae cheered, "what shoes are you wearing?" - "i want to wear the pink platforms...but what if he's short and then our super sweet kiss scene gets awkward?" she caught her friend rolling her eyes through the screen, "wear the white mary janes then, it matches your bolero anyways"
"okay...make up time!"
the girl spends the next few hours touching up her looks for the big night. she stares in the mirror over and over, making sure there wasn't anything abnormally wrong with her. yn slumps down onto her bed, careful not to wrinkle her dress. she sighs, an odd sensation bubbling up in her stomach.
"what am i so worried of?" she asked, eyes lingering at her reflection. the pinging of her phone removes her from her trance, a smile replacing the fearful look on her face as she read the message, his message.
you're not having second thoughts, are you? let me know when you're there
it's all or nothing now.
after making sure she didn't forget anything, yn jumps into the passenger seat of her dad's car. "you good, kid?" he asks, noticing the uneasy look on his daughter's face. "huh? yeah, i'm good, dad...let's go" the man nods, "whatever it is, i'm sure this'll fix it!" he said, a pointer finger reaching out towards the radio, pressing play. the girl laughs as a nostalgic tune enters her ears, black or white by michael jackson. "remember when you'd beg me to play this on the way to kindergarten?" she nods along to her dad's words, beginning to sing along to the song with him.
they make it to the school's campus in no time, stopping the car right at the drop off zone. "thanks for driving, dad. sorry i didn't tell you sooner...didn't think i was coming until i got asked" the man shakes his head, "anything for you, kiddo - can i ask why you won't tell me who the lucky boy is?" yn smirked, "i would love to, dad...i just...don't know who he is either!" that response made mr. ln's eyebrows knit together in confusion, but before he could ask anymore questions, the girl had waved him goodbye and disappeared into the building.
"oh, yn...whatever you're up to...please don't hurt yourself"
yn puts on her mask before entering the gymnasium; the usually sweaty and sports-full area had been completely turned into that of a ballroom. valentine's day themed decorations hung on every corner, hearts and bows completing the scenery. the girl smiles, wondering why it took her this long to ever attend these annual school events. 'who knew this dump was capable of looking so pretty?' that was the last clear thought she had before her conscience returned to reality. all of a sudden the heart-shaped lanterns weren't all that lovely, the romantic music playing earlier had turned into loud and hardcore techno, and worst of all the people inside the gym with her seemed to have multiplied by tenfold.
at this point it was getting too much to bear. she could barely see out of the tiny eye-holes of her mask to begin with, how was she supposed to find her mystery man in this crowd? a second away from panicking, yn escapes the rowdy gym and finds solace in the quiet hallways. she pulls her mask off for a moment to breathe, a hand clutching onto her chest - maybe this is why she never cared to go to these dances.
the girl reaches into her hand-bag, pulling out her phone. her thumbs danced against the screen and she opened up instagram to text her anonymous date.
where r u???? it's too loud i hate it i wanna go home
he replies right away.
agreed, i'll wait for you in your classroom...it's quiet and empty here
yn doesn't text back, simply nodding to herself. she gulps and takes in a deep breath as she pulls the mask over her head again. she straightens her back, walking towards her classroom and stopping right at the foot of the door. she could see his figure through the textured glass windows; he faced away from her, all she could make out was his black suit and the back of his head, where the ribbons of his mask dug into his hair. this was it. she was finally inches away from meeting the boy she had been so in love with the past few weeks, inches away from knowing his real identity. yn couldn't wait another moment - yet, at the very same time, something was stopping her from entering the room. a sense of severe nervousness rushing through her veins.
he must've felt her lingering presence and she watched as the figure inside the room turned in her direction. both masked, identities hidden, yet it felt like they could see right through each other. as if telepathically, yn felt him call for her; though he didn't utter a word. with that, the palm of her hands finally came in contact with the door, pushing it forward ever so slightly and allowing herself in.
"hey"
yn gasps as he speaks to her for the first time, his voice doesn't sound foreign at all, but she can't remember where she'd heard it from before. "hey..." her tone is more hushed than usual, breathy as she walked closer to him. they stood beside each other now, staring out the classroom's window, and up at rising moon. the girl can't help but stare at him, scanning everything that was visible to her. he's here now, flesh and skin in front of her. his dark hair, his pale skin, his tall build, his pink lips, and his milky brown eyes hidden behind his deep maroon coloured mask that covered the top half of his face. but still, she hadn't a clue who he was.
the mystery man chuckles, breaking their silence. "you can stop staring at me, yn...i'm not going anywhere" she opened her mouth to reply but nothing came out, she couldn't speak no matter how hard she tried. the pair went back to looking out the window in silence, there was no sense of awkwardness in the air though. in fact, it was nothing but comfortable.
"i like you"
it takes yn a solid ten seconds to process the words that came out of his mouth. even after they sunk into her mind she stood frozen, shocked. "w...what?" the boy's smile is visible, "i like you, yn...do you like me too?" there's a hint of playfulness in his voice, it was as though this whole ordeal wasn't too big a deal to him - unlike the way it was to her.
"i don't even know you...how am i supposed to tell whether what i feel for you is real or not?!" her tone was a lot stronger than she had planned, she gasped and slapped a hand to her mouth. she didn't mean to yell, the pressure of the situation stressed her out in ways she swore no one could imagine. the masked boy didn't fight back though, she could see his eyes softening beneath plastic that covered his face as he stared into her own. they held eye-contact for what felt like ages, no other sound apart from the loud beating in their chests. "yn..." he calls out for her, though his previously playful tone was long gone now. "yeah?" she questioned, barely above a listenable decibel.
"can i kiss you?"
her eyes get big and the girl contemplates for a second. she decides that the only correct answer was yes. besides, this was the moment she'd been yearning for all week, wasn't it?
her slight nod was all the confirmation the boy needed before he took a step closer towards her. he leans down until they were just a single breath away from one another. his hands were cold as they pressed lightly against her blushing cheeks, pulling her in. suddenly, the pair was devoid of space, their masks making a clinking sound as their lips crashed against each other's. the kiss was intense, more than anything else; a hint of desperation in the way his hands snaked down to her waist, her own ones placed against his neck.
the growing moonlight illuminated the scene, neither of them planning to let go any time soon. as the kiss began to get more passionate, yn's fingers found their way into his hair, playing with it's ends then moving up to where the ribbons of his mask sat in a knot. she doesn't give it another thought, pulling on the strings until they came undone. the boy gasps, eyes widening as they finally pull apart, the plastic material falling to the ground between them.
a breath escapes the girl's lips, her eyes beginning to water at the sight in front of her. a mixture of shock and confusion painting her complexion as she furrows her eyebrows. she can't even bring herself to blink, this was too unreal. the mystery identity of the boy she had fallen so deeply in love with...
"t...taesan?"
he sighs.
"y...yeah"
yn takes in another deep breath before ultimately breaking into a fit of laughter. "why...why are you laughing?" taesan is the confused one now, watching through knitted brows as the girl before him pulls herself together. "nothing...i just didn't think it was really you..." she said, beginning to remove her own mask. the boy's eyes glimmer a little, "what?" she asks, tossing the silver plastic onto a desk. "you're so pretty" he says, reaching his hand out to tuck a strand of her hair behind her ear. she smiles, leaning her face into his palm.
"thank you...and i'm sorry" taesan tilts his head to the side, "for what?" she laughs again, "for bitching about tripping over han taesan and calling him an asshole...i had no clue i was talking directly to him...sorry" the boy chuckles, "yeah, that was kind of mean you know?" he pouted dramatically, something about his face made her heart skip a beat. "is that why you totally ignored me for four days after?" he was taken aback by her sudden inquiry, "maybe...sorry about that, love" her cheeks turned a deep shade of pink from the nickname. "but you know..." taesan speaks again, stepping closer and slipping his hands into hers.
"you should really watch where you're going next time!"
the familiarity of his statement sends the girl through a trip of deja vu, "you know that's technically your fault...i was thinking about who you were after all, and then i couldn't focus and then i tripped!" he smiles, "does that mean you like me too?" she rolls her eyes, "i never said that" - "but you never said you didn't"
yn ln sighs in defeat, watching the smug grin that was making it's way onto han taesan's lips. "how about you kiss me again? maybe after that i'll know whether i like you or not" the boy laughs, "you just want to kiss me, i think that's proof enough" she shakes her head in disbelief, "shut up, please?" - "make me"
and with that the space between them vanished once more, their noses bumping and their breaths short as they kissed. it didn't last as long as their last one, separating for air after the first two minutes. "okay...i confess..." yn says as she catches her breath. "mhm?" taesan hums, staring into her eyes.
"i like you too"
⋆౨ৎ˚⟡˖
"oh, that's my ride!"
yn waves, signaling for her dad to come towards her. the window of the passenger seat rolls down, and the pair are met with a sleepy looking mr. ln.
"hey dad, this is my boyfriend, taesan!" the girl chirped joyfully, shooting her dad a smile. "uh...hello, mr. ln...it's nice to meet you!" the boy has a hopeful look on his face, biting down on his lip worriedly as the older man began to eye him down. "nice to meet you, kid! you better be treating my princess right...if you break her heart" - "dad! stop scaring him! we just got together, don't shoo him away"
both the guys laugh at yn's outrage. "bye, taesan. thanks for tonight, is it too early to say i love you?" the boy smiles, "thank you. and no it isn't, i love you too...and" he pulls her into a hug, leaning closer to whisper into her ear, "it's too scary to kiss you in front of your dad so i'll do that another time"
taesan watches as yn gets into her car, "i'll pick you up tomorrow, yeah? we could get froyo and go to the record store and-" he gets cut off as the girl's dad butts in. "record store? you into music, taesan?" he nods excitedly, "yes sir! love it more than anything in the world...well, maybe not as much as i love your daughter" the older man scoffs, "that's what i like to hear...how you getting home, kid?" he asks, "i'm driving. my car's parked over there" he pointed towards the parking lot and the two guys share a few more nods.
"well then, get home safe, kid"
"i will, thank you. you guys get home safe too! um, text me when you're home, okay?" yn smiles up at her boyfriend, "mhm! see you tomorrow, bye!"
she rolls her window back up as her dad begins to drive away. "i like him" her dad says all of a sudden. "yeah?" she asks, wanting confirmation from her father who just nods.
"i like him too"
the end.
⋆౨ৎ˚⟡˖
ahhhhh this fic is kinda longggg i was working on it for six hours straight TT tysm to eli my pookiebear for this awesome ideaaaa i hope i did it justice <3!! also yn ranting to her cobain poster and then taesan getting along w her dad a bit at the end is so cutesy so true!!!! anyways, thx for reading - i hope u liked this one! reblogs n feedbacks r always appreciated :3 love, kona.
#kona's work ♡#boynextdoor#boynextdoor x reader#boynextdoor imagines#boynextdoor drabbles#bnd x reader#taesan#han taesan#han taesan x reader#taesan x reader#bnd taesan#taesan imagines#boynextdoor taesan#taesan scenarios#han dongmin#boynextdoor fanfic#boynextdoor scenarios#boynextdoor headcanons
167 notes
·
View notes
Text

COLORING + SHARPENING TUTORIAL
someone asked for a coloring tutorial and my sharpening settings, so here it is! there are also a few tips to achieve more HQ gifs. :)
tutorial under the cut!
FOR HIGH-QUALITY GIFS
FILE SIZES
it doesn’t matter what your sharpening settings are if the file you’re using to gif is too low quality, so i tend to look for the best that i can get when downloading stuff.
usually, movies (+2h) look better if they’re 5GB or more, while an episode (40 min/1h) can look good with even 1GB. the minimum definition i try to find is 1080p, but i gif with 2160p (4k) when available. unfortunately, not every computer can handle 4k, but don’t worry, you can gif with 1080p files just fine if they are big enough. contrary to popular belief, size does matter! which means sometimes a bigger 1080p file is better than a smaller 2160p one, for example.
SCREENCAPPING METHOD
this can too influence the quality of your gifs. as a gifmaker, i’ve tried it all: video frames to layers, directly opening video clips, loading files into stack, and i’ve finally settled down with opening screencaps as an image sequence. with bigger files, it doesn’t matter much what technique you use, but i’ve noticed with smaller files you can do wonders if you screencap (either by loading files into stack or opening as an image sequence) instead of using video clips. for example, this gif’s original video file was only 4GB (so smaller than i’ve usually go for), if you can believe it!
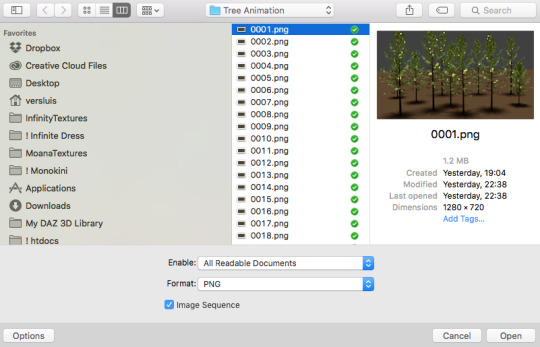
here’s a tutorial for setting up and screencapping with MPV, the media player i use to screencap. again, you can keep using video clips for bigger files, but you’ll find this useful when dealing with dire causes. i don't file loads into stack, though, like the video does. i open as an image sequence (open > screencap folder > select any image > click the image sequence button). just select OK for the speed. this will open your screencaps as a video clip (blue bar) in timeline mode (i'm a timeline gifmaker, i don't know about you). you will need this action pack to convert the clip into frames if you're a frames gifmaker. i suggest you convert them into frames even if you're a timeline gifmaker, just convert them into a timeline again at the end. that way you can delete the screencaps right away, otherwise you will delete the screencaps and get a static image as a "gif".
ATTENTION if you’re a Mac Sonoma user, MPV won’t be an option for you unless you downgrade your system. that is, if you have an Intel chip. if you have M1 Max chip (or even a better one), here’s a fix for MPV you can try while keeping that MacOS, because nowadays MPV is skipping frames in its latest build. or you can use MPlayer instead for less hassle. here are two tutorials for setting and using MPlayer. Windows users are fine, you can use MPV without trouble.
FOR EVEN MORE QUALITY
ADD NOISE
here’s a tutorial for adding noise as a way to achieve more HQ gifs if your original material is too low quality.
REDUCE NOISE WITH CAMERA RAW
instead of adding noise, you can reduce it, especially if your gif is very noisy as it is.
the path is filter > camera raw > detail > nose reduction. i do this before sharpening, but only my video file isn't great to begin with. because it’s a smart filter, you can reduce or increase its opacity by clicking the bars next to its name in the layers panel.
TOPAZ AI
i use Topaz Photo AI to increase the quality of my screencaps when i need to. it’s paid software, but there are… ways to find it for free, usually on t0rrent websites. if someone’s interested, i can make a tutorial solely about it in the future.
SHARPENING SETTINGS
here are my sharpening settings (filter > sharpen > smart sharpen). i sharpen things twice: 500% 0.4px + 10% 10px. here's an action for it, for more convenience. here's a tutorial on how to use Photoshop actions. for animated stuff, i use this action pack.

COLORING
here’s the gif i'm gonna use as a base. it’s already sharpened like the way i always do it.

LIGHTNING THE SHOTS
half of the secret of a good coloring is good lightning. i always useCurves (layers > new adjustment layer > curves) and Brightness & Contrast (layers > new adjustment layer > brightness & contrast). the settings depend on the scene you’re giffing, but i always try make my gifs bright and with high contrast to make the colors pop.
CURVES
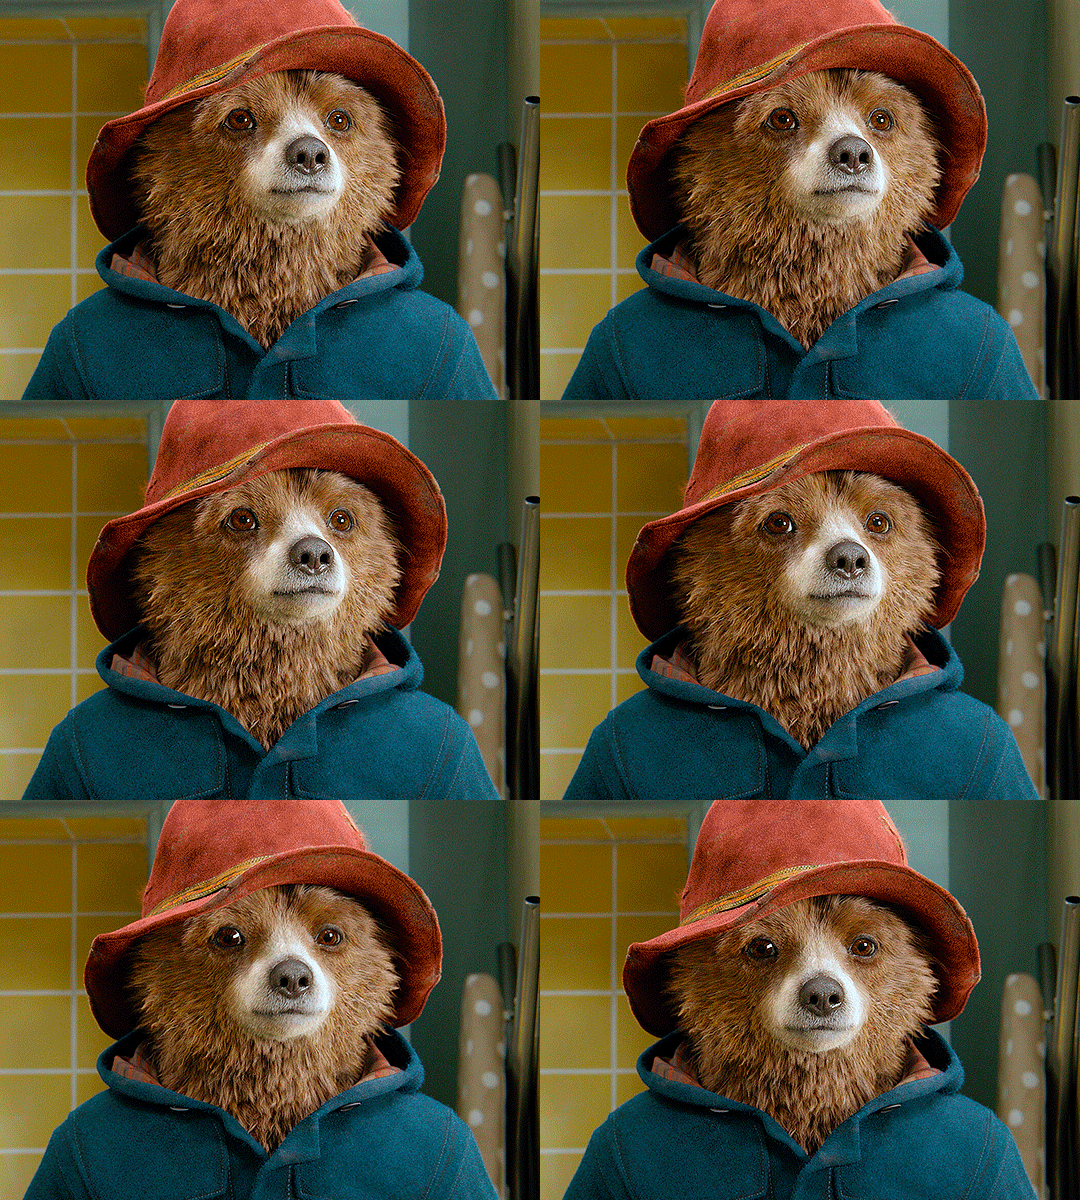
besides lighting your scene, the Curves adjustment layer has four automatic options that will color-correct it for you. it’s not always perfect and it doesn’t mean you won’t need to do further coloring, but it’s a great start. it’s a lifesaver for most ridiculously yellow scenes. look at the difference! this gif uses the 3rd automatic option (the screenshot below isn't mine btw so that's why the fourth option is the chosen one), from top to bottom. what automatic option you need to choose depends on the gif.



sometimes i like to tweak my Curves layer. not everybody does that, it’s not that necessary and if you’re not careful, it can screw your gif up. to modify your layer by hand, you will need to click and drag points of that straight line in the position you desire. this is the concept behind it:

basically, the lower part of the line handles the shadows, while the upper part handles the highlights of the image. if you pull a highlight point up, the image’s highlights will be brighter. if you pull it down, it will make them darker. same thing for the shadow points. you should play with it to get a grasp of it, that’s what i did when i first started giffing.
BRIGHTNESS & CONTRAST
then i added a bit of brightness and contrast.

CHANNEL MIXER
the scene looked a bit too yellow, so i used the Channel Mixer (layer > new adjustment layer > channel mixer) adjustment layer. here’s a tutorial of how it works. not every scene needs the Channel Mixer layer though, i mostly use it to remove heavy overall tints. in this particular case, the Curves layer got rid of most of the yellow, but i wanted the gif to be just a bit more blue so the Channel Mixer tweaks are very minimal.

SELECTIVE COLOR
now, this adjustment layer i always use: Selective Color (layer > new adjustment layer > selective color). this is THE adjustment layer to me, alongside the Curves one. this is how it works:

ie, you can separately edit a color this way, giving it tints. for this gif, i wanted to make the colors more vibrant. to achieve that, i edited the selected colors this way:
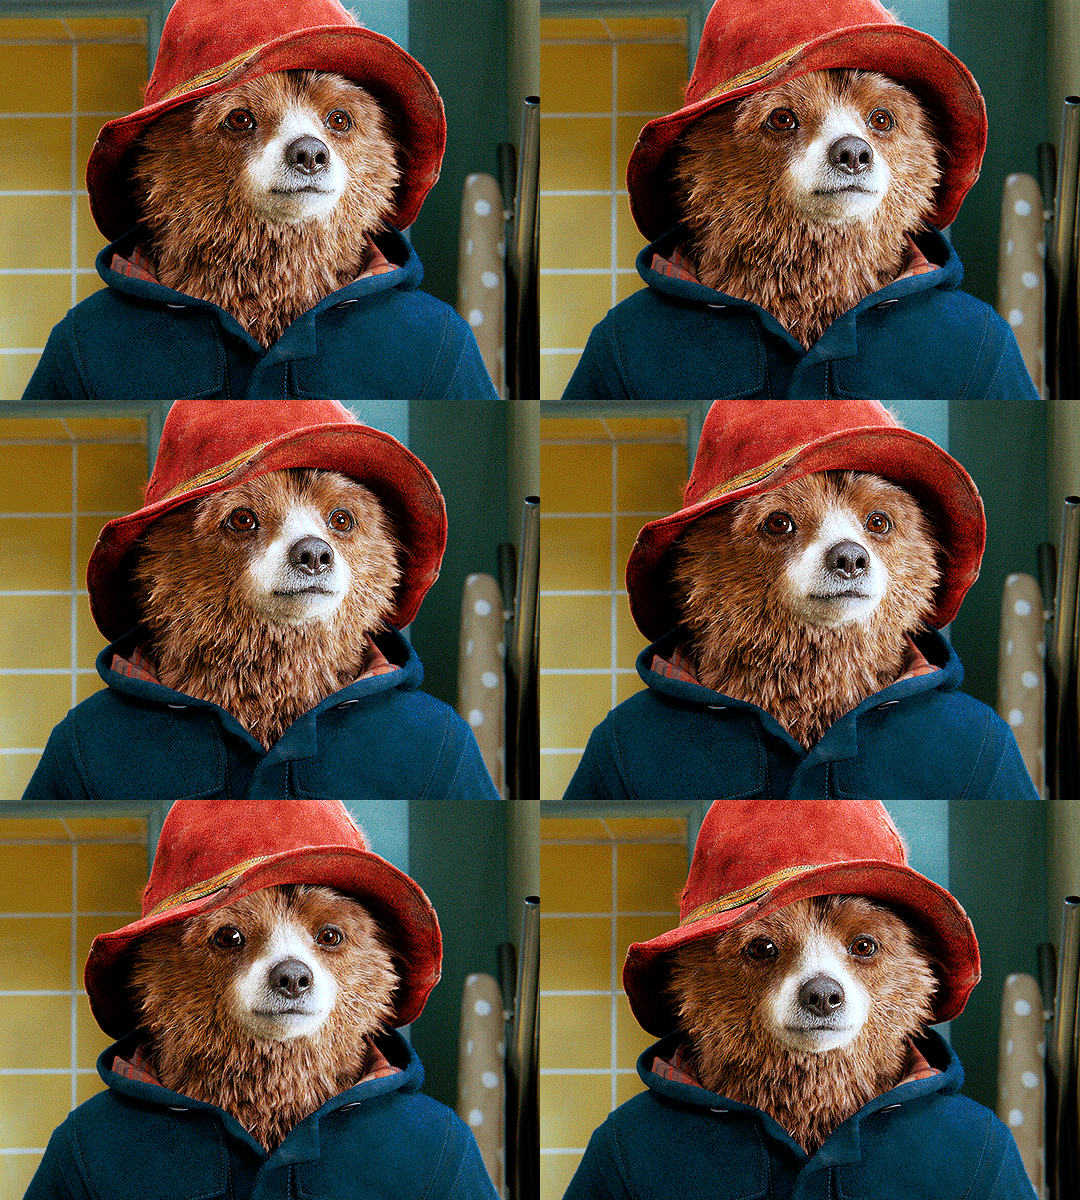
for the reds, i added even more red in them by moving the first slider to the right, making the color more vibrant. for his hat to have a more warm tint, i added yellow to the reds (third slider, moving it to the right). finally, to make the reds stronger, i moved the last slider to the right (more black).
for the yellows, i made them brighter by adding white to them, thus making the tile wall and Paddington more bright as well.
for the cyans and the blues, i just added the maximum (+100) of black that i could.
i wanted for Paddington's nose to be brighter, so i added more white to the whites.
lastly, i added depth to the blacks by increasing their own blackness.
you should always play with the Selective Colors sliders for a bit, before deciding what you want or need. with time, you will automatically know what to change to correct the color grading. it all takes practice!
HUE/SATURATION
i don’t know if you noticed, but there are some green spots on the blue wall behind Paddington. to correct that, i added a Hue/Saturation adjustment layer (layer > new adjustment layer > hue/saturation) and made the saturation of the greens 0%, making that unwanted green disappear from the background.

while the green spots on the wall are specific for this gif, i use hue/saturation a lot to tweak, well, hue and saturation. sometimes someone’s skin is too yellow, i made it redder by tweaking the reds and the yellows, or vice-versa. the hue bar follows the rainbow bar, so the maximum settings (+100 and -100) give the selected color to change its hue to something more red or pink (the rainbow extremities). changing hue can give pretty whacky results, like turning someone’s skin tone to green, so you will need to play with it to get the hang of it. you can also tweak the opacity of your hue/saturation layer to further improve your gif’s coloring. i didn’t do it in this case, the opacity is still 100%. the reds and the blues had their saturation increased to make them pop just a bit more, without affecting the other colors.
COLOR BALANCE
the highlights of the gif still had a green tint to it due to the automatic correction of the Curves layer, so i used Color Balance. this is how it works: instead of giving specific colors some tints, you can give them to the shadows, highlights, and mid-tones. if your shadows are too blue, you counterbalance them with the opposite color, yellow. same thing with the cyan-red and magenta-green pairings. in my case, i added a bit of magenta.

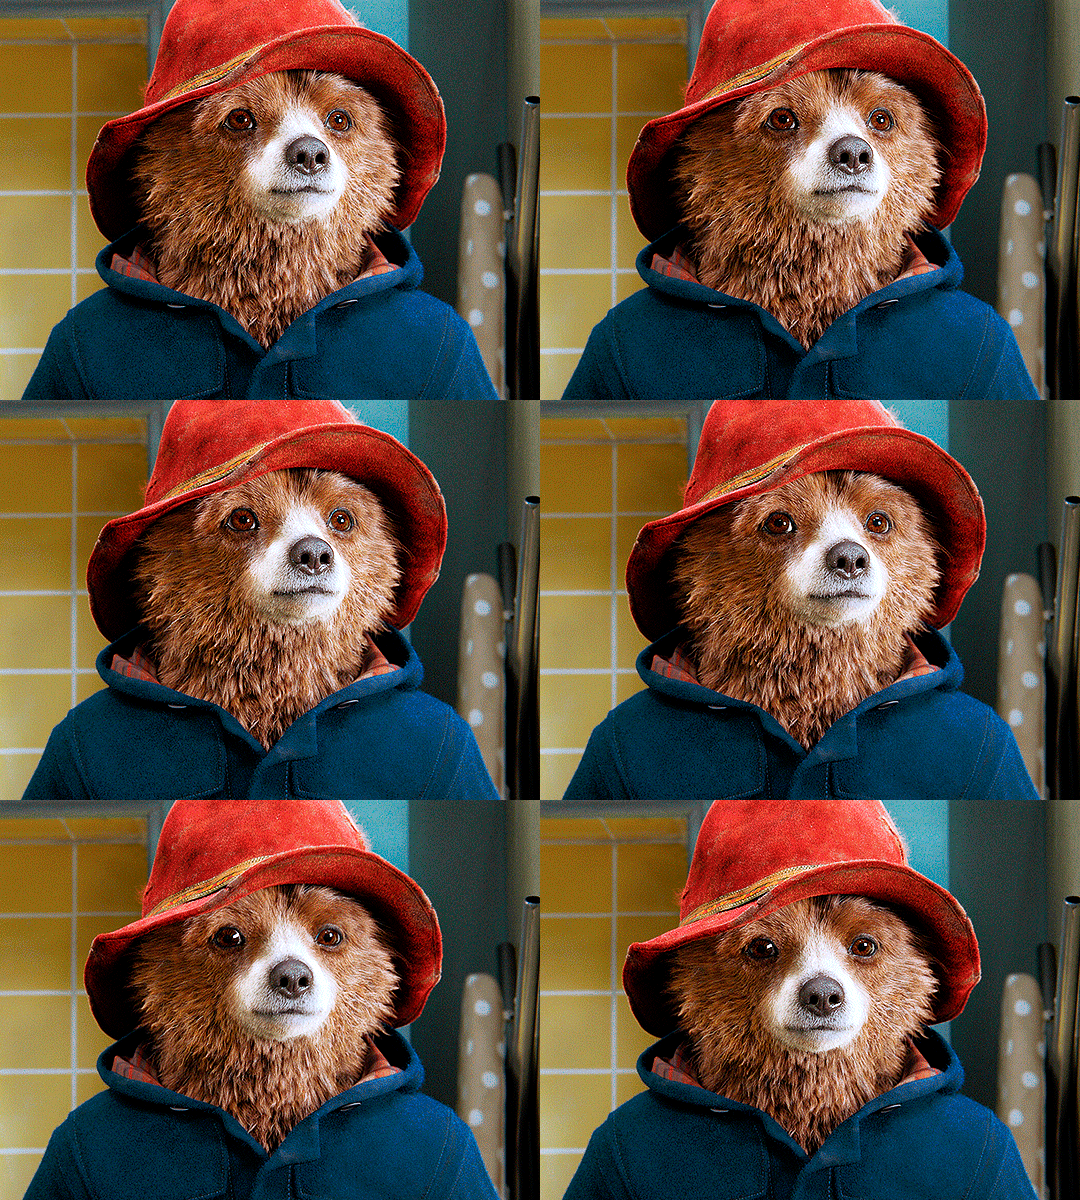
B&W GRADIENT MAP
now, if this gif was a dish, it’s time for the salt and pepper. i always add a Gradient Map (layer > new adjustment layer > gradient map) (black to white gradient) with the Soft Light blending mode, thus giving my shadows more depth without messing with the mid-tones and highlights. it also doesn’t “deep fry” (you know those memes?) the gif too much by adding even more contrast. usually, the opacity of the layer is between 30% to 70%, it all depends on the gif. it always does wonders, though!
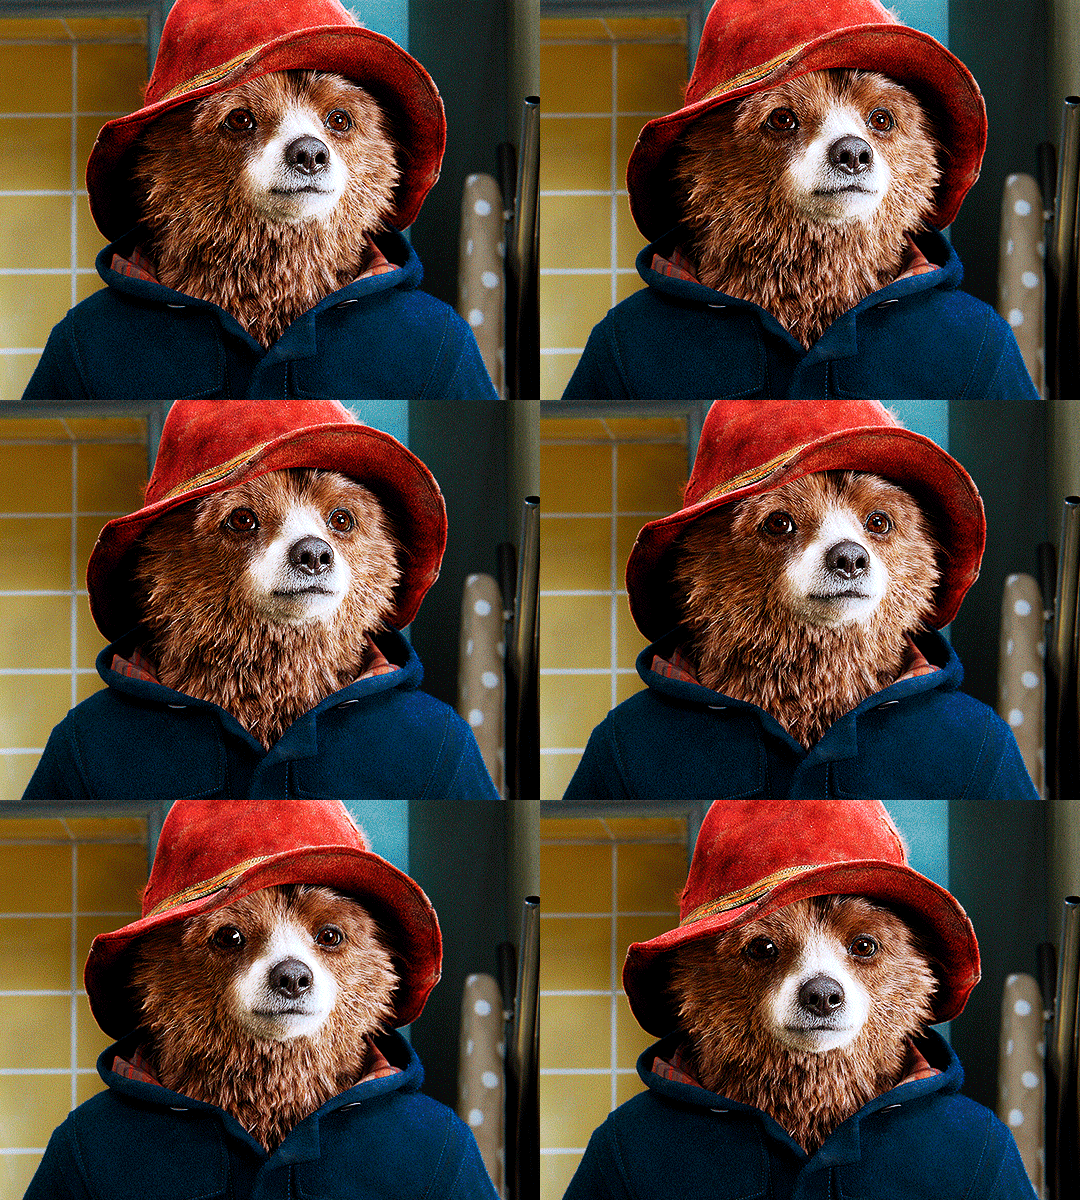
COLOR FILTER
finally, i like to add Color Filters (layer > new adjustment layer > color filter) to my gifs. it’s very handy when giving different scenes for the same minimalistic set because it makes them kind of match despite having completely different colors. in this gif’s case, i added a “deep blue” filter, opacity 50% density 25. you can change the density and the opacity of the layer for further editing, again, it all depends on the gif.
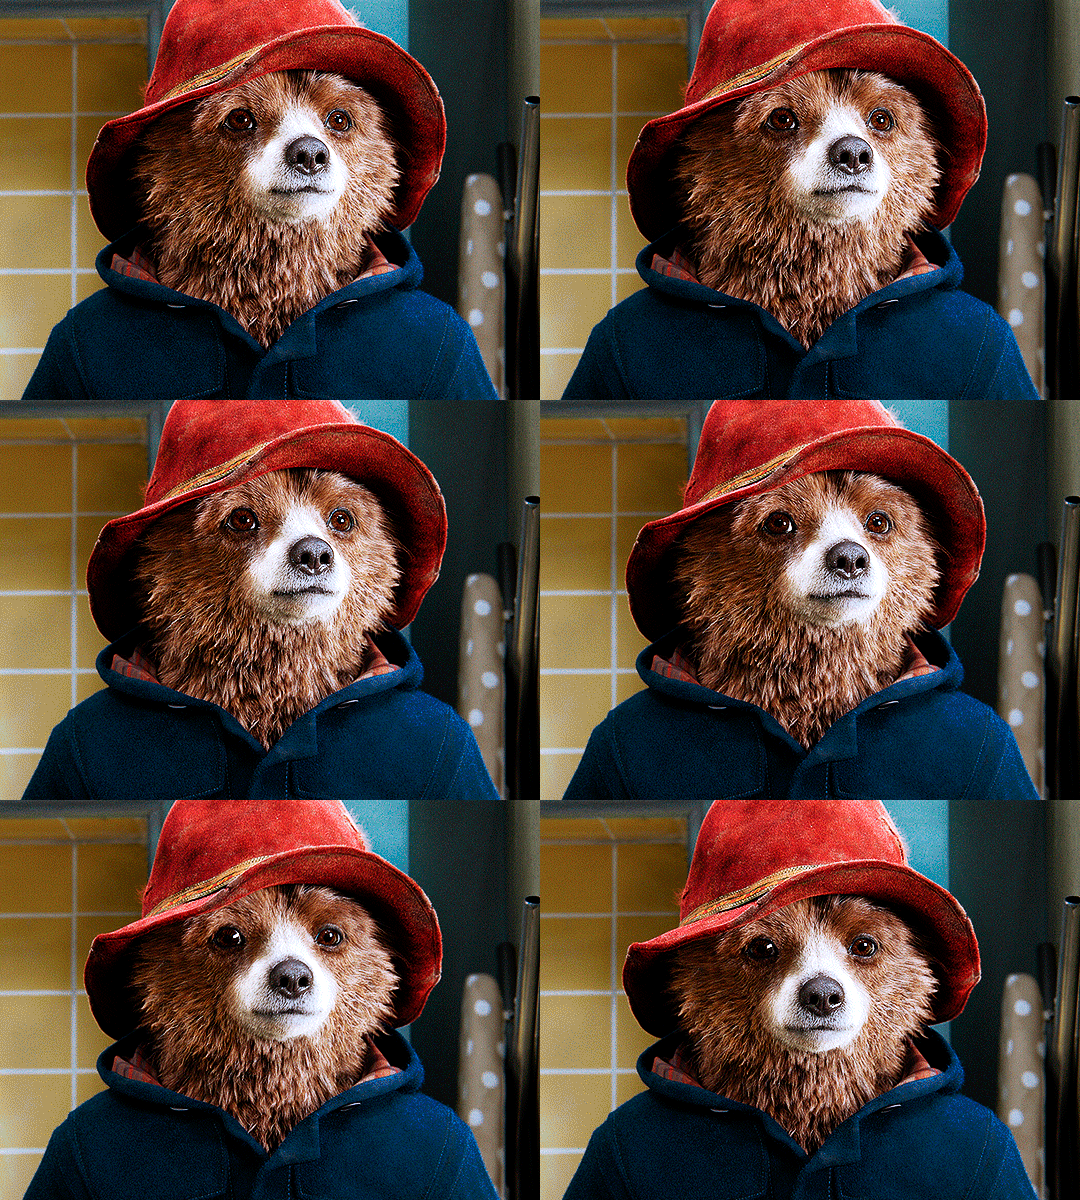


VIBRANCE
if i feel like it, i add a vibrance layer (layer > new adjustment layer > vibrance) to make the colors pop. this can ruin your coloring sometimes, especially when regarding skin color, so be careful. i didn't do it in this gif because i felt i didn't need it.
TA-DA! 🥳
AN OTHER EXAMPLE
the color grading of the original scene it’s pretty good as it is, to be honest. let’s see a worse scenario, a VERY yellow one:
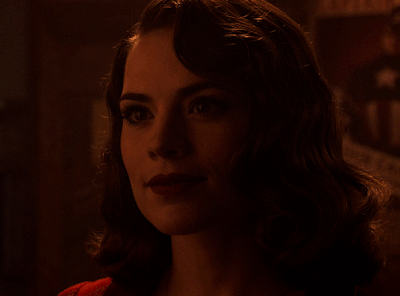
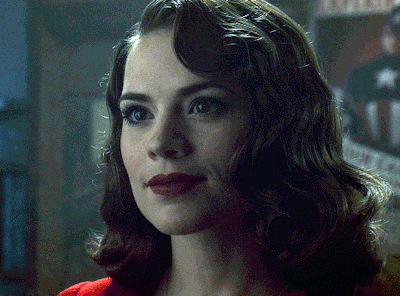
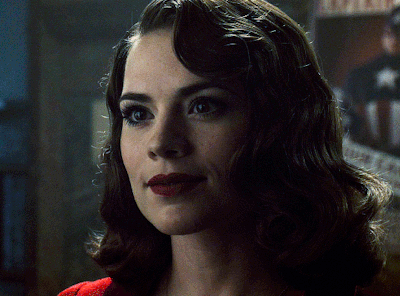
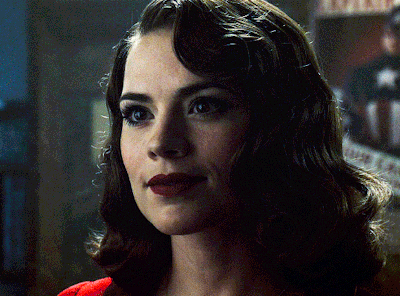
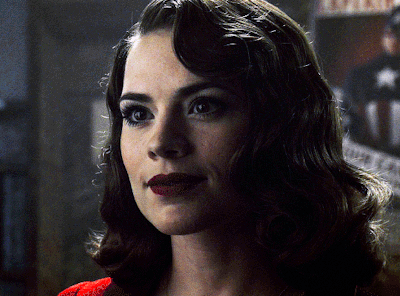
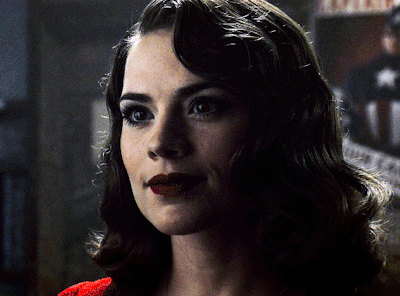
no channel mixer this time because the automatic curves option dealt with the yellowness, but you can see it made the gif too green. i needed to correct that with the following adjustment layers:
curves (automatic option) (gif 2) >> same curves layer (tweaks) (gif 3) >> brightness & contrast (gif 4) >> hue/saturation (tweaked cyan+blue+green) >> selective color >> color balance (gif 5) >> b&w gradient map >> (sepia) filter >> vibrance (gif 6)
i added a hue/saturation layer to remove the blues & greens before my selective color layer because i thought that was more urgent than tweaking the tint of all colors. color balance (gif 4) was the real hero here, though, by removing the green tint. the selective color layer was meant to make the red pop more than anything else, because the rest looked pretty good, especially her skin tone (despite the green tint). you can notice that tweaking the curves layer (small gif 3) also helped A LOT with the green problem.
tl;dr 😵💫😵💫😵💫
here's a list of my go-to's while coloring and lightning gifs. it's not a rule, just a guide. there are gifs in which i don't use all these adjustment layers, or use them in a different order. it all depends!
1. curves (automatic option + tweaks) 2. brightness & contrast 3. channel mixer 4. selective color 5. hue/saturation 6. color balance 7. b&w gradient map 8. color filter 9. vibrance
i'll suggest that you study each adjustment layer listed for more info, either with other Tumblr tutorials or YouTube ones. the YouTube ones focus on images, but you can translate what they teach to gif making very easily. you can ask me to further explain any adjustment layer, too! i was brief to keep this short (which i kinda failed lol).
feel free to ask me for clarification or something else about gifmaking wise, i always like to help. ❤️
#*#*tutorials#gifmaker tag#resources#resource: tutorials#ps help#uservivaldi#tuserjen#userrin#userelio#useralien#userzaynab#userchibi#userbuckleys#usertj#userbess#tuserlucie#useraljoscha#userdavid#usershreyu#usernolan#userhallie#userisaiah#tusergio#tusergeo#userjesslynn
803 notes
·
View notes
Note
Im in the middle of watching the new pnf episodes (ep 4 rn) and I wanna know ur indepth opinions of the new pnf episodes soooo bad,,, They carry the same energy of the early episodes which I love and theyre so fun!!! I LOVE PHINEAS AND FERB!!!! THANK U FOR MAKING COOL ART ABOUT IT!!!
AHHH THANK YOU SO MUCH.. THEY REALLY ARE SO MUCH FUN I LOVED THEM ALL.. Since you asked so niceys im fully lifting my spoiler lid and now will deliver to you all . as IN DEPTH AS HUMANLY POSSIBLE
the BEEHUNTERKISSER (first half of) SEASON 5 PHINEAS AND FERB REVIEW!!!
(THIS IS A LONG ASS POST BE WARNED)
SUMMER BLOCK BUSTER/CLOUDY WITH A CHANCE OF MOM
GOOD ASS INTRODUCTION!!!!!!!
i did find block buster to be a lot weaker than cloudy but U need to have a calm before a storm if u catch my drift. also i think this is the episode where the animation is at its weakest. it ramps up sooo fucking good in cloudy. but even then i thoroughly enjoyed it. it was so fun seeing everybody again My bebbies have returned to me...........
That one back and forth where candace steps in after and goes what if you built.. all of them. was so insanely weirdly paced and not funny to me the womp was giving johnny test whipcrack but lucky for me both bread bowl hot tub and the rest of the show get funnier as it goes on LOL
OH AND the scene in cloudy where candace is chasing down momcloud and trying to get through to her has such beautiful lighting and is so SWEEET THEY LOVE THEIR MOM SO MUCH. Also everybody teaming up to save her AND i got yuri pellets (wipes tear from eye) its so damn peak..

LOOK AT THIS MAN ITS SO FUCKING COOL ID EXPECT THIS FROM ONE OF THE MOVIES OR SOMETHING. Linda cloud holds that power over people.. This was genuinely like REALLY cool and exciting im really glad they went with a double episode high stakes adventure for the premiere because like. ive been hungry for some phineas and ferb 22 minute episode drama... its been too long.
ALSO the art in general just had some really cute moments too izzy looks so cute when shes serious. and candace hugging irving. vv first i loled then i serioused. i took a lot of screencaps so im gonna add them here as i go
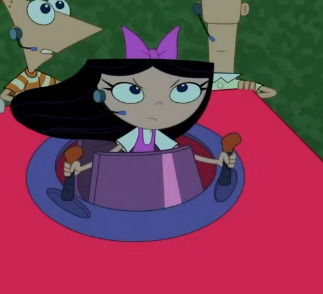
I genuinely do not have much to say about these episodes for some reason despite how much i loved them. I love that Buford found a Thingy and he Loves it. buford hungry feed him onions and discarded blue couches. Everybody got their own moment here it ruled
The songs in both. summer is starting right now changed me on a molecular level when it dropped it was stuck in my head ALLLLLL DAY EVERY DAY.
I was in work making delisandwiches and in my head technically the first day of summers tomorrow but today is the last day of school. schooooooooooool....
The song of tyhe Summer is insanely cooked and flop i dont even remember how it goes but i guess you could say its meant to be generic so like. no thoughts here. MY RATINGS:
SUMMER BLOCK BUSTER: 7/10 solid introduction banging song gotta get gone instrumental. saves the weaknesses
CLOUDY WITH A CHANCE OF MOM: 10/10. he found me crying. he crew too. we both crode
final assessment - were these episodes MADE for me?: yes. its new phineas and ferb i think i can say they thought of me when they were making phineas and ferb. who wouldnt.
SUBMARINE SANDWICH SUBMARINE/LICENSE TO BUST
I GOT A LICENSE TO BUST FULL THROTTLE FULL THRUST GOT ,Y PEDAL TO THE METAL GONNA EAT MY DUST. Ok back to the first one
I was really really excited for submarine sandwich submarine for 1 entire day when they dropped the screenshot of isabella and buford standing next to eachother because i foolishly believed they would have the plot centered around them beefing which i live for if you know me at all. BUT!! Idk it was just kinda an episode.
It really felt like an s4 plot in the sense of a really hard reach for a big idea. Im telling you my bermuda triangle idea from my beach art wouldve been better But like this was the next best thing. it even had wacky sandcastles. Umm the jessimpsons predicted submarine sandwich submarine. The fish was ugly as hell
I can really tell which episodes i liked the most based on how many screenshots or clips i took and this ones an outlier because i found everything baljeet was doing in this episode to be mega cute.
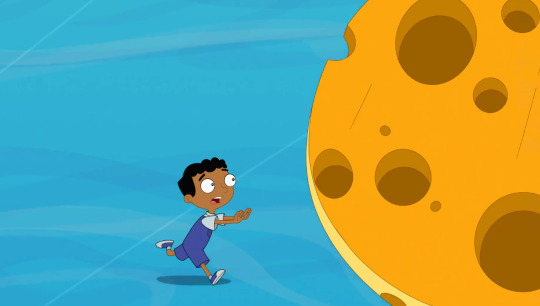
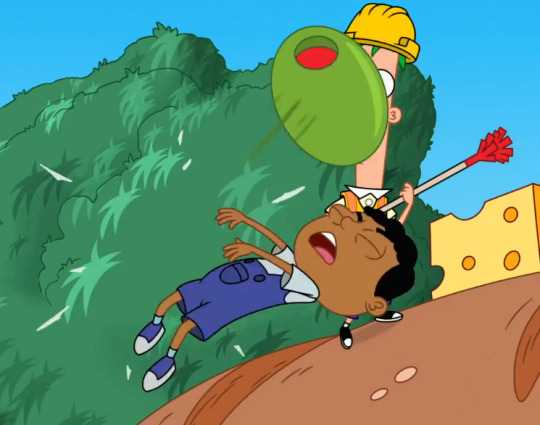
look at him go............ hungry for a cheese and pummelled by olive...
LICENSE TO BUST was a lot of fun too im so proud of my sweet little candace for getting her drivers licensed when faced with the adversary of a balding man. the SONG made the episode for me she ate that shit up thats for later though
LAWRENCE NOT THINKING SHES GONNA PASS WAS SO FUNNY WHATS HIS PROBLEM.................. HAVE FAITH IN YOUR BEAUTIFUL BABY GIRL OK.. also the gecko gear was so cute i want it so bad... but i think id get stuck to myself and wither up like a sad little freak.
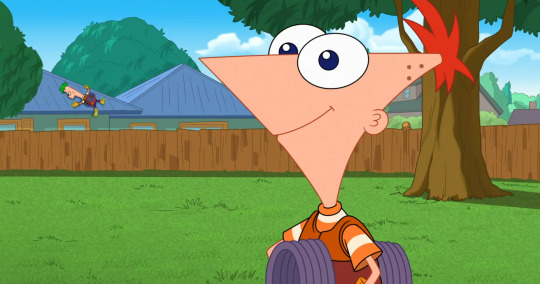
and ferb has literally perished.
I LOWKEY DID NOT EXPECT HER TO PASS I CANT EVEN LIE. The twist that mr. driving guy is also a candacetype is funny but does this mean she passed her test via bias. what does this mean for the future of danvilles road safety? We'll never know cause she goes right back to riding her bike in the episodes after this. (read like cinemasins please)
oh and also while im here. im usually an A-plot only andy so ill probably only talk about doof and perrys plot if its PARTICULARLY funny or engaging to me (no arguments against this this is my protest for every b plot guy that ignores a plots existence. we have to balance it out or we're all gonna die ok?) and this one was.
Hes literally so real ITS LEGAL ITS ENTRAPMENT. KILL YOU PERRY THE PLATYPUS!!!!!!!!!!!!!!!!!! THE LIGHTS ARE GREEN !!! heinz is a good name for a boy or a girl. DOOF WAS ACTUALLY REALLY REALLY FUNNY IN THESE EPISODES i was worried considering how bad he got near the end with like owca files doof and mml doof but MAN I WAS WRONG. SO WRONG. HES FUNNY AGAIN!!!!! BUT ILL GET TO THOSE WHEN WE GET TO MY STANDOUTS LOL. MY RATINGS:
Submarine Sandwich Submarine: 7/10. Over-animated isabella and buford scene will feed me for the rest of my life, baljeet attacked by various foods. Song mid though it was like a worse version of the sea shanty hng song
License to Bust: 9/10 IT WAS REALLY GOOD AND HAD A GREAT SONG.. The callback to her parralel parking fiasco and the Shenanigans was sooo much fun. Now that im here doesnt the intro of license to bust also sound like fred vs fred. whos better at paintball whos better at pool. whos better at driving her car safely near a school. idk just workshopping it.
final assesment - were these episodes MADE for me?: license to bust maybe not but subsandsub was really fun and 24fps buford animation makes me feel seen. 1 out of 2 score.
DRY ANOTHER DAY/DECONSTRUCTING DOOF
UNFORTUNATELY. neither of these clicked with me very much........... DESPITE THIS. DECONSTRUCTING DOOF MAY HAVE ONE OF MY TOP 3 NEW SONGS. GOOD AS FUCK but dry another day is first so shhhhhhhhhhh
this episode we see a character made because they want to keep writing veronica hill from hng but theyre in different parts of danville so they got this new weird guy in. and also a really hot day episode where theyre all sitting under the tree im litrally ghostwriting this show
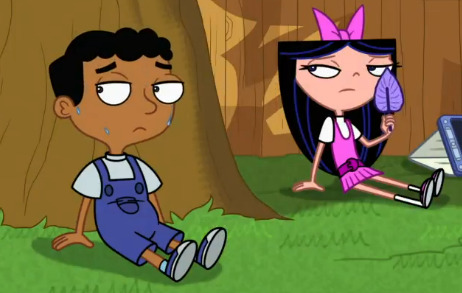
microorganisms. they need some wawer. baljeet get out of the sun. and the zebra is back. and he drinks boba.. Now i feel like hes part of the mortal realm hes real. and candace reacts with JOY when she speaks to him i thought she BEEFS WITH THIS ZEBRA. Something must have happened between them over the 9 months they mustve reached some kind of peace agreement.
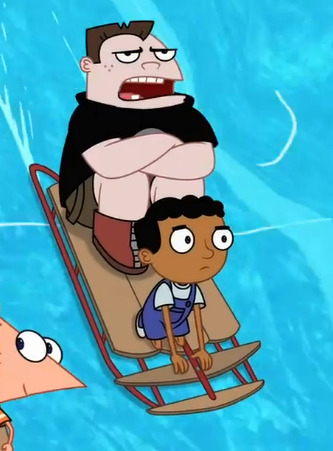
i also really love this karmic cycle buford and baljeet have going on in this season where as soon as one of them gets a moment to gloat over the others misfortune they also immediately eat shit. It makes me laugh every time i was literally hoping so much their dynamic this season would be them breaking chairs over eachothers heads and i think my dream came true.. also what was with the ferbjeet crumbs in this one. (Pic of the riddler) what is he cooking.
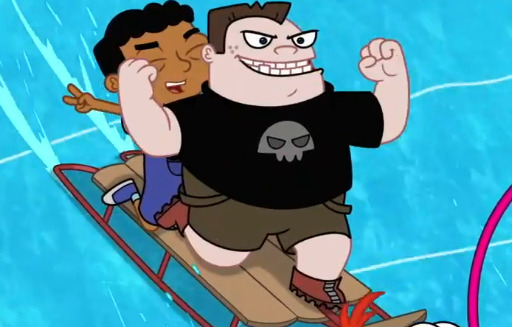
SO CUTE... The song in this one didnt really stick out to me that much i couldnt remember it at all. this ones less of a s4 flop song and more of a HNG flop song which is a different ballpark entirely..
NOT MUCH TO SAY. IT WAS A FINE LITTLE JAUNT I HAD FUN WITH IT AND THATS WHAT MATTERS. Its definitely not a skip-on-rewatch episode but its not lifechanging either.
Deconstructing doof is one of the 3 only episodes that i felt some semblance of negativity over. It wasnt bad by any means the therapist going crazy over discovering the truth was a lot of fun and i did have a good time with the episode but like. idk. the leadup was great i just didnt really like the ending it soured it in my brain
the bits where hes investigating and piecing things together is really fun and i love when hes interviewing all the kids and pnfs family. and isabellas like Hes a Genius :-). buford pulls the Im not talking to any cops move. and baljeet performs the candace reddit psychoanalysis.
what makes me think this episode didnt really resonate with me is that. i usually take screenshots. i took ONE. In this ENTIRE EPISODE. i took ONE MEAGRE SCREENSHOT AND ITS THIS

that aside though the song may be in my top 3 s5 songs. i LOVE doo wop songs and omfg this one was so fun. another candace and doof duet.. WAITER WAITER ILL TAKE SECONDS.. THIRDS.. FOURTHS. WHEN HE GOES I THINK I HAVE A THEORYYYYYYY. he ate . and seeing norm and nessa hanging out with doof is so cute im so happy norm is like. Around.
i hope he gets a bigger part eventually but i take what i can get thats my special guy. THE ENTIRE ROLEPLAY PART WAS SO FUNNY. WHYD HE GIVE NORM PAPER JUST FOR HIM TO NOT SAY OR DO ANYTHING. EXIT STAGE LEFT
and the flying disco blimp sequence SO CUTE i rlly thought that was just gonna be its own episode. the song was GREAT and their little dancemoves were so cute i cry.....
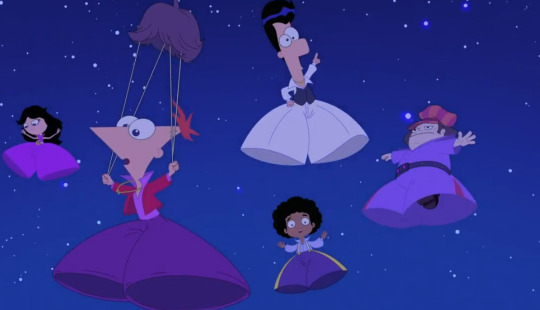
buford hitting the 'artist drawing character floating in the void cool-style pose here. MY RANKING:
DRY ANOTHER DAY: 6/10. inoffensive theres nothing much going on here. its just an s4 episode to be honest. great balls of water solos
DECONSTRUCTING DOOF: 8/10 despite my hangups i can tell this is gonna be considered a legendary episode and i love the song so i cant really complain. Its a great concept and i think they did it well theres just something rotten in my heart
final assesment - were these episodes MADE for me?: no these arent beehunterkisser episodes for sure. My battle does not lie here.. onward.. HUZZA
TROPEY MCTROPEFACE/BIBLIO BLAST!
Remember when we thought this was gonna be a ferb centric episode. and it instead turned out to be a zoetrope centric episode. maybe theyre more similar than we thought.. just something to make you think haha....
ANYWAY. MAN THAT EPISODE WAS FUNNY. THERES SO MUCH FUCKING NONSENSE I DONT EVEN KNOW WHERE TO BEGIN... MICHAEL BUBBLE...... HES HERE.
Im not used to michael buble singing anything thats not a christmas song tbh but he kind of ate this This is one of the ones thats been stuck in my head since i watched it. Episodes like this that center on some random object and what it gets up to are some of my FAVOURITES and this ones no exception its so fucking funny.
something i, as local pnf tumblr buford guy would like to point out, is that biffany got a new voice and a new design. Im kinda sad she doesnt sound like she smokes 30 packs a day anymore because that was such a vibe but THIS IS SO MUCH BETTER. I WAS LAUGHING SO FUCKING HARD
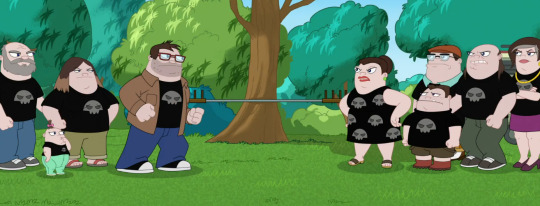
THATS THEIR FAMILY GARB. THEIR HERITAGE. Im so obsessed. i am also pretty happy that there is still no sign of anyone from bufords other side of the family so they didnt forget the lore tidbit that he comes from a broken home. The family get together from that one other pnf episode where all his family look like normal skinny background incidentals is so dead to me now. THIS is the real shit. lets all go cut down this tree. doesnt one of them look like vargskelethor joel anyway back to tropeface.
the drama.. the heartbreak.. michael bubble.. im so glad that tropey got to be with his beautiful ferris wheel wife and have triplets and the buford is a fat little hamster allegations are confirmed true. this was kinda the point in the season where i eralised hey isnt he like in this season a LOT. did they do it for me?
honest i dont even know what to say. its so serene its so beautiful. tropey has lived such a full and vast life. hes been through so much. im glad he finally gets to relax. At peace with the world......finally. Sorry to phinabella fans for this one though im keeping you in my thoughts
biblio blast was also a lot of fun it was kinda done dirty by being after the bombshell that was tropey BUT it was a giood time. IM EATING IM A PLANT IM A PLANT PLANT PLANT
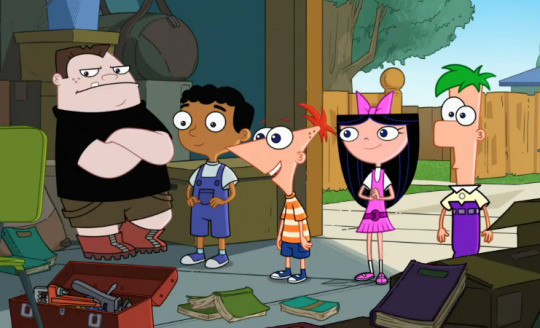
THEYRE so cute i literally get so happy when they stand next to eachother. baljeet autism handsing i know what you are.
Again this is apparently the season of buford so we got him shitting on metamorphosis because edgar allen poe is his oshi or whatever which made me laugh a lot. ISABELLA DOING A BRITISH ACCENT WAS SO CUTE ALSO When she and buf banter it gives me life. yes it happens one other time this season its really great guys. things are looking up for me. ALSO DOOF WAS SO SO FUNNY IN THIS ONE. HEINZ HAS NO CLOROPHYLLLLLL UGHHHH THATS SO EMBARASSING FOR HIM. SO EMBARASSING.
The doof plants are really cute i like them id have one in my house but i guess id have to muzzle it but that feels inhumane. so i guess i have to let them live in the wild.. free.. like a bird.. if a bird was a plant.....
The song for this episode also has hng disease in that the vocal mixing is really strange. i had the same problem with strawberry festival im not sure why it happens it just isnt all that nice to listen to. the VISUALS were so cute tho theyre so cute... my little friends! MY RANKING:
TROPEY MCTROPEFACE: 10/10 Oh my Goooooooooooooooooooooooooooooooooooooooood Its PEAK
BIBLIO BLAST: 6.5/10 Good innocent fun but not quite memorable enough to be a 7. if baljeet got to kill more itd be different.
final assesment - were these episodes MADE for me?: YES SIR. Buford lore scraps a funny circle and plants. i love all these things. these are beehunterkisser episodes for sure
A CHIP TO THE VET/MORE THAN JUST AN INTERN
this damn episode. Its so bad.
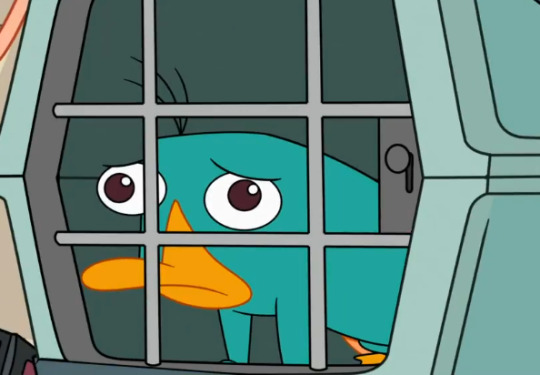
I cant even lie. I did not enjoy it. but it wasnt quite the worst episode so i guess it has that going for it.
The stakes of perry getting a chip were completely dumb and not good. i thought theyd realise the potential of this but perry gets out of getting a chip thru being a platypus and not cartoon hijinks sio basically im gonna die. i was left feeling desolate and alone after this flop and then carl shows up like an angel and brings me to a new beautiful world. thats what these 2 paired up means
the song was pretty decent i do love sophia james singing voice and her work on HNG were always the best songs so it obviously translates over. The littel dance bits with the animals are so cute phineas is literally so cockatiel coded its adorable. and i do love to see a fireside girl or two. believe it or not i genuinely took no pictures of these episodes on my first watch; chip because it sucked and i just wanted it to be over and more than just an intern because it was so damn good i didnt even think of it.
highlight of this episode was probably buford flirting with jeremy. this means he has a crush on both candace and jeremy. whats his play. what does he think hes doing.

let him keep it its cute. and isabella confirmed baldy. IM trying to avoid talking about the goat scream joke because it makes me want to throttle somebody just know it fucking sucks and i hate it. anyway The song guys :). i do really like im just gonna excema this room. i might say that one irl some day its real good. guys im just so apathetic to this episode. its not real...
MORE THAN JUST AN INTERN however is VERY MUCH REAL. ive really really wanted a carl episode for a long time cause hes one crazy son of a bitch. and it makes em wanna attack monogram. but i know some people genuinely hate monogram but i like how shitty he is because its funny LOL.. sorry carl......
i made a really bad joke to one of my friends when they were saying that doof always smelled like fish and i mean im not gonna disclose that here becuase this is a family friendly review but the connontations of this sentence tells you everything. and carl is canonically microchipped.. in case he gets lost... so sweet
THE RETURN OF THE CARL THE INTERN SONG WAS REALLY GREAT I WAS HAPPY WHEN I HERD IT. I do love a good callback and this one wasnt forced or nothing thats just his theme song. but NEW
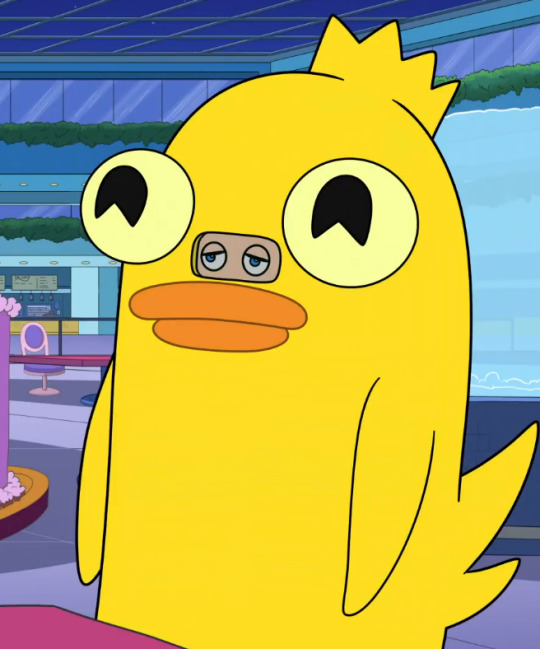
i have an engineering degree..
IT WAS SO MUCH FUN TO SEE CARL GET SOME RECOGNITION FOR HIS INSANE FUCKED UP WORK ETHIC AND IT FELT SO GOOOOOD TO WATCH HIM BLOW UP AT MONOGRAM AND FOR HIM TO ACTUALLY LISTEN FOR ONCE. WOW.. THINGS ARE A CHANGING
the ending was genuinely really sweet and carl getting to be some sort of weird part of the Monogram family like he wanted to is really nice to see.. carl win.. your strange fixation on approval from your boss has become Something New. MY RANKINGS:
A CHIP TO THE VET: 3/10 this couldve been something. you couldve done something. but you didnt. 3 points for sophia james banger
MORE THAN JUST AN INTERN: 10/10 HOOOWEEE MAMA. SWEET MAMA. THATS A GOOD EPISODE RIGHT THERE SON.
final assesment - were these episodes MADE for me?: a chip to the vet was made to make me mad. carl episode wasnt for me because im not the carl guy but if it was itd totally be for me.
THE AURORA PERRY-ALIS/LORD OF THE FIRESIDES
made me scared. i have an irrational fear of when characters get shrunk down really small in cartoons and get eaten. i dont actually know if monty ate them but i saw enough and got scared and skipped like half the episode. Idk the context of the booger napkin and i never will journey to the center of candace finally has a 2nd episode to join it in my 'scared' tier in my pnf episode tier list.
OK ASIDE FROM THAT. I really liked it. seeing montnessa again and getting a reason for why they kinda fizzled out was great and i really hope they do more with their relationship. The scene with the aurora was BEAUTIFUL AND I LOVED THE LIGHTING and i quite liked the song it was niceys i just checked its sophia james again i shouldve known. ITS SO NICE
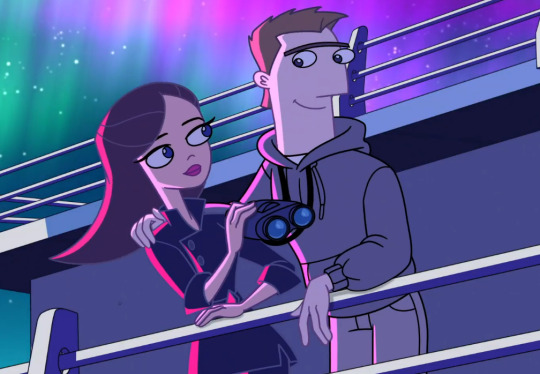
i could make them butchfemme. all hope is not lost. i can imagine anything.. and the sweet lil family moments with the flynn fletchers was awesome lawrence joining the conga line and getting rlly into it made me giggle. love you Bro
cause i missed half this episode due to getting scared we are just gonna go to lord of the firesides. IT HAD SO MUCH GOING FOR IT. AND THEN IT JUST FLOPPED RIGHT AT THE END
Gretchen declaring anarchy was so funny she was being such a little shithead. i like to think that shes just Like that sometimes even without a plot convenient inator because obviously girls would never fight like that on their own accord . ALSO ISABELLA SHOVING PNF OUT AND BEING LIKE YOU CANT SEE US LIKE THIS AHAHAHAHA
i LOOOOOOVED THE SONG IT WAS SUCH A SURPRISE and i love it when GIRLS kill eahcother but like i was genuinely really disappointed by this one. i thought it was gonna be something but it like was not. much.
I GENUIENLY THOUGHT ID HAVE MORE TO SAY. I THOUGHT WED GET MORE ABOUT THE FIRESIDE GIRLS AS INDIVIDUALS. YEAH NO That wont ever happen. Oh Whell Guys....... Oh well.. (kicks rock) oh well.....

calling all besties......KILL. MY RANKINGS:
AURORA PERRY-ALIS: scared/10. i cant really rank this one on good conscience. it made me scared
LORD OF THE FIRESIDES: 6/10. really really disappointed but ignoring what i wanted from it its still a really solid and funny episode.. im sure itll grow on me but i guess i just wanted them to fight for real. Its a shame
final assesment - were these episodes MADE for me?: NO SIR! NO SIR THEY WERENT. i got let down
THE CANDACE SUIT/AGENT T FOR TEEN
Well. we are finally here. im sure it is genuinely no surprise to anyone that the candace suit was my favourite episode of the entire batch and even made it to my top 5 pnf episodes ever. there was just so much good buford.
Why the FUCK did he show up in his garage in a purple velvet bathrobe smoking a pipe. whered he get that. they put bubbles in it but i wouldnt have even batted an eye if he was just like acutally smoking atp. IT WAS SO FUNNY. WHYS HE A CRIME BOSS
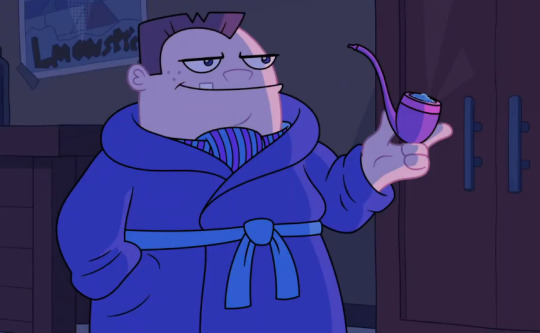
ladies. to what do i owe this pleasure. what the hell man i need to draw this fit. ALSO BALJEET BEING IN ON IT AND BEING PROUD OF THE FACT THAT THERES A FUCKING BALJEET HOMUNCULI TEA PARTY ROOM WHERE SOME OF THEM ARE SUSPENDED IN THE AIR BY CHAINS AND HANDCUFFS. ITS FUCKED UP WHAT ARE YOU DOING TO THEM. i love it. They couldnt have done better.
The suit shenanigans in the episode were so fucking funny but maybe the biggest highlight to me was that THE SONG LEAK TRICKED US. IT WAS SUNG BY BUFORD??? I THOUGHT IT WAS A DANNY JACOB BANGER. Lowkey bobby gaylor ate with it Buford has a hard voice to sing in but it was REALLY good. Like it was reminding me of how lord hater sings in WOY it made me laugh so hard. Stealing jeremy from work . why

i did this when the leak came out but i have to REDO IT BECUASE BIFFANY GOT REDESIGNED AND THE SUIT IS WAY WAY WAY WAY MORE SINISTER. BUT I ALREADY KNOW ITS A BANGER
But ohhh my god it was so funny. Their idea of buford development is turning him into some kind of art freak that knows everything about everyone. he clones people in his garage. his moms ok with it bnc their family cuts trees down for fun so theyre all fucked up in the head. awesome. Literally so fucking awesome
This episode got so many laughs outta me and i loved isabella and buford making fun of candace together for literally no damn reason. SHIT STIRRERS. LETS WEAR OUR CANDACE SKIN AND MAKE FUN OF CANDACE. For an internet trend. Yay! anyone who hates this episode is weak minded and wouldnt survive the baljeet dungeon.
AGENT T FOR TEEN. Ok so i was sad my manifest didnt work but this was SOOOOOOOOOO GOOD. I love the video at the very start the vibes are immaculate and stacy and perry team up so cute and beautiful. you ARE a donny do-good stacy. with the scraps beforehand of them playing video games together its just so peak

so cute. HER GETTING HER OWN THEME SONG AT THE END I SQUEED. AND ALL OF HER RANDOM TALENTS.. How does she ever feel like shes not enough for her mother shes insane at everything. she can even be a dolphin. GENUINELY THIS WAS EVERYTHING I WANTED AND MORE. SHE JUST JUMPS INTO ACTION FOR PERRY SHES SO NICE... and owca knows now.. and she gets a fedora AUGHHHHHHHHHHHHHHHHHHHHH ITS BEAUTIFUL ITS SO DAMN BEAUTIFUL
And its really nice to see dr hirano again she is So fine. mad about coltrane mention though hes not real no hes not sir.
i had predicted to myself shed have to cover for perry and keep candace away from him in some way. also dr diminutive and doof beefing is so funny. youre small. well youre uh divorced. shady af comebacks. its so good
I LOVE THIS EPISODE RAHHHHHHHHHHHHHH MY RANKING:
THE CANDACE SUIT: FAVOURITE/10 I LOVE IT WHEN BUFORD DOES MORALLY QUESTIONABLE THINGS WITH NO REPROCUSSIONS. MADE ME LAUGH SO HARD I STARTED SILENTLY CRYING
AGENT T FOR TEEN: 10/10 NO NOTES. Stacy badass and awesome moments and shes friends with perry and its so beautiful. i have nothing intelligent to say its just genuinely so good.
final assesment - were these episodes MADE for me?: YES BITCH. CANDACE SUIT WAS FOR ME. Buford van stomm why do you enjoy being candace (a girl) and living her life (girl life) so much. Much to think about. And STACY YAY
THE HABERDASHER/OUT OF CHARACTER
battle of the mid
Ok jokes aside i LIKED the character of the haberdasher but the most impressive and interesting part of that episode to me was the damn robot spider he was in at the start.
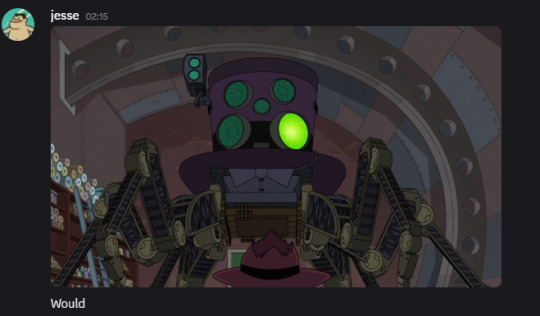
i love that hes steampunky and i love his earnest enthusiasm. hes a fun guy. this black beret really slays . Mothman doof was awesome also im really sad the mothman song was seemingly scrapped becuase i loved it But like YAY AWESOME BUG MAN. I didnt like whatever he was doing with his voice but i kinda forgot abt it after a while so like. WHO CARS.
this is the most ive ever related to doof because back in my youth i used to chew on fabric because i thought it tasted reall;y good. sometimes i crave it. like how he tried to eat socks.
The song that REPLACED THE moth man song..hoo boy. i have a hat for that was almost a good song but the pacing was just kind of off for me it felt like it was moving too fast and then would randomly slow down and then just kick off again and i was left afraid and alone.
I DO LIKE HOW HE CAN JUST TURN HIS SHOP INTO A DINKY CAR how come he has a totally different aesthetic to owca. i guess hes friends with professor elemental from real life and phineas and ferb. much to think about. hes a sweet guy and i wonder if hell ever show up again. ALSO THE SUBPLOT OF THE KIDS BUILDING SOMETHING WITHOUT PNF WAS SOOO CUTE. Buford bringing back the Thingy from cloudy made me laugh a lot. and him being like cant lie guys we're shit.
ITS SO GOOD i really want more episodes where its just them 3 because i feel like theres untapped potential. (buford isabella guy voice) particularly one dynamic in particular (hooked off stage by a cane)
Out of character was also really fun as someone who was raised into a star trek loving household . The set was REALLY fun and baljeet being so excited for acting was adorable i wanna pinch his cheeks. also buford movie interest scraps slowly making me like that career path for him so good job guys.
The song was kinda un memorable for me i do like whenever baljeet gets a solo of some kind but idk if this genre really worked with him he was just a bit shrill. I like that they tried to go for a patter-song type thing but i think with a patter song it needs to have yknow. the signature instruments. and the switch to the singers just doesnt work. Its flop im sorry my sweet little ball
also baljeets badass anime sakuga moment where he takes down the robot was awesome hes literally so iconic
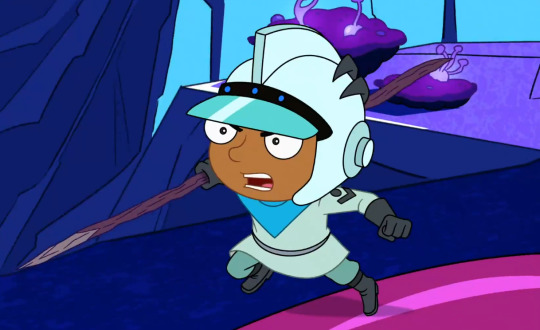
HE DIDNT DESERVE TO LOSE HIS ROLE FOR BEING TOO GOOD!!!! FREE MY BOY! MY RANKING:
THE HABERDASHER: 6/10 i had a fun time but nothing really amazed me. I want moffman back.. sigh
OUT OF CHARACTER: 8/10 A LOT OF FUN. really cute character moments. I smiled and grinned I LOVE YOU BALJEET!! MY PRECIOUS BOY
final assesment - were these episodes MADE for me?: Nahhhh not becuase theyre BAD or anything. i just dont go here. there are baljeet guys out there living their best lives and i cant pretend im allowed to be considered a baljeet guy. id just be a poseur. and im definitely not a doof guy. Im a tourist
THE CHRONICLES OF MEAP EPISODE 42: MEAP ME IN ST. LOUIS

its bad
MY RANKING:
THE CHRONICLES OF MEAP EPISODE 42: MEAP ME IN ST. LOUIS: its bad
final assesment - were these episodes MADE for me?: stabbybarfpain you are one of the best songs ever written you deserved a better episode. my god
NO SLUMBER PARTY/THE BALLAD OF BUBBA DOOF
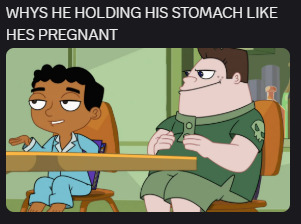
THIS WAS SOOOOOOOOOOO CUTE. BALJEET HAVING A 9:30 BEDTIME IS SO CUTE HES JUST A BABY. THE movie dome is the dream i was really hoping that hed get mega scared of the scary movie because umm idk rlly itd be cute. AND CANDACE STACY AND VANESSA HANGING OUT I COULD CRY.. ITS SO GOOD.. Vanessas outfit was great the mindy doll tanktop is so iconic and i kinda need it. Im really sad candace didnt get toi have much fun because she was so focused on busting.. but maybe in another world. in a fic my good friend wrote maybe. she could have fun. hint hint nudge nudge cometcrystal has a great slumber party big idea fic written before this episode dropped ANYWAY.
i HAVE to talk about it.

HIM HANGING OUT WITH THE GIRLS WAS SO CUTE AND HES LOWKEY IN DRAG MAKEUP... STACY SAYING SLAY QUEENIE GENUINELY MADE ME STOP BREATHING FOR A FEW SEOCNDS. s5 delivered so fucking hard on buford ive never been more vindicated as a buford fan. its literally all coming up milhouse.
the song was ALMOST really good but theres something about the takes they used for the second verse that is like grating. particularly isabellas AND THE SOUND SYSTEMS BOPPING where she sounsd like if a germ coiuld speak. WHYYYY DID THEY USE THAT TAKE. Buford eavesdropping on the girl gossip is literally so cute too i love him so much. hes so cute. ok but like genuinely the dancing in the last chorus the lipsyncing and movements are so horrifically bad they remind me of those inside out 2 songs. this is the phineas and ferb song yeah grab your friends and sing along. type shit. ASIDE FROM THAT ITS A REALLY CUTE BIT AND I LOEV HOW EVERYONE GETS A LINE
baljeet being woken up by the inator and immeditealy going back to sleep is so cute also i literally love him so much he gives me cuteness agression. THIS WAS A FUN EPISODE
Ok sleepmaster general its 9:29. next episode. THE BALLAD OF BUBBA DOOF is the other episode i felt real negativity for. i was really excited for the cowboy episode after i saw fullchains storyboards i thought it was like. an AU episode. but not only is the big idea convoluted and not in a fun way. I DIDNT EVEN GET ANY REAL COWBOY ACTION. I did like bubba doof though . Lunch :D.
i really dont have much to say about this one because like. this being the last one to watch and it flopping made me so mad. I did really like the kids outfits though they were so cute... the song was not memorable and kinda blew chunks. it just was generally . I DONT CAER ABOUT IT.. I DONT EVEN HAVE ANY PICTURES I HAVE TO GO TAKE ONE. WHAT THE HELL MAN. OK WAIT THERE IS A HIGHLIGHT. NED
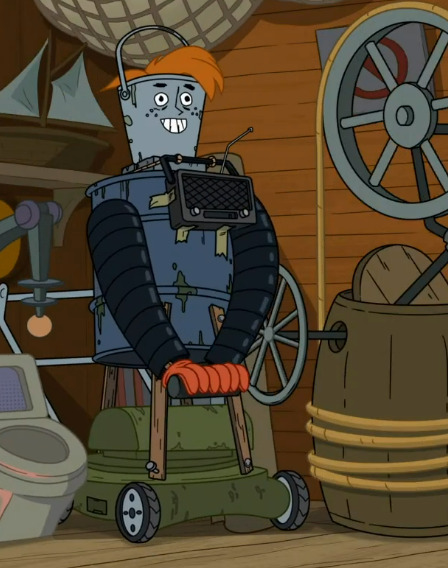
NED HES SO CUTE.. NORM COUSIN.......AWWWWWWWWWWW COME AN GET IT LITTLE FELLERS. i also liked the scene where monogram tastes perry. kind of fucked up considering they ate agent T if i was perry id be scared that hed like it HAHAHAHAHA.. ANYWAY MY RANKING
NO SLUMBER PARTY: 7/10 Its FUN AND CUTE. A little bit of wasted potential but nowhere near as bad as lord of the firesides. Its fine totally cute. i love seeing all these guys hang out, makes me Snile
THE BALLAD OF BUBBA DOOF: 3/10 idgaf guys. its wasted on me
final assesment - were these episodes MADE for me?: Slumber party yes. If im crazy enough i can taqke it as stanessa crumbs. and also whatevers going on with Buford. Its good. Bubba no sir.
FINAL VERDICT
its good as HELL!!!!!! ITS JUST LIKE OLD PNF BUT WITH NEW HUMOR AND MORE FREEDOM TO DO WHAT THEY WANT.
Its everything i wanted except the things i didnt get which i will soon get over. Im so happy with it I literally stayed up till 4am yesterday to finish it. Its SO GOOD.
and overall.. ido believe.. this season really was made for me. last year was year of shadow the hedgehog this year its year of buford van stomm BITCHES
#words#long post#PNF SPOILERS#phineas and ferb#i want people to see my insane scrawlings#sorry this is 90 percent me gushing about my buford meal#i won so hard. you guys must be jealous
100 notes
·
View notes
Note
Hello! I just saw your last Caskett gifset for usergif and i loved it, can i aks how did you make the old film look/filter?
Hi, Anon! I used an overlay which I got from here :) I don't know if you're familiar with overlays but here's what I do:
SMALL OVERLAY TUTORIAL
First I make my gif as I usually do and in that gifset this was the base I was working with (a gif with 37 frames):
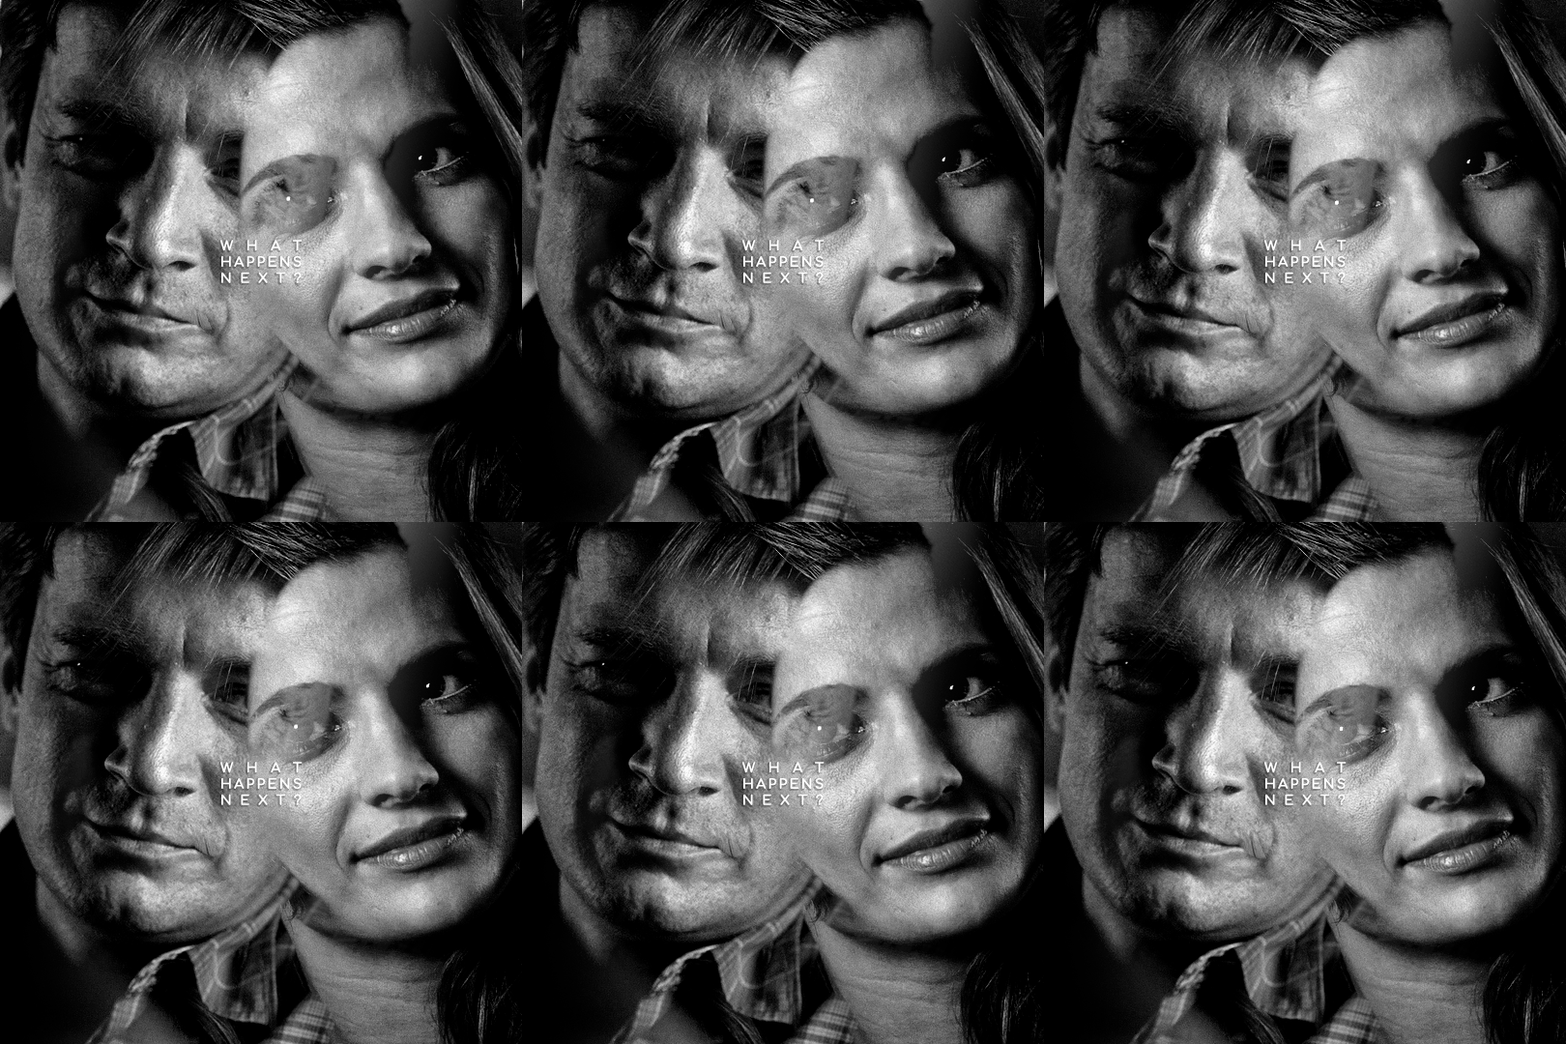
So, next I take screencaps of the overlay I'm using and I make sure it's got the same number of frames, in this case 37. Now I put my overlay screencaps above my gif and this is what my photoshop looks like:
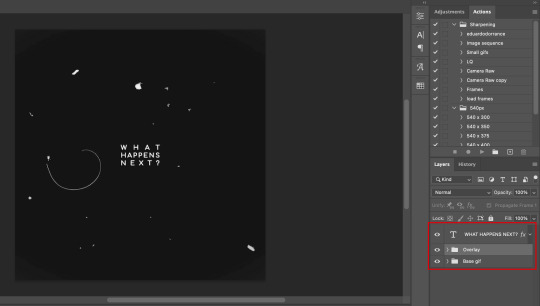
Notice how I placed my overlay between the text and the base gif. The text thing is optional but I liked the text to stand out.
Now, as you can see this overlay's background isn't completely black but gray, and I didn't want that. I added a Selective Color layer and increased the "Black" in the "Black" tab to +100. This is how it looks now:
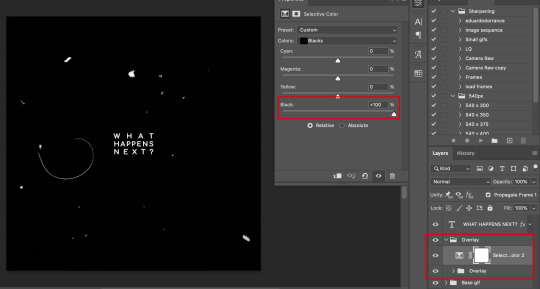
The difference is noticeable right? Well now onto the last step. I went to my overlay group layer and set the Blending mode to Lighter Color and the Opacity to 50%.
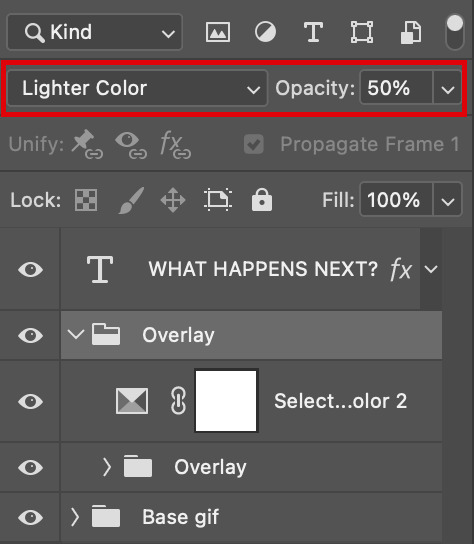
This step depends on your personal preference so feel free to play around with the Blending Modes and the Opacity and see which ones suit your gif best. With those settings I got my final gif:
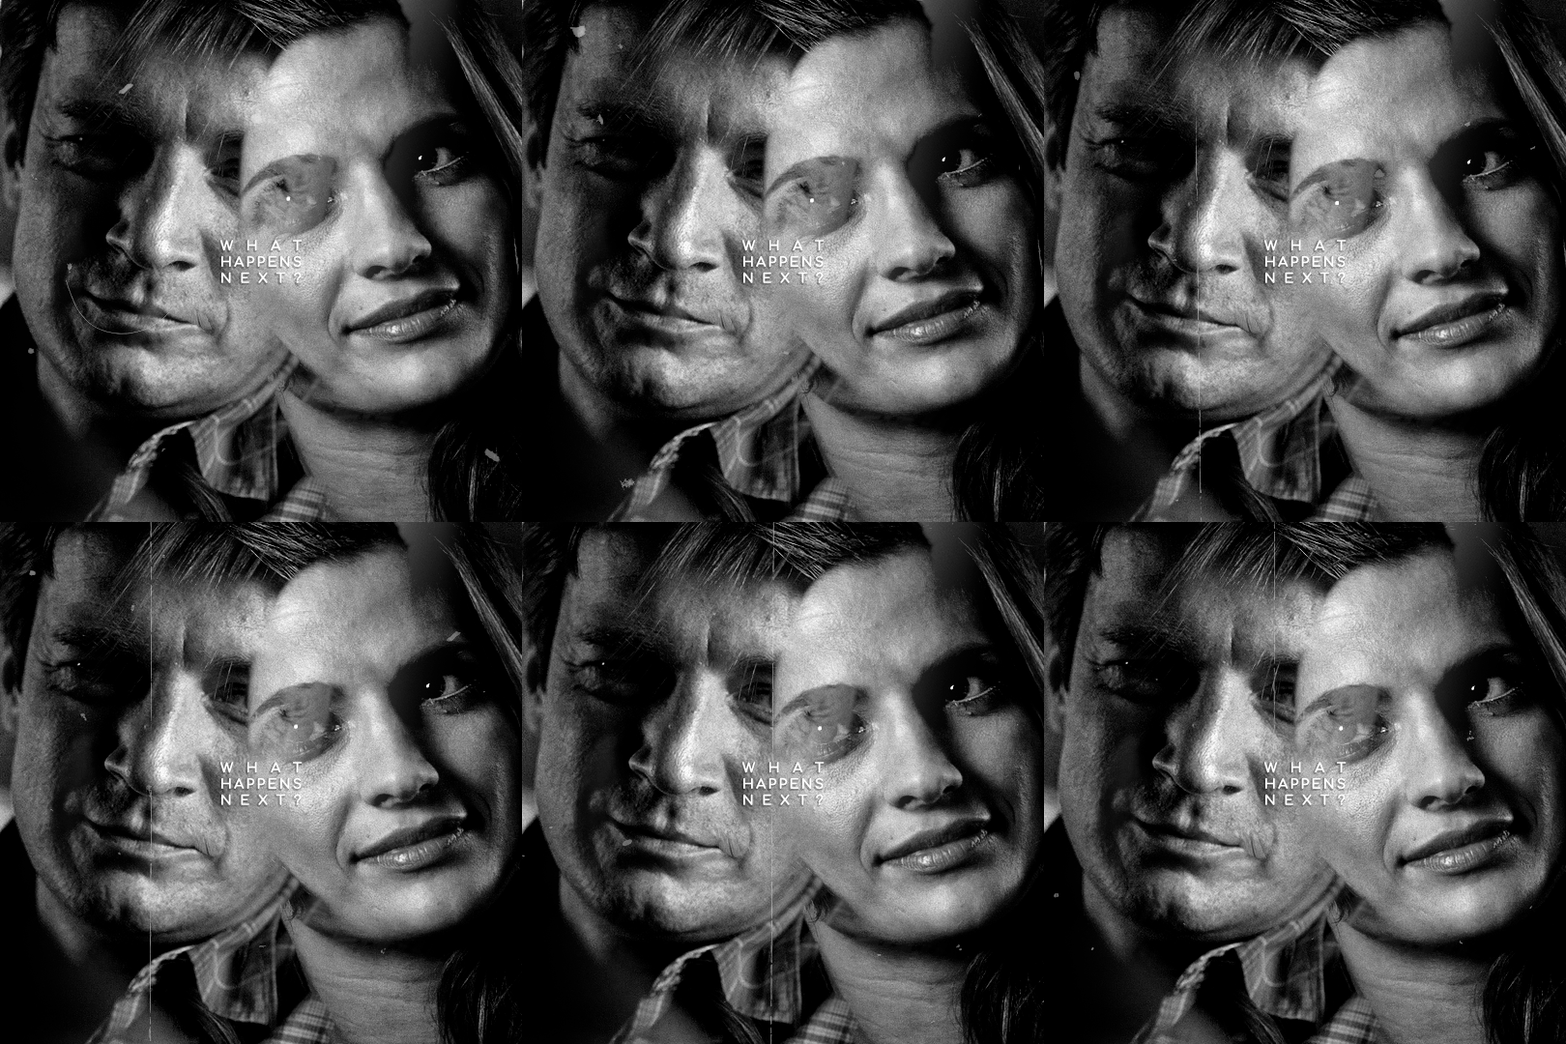
And that's how I work with overlays! There are so many nice overlays in youtube you just have to use keywords like camera, vhs, old video, lightleaks, etc. Overlays can completely change your gifs and turn a simple gif into a beautiful and complex one!
#ask#Anon#ps tag#tutorial#userabs#alielook#uservivaldi#userelio#userbuckleys#userrobin#tuseruta#userahri#userbeani#userchibi#carolook#usermai#usertenacious#userwintersoldado#usercats#usermels#tuserheidi#tusermels#chaoticresources
137 notes
·
View notes
Text
This post is going to show you the EXACT moment that tear forms with indisputable evidence that consists of several screencaps, detail shots, and slowed down video proof, which will be at the very end.
The tear and I are getting married, her name is Trina and I love her.
Let's get right into it. Be prepared for uh. Very painful facial expressions! And tears (at the end).
We're going to look through the final fifteen chronologically with pit stops at important emotional points that I think would make sense to cause a tear.
As you can see, we go into this argument with mostly dry eyes, a little glistening here and there but those are NOT tears. Probably just the contacts plus the lack of blinking making his eyes a bit more moist than your usual pair. The tear will be obvious.

Obvious disbelief when Aziraphale tells him about the Metatron's bullshit, yes, but Crowley soldiers on through.
Now a scene that I personally thought would be most likely to cause tears - "tell me you said no". However - his eyes stay dry! Both before and after Aziraphale's non-answer. No tears.

The best spot to look at is his waterline, and as you can see it's free of any sad tears.
We have reached the "go off together" stage, Crowley is yelling, they're both emotionally perturbed, a very good foundation for tears. Yet when you look at his eyes during and right after, they're still dry!

We are now right before Crowley says "you can't leave this bookshop" and when he does BOOM the tear is suddenly there!

This is what our tear looks like, and we have a very narrow time frame during which it can appear. So it is time for the grand reveal because by now you're probably yelling at me "okay but WHEN does it show up??"
I will tell you. Or rather, I will show you first and then tell you what Aziraphale said right before that triggered it. Ready?

There it is. Left - no tear. Right - tear. (no i will not make the trivago joke again i want to but i wont.)
Come with me! To heaven! I'll run it, -> no tear yet. It appears after the next part.
you can be my second in command THAT is what causes the tear to finally show up. Right as Aziraphale finishes his sentence you can watch as it appears.
As promised, here is the video evidence, slowed down by half and zoomed in on Crowley's face at the end.
Alright, have you seen enough tears? Good! Let's look at the emotional reason. Because your question is probably what is so special about that sentence that it tips Crowley over the edge?
That one sentence, that one "promise" Aziraphale makes him, destroys everything. All of it in one go.
It is not just about Aziraphale choosing heaven over him, it's not about him saying no to running away (Crowley probably saw that coming anyway). What Aziraphale does is he takes them, their us and eliminates it.
Not just is he telling Crowley that he's an evil demon tm who needs to be an angel to be worthy of staying in Aziraphale's life, but "second in command" takes that even further.
Not "ruling together" or "ruling side by side" or any variation of those. No, Aziraphale is telling him that they are not equal and never have been. That Crowley has always been inferior to him and always WILL BE even if he stops being a demon and does what Aziraphale wants.
This is why Crowley no longer things of them as an us after all of that. Aziraphale took every single meaning it had and inverted it, crushed it up, and then threw it away.
Yeah.
Crowley is telling him he is gay and in gay love with him. Aziraphale takes that and says "you can be my employee at gay conversion therapy which i will run #straight besties".
Crowley hears "second in command" and it is the last puzzle piece falling into place. It's the final straw and that is when we get the tear. Before that he was saying we can be together, be an us, just the two of us, you and me. He was referring to them as free equals who don't need heaven or hell, who are happy with everything the way it is. An Aziraphale who loves Crowley no matter what his former occupation might have been.
We could have been us. (I wanted us to be an us)
And Aziraphale's answer to that is there has never been an us and we never will be. i don't love you the way you love me.
Anyway, see y'all on my next angst post or in the tags. Have another devastating screencap to wrap this all up nicely 💚
#alex talks good omens#good omens#ineffable husbands#crowley#aziraphale#good omens season 2#go2#aziracrow#crowley x aziraphale#ineffable divorce#the final fifteen#good omens meta#good omens 2
967 notes
·
View notes
Text
rats, huh?
All the way back in 158, we have Chisaki give a monologue that I had completely fucking forgot about because it was cut from the anime

And it reminded me of a lot more recent chapter that we had gotten.
With this evidence put together, we really can make an effort to discover where exactly quirks came from.
The mother of all quirks isn't the mother of the glowing baby, as is thought by the characters in-universe. no, it was actually someone else.
The mother of all quirks is AFO and OFA's mother, and when the twins were born and she passed away, the rats that ate her corpse spread the disease to humans.
But not just any humans. Children. Mostly babies that were born at that time and children on the onset of puberty.
We don't hear of meta-abilities/quirks manifesting at puberty now, because almost everyone in this world is infected with this disease that alters their dna. this is the true source of quirks. I bet the remaining 20% of people are either people who were born before that time, or people who have resistance/immunity to the original disease so the side effects of quirks never manifested.
In the end, I don't know what type of solution will best fit for the world of BNHA. things won't go back to normal, as deku said. society has been at a tipping point for a long time, and something has to give. I really wonder what will happen next.
I don't know if Eri will be the solution for solving all of society's problems with quirks. I don't know if getting rid of everyone's quirks will even be a good solution, seeing as how much technology has advanced because of it. Destroying the symptoms of the problem at hand rarely makes the problem itself go away. Quirks just magnified every single known flaw with society and dragged them into the light.
(i had discovered this while gathering screencaps for this post, go check that out too if you dont mind)
#bnha#bnha spoilers#manga spoilers#bnha meta#meta#worldbuilding#boku no hero academia spoilers#boku no hero academia#the narwhal speaks
344 notes
·
View notes
Text
i finished AA investigations 1 btw :3 tier list update time!
All in all: Investigations 1 was pretty tough to get through unfortunately. Not that it was like BAD or anything but i really lost the drive somethin fierce with this one. The writing just did not feel even remotely as sharp or fun as the best of even AA1, though i don't think there was ever a low point as low of some of the first trilogy's worst. The very definition of "mid" overall, and I don't mean the new kind of "mid" that actually just means bad.
The last case of AAI1 was actually really good though! Really picked up the pace, it was nice and long and very fun to put the actual mystery together. It tied together the underlying plot of the entire game very nicely, one thing i think Investigations actually did really well overall. I liked how tangibly connected pretty much every case felt, even if the individual stories lost my interest often.
I will say though in regards to the final case, holy shit it goes off the rails near the end. I think there is legitimately 5 instances in a row of the murderer going "okay im going home now" only for some character to rush in at the last second and extend the investigation because of some weird asinine piece of evidence that is infinitely less valuable than everything we've already discussed. I think that final 3rd or so of the case is particularly egregious about treating previous evidence as inconsequential at the slightest bit of opposition in a way that started to really exhaust me by the end. I know that's kinda the whole bit with Ace Attorney, but usually there's a bit of balance in the more well rounded cases. This might be the worst I've seen of it so far, so it left somewhat of a sour taste in my mouth. Still enjoyed it a lot up to that point though, so it gets a solid A rank :)
Sorry I didn't post a lot of screencaps or anything when playin this one, I would have been taking them but my Steam Deck (where i play these most often) has been acting kinda buggy w my controller's screenshot button. It'll work once when I boot up the game fresh and then just not register any of my screenshots after. Hopefully that'll be fixed soon :) Time to move onto AAI2.... sometime in the near future! Maybe tonight! Maybe next week! I dunno! WEEEEE!
386 notes
·
View notes
Text

Hi! I got asked if I have an icon tutorial so I thought I'd do my best to go through my (probably way too long) process :) I'm going to show how I made that icon up there 👆
When I first started making icons I used this great tutorial by @/strwrs and then slowly added my own preferences to make this chaotic process 💕
First for getting screencaps of things i normally just google "[name of show/movie] screencaps" but one of the ones I use a lot is this site.
1. Open the pic in photoshop and crop it
Here's the full image:

Here's where I'm cropping it:

I like to make the size of my icons 250x250 but it can be more of a preference thing, a lot of people use 200x200 or I've seen 100x100 too.
I also like to crop a little above the image sometimes to give more space above the head
2. Removing the background
Removing the background is way easier on animation than on real people sometimes so I can show 2 examples even though I do it the same way...
First I go to select > select and mask:

Then I use the quick selection tool to select as much of the head as i can and the brush tool to remove/re-add parts that got missed so it should look like this:


(is the quick selection tool great? not all the time but when it works well it's great 🤡)
For something like this where her hair has a lot of texture in it and it's difficult to get a good outline, I'll zoom in really far and use the brush tool to get as many of the big pieces as I can so it looks a little more natural when the background color is added

Sometimes there can be a white/black line around the icon that got missed from erasing the background and you can use the brush tool to erase that as well.
3. resizing and sharpening
Now everything should look like this:

I'm going to go to the right where my layers are at and create a new group by clicking on the folder at the bottom
Then I drag the layer mask up to link it to the group instead of just the image and drag the image into the folder:

Next I like to sharpen before I resize the image so I open the group and highlight the image layer and then go filter > convert for smart filters and then for sharpening: filter > sharpen > smart sharpen with these settings:

Now with the image layer still highlighted i go to image > image size and set it to 250x250

4. the fun part ✨
Now we can add the background color and everything else ✌️
I have a lot of previous templates saved to save me time so what I normally do is open a psd template I have then highlight the group layer i just made then right click > duplicate group and have the destination be the psd and then I can just change the colors of gradients i've already made (For this tutorial though I'll show you how I make the gradients/paint layers)
For coloring this is pretty much what my process usually looks like (im probably going way overboard with it but oh well lol) it really depends on the pic being used, some don't need to be colored as much.
I have found that over brightening/upping the vibrance isn't necessarily a bad thing sometimes (not all the time though) because of how small the icons are it kind of helps the image stand out more when they're used but it's up to you!
(I also put all the adjustment layers into one group because it gets a little chaotic if I don't)

Next we're going to make a gradient ✨ first i go to the adjustment fill button (?) and pick gradient

Then I just pick one of the generic photoshop options that kind of has the look I want ( it doesn't matter too much since it will be edited so it can be any color)

Now to change the color of the gradient click on the color part in the gradient section and you'll see this

I deleted the bottom middle square because I didn't want it, but to change the colors double click on the bottom left or right squares and a color wheel will pop up.
When I pick the lighter color i normally just go up to a lighter section above the darker color
This is the change i made, you can move the middle diamond slider to have the darker or lighter color be more prominent

Next is playing with the angle/scale until it's how you want it, these are what mine ended up being

I also normally adjust the angle so that the lightest part of the gradient is in the top corner where the light source is coming from in the icon pic to make it look more natural
Next I add a solid color layer over the coloring layers with a color that's similar to the background gradient color im using and switch to the brush tool with black paint and with the layer mask selected on the solid color layer paint over everything i don't want colored with black
Then I do a second solid color layer set to a lightish brown, normally on just the hair, to add a bit more contrast

then i set the color fill layer that matches the background to either overlay, soft light, or color (depending on which one looks best for the image) and adjust the opacity/fill to where I want it.
I always set the brown layer to soft light with the opacity at around 80%
And NOW just when you think I might be done...I'm not...because I have to make this process as long as possible 😂
Now I do another color fill layer but this time over the entire image group layer. I normally make the color a slightly lighter color than the darkest part of the background color, set it to soft light, lower the opacity/fill to about 50% or lower, (depending on how much it changes the pic) and then right click > create clipping mask so it only effects the image and not the background
This kind of just tints the image a little with the color to bring it together a little more

Now the icon looks like this:

You can add more fun stuff like doodles/background textures i've used these and these but there's a lot of resource blogs like @/completeresources and @/allresources that have long lists of different textures
If i wanted to add a texture though i would put it over the gradient layer and set it to overlay or soft light


And to add a doodle you just put it at the very top of everything and resize it/turn it using the move tool :)


Then you're done! you can go file > export > quick export as png and thats it 👏
Hopefully this makes sense! I've uploaded the template i made in the tutorial here if that's easier to follow but feel free to ask if you have any questions!
#icon tutorial#dailyresources#completeresources#icons#tutorial#tutorial*#photoshop tutorial#usertana#userzo#tusertha#ps*
72 notes
·
View notes
Note
Please feed us Kankuro fans… something… anything 😭 but really if you have any hcs to share about him or any of the side characters it would be awesome! I’m so happy there’s a new Naruto blog ❤️

You'll find I have a deep, abiding love for side characters! I hope you enjoy this mishmash of domestic and romantic headcanons for Kankuro! (Also I don't know if that's a real screencap but it's adorable.)
Characters: Kankuro
Contents: gn!reader, Kankuro being a menace


Kankuro
Of the three Sand siblings, Kankuro is probably the one who gets overlooked the most. Between a former bloodthirsty, insomno-maniac-turned-hot-Kazekage and Temari, Kankuro just fades into the background a little more. Classic middle child syndrome.
But there's a lot more to this guy than some funky face paint and a few puppets. Let's unpack.
First of all, Kankuro actually makes a pretty damn good boyfriend. He can be a little rough around the edges like a lot of Sand shinobi, but over time things wear smooth and easy as the well-oiled joints of his favourite puppets.
When you first meet him, he veers between cocky and uncertain in equal measures because of the aforementioned middle child syndrome, but as he gets older and more comfortable around you, he becomes more grounded, more confident.
Yes, he does still talk to his puppets, especially when he's mending them. You'll approach his workshop to tell him dinner's ready and he's in there, yapping away to some marionnette like he's a doctor and it's his patient. He used to get embarrassed when you first caught him at it, but now he just laughs it off. A twitch of his finger and some chakra strings and the puppet shrugs at you.
"This guy's a great listener," Kankuro jokes. "Sometimes all a guy needs is a block of wood to clear his head."
"Yeah, to the back of the skull maybe," Temari retorts when you tell her later. "I told that idiot to stop babying those things or he'd never get any friends."
He's got a few annoying habits. While his workshop is always clean and organised, his projects at home are messier and usually left somewhere inconvenient, like the kitchen table when you're about to sit down for dinner, or behind the couch cushions, ready to jab your ass when you flop down after a mission.
He takes ages to apply his face paint in the morning, hogging the bathroom mirror because he refuses to use a dressing table/vanity, and when that stuff spatters it is a bitch to clean. Sure, the smudge-proof, sweat-proof, waterproof stuff is great for Kankuro in the field, but when its crusted around the sink? Not so much. House rule: Kankuro has to scrub it off.
He likes to use puppet parts to prank you—think finding Karasu hiding behind the shower curtain, or opening the fridge to find a disembodied wooden hand flipping you off next to the tomatoes. Kankuro's wearing the biggest shit-eating grin when you jump, until you threatened his mechanical menaces with the woodchipper.
"Aww, c'mon, babe! Not Karasu! He's family!"
"Babe" is his #1 pet name for you. He gets really self-conscious if he tries to use anything more sentimental and quickly reverts back to the tried and true.
Call him "pookie" in front of Gaara and Temari to mess with him. He goes red under his face paint and sputters, trying to explain to them that you've never called him that before.
Temari smirks. "Whatever you say, pookie."
Kankuro looks in your eyes and he just knows this is payback for hiding a disembodied puppet head in the laundry basket.
The best gifts for Kankuro, outside of bigger occasions like his birthdays, are usually consumables for his puppet making: nails, screws, sandpaper, wood polish, paints, etc. These things can run out fast, and when you show up with exactly what he was about to run out of, he feels seen. Like you've been paying enough attention to his supplies and you care enough to get it for him without asking.
Speaking of puppet supplies, wood is at a bit of a premium in Suna. The time you came back from a mission and unsealed a scroll full of rare wood from the Land of Tea, he almost hyperventilated. Dude was running his hands over the wood chunks, holding up to the light, cooing over them like they were his firstborn.
Speaking of hands, Kankuro's are quite big, with even more callouses than the average shinobi. Those skilled hands of his are good for kneading the tension out of your muscles, popping your spine as easily as if you were a puppet. Fair warning, his hands almost always migrate down to your ass for a sly grope.
If he's feeling lazy and needs something from across the room, he'll absolutely use chakra strings to snag it and yoink it over to him.
Yes, this includes you.

AO3 | Other Blogs: Bungo Stray Dogs | BNHA | Bleach | JJK
90 notes
·
View notes
Text
Oofuri and AbeMiha in the Year of Our Lord 2025?
Help I've fallen into a time warp and my mind's back in 2007/2008 obsessing over extremely passionate baseball dorks again.

They care so much about each other, it's crazy.

And the growth both of them go through to overcome their personal shortcomings is so wholesome.
I was re-reading to catch up, and... wow...

The "guy talk" is one of the best parts about this manga.
Neither Mihashi nor Abe have had a first love yet, huh. And while Mihashi likes women in nurse uniforms, Abe doesn't have anything specific in mind- he doesn't even have fantasies he uses as "material". While they're devoting themselves to each other for the next three years to become one in mind and body. Slowly coming to understand each other while being so passionate about the other guy that they cry over him at least twice each.
Um.
Yeah, the brainworms are back in full force after laying dormant for about 17 years. AbeMiha, my beloveds... I'm rewriting a fluff one-shot I did for them back in 2007 and enjoying the nostalgia (and seeing how much I've improved since then). These silly creatures are still just as charming as I remember them being.
Enjoy this moldy out-of-context screencap from my hard drive.
I wonder if it's because Oofuri is a seinen and not a shounen, but there's a lot of skinship and typical teenage boy banter about sex too. Tajima full-on strips Mihashi at the pool in front of their teammates to show them his uncut dick, for Chrissakes. And Mihashi and Abe always get paired off together; they're explicitly told to cook breakfast for everyone alone to bond together, sleep in the same hotel room, are always trying to understand each other and communicate better...

I love them so much.
I know it's not as fruity to the Japanese, but even so, the ship was hugely popular for a while for good reason. The handholding and mutual devotion alone were kind of a big deal. I don't know where the relationship is at in canon right now (I have over 130 chapters to go to catch up, yikes) but I don't think that teased romance with Shinooka has gotten very far with either of them.
Or maybe it has, I genuinely don't know! It's hard to get a feel when the fandom is basically on life support. A series that has been around for about 20 years will naturally see people cycle out, especially when it comes to creating fan works and shipping, but I feel like I'm walking through a ghost town mostly filled with time capsules from a different era. So many dead LJ groups and broken links to shrines that fell into the abyss long ago... does a series this long need a perpetual anime to keep interest up? Or was it the long hiatus that cooled things off? Both?

Still the gayest and most wholesome battery as far as I'm concerned.
Anyway, I'll do my small part to give back by fixing up that old one-shot and see what I'm feeling like when I catch up. Maybe I'll write a "why ship this" essay like I did for HakuHiro too, who knows. Depends on how active the brainworms are and for how long. For now I'm just enjoying the good times and extremely technical matches all over again. The Nishiura boys are all so precious and AbeMiha are the most precious of all.
#oofuri#abemiha#Not ruling out the chance of this becoming an oofuri blog for a bit if Kagurabachi keeps losing me and there's no KH news#Gonna test some ship tags to see what the JP fandom's been up to once I catch up#I hope it's as simple as searching あべみは but somehow I doubt it. Maybe あべ三? 阿部三? 阿部み? No clue...
77 notes
·
View notes
Note
Hi, I love your Kiu art. Do you have any tips to draw Pit’s hair? I know it’s star shaped, but I always have trouble drawing it.
Also, where does the gif from your tumblr header comes from?
Oh it’s like I was born for this question
I think I’ve gotten this question before and it’s always something I’ve wanted to make a more in-depth thread on, because Pit’s hair is one of those obscure things that I maybe have a little *too* much knowledge on haha. So I’ll try to explain my thought process the best I can in this thread! 🫡

To start, you’re gonna want some references. Be prepared to stare at Pit’s model a LOT if you really wanna get a good idea of its form. Pulling from in-game cutscenes and screencaps will work just fine. But here’s a super cool secret..you can pull up his model on a 3D program! or you can go to this lovely upload on sketchfab and turn his head however you need. For this example I’ll look at a 3/4th angle.
more under cut this thread runs a little long

Alright, let’s start with a Pit! Hi Pit.

I almost always start with this larger strand in the center. If you can nail this first piece, you can easily refer back to it to get an idea of scale and the locations of the other strands. It’s a great starting point because it’s leads back to the root of the rest of his hair. The front, anyways. The starting point is usually aligned roughly above his right eye! It’s a good rule of thumb, but always refer back to your references! You wanna utilize that sense of depth so his hair and head aren’t flatter than they are.
One of the best pieces of advice I’ve been told when looking at a reference is to check your angles! Sometimes lines are completely different than how you look at them at a glance. Looking at the outline of an object can also help if you’re struggling to get the shape of an object just right! Where was I— oh yeah, bald Pit.

After the center strand I like to draw this little strand to the right. I usually like to make it smaller than it is for more variety in sizes. Speaking of, try to add a little variety to the strands to spice things up! When looking at the model for reference, it’s super easy to get into the habit of making them all uniform, even diamonds. Which is fine if that’s your style, but for me, I like to mess around with the shapes to make it feel more natural.

After his little strand I like to move up to a piece above that. This is like your holy trinity, because everything else will usually fall behind these three strands.

Next! I usually draw this horizontal piece at the same time I do the three above. The root of this strand sits just behind the front-middle and the top-middle strands, but you can also get away with just making it the same “layer” as the first three. Hey it’s starting to look like a starfish! Or a plant! Or weird almonds!

Next strand! At this point I started to notice his head-to-hair ratio seemed off, so I made his head larger. I like to use the liquify tool to move things around that I notice while drawing.

Last strand in the front! Past this point I tend to be messier and sorta roughly follow whatever reference I’m using. Depending on what angle I’m drawing him from, whatever piece is the furthest from the camera (So if this were flipped, the orange strand above) I tend to mess around with more to make his silhouette look more appealing. It’s also good to note that the pieces that cover the front of his face are really useful to make whatever angle your drawing him from easier to define because they usually make a line.

Next! The hair that swoops down the side of his head. I tend to play around with the shape of these a lot but for the sake of this thread I did them closer to the reference. My general rule of thumb is that the piece closer to the camera will cover a little bit of his ear from this angle. Make sure to pay attention to how far out the further piece goes from your reference.

This is where I focus more on general shapes, because these outer pieces will define his silhouette and really determine if your Pits will look spikier, rounder, etc. Add some curves to the ends to make him curly! Have fun with it!


Mullet time! I like to add curvature to the piece behind his ear and to the bottom hairs so they don’t look as flat.

Add some more little hairs as you please and there you go!!

Aaand he’s done! I’ve been drawing his hair for years, so I’m at the point where I can pretty confidently freehand this process, but I still need help now and then with more complicated angles. I can’t state enough how helpful it is to have references!!
Also to your other question, my banner is from Nintendo’s E3 2011 presentation where they showed off a bunch of cool 3D demonstrations! Here’s a link of a high quality rip. It single-handedly made blades my favorite weapons class
53 notes
·
View notes
Text

Welcome back!! I hope you're doing well and, if not, I hope my silly ramblings can make your day somewhat better, like the wildcats used to say: we're all in this together ♥
previously, in harrowcita del 9:
this happened
for those of you recently tuning in, this is the tag of all the ramblings
also, I'm officially in the sixth house now, palmolive can't stop me
CHAPTER 46
we're back inside the emperor's bolthole, which is infested
this is what happens when you have a lyctor orgy without the proper protection
gideon is doing her very best to fight the infestation of herald bees swarming and attacking her
she's in harrow's feeble small kitten baby body, so she's dying a lot
I'm gonna try to represent this visually
gideon keeps apologizing to harrow for getting her bits chewed off and her insides pouring out
and puts emphasis on things she wants harrow to remember
"I saw it eat your thumb—these details are important, so keep up with me—and your thumb was back in the next half minute"
"Child, that bee smashed you"
"I touched your intestines, which is usually what, fourth date"
me:
so, gideon takes off harrow's excess bones, which are no use to her, and goes further into the emperor's infested bolthole, where she finds mercygirl
mercygirl thinks gideon is harrow at first and, turns out, she was the one who stabbed her
these lyctors istg
can't trust any of them
mercygirl thinks harrow should be grateful that she stabbed her
and she was aware that harrow had "stuffed the soul of the cavalier in the back of her brain"
NOW WE'RE GONNA GET INTO SOME TERRITORY THAT MAKES ME GO ABSOLUTELY BERSERK, SO BEAR WITH ME
I NEED TO GET MY NOTES BACK FROM MY PREVIOUS RECAPS FOR THIS
she asks what happened with gideon's eyes and, as we have seen in the previous gideon-centric chapter, gideon's eyes are in harrow's face atm, if memory serves
"You're not her—she isn't driving you—but you have her eyes. Why? When they showed me your corpse I didn't think to check the eyes"
"I thought I knew what you were, though I didn't want to believe it..."
now listen, we're starting to tie some loose ends and some of those loose ends are linked very closely to my previous theories
I have been considering the Commander Wake is Gideon's Mom and Has a Personal Connection To Gideon The First and Is The One Connected With The Harrow Notes In Canaan AU for a while now
I need to link the specific recaps where I said this because I need to be transparent about where my brain was at
Evidence A, Evidence B, Evidence C, Evidence D
there's probably more but those are pretty clear
I swear to god if I was right about this I'm gonna screencap my own recap and put it here when the time comes
I've been marinating this one for months
I actually forgot how much of that I had written down in the recaps until I re-read them
mercygirl says that she thought the commander was a bad girl workaholic who put business before family, that she made her "the dolls" and she must have "played silly buggers with the emission" and that "gideon was on her tail"
"And then Gideon ruined everything. Then the commander ruined everything. Then you ruined everything. This could have been over eighteen years ago"
apparently gideon the first was "obsessed" with the commander, which accounts for some of the notes harrow read
I'LL GET BACK TO THAT WHEN WE GET TO THE SLEEPER, MY THEORIES CONTINUE
mercygirl starts calling gideon all sorts of names, including mutant, and keeps being bothered about her eyes
"Lipochrome. Recessive. You are the evidence. He lied to us...and you are all the proof I needed" "Cytherea would have known as soon as she looked at you"
is gideon the first gideon's dad??????? I mean, I always though he might have Something with the mom but my money was on gideon being made through science rather than Traditional Means
I mean, having lyctor genes in some way would account for gideon being a demigod, something I said with those words when I was reading gideon
also, remember when not!dulcinea told gideon she was prettier than the other gideon?? because I've never forgotten
mercygirl confirms that gideon the first was sent to kill gideon's mom
who, according to mercygirl, would have hated to be called a mom
mamá luchona intensifies
all of which aligns with my theory very nicely so far
she calls gideon more names, including "abomination, you heresy, you failed ambition nineteen years too late"
gideon reacts not wanting mercygirl to touch her instinctively
man, my theories are RIGHT THERE to be fully connected I'm BITING THE DESK
but there's no time for any more talk because mercygirl is trying to kill gideon in harrow's body
but she is stopped
she is shot
by not!dulcinea
but I don't think this is not!dulcinea, I previously mentioned her maybe being used by someone, not sure if it's possession or being used or what's going on but I don't think this is her
I thought about gideon the first being the one to do it but if he wanted harrow dead, I'm not sure he'd save gideon now
not!dulcinea says "with a tone that wasn't" hers: "goodbye"
gideon ends the chapter with "what the fuck is going on?"
CHAPTER 47
we're back at canaan au and it's time to perform an exorcism
harrow has a new note
I've been connecting those notes to gideon's mom possibly commander wake (as linked above)
the latest note continues to add to my theory
"end of the line. falling. oxygen can't last the distance and won't redirect power from the payload. instead I will make you watch every moment as I get the last privilege you cannot enjoy you bygone son of a bitch. I hope you're both as sorry as I am."
I still think this is gideon's mom because that's how she died, I mean, she got to the ninth in a suit without air and gideon still had some, allegedly
I've been thinking that one of the two people involved in the situationship triangle described in the notes was gideon the first, and that maybe the other was dr reverend emperor john
he's the most likely to be a bygone son of a bitch, so maybe I'm right
so, if harrow connects the notes with the spirit that's haunting her
and I'm connecting them to gideon's mom....
what if it's her that's haunting harrow?????
I mean, Waker
I NEED TO STOP GETTING INTO THEORY TANGENTS
anyway, all of the ghoulie ghostie friends are getting together for a sleepover exorcism
I didn't use this when I should have, back when the different aus were going by, but here it is
real!dulcinea says "Pal always said I'd be the death of him. And I was..."
he died being a weenie but he's not all the way dead, so it's fine
harrow questions why everyone wants to help her but everyone's totally fine with all this, for different reasons
real!dulcinea is "horny for revenge" (that's a tshirt for the seventh girlies right there)
protozoa is there because duty is his full personality
abby is really grateful to be asked to help (she also really likes tombs, very lara croft of her)
magnus loves his wife
ortus wants a redemption arc and now has a polycule
martita is behaving better than judith
abby asks harrow if there's anything she can remember from the slasher waker sleeper to try to pinpoint who tf it is
there's a suit, blood, a gun and gideon's sword, which is the only thing harrowcita recognizes and doesn't know where it comes from
my money is on gideon's mom, commander wake, probably also the woman in the shuttle poster that harrow saw but didn't recognize back when she met camilla
I'M PUTTING MORE CHIPS IN MY BETS EVEN IF I GET NO MORE INFO RN
harrow is very interested in how abby and magnus make it work as a married couple who are also a necro and a cav
I wonder why she's so interested
anyway, everything goes to shit on the exorcism
like, it goes really, really badly
group project off the rails bad
I mean, they didn't even have blood
apparently the spirit is also tethered to an object out there (the sword??????? possibly?????)
and she (she's a SHE) is pretty much invincible and shooting everyone and performing parkour while she's at it
harrow says camilla would be impressed, which is the highest praise
the sleeper waker slasher potentially gideon's mom (but not sure because it hasn't been confirmed yet) calls harrow by her name, but in a way that sounds like she's never said it before
she says it like a curse, which maybe means she knows, to some degree, how harrow was made????
she's basically doing whatever she wants over here, shooting ghosts, punching ghosts, throwing them around, regenerating, not bleeding, pulling guns out of thin air
I mean, ok, we got it, calm down lady
where was this energy when it was time to kill the emperor
she says there's "no magic" there and that "she's been doing this for years"
she wants harrow, so she can kill her and use her body to "finish it"
WHICH MAYBE MEANS KILLING THE EMPEROR???
OH MAN I DO WANT THAT TO HAPPEN
BUT NOT AT THE COST OF HARROW
also, mrs potentially gideon's mom, even if harrow dies, there's also gideon in the body right now so, it's a bit crowded atm
maybe find another way to kill the emperor
use not!dulcinea instead, if you can get the current tenant to leave
the chapter ends with: "ortus cleared his throat"
MAN, I HOPE HE DROPS SOME POETRY LINES, WE SURELY NEED THAT
and that's it for today!!!!!things are certainly heating up in the emperor's bolthole!!!! see you soon for the next installment, fingers crossed for my theories!!!
85 notes
·
View notes