#netgear networking
Text
"Effortless Connectivity: Expert-Backed Guide for Seamless Netgear Plug-In WiFi Extender Setup!"
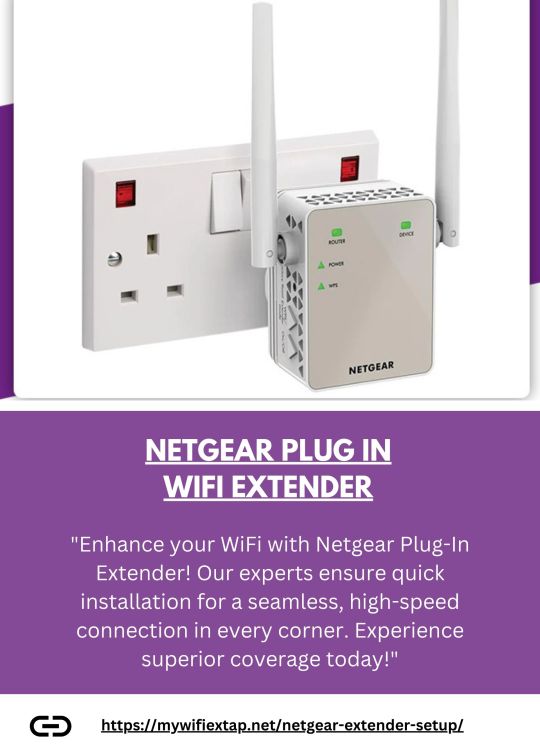
"Transform your WiFi experience effortlessly with the Netgear Plug-In WiFi Extender. Our expert-guided setup ensures seamless installation in minutes. Just plug it in, follow the intuitive steps provided by our experts, and enjoy extended WiFi coverage throughout your home. Say goodbye to dead zones and hello to a stronger, more reliable connection. Elevate your network with Netgear, where setup simplicity meets powerful performance."
2 notes
·
View notes
Text
https://routeraccess.co.uk/
Netgear Routers | Netgear Router WiFi Networking Support
For an easy Netgear Router login process, open the web browser and type the routerlogin.net web address in the browser bar. Now, enter the default admin details on the login window. Here, you will reach the smart home dashboard and configure the basic settings like SSID name and password change. To know more information regarding the same, visit us!
0 notes
Text
Netgear APM402XL 2 x 40GBASE-X QSFP+ Port Card
📌 Netgear APM402XL 2 x 40GBASE-X QSFP+ Port Card for M4300-96X
✨ Netgear APM402XL is a 2 x 40GBASE-X QSFP+ port card designed for the M4300-96X switch, enabling high-speed 40Gbps connectivity for scalable and efficient network performance in demanding environments.
Contact Us: 👇👇👇
📧 [email protected]
📞 415-704-8713
🔗 https://miatlantic.us/it/apm402xl-10000s

#MIATLANTIC#Netgear#QSFPPlus#Networking#40Gbps#PortCard#M430096X#HighSpeedNetworking#NetworkUpgrade#TechHardware#DataCenter#ScalableNetworking#WTS#usa#instock
0 notes
Text
Videoguys Quick Hits: PTZOptics Move SE PTZ Camera, NETGEAR M4250 Netw - Videoguys
New Post has been published on https://thedigitalinsider.com/videoguys-quick-hits-ptzoptics-move-se-ptz-camera-netgear-m4250-netw-videoguys/
Videoguys Quick Hits: PTZOptics Move SE PTZ Camera, NETGEAR M4250 Netw - Videoguys

On today’s episode of Videoguys Live, James talks about 3 products that can help elevate your live streaming production! First the PTZoptics Move SE 1080 60p PTZ camera. Next he will talk about Kiloviews E3 Dual Channel Encoder. Lastly, he will talk about the NETGEAR M4250 Pro AV network switches and which one we recommend for a multi camera shoot!
youtube
PTZOptics Move SE
Ideal for live streaming and video production, the Move SE offers high-quality video with a resolution of 1080p at 60fps at a fraction of the cost. With the Move SE’s auto-tracking features, users can easily control their production.
Plus, the Move SE’s Presenter-Lock auto-tracking features allow users to lock onto a specific person and switch between on-stage presenters with the click of a button.
4th generation HD PTZ camera
5 year warranty!
SONY Optics deliver up to 1080p60
Total Connectivity: HDMI, 3G-SDI, USB & IP Output. Plus POE!
Built-In Auto-Tracking
Available in Gray or White
NDI HX2 Now included with Latest Firmware!
PTZOptics Hive Studio
Access your cameras from anywhere, anytime.
Professional Control for Everyone
Introducing the simplest way to control all of your cameras from anywhere in the world.
Experience our innovative studio interface that grants control across your entire camera lineup, all for an affordable price.
Kiloview E3
Dual-Channel 4K HDMI & 3G-SDI HEVC Video Encoder
Flexible, Powerful, Professional: A New Generation of Video Encoder
Up to UHD 4K30 via HDMI
Supports Multiple Streaming Protocols
H.265 and H.264 Support
Streams to up to 16 Platforms
Built-In LCD Screen
Low <100ms Latency
PoE Support
Encoding Both Video Inputs of HDMI & 3G-SDI
E3 allows encoding video sources from either port of 3G-SDI or HDMI, mixing both video sources into one output in PIP or PBP mode or even encoding video sources into up to 1080p60 from both ports of HDMI and 3G-SDI simultaneously for high-quality live streaming.
Flexible Formats Selection
For all IP-based video transmission processes, E3 supports the high efficiency video codec HEVC as well as H.264.
With support of HEVC, E3 can maintain video image quality with lower bitrate, saving more than 50% of your bandwidth.
Compatible with All Protocols
For broad applications, E3 supports a complete range of streaming protocols including NDI HX3/NDI HX2/SRT/RTMP/RTMPS/HLS/TS over UDP/RTP*/RTSP/Onvif*
It can be used for live production with NDI HX, remote production with SRT, live streaming with RTMP or HLS, or any transmission with all different protocols.
Powerful Streaming Capabilities
The E3 input can be up to 4Kp30 from its HDMI port and up to 1080p60 from its 3G-SDI port
With its powerful output capabilities, E3 can go live to up to 4 different platforms simultaneously, max bitrate can be up to 120Mbps.
Built-in LCD Screen and Touch Button
E3 is equipped with a 1.14-inch LCD screen with touch buttons for a better user experience
With the built-in LCD screen, you can easily check the connectivity, IP address, CPU usage, memory usage, resolution and tally status in real-time
The LCD Screen is also a big-sized Tally* to display the preview/program status.
NETGEAR M4250 GSM4212PX100NAS
8-port 10/100/1000BASE-T (RJ45) PoE+ with 240W PoE budget
2-port 10/100/1000BASE-T (RJ45)
2-port 1000/10GBASE-X (SFP+)
60 Gbps non-blocking fabric across 12 ports
Out-of-band 1G Ethernet management port
USB-C and RJ45 RS232 console ports and USB-A storage port
Terms to Learn:
PoE – Power of Ethernet
PoE – 15.4 Watts
PoE+ – 30 Watts
PoE++ – 60-100 Watts depending on version
TPD – Total Power Delivery – The maximum power a switch can deliver
Why Do We Recommend NETGEAR M4250?
Engineered for AV over IP
Netgear is committed to ProAV
Easy to Configure (GUI)
Presets for NDI HX & NDI 5
Recommended by all of our partners: PTZOptics, Vizrt, Birddog etc
What Switch Do We Recommend For A Multi-Camera Shoot?
8x1G PoE+
TPD 220W
2xSFP+
8x1G PoE+
TPD 240W
2x1G
2xSFP
#4K#amp#applications#buttons#Cameras#channel#connectivity#cpu#display#easy#efficiency#Features#firmware#Fraction#Grants#gui#hdmi#Hive#IP#it#latency#Learn#management#max#memory#Mixing#Netgear#network#One#Optics
0 notes
Text
NETGEAR GS724TP
NETGEAR GS724TP: A High-Performance, Manageable Gigabit Switch for SMBs

In today's data-driven world, every small and medium-sized business requires a robust and reliable network infrastructure. An integral part of this infrastructure is a high-performance switch that helps in handling the ever-growing demand of network traffic. The NETGEAR GS724TP is a very powerful and manageable Gigabit switch designed to meet the requirements of bandwidth-intensive applications for SMBs.
Key Features of the NETGEAR GS724TP
High Performance: The GS724TP comes with 24 Gigabit Ethernet ports for plenty of bandwidth connecting devices such as computers, servers, printers, and network storage devices.
Managed Flexibility: The GS724TP comes with a number of management features that give IT administrators granular control over the performance and security of the switch yet remains easy to use. These include VLANs for network segmentation, QoS for traffic prioritization, and port security to limit access to authorized devices only.

Power over Ethernet (PoE+): The higher-end models of this switch, the GS724TP, are fitted with PoE+ technology that allows it to source power into devices like VoIP phones and IP cameras using the same Ethernet cable used for data transmission. This means that one does not need to use different power supplies for such devices, hence making installation very easy, not to mention much neater.
Reliability and Durability: It features a metal housing to ensure it lasts with fanless operation for completely silent operation. There is also an option for a limited lifetime warranty for the businesses.

Benefits of Using the NETGEAR GS724TP
Enhanced Network Performance: Gigabit speed on the GS724TP can enhance how your business rapidly transmits data with ease.
Enhanced Security: The switch's management capabilities allow IT administrators to uphold VLANs with port security, which cover the critical needs of securing vital networked resources against unauthorized access.
Easy Installation and Maintenance: The GS724TP can easily be installed and maintained—even with a business that has little IT staff—through its web-based management interface, which allows administrators to configure the switch from any web browser.
Cost Reduction: The GS724TP has PoE+ support, a feature that significantly reduces cabling and installation costs in most business setups by eliminating the need for extra power outlets to be installed for PoE devices.

The NETGEAR GS724TP is a Gigabit switch with high performance and multi-use capabilities, ideal for SMBs looking to improve the performance, security, and manageability of the network. Given the high-performance ability, flexible management features, and PoE+ support, the GS724TP is indeed a valuable asset for any business network.
Provide for the particular needs of your business by getting the right switch, with regards to the number of devices that one wants to connect within a network and types of applications that make use of it.
With the GS724TP, choose from a wide array of configurations that meet all of your needs.
Before buying a GS724TP, always consider the reviews in comparison to other similar switches available in the network equipment store.
#PoE+#NETGEAR GS724TP#Gigabit switch#SMBs#managed switch#network performance#network equipment store#security#cost-effective
1 note
·
View note
Text

How to Login to Netgear Router?
Want to make the most out of your Netgear Router? Then go ahead with the Netgear Router Login first. For this, open the web browser and type routerlogin.net web address in the browser bar. Now, enter the default admin credentials on the login window. You reach the smart Home dashboard of the router. For more info, stay tuned!
0 notes
Text
How can I find the IP address of a device connected to my Netgear router?

Have you ever wanted to learn more about IP addresses? In this article, we'll discuss what an IP address is, and how to find the IP address of a device connected to your Netgear router.
What Is An IP Address?
An IP address is a unique numerical identifier assigned to each device connected to the internet protocol for communication. It allows devices to communicate with each other and find each other on the network. Every device has a different IP address, and they are usually assigned by your ISP (internet service provider). You can think of an IP address like a phone number for your computer - it's how other devices on the internet know how to find and connect to it.
You can find the IP address of any device connected to your router by logging into your router's web interface and looking at the list of connected devices. The IP address will be listed next to each device.
How to Find the IP Address Of A Device Connected To Your Router?
When it comes to finding the IP address of a device connected to your router, there are several methods you can use. Here is a list of them:
Through the Router's Web Interface
The easiest way to find the IP address of a device connected to your router is through the router's web interface.
To identify the IP address of a device connected to your router:
- Access the login page for your router. For NETGEAR routers, refer to the instructions on "How do I log in to my NETGEAR home router?" Note: If you do not have a NETGEAR router, consult your specific model's user manual or support page.
- Locate the section of the router's web interface that displays connected devices.
- On NETGEAR routers, navigate to the "Attached Devices" page under the "BASIC" tab. Note: The menu label may vary on other models and be called "Device Manager" or similar.
- Each connected device will display information such as the device name and IP address. For further assistance, refer to your router's support page or contact NETGEAR Support.
Using a Command Prompt (Windows)
If you're using Windows, you can find your IP address by opening a command prompt and typing "ipconfig". Your IP address will be displayed next to the "IPv4 Address" field.
Using Network Settings (MacOS/iOS)
If you want to find the IP address of a device connected to your router, you can do so using the network settings on your Mac or iOS device.
- Access System Preferences and select the Network option.
- Select the location that corresponds to your current network setup (if you need help determining which one it is, look at the network icon in the menu bar).
- Click on Advanced and then select the TCP/IP tab.
- The IP address will be listed next to "Router".
Using a Network Scanner
A third way to find the IP address of a device connected to your router is by using a network scanner. Network scanners are software tools that scan your network and provide information about connected devices, including IP addresses. There are many different network scanners available, both paid and free. Some popular options include Fing and Advanced IP Scanner.
Note: It's worth noting that some devices may have a dynamic IP address which can change over time.In conclusion, finding the IP address of a device connected to your router is a straightforward process that can be accomplished using various methods. Whether you choose to use the router's web interface, command prompt or terminal, or a network scanner, you should be able to quickly identify the IP address of the device you are trying to locate. Knowing the IP address of a device connected to your router can be helpful in a variety of situations, such as troubleshooting network issues or configuring security settings. With this knowledge, you can easily manage and maintain your home network.Reference form: https://mynetgearrouterlogin.com/find-the-ip-address-of-connected-device/
Read the full article
#mynetgearrouterlogin#IPaddress#router#network#deviceIP#networkmanagement#homenetwork#networktroubleshooting#IPconfig#networkscanner#netgear
0 notes
Text
Netgear APM408C-10000S network switch module Gigabit Ethernet
👇👇👇
📌Netgear APM408C-10000S network switch module Gigabit Ethernet
🔰Brand: Netgear
🔰Sku: APM408C-10000S
🔰Condition: NEW
🔰Delivery: Next Day
🔰Product Type: General Products
👇👇👇
🔰Product Name
👉8 x 100M/1G/2.5G/5G/10GBASE-T Port Card
👉Manufacturer Part Number APM408C-10000S
👉Product Type Expansion Module
👉Ethernet Technology 10 Gigabit Ethernet
👉Media Type Supported Twisted Pair
👉Network Technology 10GBase-T
🔰Product Model APM408C
👉Application / Usage Data Networking
👉Interfaces / Ports Details 8 x RJ-45 10GBase-T Network LAN
👉Manufacturer NETGEAR
👉Manuf Part# APM408C-10000S
👇👇👇
Contact Us: 👇👇👇
📧 [email protected]
🔗https://miatlantic.com/apm408c-10000s

#Netgear#apm408c#Portcard#Networklan#TwistedPair#switch#module#switchmodule#Networking#morganingland#UK#bestquality#ithardware#bestprice#rj45#Netgearapm408c#b2bsales#birmingham
0 notes
Text
iPhone Not Connecting to Extender’s Network
0 notes
Text
Ok, I think I might have an idea why my internet is borked - when I set up the new router, I set up a different network with a new name and password, but the spectrum app lists the old network and password, while the netgear app still has the router in the new network. Question is, how do I fix this?
6 notes
·
View notes
Text
Need assistance with how to factory reset Netgear router? For this, locate the reset button at the back of the device and pick a paper clip to push the button in. Now, press & hold the reset button for at least 5-7 seconds and then release. Hereon, the reset procedure is complete. Still, seeking more help? Get in touch with us!
0 notes
Text
Wild swing on this website, but....
Anyone running a wifi mesh system as AP only? I ain't gonna redo my entire network for wifi toys.
Basically: hardwired setup is as i want it, but we're currently running a couple of APs with differing ssids for full coverage. A unified roaming setup would be far tastier, but i'm not gonna be railroaded into replacing my current router or bridging it as ceding control is the same damned thing. Current disparate APs either pull dhcp from main router, or if they can't, have been zoned ranged to not conflict with main with the gateway hardcoded.
It looks like a netgear system can run ap only mode with an ethernet backhaul, and i can likewise zone out clashes, but hoping someone already has the gear or a similar setup 'cos i ain't dropping money on potentially lying advertising spin.
4 notes
·
View notes
Text
Tech Advice and Top Tech Tips from Videoguys - Videoguys
New Post has been published on https://thedigitalinsider.com/tech-advice-and-top-tech-tips-from-videoguys-videoguys/
Tech Advice and Top Tech Tips from Videoguys - Videoguys

On this episode of Videoguys Live, James goes over some frequently asked questions by our viewers and gives you his advice and best tech tips for your live production! Topics for this week include, which NETGEAR Pro AV Switch is right for you, options for wireless production, and what you should consider when building a new production studio.
Watch the full video below:
youtube
What NETGEAR Switch is Right For Me?
Engineered for AV over IP
Netgear is committed to ProAV
Easy to Configure (GUI)
Presets for NDI HX & NDI 5
Recommended by all of our partners: PTZOptics, Vizrt, Birddog etc
Terms to Know
PoE (Power over Ethernet)
PoE – 15.4 Watts
PoE+ – 30 Watts
PoE++ – 60-100 Watts depending on version
TPD (Total Power Delivery)
The maximum amount of power a switch can deliver
A PoE+ switch with 60 watts TPD can only power 2 PoE+ cameras, no matter how many ports it has
SFP (Small Form-Factor Pluggable Transceiver)
Commonly used for optical network connection, but can be copper
Allows for port flexibility
SFP – operates @ 1Gbps
SFP+ – operates @ 10Gbps
NETGEAR M4250 Series Network Switches built for NDI
8x1G PoE+
TPD 110W
1x1G
1xSFP
8x1G PoE+
TPD 220W
2xSFP+
What Options Are There For Productions Using NDI Over Wi-Fi?
Kiloview Wireless NDI Encoders with Enhanced Wi-Fi
1080p60 HDMI Wireless NDI|HXEncoder
1080p60 3G-SDI Wireless NDI|HXEncoder
Atomos Connect
Atomos Connect shares your creative vision with your team worldwide and upgrades your Ninja’s I/O with 12G-SDI to HDMI cross-conversion, Wi-Fi 6 (6E for Ninja Ultra) and 1GbE Ethernet, wireless NDI networking and timecode synchronization.
Atomos Connect includes a 12G SDI interface for a wide range of professional SDI-equipped cameras, adding to the already huge range of HDMI-supported by the Ninja and Ninja Ultra. The SDI input can also cross convert a signal to the HDMI output, for additional workflow options.
Atomos Connect is compatible with…
JVC Pro GY-HC500SPCU 4K Connected Camcorder with Sports Overlays with NDI|HX
10-bit ProRes 422/422HQ/422LT at 4K resolution and 50/60p frame rates
recording to M.2 SSD**
4K UHD 30p/25p/24p 4:2:2 10-bit / 4:2:0 8-bit (150Mbps) and various HD recording to SDHC/SDXC card*
HDR recording, HLG or J-Log1 (10-bit)
1-inch (effective) CMOS sensor with high picture quality
BirdDog X1 and X1 Ultra PTZ Cameras
X1 Features:
1080/60p
20X Zoom
Tally Light
AI Auto Focus tracking
HDMI/USB/IP
NDI HX3
WiFi Connection
E-ink Label
Integrated NDI HX decoder
X1 Ultra Features:
4K/30p
12X Zoom
Tally Light
AI Auto Focus tracking
HDMI/USB/IP
NDI HX3
WiFi Connection
E-ink Label
Integrated NDI HX decoder
Things We Learned While Redesigning Our Studio
Typically, We talk about Lighting and Video gear. Let’s talk about Floors and Walls today!
Why we choose LVP Vinyl Flooring
No Static Electricity
Good sound absorption
Padding under feet
Easy to clean
Scratch Resistant
Bonus – Looks Great!
For Walls Not on Camera:
Get sound absorbing Padds/Curtains
Help absorb sound and reduce echo
Use dark colors to reduce light bounce
For Green Screen:
Get chroma Key Green Paint
High Saturation helps with Keying
Matte finish reduces Reflection/ Spill
#4K#Advice#ai#amp#Atomos#Building#Cameras#colors#Dark#decoder#easy#echo#electricity#factor#Features#focus#form#Full#Gear#green#gui#hdmi#how#Ink#it#Light#lighting#matter#Netgear#network
0 notes
Text
Netgear Extender Login
To log in to your Netgear extender, you will need to know the default username and password. The default username is usually "admin" and the default password is usually "password".
1.Once you have logged in, you will be able to access the extender's settings. Here, you can change the extender's SSID, password, and other settings.
2.You can also use the extender's settings to troubleshoot problems with your WiFi network. For example, you can use the extender's settings to check for interference or to change the extender's channel.
3.If you have forgotten the default username or password for your Netgear extender, you can reset the extender to its factory defaults. This will erase all of the extender's settings, including the username and password.
4.To reset the extender, press and hold the reset button for about 10 seconds. Once the reset button is released, the extender will be reset to its factory defaults.
5.Once the extender is reset, you will need to log in with the default username and password. You can then change the username and password to something that you will remember.
4 notes
·
View notes
Text
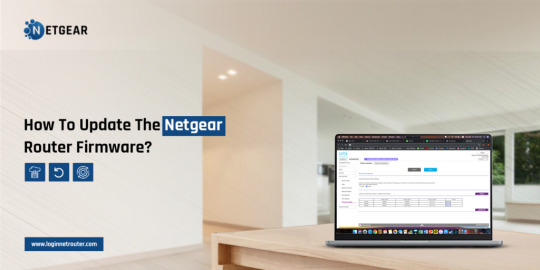
How to Update Netgear Router Firmware?
To Update Netgear Router Firmware, open the web browser and type the routerlogin.net web address in the browser bar. Here, type admin details on the login window. Further, click on Advanced>Administration>Router/Firmware Update>Check>Yes. Download the compatible firmware version and upload it. For more info, get in touch with us!
0 notes
Text
Quickly Add WPS Clients to Your Netgear Extender's WiFi

Adding a WPS (Wi-Fi Protected Setup) client to a Netgear range extender allows you to easily and securely connect devices like smartphones, tablets, and laptops to the extended Wi-Fi network. The WPS feature enables quick setup of protected wireless networks without having to enter long passwords.With most modern Wi-Fi devices having WPS capability, it provides a very convenient way to get clients connected to the range extender's SSID. The WPS exchange automatically negotiates the security, encrypts the connection, and joins the network without user intervention.
Conclusion
Adding a WPS client to a Netgear range extender provides a quick and easy way to connect devices to the extended wireless network. It eliminates the need to enter long WPA passphrases. With just a press of the WPS button, the client is securely connected.
Just make sure your extender has WPS capability, the client device is WPS-enabled, firmware is updated, and the extender is powered on before starting the WPS process. Initiating WPS and allowing the negotiation to complete will establish the connection.
Read the full article
#accesspoint#connecteddevices#encryption#extender#guide#howto#netgear#netgearrangeextender#networking#password#router#routers#security#tutorial#wifi#wifiextender#wifirangeextender#wireless#wirelessnetworking#wirelessroutersettings#wps#wpsclient
1 note
·
View note
Last Seen Blogs

imparrr
Tumblr hates me

antivano
♥

ms-cherry123
Untitled

crows-mature-ttte-blog
A blog for my mature TTTE stuff

englproject2
Untitled