#it took me way too long to do this lol
Text
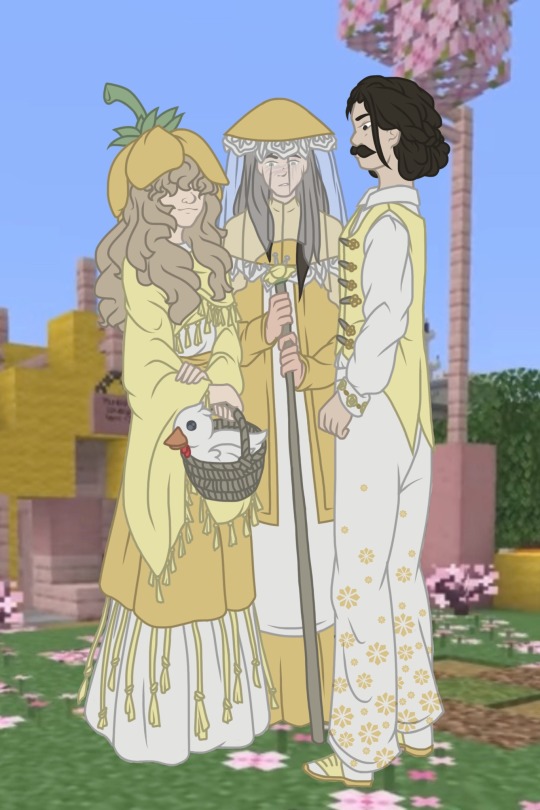
Buttercups in their natural habitat
#grian#mumbo jumbo#gtwscar#Hermitcraft#buttercups#hermitcraft s9#it took me way too long to do this lol#I got so excited#then was hit again with art block#it’s been bad the past 5 months#just on and off art block constantly#but I did it#I got dem pretty boys#based grians a lot off of my mother spore design
41 notes
·
View notes
Text
No matter how special it is, a kid's lunch is still just a kid's lunch.
I dunno, I liked "The Genius Restaurant" (Episode 1,089).
Happy (belated) birthday, Jimjam.
[Song link] [YouTube link]
#detective conan#case closed#amv#my amvs#video#eye strain#conan edogawa#shinichi kudo#song is#nosedive#by#flor#ahahahaha i thought this would just be a chill edit and was like#'i did my last vid in 30 hours so i can do this one in less because it's shorter right? and because i'm mostly using one ep?'#wrong lol this took about 40-ish hours? nooooo idea how i did 'if you kill me' in 30...#aside from the audio i think that's a more complicated edit too ^^;#way late for jimjam's bday but i guess it's not *that* birthday related anyway... but it was my first thought for a bday edit haha#been meaning to do an amv for the ep for a while! special thanks to marivanilla05 for inspiring me to watch it with their great art#i'm so behind that i don't watch new eps much but i'm glad i skipped ahead and watched this one#special thanks to astravis for helping me with the beginning and to hex for the liveblog too!#i know it was a long time ago but that liveblog definitely inspired some choices here#that said i'm glad i waited because i think i'm a much better editor than i was last july (well hope so anyway!)#and this song only released a couple of weeks ago!#had tons of trouble picking a song (usually my amvs are song first but this was idea first) but i think i really like how this one fits#sources are mostly#episode 1089#but also episodes 1 14 52 and 192 and tv special 6 (episode one: the great detective turned small) and movies 13 and 16 and ova 9
150 notes
·
View notes
Text

Felt overdue for some elsamaren ♡
#doing the weird finger heart thing that took me way too long to figure out how to do lol#I finally finished one of my portfolios so I’m giving myself time for fanart as a reward#I have some more ships I wanna draw soon too#frozen#elsa#honeymaren#frozen 2#elsamaren#my art
246 notes
·
View notes
Text
Lost You Forever 2 Trailer!
English subs by me. If there are egregious errors, please let me know. Thanks @dangermousie for sending me the link!
#lost you forever#lost you forever 2#cdrama#seriously my Mandarin is beginner level#maybe beginner plus...#and I have the audacity to try to do translations#it took so long and so much brain power!#but maybe it's better than AI subs lol 🤞🏻#I can't fucking wait for this omg#thanks mousie for introducing me to it!#Deng wei#yang zi#zhang wanyi#tan jianci#god damn it I caught an error! oh well it's good enough lol#and I did nice slow Viki style subs#because Mr. highlynerdy says all the other sites subs are way too quick#长相思
94 notes
·
View notes
Text
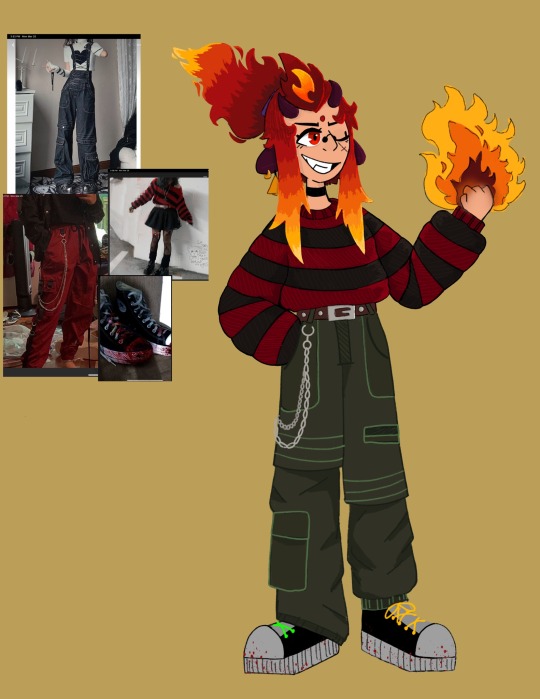
redson but with a Pinterest outfit
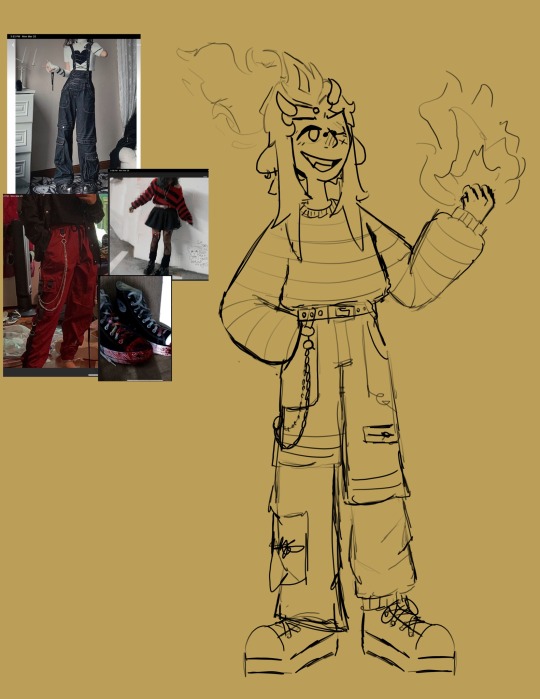
Sketch-
#lego monkie kid#lmk fanart#lmk season 4#lmk#lego monkey kid fanart#lmk red son#redson fanart#red son monkie kid#it’s spring break so I’m tryna do a new drawing everyday#it took me way too long to figure out what outfit I even wanted#to put him in lol#anyways punk redson for the win
75 notes
·
View notes
Text

new suicide squad anime got me thinking about the genderbend batman au i made when i was 16 again.
extra (nsfw??? body horror + shirtless doodle lol) art under the cut + drabble.
A mysterious actress appears in Gotham!
Production for the long-anticipated remake of the 1930s classic horror film, "The Clay", is saved in part thanks to the audition of one woman with no credits to her name, just a face and demeanor identical of the late leading actress of the original film.
However, the cast and crew have bigger worries than their limited budget and endless demands from their producers -- everyone involved seems to be disappearing one by one!
While the average gothammite worries that the cult classic's "cursed" reputation might be a little more than an urban legend, The Batman refuses to entertain such unfounded silliness and aims to get to the bottom of this crime against cinema!
presenting BATMAN '63 - THE RISE OF CLAYFACE coming not actually ever lmao

(her hair is brown now because I like the idea of her appearance never being fully consistent lol. shapeshifters gotta do their thing)
#batman au#gotham rogues#genderbend#clayface#dc comics au#i have no idea how to tag this. hi guys.#anyway i rlly do like how silly they made clayface in the isekai anime. i definitely took some inspiration from that iteration but#this version of fem clayface has been. in the back of my mind for literally years. i like the film actor angle for him too much#might do more of these might not. depends on how indulgent i feel ig.#anyway some misc headcanons for this clayface:#she was a struggling actor who was incredibly insecure about her appearance.#before she became clayface she would undergo plastic surgery for every new role she landed. her over the top passion for getting into (cont#(cont) character frightened directors. she gained a moniker for herself as “the woman with 1000 faces”#in this story specifically she's working under the penguin to get rid of some loose ends in a sensationalized way because the targets (cont#(cont) are famous. and she's more than happy to comply because a good chunk of the cast on set have been bad to her in the past.#her shapeshifting abilities have some limitations. she can morph into anything she has had skin to skin contact with however (cont)#(cont) she cannot change her total mass. which is why she has so much hair lol#she also can't copy powers cus that's whack. also only living things she can't turn into a car.#i probably forgot something important but yeah. goddamn you au i made as a teenager#goddamn you stupid ass suicide squad anime for making me think about this au again#cw horror#body horror#oh yeah she's also probably got a weird gender but she doesn't know that#she also can't maintain her not-clay-monster form for long or she starts to literally melt away.#my art
36 notes
·
View notes
Text

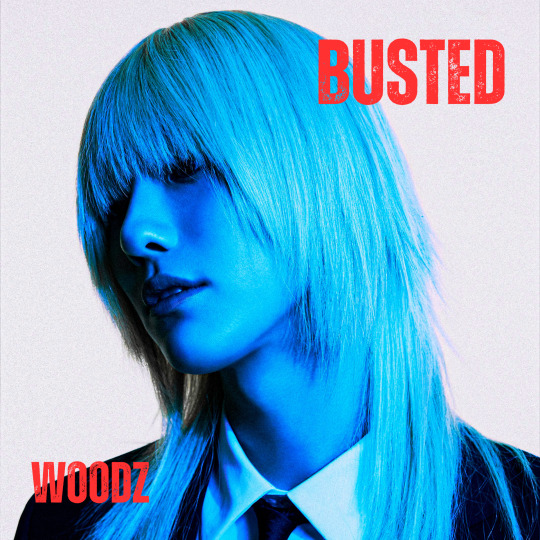

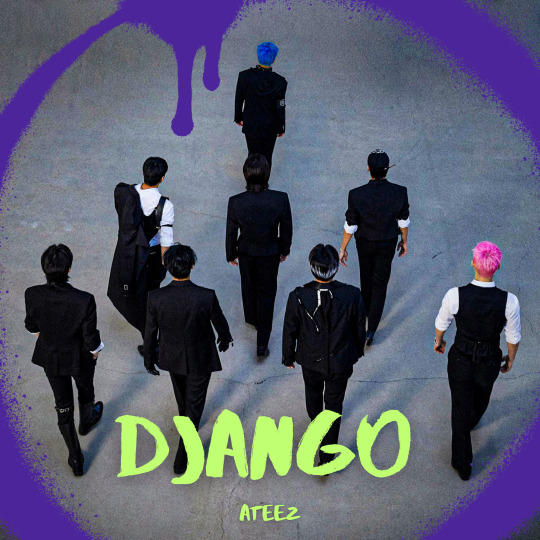
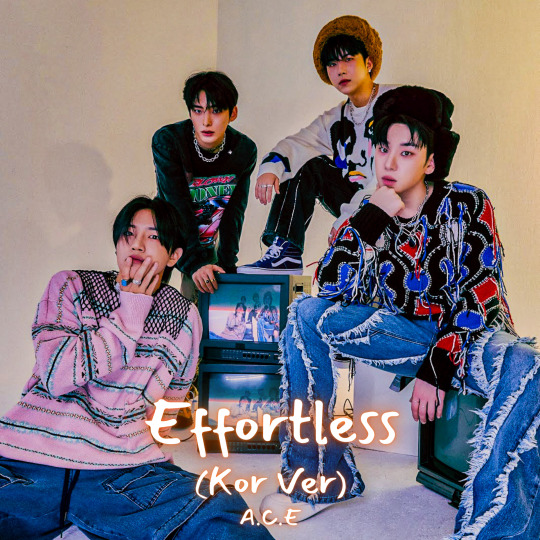


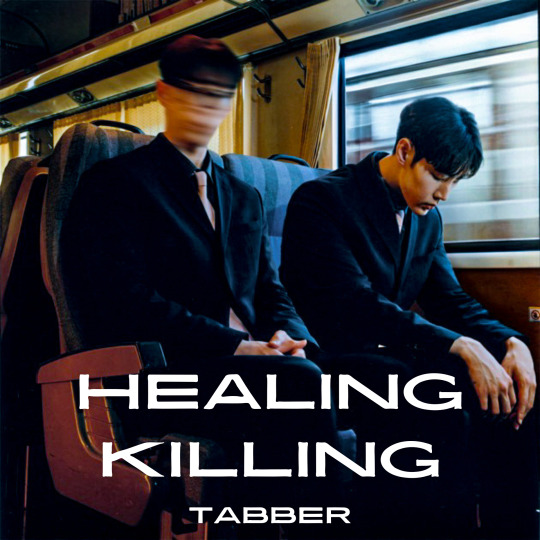
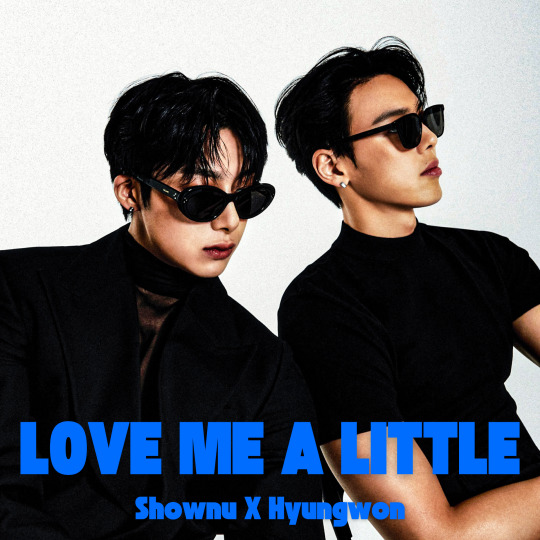
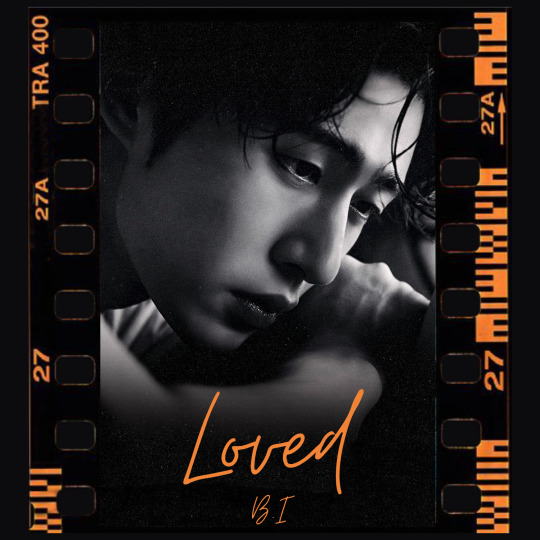
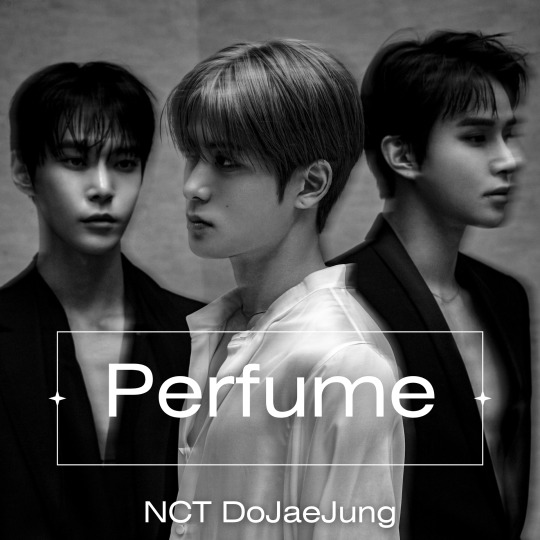
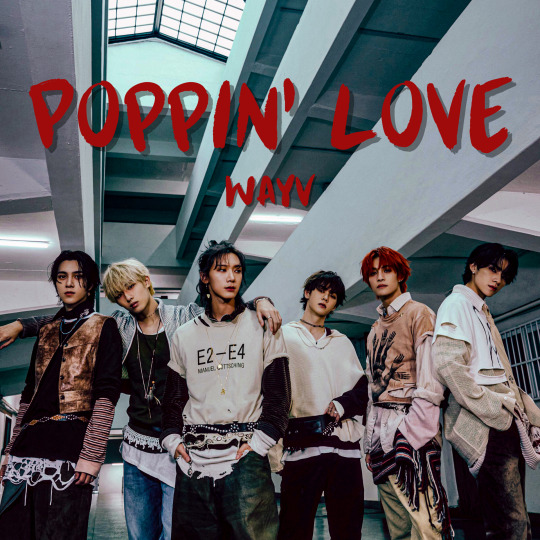


Bex's Top 20(+1) Songs of 2023
Spotify Playlists: Top 20(+1) ♡ Top 100 ♡ 2023 On Repeat (<- the unabridged favorites list [19+ hours])
tagged by @xiaojuun @dongkwan @hohowonho & @yangsminho thank you beloveds 💜
So I have learned that I am incapable of picking a reasonable number of favorites throughout this whole process and I even kept an extra song bc I wanted to make the gfx for it. Also the layout. But here are some of my favorites from 2023!
Some thoughts: I still don't know the purki members even tho I was OBSESSED with cabin fever. Busted top song of 2023? Multiple hags had comebacks this year & teen top's tt stood out to me when I was looking back (I don't count exo as hags even tho they are...)! Infinite's & tvxq's cbs were also really good! I still think knock knock by reve should've been the tt of chill kill. Loved my soloists in 2023 (jo yuri, kim sejeong, woodz, b.i, tabber, onew, d.o, kai). Several of whom were new to me. WayV may not be kpop, but their album was too important to me not to list. I joked that my top 10 was just the omy album, but it really was very good. EXO returned!! And we probably won't see them again until 2026 😭 Perfume best debut of 2023 /hj. I still don't technically stan the boyz somehow even tho I tuned in to all of their cbs this year and now know all the members. Also 🕯 pls let a.c.e drop a full album (as a full group 😒) in 2024 🕯and ilu everything I didn't mention but made the top 20. ok enough outta me 🤐
tagging (if you've already done this pls tag me!! I'd love the see it 🫶🏻 & if you're not a cc, I'd still love to see a list if you want to do one! 💜): @jwooyoung @lee-minhoe @bethereforme @possession1981 @honeydewtual @28reas0ns @sunminshine @sunghanbin @awek-s @jeonwon-wonwoo @zuhoz @kimsmingyu @jaebeomtual @okaysign @onmywayv @goblinvern @baekhyunonlyfans @wifehwa @flaredpantsagenda @haechannabelle @kihyunsgf @sunmisbf @neonsbian @wayvmp3 @duovxq @tipannies @pinktaeyeon @jftk @ninqz @nfly5 @talksaxy @baekslight @byunbaekhyunie I'm going off memory and definitely forgot people (I'm sorry🫣) but I think most people who are gonna do this have done this already anyway 😅🤷♀️
#bex.edits#multi#my first attempt at making gfx 🙈#this took me wayyy too long 😅#idk if anyone but me will listen to those playlists#but i feel like at least the top 100 is a better glimpse into what i LOVED this past year 🤷♀️#the way i tried to do a top 10 & top 50 and i just couldn't do it... 🤭#in case anyone was wondering baekhyun's LoL song is on my top 100 unironically... i love her#bex.faves2023
87 notes
·
View notes
Photo
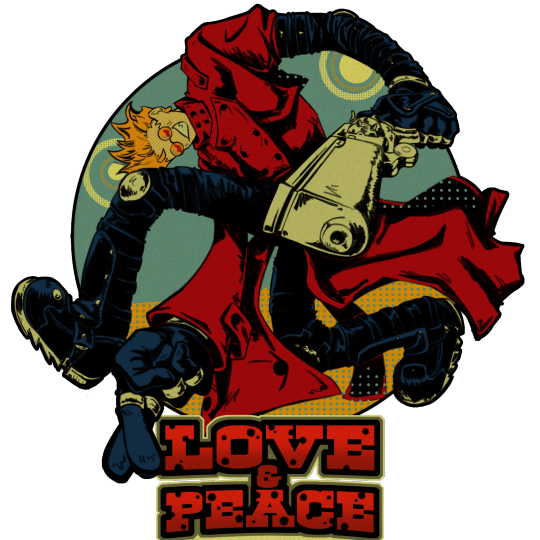
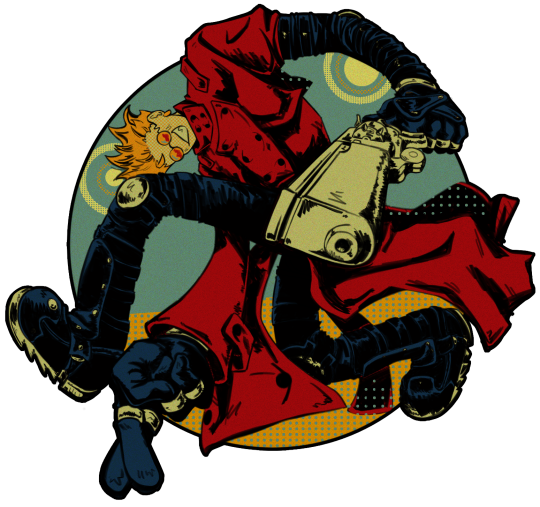
woooowwww wowowowowwwww its that guy. the dude. its my special lil guy!!
uuhh i did this because. i thought the album art for the 1998 anime looked kinda like. the sonic adventure pose. and it was SUPPOSED! to just be a shit post. and then i got
𝒸𝒶𝓇𝓇𝒾𝑒𝒹 𝒶𝓌𝒶𝓎!!
Trimax version
TriStamp version
#art#my art#digital art#Digital Illustration#fanart#trigun#trigun 98#trigun 1998#Vash the Stampede#goddddd this took me way too long lmaooo#i been busy sobb#i am not gonna lie i kinda wanna redraw it for both trimax and tristamp#but im not super sure abt it well see#i dont think itd take as long as this did#the worst part abt art imo is color i just cant do it its too hard i struggle too much i hope u cant tell i gave up on it LOL#i was literally like im done w the colors now i just gotta do bg and showed the colored vers to my mom and she was like 😬#WHAT!! WHAT DOES THAT FACE MEAN!! the colors clash really bad... it doesnt look very good.... love the lineart but the colors...... not it#the defeat in my soul#so i redid it and i redid the shading and the style and said then got back to the colors and stole them from one of my favorite paintings#and then ended up puttin a filter on em sobb#i got the colors from rosalyn drexlers chubby checker fyi#cos i mentioned i stole em might as well say from where#i like her art#idk if her arts surreal but its a lil weird its my type#actually i think its pop? idk im not good at tellin that stuff#dont ask me what happened to the bottom of the text it got cropped off on accident n i noticed too late n was too lazy to fix it#i will not change#anyways thats the post sorry for ramblin so much in the tags loll im tired i havent slept in oof a while
329 notes
·
View notes
Text
Art Resources 01 [Facial anatomy]
Hi! First post of the Art Resources thing I mentioned a while back :) Figured I'd start with something people generally want to know more about- or something people think they already know about but could still used some lesser known tips!
Resources, break downs and tips under the Keep Reading thing :]
1. The Basics
There are thousands of methods to constructing the face. The most popular one is the little circle with the cross in the middle, and sometimes a few more lines for the jaw. While that can be a useful guideline, if you're just starting to learn the ropes it might be better to use a method that has more structure decomposition and land marks to help guide you. Here I'll leave two methods of deconstructing the face that I believe are the most useful to draw faces in different angles and perspectives as well as identify where exactly should each element be placed.
REMEMBER: All of these methods are just guidelines. In order to get different facial features, you can adjust proportions for each of these and play around with sizes.
1.1 The Loomis Method
A structural approach to drawing the head, based on first: simplifying general forms and second: identifying landmarks for the face elements. Pretty good for beginners, helps you understand the head from a more tridimensional stand point to be able to draw it from different angles.
youtube
1.2 The Reilly Method
Also a structural approach, but this one is based on understanding the rhythms of the face (proportions, harmonies, and even some general muscular anatomy). It can be a bit harder to understand and use as a building block for beginner artists, but it can serve as a way to check your proportions after an initial sketch.
youtube
Here are other two methods, a bit less known, but that go a bit more in depth about the head. If you're a beginner, I'd recommend watching the Loomis method first before diving into these other two methods. Note: these are playlists covering each method, and the videos are longer, but worthwhile.
1.3 The Michael Hampton Method
1.4 The Steve Huston Method
And here's a hybrid of a visual and structural approach too if you're interested! (Again, this one is recommended mostly if you already have a good grasp of the general structure)
Having trouble finding that reference of the head from that specific angle? Here's a 3D model that can be used as reference from any angle. Bonus: It has a built in light feature that allows you to understand which planes of the face the light would hit!
There's also a version with more feminine features.
Here's a website that lets you pick a head angle and then searches for reference images with that angle too. Allows you to pick age, gender, and other features like glasses, facial hair, etc.
2. Understanding What's Below
When drawing the head and face, what most people think of is what we see everyday: the skin. However, there's more to the head and face than just that: there's a whole structure laying underneath that builds up everything on top. Understanding that structure can lead to better execution of skin level facial anatomy.
And what's that structure? Well, bones of course. And muscles. Even if (most of the time) we don't draw them, knowing they exist and how they are placed on top of each other can help with building what we do draw. Understanding the building blocks of the face will make it easier to avoid, say, making one eye bigger than the other. Or a forehead that's too small. Or ears that are too high. Or side profiles that cut off the brain.
Something I recommend for this is making study sheets of the bone structure, muscular structure, and skin structure. For this it's important to name the main bones and muscle groups. Not because you need to commit them to memory, but because if you name them on your practice sheet, it's easier to remember later on that they EXIST (even if you don't remember the name).
Here's a 3D model of the skull
Useful guide for the names of the bones of the skull
Here's a 3D model of the face muscles with names
3. Elements of a Whole
So we now understand the general structure of a face and some useful guidelines to build it. Good! But now, a face has a bunch of individual elements with their own individual structure and stuff to look out for. Those are, of course:
Eyes
Noses
Lips
Ears
3.1 Eyes
It's important to note that the eye has a volume of its own- it's not just a sticker laying on top of the face. It can be helpful to think of the eyeball inside the eye socket when drawing it (taking into account the bone structure we learned before). When understanding the eyeball as a sphere, it becomes easier to place the skin above: the eyelids. This can help with drawing the eye from any angle.

This can also help when drawing the dreaded Other EyeTM, specially if you are still a beginner artist. If you start by constructing the eyes with spheres and approach it from the perspective of "placing" the skin above that sphere, it's easier to get sizes and proportions right.
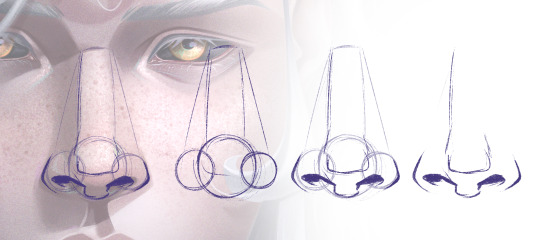
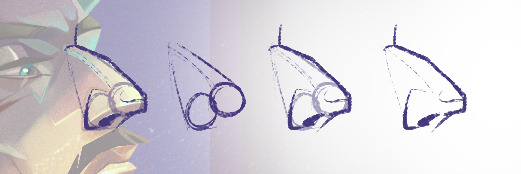
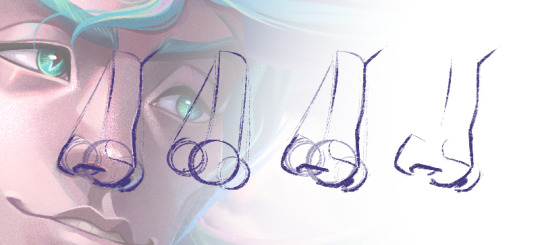
3.2 Noses
Again, spheres can be your friend.
3.3 Lips
Spheres part 3
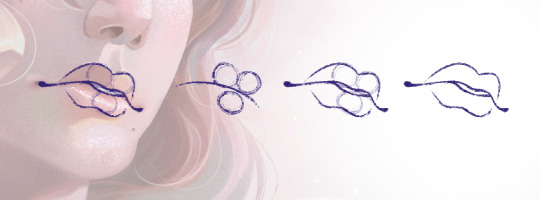
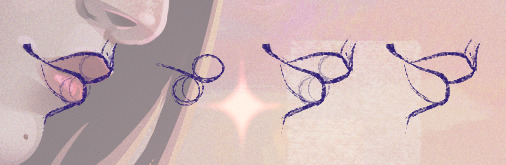
A funny thing with lips that often gets over looked when one is just learning the ropes of anatomy is that it also wraps around the volume of the face. Just like the eyes aren't stickers laying on top, the lips aren't either. It's important to take the curvature of the face when placing the lips from different angles and expressions. For example, when we thing of a smile, its usually this idea that comes to mind:

Which yeah, that's fine! ...As long as your subject is facing straight to the camera.
But when we have even a bit of perspective, the way the mouth looks changes, and we often don't think of that and just draw what we think the mouth looks like... which can lead to odd looking mouths, like they're pasted on. So, it's important to keep in mind the volume of the face:
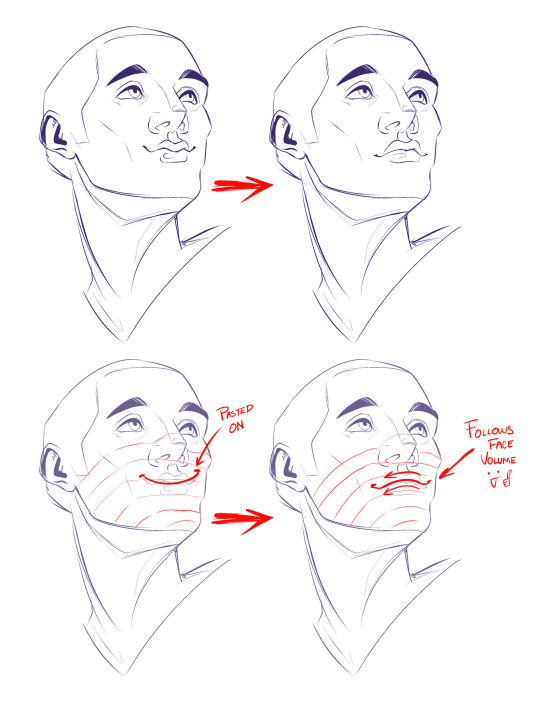
This is true for all features of the face: keeping in mind the volume. But, it can be more noticeable on the mouth.
3.4 Ears
Spheres part- no.
Even if the ear is one of the "flatter" parts of the head, it doesn't mean they don't have volume. Depending on the angle of the face, it'll change how much of the ear is shown- or which parts.
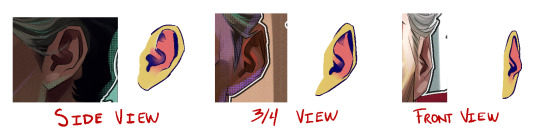
All ears are different and have their quirks, but they all can be divided in three major segments, colour coded in the image. If you deconstruct the ear in these three major parts, keeping in mind they have their own volume, it should be easier to figure out which of those parts will be seen depending on the angle of your face.
4. Expressions!
Now that we understand the elements and construction blocks of the face (bones and muscles), we can play around with them a bit more. So, time to make expressions!
When playing with how the skin moves, it's fundamental to understand the muscle groups of the face and how they move, relax and tense depending on the expression. Knowing that these muscles exist and how they interact with the skin above will help you know where the eyebrow should furrow, where wrinkles would form.
A BOOK I widely recommend is Anatomy of Facial Expression, which you can find here for purchase
Or here as a PDF
This book also covers skull anatomy, so it's a useful tool to study the structure talked about in 02.
There's also an ArtStation account that uploads a bunch of useful 3D model resources for anatomy (facial or otherwise).
Scott McCloud's book, Making Comics, has a section dedicated to facial expressions too (great book in general, not only if you're interested in comics!). You can find it in PAGE 80 (or 88 in the document).
Another thing that can be helpful is studying from life! You can do that by making different expressions in front of a mirror and pay close attention to which muscle groups tense and relax, where wrinkles appear, how your skin moves. Or, if you're like me and hate staring at your face, you can also study from video references.
Here's a link to a PLAYLIST containing various videos of people making different expressions.
The previous playlist contains real people, thus, REALISTIC ANATOMY. It's important to note that even if your drawing style is heavily stylised (like anime, cartoon, etc), it's still fundamental that you understand real world rules so you later know how to bend and break them properly to implement those to your own style.
However, that doesn't mean you can't study STYLISED EXPRESSIONS too! It's actually a great idea to see how other people exaggerate certain anatomical aspects to their own work so you can also understand how to do it in yours. Here's a list with various videos of EXPRESSIONS IN MOTION for animation tests. Study them the same as the previous ones: paying close attention to how the face and muscles MOVE.
youtube
youtube
youtube
youtube
youtube
Pause the videos you study as needed! While all of this might seem more useful for animation, it's also incredibly useful in illustration, and studying things in movement can help with understanding them better, thus putting them to paper (or tablet) becomes easier.
Finally, here's some videos in a sort of CLASS FORMAT that can help with walking you through drawing expressions more effectively than a text post could lol
youtube
youtube
youtube
#art resources#I'm sorry this took so long life just gets in the way some times#also sorry for the radio silence over here#it'll probably stay like that for a while lol#hope this can somewhat make up for it tho :']#please also tell me if the redaction is clear or if I should change something about format for these things#Maybe I'm doing way too much explanation and y'all just want the links lol
69 notes
·
View notes
Text


"He's spent the entire time being picked upon and bullied by the family. I think personally from where Juan stands he sees the hypocrisy in the family, how they can do one thing and say another. As far as Juan is concerned he's always had the best interests of the family at heart, however misguided that might be and doesn't quite comprehend why nobody understands that. Nobody seems to understand that what he does, he does for the betterment of the Borgia clan and never waivers from that. He does that in ways that perhaps aren't sanctioned by the church or sanctioned by family law."
#oh spill the tea!! he truly believed he was doing something right. an impulsive sad lonely dude who doesn't think through#he was bestowed a position he never gave a fuck about in the first place because being a soldier is NOT what he wanted#he just wanted his family's love and affection. a simple i love you would've gone a long way#the way he teases cesare about being a cardinal because that's the only way to get his attention it's just a little brother thingie#and yet cesare took it way too personal lol crazy to me how cesare was the one who slowly destroyed juan before killing him#like how he forced his hand to murder djem and then slowly sabotaging him by mocking him constantly then setting him up to die at forli#by not informing him that ludovico's army was coming for his neck like even from a military stand point cesare ruined the forli mission fr#because he decided to prioritize his own jealousy of juan; humiliating him and hoping him to die so he can take his position as a soldier#the hypocrisy part is sooo tea because cesare killed juan in cold blood telling him that they're borgias and they never forgive#5 mins later he's begging rodrigo to forgive him for killing juan like bro was just saying that to dying juan to destroy him mentally first#i'm screaming he singlehandedly caused juan's spiraling into darkness. how are you gonna fuck up your brother that hard helpppp ?!!?!?!#fucked up dysfunctional family that i love#david oakes#juan borgia#the borgias#theborgiasedit#perioddramaedit#televisiongifs#tvedit#by jen
156 notes
·
View notes
Text
kinda wild to me that one of the most compelling aspects of both Chuuya and Kunikida's characters to me, that I never really see talked about, is how they're heavily set on a doomed crash course towards complete and utter destruction, and how I am so, so worried for them both.....
#bungou stray dogs#been thinking a lot about chuuya lately (shocking for me i know (said with no sarcasm truly lmao it is rare for me))#cause of the 15 manga and also playing the fucking jeht quest in genshin impact ugh (where's the one dual genshin bsd fan who Understands)#but like this pressure has been building up for chuuya for so long due to being used and manipulated by all these people#first the sheep then mori then verlaine then still mori now#he was groomed since childhood just like dazai#but unlike dazai he didn't have an oda to help him get out of the mafia........ he's still stuck there#and his personality is different from dazai's. dazai was more self-aware imo (but still a groomed emotionally abused kid don't get me wrong#but chuuya's whole thing is needing to belong and wanting a leader to be loyal to but ending up in positions of leadership himself#which makes him feel pressured but he accepts and stifles any negative feelings just because he wants to belong#and all this crushed him with the events in the light novels and yeah he went through character growth but he's...... Still In The Mafia...#and that fucking scene asagiri added to the cannibalism stage play i don't think hardly anyone even knows about bc IT'S NOT DISCUSSED ANYMO#where mori emotionally manipulates him with the flags!!! and it deeply hurts him!!! and he presumably deals with that shit all the time!!!#it is WORRISOME. it WORRIES ME okay.#chuuya doesn't have anyone who can save him from the mafia (dazai is in no position to okay; it's all he can do just to try to save himself#and it's so so scary. it spells awful things for him.#didn't asagiri say he'd have a rough path or something??? and he added that fucking scene in the play!!! it haunts me!!#i fully expected this shit to hit a turning point in the meursault arc but we can't have nice things i guess#and as for kunikida a;lskdfl (took me this long to get to him oop) literally the ending of Entrance Exam (the novel) is just#One Big Foreshadowing for Kunikida's downfall#he's compared to the azure king for a reason. Sasaki saw the azure king in him for a reason. it's fucking worrying!!!!!#there hasn't really been anything like that since in the manga (just like for chuuya lol ugh) but he's TERRIBLE at coping with his trauma#and it only gets more apparent once shit hit the fan in the doa/hunting dogs/meursault arc#it's not good!!! i'm worried for kunikida too!!!!#even if the manga isn't focusing on this these worries are always in the back of my mind man#both kunikida and chuuya are doomed to hit some kind of breaking point eventually and i await those moments with dread yet anticipation#i want dazai to be able to save kunikida from the despair being too good a person brings the way he couldn't save oda#and chuuya.... if we get a scene with him & mori mirroring the one in dark era where dazai finds out that mori orchestrated the kids' death#oh man i think i'll fucking die (give it to me i need to cry)
28 notes
·
View notes
Text
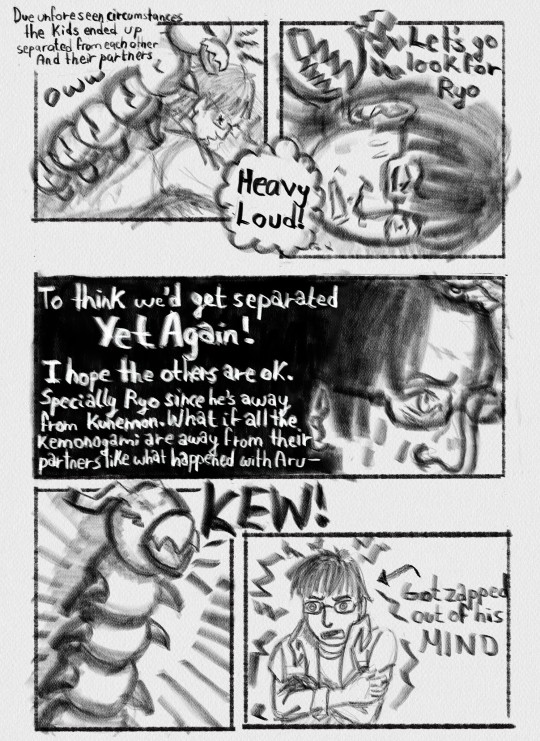
So, what if the kids were with other kemonogami?
For @surviveweek day 3: other kemonogami
[image id: Digital charcoal comic featuring Kayama Shuuji and Kunemon from Digimon Survive.
The first row has two panels. The first one is smaller than the second, and features Shuuji comically laying down on the floor with Kunemon on top of his back. There's text that reads "Due unforeseen circumstances, the kids ended up separated from each other and their partners". Below that, there's Shuuji's interjection that reads "Oww". The second panel is a close up to Shuuji's irked and sweaty face, with Kunemon's beak loudly cackling by his ear. There's a thought balloon in between panel 1 and 2 that reads "Heavy. Loud!". Above Shuuji's face in the second panel, there's text that read "Let's go look for Ryo."
The second row consists of a single rectangular panel with a black background that gets lighter towards the right, transitioning into Shuuji's hair. His face is in profile and in an extrme close up that only shows part of his face. There's text on white over the black background that reads: "To think we'd get separated Yet Again! I hope the others are ok. Specially Ryo since he's away from Kunemon. What if all the kemonogami are away from their partners like what happened with Aru—".
The third row consists of two panels, the first of them being taller. There's Kunemon standing up, dramatically shaded, and barking a KEW! that goes out of the border of the panel. There's kinetic lines around him for more dramatic effect. In the last panel, Shuuji is hugging himself, looking disoriented. There's an arrow that points at him and text that reads "Got zapped out of his MIND."]
#digimon survive#shuuji kayama#Kunemon#So I think I should stop doing lettering by hand#It took way too long and it made me hate drawing skdkkf it's not even that good looking lol
34 notes
·
View notes
Photo
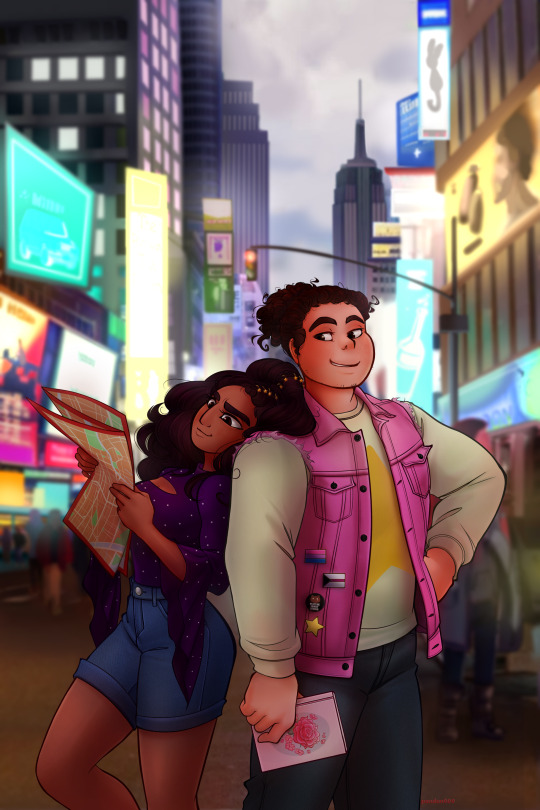

In the city!
Commission for missyuniverse_ for her fanfic at Wattpad! ( account: Kittens_escapism or juanitasuniverse ) 😊😊😊
#connverse#Connie Maheswaran#Steven Quartz Universe#SU#Those guys I googled for references of the peeps in the background#also random references for the building and such#I used a gaussian blur to blur the background and I'm thinking now I might or should find a different way to blur my background. 🤔#It was an odd experience drawing his vest because I used a real life reference at first and it looked so off. Then I used a drawing referenc#e and it instantly fixed it? So. like. I don't always trust real life reference after that.#I'm crying I really really wish I'll learn to draw facial hair some day.#I mean the client described that he only unintentionally grew stubbles because he got busy with something. but still#Why is my laptop already laggy I already restarted this and Nothing else but Chrome and Medibang is opened. -_-#I took so long to do the background. lol but I'd rather it stay blurred because of how it turned out.#Trust me it looked way bettered blurred. haha#Sorry.. Connie is suppose to be wearing her hair in a cute high ponytail with a small braid added little star accessories.#I'm not sure but I'm hoping the ponytail is still discernable#adult connverse#Okay I did spend this way too long in general but it was still fun drawing it#my shiz#commissioned work
145 notes
·
View notes
Text

"Don't get me venting on friends who resent you
'Cause all you've ever done is been a noose to hang on to
They thought was a necklace and reckless they fell into hell
Where you both hang with nothing to do but
Scratch, kick, let gravity win like
Fuck this, let gravity win like
You could leave it all behind
Even the Devil needs time alone sometimes"
#good omens#good omens fanart#crowley#good omens 2#neil gaiman#terry pratchett#my art#yeah i draw sometimes#i dont entirely like the way it turned out but it took me way too long not to post it#i listen to this song way too much#this is meant to be the first part of a project also#i wanna draw different scenes to the lyrics#dunno yet if ill ever actually do it tho lol#just this one took like half a year lol#its the adhd#anyway
92 notes
·
View notes
Text


extremely late mob birthday art <33
chibi mob in read more also posted this on twt under the same username 👍
silly chibi mobs with and without a colour dodge on them


#mob psycho 100#mp100#mob psycho 100 fanart#mp100 fanart#mob psycho fanart#kageyama shigeo#shigeo kageyama#mob psycho shigeo#mp100 shigeo#shigeo kageyama fanart#mob fanart#mob birthday#shigeo birthday#shigeo kageyama birthday#mob birthday 2024#digitalart#digital art#digital artist#digital fanart#digital illustration#digital drawing#procreate#ibispaintx#<- used it for the bg#my art :3#this took me way too long to fully finish for literally no reason#other than just not being in the mood to do art lol
19 notes
·
View notes
Text
Oh fuck tomorrow I'm going to be a little birthday boy I keep almost forgetting
#it's probably bc i dont have specific plans im just playing it by ear based on how the newborn will be#(the amount of time I'll be needed w the other kids basically depends on how much sleep the parents got the night before lol)#so i dont wanna be out too late... ahh i miss the club bro i wanna go#i love kids just to be clear which is why i do this but i also think I've gotten any child rearing out of my system#so i dont want my own. in a way it's freeing bc my future will just be for me and i won't have to worry about this stuff long term lol#ah but if I'm free on the 4th theres also something else i wanna do so maybe i shouldn't get drunk anyway#maybe just wait for the next free day 🤷♂️ we'll see#I've been highover BAD though shit lasted until like 8pm the next day. and i had to take the day off w the kids#luckily there happened to be other family there that took over but dude it sucked. i remember trying to help them in the morning like#ok sorry 4 year old trying to find pants i have to lay down in your bed you can do it by yourself i believe in you#so. taking the day off was a good call for their sakes too lol#he was fine just to be clear he could've done it on his own either way. i was just unhelpful 😅 i promise im usually way more attentive
42 notes
·
View notes
Last Seen Blogs

musicistheair-blog
Music Is The Air

neerumenthol
Neeru Menthol

dosy
-Dosy-
artemisvexing
Untitled
aimeecarreros
because i love you, dearest