#is polymer clay a real art material
Explore tagged Tumblr posts
Text
WORDS TO HOLD IN OUR HEARTS
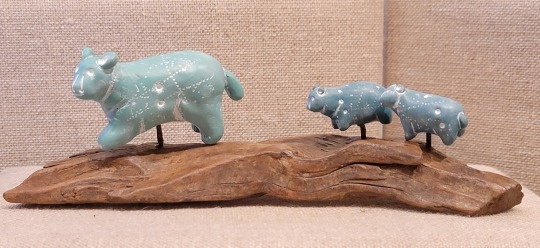
A very tiny migration! But as a fan said, it’s a FAMILY, so it’s an important one. Finally working on my single-box artwork! Small shrine series We make our art for ourselves, first. A couple years ago, I had the opportunity to share my work with a new gallery in a small town here in Sonoma County. The owner loved my work, and did a great job of displaying it. After six months, they had me take…
View On WordPress
#advice for artists#bear art#cave art#do what makes YOU happy#horse art#imitative techniques in polymer clay#is polymer clay a real art material#Lascaux Cave#life lessons#Luann Udell#mental attitude#Migration series#polymer clay art#polymer clay artifacts#red deer#small shrine series#the healing power of art#the work of our heart#wildlife art
1 note
·
View note
Text
Blog No.002🍋 24年5月4日
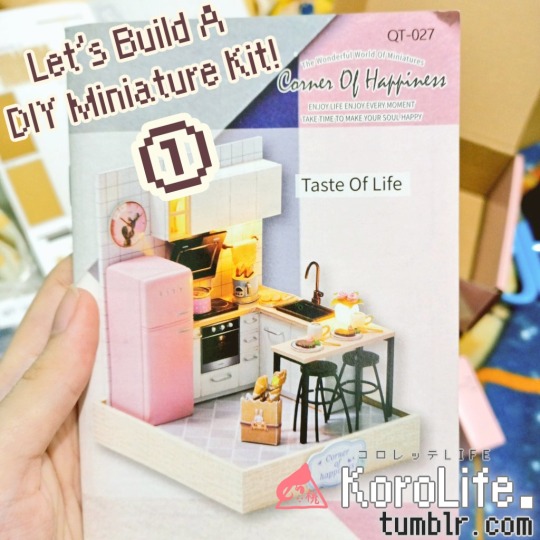
「Working on My Very First Miniature Kit!」
Hi, this is a behind-the-scenes on my experience in making the Corner of Happiness: Taste of Life DIY miniature kit!
It was from a couple of years ago, we found a stall selling miniature craft kits while strolling around the mall. My sister bought me the very same model I've been eyeing on my online shopping cart as a birthday present.
Me and my sister both love miniatures since we were very young, but making them from scratch require a lot of time, materials, and tools we don't really have (especially if you don't want them to look crudely made). Luckily, now with a Do-it-yourself kit, that wasn't going to be much of an issue! ...or so I'd hoped as a miniature newbie.
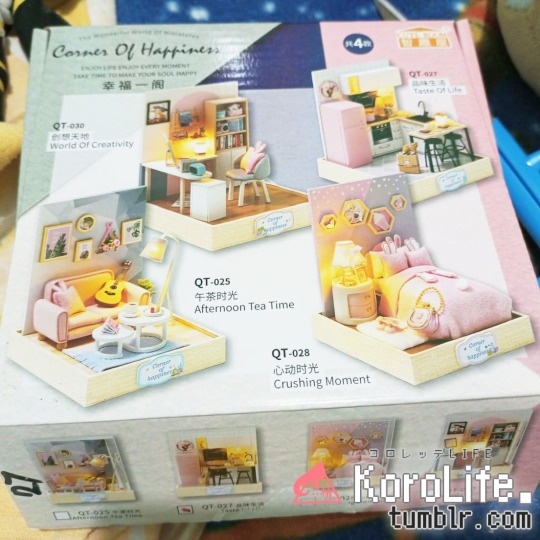
These are all the other variants of this series. I really dig the pink bunny aesthetics they're going for, though it's not as apparent on this one.
The kit also included custom wooden parts, wires, beads, and a tool kit necessary for the build. It also comes with an acrylic glass for dust-free casing!
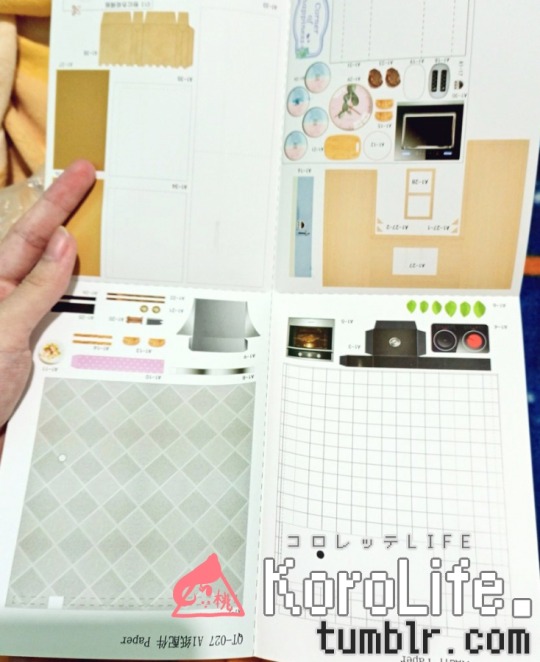
Most of the parts were made from a print-out glossy paper with all the items' photo-real textures; some of which are just to be pasted onto a harder material like wood shaped similarly to the object, but most of them are just the paper itself.
I guess doing it this way cuts costs for manufacturing, but it was very challenging to work with, in my opinion. You'll see what I mean in a bit.
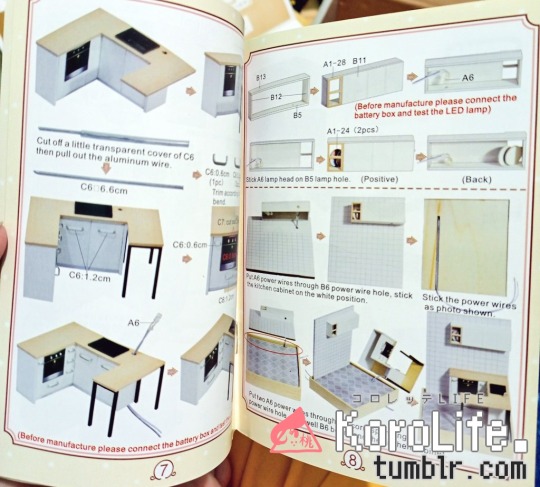
And here's a preview of the instruction booklet's contents.
I thought it was worded weirdly at parts, but still understandable enough with plenty of visuals to go with it.
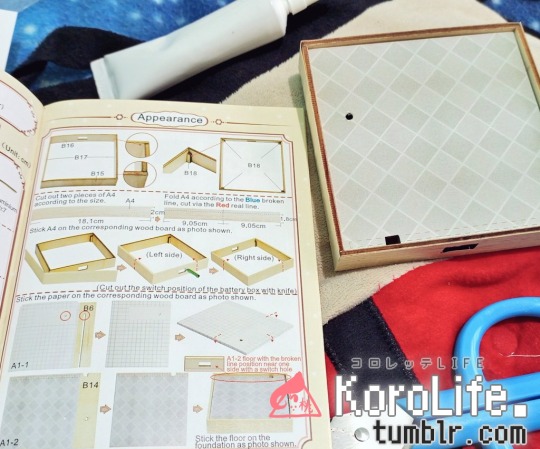
Starting with the base/foundation of the model before anything else seemed to be the best option... though I was very, very tempted to skip to work on the food items. I don't know why, but miniature food just gets me really giddy.
But, gotta hold backーcan't make food without the oven and all.
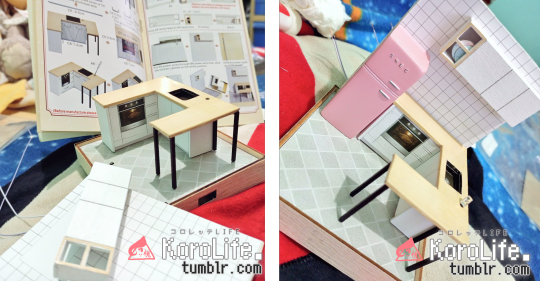
I then worked my way through the biggest parts and set them down permanently with the paste provided in the kit.
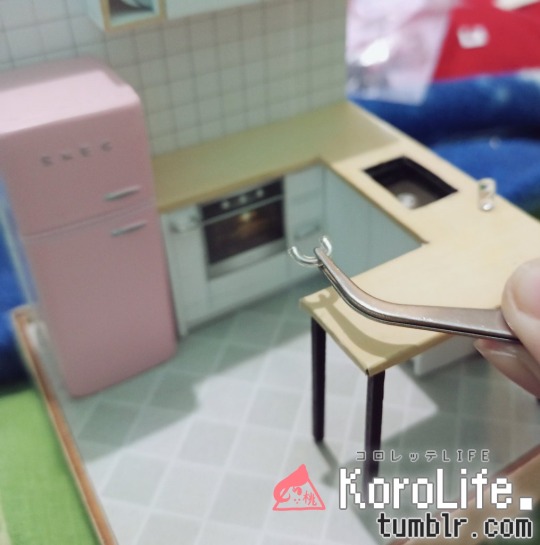
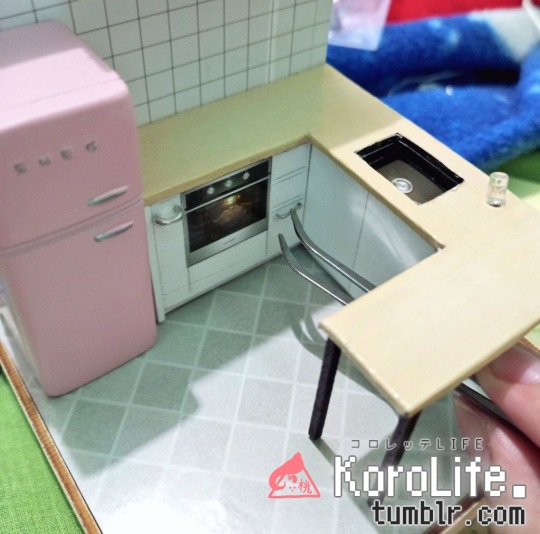
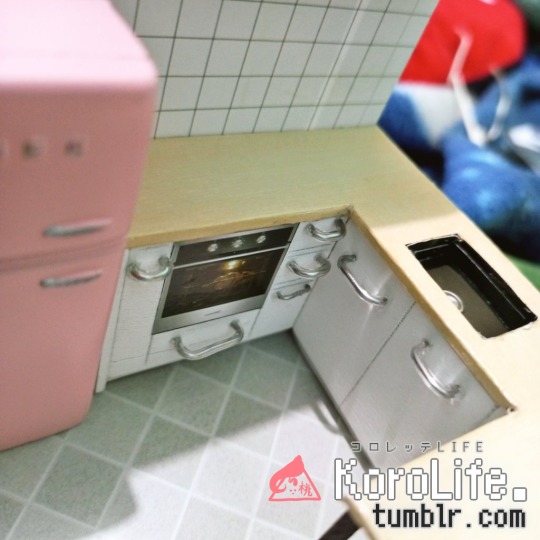
...but I probably shouldn't have glued the kitchen island in place before placing the handles...aiyah one of them is really crooked-
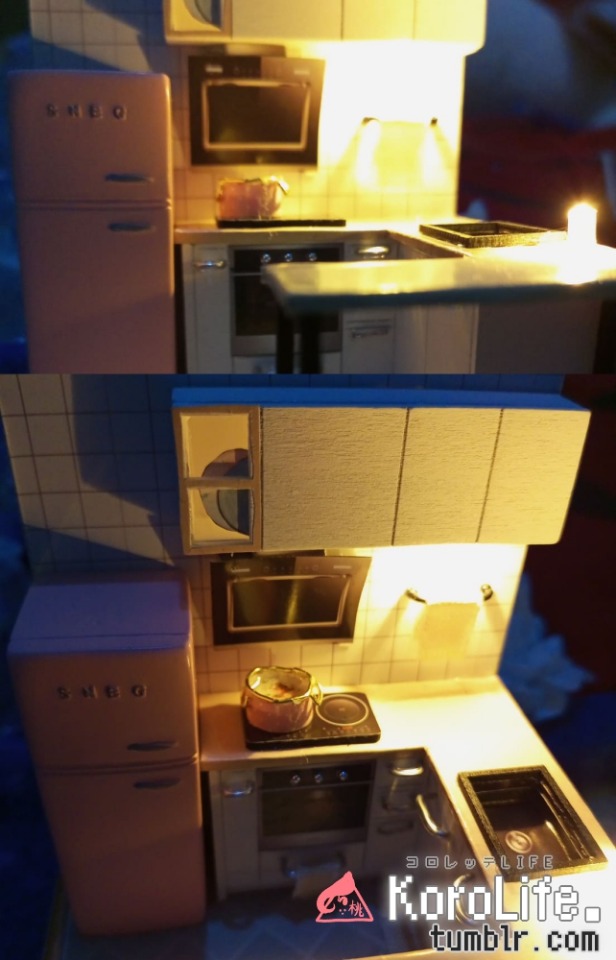
I'm not familiar with wirings, so setting up the LED lights made me panic a little. But somehow, it all worked out! I'm confident that if an idiot like me can get through this, so can anyone!!
And now I present to you: The Paper Struggles™
+ and a "It's so fakken small" compilation.
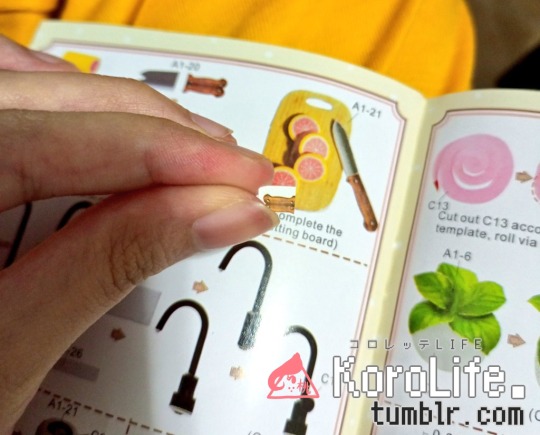
The booklet is a lie lol that knife .jpg is 5x bigger than what you've got to work with-
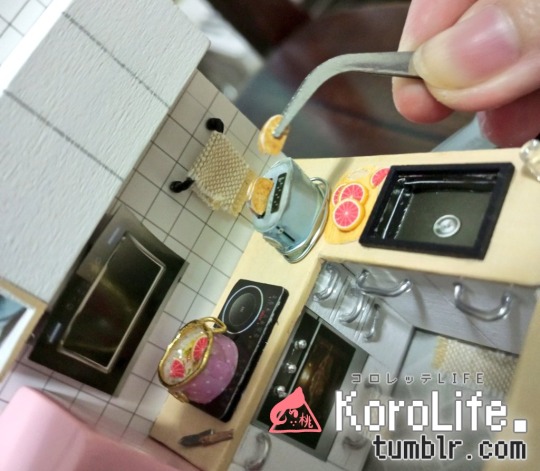
I remember both bread toasts being squished from the tweezers... thankfully tiny enough for anyone to really see, but there's definitely a shtload of dents on there...
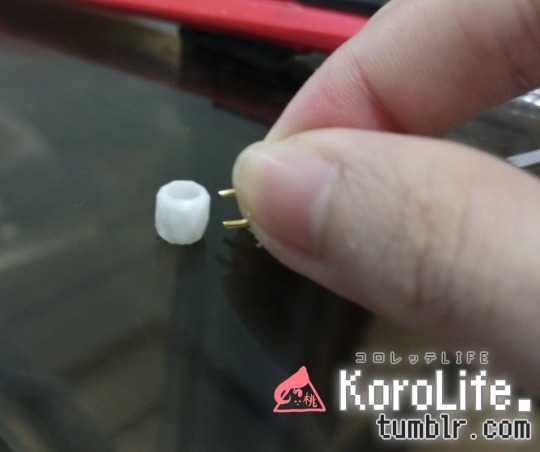
The wire handles for the mug was such a struggle lol it kept falling off no matter what, so I just kept adding glue and just... held on to it with pressure against the bead for what felt like eternity until it dried completely.
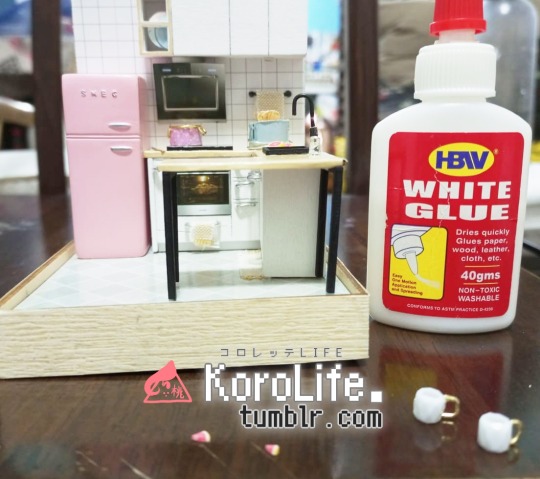
I also remember struggling with the semi-origami flowers quite a bit, but I think the trauma of it all made my brain forget to take photos-
Next up are the wires. I never really considered it before this kit, but they can actually have a lot of use when it comes to making miniature furnitures and accessories.
This was unfortunately before I got into making earrings, so I didn't have the right tools (pliers) to straighten them out. The very thin tweezers that came with the kit didn't help that much, so I just had to use my fingers.
The results... are as wobbly as the hands that created them lol I've learned my lesson...
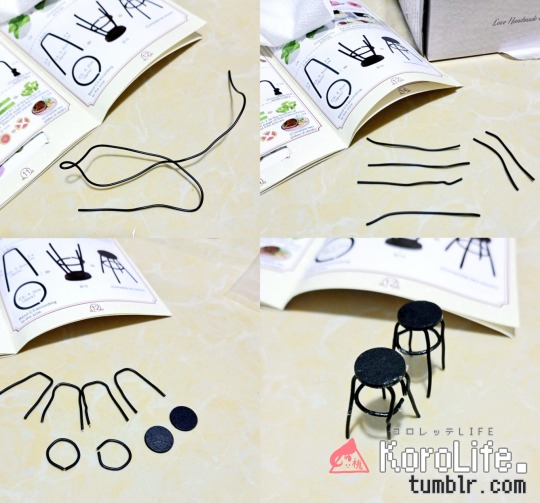
that incomplete circle pains me so
And here we have my favorite partーthe food! All the tiniest of detailing, the garnishing, the arrangements... it just makes me so happy, I really don't understand why.
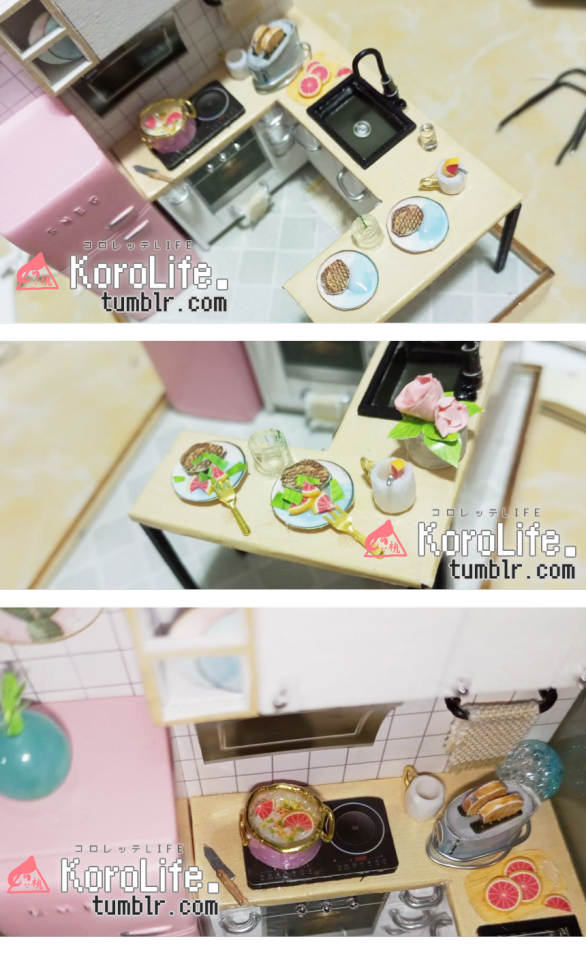
The original instructions only intended the oranges to be on the chopping board, but not in this household!!!
Oh, and the oranges were sliced up polymer clay rolls that I know are popularly used as nail art? Me and my sister used to sell polymer clay accessories back in the day and it felt very nostalgic seeing those tubes again.
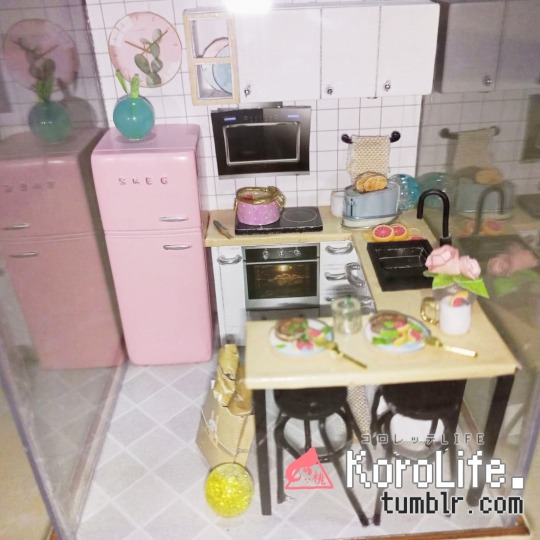
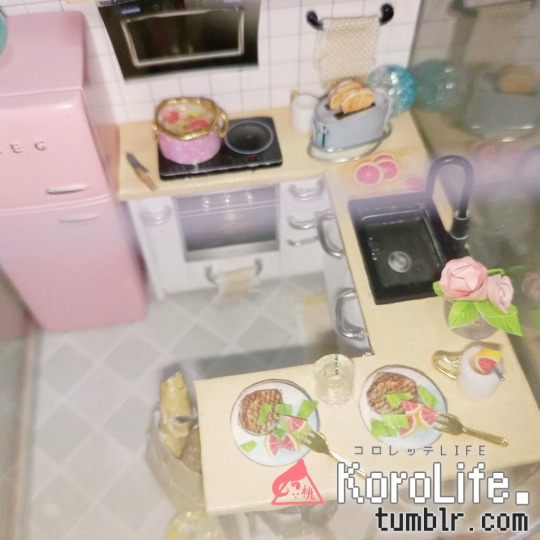
And here we have the finished model! ☆
I made a few changes from the original intended 'look' + added a couple of my own beads from my hoard material collection from childhood I planned on using for when we started making miniatures... and the time for use was most certainly now!
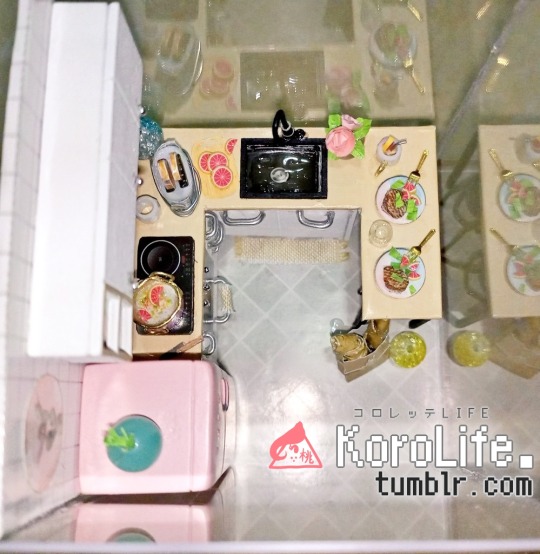
Aaand here's a bird's eye view before completing with the dust-free acrylic glass encasing top lid.
~ CONCLUSION ~
Overall, I thought it was really fun, despite the unforeseeable challenges along the way. Even as a newbie with little to no experience working on actual builds + with only the enthusiasm and love for miniatures to desperately cling to when the damn wires wouldn't stick on their corresponding surfaces properly... it seemed to turn out pretty OK!! I expected a whole lot more screaming and dying inside lol If you're interested in getting it, I think simply searching up "Corner of Happiness" or "Taste of Life DIY miniature kit" should get you some results on your preferred online shopping platform! ※NOTE: I do have to stress to make sure to check (either through other user reviews or the listing's description) if the seller is including a tool kit in your purchase. A lot of the items included in this kit you can probably find at home, but not a lot of people are so crafty to just have them lying aroundーespecially if you're a complete newbie with crafts/miniatures! You'll have a hard time trying to wing it without tools. ※also, they might just skimp on you by not including them, but still have you pay for the full price lol it's definitely worth considering when purchasing.
I know a lot of parents may see these kits to buy for their kids, but unless ➀ they're also helping out the kid in the process or ➁ if the kid in question has no interest or patience for these kind of things, I think it's best not to buy them DIY kits like these if you don't want to risk wasting money. But that's just my opinion, as a broke adult who's always wanted one of these haha
The amount of care, effort, and attention to make sure everything is sturdy enough and visually clean can be very drainingー but if you're willingーanyone can do it!
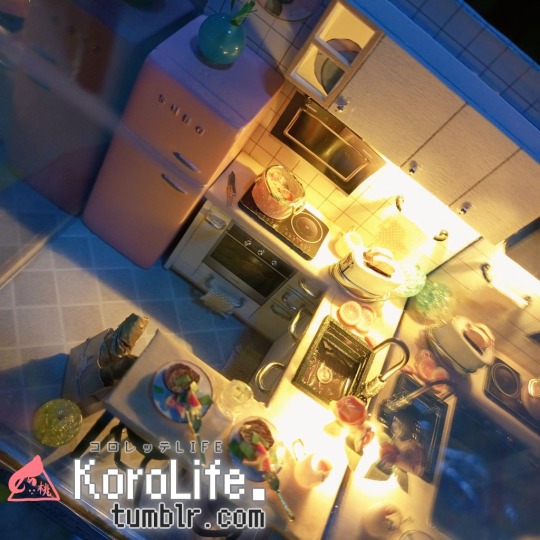
And of course, a final very cool look on LED lights turned on at night.
This project was done around 2022年. I've done one more miniature kit since then that was way more complex, but that's a whole 'nother journal entry for another day...
For now, here's a mini update of how this Taste of Life is hangin' after two years have passed:
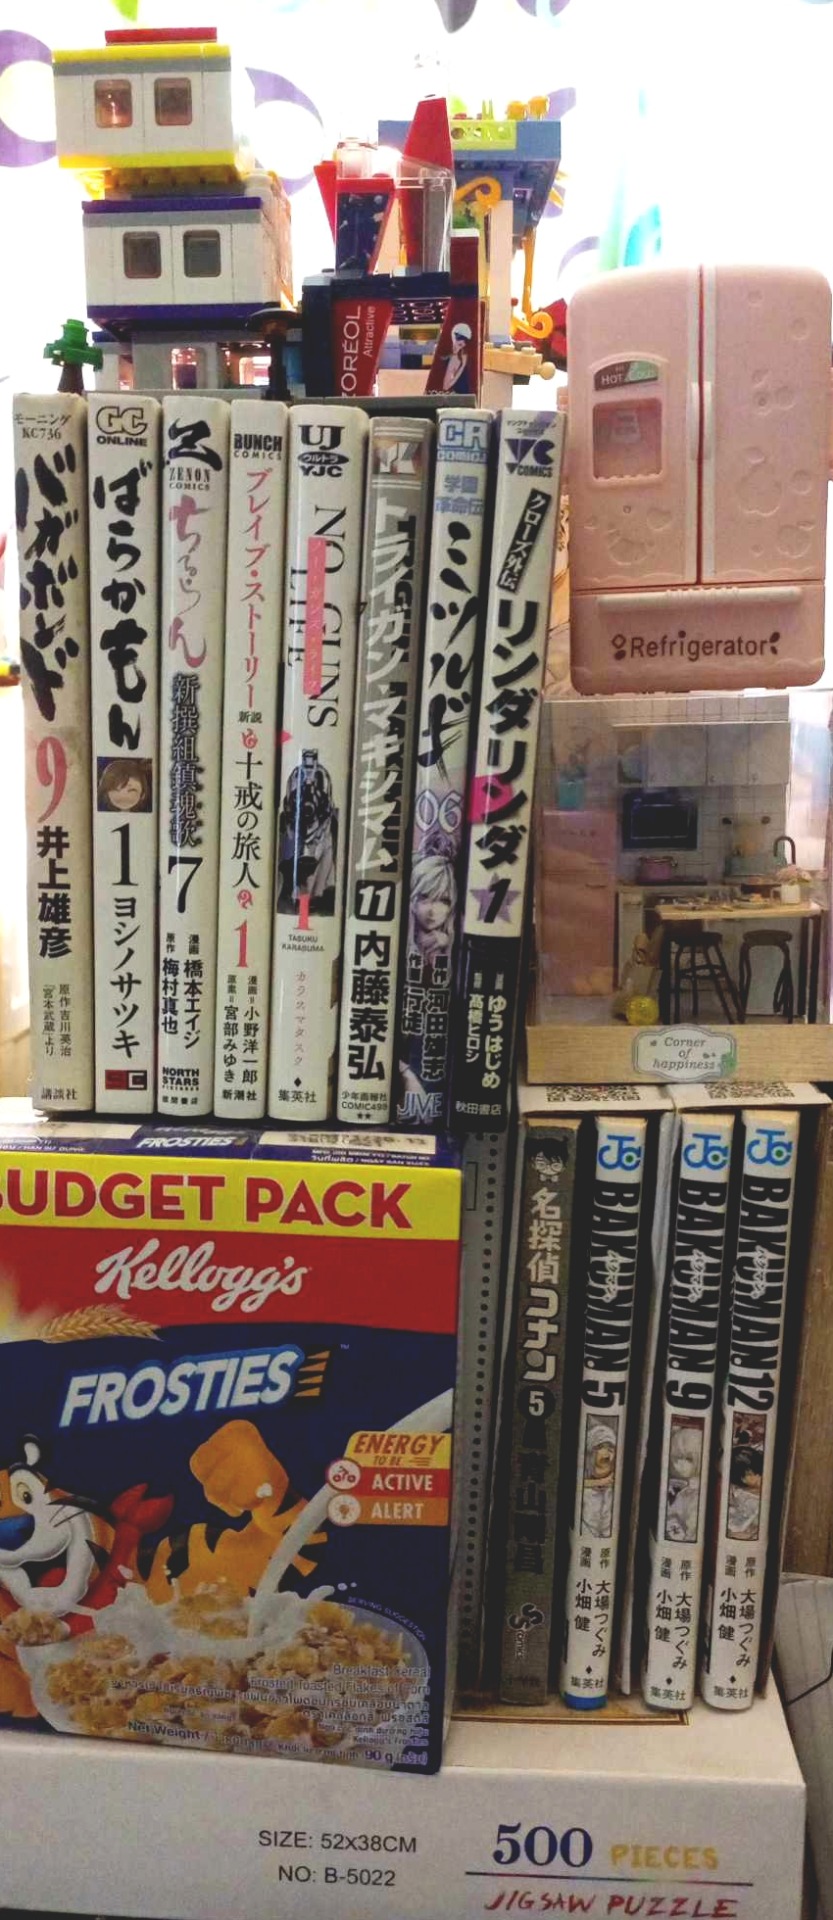
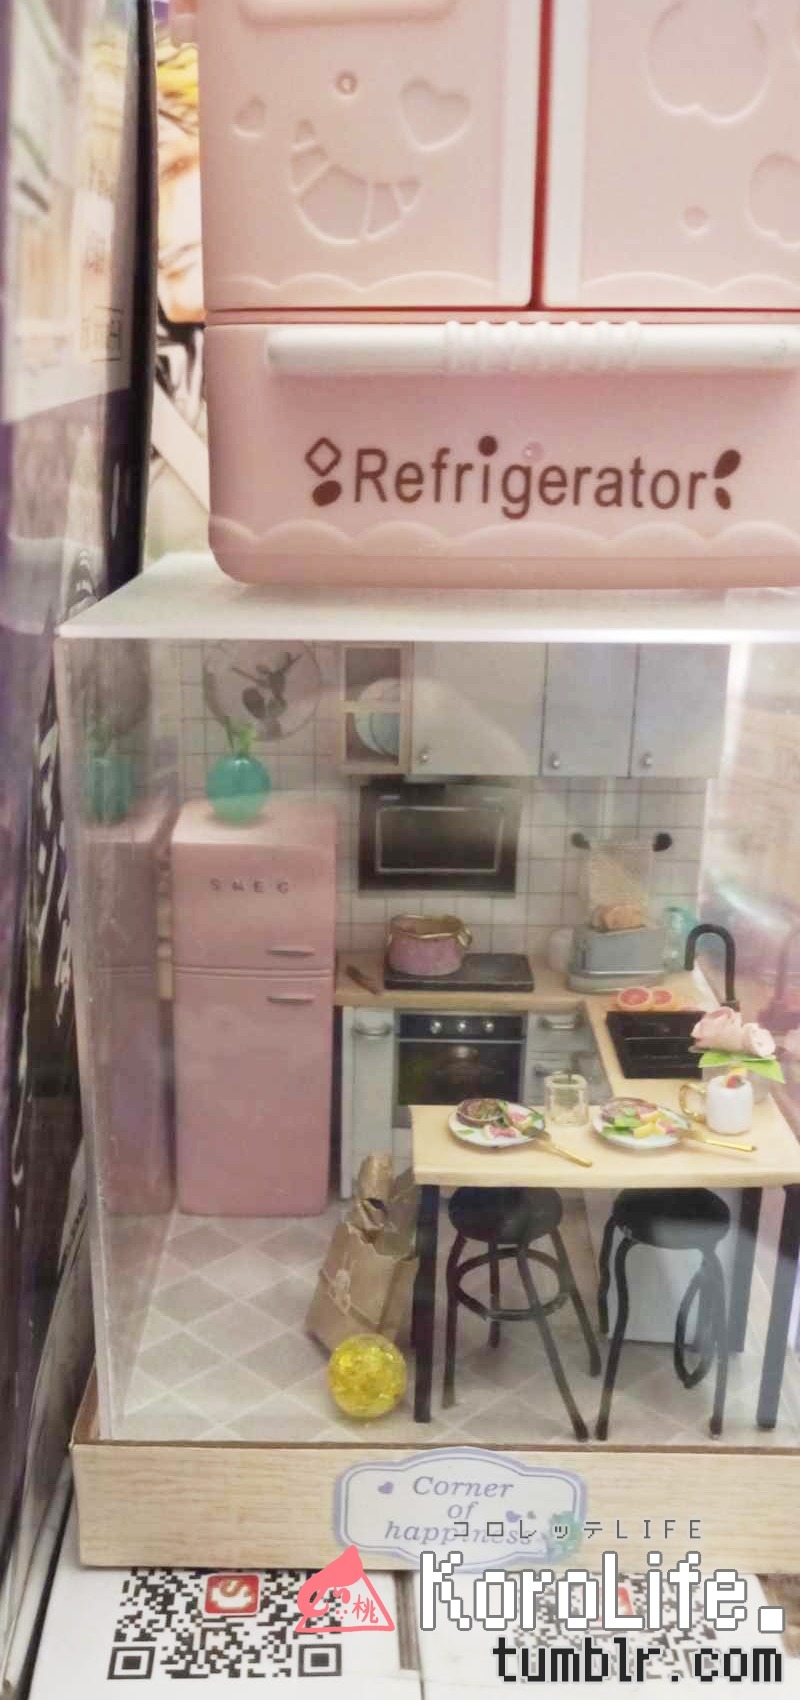
please don't mind Mr. Gamma side-eyeing you in the BG-
The batteries for the LED unfortunately need replacing and one of the wire chairs kind of died a bit, but it's still alive + currently displayed and part of my makeshift not-all-Shounen Jump Manga corner! I might make a separate blog about that too...
But until thenーthanks for reading ( ´ ꒳ ` )⸝ see you in the next one!★
#crafts#miniature#miniature model#kitchen#taste of life#corner of happiness#diy#diy kit#review#miniature dollhouse#miniature craft#craft kits#diy dollhouse#diy miniature
5 notes
·
View notes
Text
Okay since I work with resin and am apparently the only resin creator that knows this, everybody listen the fuck up. This includes buyers and creators.
Unless a special heat proof and light fast resin is used, do not make/buy coasters, candle holders, or lamps. Resin is plastic. Plain and simple. If you put heat on it, it will melt an itty-bitty bit and release fumes into the air. Now it's not enough to do any real damage, so that's not the problem. What's really the issue is that it will affect the color. If you put a candle in a pretty crystal shaped resin candle holder, it will turn the resin closest to the flame yellow and eventually brown. If you put hot cups or pots on resin coasters, they will eventually turn yellow and then brown. If you have an led in your resin sculpture that you turn on a lot, it will happen much slower but your resin will turn yellow.
Now this happens with any resin with age, it is plastic, it degrades and it discolors, but it will do it faster if you introduce heat or moisture. By the way don't put resin in your food or water it does put toxins in it. Again miniscule with no more effect than the microplastics in your fish filet on your health but if it can be avoided why not?
If you can afford a bioresin (ie made from organic resins like the kind that makes ambers) then by all means go for it, to my limited knowledge about them they're far less toxic, but I have a sneaking suspicion they degrade faster. I also do not know how they hold up to heat and moisture, but I suspect they degrade faster when that's introduced as well.
Yes resin is plastic and plastic is bad but remember so is acrylic paint, most housepaints, nail polish, acrylic nails, polymer clay. The thing is, though, plastic is not such a cut and dry moral material. Plastic is good. Plastic is good for prolonging the lifetime of products. It's good for safe food storage. It's good for affordable products. The issue is single use plastics and planned obsolescence. Reduce reuse recycle and lobby for larger companies to be fined to hell and back for only using single use packaging and production with planned obsolescence in mind and we'll all be fine. Resin isn't evil, it's an art medium that's made to last years, it's been around for a while and it will be around. Just be responsible about the resin products you consume and you'll be fine.
3 notes
·
View notes
Text

After-School Jewellery Making Class (Ages 8-16)
Class Description: Join us for a fun and creative after-school Jewellery Making Class designed for children aged 8 to 16. In this engaging one-and-a-half-hour class, students will learn to create unique and personalised jewellery pieces such as earrings, pendants, necklaces, bracelets, hair accessories, and clips. Using a variety of materials, including polymer clay, resins, and beading techniques, students will explore different methods of crafting beautiful, wearable art.
Each session, students will be guided through hands-on projects, developing their skills with step-by-step instructions, while also leaving room for their own creativity and expression. By the end of the course, each participant will have a collection of custom-designed jewellery pieces to take home and proudly wear or give as gifts.
Course Details:
Day: Wednesdays
Time: 3:45 PM – 5:15 PM or 5:30 PM - 7:00 PM
Start Date: 6th November, 2024
Duration: 1.5 hours per session
Materials: All materials, including polymer clay, resin, beading supplies, and tools, will be provided.
Why This Course Is Important: This jewellery-making class offers children more than just a fun after-school activity—it’s an opportunity for them to develop important life skills and explore their creativity in new ways.
1. Enhances Creativity and Self-Expression: Jewellery making encourages children to think outside the box, visualise designs, and create something completely unique to them. It helps them express their individual style while tapping into their imaginative thinking.
2. Builds Fine Motor Skills: Working with small beads, clay, and other delicate materials improves fine motor skills, hand-eye coordination, and precision. These skills are not only essential for crafting but also beneficial for everyday activities.
3. Fosters Problem-Solving Abilities: Crafting jewellery requires planning and decision-making, from selecting materials to understanding the right techniques. This strengthens problem-solving skills and critical thinking as students experiment with designs and find solutions to challenges.
4. Boosts Confidence and Achievement: Successfully completing a project gives children a sense of accomplishment and boosts self-esteem. Wearing or gifting their creations builds confidence as they see the tangible results of their hard work and creativity.
5. Promotes Focus and Patience: Crafting jewellery requires attention to detail, focus, and patience. These qualities help children slow down, concentrate on the task at hand, and enjoy the process of creating something meaningful.
6. Encourages Social Interaction and Teamwork: As part of a group class, students have the opportunity to interact with peers, share ideas, and learn from each other. This promotes teamwork, communication, and the ability to appreciate different perspectives.
Why It’s Necessary: In an increasingly digital world, hands-on activities like jewellery making allow children to step away from screens and engage in tactile, real-world experiences. This class provides a structured yet creative environment where children can explore art in a way that feels personal and rewarding. It encourages creativity, mindfulness, and a sense of achievement—all of which are essential for healthy emotional and intellectual development. Moreover, it offers a break from traditional academic pressures, providing a space where children can express themselves freely while learning practical skills.
Enrol your child in this exciting Jewellery Making Class and watch them discover the joy of crafting while building lifelong skills!
Click on the link below to register
https://forms.gle/Av9MDLB5V1y4yo3a7
CONTACT US
Call: 074 32 44 0997
Email: [email protected]
Website: www.skilledhandsorganisation.org
#inspiration#education#keepmotivated#after school club#growth#confidence building#after school lessons#jewellerymaking#jewellery#jewellerymakingclass#nottingham#mentalhealth
0 notes
Text
Crafting Your Own Beyblade-themed Accessories
In the world of beyblade, where fierce battles between spinning tops reign supreme, the passion for customization and personalization knows no bounds. Crafting your own beyblade-themed accessories is not just a hobby; it's an art form that allows fans to immerse themselves even deeper into the thrilling beyblade universe. Whether you're a seasoned blader or just embarking on your beyblade journey, creating custom accessories adds a unique dimension to your gameplay experience. From designing eye-catching launchers and ripcords to fashioning intricate beyblade arenas and battle stadiums, the possibilities are as limitless as your imagination. This craft transcends the mere material realm, offering a chance to express your creativity and pay homage to your favorite beyblade characters and teams. Join us on this creative journey as we explore the exciting world of crafting beyblade-themed accessories, where innovation meets passion, and the spinning adventure takes on a whole new level of personal flair and style. So, gather your crafting materials and prepare to unleash your inner blader as we delve into the art of beyblade customization.
Introduction to Crafting Beyblade-themed Accessories
Crafting beyblades store themed accessories is a delightful hobby for fans of this iconic spinning top battle game. Whether you're a seasoned blader or a newcomer to the beyblade universe, creating your own custom accessories can add a personal touch to your collection. In this guide, we'll explore the exciting world of crafting beyblade-themed accessories and the endless possibilities it offers for expressing your creativity.
Essential Tools and Materials for Crafting Beyblade Accessories
To embark on your journey of crafting beyblade-themed accessories, you'll need a set of essential tools and materials. From polymer clay and acrylic paint to precision cutting tools and molds, we'll delve into the must-haves for your crafting arsenal. Understanding these materials and their uses is crucial as they lay the foundation for bringing your beyblade-inspired creations to life.
Designing Your Beyblade-themed Accessories
Design is at the heart of crafting beyblade-themed accessories. This section will guide you through the process of brainstorming, sketching, and finalizing your accessory designs. Whether you're recreating iconic beyblades or inventing your own unique spin, we'll explore techniques to ensure your accessories capture the essence of the game and resonate with fellow fans.
Sculpting and Shaping Beyblade Accessories
Sculpting and shaping your beyblade accessories is where the magic happens. Learn how to transform your design concepts into tangible creations using polymer clay and other sculpting materials. We'll cover techniques for achieving precise details, from the intricate motifs on beyblade tops to the handles of launchers, ensuring that your accessories are as visually striking as they are functional.
Painting and Detailing Beyblade Accessories
Adding color and details is a crucial step in crafting beyblade-themed accessories. Discover the art of painting and detailing as we explore various painting techniques, color palettes, and tools that will make your accessories pop. Whether you're aiming for realism or a more stylized look, this section will help you bring your designs to life.
Assembling Functional Beyblade Accessories
Beyond aesthetics, crafting beyblade-themed accessories often involves making them functional. Learn how to assemble working launchers, ripcords, and even beyblade stadiums that can enhance your beyblade battles. We'll explore engineering principles to ensure your accessories spin, launch, and battle just like their real counterparts.
Showcasing and Sharing Your Beyblade Accessories
Once your beyblade-themed accessories are complete, it's time to showcase your craftsmanship to the world. Discover tips for photographing and displaying your creations in a way that highlights their beauty and uniqueness. Additionally, we'll discuss avenues for sharing your work with the beyblade community, whether through social media, fan forums, or local events, so you can connect with fellow enthusiasts and inspire others to embark on their own crafting journeys.
Conclusion
In conclusion, crafting your own beyblade-themed accessories is a creative and enjoyable endeavor that allows fans of this iconic franchise to express their passion in unique and personalized ways. Whether you're designing custom beyblade launchers, painting intricate beyblade designs on clothing, or even crafting your own beyblade-inspired jewelry, the possibilities are limited only by your imagination.
1 note
·
View note
Photo


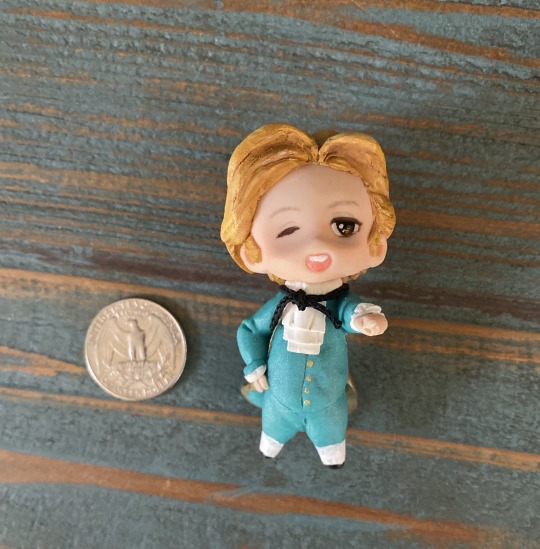


Lil’ chibi Stede Bonnet I made for my friend’s OFMD birthday party! This isn’t “quarantine craft” anymore I guess lol, but the materials are the same old polymer clay (sculpey iii, to save time I bought more colors than one this time 😂), painted with colored pencils, pastel, and acrylic, and finished with Testor Dullcote overall and mod podge for the eye. The tie thing is a real string. More process under the cut
The Horrible Goose post
Aziraphale and Crowley post

*the show playing in the background* I actually did the OPPOSITE hand first like I always do in art akajshdkashd and had to make this TINY hand again
My mom threw out our small convection oven (which I’ve used to bake all my other polymer clay) ever since we got an air fryer, and the big conventional oven takes too long to preheat so...after some brief research I decided to go for it and put Stede in the air fryer lmao. He survived beautifully.

#my craft#polymer clay#stede bonnet#our flag means death#before I glued his head on I put on one glove and made a ton of 'Izzy ripping Stede's head off' videos 😂😂 my friends were. Thrilled (Not
185 notes
·
View notes
Photo

Wondering what materials Ellen Jewett uses to create grand spectacles like this untitled wor For gosh sakes, NO real animal body parts. Ohhh, but she definitely seems to keep art stores in business! Look at this long list of supplies: Air drying polymer, polymer clay, cold porcelain, metal (armature), glass or resin (eyes), acrylic paint, oil paint, mineral pigment powder, resin or polymer finish 🎨ARTWORK DETAILS🎨 Approximate Dimensions: Height – 21 inches Width - 9 inches Length - 23 inches 👉www.ellenjewettsculpture.com ••• posted on Instagram - https://instagr.am/p/CQmMvvVrhEI/
#surrealart#beautifulbizarre#ellenjewett#animals#animalart#art#artist#artwork#artsculpture#creative#c
45 notes
·
View notes
Photo
All things are Atoms: Earth and Water, Air And Fire, all, Democritus foretold. Swiss Paracelsus, in's alchemic lair, Saw Sulfur, Salt, and Mercury unfold Amid Mellennial hopes of faking Gold. Lavoisier dethroned Phlogiston; hen Molecular Analysis made bold Forays into the gases: Hydrogen Stood naked in the dazzled sight of Learned Men.
The Solid State, however, kept its grains Of Microstructure coarsely veiled until X-ray diffraction pierced the Crystal Planes That roofed the giddy Dance, the taut Quadrille Where Silicon and Carbon Atoms will Like Valencies, four-figured, hand in hand With common Ions and Rare Earths to fill The lattices of Matter, Glass or Sand, With tiny Excitations, quantitatively grand. The Metals lustrous Monarchs of the Cave, Are ductile and conductive and opaque Because each Atom generously gave Its own Electrons to a mutual Stake, A Pool that acts as Bond. The Ions take The stacking shapes of Spheres, and slip and When pressed or dented; thusly Metals make A better Paper Clip than a Window, Are vulnerable to Shear, and heated, brightly glow. Ceramic, muddy Queen of human Arts, First served as simple Stone. Feldspar supplied Crude Clay; and Rubies, Porcelain, and Quartz Came each to light. Aluminum Oxide Is typical ¬– a Metal is allied With Oxygen ionically; no free Electrons form a lubricating tide, Hence, Empresslike, Ceramics tend to be Resistant, porous, brittle, and refractory. Prince Glass, Ceramic's son, though crystal-clear Is no wise crystalline. The fond Voyeur And Narcissist alike devoutly peer Into Disorder, the Disorderer Being Covalent Bondings that prefer Prolonged Viscosity and spread loose nets Photons slip through. The average Polymer Enjoys a Glassy state, but cools, forgets To slump, and clouds in closely patterned Minutes The Polymers, those giant Molecules, Like Starch and Polyoxymethylene, Flesh out, as protein serfs and plastic fools, The Kingdom with Life's Stuff. Our tme has seen The synthesis of Polyisoprene And many cross-linked Helixes unknown To Robert Hooke; but each primordial Bean Knew Cellulose by heart: Nature alone Of Collagen and Apatite compounded Bone.
What happens in these Lattices when Heat Transports Vibrations through a solid mass? T = 3Nk is much too neat; A rigid Crystal's not a fluid Gas. Debye in 1912 proposed Elas- Tic Waves called phonons which obey Max Planck's Great Quantum Law. Although amorphous Glass, Umklapp Switchbacks, and Isotopes play pranks Upon his Formulae, Debye deserved warm Thanks. Electroconductivity depends On Free Electrons: in Germanium A touch of Arsenic liberates; in blends Like Nickel Oxide, Ohms thwart Current. From Pure Copper threads to wads of Chewing Gum Resistance varies hugely. Cold and Light As well as "doping" modify the sum Of Fermi Levels, Ion scatter, site Proximity, and other factors recondite. Textbooks and Heaven only are Ideal; Solidity is an imperfect state. Within the cracked and dislocated Real Nonstoichiometric crystals dominate. Stray Atoms sully and precipitate; Strange holes, excitons, wander loose; because Of Dangling Bonds, a chemical Substrate Corrodes and catalyzes – surface Flaws Help Epitaxial Growth to fix adsorptive claws. While Sunlight, Newton saw, is not so pure; A Spectrum bared the Rainbow to his view. Each Element absorbs its signature: Go add a negative Electron to Potassium Chloride; it turns deep blue, As Chromium incarnadines Sapphire. Wavelengths, absorbed, are reemitted through Fluorescence, Phosphorescence, and the higher Intensities that deadly Laser Beams require. Magnetic Atoms, such as Iron, keep Unpaired Electrons in their middle shell, Each one a spinning Magnet that would leap The Bloch Walls whereat antiparallel Domains converge. Diffuse Material Becomes Magnetic when another Field Aligns domains like Seaweed in a swell. How nicely microscopic forces yield, In Units growing Visible, the World we wield!
AUTHOR John Updike


I actually… love this
180K notes
·
View notes
Text
MAKING ART: It's NOT about your materials!
Do the work that matters to YOU! When I first started working with polymer clay back several decades ago, I got a lot of flack for my choice of materials. “It’s just plastic!” was the most common comment. A lot of art media gets the same push-back. Acrylic paint is not as “professional” as oils. Stone sculptures are “real art”, clay pots are not. I’ve encountered people who don’t think…

View On WordPress
#art vs. craft#how do I know if my art is real#it&039;s not the materials it&039;s what you do with materials#Support your medium#what art materials make "real art"?#what if people say my work isn&039;t real art#what is real art#what is the best art material#what is the definition of real art#why you choose the materials you use#why you do the work you do
0 notes
Text
Francis Upritchard
'Upritchard questions how we construct a vision for the future through our fractured, partial and often conflicted understanding of the past. She creates a place where histories and archives can viewed anew through playfully exploring aspects of partiality, misreading, dodgy translations and uncanny coincidences. Upritchard’s mini worlds are anti-imperial and non-hierarchical - there is no dominant culture.’ Heather Galbraith.
Save Yourself, 2003 Mixed media
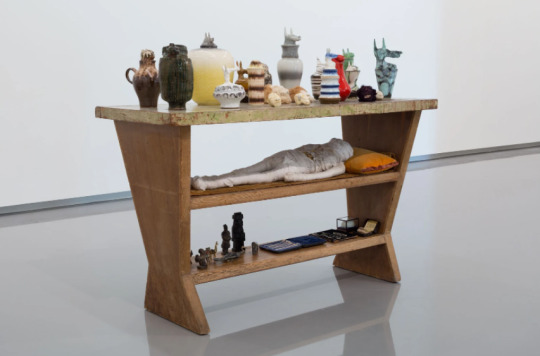
- a humorous work playing on b-movie gags - ’Her mummy-on-the-cheap (a mass of rags, with a knowing glass eye), unearthed with all his burial treasures – a bar of gold (pack of fags), and earthly treasures (kitschy teapots), comes replete with his own curse: vibrating spasmodically, he might actually be frightening if his electric cord wasn’t in plain view.’#

Francis Upritchard The Misanthrope, 2011 Modelling material, foil, wire, acrylic paint, silk, wood, polyester padding, nylon, costume jewellery, found table



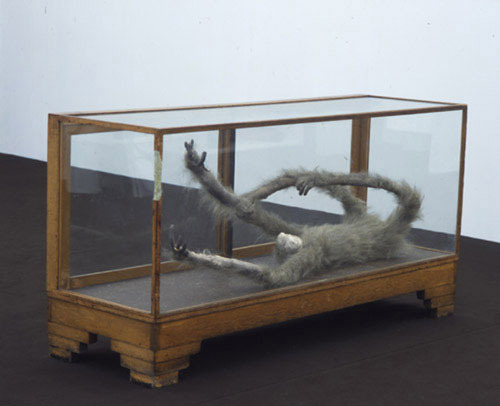
Francis Upritchard Sloth, 2003 modelling material, fake fur, kid gloves, gold and silver rings, wood and glass cabinet
Bejewelled, with all-too human hands, this seemingly long-dead relic is unlike anything in the known animal kingdom. Upritchard’s tampering with history again: she’s made a plausible missing link, a falsified curios, playing on horror-movie expectations of a collective consciousness.
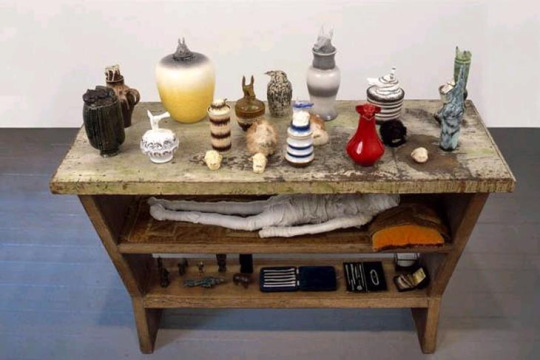
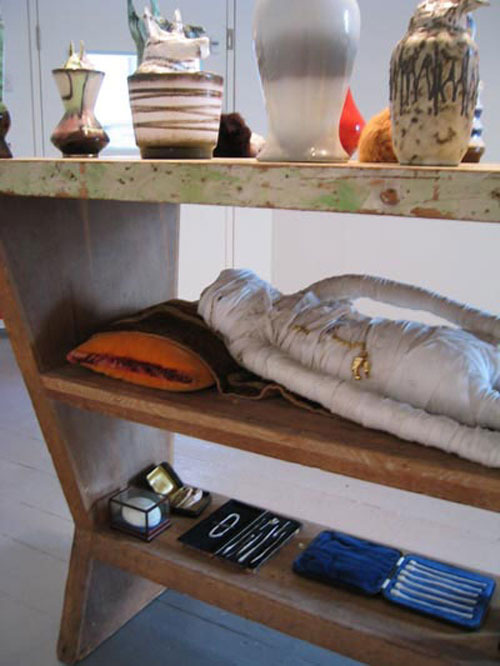
Francis Upritchard Travellers Collection, 2003 Mixed media
Upritchard forges a dark and twisted history of her own. Haunting and perverse, The Travellers Collection is a curio cabinet: it’s shelves house the untold magic of grotesque clay pots, ’shrunken’ animal heads (snarling real teeth!), bizarre instruments which seem to be carved (from possibly human!) bones.
Upritchard’s is an art of falsifying information. Appropriating readymade artefacts, hexing the viewer’s imagination to wilfully reinterpret: a car boot sale cookie jar as a mysterious ancient urn, tacky tourist shop paraphernalia as prize trophies from a long lost empire. Upritchard’s a magpie Indiana Jones: inventing creepies and curses from stuff that probably exists in your attic.

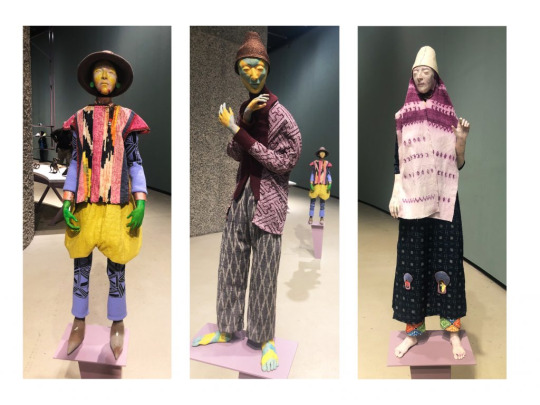
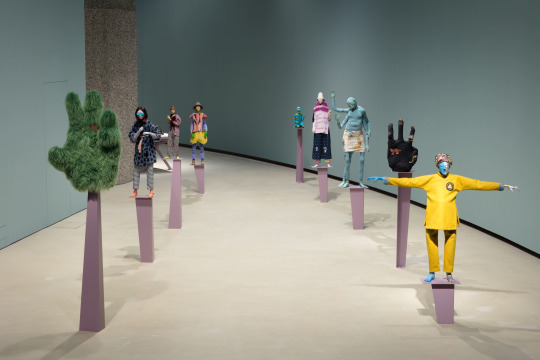
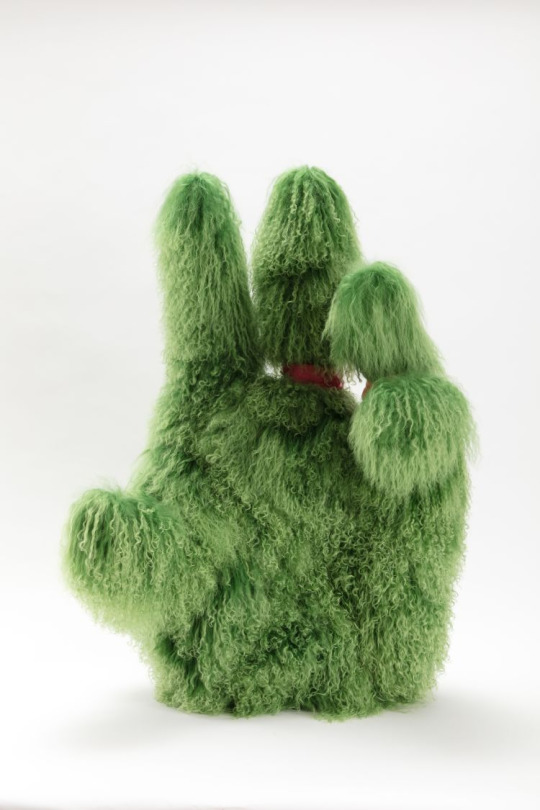
Exhibition at the Barbican:
-Upritchard’s works are characterised by a sense of curiosity and exploration of the human form, from medieval knights to meditating futuristic hippies
-modelled in polymer clay, skins painted in a range of monochromatic colours or distinct gridded patterns
- Traversing cultures and time periods, her figures resist easy categorisation, allowing for multiple readings. Hand-woven blankets, tie-dyed silks and bespoke garments often decorate these deftly made sculptures which are frequently combined with found objects.



0 notes
Text
Artist Sculpts Polymer Clay Into Colorful Swirling Landscapes
Polymer clay is among the favorite materials of arts and crafts enthusiasts, as it is very easy to use and comes in a wide range of colors. But taking your art to the next level means creating intricate sculptures using this moldable material.
Alisa Lariushkina is a Sweden-based artist who fell in love with polymer air-dry clay and she was inspired by famous impressionist painters, such as Monet in making her art. She makes amazing-looking dynamic landscapes in vibrant colors, resembling famous paintings or simply styles of famous painters. It took Lariushkina 6 years to perfect her technique. Each piece is formed separately and fixed together using glue. The swirls and waves created by her hands transport the viewer into new territories of unexplored lands and fantasy landscapes. Her works can be purchased on her Etsy shop or simply admired on her Instagram account where Lariushkina has built a fan base of more than 70,000 followers.
(adsbygoogle = window.adsbygoogle || []).push({});
(adsbygoogle = window.adsbygoogle || []).push({});
Find them HERE…
from Real Estate https://www.goodshomedesign.com/artist-sculpts-polymer-clay-into-colorful-swirling-landscapes/ via http://www.rssmix.com/
0 notes
Text
I have so many things to put together, make, and do right now, I dunno where to fucking start 😁.
Just took delivery of a Paper Nano Hong Kong skyline kit, with LED plate for lighty-uppy goodness. It's dinky. Not as dinky as Metal Earth but probably just as fiddly on account of the material being much more fragile.
Thank fuck for tweezers is all me and my gorilla fingers can say 😝.
I've got a wooden eagle thingy mum bought me in Northumberland last year, and 2 mechanical wooden model sets from a couple of xmasses ago which have been languishing in storage. Also have a handful of foil art kits in there too. And then there's the polymer clay and Doh Vinci stuff my sibs got me for Xmas just gone.
Oh, and the half finished Titanic model. And all my art stuff.
All that plus I'll have a big ol' chest of drawers to put together in the next couple of days. Fun!
No seriously. Fun. I love a flatpack, me.
Let's just hope my motivation sticks around. I craft much like I read (actual books about real life or original characters, not fic which I consume pretty much daily): I'll go hard for weeks/months and then do fuck-all for about as long.
Which is why I'm still a mediocre guitar player after 25-odd years 😭.
#and that's before you add mental/physical health issues and executive dysfunction to the mix#rc's random ramblings
2 notes
·
View notes
Text
Creating my final diorama: 5-2-20
On wednesday after weeks of experimenting and planning we finally started making our dioramas.

As I already had constructed a few elements I had less to do other than making and painting the base, creating the treehouse, and then combining everything together.
Because I enjoy working on a small scale and to make it easier transporting it home to work on it I made the scale of the diorama small (about the size of an A4 sheet of paper) and sketched out the size of my base onto a large piece of cardboard which I used as the material for my base.

After cutting out my base with a scalpel I cut it in half again so that I could easily transport it home and then used acrylics to do my base coat of paint.
My base coat was a dark sandy brown I created by mixing Orange, Yellow and a bit of black together which when painted over would keep an aged and dry look to it to fit my savanna landscape.
I then put a hold at the edge of the base for the tree to go into and left the base to dry.
Constructing the the tree was quite difficult but I made it easier by using a hot glue gun which stuck the branches on with ease, I didn’t glue the leaves on though because i wanted to be able to take the diorama apart in little bits.
Once my base was dry I then glued sand and spread it around to add a desert texture, after it was dry I shook off the excess and then dry brushed a light sandy dirt colour and watered down some ink which I brushed around and dried using a tissue to make the sand look dirty and aged.

Once the base was dry again I superglued some straw down to add some dead vegetation to the landscape and to make it look more apocalyptic and dry (The effect and theme I was Going for) next I started on my treehouse which I made using polymer clay as the base and support and a piece of toilet roll tube which I glued and painted onto the clay base. I took some toned paper and made a cone for my roof and then glued some straw onto the cone to make it look like a mud-hut.

The final step for my treehouse was to take a white gel pen and to doodle primitive symbols all over the hut to make it relate back to african primitive art and my artist study of Keith Haring.
The last thing I did for my diorama was cut out a bit of the sun in my background so a light could shine through to act like a real sun.

When each element was assembled I built my diorama together to see how it looked and I was incredibly pleased with my final outcome.


The texture, colour and design of my final diorama was exactly what I wanted and envisioned, It also looked exactly like the plan I drew which made it even better. I couldn’t change my final diorama in anyway to improve it as It was exactly what I wanted.
0 notes
Text
Polymer Clay is the Heart Beat of Every Artist
Intended for artists and crafters, Polymer clay is a unifying and pliable polymer compound. Since clay is composed of particles of silicate suspended in water, it is not considered real clay. Suspended in a plasticizer from particles of polyvinyl chloride or PVC, Polymer clay comes.
Polymer clay being different from real clay is a popular choice among artists.
Originally, prior to curing in low temperatures, they were soft when these clays were first produced. However, air-dry polymer clays are now available nowadays. To one's personal liking, Kato clay makes it easier to mold these. Afterward, at high temperatures, it can be hardened to fixate the design.
There are basic conditioning and curing steps to follow so that in accidental falls and in the changing conditions of weather, the finished product will not even break. As often as one wants, Curing can be done. To smoothen out rough finishes, it can be sanded lightly afterward.

The polymer clay is special due to its versatility. In different colors, it is available. To make your own unique colors, you can blend paints with this clay. Without blending them, you can also work out two or three different color-schemes.
If rather than the plain one-colored clay you greatly prefer effects like cane working and marbling, this is effective. The Kato matrix is very helpful for every artist.
For glasswork, architecture, textiles, and sculpture, the pliability and ductility of polymer clay let you use certain techniques. The fact that it does not dry out is the best thing about polymer clays so whenever they are doing some art forms such as sculptures, people who use it won't have to worry about a time limit.
The process which fuses the fine particles on polymer clay into a solid material is firing. Low heat is required for this process. To use your home oven as a kiln, the heat must be low enough for you.
To make your art form durable objects, the clay gets solid and hard enough. To obtain the desired textures, there are several techniques. From glass-like to stone-like figures, Texture may range.
In many ways, Kato Polymer clays can be used. As long as it doesn't melt or burn during the firing process, you can actually cover anything with it. With this type of clay, you can cover mirrors, wooden boxes, picture frames as well as tableware.
In jewelry, you will find the popular application of polymer clay. To make bracelets, beads, pendants as well as neckpieces, this clay is used. Miniature sculptures and Buttons are also good options.
To offer this clay other appearances such as amber, coral, granite, ivory, turquoise, and jade, many clay artists evolved various techniques. It can be shaped any way you want as it is very flexible.
Conclusion
Due to its surging popularity, Polymer clay is widely available nowadays. Obviously, in the market, there is lots of polymer clay. Look in bead shops, local craft stores, and art supply stores or online.
Author’s Bio
PrairieCraft is the first online store to serve the polymer clay enthusiast. We fulfill the demand for better products, tools, and clay and offer Kato tools like Kato matrix, Kato cutters and forms, Kato Polyclay, Kato rubber stamps, and many more. Visit www.Prairiecraft.com for details.
0 notes
Text
Permanent Ceramic Coating: Opti Coat PRO
I want to talk about the back days, car detailing industry received a bad reputation but with the passage of time the image has changed and people are positive towards it. Traditionally, the dealership products for paint protection were not other than any bit durable paint sealant. So, after every six-month, reapplication was needed and if you miss the schedule the application, the warranty of the protective layer would be voided. Well, things are now different and paint protection processes like ceramic coating have come a long way over decades as people showed their interest.

DEFINING THE TERM “OPTI COAT PRO”
It is a completely different paint protection product which is long durable or says permanent. It is sold at car detailing outlets and is only applied through professionals. It is applied once over the car exterior surface and protects it from environmental hazards permanently. It is a product from Optimum Polymer Technologies which is somewhat like wax coating applied onto the car’s surface. Imagine a car going through the brushless car wash and coming out looking absolutely fresh and detailed. I am talking about a really detailed car, not exactly the one which is rinsed off using harsh chemicals and recycled water. Car detailing is a big term to deal with on an easy note.
Opti coat Pro is a crystal-clear ceramic polymer coating which chemically bonds to factory clear coat to form a permanent layer. It’s not a kind of wax or any sort of sealant which will wash away or break down after a certain time frame and with direct exposure to any environmental hazards like chemical etching or stone chips. It is harder and thicker than the factory surface clear coat and can really absorb the damages which would otherwise directly hamper the painted layer of the car. over the top of body protection, Opti Coat has shown its full resistance towards any sort of alkaline or acidic substances like tree sap, bird dropping or even any harsh chemicals used in name of cleaners. It will surely not dissolve, etch or maintain a glossy and clear finish. In fact, this Opti Coat Pro turns up with a warranty period of car’s paintwork protection. A typical factory clear coating measures generally 35 to 50 microns in terms of thickness that is somewhat as thick as the human hair. The significant thickness of this ceramic coating measures up to double up microns in thickness and talking about a wax then its measurement lies less than 0.02 micron.
This significant measurement of thickness permits this ceramic coating to protect the car against any damage which would in another way directly affect the original factory paint. Swirl marks and few of the light scratches are not just reduced by the Opti-Coat ceramic coating, the original factory paint is even having a shield against the damages caused by UV and oxidization.
In addition to any kind of physical protection this Opti-Coat PRO gives, this ceramic coating is also a highly hydrophobic surface, that means that it sheds off water, dirt, dust and road grime very easily. In short, this explains that the surface having ceramic coating is easier to clean and maintain and even stays new and clean for longer.
CERAMIC COATING Installation:
At first look, the ceramic coating installation method seems very easy – just wipe the product and allow it to settle by drying. But this is not that easy and applying Opti coat is a big deal. Here is the detailed process of ceramic installation which initiates with thorough washing then proceeded by clay bar treatment. Only deionized water is used along with car detailing tools and latest techniques designed mainly to minimize certain scratching. Further chemical degreaser is used to wash off any remaining grime, dust, oil, or grease. The car is then further dried using the compressed air.

At this point in time, the car is prepared for any sort of paint correction process. Scratch marks and light swirl marks are easily removed using the process of compounding and then polishing before the application of Opti-Coat PRO. Any kind of paint imperfections will be trapped otherwise under the hard-ceramic coating layer. After any of the paint correction steps, the car is further ready for the initial step of the installation process Opti-Coat PRO– the professional application of Opti-Coat PRO primer polish. This primer polish is light polish which is designed for preparing the factory car coated surface so to receive the ceramic coating. A professional primed clear coat surface will permit the ceramic coating to optimally bond.
Next, the car is taken into the state of the art, properly sealed installation outlets where it is treated professionally, wiped down, for the final round, using a proper mixture of water and alcohol. After ensuring that the car paint protection for surface is completely free from any leftover primer polish, grimes and dust, professionals start the real installation of the ceramic coating. Opti coat pro is completely different from the ceramic pro but if you get into the car detailing world, there are professionals who claim it to be the same.
“Opti-Coat PRO” is applied over the cleaned using a foam applicator pad. Once it is properly wiped on, this car coating will self-level and start to bond chemically with the car’s factory clear coat surface, as the liquid source evaporates. Opti-Coat PRO is applied in sections of the car as you are left with limited time for wiping on the applied product, hold on for few seconds so that it properly flash, and further wipe off the remaining add on the material. It can be a lengthy process to apply the ceramic coating on the entire car surface.
Proper care is taken to the proper application of the coating at every nook and corner without missing out any section of the car. The high-intensity, lighting in the sealed installation outlets helps to ensure that the ceramic coating is properly installed. Once Opti-Coat PRO is properly cured then comes the turn of real magic. Water, dust, dirt, and grime easily rinses off as they don’t damage the freshly coated surface. You can now wash odd all the other damages like a bird dropping, tree sap or chemical residue without struggling.
Conclusion:
If compared to other brands of ceramic coating, Opti coat is the best brand to go for. So, waiting for what. Hurry up, take your car to any of the car detailing outlet and get it professionally installed. Reach us http://www.opticoatindia.com/.
0 notes
Text
Get a Hobby Kit and Learn Something New
water filter
If you are tired of the ho-hum of life and would like to branch out a little, maybe you should get a hobby kit. Many different hobbies have kits that can help a beginner learn about the hobby quickly and easily. It is not easy to teach yourself some hobbies, but with a hobby kit, you can learn from the kit.

For instance, if you have been wanting to learn how to do a needlecraft, such as cross stitch or crewel embroidery, there is no better way to start than with a kit. In a hobby kit, you will receive a piece of cloth with the design already stamped on, yarn or floss in the proper colors and possibly already cut to the proper lengths, and a needle. You may even get an embroidery hoop in the kit. When you buy a hobby kit, be sure to read on the package to see if any other materials or tools will be needed to do the hobby. water filter
A hobby kit is also the best way to learn a hobby like building model cars. In a model car kit, you will get all the pieces you need and detailed instructions. In some kits, you might also receive paint, a brush, and glue, but read the label. You might have to provide these things separately.When choosing Christmas or birthday gifts for a young person, consider a hobby kit, such as a candle-making kit or a rock tumbling kit. In the fall, the stores are full of kits that could start a kid on a hobby that would last throughout his life. You can find small weaving loom kits, glycerine soap making kits, bead craft kits, wood-burning kits, and art kits. There is a line of colorful books put out by the Klutz company that each gives instruction in a hobby and has a packet of materials for learning the hobby. Some of the topics Klutz books cover are polymer clay modeling, hair styling, and pompon creations. They are all cleverly written and lots of fun.
Another hobby that can be learned from a kit is starting garden seedlings, especially herbs. A seed starting kit typically contains a pot, a small trowel, seeds, fertilizer, and a greenhouse dome or cover. Potting soil may need to be purchased separately.
When choosing a hobby kit, be careful to get one that is appropriate for the recipient. Sometimes a hobby kit is quite challenging. An example of a difficult project is an electronics kit for wiring one's own radio. If a kit is a gift for a child and it is too hard, it will wind up gathering dust on some shelf. In fact, it might gather dust even if you buy it for yourself! water filter Consider getting a smaller project that you can finish in a short time so you can get a feel for the hobby. The next hobby kit you buy can be harder if you find that you enjoy the hobby and have a real desire to learn more about it.
0 notes