#individual panels with alt text below the cut
Explore tagged Tumblr posts
Text
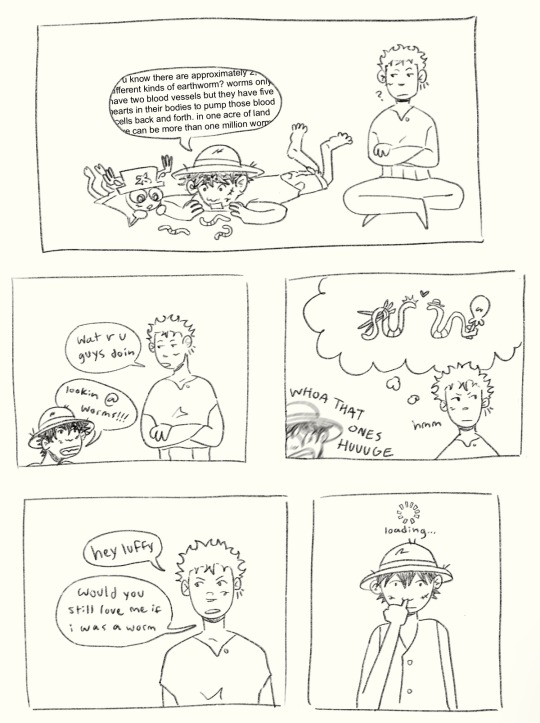
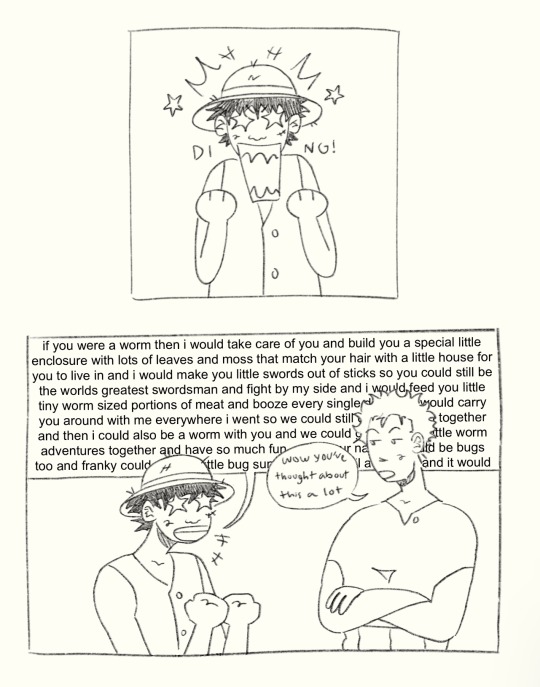
by god they’re insufferable. inspired by this post
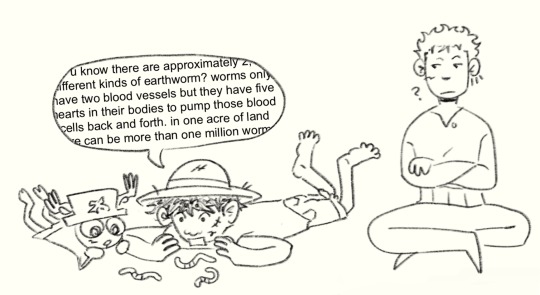
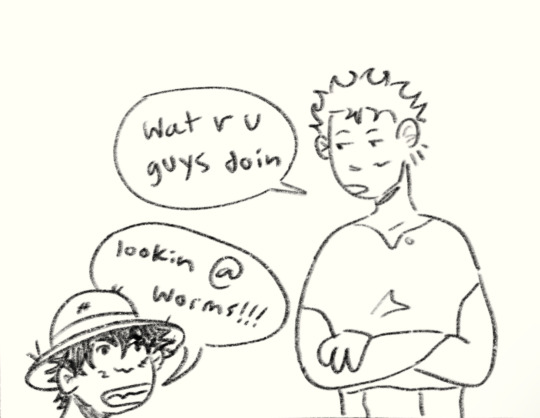
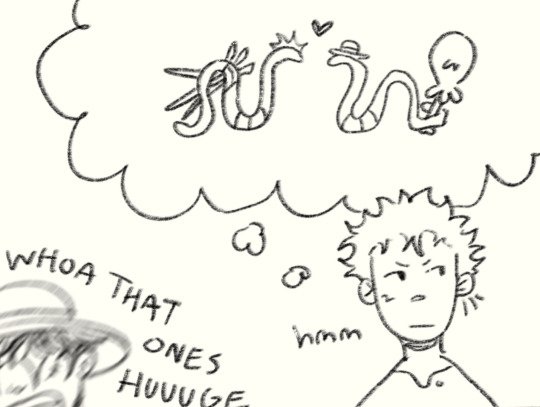
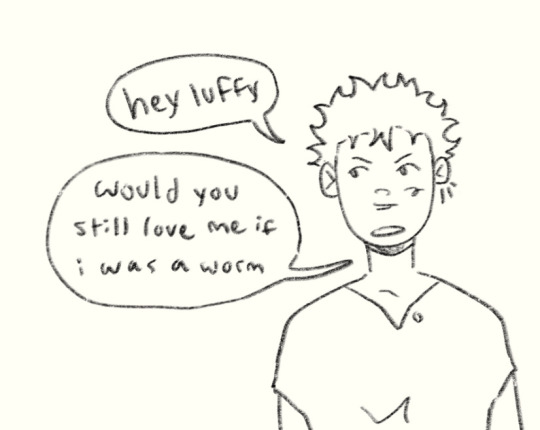
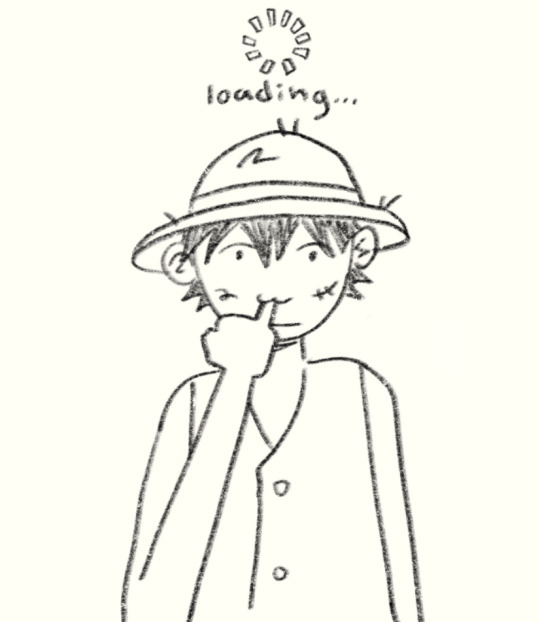
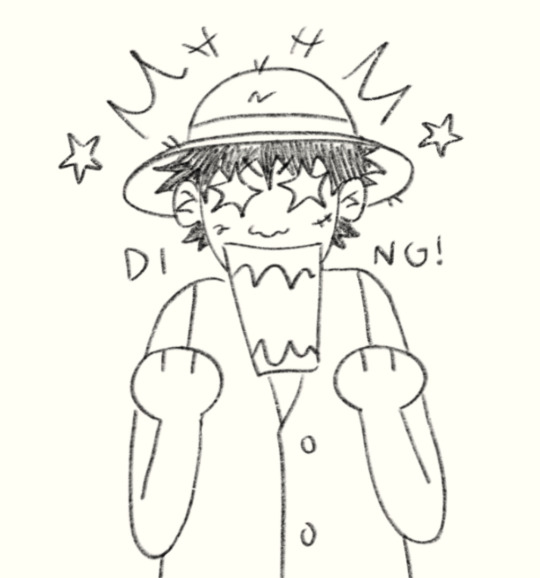
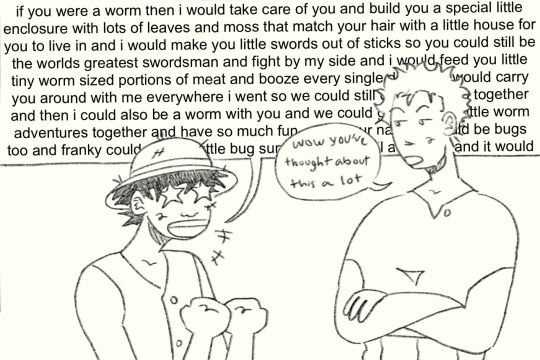
#luffy has been waiting for this moment for his entire life#zoro is kicking his feet internally#individual panels with alt text below the cut#this is my first time doing image descriptions so lmk if there’s anything i can do to improve them#one piece#zolu#monkey d. luffy#roronoa zoro#tony tony chopper#strawhat pirates#op#1pc#luzo#op fanart#one piece fanart#one piece comic#would you still love me if i was a worm#my art
497 notes
·
View notes
Text


This comic has two versions for a reason. The difference is in Millia's second paragraph in panel 3. Please read my translation notes below to understand why I did not pick one version over the other. If you understand Japanese, I would welcome a retranslation of this comic for better accuracy.
I picked this comic because it had some cute Millia and Venoms, and I wanted to practice redrawing.
Untranslated & cleaned comics under the cut.
Translation assistance: @solradguy + @yomotsu-hirasaka
ID in alt for both images.


To begin with, the version of the comic where Millia tells Venom that there are women who would like to get to know him is the version more accurate to the translation that DeepL gave me. The assistance that @.yomotsu-hirasaka gave me was confirming that Millia specifically says woman in her monologue, and that it wasn't an assumption that DeepL made based on other parts of the dialogue.
It was difficult deciding what to translate it as, because I don't want to change the contents of a comic for modern sensibilities, especially as I'm using a machine translation and it could be that what I'm changing the dialogue from may be a poor translation to begin with. But on the other hand, it feels wrong to have someone tell Venom that there's a woman out there for him.
I picked the middle road and made two versions of the comic, one with a translation more accurate to what DeepL gave me and one that I think works better in emotions and tone. It's so weird what two words changing can achieve.
Honestly, picking up the script for this one wasn't hard at all, unlike other comics with way less text. I think what I'll do from now on is submit each panel to google keep individually and OCR it from there, instead of doing the four panels as a whole.
I hope that my redrawing isn't too obvious... I don't know how to get my pen to the exact level of fuzziness as the original comic. Alas.
I really do adore the contents of this comic, though; the artist is very skilled with drawing expressions and chibis though they could've made venom a touch darker, and the conceit is very sweet.
I said this before, but if you know Japanese and want to retranslate this, get in touch with me and I'll update the post with your translation, along with crediting you for it.
#this took so long...#guilty gear#venom guilty gear#millia rage#jam kuradoberi#johnny guilty gear#illym translation
60 notes
·
View notes
Photo
Flipping through an old sketchbook and these actually made me laugh out loud
I can't handle this
IDs for the above images under the cut cus I posted em before Alt Text was enabled
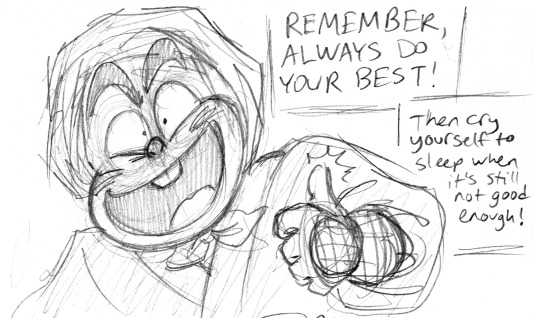
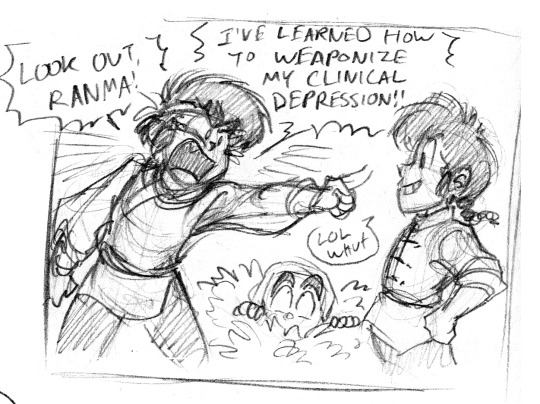
[Image IDs: 2 sketch dumps of several loose cartoony pencil drawings of the cast of Ranma 1/2, mostly the ninja Sasuke Sarugakure. IDs for both sketch dumps will be combined below, just separating the individual doodles/comics.
1: Sasuke stands with a confident grin, chuckling "Hyeh hyeh hyeh" with his hands behind his back. He cries triumphantly "Behold—your DOOM!" as he shows what he's hiding with a "DUN DUN!" sound effect—but his hands are empty. He stares at his empty hands in wide-eyed disbelief and says "Oh geez, I must've dropped it." Offscreen dialogue reads "Did you hear something, Akane?" "Huh?"
2: Sasuke gives an extremely enthusiastic thumbs-up next to the captions "Remember, always do your best!" "Then cry yourself to sleep when it's still not good enough!"
3: Sasuke hugs Tatewaki and Kodachi Kuno around the neck. Both look disgusted and annoyed, but Sasuke looks blissfully affectionate as he says "I love you two as if you were the children you'll never permit me to have."
4: Sasuke has his hands clapped to his cheeks, flustered and sweating and blushing with a goofy grin, saying "I've been SMILED at! I'm in LOVE!" Next he's shown with his hands clasped in prayer, blushing with a serene smile and tears running down his face, thinking "I've been smiled at TWICE...I could die with no regrets."
5: Sasuke throws his arms in the air triumphantly, proclaiming "Aw yeah! Sasuke's EATIN' DINNER tonight!" A caption reads "That's what YOU think."
6: An extreme closeup of Akane punching Kuno with an uppercut, screaming "Get lost, CREEP!" In the next panel, Kuno is on the floor and Sasuke is standing there with a rope, looking confused as Akane cheerfully says to him "YOU'RE still coming over for dinner though, right?"
7: Sasuke and Gosunkugi are kneeling side by side on the ground, holding up identical cameras. Sasuke cheerily says "Twinsies!" while Gosunkugi, barely suppressing rage, mutters in small text "I'll kill you." Sasuke, flustered, says "Uh, I didn't quite catch that," to which Gosunkugi mutters even more furiously "Dark Lord Sauron, grant me strength..."
8: A cropped image of Sasuke's head looking furious, but in a cute way with pouty puffed-out cheeks. Caption reads "I am not 'CUTE.' I am a DEADLY WEAPON."
9: Sasuke has his face in his hands, blushing, eyes closed in a private reverie, interrupted by an unseen character. "Where (eheh) 'adult fantasies' are concerned," ("Uh, Sasuke") "I'd have to say my 'kink' is 'being loved and respected.'" ("Sasuke—") "Like many kinks, it's rather unfeasible in real life and can only be achieved through fantasy." ("SASUKE NO")
10: Sasuke sits on the ground in the rain, a wide-eyed long-suffering expression on his face, hugging his knees to his chest. Caption reads "Waiting to see if things will improve."
11: Sasuke beams cheerfully with his hands on his hips and sparkles emanating from his face. He proclaims "Today was a really great day! I tripped over a rock, and when my face slammed into the ground, I found a penny!" Next, he's holding the same pose but is shaking, trying to smile but clearly trying to hold back tears, choking out "WONDERFUL."
12: Ryoga, tears in his eyes, points aggressively at masculine-form Ranma shouting "Look out, Ranma! I've learned how to weaponize my clinical depression!" Ranma just smiles disbelievingly, "LOL whut?" Sasuke watches from inside a bush. Next, closeup on Sasuke, thinking "Huh...I wonder if I could do that..." as offscreen Ryoga shouts "SHI SHI HOKO DAN!" Next, smash cut to a TV news reporter saying "Authorities are still unable to explain the mysterious blast of chi that DESTROYED JAPAN earlier today..."


Okay but hear me out:
He’s fun to draw
He lives a miserable stressful life with crippling depression but still puts a good face on it and keeps trying (even though that’s mostly denial and Stockholm Syndrome)?? hashtag Role Model
A Ninja But Clumsy And Loud = objectively funny
110 notes
·
View notes
Text












A Creature's Warning
Full Poem
Instagram • Website • Redbubble
Image ID in alt and below the cut
[Image ID: Comic with 24 panels.
Panel 1: black image with a painting of a distant, glowing light with minor spacial distortion under it, there is text under the image that reads “While I sit in a silent abyss, gazing upon a stolen light, I ponder the other”
Panel 2: a drawing of a dark creature with pink eyes looking at its reflection is in the corner of the image, next to it is a looping complex pattern of carrying colors and designs, on the opposite corner there is another pattern, this one is more like swirls and circles. There is text on the image that reads “Dimensions separate from my own, occupied by gods and creatures of great splendor”
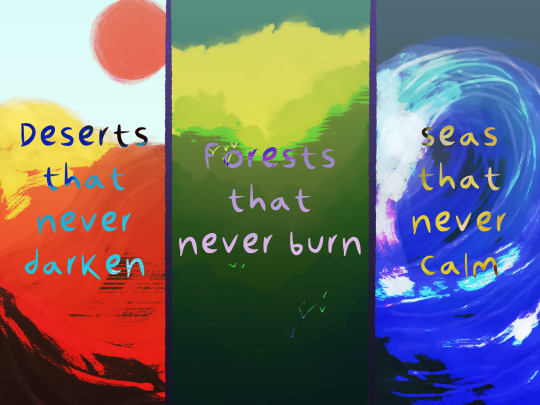
Panel 3: An image separated into 3 panels, the first panel depicts a desert, the second a forest, and the third a big wave, the images towards the bottom have extreme color distortion. The text reads “Deserts that never darken, forests that never burn, and seas that never calm”
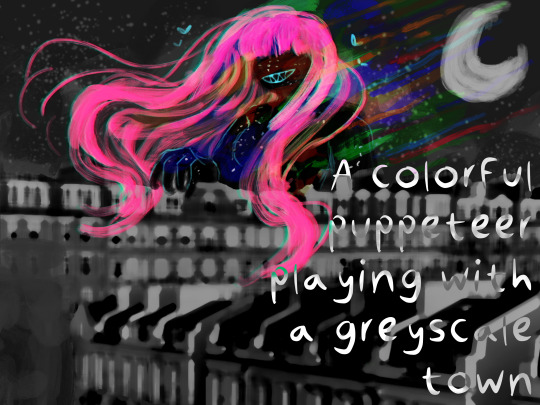
Panel 4: A London neighborhood seen from a high up view, its black and white and looks painted. A woman with black, starry skin and bright neon pink hair looms above the buildings. The text reads “A colorful puppeteer playing with a greyscale town”
Panel 5: A stylized painting of a woman depicted as a white silouette shaking hands with a human sized praying mantis. In the background there are humans and other mantises watching. Theres a stylized golden ring behind their handshake meant to portray a sense of divinity/prosperity. The text reads “A species that has accomplished all their goals yet never stops their journey”
Panel 6: A stylized, monochromatic painting of two people, the woman is stabbing the man, both their eyes glow and bleed gold. There is a transparent white swirling pattern going from the woman’s eyes to the man’s. The text reads “One lone entity using her immortality to play every part”
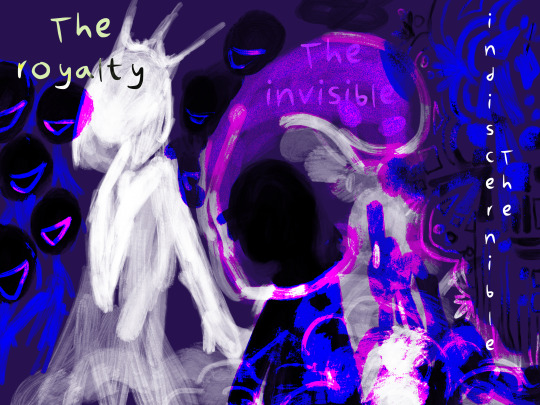
Panel 7: A heavily distorted image depicting a human-like creature with a crown, she has adoring fans in the background. Next to her is a silouette of an individual with a ghost like apparition circling them. Finally, next to him there is a complex pattern with saturated/contrasting colors. The whole image is a blend of white, neon magenta, purple, royal blue and black, the background is a dark purple. The text reads “ the royalty, the invisible, the indiscernible”
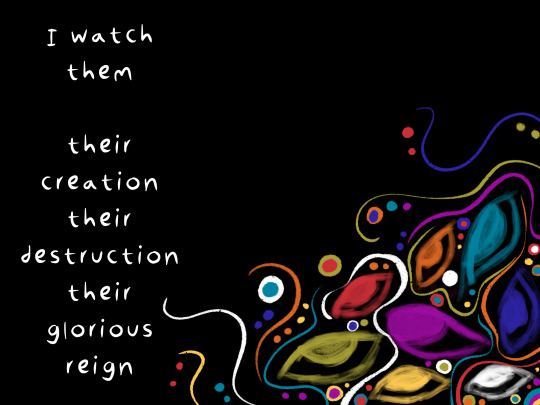
Panel 8: Black background, on the bottom right there are a bunch of simplistic painted eyes with flowing lines looping around them and circles of various colors dotted in between the lines. The text reads “I watch them, their creation, their destruction, their glorious reign”
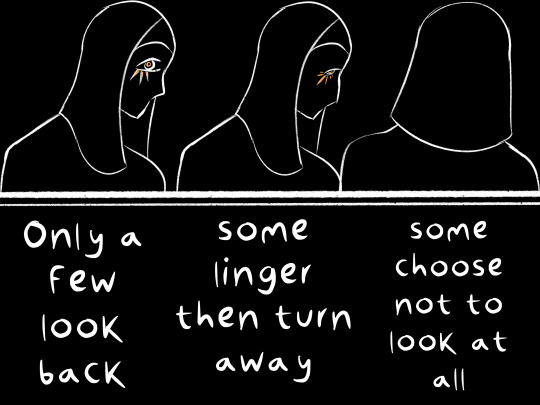
Panel 9: A black background. There are 3 drawings of a woman with a head covering. They are simple white outlines lined up next to each other. The first woman on the far left is looking towards us like she’s just noticed us behind her. The second woman in the middle is only slightly glancing at us. The third woman on the right is turned away from us completely. The text reads “Only a few look back, some linger then turn away, and some choose not to look at all”
Panel 10: Black background with white text that reads “But some reach out”
Panel 11: Black background, a black hand is reaching down towards the text, it is only visible because of the swirling pattern on its skin which helps outline it. There is a glowing golden circle behind it which also helps illuminate it. The text its reaching towards reads “hands grasping upon shallow air, pleading for something to meet their palms and pull them from their reality” /
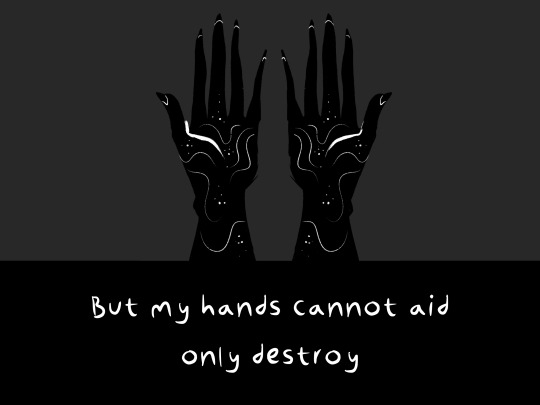
Panel 12: A crude drawing looking down on someones jet black hands, there are thin white lines and stars on their skin. This drawing is on top of a dark grey background, there’s a black bar beneath the drawing with white text that reads “But my hands cannot aid, only destroy”
Panel 13: An image with multiple images overlaid over one another, its a mess of various colors and barely discernible shapes. There is text over it that almost blends into it reading “Why do they reach out? Is their own reality too unbearable? Why do they seek refuge in my abyss?”
Panel 14: Black background, with white text that starts with a pause then reads “Or do they wish to pull me in?”
Panel 15: A vivid simplistic drawing of a jet black creature with white hair and pink eyes. The drawing has heavy image distortion around the edges. Behind it there’s a similarly distorted blend of colors and music notes with white text over it that reads “Sing out to me with songs of melancholy”
Panel 16: A black background. Theres a speech bubble but the dialogue is just a light colored jumbled mess of swirling lines and circles. The patterns look like they’re bleeding out of the speech bubble. There is white text next to it that reads “Plead with words of desperation”
Panel 17: Black background with white text that reads “To gain my favor? To win my trust?”
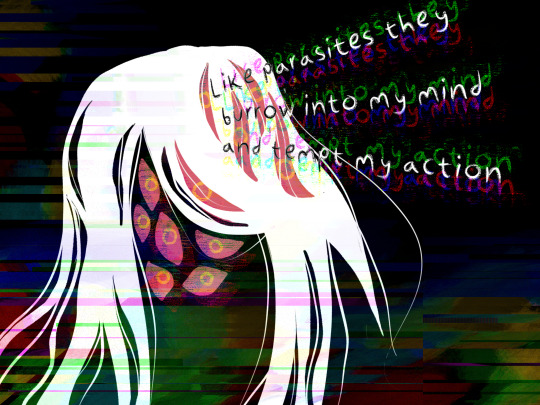
Panel 18: Another simple drawing of a creature with white hair and pink eyes, but its skin blends into the background. There is minor color distortion around it. There is text embedded into its skull reading “Like parasites they burrow into my mind, and tempt my action”
Panel 19: Black background with white text that reads “Did something break their reality or did they break their own”
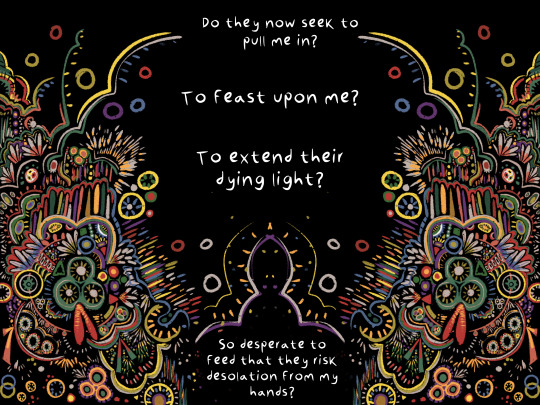
Panel 20: A giant mess of complex patterns, shapes, lines, and tiny details. The pattern is mirrored on each side of the image, overlaid on a black background. There is white text in the center of the image reading “Do they now seek to pull me in? To feast upon me? To extend their dying light? So desperate to feed that they risk desolation from my hands”
Panel 21: Black image
Panel 22: Black image
Panel 23: Black image with white text that reads “Their hands reach out and urge me to take them”
Panel 24: Black image with white text that reads “I turn away” / End ID]
#art tag#cosmic horror#comic#experimental#illustration#lovecraftian#dreamcore#my art#eyestrain cw#eyestrain tw#body horror tw#body horror cw#art#digital art#image id#alt text#image id critique is welcome#I'm new to this#the text in alt and under the cut are the same just slightly modified
15 notes
·
View notes
Text


august 27th 2020 vs. august 3rd 2023
[Image Description: Two fragments from different fanfiction drafts. The first draft is from a Danger Days fanfiction, while the second is a fanfiction set in an unspecified vintage era. Character names have been redacted in the second fragment by using red scribbles. The text reads as included in alt text and below the cut. /End ID.]
Image 1:
"Dr Death Defying is one of the Zones most infamous DJs, so when he calls upon Poison for "a very important mission" it's hard for them not to stop down at the station if only because they're curious what this mission is. It takes cashing in a few favours and hitching a ride, but they make it there the very same day following the directions they were given by the zonerunner who apparently knew where Poison was going to be before even they did. They refused to believe they are so predictable that a total stranger could do that, so instead they settle that the DJ must’ve told them where the red-haired tumbleweed would be- he always seems to know exactly what’s going on in the desert eerily well.
Against the background of the watercolor sky of swirling red, pinks, yellows and oranges, the old wooden shack stands out like a sore thumb, almost like its graffiti covered walls are trying to prove to the colors above that they aren’t the only ones able to create beautiful disasters. There aren’t many windows- maybe two or three- and even less that were intact, cracks appearing like intricate webs weaved inside the glass panes and shards stretching out like spindly fingers trying, but not quite managing, to reach for the frame. Taking a closer look, they notice that even if the windows were intact it wouldn’t matter much since they’re covered with thick curtains and, no doubt, boarded up."
Image 2:
"Red is a reasonable man, and he clings to that notion with the desperation of a man at sea as he slowly descends further and further down the ladder, nothing but a flickering oil lamp to guide him. Somewhere above him, rain pounds down on a set of heavy old trapdoors that have been all but reduced to a fixture of the street that was built around them, drops of ice cold water hitting in rhythmic patter the top of his head. At the bottom of the ladder there is a small alcove dug into the dirt wall supported by a cross section of wooden beams painted white, and a warm glow faintly shining beyond it. If he strains his ears, Red can almost convince himself he can make out the sound of people talking, but between the ground and himself there is still a long way to go, so he braces himself and pretends his stomach doesn’t tie itself in knots with every creaking step he takes.
The speakeasy is…surprisingly plain, compared to what Red had expected— then again, maybe that’s just because Red has never been to a speakeasy before. The floors are plain and wooden, covered in a thin layer of dirt that’s gathered over the years and slipped between the cracks like grout between individual wood panels. The walls are rough-hewn, still bearing marks of the tools used to carve out the space deep beneath the city streets, with wooden supports serving both as architectural feature and somewhere to hang up lights other than the candles scattered across patrons’ tables. A gramophone sits perched on an old nightstand in the back corner of the room, the voice of a woman singing droning softly over the bar patrons’ conversation, accompanied by string and brass instruments."
Looking through some old unfinished drafts because I forget so so badly until i remember, and by god do I wish I had the spine to write first drafts that attrocious again <3
#technically they're both rewritten first drafts but i like to think i've improved some since 3 years ago#also i'm itching so bad to drop a fragment from the gladiator fic i'm working on but it'd have to be so heavily redacted in order to keep m#fandoms separated it wouldn't even be funny </3#self reblog#boo's writing
7 notes
·
View notes
Text
Five important dog products and why should you have them?
When you first bring your pet home, they may require Pet Products. You don't have to go overboard—you can always improve and add to your dog products once you've figured out what they like—but they should feel at ease.
Finding the dog products may be a lot of fun, especially when there are so many to select from. Take a stroll through any pet store, big-box shop, or department store.
You'll find luxury meals and snacks, plush beds, toys of all shapes and sizes, and even doggie haute couture at any pet shop, big-box retailer, or department store, basically any and all dog products. It will be tempting to spend a lot of money on your new pet.
Image Alt Text: Top Five Dog Products
Image Title: Top Five Dog Products
Description: Top Five Dog Products essentials to ensure a seamless transition for your pet.
To begin, gather the following Top Five Dog Products essentials to ensure a seamless transition for your pet.
The collar: First and foremost, your dog will require a collar, it is a primary dog product. At least one collar is required for your dog. This is one of the Top Selling Dog Products 2021.
A “flat collar” consisting of nylon, cloth, or leather and secured with a buckle or a quick-release clasp is the safest basic collar for regular usage. This is the collar that should be worn by your dog, complete with identification and licence tags.
Check the fit of the collar on a regular basis, especially as your dog grows, and tweak or replace it if it no longer fits. Two fingers should be able to fit between the collar and your dog's neck.
A collar, the most important dog products, that hangs looser than that might get hooked on items and trap or strangle your dog, while a collar that hangs tighter than that is too restrictive for comfort and safety.
If you adopt from a shelter or a breeder, they may provide you with a collar, but chances are you'll want one dog products that matches your style. When looking for a dog collar, choose one that fits your dog properly, has a quick-release clasp for safety, and is sturdy.
When looking for a dog collar, choose one that is the correct size for your dog, has a quick-release clasp for safety, and a robust D-ring for attaching a leash.
Dog products like dog tags may also be attached to extra loops on collars like this one from Blueberry Pet so they don't get in the way of your leash. On the day you bring your puppy home, they will require a collar and leash.
Image Alt Text: Dog Products
Image Title: Dog Products
Description: You should plan to buy multiple collars, when you purchase dog products, as your puppy grows older and outgrows them.
Your dog's dog licence and identification tag, which contains your name and phone number, are kept in a collar, which can be basic or elegant. The collar connects to the leash, which you'll need to take your dog for a stroll.
Choose an adjustable nylon collar with a two-piece buckle for your dog's first few collars. The collar should be snug but not too tight so that it does not fall off; two fingers should be able to fit between the collar and the pup's neck. You should plan to buy multiple collars, when you purchase dog products, as your puppy grows older and outgrows them.
During walks or obedience training, the leash, which attaches to the collar, provides you control. The leash, as well as the hardware that connects the leash to the collar, should be sturdy and a well-made dog product.
The leash should also feature an easy-to-grasp loop for your convenience. When you initially get your puppy, use a shorter 4-foot leash; after you enrol in obedience instruction, you'll need longer leashes.
Identification: Your puppy will need to be identified. While identification (ID) tags and microchips are two alternatives, it's a good idea to utilise both.
This should be at the top of your list of canine necessities and is one of the best dog products. Even if your dog is microchipped, ID tags customised with their name can assist them find their way home as quickly as possible if they escape or become lost. ID Tags are important dog products.
In the event of a fire, earthquake, or other emergency, ID tags should be worn on a flat collar (not a martingale-style) 24 hours a day, seven days a week for most dogs.
An ID tag is a plastic or metal medallion that hangs on your dog's collar dog product that has particular contact information that will help you find your dog if she runs away.
Some individuals post the dog's name, as well as their own name, phone number, and address; others, for safety concerns, just list their name and phone number, leaving out any information about the dog.
List your name and the best method to reach you, whether it's a mobile phone, business phone, or home phone, at the absolute least.
Another viable option is a microchip. A microchip is a rice-sized device that stores a code in a database along with your contact information. When your dog is discovered, a staff member at the shelter uses a portable scanner to read the code on the microchip, which is injected between your dog's shoulder blades.
Image Alt Text: Dog accessories list
Image Title: Dog accessories list
Description: Consult your breeder and a professional groomer for advice on grooming dog accessories list
The code is then put into a database, which sends your name and phone number to the shelter, allowing you and your dog to be reunited. Always remember to register your contact information and keep it up to date.
You will obtain a numbered dog tag when you register your dog with your local municipality. This dog product device, when linked to your dog's collar, can help you find him if he ever gets lost. This figure, however, signifies little to the typical person on the street.
Purchasing a customised tag dog product for your dog is a great method to offer him with identification. Personalized tags are quite affordable and simple to get by. Include the name of your dog, your address, and your phone number (including area code).
Also, remember to secure the tag to your dog's collar. A tag is worthless if he doesn't wear it. A microchip is the most permanent type of identification.
If your dog is ever taken, a tag will be useless in locating him. Microchipping him would be a far more long-term and effective option. A canine microchip, about the size of a grain of rice, may be implanted beneath your dog's skin with a needle during a regular veterinarian appointment with no anaesthetic (usually between his shoulder blades).
The unique number assigned to your dog is then registered with the relevant business. A veterinarian or animal shelter worker can scan the chip to establish his identification if he is lost or stolen.
The crate: It is entirely up to you whether or not you crate train your dog, although many pet owners and expert trainers advocate it. Even if you aren't crate training, a crate dog product may serve as a comfortable dog-only space in a compact living space.
A portable plastic or soft-sided cage is ideal for transporting your dog safely. Crates and containment devices keep your new puppy in a restricted space where you can supervise and housetrain him, which is a requirement for every puppy owner looking for dog products.
When you bring your puppy home, the most important dog product you'll need is a dog crate or carrier, as well as an exercise pen, playpen, or gate. Stainless steel, plastic, and fibreglass are among the materials used to make hard-sided boxes and travel containers.
Though dog products stainless-steel cages will last a lifetime, the lightweight plastic and fibreglass types provide your puppy some protection and security when driving or travelling.
They also resemble a warm, inviting den, especially when paired with a plush bed or blanket. Make sure your dog can stand up, lie down, turn around, and stretch within the cage or carrier when picking one dog product.
Though dogs enjoy a close-in den-like environment, they still require some space — but not too much — to be comfortable. If you can't keep a close check on your puppy, you might want to invest in a pen or some baby gates to keep him contained.
Exercise pens are a collection of moveable wire panels that keep your dog contained in a certain area. They may be adjusted to fit almost any area. They are a must-have dog product.
He can't go where he shouldn't because of baby gates, which are designed to fence off limited regions. Many new dog owners are put off by the thought of a crate, yet the restricted area is like a comfortable cave to the dog.
Dogs and puppies like having a secure and private spot to cuddle up. Crates are available in a variety of materials, including wood, wire, and plastic.
Wooden cages are costly, heavy, and difficult to keep clean. People typically throw a blanket or towel over the wire cage to make it more cave-like.
Wire crates are easy to clean and allow adequate airflow for the dog. Plastic crates are lightweight, simple to clean, and may be used in a variety of climates.
If you have a puppy, a crate divider will assist you start the housetraining process by making the cage smaller. If the crate is too big for your dog, he can claim one portion as his resting area and the rest as his toilet area.
This first crate should be large enough to serve as a bedroom, not a master suite with its own bathroom. Its an important point to be noted when you are considering to buy dog products.
Image Alt Text: Best Dog Products 2021
Image Title: Best Dog Products 2021
Description: The Best Dog Accessories of 2021 · Go the extra mile with these pet products
Consult your breeder and a professional groomer for advice on grooming materials. Even pups will have to be groomed and taught how to behave while doing so.
His coat will need to be washed, combed, and brushed on a regular basis. His toenails will need to be cut, his ears will need to be cleaned, and his teeth will need to be brushed.
Read below for the complete Dog accessories list.
Blow dryer
Bristle brush
Comb
Conditioning spray
Cotton balls
Ear cleaning solution
Grooming table or grooming area
Nail clippers
Scissors
Shampoo and conditioner
Slicker brush
Styptic powder
Toothbrush and dog toothpaste
Towels
These are some of the Best Dog Products 2021
The bedding: Many pet owners desire soft, comfortable beds for their dogs, but if you're not sure whether your new dog is a chewer, you might want to go with one of these raised dog bed dog products instead.
The raised design of these beds, which include a steel frame wrapped in durable, PVC-coated fabric, will keep your dog cooler on hot days.
Dogs seem to enjoy this bed, and several reviewers point out that you can cover it with a blanket or towel if you want to offer your dog more comfort.
Your dog will require a comfortable bed for the first night she is at home. You may select from a variety of pillows, cushions, dog-sized sofas, and even memory-foam mattresses when your puppy has been housetrained and graduated from her crate to a genuine dog bed, all of the dog products which can be matched to your home's décor.
If you care about the environment, you may discover dog product beds that are filled with recyclable materials such as reused cotton or soda bottles. For odour and pest control, cedar chips can be placed into mattresses.
The covers on most mattresses are detachable and washable. Choose a modest to medium-sized dog product bed that will make her feel safe and comfortable.
Remove your dog's bedding from her kennel or take dog products away from her if she chews on it and ingests part of the foam or filling. This will avoid an intestinal obstruction. Provide her with a blanket or towel to sleep on until she has finished chewing.
0 notes
Text
6 Handy Buttonholes for Web Design to Make your UI More Accessible
It is without a doubt that digital products refashioned the world. However, in our lifespan, we’ve come to learn accessibility to (UI) User Interference with the help of a Website Designing Agency.
We are consistently just a few clicks behind outwardly the eternal information. We can do anything like submitting tax returns, ordering green groceries, associating with our governments, and completing the degree or certificates online just because of hiring the best website designing agency.
At the same time many concern people with disabilities to be a minor subset of their audiences, this is a fictitious. Fortunately, the world embarks on to realize that the website should be Design for every humankind.
An accessible website is a handful that is designed and coded. Communities with disabilities can handle them. Therefore, it is noteworthy that web designers consider about accessibility when driving to generate intuitive Ecommerce Website Development.
The Interaction Design Foundation discloses that there are five key usability cases to think: visual, motor/ability, auditory, seizures, and learning.
In addition, there are communities of all backgrounds running your site or app who desire to meet what they crave as quickly and efficiently as everyone else would.
Here are some buttonholes web design to make your website better accessible.
Support users to rescale pages & content:
Users are considering your brand from different panels on various devices. Therefore, we enjoy sharing experiences in which users can resize content to readjust to their demands.
Make the search bar handy to discover & use:
A natural goal of user experience is to play down the effort needed for the user to execute a task, such as reducing the volume of the clicks required to open information into a search bar.
Annex alt text to all images:
The benefits of alt tags stretch beyond SEO services. Alt text doth it easy for individuals with visual disabilities to learn your images. This is exclusively noteworthy for images that aren’t purely ornamental.
Corresponding to Moz, the alt text should be maintained in brief. Because most screen visitors cut off the text at about 125 characters, it’s beneficial to keep it at or below that number.
Cover section headings:
Just like a book, or a highway sign, digital products are supposed to deliver knowledge in a manner that coordinates, counselors, and leads the visitor to the next track.
Section headings, like a subtitle in a blog or at the uppermost of a page, encourage users to learn what they are reading.
Adopt color contrast:
Perhaps a neglected item, adopting the ideal color contrast to assure maximum readability is key to setting up your UI more accessible.
Hover link text on the menu navigation:
This measure considers users who have trouble searching menu items, learning what tab they are hovering over and following where they are on the site. Ecommerce Website Development Services solution is when a user lingers over the menu section on a page, and the screen visitors read-aloud that particular button by referring to the link text.
#EcommerceWebsiteDevelopment#DesignCompany#EcommerceWebsiteDevelopmentServices#EcommerceWebsiteDevelopmentCompany
0 notes
Text
Updated gif-making tutorial:
making and using actions to make hq gifs quickly and efficiently, watermarking, adding text/subtitle, sharpening, coloring for natural base coloring on videos
I do not use .ts files for kpop performances (just .mp4 720 or 1080), nor do I use topaz to sharpen.
You will need:
A computer (I use a PC so the hot keys i’ve listed aren’t the same as on macs)
A video editing program that can split your video into smaller sections (DVDvideosoft’s free studio is what I use, but anything similar will do)
Photoshop CS6 extended or a more recent version (you need to have the video timeline function)
a half hour or an hour to make your first set with all the actions specific to your blog url, afterwards full 4-8 piece gifsets should take around 15 minutes or less to make (if your computer is cooperating lol)
We will make actions to:
watermark
convert to timeline and smart object
add a text box with stroke and drop shadow for both 268px and 540px wide gifs for w/e font you want to use
video used // link to finished gifset // there are some images to help in the tutorial, you can ask if you have any questions!!
Result:

my sharpening action (directions in tutorial) download
Full tutorial under the cut
after the first run of the tutorial where you make your actions, your process should be:
Cut your video into a clip short enough to import into photoshop
Import your frames
Split your frames into multiple documents, one for each gif in the set
crop and resize your gifs
Color your gifs
watermark (action)
convert to video timeline and smart object (action)
add text (action)
sharpen (action)
save for web
1. Cut your video into a clip short enough to import into photoshop:
For most youtube videos which are either 24fps or 29fps you can import up to 15 seconds at a time, for those that are 60fps the limit is around 7 seconds
2. Import your frames:
If you’re making gifs from a performance or a short drama scene, it’s faster to import all of your frames onto one document at once and then copy the frames on to multiple separate documents for the multiple gifs in the set
file -> import -> video frames to layers
make sure that the “Make Frame Animation” option is checked
3. Split your frames into multiple documents, one for each gif in the set
select the frames you want for your first gif (click first frame you want -> hold shift and click the last frame you want)
copy frames (go to the drop down menu for the timeline window -> copy frames)
duplicate any layer from the first document onto a new separate document (right click any layer -> duplicate layer -> document: new -> name the document “[your gifset name] [gif number]”
create frame animation on your new document (timeline window -> create frame animation) (if it says create video timeline instead, use the dropdown menu next to the button to change it to frame animation)
paste the frames onto this new document (timeline drop down menu -> paste frames -> replace frames)
change your frames’ timing (select all frames -> click the time under one of the individual frames -> other -> put your time) for 24 or 29 fps video I use .06; for 60fps I use .03
delete the frames from the original document, repeat for the next gif within the remaining frames on your original document

4. crop and resize your gifs
select the crop tool
chose your dimensions
crop all your gifs to the same dimension ratio
resize your gifs (ctrl + alt + i) for 3 columns it’s 177,178,177; for 2 columns it’s 268px, for 1 column it’s 540px
5. Color your gifs
I usually color to make everything as neutral as possible before doing anything specific so this is just telling how to make a neutral coloring.
make a curves layer on top of all your other layers (layer -> new adjustment layer -> curves)
color adjust for black click the black eyedropper on the curves layer and then find a spot on your gif that should be black and click it (if it becomes too dark, hold alt and click on a spot that comes up black until most of the image is now white) (image below)
color adjust for white do the same with the white eyedropper (if it’s too light, hold alt and click the white areas until the image is mostly black) (adobe’s tutorial to help you out if you need)
make a brightness/contrast layer (layer -> new adjustment layer -> brightness contrast) and add a little bit more contrast depending on your image
add vibrance (layer -> new adjustment layer -> vibrance/saturation) boost the vibrance slightly
(personal taste to make skin tone clearer and the whites of eyes brighter) make midtones warmer; highlights and shadows cooler (layer -> new adjustment layer -> color balance -> adjust layer according to your image)
brighten highlights and darken shadows (layer -> new adjustment layer -> selective color -> blacks: add black -> whites: subtract black)
group all your coloring layers together (select your coloring layers -> create group -> leave the name as “group 1″)
duplicate this group onto all of your open gif documents (right click -> duplicate group -> document: [your next gif file name] -> repeat for all)

6. watermark + recording your watermark action
people on tumblr suck, people on the internet suck, people on other websites suck, weheartit sucks, etc...... you want to have your url on the things you make so people don’t steal your work right?!! we’re gonna watermark EVERYTHING we make ever
(this is going to be the first action we make!! woo hoo!! you don’t want to have to be remaking this layer every time you make gifs do you)
making the action:
open your actions window (window -> actions)
create new actions set (click the icon that looks like a folder on the actions window -> name this set “gifs” or something else you’ll remember)
make sure you’re not on the first frame of your animation, any other will do
record new action (hit the circular icon on the actions menu -> name this action “watermark”)
select first frame of animation
create new text layer at the top left corner (click the text tool -> click the top left corner of your canvas)
type your url in an nice and easy to read font (I use myriad pro semibold italic at 9px height)
click the check on the text editing panel to finish making the layer
change the opacity to 30% in the layers panel
stop recording the action (click the square on the actions window)

using the action:
click the “watermark” action in your “gifs” action set
make sure you’ve selected your top layer (which should be your color group)
click the play button in the actions window (now your watermark is on your first gif)
duplicate this layer onto the rest of your gifs, always as the top layer
7: convert to timeline and smart object (action)
we’re gonna be making another action to this (yay less work for future us)
making the action:
before you make the action make sure you’re not on your first frame
record a new action, name it convert
select all layers (ctrl + alt + a)
deselect your watermark layer (ctrl + click the text layer named [your url])
select your first frame
convert to timeline (click the convert to video timeline icon at the bottom of the timeline window)
convert to smart object (right click your layers -> convert to smart object)
stop recording, you should be left with a timeline animation with two layers, one is the animation smart object which will now be named “group 1″ and the other is your watermark layer on top

using the action:
play the action (that’s all)
you should be left with a timeline animation with two layers, one is the animation smart object which will now be named “group 1″ and the other is your watermark layer on top
do this on every document for your gif set
8. adding text (action)
make the action for 268px gifs:
on a 268px wide document with a video timeline make a guide at 134px vertical (view -> new guide -> “134px” vertical)
start recording the action, name it “text 268″
create a new text layer on the guide at the top of the box, centered text, 12point font (I use myriad pro semibold italic with tracking at 50)
double click the layer, add stroke at 2px, add drop shadow
stop recording
make the action for 540 px gifs:
on a 540px wide document with a video timeline make a guide at 270px vertical (view -> new guide -> “270px” vertical)
start recording the action, name it “text 540″
create a new text layer on the guide at the top of the box, centered text, 12point font (I use myriad pro semibold italic with tracking at 50)
double click the layer, add stroke at 2px, add drop shadow
stop recording
using the actions:
use the appropriate sized action for what you’re making, play the action after steps 1-7 of your gif are done
use your text tool to put in the text for your gif
hold shift and click to slide the subtitle to the spot you want either at the top or bottom of your gif while keeping it centered
9: sharpening:
everyone sharpens differently, so you might want to change this up a bit and make a new sharpen action on your own, but this is mine [download]
there’s a low opacity motion blur layer in there so it adds a bit of softness to the edges
to use the one that I included a download of, select the smart object named “group 1″, return to the start of your video timeline, play the action on all the documents for your gifs
10. save for web
file -> save for web
set looping to forever
save all the gifs
these are my settings:

and you’re done!!!! boom post your super nice gifset with your watermarks so no one will steal it and it’s urs and u love it!!! yay!
#photoshop tutorial#itsphotoshop#yeahps#completeresources#gif tutorial#*tutorial#i'll make a quick template gif tutorial next week#and then one for my basic gfx bc ppl occasionally ask when i'm not being a lazy butt to make them LOL#ceohan
26 notes
·
View notes
Text
Clipping Mask Photoshop
Clipping Mask Photoshop | Better Facts In Clipping Mask And Layer Mask
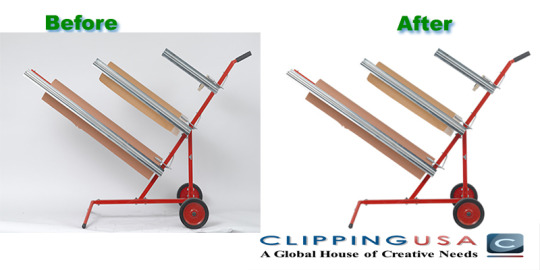
Clipping Mask In Photoshop, Research shows that more than 35% online buyers want to see product that features on a white background. But for a professional photographer capture all images in white background can be proved a really tough task. It doesn’t really any matter whether you are using photos for print or digital use, the fact that really matter it is attention. The key is attention to details. As technology has grown and people are getting smarter and smarter day by day, now they demand better images. Same formula applied for your customer also. If you can grab your customer’s attention, then success is just a matter of time.
With Clipping mask Photoshop you can attract customers with images. This is really a good technique to apply. Businessmen from all over the world are using this method to expand their business. Are you also thinking to know about Clipping Mask Photoshop? Do you also want to grow your business? Then this is very useful article for you. Read it carefully and apply this in your professional life. This article will inform you, what is clipping mask in Photoshop and how to make clipping mask in Photoshop. You will also find out how to use clipping mask in Photoshop. So, let’s start.
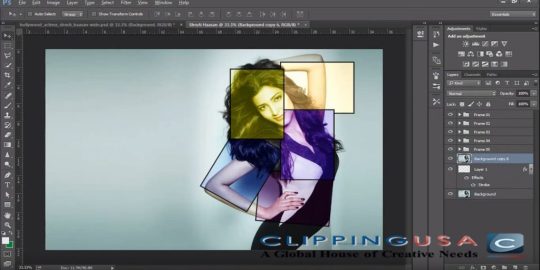
clipping mask
What is clipping mask Photoshop?
Clipping mask is pretty similar to Photoshop’s layer mask feature. Definition of clipping mask Photoshop can be described like that; the mask that allows you to apply a mask a section cover enables you to apply a veil to numerous layers without a moment’s delay. As a matter of course, the base layer defines the limits for the general gathering. Contingent upon your base layer’s substance, the above layers will be influenced in certain ways. Underneath, we’ve laid out how to utilize cutting covers effectively in Photoshop, so you can concoct increasingly innovative layering in your photography and configuration work.
Difference between clipping mask Photoshop and layer mask May be you are thinking about what is the difference between a clipping mask and a layer mask? Clipping mask and layer mask both allows you to fuzzy specific section of a layer. But Photoshop layer mask needs you to select particularly that section you want to apply mask. If you use paint tools, then you fill in specific areas with black, white or gray to tell apps what should do. Now a question can come into your mind that, “what is the specialty of clipping mask then? “ In theory, clipping mask uses different layers contents to indicate what to mask on the layer upper it. It can be more effective, instinctual and fun to use than layer mask Photoshop. Do you want to know how to make a mask? There are many creative way to apply it. We will discuss about it in the later part. Let’s move forward.
How does A Clipping Mask Photoshop works In Photoshop clipping masks are an effective path to control the visibility of layer. In this case,we compare clipping mask to layer mask in previous part. At the end of your work, sometimes result can be the same or relatively close. Two layers are needed for creating clipping mask. The layer that are in the beneath it control the visibility of the layer above it. In another words, the mask is the bottom layer. The layer above the layer’s cut to the cover.
The layer on the base controls the decidability of the layer above it. At the end of the day, the base layer is the veil, and the layer above the layer’s cut to the cover. That’s why people prefer to use Photoshop clipping Mask Multiple layers. Where the base layer contains real substance (pixels, shapes, or type), the substance on the layer above it is unmistakable. In any case, in the event that any piece of the layer on the base is straight forward, at that point that equivalent territory on the layer above it will be covered up. That may sound more confounding than how a layer cover functions, yet cutting veils are similarly as simple to utilize. How about we make a cut-out veil ourselves so we can all the more likely see how they work.
clipping mask
Using Clipping Masks Photoshop for Typography
In this part, you are going to learn step by step how to make Photoshop clipping mask for typography. Let’s dive forward.
At the primary step, you have to create a new document in Photoshop. If you are going to use it for web expert suggest you to set the resolution setting to 72. In the next part type your desired word. Point to be knotted here; you can also use this method for your blog header.
In the next step, you need to create a new layer on top of your text layer You can also create a new layer by going to Layer option then New then again Layer (in the top menu) OR by pressing the icon that looks alike of a piece of paper lays after the trash in the bottom right of your layers panel. New layer that you created will be blank. Later on,anything you want can be drawn in this new layer.
In the next step: Make beyond any doubt your new layer is featured in the layers board .At that point, you have to go to Layer then choose Create Clipping Mask. An easy route is to drift between your two layers with your cursor while holding down the alternative key (on a Mac). You’ll see a little bolt spring up and when you click, it will make a cut-out cover. That’s it. It seems pretty easy for beginner also. But when you are using it for business purpose you need to be very accurate. Now moves to our today’s main topic; Photoshop clipping mask tutorial. Scroll down to know its procedure.
Adobe Photoshop clipping mask tutorial
youtube
How to Use Layer Masks in Photoshop
In this section, I am going to show you how to create Clipping Mask in Photoshop. At the very first, you have to go to File. Then choose New and create a new square Photoshop document will be created. Secondly, you need to choose the Rectangle Tool and after this chink and drag at the same time you have to hold the Shift key for creating a square. In next step just set the Fill to black and change the stroke to none.
In this step, you have to press Ctrl + J to make a copy of your black square and then create a 5×5 grid. Don’t forget to assure that the squares are properly spaced. Then go to View option then choose Snap. Now it will give you more control and flexibility of your square for the placement.
When you’re satisfied with your grid, you need to feature every one of the squares and snap on the New Group symbol at the base of the Layers board to bunch them all together. You can rename this gathering as ‘Squares’.
In this step, open the image that you want to customize in Photoshop and at the top of the layer drag it into the new document.
While Holding down Alt, click on the jumping line between the Squares gathering and your picture in the layers board. A little bolt ought to show up beside your picture layer, which demonstrates a Clipping Mask has been made.
Finally, you can use the shortcut use Ctrl + T to move and measure your photos as it required. Option of changing the opacity of some of the main squares is also available for more interesting mosaic effect. You can chink on each specific square in your group. Then change the opacity of slider as you need.
That was its tutorial part. I hope now you have a proper concept of how to mask in Photoshop.Continue reading to know more details about Clipping masking Photoshop.
CLIPPING MASK IN ADOBE ILLUSTRATOR
Above part was for Photoshop. But if you want to create a clipping mask using Adobe illustrator, then this part is for you buddy. May it sounds complex to you creating a clipping mask in adobe illustrator. But it is not as hard as you thinking. So let’s forward to its procedure. At first, choose the desired file and place to place it with the expected one. Then you have to do mask work with objects that is created in illustrator with object placed there. Then create the item .Create the thing you need to use as a cover by utilizing the Pen instrument to make a shape or a shut way. While making a cut-out veil, ensure that the item to be utilized as a cover is a shut shape and is at the highest point of the stacking request. In the next step, using the selection tools to select the placed image along with shape. Then click shift for adding an object to the selection. Later, for creating the clipping mask use keyboard shortcut CTRL + 7 if you are windows user. Command + 7 is the option for MAC user. That’s it. That was the procedure. I want to let you know one more thing, If you want to turn off the clipping mask. Select Object then go to Clippping mask option followed by Release.
An extra bonus tips for you:
Text can also be used as clipping mask. Over an object make sure a word is positioned. Later on,you have to choose the both text and the object and select object followed by Clipping mask and then make.
Let’s have a view at the key points of clipping mask Photoshop:
It gives you the permission of applying pixels on a layer or color and exposure adjustments. It works via Adjustment Layers to only one individual layer as supposed to all layers below it.
A clipped layer’s pixels or adjustments will be applied to any opaque pixels in the layer it is clipped to.
The opaque pixels essentially form a mask for the one or more layers that you clip to it.
When a layer that has other layers clipped to it is disabled/hidden, all clipped layers will automatically hide as well.
Clipping Masks can be created in a variety of ways, with the easiest being to select the layer you want to clip to the layer below, then use the keyboard shortcut Command+Option+G (Ctrl+Alt+G).
The most common use for Clipping Masks is to apply various adjustment layers to a specific layer as opposed to the entire image.
Clipping masks are also very useful for removing fringing in a subject cut-out within a composite image, or to add texture to areas of smoothed skin as demonstrated in the video.
Free clipping mask frames Many people’s want to know about how they can find free clipping mask templates. Are you one of them? If you are, then this Para is only for you. A few website provides clipping mask frame. PINTEREST is the best site for this purpose. You can also try PHOTOBUCKET and CREATIVEMARKET.
Clipping Mask Online Service
In the business area, you don’t want to take any kind of risk. That’s why you can take clipping mask online service. Many website provide online clipping mask service. Considering some fact you can take your service for clipping mask. Before placing an order you need to be sure that they are trustworthy, they deliver their order in time and they also charge according to your budget and obviously their service should be quality-full. But before placing an order how can you know about their quality. Then you can try ClippingUSA. Cause, it provides free trial option. You can place a free trial now. CLIPPINGUSA deliver their service in time. On the other hand, it also charges a little. That will obviously meet your budget. So if you want to take online service for clipping mask. Then ClippingUSA deserves thumbs up.

Now allow me to end up with the answers of some frequently asked question.
QU: Why is clipping mask not working?
AN: One needs to use only one path to create a mask. The possible cause can be you are working with multiple paths for creating one mask. Sometimes, a locked layer can be an issue. To customize any specific layer you have to unlock it first by tapping to lock icon.
QU: How to crop a layer in Photoshop?
AN: There is an easy way to apply Photoshop crop layer technique. To perform it you have to utilize rectangular marquee tool to choose which part you are going to crop. After this, remove the complete layers and paste your copied portion into a new layer. This is the similar technique when you are willing to know how to crop one layer in Photoshop. It is an effective technique when you want to crop a bigger canvas.
QU: How to make a box in Photoshop?
AN: To create a box in Photoshop open a new window by pressing CTRL+ N or you can also create on your desired background. Go to shape tool and pick rectangle tool. Then set opacity and foreground color and place it in your working place by dragging the mouse.
QU: How to crop image in Circle shape in Photoshop?
AN: At first open the image that you want to crop. Create a new layer and go to Elliptical Marque option from the topside and create the circle. By holding shift you can move the circle.
The post Clipping Mask Photoshop appeared first on Clipping path service, Remove background from image-CLIPPING USA.
0 notes
Text
How To Bleed A Radiator
The ‘Ultimate’ Guide To Bleeding A Hot Water Radiator
In this Best Heating guide we’re going to show you How To Bleed A Radiator to increase your central heating’s efficiency and help you to reduce your energy bills. If you are looking to Bleed A Heated Towel Rail, check out this guide instead.
Why Should I Bleed My Radiators?
Bleeding your radiators will help to remove any excess air that may have become trapped in your radiators.
This trapped air can cause cold spots on the surface of the radiator, reducing their efficiency and effectiveness when heating your home.
Your radiators work alongside your boiler and if they are not working properly you’ll be paying for your energy without actually feeling the benefits.
Bleeding a radiator is a simple job – and one that you can do yourself – leading to a warmer home and cheaper energy bills!
Please Note: If you find you still experience cold spots after bleeding your radiators, this may mean that you have a build up of rust or ‘sludge’ in your central heating system and you should contact a qualified engineer.
What ‘Tools’ Do I Need To Bleed A Radiator?
Radiator Bleed Key
Cloth or towel to catch drips
How To Bleed A Radiator For Energy Efficiency
Step 1 – Turn Your Heating On
First up, turn the heating on so that all of the radiators come on in your home. (Some other ‘experts’ advise against this, but you need to build up the pressure in your radiator to force the air out, so go and do it.)
Leave the system to heat up – make a brew or something – before moving on to step two.
Step 2 – Which Radiators Need Bleeding?
Once your heating is up to speed, go and check each radiator individually to see which are heating up properly and which are not.
BE CAREFUL! Radiators can get really hot and you don’t want an unexpected trip to A&E to deal with!
Cool spots – especially nearer to the top of the radiator – mean that there could be air trapped inside and you’ll need to bleed that radiator.
Once you’ve found your cold spots, it’s time to get bleeding.
Step 3 – Bleeding The Radiators
Now switch off your central heating and allow the system to cool down – this will allow you to handle the radiators without scalding yourself or soaking the floor wet through.
At the top of the radiator, you are going to bleed, you’ll find a bleed valve – or nipple – at one end.
Insert the radiator bleed key into the groove of the bleed valve (you may be able to use a screwdriver here) and carefully turn it anti-clockwise – you should begin to hear a hissing sound, this is the air escaping.
Hold the radiator bleed key until no more air comes out and water begins to dribble from the radiator bleed valve.
With more modern bleed valves, you may find that water emerges as a ‘jet’ of water and not a dribble, so you’ll need to be on your toes and close the valve quickly in the event of this happening when you bleed your radiator. Be careful NOT to over-tighten the radiator bleed valve, or you may cause damage.
Step 4 – Check The Pressure Of Your Heating System
Once you’ve closed the radiator bleed valve, go and take a look at the pressure gauge on your boiler (you could get someone else to do this).
If the pressure is too low, you will have to use the lever on your boiler – the ‘filling loop‘ – to top up the level of water in your central heating system.
Once you have done this, turn your heating back on and repeat the same checks as above. You may find that you have to bleed your radiator(s) and re-pressurise your system a couple of times to get the desired result.
Please Note – ALWAYS turn OFF the power to your boiler when re-pressurizing your central heating system.
How To Re-Pressurise Your Heating
To re-pressurise your heating you’ll need to locate your central heating filling loop.
A central heating filling loop is the pipe that connects your central heating system to the mains water supply.
Your filling loop isn’t part of your boiler – but it will connect to it, so it will be nearby.
If you have an external filling loop, it will probably look something like this and you’ll have to turn the taps to allow water into the system.
Don’t turn any taps other than those connected to the filling loop. The one’s you are looking for are normally black in colour and may even have the words ‘filling loop’ on them.
Turn the taps slowly in order to safely control the flow of water into the system, being careful not to exceed the required level – you should hear water being fed through the inlet pipe and into your central heating system.
Alternatively, you might have an internal filling loop key attached to a panel at the bottom of your boiler – like the one in this video – or a couple of filling taps situated underneath, like this.
Please Note – Different boiler manufacturers and installers will recommend different optimum operating pressures for your boiler and central heating. If you are unsure of what these pressures are, please seek professional advice.
What Bleed Valve Do You Have?
You might not believe it, but there are a few different kinds of bleed valve available for your radiators, and it’s important to know which ones your radiators currently have.
This is a standard bleed valve that you will find in a lot of radiators. Not brilliant in design, you’ll often find that water just leaks from the valve when you are bleeding your radiator.
You’ll find this type of bleed valve in our collection of designer radiators. It looks good, but be careful when attaching and try to ensure the bleed hole is facing away from the wall.
This is a lightweight manual bleed valve. Quite a common feature on modern convector radiators, this bleed valve will allow you to direct the spray of water any way you choose.
A convenient way to bleed your radiator, this bleed tank is great for catching water and avoiding any spillage.
Great if you have lost your radiator key, just turn the wheel to bleed your radiator.
And finally, this great time-saving radiator bleed valve is automatic and will only release air when the system needs it. So there’s no need for you to do it yourself anymore and no need for tenants to call out engineers just to purge radiators. #Genius
Improving Your Home Heating
When it comes to fuel bills, over 50% of the money we pay out goes towards heating and hot water needs.
Because of this, knowing how to bleed a radiator can be pretty useful when helping you to cut down on your heating costs. But there are a few other things that are worth knowing that can make your central heating system more energy efficient, helping you to keep the cash in your pocket.
Although common sense might suggest it’s a bit of a silly thing to do, switching your heating on in the spring and the summer – just as you do at colder times of the year – can actually be a good idea.
Just quickly flicking your boiler on for 10-15 minutes during the warmer months could help to prevent a boiler breakdown when the weather turns.
It’s also a good practice to keep your eyes peeled for any signs of trouble with the system. If you find your pressure drops repeatedly on your boiler, it may mean that you have a leak in a radiator or maybe your pipework – meaning you may have to call out a Gas-Safe registered engineer.
Getting an annual boiler service is also prudent practice, and at a cost of around £60, it is definitely better to be safe than sorry.
If you haven’t already, installing a thermostat onto your boiler is also a good way to save money. Setting it to a maximum temperature of around 60°C is really cost-effective and could save you around £30-a-year.
And last, but by no means least, is insulation. Loft insulation and proper draught-proofing around your windows and doors could give you a potential saving of around £300-a-year on your gas central heating bills.
Radiator Bleeding Video Guide
We humans are visual folk, so here’s a handy video on how to bleed a radiator
youtube
We’re sure you’ll be fine, but if you do get stuck, just refer to the video. Good luck!
How To Bleed A Radiator – Infographic
textarea {text-transform: lowercase !important;}
Just copy and paste the text below and share the this infographic on your page!
Please Include Attribution To BestHeating With This Graphic.
<a href=’http://ift.tt/2zCKWCx src=”http://ift.tt/2zXf4ZQ; alt=’How To Bleed A Radiator’ width=’540px’ border=’0′ /></a>
Let us know how you got on bleeding your radiators on Facebook, Twitter and in the comments below.
Till next time, Stay Safe & Happy Heating
from WordPress http://ift.tt/2d1QZGR via IFTTT
0 notes