#clipping path
Explore tagged Tumblr posts
Text
How to Make Perler Bead Patterns in Photoshop
Pixel art has a unique charm that appeals to both creativity and nostalgia. Perler beads, also known as Hama beads or fuse beads, are small plastic beads that can be arranged on a pegboard to create intricate designs. If you're a fan of both pixel art and crafting, combining the two to make Perler bead patterns using Photoshop can be a rewarding and enjoyable experience. In this tutorial, we'll guide you through the process of creating your own Perler bead patterns using the powerful tools of Adobe Photoshop.
Understanding Perler Bead Patterns
Before we dive into Photoshop, let's briefly understand the basics of Perler bead patterns. These patterns are essentially pixel art representations that can be transformed into physical creations using beads. Each pixel in the pattern corresponds to a bead on the pegboard. The challenge lies in translating your creative vision into a pattern that can be replicated with beads.
Read More
Gathering Your Materials
Adobe Photoshop: Any version from CS6 to the latest Creative Cloud will work. Pixel Grid: This can be a physical pixel grid or a digital one. It helps you visualize your design on a pixel level. Reference Image: An image or idea that you want to recreate in Perler beads. Perler Bead Pegboard: The pegboard will serve as the base for your design. Step-by-Step Guide
1. Setting Up Your Canvas
Open Photoshop and create a new document. Choose the dimensions for your pattern; remember that each pixel will correspond to one bead. For instance, if you want your finished Perler pattern to be 20 beads wide and 15 beads tall, create a canvas of 20x15 pixels.
2. Enabling the Grid
In Photoshop, you can enable a grid that mimics the layout of your Perler bead pegboard. Go to "View" in the menu and select "Show" followed by "Grid." This will overlay a grid onto your canvas, making it easier to align your design accurately.
3. Importing Your Reference Image
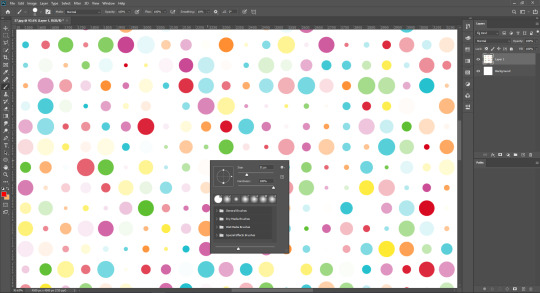
Import your reference image onto the canvas. This could be a picture of a character, an object, or anything you'd like to turn into a Perler bead creation. Make sure your reference image is appropriately sized to fit your canvas.
4. Pixelating the Image
With the reference image on your canvas, it's time to start pixelating it. Zoom in to see individual pixels clearly. Using the Pencil tool, manually fill in each pixel of the image with the color that corresponds to the bead you plan to use. Remember that Perler beads come in a limited range of colors, so try to match your colors as closely as possible.
5. Adding Details
Creating complex patterns might involve using different shades of a single color to add depth and detail. Experiment with dithering techniques (using different colors close to each other to create the illusion of a third color) to achieve the desired effects.
6. Exporting the Pattern
Once you're satisfied with your Perler bead pattern, it's time to prepare it for crafting. Zoom out to ensure the entire design is visible and fits within your desired dimensions. Then, save the image in a format that you can easily reference during crafting, such as JPEG or PNG.
7. Crafting Your Perler Bead Pattern
With your pattern ready, you can now use it as a guide to arrange the beads on the pegboard. Each bead should be placed according to the corresponding pixel in your pattern. This is where the alignment provided by the grid becomes incredibly useful.
8. Fusing the Beads
Once your pattern is complete on the pegboard, carefully move it to an ironing board. Place a sheet of ironing paper or parchment paper over the beads and, using an iron on a medium heat setting, gently melt the beads together. This will fuse the beads into a solid piece while maintaining their individual colors.
9. Finishing Touches
After the fused bead creation cools down, remove it from the pegboard and admire your handiwork. You can trim any excess paper and display your Perler bead masterpiece as a keychain, magnet, or even framed art.
Learn More: Image Color Correction Services
Tips and Tricks for Perfect Perler Bead Patterns
Creating intricate Perler bead patterns can be both fun and challenging. Here are some additional tips and tricks to help you achieve the best results:
Choose the Right Image: Not all images translate well into Perler bead patterns. Images with clear lines, distinct colors, and minimal shading work best. Start with simpler designs as you get familiar with the process.
Color Selection: Perler beads come in a limited palette of colors. While Photoshop allows you to use any color, try to stick to colors that closely match the available bead colors. This ensures that your final creation looks like your design.
Zoom and Grid: Zoom in on your canvas to work on individual pixels, and use the grid to maintain accuracy. This step is crucial for ensuring your beads align perfectly when it's time to craft.
Dithering: Experiment with dithering techniques to create shading and gradients. By placing beads of different colors close to each other, you can achieve smoother transitions between shades.
Pixel Preview Mode: Photoshop has a Pixel Preview mode that shows you how your design will look when displayed at a smaller size. This mode can help you catch any pixelation issues or errors in your design.
Save Multiple Versions: As you work on your design, save different versions of your pattern. This way, if you make a mistake or want to experiment with different color combinations, you won't lose your progress.
Test Before Ironing: Before ironing your beads together, test a small section of your design to make sure the colors fuse correctly and the beads hold their shape.
Ironing Tips: When ironing your Perler bead creation, move the iron in a circular motion to evenly melt the beads. Avoid pressing too hard, as this can cause beads to warp or melt unevenly.
Finishing: After ironing, allow your creation to cool completely before removing it from the pegboard. If you plan to turn it into a keychain or magnet, attach the necessary hardware using a strong adhesive.
Exploring Advanced Techniques
Once you've mastered the basics, you can explore more advanced techniques to elevate your Perler bead patterns:
Pixel Brushes: Use custom pixel brushes in Photoshop to speed up the pixelating process. These brushes automatically fill in squares of color as you paint, making your design process faster and more efficient.
Layer Effects: Experiment with layer effects like gradients and patterns to add depth and texture to your designs. These effects can give your Perler bead patterns a unique and professional look.
Combining Techniques: Combine Perler bead art with other crafting techniques. For example, you could create a 3D effect by layering fused Perler bead patterns on top of each other, creating a multi-dimensional artwork.
Conclusion
Creating Perler bead patterns using Photoshop is a creative journey that merges the digital world with the tangible joy of crafting. From pixelating your design to meticulously placing each bead on the pegboard, the process allows you to express your artistic vision in a unique and tactile way. Whether you're a pixel art enthusiast, a crafting aficionado, or someone looking for a new creative outlet, Perler bead patterns offer a delightful and rewarding experience. So, unleash your imagination, let your creativity flow, and embark on a crafting adventure that combines the best of both pixel art and hands-on creativity. Your Perler bead masterpiece awaits!
3 notes
·
View notes
Photo
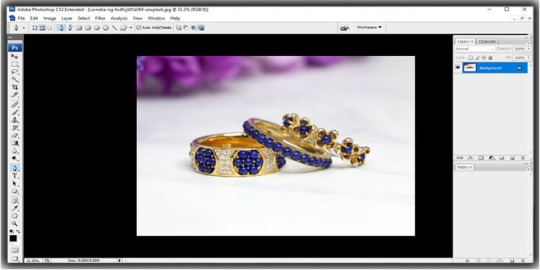
Unlock the Power of Photoshop: A Step-by-Step Guide to Creating Clipping Path Easily.
7 notes
·
View notes
Text


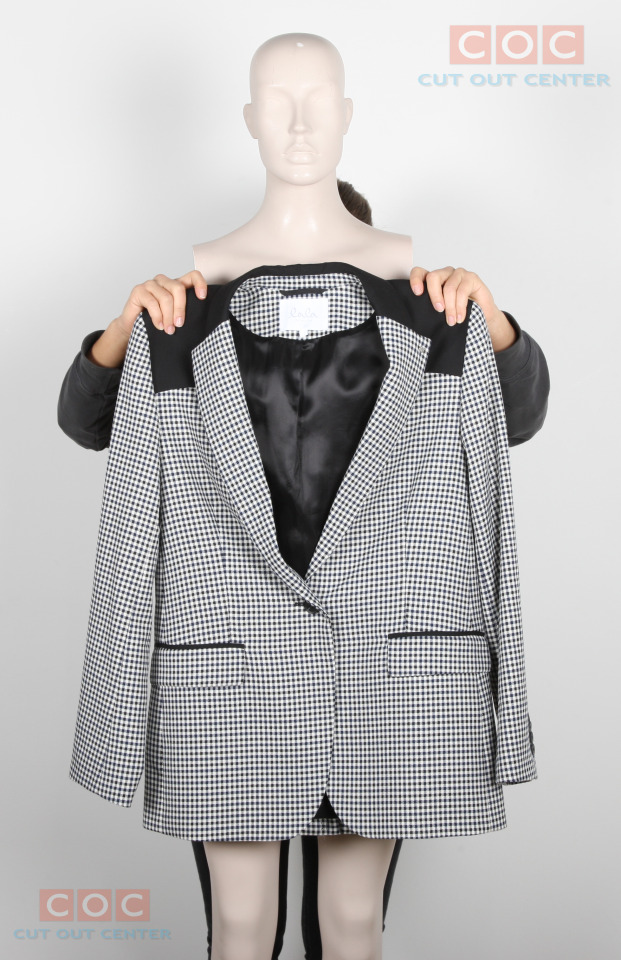
Cut Out Center (COC) designers use neck joint/Ghost mannequin service to remove the doll from the images and combine them to show the garments in their proper sizes and shapes.
Daily 3000 E-Commerce Image Editing Capacity. Dedicated Secure FTP Account. Urgent Delivery Service (1 Hour, 3 Hours, 6 Hours)High-Quality Service Up To 60% Discount 50-100 IMAGES ORDER 10 IMAGES FREE Facility And Many More. Our company's Graphics Design Experts are the best in this market.
Free-Trial Link: https://lnkd.in/gYJkXjh9 W: https://cutoutcenter.com/
#clipping path#shadow creation#color correction#background remove#raster to vector#resize#photo retouching#shoe retouch#background change#recolor#neckjoint#photoretouching#backgroundremoval#clippingpath#photo manipulation#gust mannequin
2 notes
·
View notes
Photo

Drop shadow is a service for getting shadows like a natural shadow to an image. It makes the image look more realistic.
8 notes
·
View notes
Text
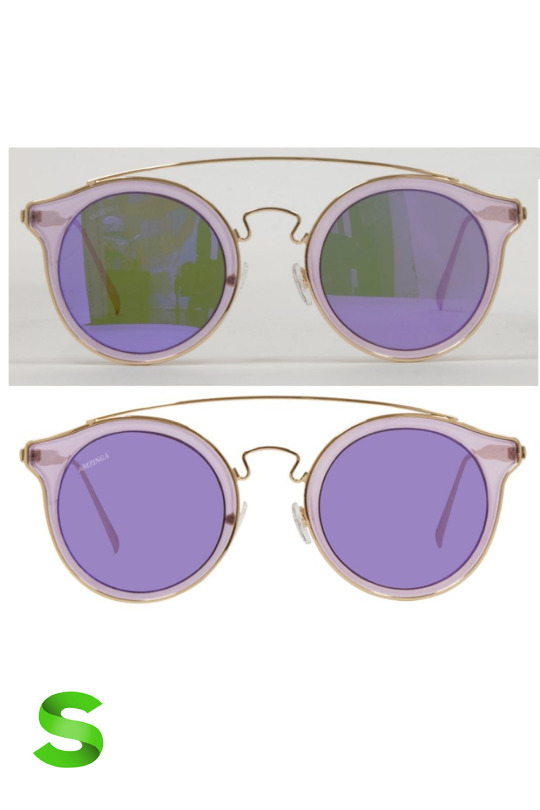
Unleash Your Creativity with Our Exclusive Free Editing Offer!
Are you ready to transform your photos from ordinary to extraordinary? Our Free Editing Offer is here to take your visuals to new heights of brilliance and creativity! Whether you're an aspiring photographer, a business owner, or simply someone who loves capturing moments, this is an opportunity you won't want to miss.
#commercial#marketing#ecommerce#branding#product photo editing#smartservice24#upwork#fiverr#freelance#virtual assistant#freelancers#photoshop#editing#image_editing#graphics design#product design#designer#studio#clipping path#background remove#Photo Editing#Photoshop#E-commerce#Image Editing#Commercial Product#Photography
2 notes
·
View notes
Text

Let travel change you.💔
#imageediting#mdishakrahman#shadow#graphicdesign#photography#clipping path#photo retouching#neckjoint#ghostmannequin#background#travel#sikkimtrip#sikkim#tourism#gangtok#car photography#photoshop#i sell photos#photo edit#photoshoot#my photos#photographer#munshiganj#bikrampur#india#tour
2 notes
·
View notes
Text

Are you tired of wasting time on sophisticated image editing? Learn why selecting the finest clipping path service provider is essential for workflow productivity and outstanding visual outcomes! #clippingpath #clippingpathservices #designservices
5 notes
·
View notes
Link
6 notes
·
View notes
Text
very nice
14K notes
·
View notes
Text
Clipping Path Service
Our clipping path service provides precise and accurate image editing by isolating subjects from their backgrounds. Ideal for product photography, e-commerce, and design projects, we deliver clean, sharp outlines that enhance your images. Trust our expert team to provide high-quality results, making your visuals stand out with clarity and professionalism.
0 notes
Text
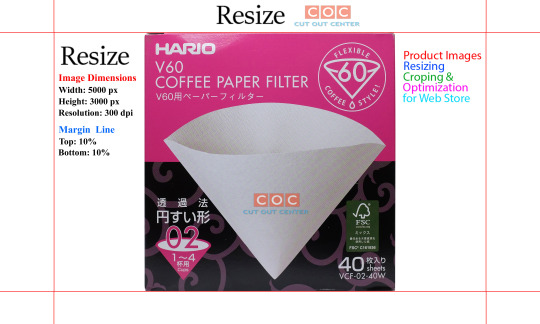
Best Resize Photo Editing Service || Cut Out Center || Asia Best Photo Editing Company
We Have In-House 500+ Expert image editors and Graphics Designers. Each Client Wise Personal Dedicated 24/7 Support. Daily 3000 E-Commerce Image Editing Capacity. Dedicated Secure FTP Account.
Our image editing services :
➱Background Removal ➱Clipping Path ➱Image Retouching ➱Ghost Mannequin ➱Color Correction ➱Ecommerce Photo Editing ➱Shadow Creation ➱Image Masking ➱Image Manipulation
#clipping path#shadow creation#color correction#background remove#raster to vector#resize#photo retouching#shoe retouch#background change#recolor
2 notes
·
View notes
Text

Zenith Clipping offers professional Background Removal Services to enhance your photos and make your products stand out. Perfect for e-commerce, photography, and marketing needs, our skilled team ensures clean, precise edits with fast turnaround times. Boost your brand’s appeal with visually stunning images that captivate your audience. From simple cuts to complex subjects, we handle it all with care and accuracy. Trust Zenith Clipping for flawless results every time! ✅ #BackgroundRemoval #ZenithClipping #PhotoEditing #EcommerceSolutions #ImageEditing #ProfessionalEditing #ClippingPath #ProductPhotos #CreativeDesign #ClippingPath
0 notes
Text
Professional photo retouching service India
India is home to many professional photo retouching service providers that cater to a global clientele. These services are known for their expertise, affordability, and quick turnaround times. Here’s an overview of what you can expect from professional photo retouching services in India:

Key Services Offered
Portrait Retouching
Skin smoothing, blemish removal, and feature enhancement.
Retouching for personal, professional, or editorial use.
E-commerce Product Photo Editing
Background removal, color correction, and shadow effects.
High-quality retouching to make products stand out on online platforms.
Wedding and Event Photo Retouching
Enhancing group shots and candid moments.
Adjusting tones and lighting to create memorable wedding albums.
Real Estate Photo Retouching
Correcting perspectives and enhancing interior and exterior shots.
Adding sky replacements and improving lighting for property listings.
Image Restoration
Repairing old or damaged photos by fixing tears, scratches, and discoloration.
Recoloring black-and-white photos to restore their vibrancy.
Fashion and Beauty Retouching
High-end editing for models, designers, and fashion magazines.
Focus on maintaining a balance between enhancement and natural looks.
Commercial Photo Retouching
Tailored solutions for advertising, marketing campaigns, and brand imaging.
Why Choose India for Photo Retouching?
Skilled Professionals India has a vast pool of highly trained photo retouchers proficient in tools like Adobe Photoshop, Lightroom, and Capture One.
Cost-Effectiveness Competitive pricing makes it an ideal choice for businesses and individuals seeking high-quality edits at affordable rates.
Quick Turnaround Many Indian photo retouching companies provide efficient services with fast delivery times, meeting tight deadlines.
Custom Solutions Services are tailored to the unique needs of international clients, offering flexible packages and scalable operations.
Leading Photo Retouching Service Providers in India
PicsRetouch: Specializes in professional and high-quality photo editing for various industries, including e-commerce, fashion, and real estate.
Smart Photo Editors: Offers a wide range of photo editing and retouching services with global delivery.
Global Photo Edit: Focused on detailed image enhancement for photographers and businesses.
0 notes
Text

Taking the scenic route.💔
#mdishakrahman#imageediting#photography#shadow#photo retouching#graphicdesign#clipping path#neckjoint#ghostmannequin#background#car photography#photoshoot#my photos#photo edit#picture#photographer#sikkim#travel#gangtok#tourism#travel photography#carphotoedit#northsikkimm#love#self love#love yourself#mdishakrahmanmd#md ishak rahman#dress#fashion
2 notes
·
View notes
Text
Title: Enhance Your Visuals with Professional Image Masking Services
Content:
In today’s visually driven world, high-quality images are essential for standing out in the digital landscape. Whether you're running an online store, managing a photography portfolio, or creating marketing campaigns, professional image editing can make or break your visual appeal. One of the most effective techniques to ensure your images are sharp, polished, and visually compelling is image masking.
What is Image Masking?
Image masking is an advanced photo-editing technique that involves isolating a subject from its background with precision. Unlike traditional editing methods, image masking is ideal for intricate details such as hair, fur, glass, or any element that requires precise cut-out, especially with complex edges. This technique ensures smooth and realistic results that are crucial for high-end visuals.
Why Image Masking Matters for Your Business?
Accuracy & Precision: Image masking ensures that no detail is lost, whether it's fine hair strands or delicate fabric edges. It provides accurate cut-outs, making your images look professionally edited and sharp.
Time and Cost-Effective: Outsourcing your image masking to experts saves you time and money while ensuring top-tier results. You don’t need to invest in expensive software or spend hours learning complicated editing techniques.
Versatility for All Industries: From e-commerce and fashion to photography and real estate, image masking is suitable for any business that requires high-quality visuals. It’s especially useful for editing images with complex elements, making it a go-to solution for various industries.
Boost Your Brand’s Visual Appeal: High-quality images are essential for effective branding. By using image masking, you can create stunning visuals with clean backgrounds, enhancing the appeal of your products and services. This makes your brand stand out on websites, social media, and ads.
Seamless Integration Across Platforms: Whether you're working on product images for an online store or preparing images for an advertising campaign, image masking helps create consistent, high-quality visuals that perform well across various platforms.
Why Choose Our Image Masking Service?
Our expert team specializes in delivering flawless image masking results. We use advanced techniques and tools to ensure that your images are perfectly edited, no matter how intricate the subject. From removing complex backgrounds to creating transparent images, we guarantee precision and attention to detail in every project.
If you're ready to elevate your visual content and take your digital presence to the next level, our image masking services are the perfect solution. Contact us today to learn how we can help enhance your images and make your brand shine!
#Photo Masking#Background Removal#Image Editing#Layer Masking#Clipping Path#Transparency Editing#Photoshop Masking
0 notes
