
Don't wanna be here? Send us removal request.
Statistics
We looked inside some of the posts by clickthephotoblog and here's what we found interesting.
Average Info
Notes Per Post
1
Likes Per Post
1
Reblog Per Post
0
Reply Per Post
0
Time Between Posts
11 days ago
Number of Posts By Type
Text
17
Last Seen Tumblr Blogs


Fun Fact
The “We are the 99%” Tumblr blog became the slogan for the Occupy Wall Street movement.
Text
How to Take Pictures of Clothes Without Mannequin
In the world of e-commerce, the importance of stunning product photography cannot be overlooked. Whether you're running your own online boutique or selling items on platforms like Etsy or eBay, high-quality images are essential to attract potential customers and drive sales. When it comes to showcasing clothing items, many sellers rely on mannequins to display their products. However, if you don't have access to a mannequin or prefer a more creative approach, fear not! In this comprehensive guide, we'll explore various techniques and tips for taking captivating photos of clothes without using a mannequin.
Read More
Setting the Stage: Creating a Professional Photography Setup
Choosing the Right Location: Select a well-lit area with ample natural light. Avoid harsh shadows and opt for a clean, clutter-free background.
Setting Up Your Equipment: Invest in a good quality camera or use a high-resolution smartphone with a decent camera app. Tripods can help stabilize your shots and ensure consistency.
Styling the Garments: Steam or iron the clothes beforehand to remove wrinkles and ensure a polished appearance. Pay attention to details like buttons, zippers, etc.
Props and Accessories: Consider using props such as hangers, decorative elements, or lifestyle accessories to add visual interest to your photos.
Creative Display Techniques: Bringing Your Clothes to Life
Flat Lay Photography: Lay the garment flat on a clean surface and arrange it in an aesthetically pleasing manner. Experiment with different folds, textures, and arrangements to create eye-catching compositions.
Hanging Displays: Use a sturdy hanger to hang the clothing item against a neutral background. Play around with angles and perspectives to highlight key features like neckline or hemline.
Model Substitutes: Enlist the help of friends or family members to act as models without showing their faces. Alternatively, you can use mannequin alternatives like dress forms or body pillows to give the clothes shape and form.
Mastering Lighting and Composition: Enhancing Your Photos

Natural Light vs. Artificial Light: Experiment with different lighting sources to find the most flattering option for your garments. Natural light provides a soft, diffused effect, while artificial lighting can be more controlled and consistent.
Understanding Composition: Follow the rule of thirds to create balanced and visually appealing compositions. Pay attention to framing, symmetry, and negative space to draw attention to the clothing item.
Editing and Retouching: Use photo editing software like Adobe Photoshop or Lightroom to enhance colors, adjust exposure, and remove imperfections. However, avoid over-editing, as it can detract from the authenticity of your photos.
Showcasing Details and Textures: Highlighting the Unique Features
Close-Up Shots: Capture detailed shots of fabric textures, embellishments, and stitching to give customers a closer look at the quality and craftsmanship of the garment.
Focus on Key Features: Draw attention to specific design elements like patterns, prints, or intricate embroidery. Experiment with different angles and perspectives to showcase the garment from multiple viewpoints.
Learn More: Neck Joint Services
Building Trust and Engagement: Creating a Memorable Brand Experience
Consistency is Key: Maintain a consistent style and aesthetic across all your product photos to establish a cohesive brand identity. This helps build trust and credibility with your customers.
Tell a Story: Use storytelling techniques to create a narrative around your products. Incorporate lifestyle imagery or styling ideas to inspire and engage your audience.
Customer Feedback and Iteration: Solicit feedback from your customers and use it to improve your photography skills over time. Pay attention to which photos generate the most interest and adjust your approach accordingly.
Harnessing the Power of Social Media and Online Platforms: Reaching Your Audience
Utilize Social Media Platforms: Share your beautifully crafted photos on social media platforms like Instagram, Facebook, Pinterest, and Twitter to reach a wider audience. Use relevant hashtags and engage with your followers to increase visibility and drive traffic to your online store.
Optimize for E-commerce Platforms: If you're selling your products on e-commerce platforms like Etsy, eBay, or Shopify, optimize your photos for these platforms' specific requirements. This may include adhering to certain image dimensions or file sizes to ensure your photos display properly.
A/B Testing and Analytics: Experiment with different photo styles, angles, and compositions to see what resonates best with your target audience. Use analytics tools provided by social media platforms or e-commerce sites to track engagement metrics and make data-driven decisions to improve your photography strategy.
Building a Photography Toolkit: Essential Gear and Resources
Camera Equipment: Invest in a quality camera with interchangeable lenses for maximum versatility. Consider additional accessories like reflectors, diffusers, and external flashes to enhance your lighting setup.
Photography Props: Build a collection of props and accessories that complement your brand's aesthetic and style. This could include items like flowers, jewelry, or decorative objects that add visual interest to your photos.
Editing Software: Familiarize yourself with photo editing software like Adobe Photoshop, Lightroom, or Canva to fine-tune your photos and make them stand out. Take advantage of online tutorials and resources to learn new editing techniques and improve your skills.
Staying Inspired and Evolving Your Style: Continuing Your Photography Journey
Draw Inspiration from Others: Study the work of professional photographers, fashion bloggers, and brands known for their exceptional product photography. Take note of composition techniques, lighting setups, and creative styling ideas that you can incorporate into your own photos.
Experiment and Innovate: Don't be afraid to think outside the box and experiment with unconventional photography techniques. Embrace new trends and technologies to keep your photography style fresh and innovative.
Seek Feedback and Collaboration: Join online communities, forums, or photography groups where you can connect with fellow photographers and receive constructive feedback on your work. Collaborate with other creatives to exchange ideas and collaborate on photoshoots that push the boundaries of traditional clothing photography.
Conclusion:
Taking captivating photos of clothes without a mannequin may seem daunting at first, but with the right techniques and creativity, you can create stunning imagery that showcases your products in the best possible light. By setting up a professional photography setup, experimenting with creative display techniques, mastering lighting and composition, highlighting details and textures, and building trust and engagement with your audience, you'll be well on your way to becoming a master of clothing photography. So grab your camera, unleash your creativity, and let your garments shine!
0 notes
Text
How to Hang a Picture on a Curved Wall

Hanging a picture can be a simple task, but what about when your wall isn't flat? Curved walls add a unique challenge to the mix, requiring a bit more finesse to get that perfect placement. Whether you're dealing with a curved wall due to architectural design or simply want to add some character to your space, we've got you covered with these expert tips on how to hang a picture on a curved wall.
Read More
Assess the Curve
Before you dive into hanging your picture, take a moment to assess the curve of the wall. Is it gently curved or more pronounced? Understanding the shape of the curve will help you determine the best approach for hanging your picture.
Choose the Right Hardware
When it comes to hanging pictures on curved walls, traditional nails or screws may not be the best option. Instead, opt for specialized hardware designed specifically for this purpose. Look for flexible picture hangers or adhesive hooks that can conform to the curve of the wall without damaging it.
Measure Twice, Hang Once
As with any hanging project, proper measurement is key. Use a tape measure to determine the desired placement of your picture on the curved wall. Take into account the curve itself, as well as any other elements in the room that may affect the placement.
Mark Your Spot
Once you've determined the ideal placement for your picture, use a pencil to mark the spot on the wall. This will serve as your guide when it comes time to hang the picture, ensuring that it's positioned exactly where you want it.
Use a Level
To ensure that your picture hangs straight on the curved wall, use a level to double-check your markings. This will help prevent any crooked installations and ensure that your picture looks its best once it's on display.
Test Before Committing
Before committing to hanging your picture, do a test run with the hardware you've chosen. This will allow you to make any necessary adjustments and ensure that the picture hangs securely on the curved wall.
Consider Weight Distribution
If you're hanging a particularly heavy picture on a curved wall, consider distributing the weight across multiple hanging points. This will help prevent damage to the wall and ensure that your picture stays securely in place.
Read Also:
Clipping Path Services Background Removal Services
Take Your Time
Hanging a picture on a curved wall may require a bit more patience and precision than hanging one on a flat surface. Take your time, and don't be afraid to adjust as needed to achieve the perfect placement.
Enjoy Your Handiwork
Once your picture is securely hung on the curved wall, step back and admire your handiwork. A well-placed picture can add personality and charm to any space, and with these tips, you can ensure that yours looks its best on even the most challenging of walls.
Conclusion
Hanging a picture on a curved wall may seem daunting at first, but with the right tools and techniques, it can be a straightforward process. By choosing the right hardware, taking accurate measurements, and exercising patience, you can hang your picture with confidence, knowing that it will look great on your curved wall for years to come. So go ahead, unleash your creativity, and make your curved wall a focal point of your space with a beautifully hung picture.
0 notes
Text
How to Darken the Edges of a Photo in Photoshop
Photography is not just about capturing a moment; it's about creating an experience, evoking emotions, and telling a story. One way to enhance the visual impact of your photos is by adding creative effects during post-processing. Darkening the edges of a photo is a technique that can draw focus to the subject, create a sense of depth, and add a touch of drama to your images. In this tutorial, we'll explore how to achieve this effect using Adobe Photoshop.
Read More
Understanding the Purpose:
Before we delve into the technicalities, it's essential to understand why you might want to darken the edges of a photo. This technique can be used for various reasons:
Directing Focus: By darkening the edges, you draw the viewer's attention towards the center of the image, where your subject is typically located. This helps to emphasize the main subject and eliminates distractions from the background.
Creating Depth: Darkening the edges can add depth and dimension to your photo, making it feel more immersive and visually interesting.
Enhancing Mood: Depending on the intensity of the darkening effect, you can create different moods ranging from subtle and moody to dramatic and intense.
Now that we understand the purpose let's dive into the process.
Step 1: Open Your Image in Photoshop
The first step is to open the image you want to edit in Adobe Photoshop. To do this, launch Photoshop and go to File > Open, then navigate to the location of your image and select it.
Step 2: Duplicate the Background Layer
Once your image is open, the next step is to duplicate the background layer. This allows us to make non-destructive edits, preserving the original image. Right-click on the Background layer in the Layers panel and select Duplicate Layer. Click OK in the dialog box that appears.
Step 3: Create a Layer Mask
With the duplicated layer selected, click on the Add Layer Mask icon at the bottom of the Layers panel. This will add a layer cover to the copied layer. A layer mask allows you to selectively hide or reveal parts of a layer without permanently erasing them.
Step 4: Apply a Gradient to the Layer Mask
With the layer mask selected (it should have a white outline around it), choose the Gradient Tool from the toolbar (shortcut key: G). Make sure you have the default black to white gradient selected in the toolbar at the top.
Step 5: Draw the Gradient
Click and drag with the Gradient Tool from the center towards the edges of the image. As you drag, you'll see a gradient preview indicating how the mask will be applied. Release the mouse button once you've reached the desired extent of the darkening effect. You can experiment with the length and angle of the gradient to achieve different results.
Step 6: Fine-tune the Effect
If the darkening effect is too strong or not strong enough, you can adjust the opacity of the duplicated layer to control the intensity. Simply select the duplicated layer in the Layers panel and use the Opacity slider at the top to adjust the opacity to your liking. You can also refine the gradient by selecting the layer mask and using tools like the Brush Tool to paint with black or white to hide or reveal parts of the effect manually.
Step 7: Save Your Image
Once you're satisfied with the result, it's time to save your image. Go to File > Save As to save a copy of your edited photo. Pick your ideal record arrangement and area, then click Save.
Learn More:
Image Masking Services
Photo Retouching Service
Step 8: Experiment with Additional Adjustments (Optional)
While darkening the edges of your photo can significantly enhance its visual impact, you can further refine the overall look by experimenting with additional adjustments in Photoshop. Here are a few optional adjustments you might consider:
Contrast and Brightness: Depending on the mood you want to convey, adjusting the contrast and brightness of your image can complement the darkened edges effect. Increasing contrast can make the subject pop, while reducing brightness in certain areas can add depth and atmosphere.
Color Grading: Experiment with color grading techniques to enhance the overall mood and tone of your photo. You can use adjustment layers such as Color Balance, Curves, or Selective Color to fine-tune the colors and achieve a more cohesive look.
Vignetting: Vignetting is another technique that involves darkening or lightening the edges of a photo. While we've already covered darkening the edges in this tutorial, you can also add a subtle vignette effect using the Lens Correction filter or by creating a new layer with a circular gradient and adjusting the blending mode and opacity.
Sharpening: Applying selective sharpening to your image can help to enhance details and textures, especially in the focal point of your photo. Use the Sharpen tool or apply Unsharp Mask filter to areas that require additional clarity and definition.
Noise Reduction: Depending on the quality of your original image and the level of detail you want to preserve, you may need to apply noise reduction to reduce any unwanted grain or digital noise. Use the Noise Reduction filter or third-party plugins to achieve a smoother, cleaner look.
Step 9: Save Your Final Image
Once you're satisfied with all the adjustments you've made, it's time to save your final image. Go to File > Save As and choose your desired file format (such as JPEG or TIFF) and compression settings. Give your image a descriptive name and select the destination folder where you want to save it. Click Save to export your edited photo.
Conclusion:
Darkening the edges of a photo in Photoshop is a simple yet powerful technique that can add depth, focus, and mood to your images. By following the steps outlined in this tutorial, you can easily master this effect and take your photography to the next level. Experiment with different images, gradient lengths, and opacity levels to discover the perfect combination for your desired effect. So, next time you're editing your photos, don't forget to give this technique a try and see the difference it can make!
0 notes
Text
How to Send Photo to Amazon Seller
In the dynamic world of e-commerce, where visuals play a pivotal role in attracting customers, sending high-quality photos to Amazon sellers is crucial for effective product listings. Whether you're a supplier, manufacturer, or a freelancer hired for product photography, understanding the process of sending photos to Amazon sellers ensures smooth collaboration and enhances the overall shopping experience for customers. In this guide, we'll delve into the step-by-step process of sending photos to Amazon sellers, along with best practices to ensure your images meet Amazon's standards.
Read More
Why High-Quality Photos Matter
Before we dive into the 'how,' let's briefly touch on the 'why.' High-quality product images are essential for several reasons:
Enhanced Visibility: Crisp, clear images grab attention and entice potential buyers to click on your product listing.
Improved Conversion Rates: Detailed and aesthetically pleasing images instill trust in buyers and increase the likelihood of making a purchase.
Reduced Returns: When customers have a clear understanding of the product's appearance, they are less likely to return it due to mismatched expectations.
Brand Reputation: Consistent, professional imagery reflects positively on your brand, signaling credibility and professionalism to customers.
Step-by-Step Guide to Sending Photos to Amazon Sellers
Step 1: Capture High-Quality Images
Before sending photos to Amazon sellers, ensure that your product images meet Amazon's image requirements. Here are some key guidelines to follow:
Use a high-resolution camera to capture sharp images.
Opt for a neutral background that doesn't distract from the product.
Include multiple angles and close-up shots to showcase product details.
Avoid adding watermarks, logos, or promotional text to the images.
Step 2: Organize Your Files
Properly organizing your image files makes it easier for Amazon sellers to navigate and use them for product listings. Consider the following tips:
Create separate folders for each product or product category. Use descriptive file names that include the product name, variant (if applicable), and angle (e.g., product_name_color_angle.jpg).
Compress large image files to reduce upload/download times without compromising quality.
Step 3: Communicate with the Seller

Before sending the photos, establish clear communication with the Amazon seller regarding their specific requirements and preferences. Discuss aspects such as:
Preferred file formats (JPEG, PNG, etc.).
Any specific dimensions or aspect ratios required.
Additional shots or angles they may need for the product listing.
Deadlines for submitting the images.
Step 4: Choose a Secure Transfer Method
When sending photos to Amazon sellers, prioritize security to protect sensitive data and intellectual property rights. Consider the following secure transfer methods:
Secure File Sharing Platforms: Utilize reputable file-sharing services like Dropbox, Google Drive, or WeTransfer, which offer encryption and password protection features.
Encrypted Email Attachments: If sending files via email, encrypt them using password-protected ZIP files to prevent unauthorized access.
Step 5: Double-Check for Quality and Accuracy
Before finalizing the image transfer, conduct a thorough review to ensure that the photos meet the seller's requirements and adhere to Amazon's guidelines. Pay attention to the following aspects:
Image resolution and clarity.
Consistency in lighting and color accuracy across all photos.
Correct product variants and angles.
Absence of any visual imperfections or distortions.
Step 6: Follow Up and Provide Support
After sending the photos, follow up with the Amazon seller to confirm receipt and address any additional requests or concerns they may have. Offer ongoing support to ensure a smooth collaboration and resolve any issues promptly.
Learn More: Product Photo Editing Service
Best Practices for Sending Photos to Amazon Sellers
Be Responsive: Promptly respond to seller inquiries and requests to maintain a positive working relationship.
Respect Intellectual Property: Obtain necessary permissions for using trademarks, logos, or copyrighted materials in the product images.
Stay Organized: Maintain a systematic approach to file organization and communication to streamline the process.
Stay Updated: Keep abreast of any changes to Amazon's image guidelines and adapt your practices accordingly.
Seek Feedback: Request feedback from sellers to continually improve the quality and effectiveness of your product images.
The Importance of Amazon's Image Requirements
Amazon has specific image requirements that sellers must adhere to for their product listings to ensure consistency, professionalism, and a seamless shopping experience for customers. These requirements serve several purposes:
Uniformity: Standardizing image specifications across product listings ensures a cohesive browsing experience for customers, making it easier for them to compare products.
Clarity and Detail: By mandating high-resolution images with clear visibility of product features, Amazon ensures that customers have a comprehensive understanding of the products they're interested in.
Mobile Compatibility: With a significant portion of online shopping occurring on mobile devices, Amazon's image requirements prioritize mobile responsiveness, ensuring that images display properly across various screen sizes and resolutions.
Brand Integrity: Adhering to image guidelines helps maintain the integrity of brands and prevents misleading or low-quality visuals from detracting from a seller's reputation.
Tips for Meeting Amazon's Image Requirements
To ensure that your photos meet Amazon's standards, consider the following tips:
Image Size and Resolution: Amazon recommends images with dimensions of at least 1000 pixels or larger in either height or width to enable zoom functionality and maintain clarity. Aim for a resolution of at least 72 pixels per inch (PPI) to ensure crispness.
Background: Use a clean, white background for product images to minimize distractions and focus attention on the product itself. Avoid using borders, watermarks, or additional graphics in the image.
Product Placement: Center the product in the frame and fill the majority of the image area with the product to maximize visibility. Include multiple angles and close-up shots to showcase different features.
File Format: Save images in JPEG (.jpg) format with minimal compression to preserve image quality while keeping file sizes manageable. PNG (.png) format is also acceptable for images with transparent backgrounds.
Color Accuracy: Ensure that the colors in your images are true to life and accurately represent the product. Avoid oversaturation or alterations that may mislead customers about the product's appearance.
No Additional Text or Graphics: Amazon prohibits the inclusion of text, logos, watermarks, or promotional overlays in product images. The focus should be solely on the product itself without any distractions.
Primary and Secondary Images: Designate one image as the main product photo, which will appear in search results and product listings. Include additional images to showcase different angles, features, or variations of the product.
Image Cropping and Editing: Use image editing software to crop, resize, and adjust images as needed to meet Amazon's specifications. However, avoid excessive editing or manipulation that may misrepresent the product.
Conclusion
Sending photos to Amazon sellers is a collaborative process that requires attention to detail, clear communication, and a commitment to quality. By following the step-by-step guide outlined in this article and adhering to best practices, you can ensure that your product images meet Amazon's standards and contribute to the success of your online listings. Remember, compelling visuals are often the difference between a browser and a buyer in the competitive landscape of e-commerce.
1 note
·
View note
Text
How to Reverse a Gif in Photoshop
GIFs have become an integral part of online communication, adding a touch of humor, emotion, and creativity to our digital conversations. While there are countless GIFs available on the internet, sometimes you might come across one that's almost perfect, but you wish it played backward. Fortunately, with the power of Adobe Photoshop, you can easily reverse a GIF and unlock a whole new level of customization. In this tutorial, we'll guide you through the step-by-step process of reversing a GIF using Photoshop.
Read More
I. Getting Started:
A. Open Photoshop:
Launch Adobe Photoshop on your computer.
Make sure you have a version that supports GIF editing.
B. Import Your GIF:
Navigate to "File" and select "Open."
Choose your desired GIF file and click "Open."
II. Understanding the Timeline Panel:
A. Locate the Timeline Panel:
If the Timeline Panel is not visible, go to "Window" and select "Timeline."
B. Frame Animation vs. Video Timeline:
Choose "Create Frame Animation" for a GIF with a few frames.
Choose "Create Video Timeline" for a longer GIF or if you want more advanced editing options.
III. Reversing the GIF:
A. Frame Animation Method:
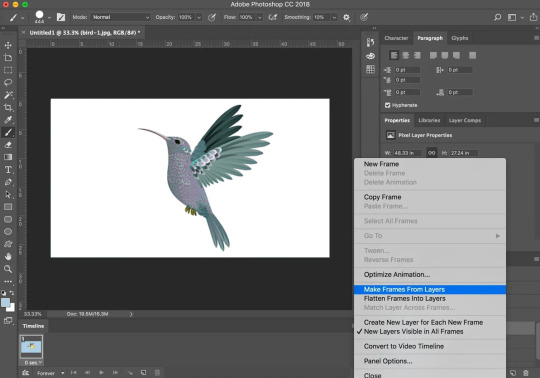
Select all frames in the Timeline Panel.
Click on the dropdown menu and choose "Reverse Frames."
B. Video Timeline Method:
Select the video layer in the Timeline Panel.
Right-click and choose "Reverse Frames."
IV. Adjusting Speed and Duration:
A. Frame Animation:
Adjust the delay time for each frame by selecting them individually.
Experiment with different durations to achieve the desired speed.
B. Video Timeline:
Drag the edges of the video layer to adjust its duration.
Fine-tune the speed by right-clicking on the layer and selecting "Speed/Duration."
V. Adding Effects:
A. Apply Filters:
Experiment with Photoshop's filters to add unique effects to your reversed GIF.
B. Text and Overlays:
Use the Text tool to add captions or annotations.
Overlay additional elements for a personalized touch.
Learn More: Photo Retouching Service
VI. Exporting Your Reversed GIF:
A. Go to "File" and select "Export" > "Save for Web (Legacy)." B. Choose the GIF preset and adjust settings like size and quality. C. Click "Save" to export your reversed GIF.
VII. Troubleshooting Tips:
A. Frame Order Confusion:
If the frames don't seem to reverse correctly, double-check the order in the Timeline Panel.
Ensure that you've selected all frames before applying the reverse action.
B. Choppy Playback:
If your reversed GIF has a choppy playback, consider adjusting the frame duration for smoother animation.
Opt for shorter durations between frames for a faster-paced animation.
C. Experimentation is Key:
Don't be afraid to experiment with different settings, effects, and speeds.
Photoshop offers a wide range of tools, so try out various options to find the perfect combination for your reversed GIF.
VIII. Creative Ideas for Reversed GIFs:
A. Storytelling in Reverse:
Craft a narrative by reversing a GIF to tell a story backward.
Consider using this technique for comedic effect or creating a unique visual experience.
B. Time-Reverse Effect:
Use the reversal feature to create a mesmerizing time-reverse effect.
Combine with other visual elements for a surreal and captivating result.
C. Looping Magic:
Create a seamless loop by reversing a GIF with carefully chosen start and end frames.
Experiment with looped animations for an endless, hypnotic effect.
IX. Sharing Your Reversed GIF:
A. Social Media Platforms:
Share your reversed GIF on popular social media platforms like Twitter, Instagram, or Facebook.
Consider adding relevant hashtags to reach a broader audience.
B. GIF Hosting Platforms:
Upload your reversed GIF to dedicated GIF hosting platforms like Giphy or Tenor.
Make sure to add tags and descriptions for better discoverability.
Conclusion:
Reversing a GIF in Photoshop is a skill that adds a unique touch to your digital creations. From storytelling to creating captivating visual effects, the possibilities are endless. Take the time to explore Photoshop's features, experiment with different ideas, and let your creativity flow. With this newfound knowledge, you're not just reversing GIFs; you're transforming them into personalized works of art. Embrace the creative process, share your creations with the world, and continue exploring the vast realm of GIF customization in Adobe Photoshop.
0 notes
Text
Product Photo Editing Service
In the competitive world of e-commerce, first impressions matter. When potential customers visit your online store, the first thing they notice is the product images. High-quality, visually appealing photos can significantly impact their purchasing decisions. This is where professional product photo editing services come into play. In this article, we'll delve into the importance of product photo editing and how it can help elevate your e-commerce business.
Read More
The Significance of High-Quality Product Images
Capturing Attention: In the vast sea of online products, it's crucial to capture the attention of potential customers instantly. High-quality images stand out and draw customers in, increasing the likelihood of them exploring your products further.
Building Trust: Clear, well-edited images build trust with your audience. Customers are more likely to trust a business that presents its products professionally. This trust converts into higher transformation rates and client unwaveringness.
Highlighting Features: Product photo editing allows you to showcase the key features of your products. Whether it's highlighting intricate details or demonstrating functionality, professional editing ensures that your products are presented in the best light possible.
Types of Product Photo Editing Services

Background Removal: A cluttered or distracting background can take away from the focus on your product. Professional editing services can remove backgrounds or replace them with a neutral backdrop, ensuring your product remains the star of the show.
Color Correction: Consistent and accurate colors are crucial for portraying your products realistically. Photo editing experts can adjust colors to match your brand standards and ensure a cohesive look across all your product images.
Retouching: Product images often require retouching to remove imperfections, dust, or scratches. This process enhances the overall aesthetics of the product and creates a polished appearance.
Shadow and Reflection Enhancement: Adding shadows or reflections can make your products appear more realistic and visually appealing. Professional editors use advanced techniques to create natural shadows or reflections that enhance the overall presentation.
Image Resizing and Cropping: Ensuring that your product images are consistent in size and aspect ratio is essential for a professional-looking website. Editing services can resize and crop images to meet the specific requirements of your online store.
Benefits of Outsourcing Product Photo Editing
Time and Cost Efficiency: Outsourcing photo editing tasks allows you to focus on core business activities. It also eliminates the need to invest in expensive editing software and training for in-house staff.
Expertise and Quality: Professional editing services bring expertise and experience to the table. Their skilled editors know the ins and outs of photo enhancement, ensuring high-quality results that align with industry standards.
Consistency Across Products: Maintaining a consistent look across all product images is vital for brand identity. Outsourcing editing to professionals ensures uniformity and coherence, creating a visually appealing online store.
Quick Turnaround: Professional editing services often provide quick turnaround times, enabling you to update your product listings promptly. This agility is crucial in the fast-paced world of e-commerce.
Learn More: Jewelry Retouching Services
Case Studies: Success Stories with Product Photo Editing
Increased Conversion Rates: Several e-commerce businesses have reported a significant increase in conversion rates after implementing professional product photo editing. Clear, attractive images encourage customers to make purchasing decisions.
Brand Recognition: Consistent and well-edited product images contribute to brand recognition. Customers can easily identify and remember your products, fostering brand loyalty over time.
Implementing a Seamless Workflow
Now that we understand the significance of product photo editing, let's explore how to seamlessly integrate these services into your e-commerce workflow.
1. Choose the Right Editing Partner:
Selecting a reputable photo editing service is crucial. Look for a provider with a proven track record, positive client reviews, and a portfolio showcasing their expertise in e-commerce product editing. Ensure they can handle your specific industry and product types.
2. Define Your Editing Guidelines:
Clearly communicate your brand guidelines, expectations, and specific editing requirements to the service provider. This includes color preferences, background styles, and any unique characteristics that should be highlighted or downplayed in the editing process.
3. Invest in High-Quality Originals:
Provide the editing team with high-resolution and well-lit original images. The better the quality of the input, the more impressive the final edited product will be. Ensure that your photographers understand the importance of capturing images with editing in mind.
4. Establish a Consistent Style:
Work with the editing team to establish a consistent style for your product images. This includes aspects like lighting, shadows, and color grading. Consistency across your product catalog enhances brand recognition and creates a cohesive shopping experience for your customers.
5. Regularly Update Your Product Catalog:
As your product offerings change, it's essential to update your online catalog promptly. Work with your editing service to establish a system for quick turnarounds, especially during product launches or seasonal updates.
6. Monitor and Evaluate Results:
Regularly assess the edited images against your guidelines. Ensure that the editing team is meeting your expectations and making any necessary adjustments. Open communication with the editing service is crucial for maintaining a successful partnership.
7. Stay Updated on Industry Trends:
E-commerce trends, including visual styles and presentation, can evolve rapidly. Stay informed about industry trends and work with your editing service to incorporate relevant styles and techniques into your product images.
8. Optimize for Different Platforms:
Consider the platforms where your products will be showcased. Different platforms may have specific image size or resolution requirements. Ensure that your editing service can optimize images for various platforms, including your website, social media, and third-party marketplaces.
9. Test and Iterate:
A/B testing can help you understand the impact of different image styles on your conversion rates. Experiment with variations in editing styles, backgrounds, or angles to find the most effective presentation for your products.
10. Adapt to Feedback:
Pay attention to customer feedback and data analytics. If certain products or styles consistently receive positive or negative feedback, use this information to guide future editing decisions.
Conclusion
Professional product photo editing is a valuable investment that goes beyond enhancing the visual appeal of your online store. It contributes to brand credibility, customer trust, and, ultimately, increased sales. By integrating these services into your e-commerce workflow and partnering with a reliable editing service, you position your business for long-term success in the competitive online marketplace. Embrace the power of compelling visuals, and watch your e-commerce venture thrive in the digital landscape.
0 notes
Text
Features of Adobe Photoshop CS5 for Every Learner
In the dynamic world of digital design and image manipulation, Adobe Photoshop CS5 stands as a beacon of creativity and innovation. Released in 2010, Photoshop CS5 brought forth a plethora of features that not only revolutionized the way professionals approached graphic design but also provided an extensive toolkit for learners eager to explore the realm of digital artistry. In this article, we will delve into the key features of Adobe Photoshop CS5 that make it an indispensable companion for every aspiring digital artist.
Read More
1. Content-Aware Fill: A Stroke of Genius
One of the standout features of Photoshop CS5 is Content-Aware Fill. This tool allows users to seamlessly remove unwanted elements from an image and replace them with content that blends seamlessly with the surrounding area. Whether you're erasing a distracting background or eliminating an unwanted object, Content-Aware Fill makes the process efficient and natural.
2. Enhanced Selection Tools for Precision Editing
Selecting specific areas in an image is a fundamental skill in Photoshop, and CS5 takes it to the next level with improved selection tools. The addition of the Refine Edge tool empowers users to create more accurate selections, especially when dealing with complex subjects like hair or fur. This enhancement makes it easier for learners to achieve precise and professional-looking edits.
3. HDR Imaging for Stunning Visuals
High Dynamic Range (HDR) imaging is a technique that captures a broader range of light and color in a scene. Photoshop CS5 introduces HDR Pro, enabling users to merge multiple exposures into a single, stunning image with enhanced tonal detail. This feature opens up new possibilities for learners interested in creating visually striking and vibrant compositions.
4. Puppet Warp: Animate Your Creativity
For those diving into digital art and design, Puppet Warp is a game-changer. This feature allows users to distort and manipulate images with incredible flexibility. Whether you want to subtly adjust the posture of a model or create whimsical, surreal scenes, Puppet Warp provides a user-friendly way to bring your creative visions to life.
5. Advanced Brush Features for Artistic Expression
Photoshop CS5 offers an array of enhancements to its brush system, making it a paradise for digital painters and illustrators. The Mixer Brush, in particular, simulates realistic paint mixing and blending, allowing learners to emulate traditional painting techniques digitally. The addition of bristle tips and enhanced brush dynamics provides a level of control that is crucial for artists honing their craft.
6. 3D Extrusion: Adding Depth to Designs
With the inclusion of 3D extrusion capabilities, Photoshop CS5 expands its reach into the realm of three-dimensional design. Learners can now create and manipulate 3D objects directly within the application, adding depth and dimension to their projects. This feature is especially beneficial for those exploring graphic design for print, web, or even multimedia projects.
7. Adobe Camera Raw 6: Fine-Tuning Your Photography
Photography enthusiasts will appreciate the improvements made to Adobe Camera Raw (ACR) in Photoshop CS5. Version 6 of ACR introduces better noise reduction, improved sharpening, and enhanced post-processing capabilities. For learners keen on mastering the art of digital photography, these enhancements provide a powerful set of tools for refining and perfecting their images.
Learn More: Photo Retouching Service
8. Improved User Interface: Navigating with Ease
A user-friendly interface is paramount for learners navigating the intricate world of Photoshop. CS5 introduces a more streamlined and customizable interface, ensuring that users can access the tools they need quickly. Custom workspaces and the ability to rearrange panels make it easier for learners to organize their workspace according to their preferences, enhancing overall efficiency.
9. Enhanced HDR Toning: Balancing Light and Color
In addition to HDR Pro, Photoshop CS5 includes enhanced HDR toning capabilities. This feature allows users to fine-tune the balance of light and color in their images, achieving a more natural and visually appealing result. Whether working with photographs or digital paintings, the ability to control HDR toning adds a layer of sophistication to the creative process.
10. Automatic Lens Correction: Perfecting Your Photos
Photoshop CS5 takes the hassle out of correcting lens distortions with its automatic lens correction feature. This tool identifies the lens used to capture an image and applies corrections to minimize distortions such as barrel and pincushion effects. For learners venturing into photography, this feature is a valuable asset in ensuring the accuracy and quality of their captured moments.
11. Mini Bridge: Seamless File Management
Efficient file management is crucial for any creative project, and Photoshop CS5 introduces Mini Bridge to simplify the process. Mini Bridge is a streamlined file browser within the Photoshop interface, allowing learners to navigate, preview, and open assets without leaving the application. This integration enhances workflow efficiency, helping users stay organized and focused on their creative tasks.
12. HDR Toning Presets: Instant Artistic Effects
For learners seeking a quick and artistic touch to their images, HDR toning presets in Photoshop CS5 are a treasure trove. These presets offer one-click solutions to apply stunning effects to your HDR images. Whether you want to evoke a vintage feel or a futuristic vibe, experimenting with these presets provides a fast track to creative expression.
13. Refined Auto-Adjustments: Intelligent Editing Assistance
Auto-adjustments in Photoshop CS5 have been refined to deliver more accurate and intelligent results. The Auto Levels, Auto Contrast, and Auto Color functions analyze the image and make adjustments based on the content. This is particularly helpful for learners who are still developing an eye for color correction and tonal balance, providing a reliable starting point for their edits.
14. Enhanced Raw Image Support: Preserve Image Quality
Photoshop CS5 extends its support for a wider range of camera models and their respective raw file formats. This enhancement ensures that learners working with raw images can preserve the maximum amount of detail and dynamic range. The ability to work with raw files directly in Photoshop gives users greater control over their editing process, especially when it comes to exposure and color adjustments.
15. Customizable Keyboard Shortcuts: Personalized Workflow
Efficiency in Photoshop often comes down to speed and familiarity with the tools. CS5 allows learners to customize keyboard shortcuts, enabling them to tailor the interface to their preferences. This feature not only enhances workflow speed but also encourages a more personalized and intuitive approach to using the software.
Conclusion
Adobe Photoshop CS5, with its diverse array of features, caters to learners at every stage of their creative journey. Whether you're a digital art enthusiast, a budding photographer, or a graphic design novice, the tools and enhancements in CS5 provide an immersive and empowering experience. As you embark on your creative endeavors, harness the power of Adobe Photoshop CS5 to bring your visions to life and elevate your skills to new heights. The journey into the world of digital artistry has never been more exciting.
0 notes
Text
How To Outline Drawings - Easy Process
Drawing is a timeless form of expression, and outlining is an essential step that brings your creations to life. Whether you're a seasoned artist or just starting on your artistic journey, mastering the art of outlining can significantly enhance your drawings. In this guide, we'll explore an easy and comprehensive process to outline drawings effectively.
Read More
I. Understanding the Basics of Outlining:
Before diving into the process, it's crucial to understand the basics of outlining. Outlines serve as the framework for your drawings, defining shapes, edges, and contours. A well-executed outline adds depth and clarity to your artwork, making it visually appealing and easy to comprehend.
II. Selecting the Right Tools:
Having the right tools at your disposal is the first step to successful outlining. Here are some essential tools you'll need:
Pencils: Start with a light pencil for the initial sketch and a darker pencil for the final outline.
Eraser: A good quality eraser is essential for correcting mistakes and refining your outlines.
Paper: Choose a smooth, high-quality paper that complements your drawing style.
Ruler: A ruler helps in creating straight and precise lines, especially useful in technical drawings.
III. Preparing Your Sketch:
Begin by sketching the basic shapes and forms of your drawing lightly. This serves as a foundation for the final outline. Take your time during this stage to ensure accuracy and proportionality in your composition.
IV. Defining Lines and Contours:

Once your sketch is in place, identify the key lines and contours that will make up your outline. Consider the light source and shadows to create depth in your drawing. Start outlining with a lighter pencil, gradually building up to the desired intensity.
V. Emphasizing Detail:
Detail is what makes your drawing unique and captivating. Pay attention to intricate elements, such as facial features, textures, or patterns, as you refine your outline. Use varying line weights to add dimension and interest to your artwork.
VI. Correcting Mistakes:
It's perfectly normal to make mistakes during the outlining process. Use your eraser to correct any inaccuracies or adjust lines as needed. Take your time to ensure precision, as a well-crafted outline significantly contributes to the overall quality of your drawing.
VII. Experimenting with Line Styles:
Explore different line styles to add character to your outlines. Experiment with solid lines, dashed lines, or hatching to create visual interest. The variety in line styles can convey different textures and moods in your artwork.
Learn More: Product Photo Editing Service
VIII. Finalizing the Outline:
Once you're satisfied with the outline, go over it with a darker pencil or a fine liner to make it more defined. Be confident in your strokes, and don't be afraid to let the lines flow smoothly. This final step brings your drawing to its polished form.
IX. Additional Tips for Success:
Practice Regularly: Like any skill, outlining improves with practice. Set aside time regularly to hone your outlining technique and experiment with new styles.
Observe and Learn: Study the work of artists you admire. Analyze their outlining techniques and incorporate elements that resonate with your style into your own drawings.
Seek Feedback: Share your drawings with fellow artists or mentors to receive constructive feedback. Gaining according to others' viewpoints can assist you with distinguishing regions for development.
X. Exploring Digital Outlining Techniques:
In addition to traditional methods, digital tools provide a whole new dimension to the outlining process. Many artists now use graphic tablets and drawing software to create digital artwork. Here are some tips for digital outlining:
Digital Brushes: Experiment with different digital brushes to achieve various line textures and styles. Many drawing software options offer a wide array of brushes that can mimic traditional tools like pencils, pens, and brushes.
Layering: Take advantage of layering features in digital software. Separate your sketch from your outline, allowing you to refine each element independently. This makes it easier to correct mistakes and make adjustments without affecting the entire drawing.
Undo Function: Digital platforms often provide an undo function, allowing you to reverse any mistakes quickly. This feature can be a valuable asset during the outlining process, enabling you to explore different options without fear of permanent errors.
XI. Troubleshooting Common Outlining Challenges:
Even with a well-defined process, artists may encounter challenges during the outlining phase. Here's how to troubleshoot common issues:
Shaky Lines: If you struggle with shaky lines, try resting your hand on the drawing surface or using a stabilizing feature available in some digital drawing programs.
Inconsistent Line Quality: Achieving consistent line quality can be challenging. Practice drawing lines of varying lengths and thicknesses to build control and confidence.
Overworking the Outline: Avoid overworking your outline, as too many lines can clutter your drawing. Focus on the essential details, allowing negative space to contribute to the overall composition.
XII. Showcasing Your Outlined Masterpiece:
Once your drawing is outlined to perfection, consider showcasing it in various ways:
Photography: Capture your artwork using a high-quality camera or smartphone. Pay attention to lighting to ensure the details of your outline are well-captured.
Scanning: If working with traditional media, consider scanning your drawing for digital use. This allows for easy sharing on social media platforms or incorporating your artwork into digital projects.
Framing: Frame your drawings for display in your home or at art exhibitions. A well-chosen frame can enhance the overall presentation of your outlined masterpiece.
Conclusion:
Mastering the art of outlining drawings is a fulfilling journey that enhances your artistic capabilities. By understanding the basics, selecting the right tools, and following a systematic process, you can create outlines that breathe life into your creations. Embrace the joy of experimentation, learn from your experiences, and watch as your drawing skills evolve and flourish.
0 notes
Text
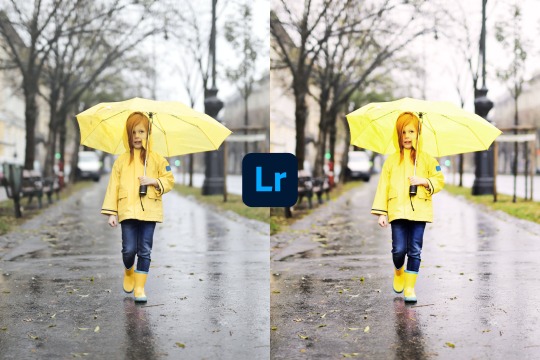
How to Fix an Overexposed Photo in Lightroom
Capturing the perfect photograph can be a challenging task, especially when dealing with varying lighting conditions. One common issue that many photographers face is overexposure, where the image appears too bright, and details are lost. Fortunately, Adobe Lightroom provides powerful tools to salvage overexposed photos and bring them back to life. In this comprehensive guide, we will explore step-by-step techniques on how to fix an overexposed photo in Lightroom, ensuring your images look stunning every time.
Read More
Understanding Overexposure:
Before diving into the editing process, it's essential to understand what overexposure is and how it affects your photos. Overexposure occurs when too much light enters the camera, resulting in a loss of detail in the highlights. This often leads to washed-out colors, blown-out highlights, and a lack of contrast. Fortunately, Lightroom's advanced editing capabilities can help you rescue these photos and achieve the desired balance.
Step 1: Importing the Overexposed Photo into Lightroom:
The first step in the editing process is importing your overexposed photo into Lightroom. Open the Lightroom application, select the Library module, and import your image into the catalog. Once imported, navigate to the Develop module to begin the editing process.
Step 2: Adjusting Exposure and Highlights:
The primary focus when fixing an overexposed photo is to bring down the overall exposure and recover lost details in the highlights. Start by adjusting the Exposure slider to reduce the overall brightness. Additionally, use the Highlights slider to recover details in the overexposed areas, bringing back texture and contrast.
Step 3: Tweaking the Whites and Blacks:
Fine-tune your image by adjusting the Whites and Blacks sliders. The Whites slider controls the brightest parts of the image, while the Blacks slider adjusts the darkest parts. By finding the right balance, you can enhance contrast and ensure a well-balanced exposure.
Step 4: Utilizing the Tone Curve:
The Tone Curve in Lightroom allows for precise control over tonal adjustments. Create an anchor point in the highlights region of the curve and lower it slightly to recover additional detail in bright areas. Experiment with the curve to achieve the desired balance between highlights and shadows.
Step 5: Correcting Color Balance:
Overexposed images often suffer from color shifts. Use the Temperature and Tint sliders to correct the white balance and restore natural color tones. Pay close attention to the image's overall warmth and adjust accordingly for a more realistic appearance.
Step 6: Fine-Tuning with Graduated Filters and Radial Filters:
For more localized adjustments, utilize Graduated Filters and Radial Filters. These tools allow you to target specific areas of the image, making it easier to correct uneven lighting. Graduated Filters are ideal for adjusting skies, while Radial Filters can enhance the exposure of a central subject.
Learn More: Image Color Correction Services
Step 7: Sharpening and Noise Reduction:
As you recover details in the overexposed areas, it's essential to address any potential loss of sharpness. Apply sharpening selectively using the Sharpening panel and consider employing Noise Reduction to combat any digital noise introduced during the editing process.
Step 8: Final Touches and Exporting:
Complete your editing process by making any final adjustments, such as adding vignettes or fine-tuning the overall tone. Once satisfied with the result, export your edited photo in your preferred format, ready for sharing or printing.
Step 9: Embracing Creative Editing Techniques:
While the primary goal is to correct overexposure, Lightroom also provides an opportunity to unleash your creativity. Experiment with creative editing techniques, such as adding a touch of vignetting, applying split toning, or experimenting with different color grading options. These enhancements can not only fix overexposure but also add a unique flair to your photos.
Step 10: Utilizing the Dehaze Tool:
If your overexposed photo has a hazy or washed-out appearance, the Dehaze tool in Lightroom can be a game-changer. Located in the Effects panel, the Dehaze slider helps cut through atmospheric haze and restore clarity to your image. Be cautious not to overuse this tool, as it can introduce artifacts if pushed to the extreme.
Step 11: Monitoring Histogram and Clipping Indicators:
Throughout the editing process, keep a close eye on the histogram and clipping indicators in Lightroom. The histogram provides a visual representation of your image's tonal range, helping you identify and address any areas that may be underexposed or overexposed. Clipping indicators, visible when you press the 'J' key, highlight clipped shadows or highlights, aiding in precise adjustments.
Step 12: Creating Virtual Copies for Comparison:
To evaluate different editing approaches or preserve multiple versions of your image, consider creating virtual copies in Lightroom. Virtual copies allow you to experiment with various edits without affecting the original image. This feature is particularly helpful when exploring alternative exposure adjustments or creative enhancements.
Step 13: Learning from Presets and Profiles:
Lightroom offers a range of presets and profiles that can serve as starting points for your editing process. While these can be useful for quick adjustments, it's essential to tailor them to suit the specific needs of your overexposed photo. Experiment with different presets and tweak their settings to achieve the desired look while maintaining control over the editing process.
Conclusion:
Fixing an overexposed photo in Lightroom requires a combination of exposure adjustments, color correction, and localized adjustments. By following the steps outlined in this guide, you can rescue overexposed images and transform them into visually appealing works of art. Remember to experiment with the various tools Lightroom offers and develop your unique editing style to consistently produce stunning photographs. Mastering the art of photo editing is a continuous journey, and with Lightroom as your ally, you have the tools to bring your creative vision to life.
0 notes
Text
How to Take Picture of Your Fingerprint
In an era dominated by digital technology, the importance of biometric security has soared. Fingerprint recognition, in particular, has become a ubiquitous method for identity verification. Have you ever wondered how those intricate ridges and loops are captured in high-resolution images for security systems? In this comprehensive guide, we will delve into the fascinating world of fingerprint photography, providing step-by-step instructions on how to capture detailed images of your fingerprints.
Read More
I. Understanding the Basics of Fingerprint Photography
Before delving into the process of capturing fingerprint images, it's crucial to understand the fundamentals of fingerprint identification. Each fingerprint is unique, characterized by ridges, valleys, and minutiae points. The first step in fingerprint photography is choosing the right equipment.
Equipment Needed

To capture high-quality fingerprint images, you'll need the following equipment:
a. Camera: Use a digital camera with a high-resolution sensor. A camera with at least 10 megapixels is recommended.
b. Macro Lens: Invest in a macro lens to capture fine details. Ideal focal lengths are 60mm to 100mm.
c. Tripod: A sturdy tripod is essential to prevent camera shake and ensure sharp images.
d. Lighting: Proper lighting is crucial for capturing detailed fingerprints. Use diffused light to minimize shadows.
II. Setting Up Your Photography Environment
Creating the right environment is essential for successful fingerprint photography. Follow these steps to set up your workspace:
Choose a Controlled Environment Select a well-lit, controlled environment free from distractions. Ensure that the lighting is consistent to avoid shadows that may interfere with the image quality.
Positioning the Subject Place your hand or the fingerprint surface on a stable platform, ensuring it is parallel to the camera lens. This will help capture the fingerprint details accurately.
Adjusting Camera Settings For full control over exposure settings, set your camera to manual mode. Adjust the aperture to a small f-stop (e.g., f/8 to f/16) for a wider depth of field, ensuring all fingerprint details are in focus.
III. Capturing the Fingerprint Image
Now that your equipment is set up and your environment is ready, it's time to capture the fingerprint image:
Focus on the Fingerprint Use the macro lens to focus on the fingerprint's ridges and valleys. Take test shots and adjust the focus until you achieve sharp and detailed images.
Experiment with Lighting Experiment with different lighting angles and intensities to find the optimal setup. Avoid direct, harsh lighting, as it can create unwanted reflections and shadows.
Multiple Angles Capture the fingerprint from multiple angles to ensure a comprehensive record. Rotate the subject or reposition the camera to capture different portions of the fingerprint.
Learn More: Photo Retouching Service
IV. Post-Processing for Optimal Results
After capturing the images, post-processing can enhance the final results. Follow these steps to refine your fingerprint photographs:
Image Editing Software Use image editing software like Adobe Photoshop or GIMP to adjust brightness, contrast, and sharpness. Clean up any unwanted artifacts or distractions.
Contrast Enhancement Boost the contrast to make the ridges and minutiae points more pronounced. This step is crucial for creating a detailed and recognizable fingerprint image.
Cropping and Scaling Crop the image to focus on the fingerprint region, and scale it appropriately for analysis. Ensure the final image meets the resolution requirements for biometric applications.
V. Ethical Considerations
While capturing fingerprint images can be an intriguing process, it's essential to approach this practice with ethics in mind:
Respect Privacy Always obtain explicit consent before capturing someone's fingerprint. Be transparent about the purpose and ensure that individuals are comfortable with the process.
Secure Storage If you are capturing fingerprints for security purposes, ensure secure storage and protection against unauthorized access. Treat biometric data with the same level of sensitivity as other personal information.
VI. Beyond the Basics: Advanced Techniques
For those looking to take their fingerprint photography skills to the next level, consider exploring advanced techniques:
Multispectral Imaging: Utilize multispectral imaging to capture fingerprints beyond the visible spectrum. This technique can reveal additional details not visible to the naked eye, enhancing the overall accuracy of fingerprint identification.
Reflective UV Photography: Integrate ultraviolet (UV) light into your setup to capture reflective details on the skin's surface. This can be particularly useful for forensic applications, where even subtle distinctions in the skin's texture may play a crucial role.
3D Imaging: Experiment with 3D imaging technologies to create a more comprehensive representation of fingerprints. This can be achieved through structured light scanning or other 3D imaging methods, providing a more robust dataset for analysis.
VII. Applications of Fingerprint Photography
Understanding how to capture fingerprint images opens the door to various applications:
Forensic Science: Fingerprint photography plays a pivotal role in forensic investigations. Detailed images can assist forensic experts in analyzing and matching fingerprints found at crime scenes.
Biometric Security: In the realm of biometrics, high-quality fingerprint images are essential for creating secure and reliable identification systems. Whether for access control or device authentication, accurate fingerprint data is paramount.
Research and Development: Researchers may utilize fingerprint photography for studying the growth and development of ridges and patterns over time, contributing to a deeper understanding of dermatoglyphics.
Conclusion
In conclusion, mastering the art of fingerprint photography is a journey that combines technical skills, ethical considerations, and a keen eye for detail. Whether you're exploring this field out of personal curiosity or pursuing it for professional reasons, the knowledge gained from capturing fingerprint images can have far-reaching implications in forensic science, biometrics, and research. As technology continues to evolve, so too will the techniques and applications of fingerprint photography, making it an exciting and dynamic field to explore. Remember, with great power comes great responsibility, so always approach fingerprint photography with respect for privacy and ethical considerations at the forefront of your practice.
0 notes
Text
How to Remove Shadow From Picture in Lightroom
Capturing the perfect shot is an art, but sometimes unwanted shadows can make their way into your photographs, diminishing the overall quality. Fortunately, with the right tools and techniques, you can easily enhance your images and remove those pesky shadows. In this guide, we'll explore how to effectively remove shadows from pictures using Adobe Lightroom, a powerful photo editing tool that has become a staple for photographers worldwide.
Read More
Understanding Shadows in Photography:
Before delving into the process of removing shadows, it's crucial to understand the role shadows play in photography. Shadows can add depth, drama, and contrast to your images, but when they become overpowering or distracting, it's time to address them during the post-processing stage.
Step 1: Importing Your Image into Lightroom:

The first step in any photo editing process is importing your image into Lightroom. Open the software and navigate to the "Library" module. Click on "Import" and select the image you want to work on. Once imported, switch to the "Develop" module to begin the editing process.
Step 2: Adjusting Basic Exposure Settings:
Begin by adjusting the basic exposure settings to set a solid foundation for your edits. In the "Basic" panel, you'll find sliders for exposure, contrast, highlights, shadows, whites, and blacks. To reduce shadows, drag the "Shadows" slider to the left. This will help in recovering details from the darker areas of your image.
Step 3: Fine-Tuning with the Tone Curve:
The Tone Curve is a powerful tool for refining the contrast and tonality of your image. Click on the Tone Curve panel, and you'll see a graph representing the tonal range from shadows to highlights. To specifically target shadows, create a point on the left side of the curve and lift it slightly. This will brighten the shadows without affecting the overall contrast.
Step 4: Utilizing the Graduated Filter:
The Graduated Filter tool in Lightroom allows you to make selective adjustments to different parts of your image. To remove shadows from a specific area, select the Graduated Filter tool and drag it over the shadowed region. Adjust the sliders for exposure, highlights, and shadows to balance the lighting in that particular area.
Step 5: Employing the Adjustment Brush:
For more precise control, use the Adjustment Brush to paint over the shadowed areas. Select the Adjustment Brush, adjust the size and feather settings, and start brushing over the shadows. Fine-tune the exposure, highlights, and shadows sliders until you achieve the desired result. This method is particularly effective for intricate details and localized adjustments.
Step 6: Enhancing with the Radial Filter:
The Radial Filter is another valuable tool for isolating and modifying specific areas of your image. Create a circular mask around the subject or the shadowed region, and then adjust the exposure, highlights, and shadows to improve the lighting in that area. This technique is excellent for portraits and landscapes where certain elements need focused attention.
Learn More: Image Shadow Making Services
Step 7: Refining with the HSL/Color Panel:
In some cases, shadows may appear discolored or have unwanted tints. The HSL/Color panel allows you to fine-tune the hue, saturation, and luminance of specific colors. Navigate to the panel, select the targeted color range, and adjust the sliders to correct any color issues within the shadows.
Step 8: Harnessing the Power of Dehaze:
For outdoor shots where shadows might be intensified by atmospheric conditions, the Dehaze tool can be a game-changer. Located in the "Basic" panel, the Dehaze slider can cut through atmospheric interference, reducing the impact of shadows and enhancing overall clarity. Experiment with this tool to find the right balance for your image.
Step 9: Perfecting Highlights and Shadows with Split Toning:
Split toning allows you to add different tones to the highlights and shadows of your image. Navigate to the "Split Toning" panel, and experiment with the sliders to add warmth or coolness to your shadows. This subtle adjustment can bring harmony to your photo and ensure that the removal of shadows doesn't compromise the overall mood.
Step 10: Checking Your Progress with Before-and-After Views:
As you make adjustments, it's essential to regularly check your progress. Lightroom provides a convenient way to compare the original and edited versions of your image. Simply press the backslash key "" to toggle between the before-and-after views. This feature ensures you don't go overboard with your edits and helps maintain a natural look.
Step 11: Fine-Tuning Global Settings:
After addressing specific shadowed areas, revisit the global settings in the "Basic" panel to ensure that your overall image remains well-balanced. Pay attention to exposure, contrast, and white balance to create a cohesive and visually pleasing result. Striking the right balance between global and localized adjustments is key to achieving a professional finish.
Step 12: Exporting Your Enhanced Image:
Once you are satisfied with the removal of shadows and overall enhancements, it's time to export your image. Click on the "File" menu, select "Export," and choose your preferred settings for file format, quality, and destination. Saving your edited image separately ensures that your original remains untouched for future reference.
Conclusion:
Removing shadows from pictures in Lightroom is a nuanced process that involves a combination of global and localized adjustments. By familiarizing yourself with the various tools at your disposal, such as the Graduated Filter, Adjustment Brush, and Radial Filter, you can tackle shadows in specific areas with precision. Additionally, global adjustments using exposure, contrast, and tone curve settings contribute to an overall well-balanced image.
0 notes
Text
How to Save a Photoshop File as A Vector
Adobe Photoshop is undoubtedly one of the most powerful and versatile graphic design software tools available today. While it excels in raster-based editing, it's not typically thought of as a vector graphics editor like Adobe Illustrator. However, there are instances where you might want to save a Photoshop file as a vector for various reasons, such as scaling without loss of quality or exporting artwork for print. In this comprehensive guide, we'll explore the techniques and best practices for saving a Photoshop file as a vector.
Read More
Understanding Raster vs. Vector Graphics
Before we dive into the process of saving a Photoshop file as a vector, it's essential to understand the fundamental difference between raster and vector graphics.
Raster Graphics: Raster graphics, also known as bitmap graphics, are composed of pixels. Each pixel contains color information, and when you zoom in on a raster image, you'll notice it becomes pixelated. Raster images are suitable for photographs and images with complex gradients.
Vector Graphics: Vector graphics, on the other hand, are created using mathematical formulas. They are composed of paths, lines, and shapes. Vector designs are goal-free, and that implies you can increase them or down without losing quality. They are perfect for logos, illustrations, and designs that require scalability.
Preparing Your Photoshop File
Before you can save your Photoshop file as a vector, you need to ensure it is well-prepared. Follow these steps:

Create Vector Shapes: Use Photoshop's vector tools (e.g., Pen Tool) to create vector shapes in your design. These vector shapes can be edited and scaled without quality loss.
Organize Layers: Keep your layers well-organized. Each layer should contain distinct vector elements to maintain flexibility during the conversion process.
Use Shape Layers: Whenever possible, use shape layers instead of pixel layers. Shape layers are vector-based and are ideal for maintaining quality.
Simplify Paths: If you've used complex paths or effects, consider simplifying them. Overly complex paths can lead to issues during the vectorization process.
Converting to a Vector
Once your Photoshop file is prepared, it's time to convert it into a vector format. There are a few methods to achieve this:
Export as SVG (Scalable Vector Graphics): Photoshop allows you to export your file as an SVG, which is a widely accepted vector format. To do this, go to "File" > "Export" > "Export As." In the format dropdown, choose "SVG" and customize the settings as needed.
Raster to Vector Software: If your design is more complex or includes a lot of raster elements, you can use specialized software like Adobe Illustrator's Image Trace feature, CorelDRAW, or dedicated raster-to-vector conversion tools. These software applications can automatically convert your raster image into vector graphics.
Pen Tool: For a hands-on approach, you can use the Pen Tool in Adobe Illustrator to manually trace your Photoshop design. Create new vector paths by following the outlines of your existing raster design.
Learn More: Image Color Correction Services
Exporting from Illustrator
If you choose to use Adobe Illustrator for vectorization, follow these steps to save your design as a vector:
Open the Photoshop file in Illustrator: Import the Photoshop file into Illustrator. Ensure that the file is in CMYK color mode if it's intended for print or RGB for web use.
Manually Trace: If you've used the Pen Tool to create vector shapes in Photoshop, you may only need to adjust the paths in Illustrator. If not, use the Pen Tool to manually trace the raster elements.
Group and Organize: Organize your vectors into groups and layers for easier editing and future modifications.
Export as Vector Format: To save your file as a vector format, go to "File" > "Save As" and choose a vector format such as AI (Adobe Illustrator), EPS (Encapsulated PostScript), or PDF (Portable Document Format). These formats are widely compatible and retain vector properties.
Best Practices for Vectorization
To ensure the best results when saving your Photoshop file as a vector, consider the following best practices:
Keep It Simple: Simple designs convert more effectively to vectors. Complex textures and shading may require more extensive manual work.
Maintain Consistency: Use consistent line weights and colors throughout your design.
Check for Errors: After converting, zoom in to check for any irregularities or errors in your vector paths. Manually adjust them if necessary.
Consider Text: If your design includes text, convert it to vector paths to maintain font consistency.
Applications and Use Cases
Saving a Photoshop file as a vector can be advantageous for various applications:
Logo Design: Vector logos are essential for brand consistency, as they can be scaled to any size without loss of quality.
Illustrations: Create detailed, scalable illustrations for various media, such as books, websites, and marketing materials.
Print Projects: Prepare vector graphics for high-resolution printing, such as brochures, posters, and banners.
Web Design: Use vector graphics for icons, buttons, and other elements on your website.
Conclusion
While Adobe Photoshop is primarily a raster-based image editing software, it's still possible to save your files as vectors using the methods discussed in this guide. By carefully preparing your Photoshop file, converting it into a vector format using Adobe Illustrator or other tools, and following best practices, you can create high-quality vector graphics for a wide range of applications. Whether you're designing a logo, creating illustrations, or preparing artwork for print or the web, mastering the art of saving Photoshop files as vectors is a valuable skill for any designer.
0 notes
Text
Real Estate Photo Editing

A picture is worth more than a thousand words but in the world of real estate—it's worth thousands of dollars. Real estate photo editing has become an indispensable tool for real estate agents, photographers, and property sellers, as it can significantly impact the perception and value of a property. With prospective buyers increasingly turning to online listings, the power of visually appealing real estate images cannot be underestimated.
In this article, we will explore the world of real estate photo editing and how it can help you take your property listings to the next level. Whether you're a real estate agent, a photographer, or an individual selling your property, understanding the basics of photo editing can make a substantial difference in how your listings are perceived, leading to quicker sales and potentially higher prices.
Read More
The Importance of Real Estate Photo Editing
The real estate market is saturated and highly competitive, and first impression is very important. Most potential buyers start their search online, browsing through countless property listings. If your images fail to capture their attention, you risk losing potential clients to your competitors.
Real estate photo editing can help your listings stand out by improving image quality, enhancing property features, and creating a more inviting atmosphere. It's a crucial aspect of digital marketing in the real estate industry, serving to highlight the property's best attributes while minimizing its shortcomings. Here's why real estate photo editing is so essential:
Highlighting Key Features: Editing can emphasize the most attractive aspects of a property, such as a spacious living room, a stunning view, or a beautifully landscaped garden.
Correcting Imperfections: Photo editing can help remove distracting elements, correct lighting issues, and even digitally stage empty rooms to make them more appealing.
Creating a Consistent Look: Maintaining a consistent and professional appearance in all your listings can help establish trust with potential buyers and strengthen your brand.
Attracting More Buyers: High-quality, professionally edited photos can attract more potential buyers, increasing your chances of making a sale.
Common Editing Techniques for Real Estate Photos
Now that we've established the importance of real estate photo editing, let's delve into some of the most common techniques used in this field.
Color Correction: Balancing and enhancing the colors in an image is crucial. It can make a room look more inviting and accurately reflect the property's atmosphere.
Exposure Adjustment: Correcting exposure issues, such as overexposed windows or underexposed rooms, can help maintain the detail in the image.
Lens Correction: Distortion caused by wide-angle lenses can be corrected to ensure the rooms look natural and proportionate.
Cloning and Retouching: Unwanted objects or imperfections can be removed from the image to present the property in its best light.
HDR Photography: High Dynamic Range (HDR) photography combines multiple exposures to capture a broader range of light and shadow, resulting in more detailed and vibrant images.
Virtual Staging: Empty rooms can be virtually staged to help potential buyers visualize the space with furniture and decor.
Sky Replacement: Replacing a dull or overcast sky with a clear blue one can dramatically improve the appeal of exterior shots.
Panorama Stitching: Stitching multiple photos together to create a panoramic view can showcase a property's surroundings effectively.
Tools for Real Estate Photo Editing
To excel in real estate photo editing, you'll need the right tools. Here are some popular software options:
Adobe Photoshop: A versatile tool for advanced photo editing, including color correction, retouching, and more.
Adobe Lightroom: Ideal for enhancing colors, adjusting exposure, and maintaining a consistent look across multiple photos.
Photomatix Pro: A go-to choice for HDR photography.
Snapseed: A user-friendly mobile app for quick edits on the go.
Canva: Great for adding text, creating flyers, or social media posts to promote your listings.
Virtual Staging Services: Consider outsourcing virtual staging to professionals who specialize in this area.
Learn More:
Image Color Correction Services
Photo Retouching Service
Real Estate Photo Editing Best Practices
While photo editing can work wonders, there are some best practices to keep in mind:
Stay Honest: Enhancing images is one thing, but avoid over-editing that misrepresents the property. Buyers should not be disappointed when they see the real thing.
Consistency: Maintain a consistent editing style across all your listings to build a recognizable brand.
Professional Help: If you lack the skills or time, consider hiring a professional photo editor or a virtual staging service.
Before and After Photos: Consider providing before and after photos to demonstrate the improvements made through editing.
High-Resolution Images: Ensure that your images are of high quality to begin with, as editing can only do so much with low-resolution photos.
Conclusion
Real estate photo editing is an indispensable tool for anyone involved in property sales. It's the key to making your listings shine in an online marketplace flooded with competition. Whether you're a real estate agent, a photographer, or a homeowner looking to sell, mastering the art of photo editing can help you capture the hearts and wallets of potential buyers.
Investing in the right tools and techniques and adhering to best practices will pay off in terms of quicker sales and potentially higher prices. Remember, when it comes to real estate, a well-edited picture truly is worth more than a thousand words.
0 notes
Text
How to Repair a Neck Joint in Photoshop
When it comes to photo editing, Photoshop is the undisputed king of the digital realm. Whether you're a professional photographer, an amateur, or just someone who loves taking pictures, there will come a time when you need to enhance or fix an image. One common issue in portrait photography is the dreaded "neck joint" problem, which occurs when a subject's neck is not properly aligned in a composite image. In this article, we'll guide you through the process of repairing a neck joint in Photoshop step by step.
Read More
What is a Neck Joint and Why Does it Occur?
A neck joint, also known as a ghost mannequin effect or an invisible mannequin effect, typically happens when photographing clothing or garments on a mannequin. The goal is to make the clothing look as if it is being worn by an invisible person, showcasing its fit and design without any distractions. To achieve this effect, a garment is usually photographed on a mannequin, and later, the mannequin is removed in post-processing, leaving only the clothing.
However, in some cases, neck joints can become visible in the final image due to errors in alignment or lighting. The result is a disjointed or incomplete appearance, which doesn't look professional and can detract from the overall quality of the image.
Tools You'll Need
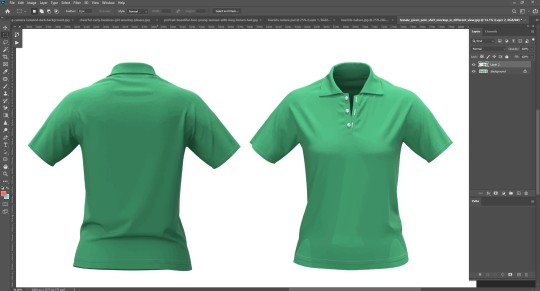
Before we begin, make sure you have Adobe Photoshop installed on your computer. Photoshop is a powerful image editing software that will allow you to effectively repair neck joints in your photos.
Step 1: Open Your Image in Photoshop
Launch Photoshop and open the image that requires a neck joint repair. Go to File > Open, and select your image from your file directory.
Step 2: Duplicate Your Image
It's essential to work on a duplicate layer of your image to preserve the original. In the "Layers" panel, right-click on the background layer and choose "Duplicate Layer." This will create a copy of your image on a new layer.
Step 3: Select the Pen Tool
To create precise selections for your neck joint repair, use the Pen Tool (P). This tool allows you to draw paths that can be used to make accurate selections.
Step 4: Trace Around the Garment
Zoom in on the area around the neck where the neck joint needs to be repaired. Begin tracing around the garment, excluding the neck area. Click to create anchor points and use curves as needed to follow the contour of the clothing.
Step 5: Make a Selection
After you've traced the entire garment, right-click inside the path and select "Make Selection." You can leave the feather radius at 0 pixels for sharp selections.
Step 6: Copy and Paste
Now, press Ctrl+C (or Command+C on Mac) to copy the selected area, and then Ctrl+V (or Command+V on Mac) to paste it. This will create a new layer with only the selected garment.
Step 7: Align and Position
Using the Move Tool (V), position the pasted garment layer over the original layer in such a way that it aligns perfectly. Ensure that the neck area matches seamlessly, eliminating any visible neck joint.
Learn More: Neck Joint Services
Step 8: Mask the Layers
In the Layers panel, select the top layer (the one you pasted) and click the "Add Layer Mask" button at the bottom. This will allow you to hide or reveal parts of this layer as needed.
Step 9: Refine the Mask
Select the Layer Mask and use a soft brush to refine the mask. Paint over areas where the two layers meet to create a smooth and seamless transition. The goal is to blend the neck joint so it's no longer visible.
Step 10: Check for Imperfections
Zoom in and carefully examine the repaired neck area. Look for any imperfections, such as color discrepancies or misalignments. Use the Clone Stamp Tool or the Healing Brush Tool to correct these issues.
Step 11: Add Finishing Touches
Once the neck joint is seamlessly repaired, you can make additional adjustments to the image, such as color correction, retouching, or enhancing the overall appearance to make it more visually appealing.
Step 12: Save Your Image
Once you're satisfied with the result, go to File > Save As and save your image in the desired format (JPEG, PNG, etc.).
Conclusion
Repairing a neck joint in Photoshop may seem like a daunting task, but with the right tools and a step-by-step approach, it becomes a manageable process. Adobe Photoshop provides the necessary features and capabilities to achieve a professional, seamless neck joint repair, allowing your clothing or garment images to look flawless and captivating.
Remember, practice makes perfect. The more you work with Photoshop and hone your skills, the better you'll become at addressing various image editing challenges. If you don't get desired output don't be discouraged. Keep refining your technique, and over time, you'll be able to create stunning images that captivate your audience and showcase your products in the best possible light.
0 notes
Text
How to Fix Picture Frame Stand - In 3 Step
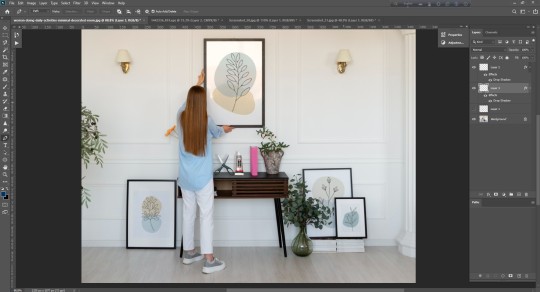
Picture frames add a touch of personality and warmth to our homes, showcasing cherished memories and beautiful artwork. However, even the most carefully positioned frames can sometimes fall victim to a common issue: a wobbly or broken stand. Don't worry; you don't need to rush out to buy a new frame or hire a professional to fix it. In this article, we'll guide you through the process of fixing a picture frame stand in just three simple steps. Whether you're dealing with a loose stand or a completely broken one, we've got you covered.
Read More
Step 1: Gather Your Materials
Before you begin any DIY project, it's crucial to ensure you have all the necessary materials at your disposal. For this picture frame stand repair, you'll need the following items:
Picture Frame Stand: The first thing you'll need is the picture frame stand itself. Make sure you've removed the picture frame from it if it's still attached.
Screwdriver: A Phillips or flat-head screwdriver, depending on the type of screws on your stand, will be required.
Wood Glue: You'll need wood glue to reattach or reinforce any broken parts.
Clamps: Clamps will help you secure the parts together while the glue dries.
Sandpaper: If your stand has any rough or splintered areas, sandpaper can help smooth them out.
Optional: Paint or wood stain if you want to touch up the appearance of your repaired stand.
Once you have all these materials, you're ready to move on to step two.
Step 2: Disassemble and Assess the Damage
Now that you have your materials ready, it's time to disassemble the picture frame stand and assess the damage. Here's a step-by-step guide to help you with this process:
Remove the Picture Frame: If your picture frame is still attached to the stand, carefully remove it to get a clear view of the stand's condition.
Examine the Stand: Thoroughly inspect the stand for any visible damage. Look for loose or missing screws, cracks, or breaks in the wood.
Disassemble the Stand: If necessary, use your screwdriver to remove any screws that are holding the stand together. Be sure to keep track of these screws, so you can use them later.
Assess the Damage: Once the stand is disassembled, assess the extent of the damage. Are there broken pieces that need to be glued back together, or is it a matter of tightening screws? Make a note of the issues you've identified.
Clean and Sand: If your stand has any rough edges or splintered areas, use sandpaper to smooth them out. This step will help ensure a cleaner and more secure repair.
At this point, you should have a clear idea of what needs to be done to fix your picture frame stand. Now, let's move on to step three, where we'll tackle the repairs.
Learn More: Product Photo Editing Service
Step 3: Make the Necessary Repairs
The final step is to make the necessary repairs to your picture frame stand. Depending on the damage you identified during the assessment, you may need to follow one or more of the following repair methods:
Tightening Screws:
If your stand is wobbly due to loose screws, use your screwdriver to tighten them. Make sure to check all the screws, including those holding the stand together and any that secure the frame in place.
2. Gluing Broken Parts:
If you have identified broken or cracked pieces in the stand, it's time to apply wood glue. Follow these steps:
a. Apply Wood Glue: Generously apply wood glue to the broken surfaces that need to be rejoined.
b. Reassemble: Carefully fit the broken pieces together, ensuring a snug fit.
c. Secure with Clamps: Use clamps to hold the pieces together firmly while the glue dries. Follow the recommended drying time on the glue bottle.
d. Remove Excess Glue: After the glue has dried, remove any excess glue using a damp cloth or sandpaper.
3. Reinforcing Weak Joints:
If your stand has weak joints that seem prone to breaking, you can reinforce them with extra wood or metal brackets. Simply attach these brackets using screws or nails for added stability.
4. Painting or Staining:
Once your repairs are complete and everything has dried, you may choose to paint or stain the stand to match its original appearance or give it a fresh look.
Conclusion
Fixing a picture frame stand doesn't have to be a daunting task. With the right materials and a systematic approach, you can have your stand looking as good as new in just three simple steps. Whether it's a loose screw or a broken piece, this DIY repair allows you to preserve the memories and artistry that your picture frames hold. So, the next time you encounter a wobbly frame stand, don't rush to replace it. Instead, gather your tools and follow these easy steps to give your frame the support it deserves.
0 notes
Text
How to Zoom in on a Picture and Make it Clear
In today's digital age, we capture and share countless images every day, from special moments with loved ones to stunning landscapes and everything in between. However, there are times when we want to take a closer look at a particular detail within a photo. Zooming in on a picture can reveal hidden details and enhance the overall viewing experience. But how can you do it effectively without sacrificing image quality? In this article, we'll explore various methods to zoom in on a picture and make it clear.
Read More
Understanding Image Resolution
Before we delve into the techniques for zooming in on images, it's essential to understand the concept of image resolution. Image resolution refers to the amount of detail an image holds and is typically measured in pixels per inch (PPI) or dots per inch (DPI). Higher resolution images contain more information and detail, making them suitable for zooming in without a significant loss of quality.
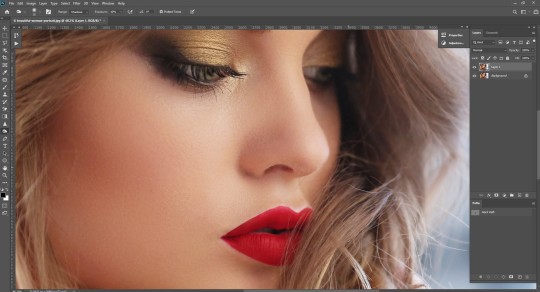
When you zoom in on a low-resolution image, you'll notice pixelation, which appears as blocky or blurry artifacts. This is because the image lacks the necessary detail to maintain clarity when zoomed in. To zoom in effectively while preserving image quality, it's best to start with a high-resolution image.
Method 1: Using Software Editing Tools
One of the most common methods for zooming in on a picture and making it clear is by using software editing tools. Here's how to do it:
1. Choose a Photo Editing Software
Start by selecting a photo editing software. Adobe Photoshop, GIMP (GNU Image Manipulation Program), and Pixlr are popular choices. You can use either a desktop application or a web-based tool, depending on your preference and requirements.
2. Open Your Image
Launch the selected software and open the image you want to zoom in on.
3. Select the Zoom Tool
Look for the zoom tool, usually represented by a magnifying glass icon. Click on it to enact the zoom device.
4. Zoom In
Click on the region of the picture you need to focus in on. You can either click multiple times to zoom in incrementally or click and drag to create a selection box for a specific area.
5. Adjust Image Size
To make the zoomed-in image clear, you'll need to adjust its size. Go to the "Image" or "Resize" menu and increase the dimensions while maintaining the same resolution. Make certain to check the "Keep up with Angle Proportion" choice to stay away from bending.
6. Apply Sharpness Filters
To enhance clarity further, apply sharpness filters or adjustments. Look for options like "Sharpen," "Unsharp Mask," or "Smart Sharpen" in the software's menu and experiment with their settings until you achieve the desired result.
7. Save the Edited Image
Once you're satisfied with the zoomed-in image's clarity, save it with a different file name to preserve the original.
Method 2: Using Online Image Enlargement Tools
If you're looking for a quick and hassle-free way to zoom in on an image without installing any software, online image enlargement tools can be a great option. Here's how to use them:
1. Choose an Online Tool
There are several online tools designed specifically for image enlargement and enhancement. Websites like "Waifu2x," "Let's Enhance," and "Bigjpg" are popular choices. Visit one of these sites in your internet browser.
2. Upload Your Image
On the chosen website, you'll typically find an option to upload your image. Click on it, and select the image you want to zoom in on from your computer.
3. Configure Settings
Most online image enlargement tools provide options to adjust settings like the level of zoom, output resolution, and enhancement filters. Explore different avenues regarding these settings to accomplish the best outcomes.
4. Start the Process
After configuring the settings, initiate the image enlargement process. The online tool will analyze your image and generate a zoomed-in version based on your preferences.
5. Download the Enlarged Image
Once the process is complete, the tool will provide a download link for your zoomed-in image. Download it to your PC for additional utilization.
Learn More: Headshot Retouching Services
Method 3: Using Specialized Image Upscaling Software
For those who frequently work with image zooming and require the best possible results, specialized image upscaling software can be a valuable asset. Software like Topaz Gigapixel AI and AI Image Enlarger utilizes artificial intelligence to upscale images while preserving clarity. Here's how to use such software:
1. Install the Software
Start by installing the chosen image upscaling software on your computer. Adhere to the establishment directions given by the product designer.
2. Open Your Image
Launch the software and open the image you want to zoom in on.
3. Configure Settings
Most specialized image upscaling software allows you to adjust various settings, including the level of zoom, output resolution, and enhancement options. Adjust these settings as per your inclinations.
4. Start the Upscaling Process
Initiate the upscaling process by clicking on the relevant button or menu option within the software. The AI algorithms will analyze your image and generate a high-resolution, zoomed-in version.
5. Save the Upscaled Image
Once the process is complete, review the results and save the upscaled image with a different file name to distinguish it from the original.
Method 4: Using Smartphone Apps
If you prefer a mobile solution for zooming in on images, many smartphone apps are designed to enhance image clarity and zoom capabilities. Here's how to do it using a smartphone app:
1. Install a Photo Editing App
Visit your device's app store and search for a photo editing app that offers zoom and enhancement features. Famous choices incorporate Adobe Lightroom, Snapseed, and VSCO.
2. Open Your Image
Launch the chosen photo editing app and open the image you want to zoom in on.
3. Zoom In and Enhance
Within the app, use the zoom tool or pinch-to-zoom gestures to get closer to the area you want to focus on. Some apps may also offer enhancement filters or adjustments for sharpening and clarity. Experiment with these options to improve image quality.
4. Save the Edited Image
Once you're satisfied with the results, save the edited image to your device's photo library.
Conclusion
Zooming in on a picture and making it clear is a valuable skill in the world of digital photography and image editing. Whether you choose to use desktop software, online tools, specialized upscaling software, or smartphone apps, the key is to start with a high-resolution image and carefully adjust settings to preserve image quality. With the right techniques and tools at your disposal, you can uncover hidden details and enhance your photos, allowing you to appreciate the beauty and intricacies of your images like never before. So go ahead and zoom in – the world of details awaits your exploration!
0 notes
Text
How Can I Record My Voice Over a Picture
In today's digital age, multimedia content has taken center stage in the world of communication and storytelling. Whether you're a content creator, educator, marketer, or simply someone looking to add a personal touch to your photos and videos, the ability to record your voice over a picture can be a powerful tool. This technique allows you to convey emotions, explain concepts, or share stories in a more engaging and personalized way. In this comprehensive guide, we will explore various methods and tools to help you record your voice over a picture effectively.
Read More
Why Record Your Voice Over a Picture?
Before we dive into the practical steps, let's understand why you might want to record your voice over a picture. This multimedia approach offers several benefits:
Enhanced Engagement: Combining visuals with audio increases the engagement level of your content. It helps convey your message more effectively, making it easier for your audience to understand and connect with your material.
Clarity and Context: Sometimes, a picture alone may not convey the full message or context. Adding your voice allows you to provide explanations, anecdotes, or emotional cues that can make your content more impactful.
Personalization: Recording your voice adds a personal touch to your content. It can create a stronger bond between you and your audience by allowing them to hear your voice, which can be especially useful in online courses, vlogs, or personal messages.
Storytelling: If you want to tell a story or narrate an experience, combining voice and visuals can be a powerful storytelling tool. It immerses your audience in your narrative and makes it more memorable.
Now that we've established why recording your voice over a picture is valuable, let's explore the methods and tools to achieve this.
Method 1: Using Video Editing Software
One of the most common and versatile ways to record your voice over a picture is by using video editing software. Popular options like Adobe Premiere Pro, Final Cut Pro, and even free software like DaVinci Resolve offer this capability. Here's a step-by-step guide:
Import Your Picture: Open your video editing software and import the picture you want to use.
Create a Timeline: Create a timeline for your project and drag the picture onto it.
Record Your Voice: Record your voice using a microphone connected to your computer. Most video editing software has a voice recording feature built-in.
Import Your Voiceover: Import the recorded voiceover into your project and place it on the timeline.
Sync and Edit: Align the voiceover with the picture timeline. You can trim, split, and adjust the voiceover as needed to match the visuals.
Export Your Video: Once everything is synchronized and edited to your satisfaction, export the video with the voiceover.
Method 2: Using Online Tools
If you prefer a simpler, web-based approach, there are several online tools that can help you record your voice over a picture without the need for advanced video editing software. Kapwing and VoiceThread are two popular options. Here's how to use them:
Visit the Online Tool: Go to the website of your chosen online tool (e.g., Kapwing or VoiceThread).
Upload Your Picture: Upload the picture you want to use.
Record Your Voice: Most online tools have a built-in voice recording feature. Click on it and start recording your voiceover.
Adjust Timing: Some tools allow you to adjust the timing of your voiceover by simply dragging and dropping it on the picture.
Preview and Save: Preview your creation to ensure everything looks and sounds as you want it. Then, save or export the final product.
Method 3: Using Mobile Apps
If you prefer to work on your smartphone or tablet, numerous apps are designed specifically for adding voiceovers to pictures. Here's a basic guide using the VoiceOver app for iOS:
Download and Open the App: Download the VoiceOver app from the App Store and open it.
Select Your Picture: Tap the option to add a picture from your device's photo library.
Record Your Voice: Tap the record button and start recording your voiceover while viewing the picture.
Edit and Save: The app may provide basic editing tools to trim and adjust your voiceover. Once you're satisfied, save the combined voiceover and picture as a video or share it directly.
Learn More: Product Photo Editing Service
Method 4: Using Presentation Software
If your goal is to create a narrated slideshow or presentation, you can use software like Microsoft PowerPoint or Google Slides. Here's how:
Create Your Slides: Open your preferred presentation software and create your slides. Each slide can contain a picture.
Record Your Voice: Most presentation software offers a voice recording feature. Record your voiceover for each slide.
Sync Timing: Adjust the timing of each slide to match your voiceover. You can set specific time intervals for each slide transition.
Preview and Save: Preview the presentation to make sure the voiceover and visuals are synchronized correctly. Save or export the presentation as a video file.
Tips for a Successful Voiceover Picture
To ensure your voiceover picture is effective and engaging, consider the following tips:
Use Clear and Concise Language: Speak clearly and concisely to convey your message effectively.
Match Tone and Emotion: Adjust your tone and emotion to match the content and context of the picture.
Control Background Noise: Record your voice in a quiet environment to minimize background noise.
Practice and Review: Practice your voiceovers, and review them to ensure they enhance the visuals.
Add Music (Optional): If appropriate, you can add background music to enhance the mood of your voiceover picture.
Conclusion
Recording your voice over a picture is a creative and effective way to engage your audience, convey your message, and add a personal touch to your content. Whether you choose to use video editing software, online tools, mobile apps, or presentation software, the methods are accessible to beginners and professionals alike. Experiment with different approaches, and don't be afraid to unleash your creativity to make your voiceover pictures truly stand out. With the right tools and techniques, you can captivate your audience and tell your story in a memorable way.
0 notes