#image resizer website
Explore tagged Tumblr posts
Visit Tumblr Blog
Explore Tumblr blogs with no restrictions, modern design and the best experience.
Last Seen Tumblr Blogs


Fun Fact
25% of US internet users with an annual income of $80-100K use Tumblr.
Text


[78] crocs lol
#does somebody know how to resize images on this website bc like. why is it so big holy molcar lmao#qsmp fanart#qsmp#춘식#qsmp eggs#chunsik
139 notes
·
View notes
Text
is it common knowledge that if you see an image on a website that you wish were bigger and seemingly isn't even when you open it, to check the url to see if the height and width are in the link, bc it's being displayed scaled down, which you can either delete or - if that sometimes leads you to a broken page - change to a larger size
#I also absolutely don't know how websites are built aside from images being resized for performance#so there may be even simpler solutions to accessing the raw image than this
25 notes
·
View notes
Text
.. why does 16personalities have a premium

#hello i'm just working on my.. um.. a proper intro maybe?#and the original template mentions mbti so i went to look up some stuff and..#w-why would a mbti website need a premium..#also lina my apologies even though i'm that headmate who doesn't have any school-related trauma.. i'm still kind of dumb#it took me three minutes to remember how the word disassociation is spelled.#I'VE FIGURED OUT HOW TO TYPE IT RIGHT NOW ONLY THANKS TO AUTOCORRECT.#also i'm still using an image resizer for the replycons lina made and they're blurry but.. i kinda like it?#[❄️ winter speaks]#will tumblr ever remember our tags. probably not.#we don't want to create separate blogs okay.
8 notes
·
View notes
Text
Behold my bookmark folders, sorted by priority
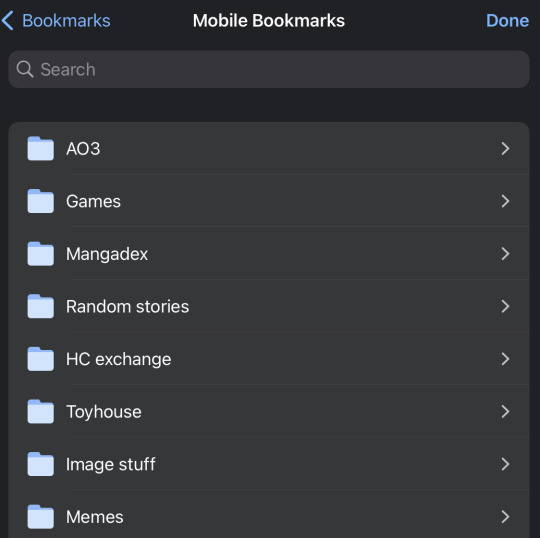
#‘Games’ contains stuff like chicken smoothie#‘Memes’ is stuff I made on complex meme generator websites#You don’t need to know what’s in the rest#Technically the HC exchange stuff should be a subfolder in the TH folder but IDK how to do that#Oh and also ‘image stuff’ is for resizing images and finding stock photos
0 notes
Text

Every so often, I remember I can draw whatever I want and no one can stop me.
OG image
#i am Normal about this show#also these two are weirdly fun to draw#also how do you resize images on tumblr i swear they always come out huge#also im on the website not the app for once and i keep accidentally adding page breaks then having to delete them#mike draws things#🪖👨⚕️
1 note
·
View note
Text
HI!! Do you wanna have a neocities website where you can put images and read words? Have you never coded a dang thing in your life?
THE BEST TIME TO FUCK AROUND AND FIND OUT IS NOW!!!! And you can feel free to fuck around with MY CSS and HTML code!!!! Check it out!
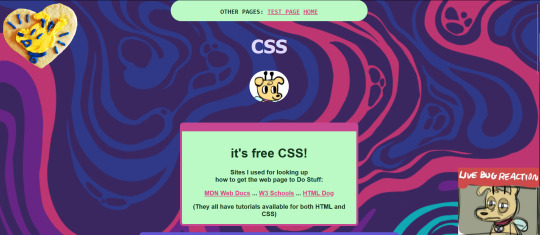
LOOK AT THAT! Isn't she beautiful? It's got amazing features such as
boxes with rounded corners!
one column!
ourple!
a top spot and a bottom spot for links!
two images that follow you around as you scroll!
pretty OK resizing for mobile view!
AND NOT MUCH MORE!
Simple and hopefully easy to fuck around with, I hope maybe this code can help more people experiment with making their own web page because it is very fun! ^_^
4K notes
·
View notes
Text

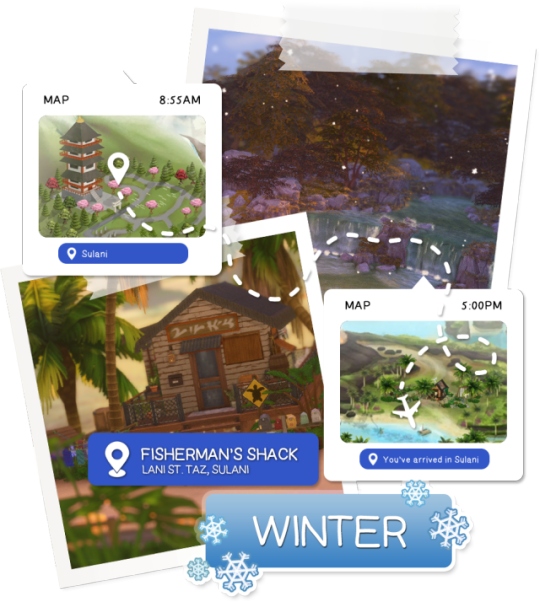
In celebration of reaching 900 followers!
Ever since I started playing the Globetrotter challenge by @moonfi; I've been creating a collection of UI Widget style templates. This collection includes 20(ish) different templates for you to use in your gameplay screenshots. I'm hoping I did my best to make this as user-friendly as possible; but if you have any questions or notice something off - don't hesitate to message me or send an ask!
[Terms of Use] Do: Use & edit as much as you want and/or know how to. Don't: Reupload & claim as your own. Do: Link back to this post if asked where they're from.
[You Need] Fonts: April | Lemonmilk | Kids Handmade TS4 Icons: deathbypufferfish | w-sims | TheSimKid (I've had L'Universims' icons before they were hacked but as far as I know they've moved to a new website so download from there at your own risk.)
DOWNLOAD (SFS) 66.3mb **FIXED** (Missing moodlet)
ALT DOWNLOAD (Mediafire)
[Tips & Hints]
Open the awkwardwhims psd collection file in Photoshop, then drag & drop the folder or group of templates onto your image.
The photo album template was inspired by @folkbreeze (definitely check out their resources, they're all so nice!) & other various examples I saw online.
Resize the template by selecting the folder as a whole; resizing individual layers may makes things unaligned.
Feel free to change background colors/fonts/etc as much as you want.
The text message template has 3 styles: sender, green receiver & blue receiver. There are also reaction icons & a separate reaction bar.
For the to-do list template I didn't include every aspiration icon (I was trying to keep this file as small as possible) but you can download this pack by @deathbypufferfish that has all the aspiration icons you'll need. However, it may be missing some of the newer aspiratons.
When adding photos (album cover/recent photos/etc) use a clipping mask.
The weather template includes all the different weather icons, so be sure to hide/unhide the one that applies.
For the new transaction template, make sure to only change the number of the price otherwise the Simoleon symbol will get changed to Times New Roman.
The notification message template is for life events, bad events & default game notifications (ie: legacy player, etc).
DOWNLOAD (SFS) 66.3mb **FIXED** (Missing moodlet)
ALT DOWNLOAD (Mediafire)
@alwaysfreecc @maxismatchccworld
2K notes
·
View notes
Note
how r u so good at editing omg.. im star struck/silly/pos WHAT DO YOU USE TO EDIT ?? ^w^ I WANNA GET INTO EDITING BC OF YOU NGL...
THANK KYU SO MUCH EEEKK (*´ω`*)!!! spend 30 mins writing this hoping it'll help kyu >o< !!
resource links that thy puppet uses ^_^ :
☆ = personal favourite, mostly used!
.co/ulzzang , .co/crusher ☆ , .co/pixelprism ☆ , .co/adultswim , .co/mikopixels , .co/border ☆ , xyz.crd.co , tonomi.neocities.net , gifs.crd.co ☆ , gothiclolita.neocities.net , .co/vamptism , .co/resources ☆ , pixel diary (loads of favicons!) ☆ , supplies.ju.mp , watermelon.crd.co ☆ , autism ☆ , .co/dp3cry ☆ , sakuradreams.neocities.net
apps & websites :
reminder the ones w the star is personal fav!
ibispaint x = go-to editing app for everything ☆
picsart = find cutesy pictures & edit ur work ☆
photopea = graphic making website & many effects
ezgif = resize gifs or images, make or edit gifs! ☆
removebg = a free to use background remover ☆
waifu2x = a website that enchances the quality of your image ☆
capcut = a video-editing app, i use it to add gifs to my banners ☆
pinterest resource accounts : ( ☆ = personal fav )
serrnz = icon masks resource account (all f2u) ☆
vcriin = beginner-friendly resource account with organized boards to help! ☆
nazushu = an account for rentry inspo!
t4tfyolai = account for rentry inspo again
(not much here, still finding rsrc accounts!)
extra links (linked resources):
png hoard ☆¹
stamps
small resource dump:


#‧𓈒 ݁ ♡ ུ ⁺ ୨ഒ୧‧𓈒 thy dwesigner#₊𓎟 ˚ ᧔𓉸᧓𓂃 ˛ kuni's inbwox . .#┄ ଘ( ཫ . ᵔ ) ꔫ ⁺ pwuppet’s rsrcs#resources#rentry resources#editblr#rentry inspo#rentry frames#rentry#rentry graphics#rentry decor#rentry stuff#editing resources#pngs#frames#dividers#resource links#links#helpful sites
432 notes
·
View notes
Text
Digital Stamp Making Tutorial
Hello, and welcome to the long-awaited(at least on my part) digital stamp-making tutorial from neosprites! I’d like to preface that I learned what I was doing from this tutorial so it may be a bit redundant, but if anything I get a bit more specific. Thank you so much to @graphic--horde for your work, it changed me as a graphic maker. This is gunna be a long post so feel free to bookmark it for later. Now, onto the show!

The frame I will be using for this tutorial (which is the frame I use on 99.9% of my stamps) I found from the above linked post, which I believe is from a creator that OP lost track of. Its inner dimensions are 94x50 pixels and its outer dimensions are 99x56 pixels. Here it is!

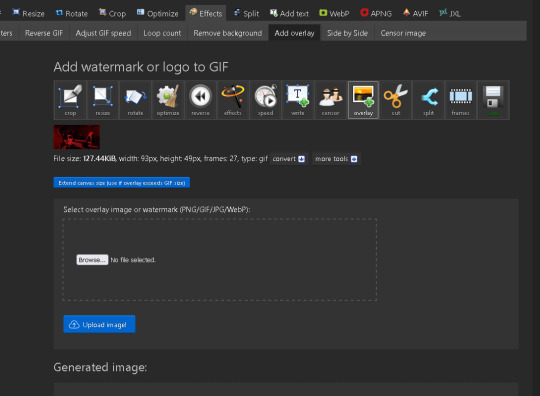
Find your material! - I recommend using websites like Tumblr and searching with the “GIF” filter only on, or alternatives such as Giphy or Tenor. Your browser may let you directly save the .gif file; if not and you are noticing it restricts you to save it as a .webp file you can try an extension like “Save webp as PNG or JPEG” (for Firefox but I image other browsers have similar functions, but I really recommend you switch to Firefox). To use this you will right click on your source .gif like normal but instead of clicking on “Save image as…” click “Save webP as…” and then click “GIF”. You should be redirected to the website ezgif.com where we will actually be doing all of our editing! Here’s the .gif we’ll be working with.

Convert to GIF (optional) - if you used the extension from the above step you should already be ready to click the blue “Convert to GIF” button. If not, go ahead and open ezgif.com and click on “webP” and then “WebP to GIF”; then convert to a gif with the blue button.

Resize the GIF - now that we have a gif ready to edit, let’s make it the right size. The easiest method I have found is to change it directly to the frame’s inner dimensions, 94x50 pixels. [EDIT: Make sure in the aspect ratio drop drop menu you select "stretch to fit" and not "center and crop to fit" like I did in the photo example.] Click “resize” and then type [94] in for the width and [50] for the height. Next press the blue “resize image” button.


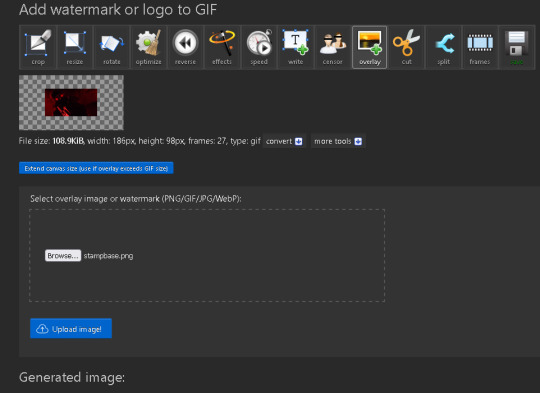
Add the frame - next click “overlay” then click the thin blue button that says “Extend canvas size(use if overlay exceeds GIF sizes)”. This will give us some extra room to add the frame onto the design. Next click “Browse…” and find the frame you have saved onto your device, then click the blue “Upload image” button.


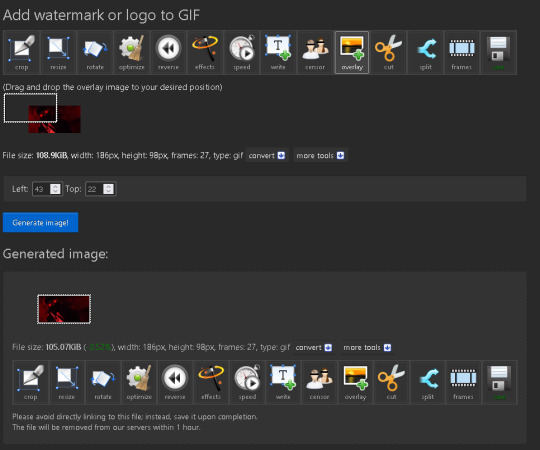
After that it’s going to be misaligned, that’s normal! It will say you have the option to drag it into place, but don’t bother. That’s one of the reasons my old stamps look wack, it’s just harder to do. Instead type [44] in for the Left box and [22] in for the Right box. It took me a while to figure out these dimensions to be honest, and I’ve only tested it with this frame so I don't know if it works with others. Then click the blue “Generate image” button.


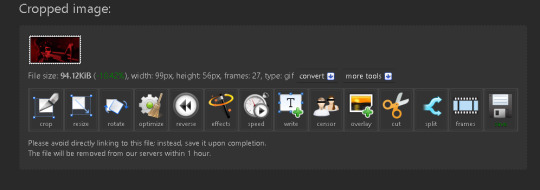
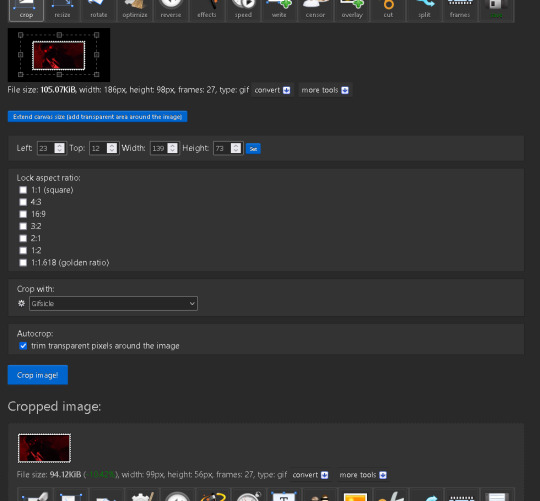
Crop the transparent edges - click on “crop”. You will have the option to check a box that says “trim transparent pixels around the image” however, I don’t recommend this as it tends to crop a few of the frame’s pixels with it sometimes. Next, set the Left position to [44] and the Right position to [22]. For the other dimensions we will use the outer dimensions of the frame which are 99x56 pixels, this will trim everything except the tiny spaces in between the stamp frame’s spikes. Type the width as [99] and the height as [56] and click the tiny blue button that says “set”. After that click the blue “Crop image” button.


Save and use! - all that's left is to click “save” and upload the graphic to your liking. (best seen on dark mode obviously)

If you’d like to tag me in stamps you’ve made using my tutorial I would love to see them, but it’s not required!! Make sure to always give credit for pictures/gifs when you can and try not to make stuff out of personal/fan art. Thank you to the person in my inbox who requested this tutorial, I had been meaning to for a while but it was just the kick I needed. :)
#carrd graphics#carrd resources#carrd stuff#rentry graphics#rentry resources#rentry decor#rentry pixels#rentry stuff#rentry inspo#deviantart#neocities#mine#my graphics#my tutorials#resources#tutorials#tutorial#how to#stamps#blinkies#graphics#web graphic#old internet#early internet#spacehey#da stamps#page decor#custom#old web#frames
202 notes
·
View notes
Text

☆ vintage, a small custom content set ☆
hi everyone! not too long ago i stumbled across a public domain art website. as i scrolling through it, i had this burst of inspiration so i decided to create a collage of my favorite posters. at first, this was supposed to be only just the collage but then i remembered i made a recolor of this image i found on Pinterest. i ended up adding it in because it fit the theme. i miiight end up making a part two of this set, not sure yet. enjoy!


☆ set includes ☆
poster collage, one swatch §10
tarot card print, one swatch §20 [mesh required]
☆ more info ☆
base game compatible
posters are public domain
posters appear small in game, use the '[' and ']' keys to resize.
☆ download (patreon, always free)
@love4sims4 @emilyccfinds @maxismatchccworld @mandy-ccfinds @itsjessicaccfinds @ivyccfinds
312 notes
·
View notes
Text
how to make gif stamps
you ever wanted to make your own stamps with gifs like this and have no idea how the fuck to do that?


it's really easy and all you need is a gif of your choice and the stamp base. all stamps are 99 x 56px as a tip for normal stamps.
during these steps i am pressing the buttons below every edited image so its easier to navigate.
step 1.
head over to the website ezgif.com. i use it for a lot of gif related things too and its really damn useful.
step 2.
head over to the resize tab and toss in your gif.
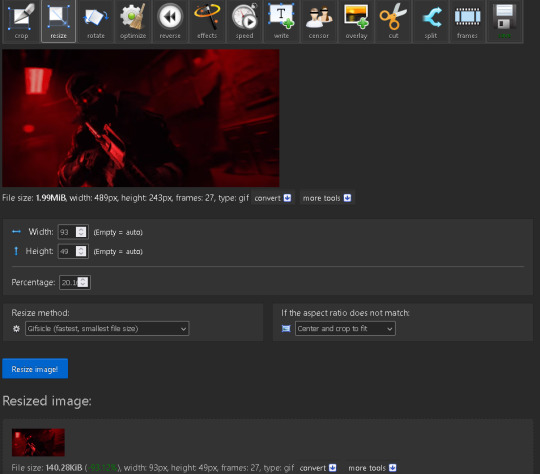
make sure the width is 93 pixels and the height is 49 pixels, dont worry about it being stretched since it resizes it down and some a little bit of cropping.
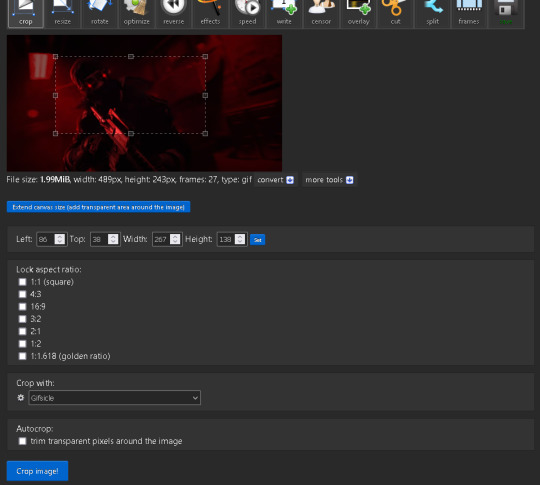
and if you want it to cover a specific area just go to the crop tab and make a selection around the area that's about the shape of the stamp, doesn't need to be perfect. and then head back to resize and do the resizing.
step 3.
head over to overlay in the effects
make sure to press the blue button under the gi that says "extend canvas size" its really important you do this so the actual stamp part doesn't get cut off. and add your overlay image aka the stamp base
and heres the base:

step 4:
adjust the overlay by putting 43 to the left and 22 to the top so it lines up like its shown here.
step 5.
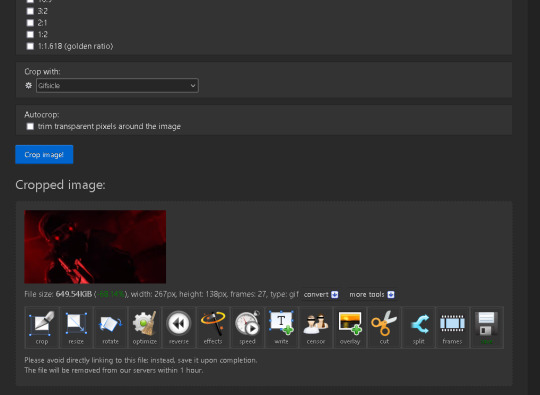
and finally go to crop and scroll down and enable the checkbox that says "trim transparent pixels around the image" and hit crop image.
and there you go, you just made an animated stamp. and heres the finish product on the one i made.

hopefully this helps out in someway and that the steps were easy to understand, let me know if you have any issues or questions.
406 notes
·
View notes
Text
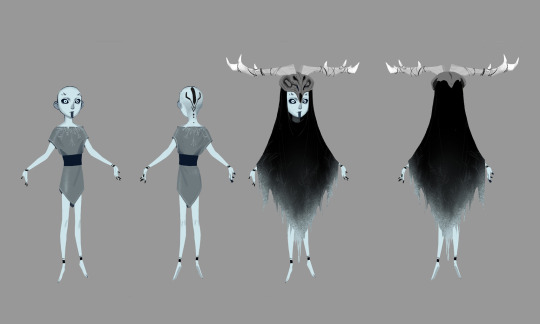
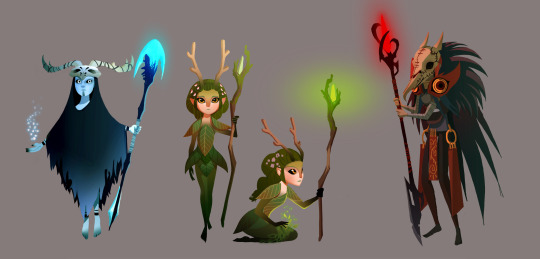
Skrael Design Path
Rolling onward to the second of these Arcane Order closer looks and this time it's Skrael at the helm! As ever with these it is far from impossible something else will belatedly turn up. Should this occur, wherever it is added will have a [/edit xx/xx/xxxx] which includes a date marker. Just makes it easier to find the “new” thing :)
Given Skrael is often written by many fic writers as He/They, suppose we got some more non-binary wrongs going on. All for a good cause tho, right?
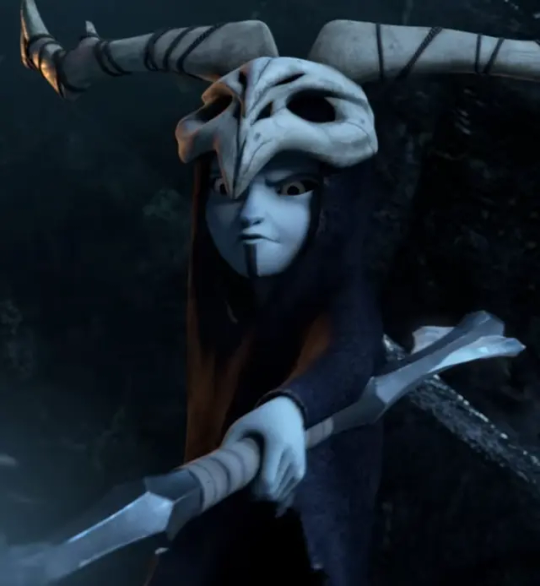
Skrael is unusual of the three in that his design, from what work is public, was cemented pretty early on. Still, Francisco Ruiz Velasco did have his own stab at a bunch of wizards which are nigh impossible to pin down if it was for any of the Arcane Trio specifically or not. This one will very understandably appear in all three as there could well be a Skrael potential here.
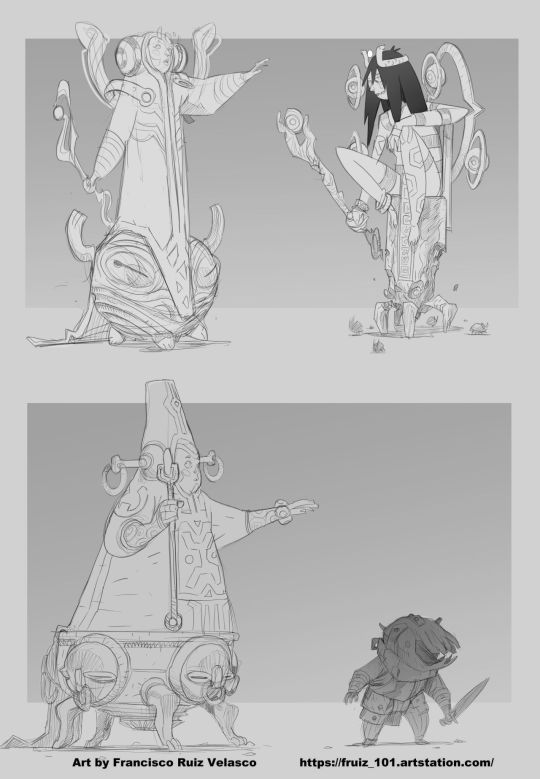
Source goes to Linkedin so may require an account.
According to Yingjue Chen who drew the below Ice Wizard designs, Sean Murray did a sketch which the most Skrael looking one is based. It's a pretty low chance of said sketch ever turning up but you never know.
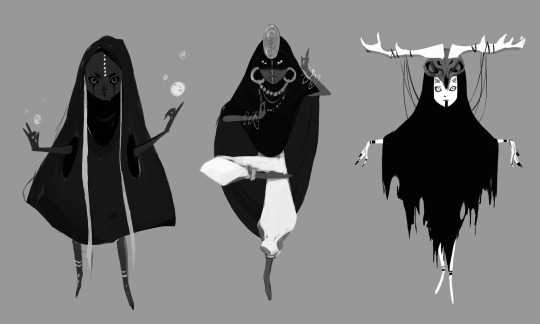
Source
A coloured version of this very Skrael looking Skrael is also shown in the Art of Wizards panel on the height comparison chart too.
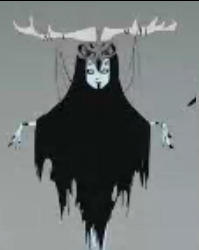
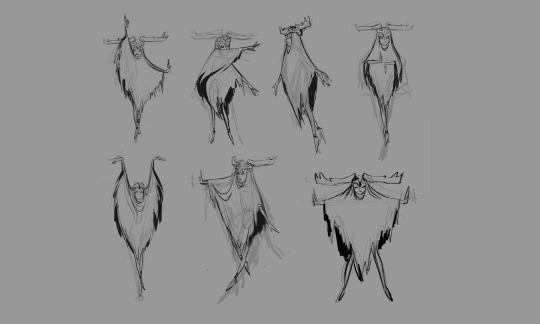
From there comes his final design plus quite literal gesture sketches. These are again by Yingjue Chen!
Source
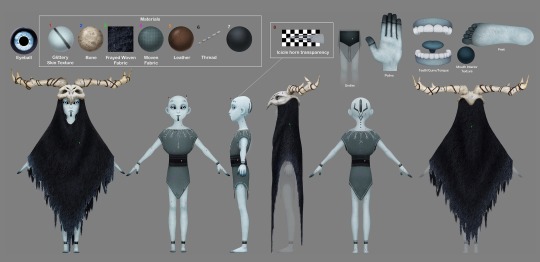
Skrael next pops up in the hands of Betsy Bauer for his paint and turn around which much like Bellroc is a reference goldmine. He is no longer on her website but you can check out other things she did for ToA here.
Decided to add a trio of bonuses just for fun. You might have noticed the Order pops up in the Wizards credits sequence though unlike Trollhunters and 3Below, it is not Headless Studios. They were drawn in a similar way though! They are by Alison Donato.
Source
This is also a great excuse to yet again break out Francisco Ruiz Velasco's Order band poster again! In part due to him only appearing in colour keys for RotT otherwise.
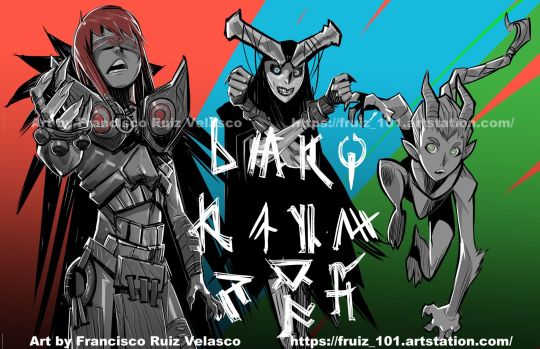
Source goes to Linkedin so may require an account.
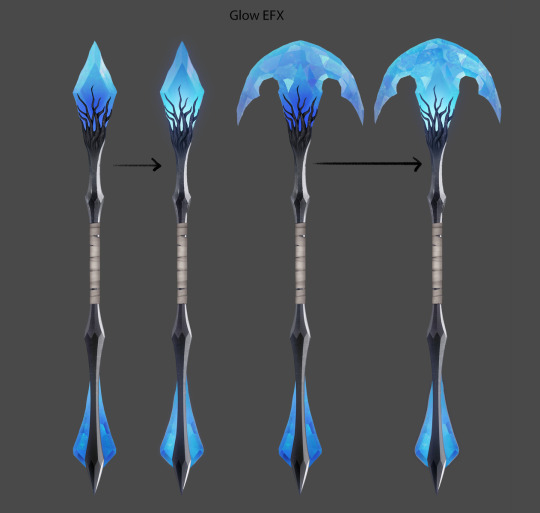
Of all the Order for some reason there's a lot of detail for Skrael's staff. Starting off we have the painted concepts by Yingjue Chen which we lack for Bellroc at this time.

Source
And from theeeere we have a whole bunch from Alison Donato including callouts! The small and texture free Skrael model resized for height comparison purposes will have been made at Leo Sanchez Studios.
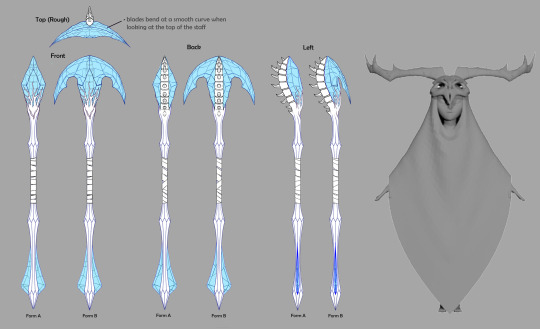
Source
Source
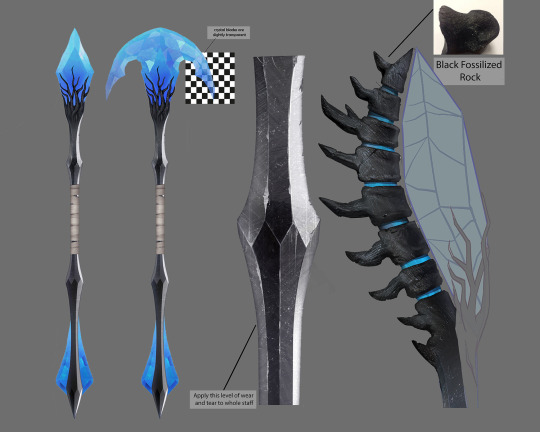
Source
On the more magical front there is a tiny screenshot from the Art of Wizards panel which shows the magic effects for Skrael. It is unknown who the other images including what could be the ice bridge belong to however -
We do have a bigger version of the left image which we know is by Yingjue Chen! Aren’t effects neat?
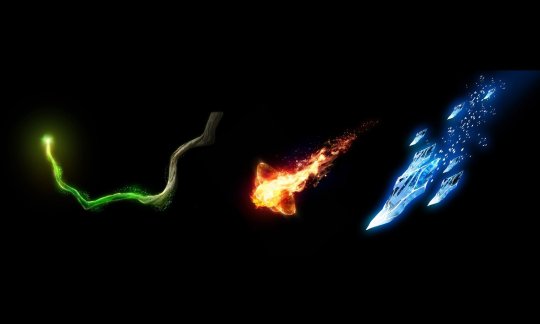
Source
[/Edit 13/02/2025] The following was missed due to no obvious note of what it is on the original tweet this version is from and it's being added in now. This is the spell effect combining Bellroc, Skrael and the Green Knight's power into a single shot! It is by Isaac Orloff.
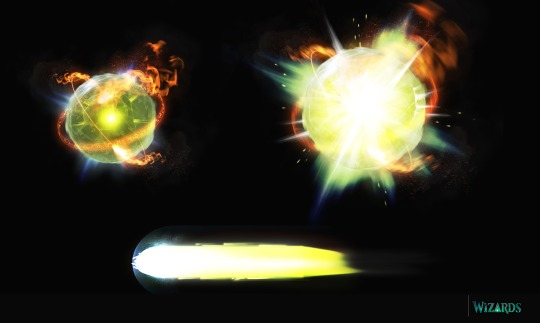
Source
Poking Rise of the Titans a moment, thanks to Andy Murray we have the glow up eye effect for Skrael. This has been cropped from a larger image for fitting this post reasons only.

Source
And for fun since we also have it, this is the Arcane Circle for Skrael which is shown on the Ice Titan. The Genesis Seal marker is on the same row as Bellroc so is not shown here. As above it has been cropped for fitting this post reasons only. This time they are by Sean Wang.

Source
Much like Nari, we do actually know what Skrael's development name: Thule! They're not in the most easy to spot place mind and likely why many have missed it over the years. One of them is in Alison Donato's file names on her website like so:

The other location is on one of the Felix Yang sequences that hasn't been converted from nyoom status yet. In this case, yeah you have to be very lucky to spot it:
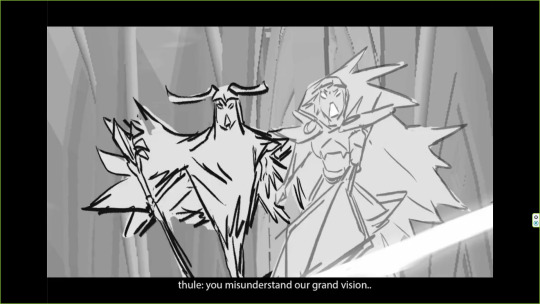
It can can be found Here.
When all three posts are up there will be a link here to the other two members. For now it is a half completed placeholder:
Bellroc - Nari - Skrael
#Tales of Arcadia#ToAWizards#Wizards#ToA Wizards#Rise of the Titans#Vis dev: Francisco Ruiz Velasco#Vis dev: Yingjue Chen#Vis dev: Betsy Bauer#Vis dev: Alison Donato#Modelling: Leo Sanchez Studios#Vis dev: Andy Murray#Vis dev: Sean Wang#Storyboarder: Felix Yang
66 notes
·
View notes
Text

I couldn't fit the tutorial on a reply lmao, here's a full post explaining my process :]]
STAMP TUTORIAL (TF2 edition, but works for everything)
99% of the process is done on the website ezgif. Ezgif carries the stamp-making process lmao
1. Get your GIF
Tenor: Ok place to grab your GIFs. Average quality of the GIFs is good enough, and looks ok when resized to the size of the stamp. You'll find like 1 normal GIF every 4 buff characters GIF tho.
GIPHY: Average quality of the GIF is better (I don't think the web compresses the GIFs that are uploaded)… If you find what you're looking for. You'll have to SCROLL before finding what you're looking for because there are always non-related GIFs on the top of your searches or the same GIF multiple times, it's crazy.
makeagif: You will find cool GIFs, but the quality is pretty low (I think the web itself compresses the GIFs a lot). It looks bad even when resized down. And it has a watermark, which I recommend cropping because it's not even visible when resized, it just looks like a gray blob on the corner.
Google: Best option by far, quality is pretty good and the ratio of “things I was looking for/things I actually find” is SLIGHTLY in favor of “things I was looking for” (and most of “things I actually find” are just the characters rotating, not NSFW, so that's only a nice change from Tenor). You won't have to scroll much to see different and interesting GIFs. JUST REMEMBER TO FILTER BY GIFS.

You search whatever > Images > Tools > Type > GIF
Make it on your own: Aka, you download your video, go to ezgif's “Video to GIF” (then you can crop it, CUT IT. THIS IS IMPORTANT, YOU DON'T NEED TO GO ANYWHERE ELSE TO CUT YOUR CLIP, YOU CAN DO IT ON EZGIF ITSELF). Ok, I lied, it wasn't Google, this is the best oftion by far. You get exactly what you want, the best quality if you don't compress it much until after the GIF has been resized into the size of a stamp… It's just super time-consuming, and you'll have to spend like an entire hour just watching a video to find the clips.
OK, I HAVE MY GIF NOW
Hehe, his legs go pipupipu
2. Resize
Go to ezgif, this is where the fun begins (if you weren't on ezgif already). You download your GIF, or copy the link and insert it, or you'll have it there if you made it yourself.
A STAMP MAKES 99px × 56px
THE INNER PART OF THE STAMP MAKES 91px × 47px
I RECOMMEND MAKING YOUR GIF 92px × 48px
BTW, THESE MEASURES ARE FOR THE TEMPLATE I'LL GIVE YOU LATER. If you use another template, just go to an image editor and see what the inner size of the stamp is.
So, you set your GIF's width to 92px.

Then crop it, so your height is 48px.

Or you can resize it so it's directly 92px × 48px, but the crop will be in the center, and SOMETIMES YOU DON'T WANT THAT.
For example:

It's a vertical GIF whose area of interest is not in the center, so if we resize it directly-

oops-
ANYWAY
Once you have your GIF resized:
IMPORTANT: BEFORE THE NEXT STEP, REMEMBER TO CONVERT TO GIF IF THE FILE YOU'RE WORKING ON ISN'T A GIF ALREADY
Sometimes you'll be working with a webp without even noticing (EW, I hate webp) and transparencies don't work particularly well with that extension.
3. Overlay

Click on this icon.
Ok, now that that's fixed:

Extend the size of the canvas.

Select your template and Upload image!

This is the template, btw.

Then move the overlay around until it contains the GIF nicely, or just set Left to 43, Top to 20 and Generate image! (I have these numbers memorized, it saves you like 20 seconds lmao)
Also, again, these numbers work on MY template, if you use another one, you'll have to figure it out yourself.
4. Crop

THIS OPTION IS A TIME-SAVER FR
5. Optimize (optional, highly recommend)

I always set my optimization method to Lossy GIF and level 10 because I find that there is no quality loss, and the file size might drop by 30%-70% (actually crazy). These percentages don't change much in higher compressions, even though you'll start seeing a drop in quality around level 35 of compression (the default).
6. Save

YIPPE!!! Your stamp is done :D
You can save it and look at it and place it on your profile or website.


Here it is btw, in case someone wanted it :]] The Sniper GIF but correctly cropped and made into a stamp as well.
Now do that another… eleven times, and you'll have a stamp pack to make into a Tumblr post... Oof TT
There's no website that lets you make stamps faster lmao (I wish)
@sir-broken-bones (I'm @ them so they actually see it, I made this tutorial for them after all lol)
#team fortress 2#tf2#tf2 scout#tf2 sniper#stamps#da stamps#tutorial#graphics#old graphics#neocities#old web graphics#old web
134 notes
·
View notes
Note
HOLY SHIT!! DIRECT REPLIES?! IMAGE RESIZING AND BORDERS IN WEBSITE?! THEY WERE COOKING
.
84 notes
·
View notes
Text
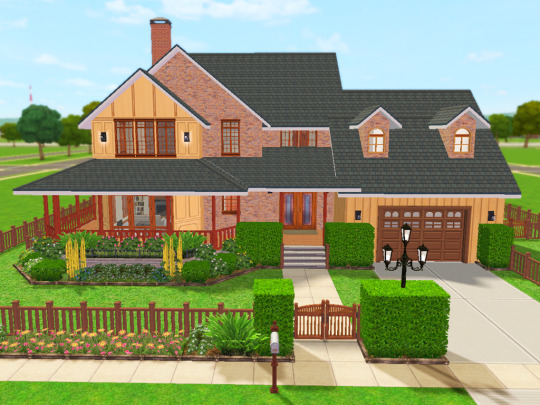
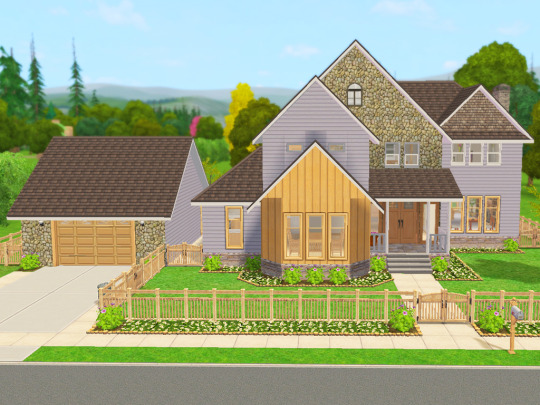
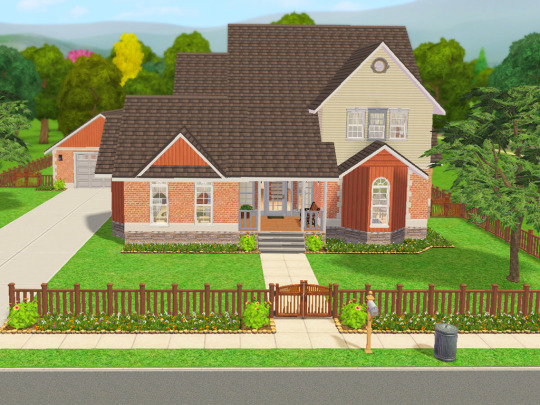
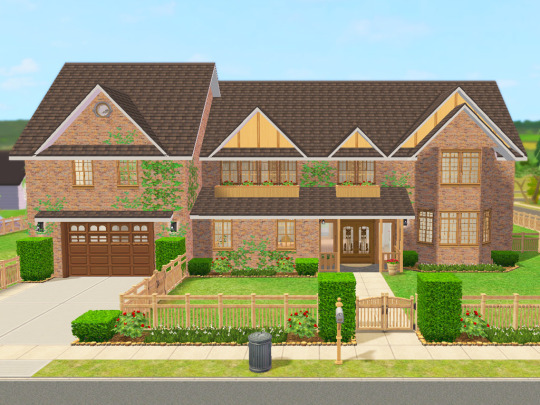
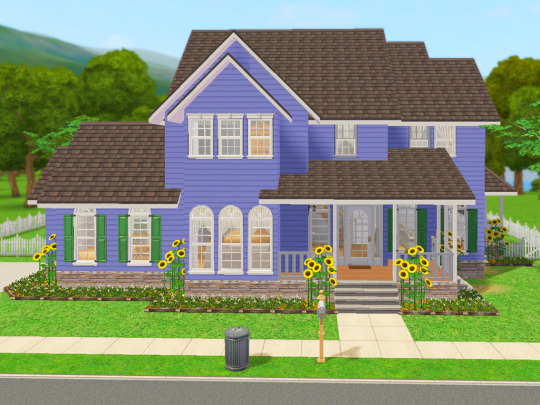
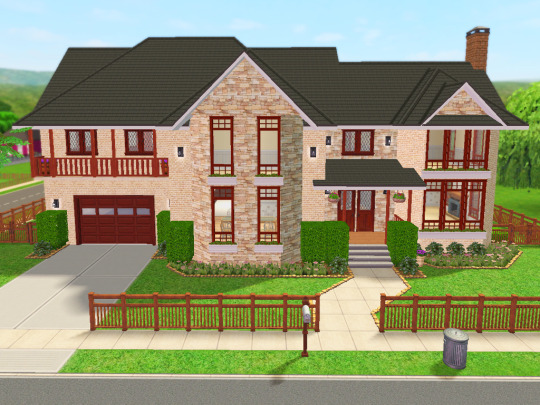
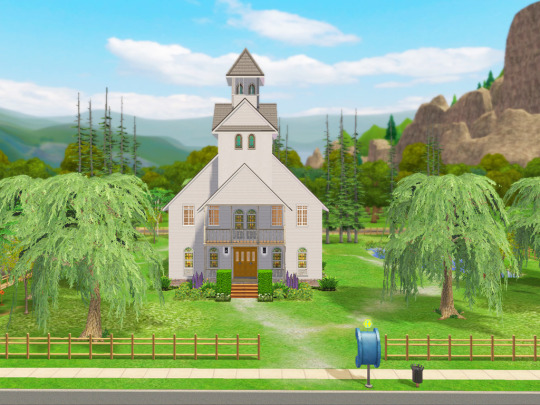
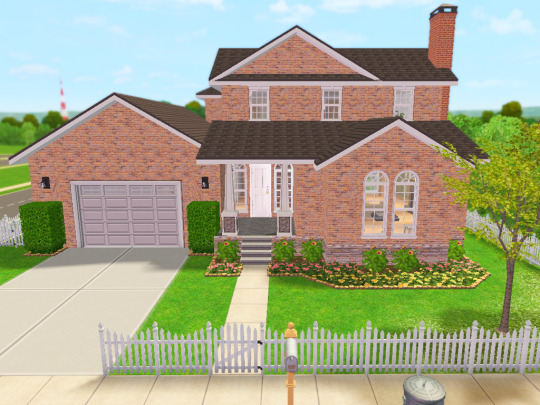
Lot Previews and Build/Buy Mode Mods I use
Finally! Pretty much everything I had on my old Simblr has been reposted here! Thank you for your interest in these homes. I hope they continue to bring a smile to your face as you play with them. 😊
Here are some previews of the lots I've been polishing up recently. Fun fact: 90% of these lots started out as houses I built for my kids' sims families when they were young (ah how the years fly by!).
These will eventually get uploaded at least that's the plan as I have more time.
Here's where I could use your feedback though:
I love to build and landscape, but decorating the insides...not quite as much.😅
I'd be able to put these lots up faster if you're ok with furnishing and decorating them yourself. I'd add things like kitchens and bathrooms and place beds in the bedrooms.
What do you think? Scroll through and let me know!
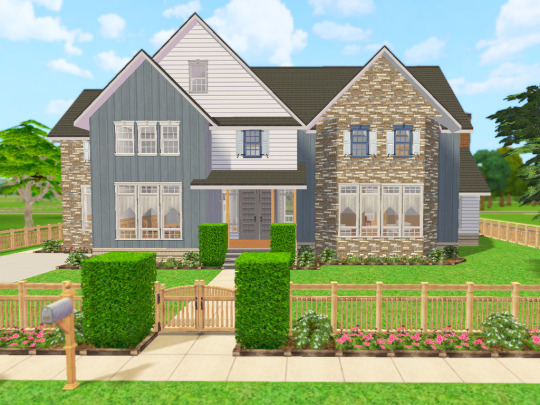
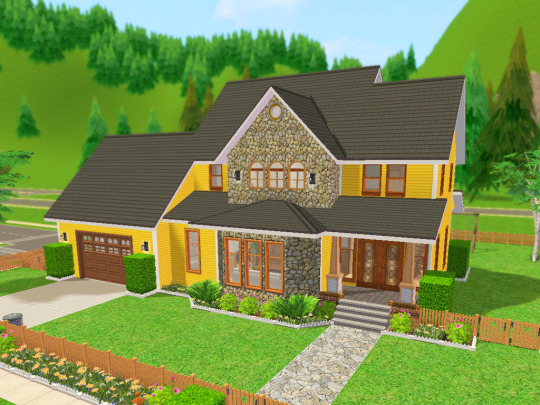
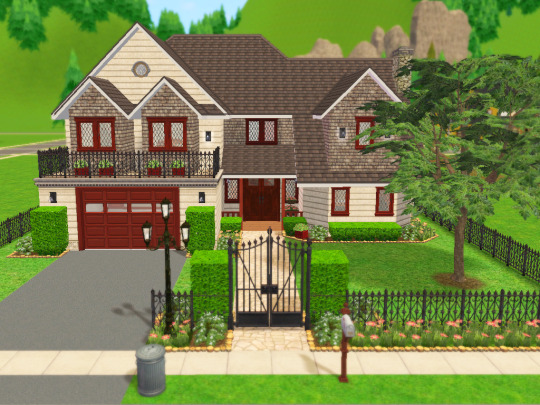

I am using Reshade 4.91 for the images that you see. That link will take you to Reshade's official repository folder for Reshade 4.0 series downloads.
Other than cropping and resizing, this is how they look in my game. I'm blessed enough to have a machine that will let me play with this beautiful custom LUT I configured. It helps to see bright, happy colors, especially in winter. 😎
So now a few words about the mods or hacks I use to make building a whole lot more fun, considering I play with very little CC in my game.
I use a number of building cheats such as 'allow45degreeangleofrotation true', 'boolprop snapobjectstogrid false', "setquartertileplacement on", and of course, "moveobjects". If you notice an object blocking something feel free to move/remove it. Grab this mod to allow your sims to sit in chairs placed at 45 degree angles.
I use a lot of shiftable decor mods: shiftable wall lamps, ceiling deco made shiftable, shiftable wall decor. The other day I ran across this mod that allows you to shift just about anything up or down, so I may switch to this in the future. Today I came across Fway's Object Freedom mod which I'm going to start testing out since it includes the "Shiftable Everything" mod. If you've been frustrated by the limits of where things can be placed in order to be used, this might be the answer!
I also use a few default replacements (head over here for a more complete list):
CuriousB's Lush Terrain
Peppermint & Ginger's Shrub defaults
TVickie's Phlox default replacement
PineappleForest's Spiderlily texture default (along with a number of other defaulted things).
Fway's Default Garden Plot
Less saturated BG flowers (I can use the poppies finally!)
Lunatech Lighten Up Ceiling Light Placement Fix
I do use a few other things but these are the primary ones.
And as far as CC goes, these are the only items you'll have to deal with (Use Sims 2 Pack Clean Installer to remove any of these things if you don't want them in your game):
Anything Maxis "Lost and Found", preorder "Bonus" items, or items that were offered on the Sims 2 website. I'll label this in the lot post.
Functional Washer/dryer
Maxis Match Wall Cabinets by CTNutmegger at ModtheSims
Maxis Match Chimney Recolors: Brick, Stucco, Southwestern Style Stucco, Masonry
So there you have a short list of things I have in my game that you may already have in yours, but if not, you now know where to find them. :) I'm looking forward to hearing your feedback on what I should do with the lots (since my time is pretty limited by real life responsibilities). 🎉😄
#ts2 build#sims 2 lots#residential lots#ts2 screenshots#sims 2 build#sims 2 house#lot#sims 2 mods#ts2 mods
50 notes
·
View notes
Note
When addressing limits like 100 by 100 pixels, do you know how exactly we can figure out the dimensions of our photos when using art applications like ibis paint that don't give us pixel counts? I'm having to compress a lot of my stuff, and even then, It'll turn out that the only canvas I can use is so small my image barely shows up.
You can use a website like this image size finder to double check the dimensions of your image. To resize them, we generally recommend imageresizer.com, which should keep similar quality to the original.
96 notes
·
View notes